No need to apologize. It's much appreciated!Duke Maddog wrote: My apologies for such a long winded response. Time to get back to the workbench.
Maddog Manufacturing Production for 2019
Re: Maddog Manufacturing Production for 2019
When the sun of culture hangs low even dwarfs throw shadows.
- Duke Maddog
- Elite Member
- Posts: 7088
- Joined: Tue Jun 03, 2014 11:22 am
- Location: Rowland Heights, CA
Re: Maddog Manufacturing Production for 2019
Thank you Mostrich! Stay tuned, more to come.
The Duke
Virtuoso of Miniatures
"Do you know what the chain of command is? It's the chain I get and beat you with 'till you understand who's in ruttin' command!"
-Jayne Cobb, Firefly Episode 2 "The Train Job"
We are modelers - the same in spirit, in hunger to insanely buy newly released kits, hustlers in hiding our stash from our better halves and experts in using garbage as replacements for after-market parts.
- Duke Maddog
- Elite Member
- Posts: 7088
- Joined: Tue Jun 03, 2014 11:22 am
- Location: Rowland Heights, CA
Re: Maddog Manufacturing Production for 2019
Okay, here is my very late update on the latest progress I've made. This is at least a week late. My apologies; I thought this had been posted here.
Here is my latest progress done at Hobby Day and a few days before and after. I was very happy with how much I got done.
I'll start with my aircraft; or in this case, helicopters.
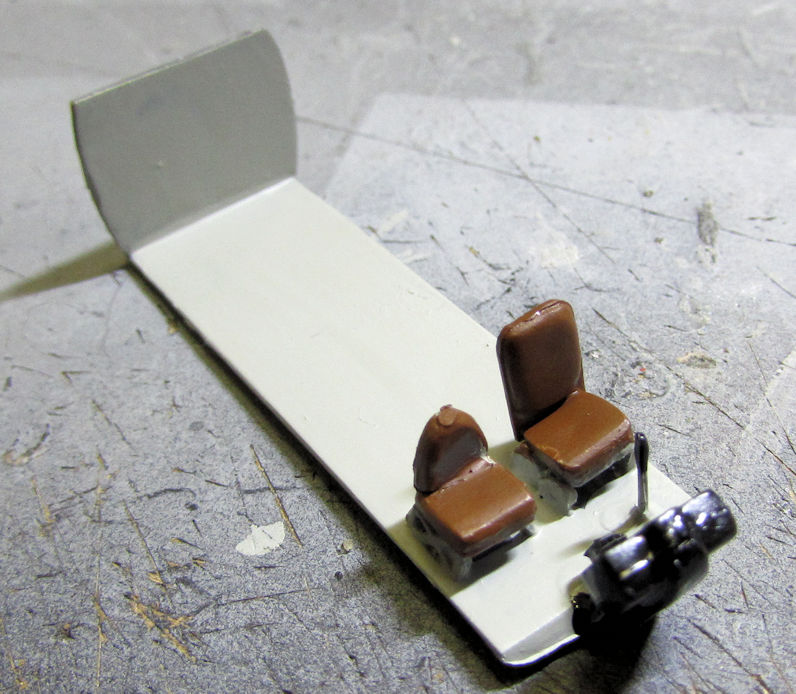
I finished painting the interior for the HUP-2, so once I get the windows in the fuselage, I'll be able to close this little bird up:
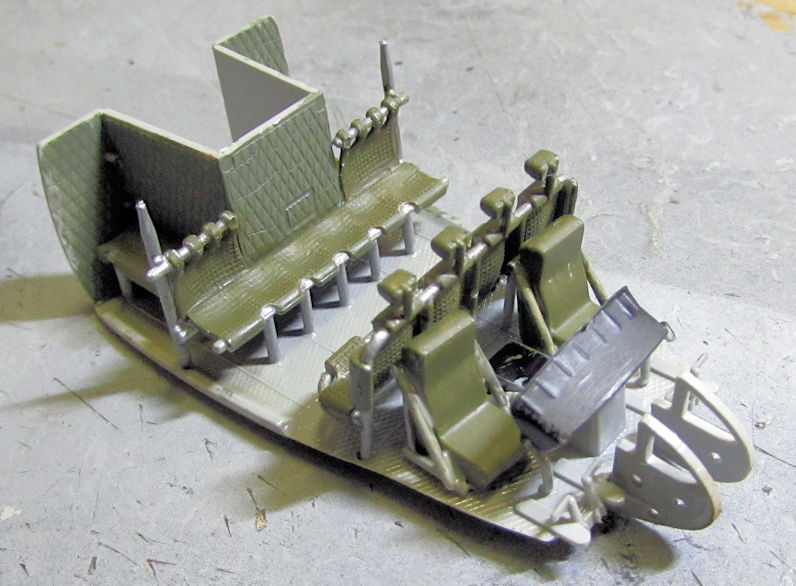
I also got the interior painted on the Huey Hog. This one will be able to be closed up after I apply the instrument panel decals and then install the windows as well:
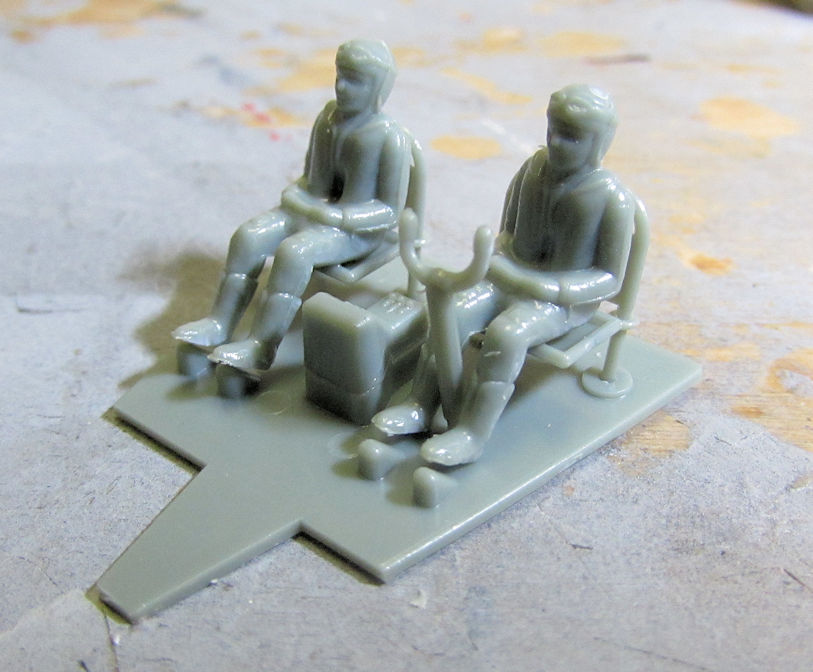
Now here is the work I did on the Gotha I bought from my friend. He had already assembled the booms and the wings, so I started with the cockpit... such as it is:
This model gives the option of making this plane a glider or a powered transport aircraft. I decided that since I haven't got this in powered form yet, I'll build it with engines:
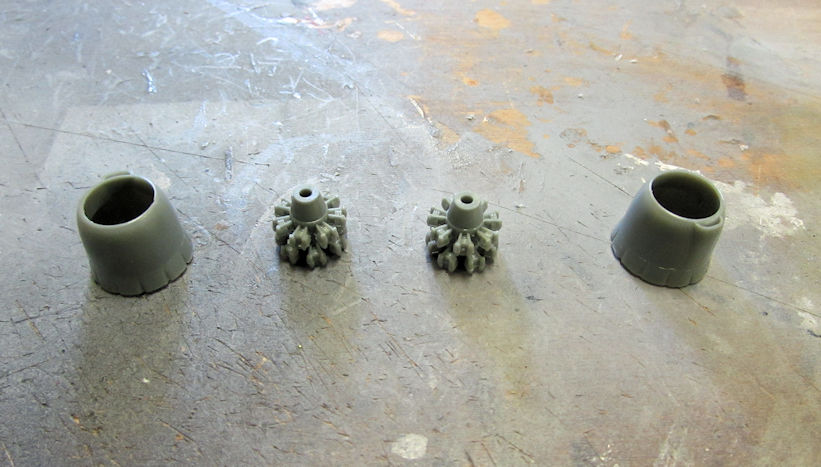
As those were drying, I then added the engine nacelle parts to the wings that will hold those engines and the booms:
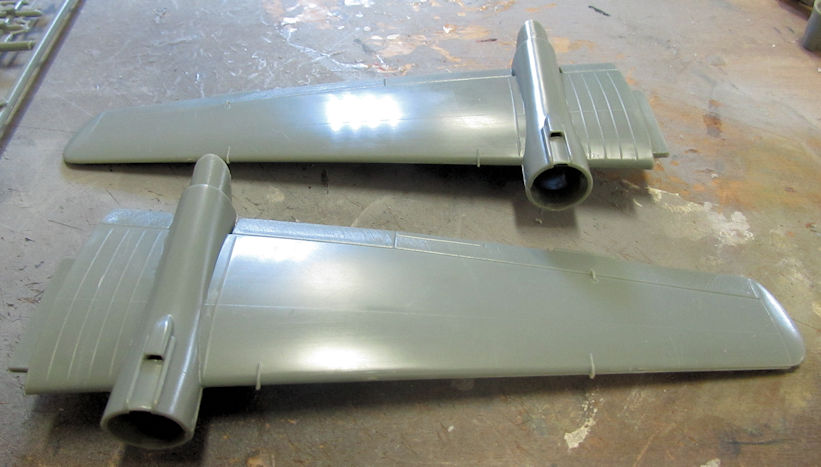
That's as far as I got on that. After all that I moved on to my armor.
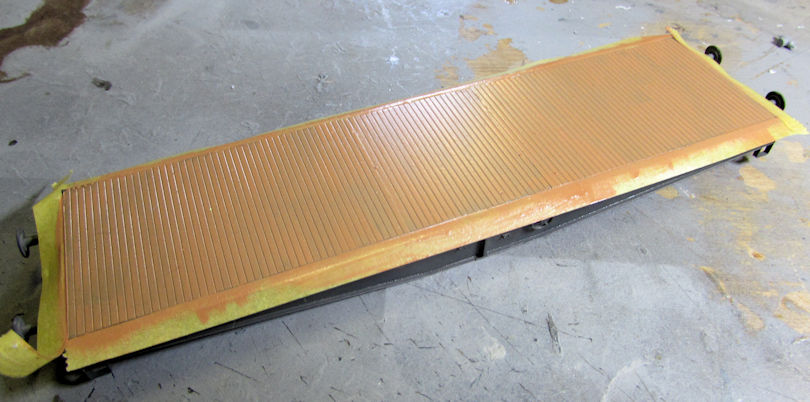
The first thing I did was to paint the base tan color on the deck of my railroad flatcar. Later I'll try to make this look more like wood:
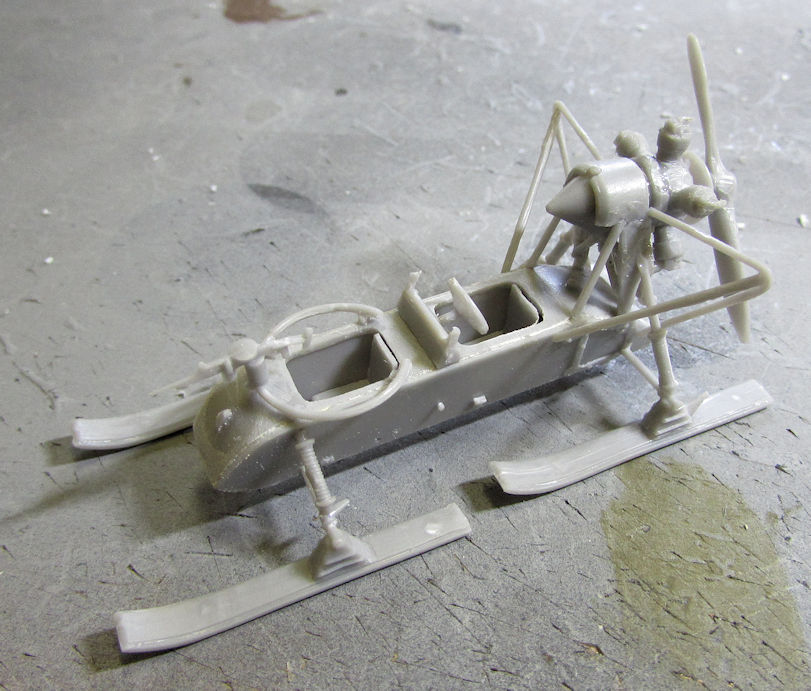
Next I decided to move forward on more of the Aerosans for the Treasure Train game that I'd been "threatening" to put on for a year now. I had one already half built so I assembled the engine and added it to the body to finish it up and have it ready for paint:
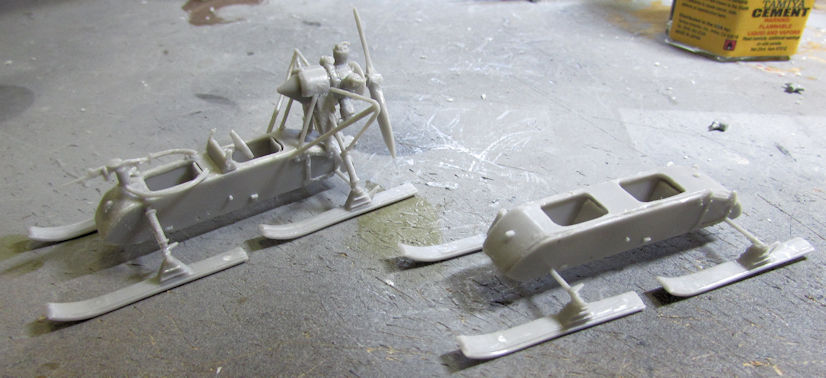
After that, I started the last one I have in my stash. I do need to buy a few more....
Anyway, I got that one half done before I realized I left all the engine parts at home. Still, it is started at least, and the engine will be easy to get finished and mounted on this. Here is the last one next to the finished on I just did:
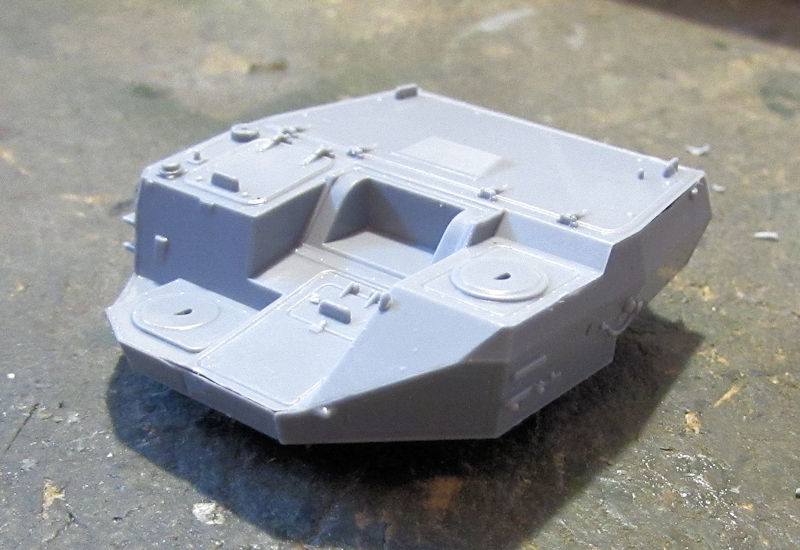
Moving on from there, I next decided that the T-15 Armata was calling my name too loudly so I got started on that one. First thing I did was to build the turret. That went fast:
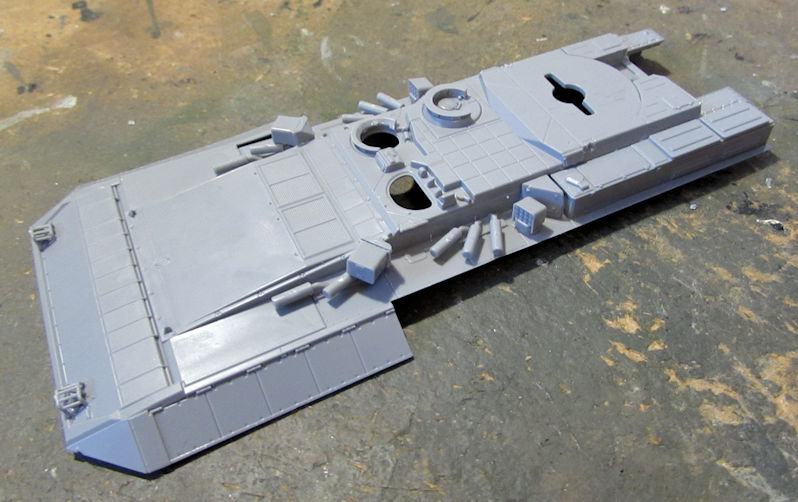
Next I added the detail parts to the upper hull. There wasn't too much to add, so this went fast as well:
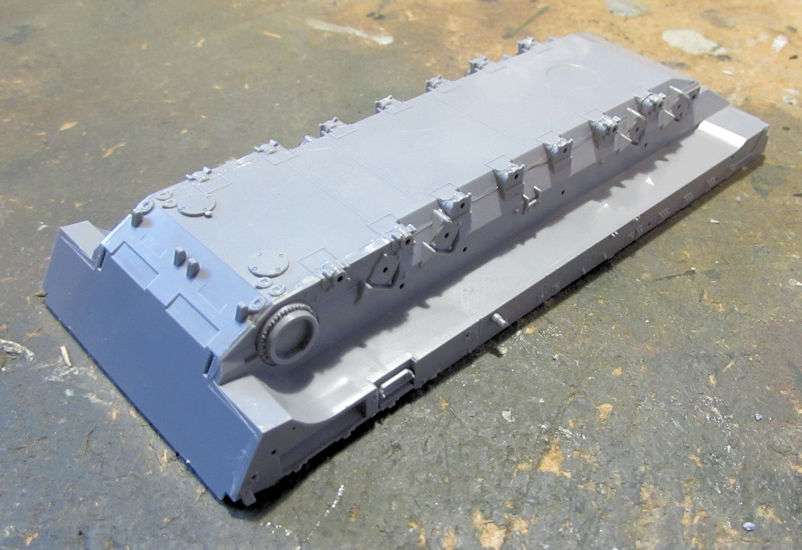
After that I assembled the lower hull. I'm really thrilled at how well this model fits together:
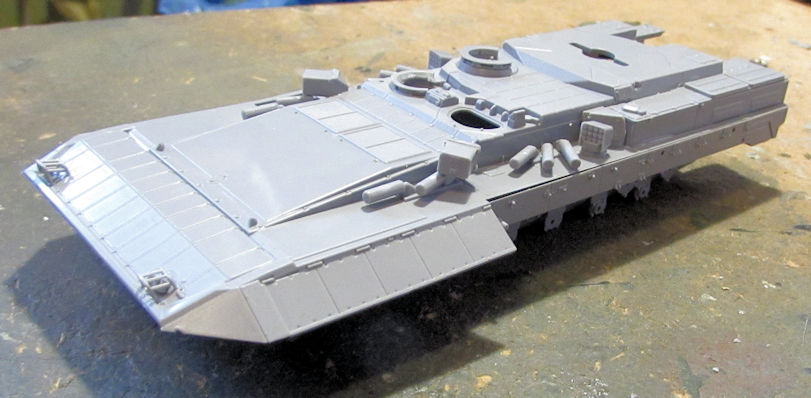
Finally, I test fit everything together sans turret. This is one big beastie! Check this out:
I did stop there but I was having so much fun with this Zvezda kit that I pulled out the Terminator to finish up a bit more. The first thing I did was to assemble the rocket tubes and mount them on the turret:
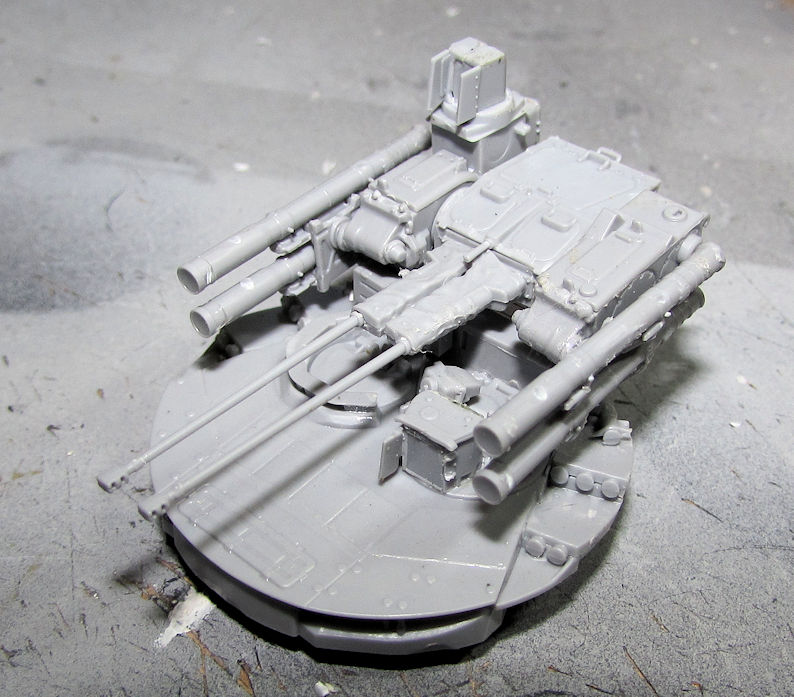
They are pretty fiddly and will make turning that turret a bit hard. Moving on, I finished up adding the bogies and roadwheels to the lower hull:
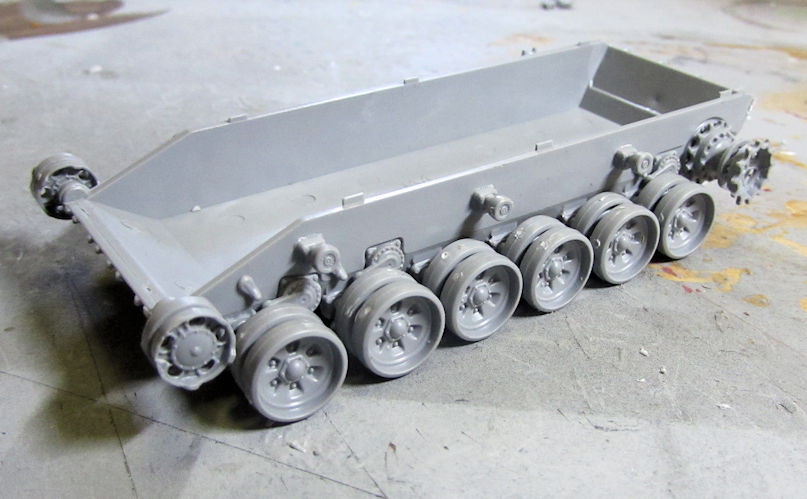
I also added the side skirts and other detail parts to the upper hull as well:
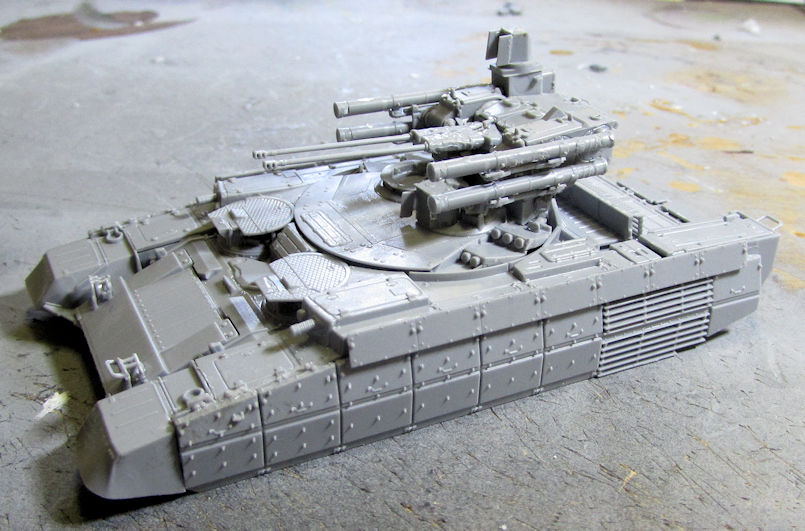
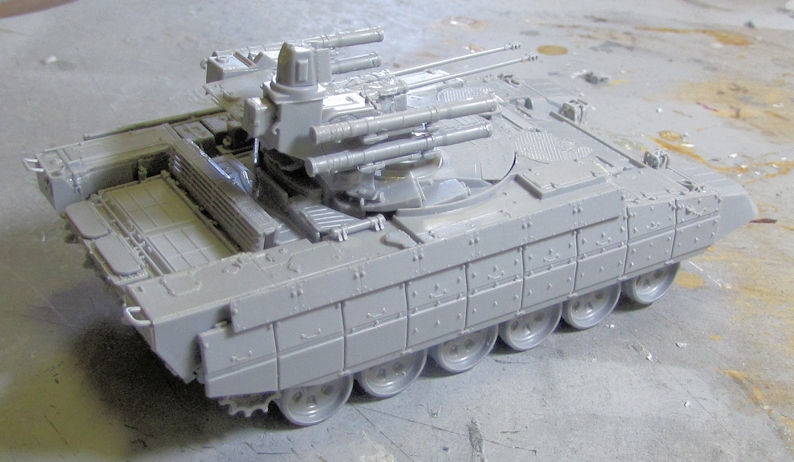
Putting the upper and power hull together looks great, this vehicle is now ready for paint:
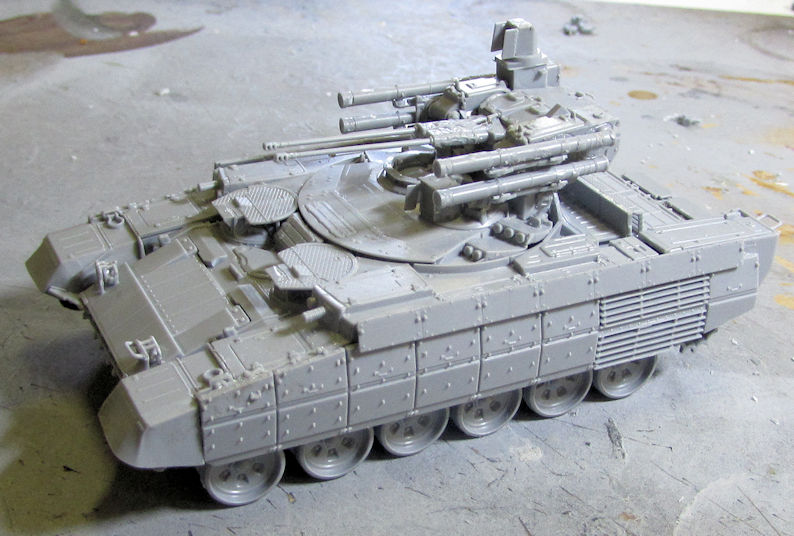
After that, I moved on to the final steps I needed to do to finish my Nagmachon. All the photo etch radar antennae, stowage fences, fenders and anti-RPG bar armor was installed:
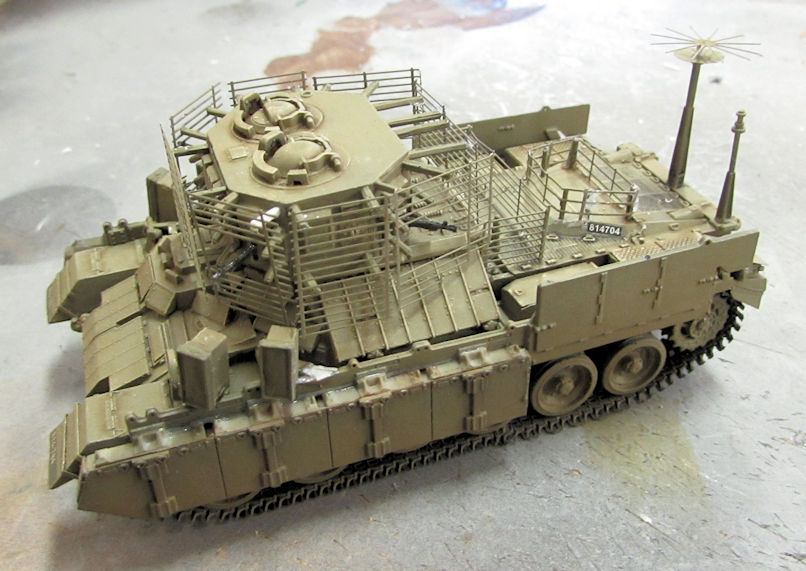
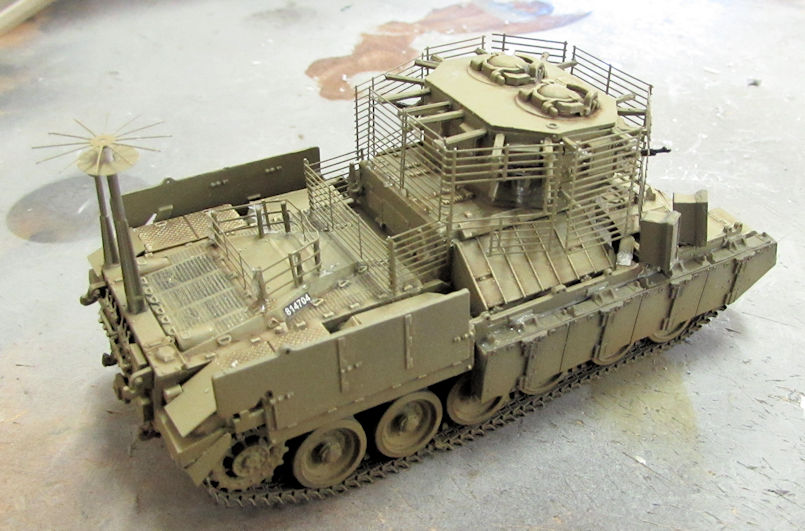
After some touch up to the paint and adjustment to some of the photo-etch screens, I can declare this thing done. Pics of that are forthcoming later....
After that, I just wanted to build and/or paint. Since I wanted to move forward on some of my eight-wheeled trucks, I pulled them out and chose the AA-60 fire truck first.
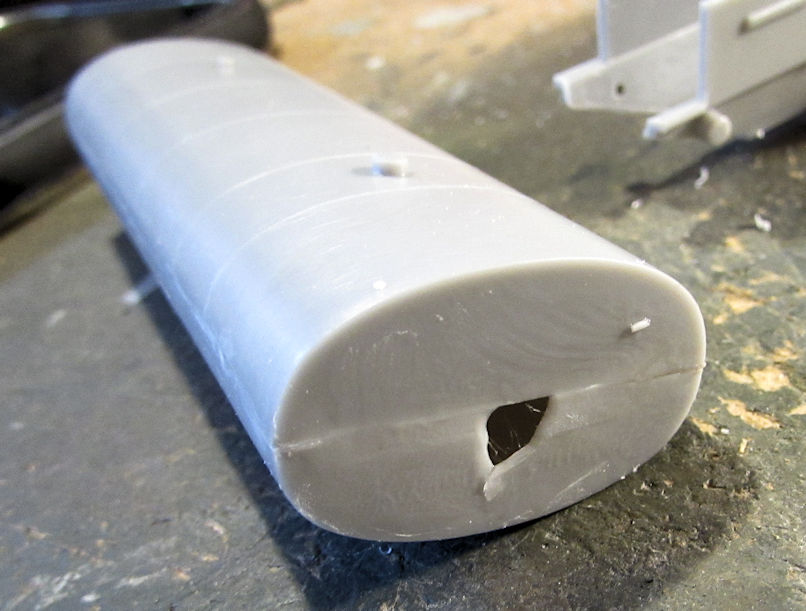
While cleaning the seam on the end of the tank, I ended up cutting a big hole in the end of it!
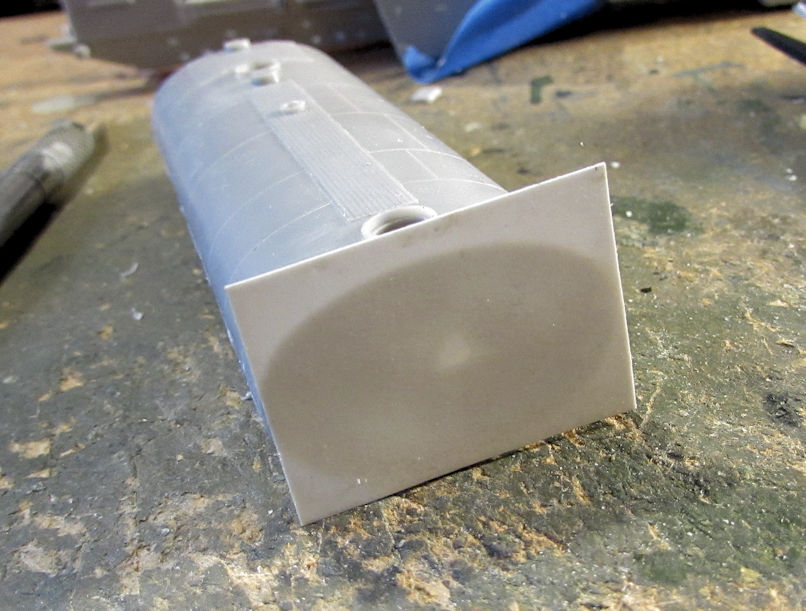
Out came the sheet styrene and some squares were cut. The first one went on the holed end:
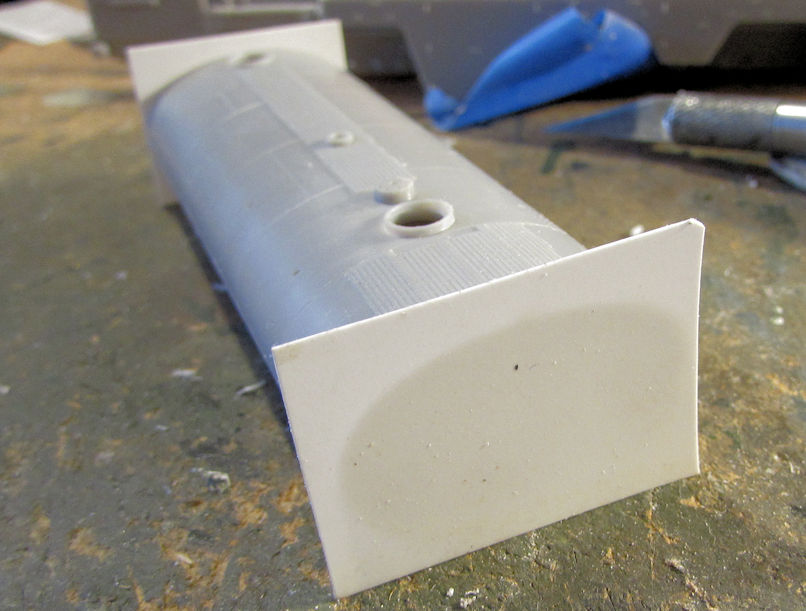
To make this look better, I added the other square to the opposite end:
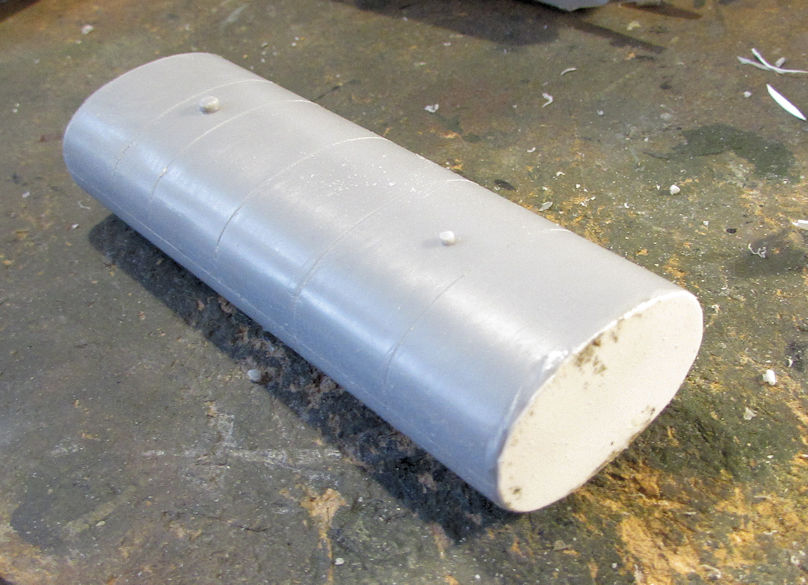
I then trimmed the excess off with a pair of scissors:
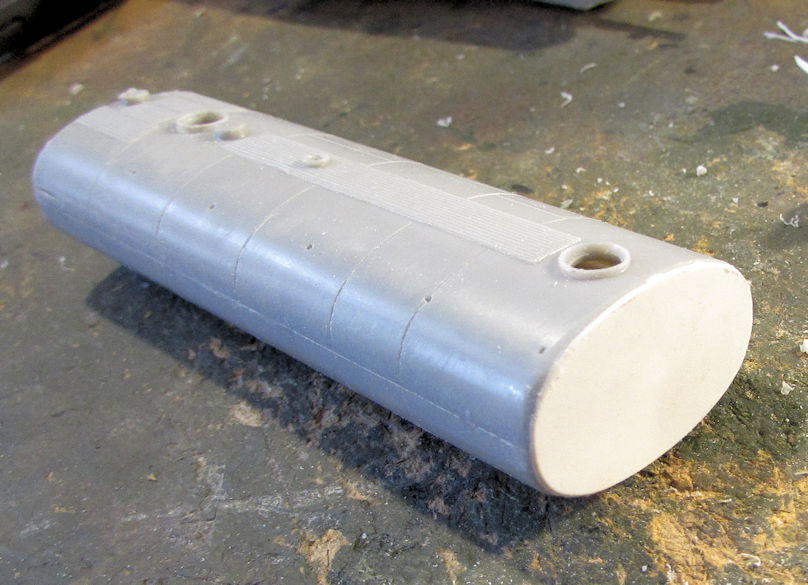
...and some careful sanding later, I have a smooth finish on each end:
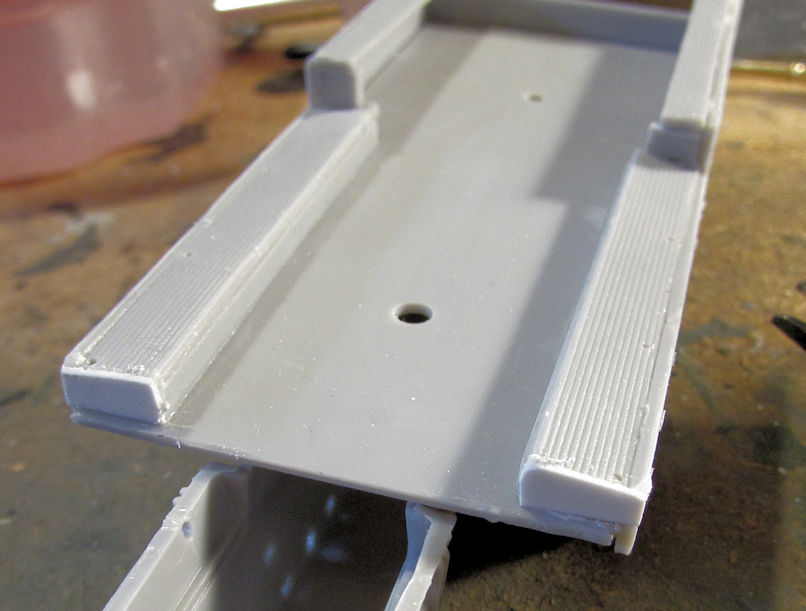
Next, because the end plates on the main body were not fashioned properly to fit without major gaps; I used more of that sheet styrene to plug the ends:
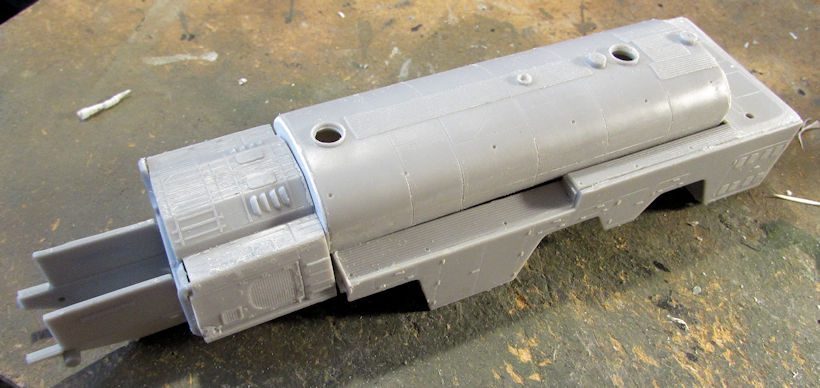
After some additional assembly, I then cemented the lower body and the forward engine cabin to the chassis. I then snapped the tank in for now. Here's how it looks so far:
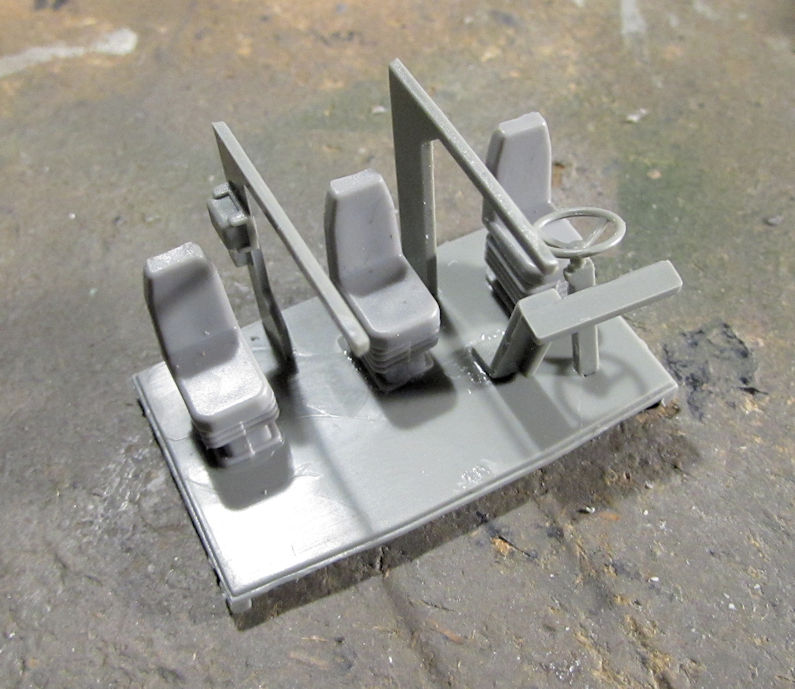
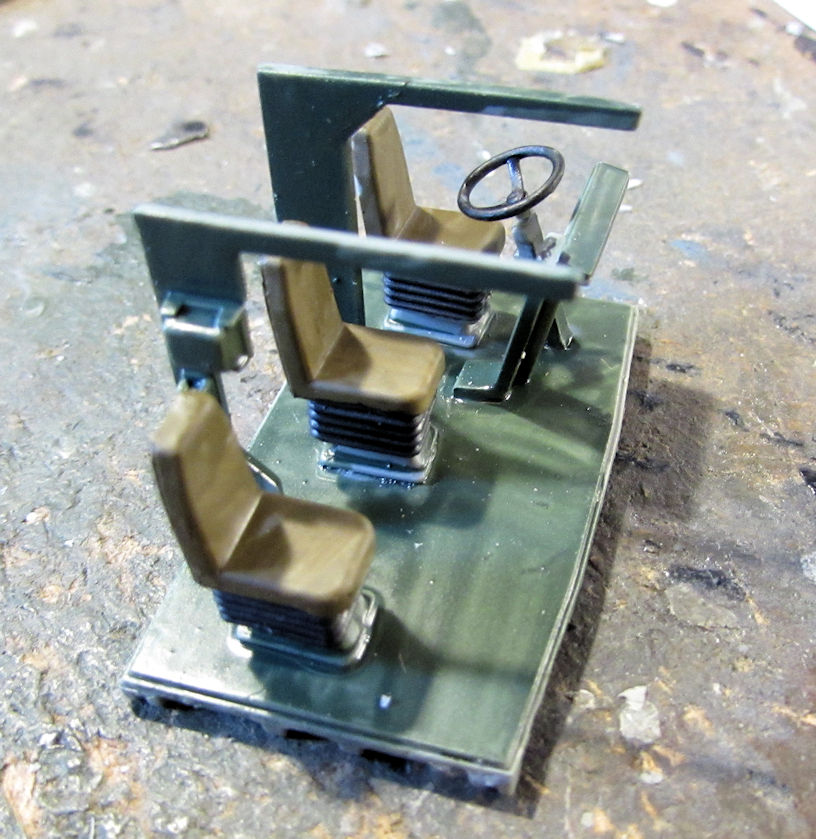
Well, that was enough of fighting that. I then pulled out one of the KZKT truck cabs and started to assemble the interior:
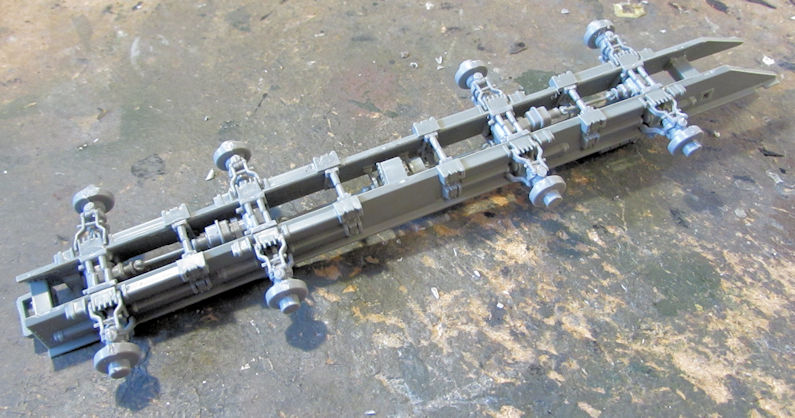
Next I added the axles to the chassis:
Additional detail parts went on, such as the fuel tanks on the side. I also checked to be sure the wheels all line up and sit properly:
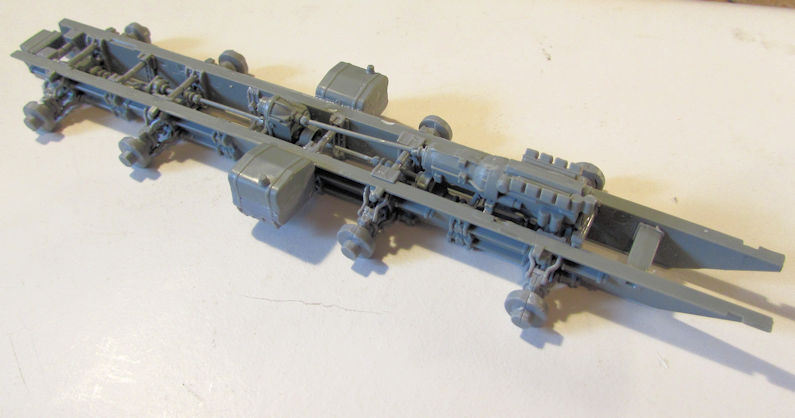
I then painted the interior of the cab:
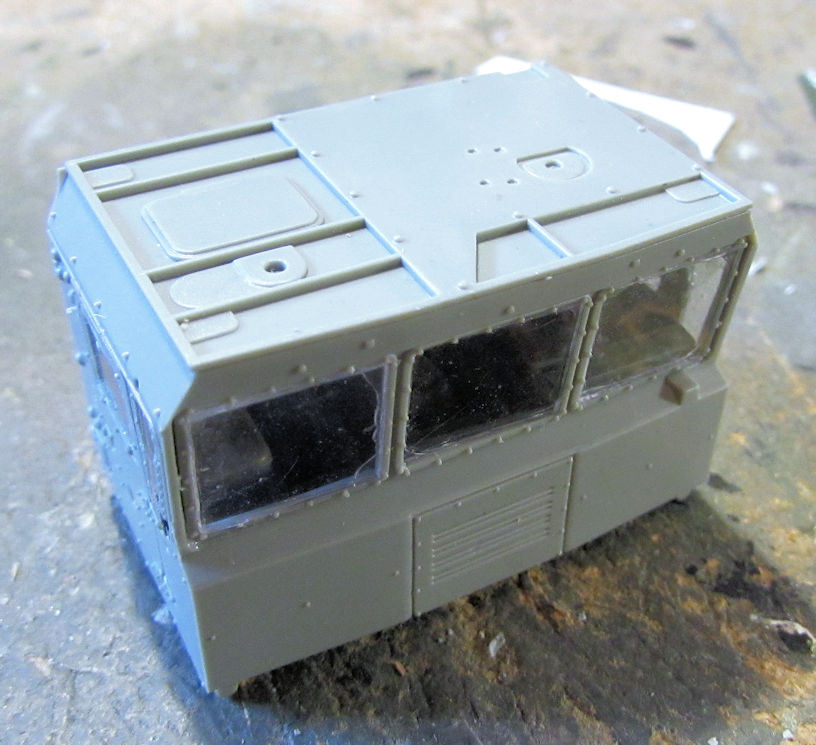
Here's how the cab looks all assembled. I only snapped the outer cab on the interior:
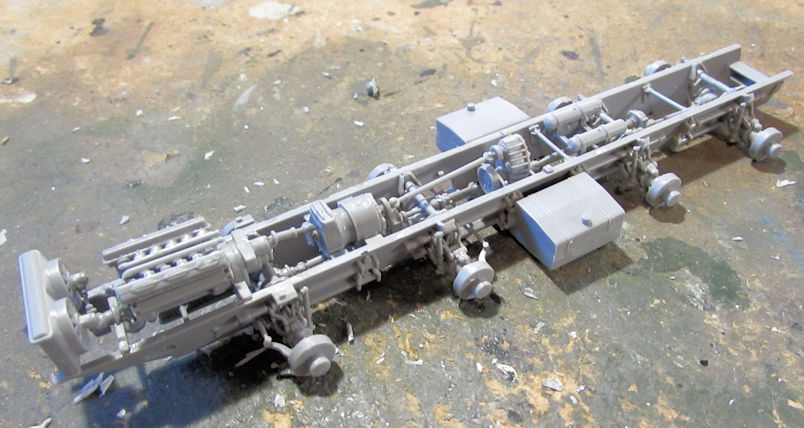
Now that was for the KZKT Heavy Truck. I also worked on the MAZ heavy Truck, starting with the axles and fuel tanks on that chassis:
The MAZ has that split cab and so I assembled and painted the interiors for both sides:
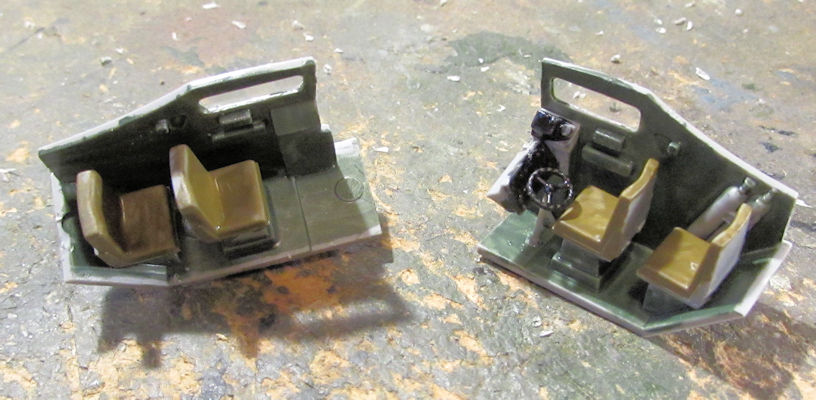
And that is where I had to stop due to Hobby Day being over and all the work I've been doing this past week. Hopefully I'll have more to show soon.
Thanks all for looking in, comments are always welcome.
Here is my latest progress done at Hobby Day and a few days before and after. I was very happy with how much I got done.
I'll start with my aircraft; or in this case, helicopters.
I finished painting the interior for the HUP-2, so once I get the windows in the fuselage, I'll be able to close this little bird up:

I also got the interior painted on the Huey Hog. This one will be able to be closed up after I apply the instrument panel decals and then install the windows as well:

Now here is the work I did on the Gotha I bought from my friend. He had already assembled the booms and the wings, so I started with the cockpit... such as it is:

This model gives the option of making this plane a glider or a powered transport aircraft. I decided that since I haven't got this in powered form yet, I'll build it with engines:

As those were drying, I then added the engine nacelle parts to the wings that will hold those engines and the booms:

That's as far as I got on that. After all that I moved on to my armor.
The first thing I did was to paint the base tan color on the deck of my railroad flatcar. Later I'll try to make this look more like wood:

Next I decided to move forward on more of the Aerosans for the Treasure Train game that I'd been "threatening" to put on for a year now. I had one already half built so I assembled the engine and added it to the body to finish it up and have it ready for paint:

After that, I started the last one I have in my stash. I do need to buy a few more....
Anyway, I got that one half done before I realized I left all the engine parts at home. Still, it is started at least, and the engine will be easy to get finished and mounted on this. Here is the last one next to the finished on I just did:

Moving on from there, I next decided that the T-15 Armata was calling my name too loudly so I got started on that one. First thing I did was to build the turret. That went fast:

Next I added the detail parts to the upper hull. There wasn't too much to add, so this went fast as well:

After that I assembled the lower hull. I'm really thrilled at how well this model fits together:

Finally, I test fit everything together sans turret. This is one big beastie! Check this out:

I did stop there but I was having so much fun with this Zvezda kit that I pulled out the Terminator to finish up a bit more. The first thing I did was to assemble the rocket tubes and mount them on the turret:

They are pretty fiddly and will make turning that turret a bit hard. Moving on, I finished up adding the bogies and roadwheels to the lower hull:

I also added the side skirts and other detail parts to the upper hull as well:

Putting the upper and power hull together looks great, this vehicle is now ready for paint:


After that, I moved on to the final steps I needed to do to finish my Nagmachon. All the photo etch radar antennae, stowage fences, fenders and anti-RPG bar armor was installed:


After some touch up to the paint and adjustment to some of the photo-etch screens, I can declare this thing done. Pics of that are forthcoming later....
After that, I just wanted to build and/or paint. Since I wanted to move forward on some of my eight-wheeled trucks, I pulled them out and chose the AA-60 fire truck first.
While cleaning the seam on the end of the tank, I ended up cutting a big hole in the end of it!

Out came the sheet styrene and some squares were cut. The first one went on the holed end:

To make this look better, I added the other square to the opposite end:

I then trimmed the excess off with a pair of scissors:

...and some careful sanding later, I have a smooth finish on each end:

Next, because the end plates on the main body were not fashioned properly to fit without major gaps; I used more of that sheet styrene to plug the ends:

After some additional assembly, I then cemented the lower body and the forward engine cabin to the chassis. I then snapped the tank in for now. Here's how it looks so far:

Well, that was enough of fighting that. I then pulled out one of the KZKT truck cabs and started to assemble the interior:

Next I added the axles to the chassis:

Additional detail parts went on, such as the fuel tanks on the side. I also checked to be sure the wheels all line up and sit properly:

I then painted the interior of the cab:

Here's how the cab looks all assembled. I only snapped the outer cab on the interior:

Now that was for the KZKT Heavy Truck. I also worked on the MAZ heavy Truck, starting with the axles and fuel tanks on that chassis:

The MAZ has that split cab and so I assembled and painted the interiors for both sides:

And that is where I had to stop due to Hobby Day being over and all the work I've been doing this past week. Hopefully I'll have more to show soon.
Thanks all for looking in, comments are always welcome.
The Duke
Virtuoso of Miniatures
"Do you know what the chain of command is? It's the chain I get and beat you with 'till you understand who's in ruttin' command!"
-Jayne Cobb, Firefly Episode 2 "The Train Job"
We are modelers - the same in spirit, in hunger to insanely buy newly released kits, hustlers in hiding our stash from our better halves and experts in using garbage as replacements for after-market parts.
Virtuoso of Miniatures
"Do you know what the chain of command is? It's the chain I get and beat you with 'till you understand who's in ruttin' command!"
-Jayne Cobb, Firefly Episode 2 "The Train Job"
We are modelers - the same in spirit, in hunger to insanely buy newly released kits, hustlers in hiding our stash from our better halves and experts in using garbage as replacements for after-market parts.
Re: Maddog Manufacturing Production for 2019
Been busy? OUTSTANDING!
To make each build less crappy than the last one. Or, put another way, "Better than the last one, not as good as the next one!"..
- Medicman71
- Elite Member
- Posts: 9713
- Joined: Mon Apr 07, 2014 9:32 am
- Location: Houston, Tx
Re: Maddog Manufacturing Production for 2019
Man I wish I could build that fast!!
Mike
Sponsored by Boeing, Lockheed Martin, Northrop Grumman, Saab, BAE, and Dassault
Sponsored by Boeing, Lockheed Martin, Northrop Grumman, Saab, BAE, and Dassault
- Stikpusher
- Moderator
- Posts: 18867
- Joined: Sat Apr 05, 2014 8:37 pm
- Location: Ceti Alpha 5
Re: Maddog Manufacturing Production for 2019
I could swear that he never sleeps... 
"Surely I have made my meaning plain? I intend to avenge myself upon you, Admiral. I have deprived your ship of power, and when I swing 'round, I intend to deprive you of your life."
FLSM
FLSM
- speedgraflex
- Moderator
- Posts: 9755
- Joined: Fri Feb 10, 2017 11:08 pm
- Location: Santa Monica, California
Re: Maddog Manufacturing Production for 2019
Mark,
Did your styrene repairs to the fire truck necessitate finessing the opening where it rests? I assume you added a slight thickness to each end and from the following progress shot, appears to nestle against the cab section as well as a rear deck?
Did your styrene repairs to the fire truck necessitate finessing the opening where it rests? I assume you added a slight thickness to each end and from the following progress shot, appears to nestle against the cab section as well as a rear deck?
Bruce / SPEEDGRAFLEX
Re: Maddog Manufacturing Production for 2019
A fantastic selection of builds as always Mark!
Stuart Templeton 'I may not be good but I'm slow...'
My blog: https://stuartsscalemodels.blogspot.com/
My blog: https://stuartsscalemodels.blogspot.com/
- Duke Maddog
- Elite Member
- Posts: 7088
- Joined: Tue Jun 03, 2014 11:22 am
- Location: Rowland Heights, CA
Re: Maddog Manufacturing Production for 2019
Thanks Lyle! Been trying to stay busy here; I wouldn't have gotten so much done except for Hobby Day. I wish I could do more like this during the rest of the month.
Thanks Medic! But I feel I'm way under my usual productivity levels.
Carlos, thanks! And yes, due to having to use power tools, I get my eight hours a night sleep. I really hope to keep all my fingers!
Bruce, the tank actually fit just as well after the repairs as it did before. I did use a very thin sheet of styrene so no finessing of the opening where it rests was needed. I believe the styrene sheet was .10 in thickness; it barely added anything to the length of the tank.
Stuart, thanks! Stay tuned, I hope to get more done soon.
The Duke
Virtuoso of Miniatures
"Do you know what the chain of command is? It's the chain I get and beat you with 'till you understand who's in ruttin' command!"
-Jayne Cobb, Firefly Episode 2 "The Train Job"
We are modelers - the same in spirit, in hunger to insanely buy newly released kits, hustlers in hiding our stash from our better halves and experts in using garbage as replacements for after-market parts.
Virtuoso of Miniatures
"Do you know what the chain of command is? It's the chain I get and beat you with 'till you understand who's in ruttin' command!"
-Jayne Cobb, Firefly Episode 2 "The Train Job"
We are modelers - the same in spirit, in hunger to insanely buy newly released kits, hustlers in hiding our stash from our better halves and experts in using garbage as replacements for after-market parts.
- Duke Maddog
- Elite Member
- Posts: 7088
- Joined: Tue Jun 03, 2014 11:22 am
- Location: Rowland Heights, CA
Re: Maddog Manufacturing Production for 2019
Now that the Thanksgiving holiday is over, I'll show you the small amount of progress I managed to make during the holiday weekend. I don't expect much replies given the small update, but personally I'm very thrilled with the progress I made. So sit back and enjoy this latest tour of Maddog Manufacturing...
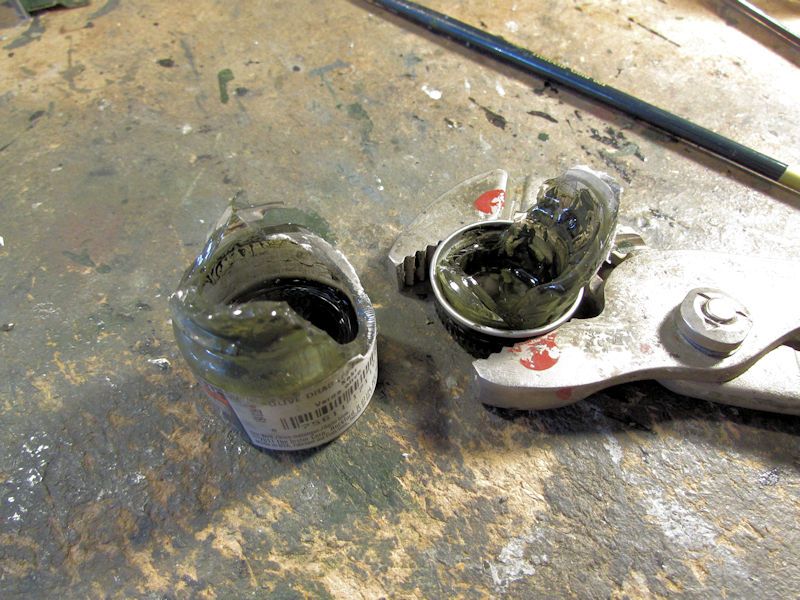
I'll start with the unexpected setback I had when I was preparing to paint the interiors of my Russian truck cabs. I didn't use much pressure and I sure wasn't gripping this too hard, but this is what happened anyway:
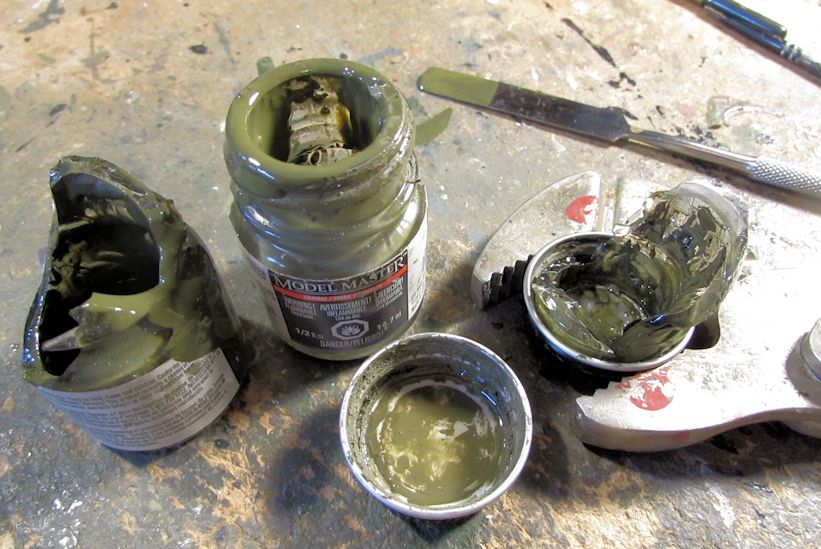
Fortunately I had another bottle of that same paint which had been used so I was able to filter the remaining paint from the broken jar into the other one:
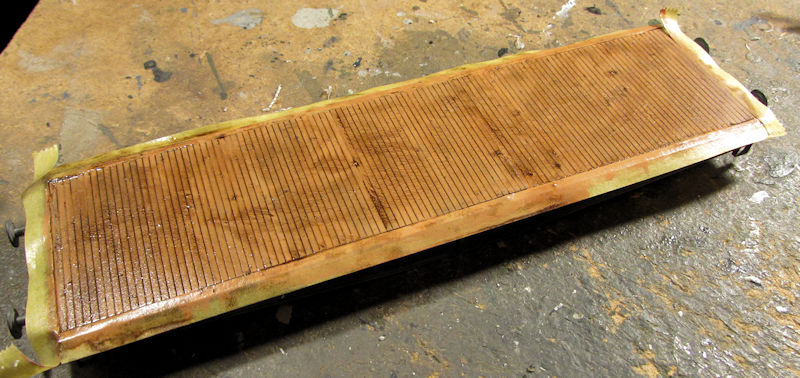
So, after that was done I painted the seats on the interior of some of the trucks. While they dried, I pulled out my German railroad flatcar which I'd already painted with a light tan. I then gave it a heavy dark brown wash:
After that, I decided I didn't want to work on axles and bogies so I started another German Cabriolet car from ACE. I started with the chassis/undercarriage. I got only a little progress when one of the springs shot out of the tweezers and disappeared. After spending too much time searching, I said 'screw it!' and cut a piece of sprue to the same length as the first spring. While sizing that and getting it ready to glue; it snapped off and disappeared. A second one also did. Finally, the third one went on:
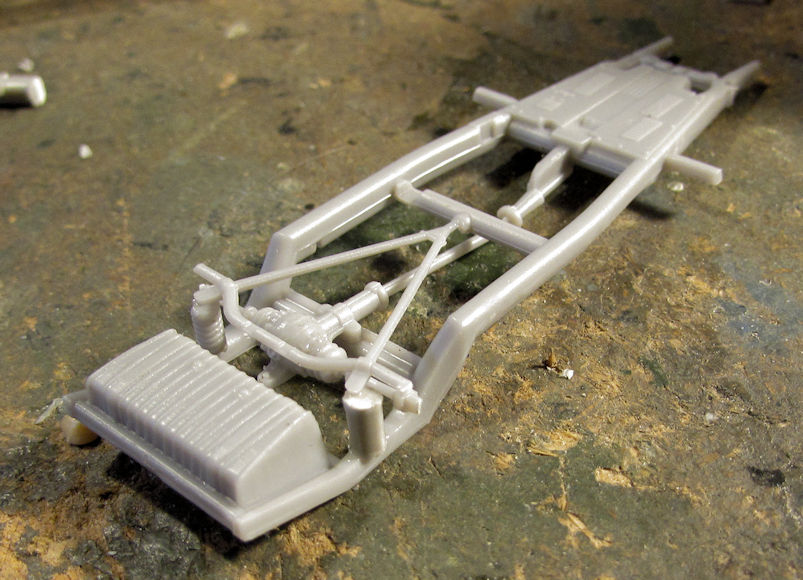
That's it. I was done with that! It ain't gonna be seen with the wheel on anyway!
Axles and bogies didn't look so bad after that ordeal!
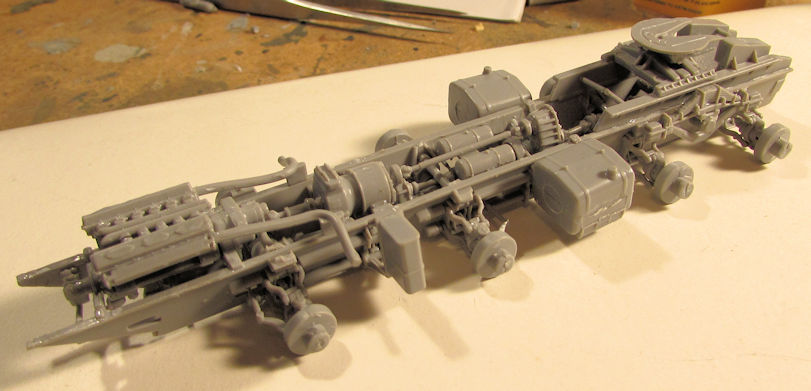
So, I pulled out the MAZ tractor and assembled all the axles and installed them and other bits to the chassis:
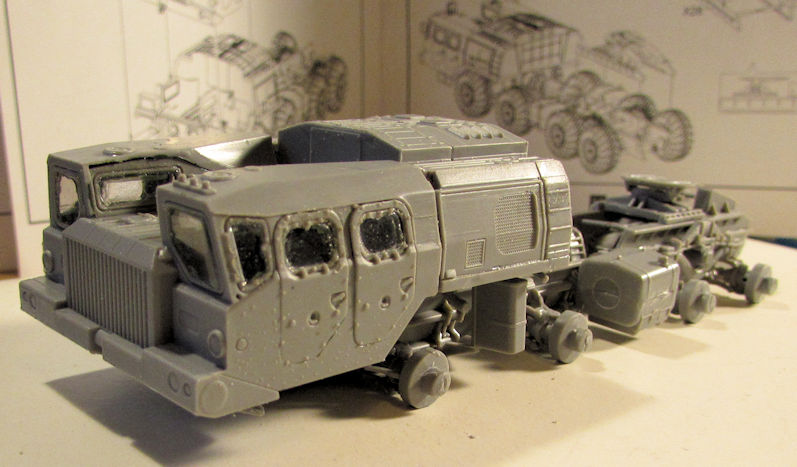
Next it called for installing the main driver's cabin and the one behind it. So, I assembled the whole cabin and then mounted that on the chassis. That did present some issues, but it went on well, along with the rear cab:
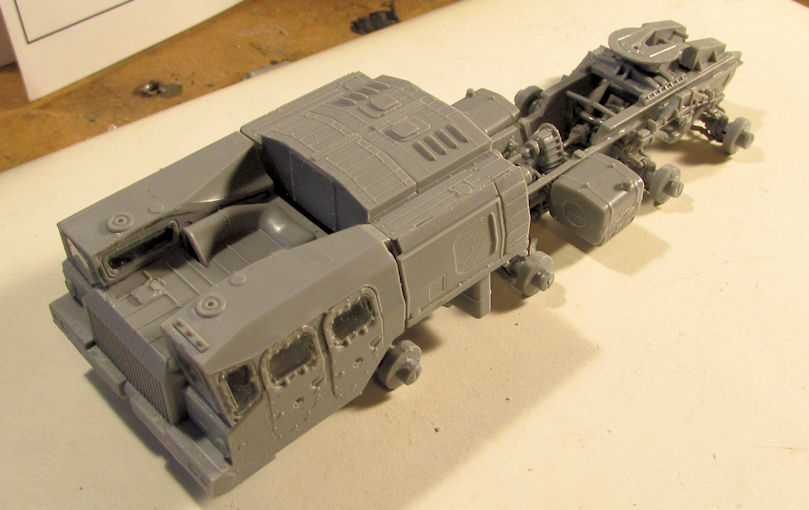
Another shot from slightly above:
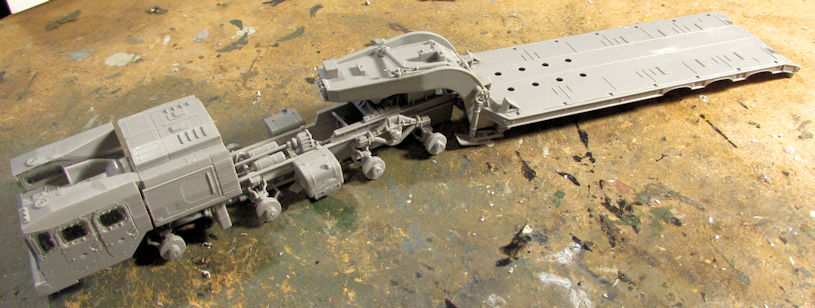
And of course, I just had to shoot this whole thing with the trailer behind it:
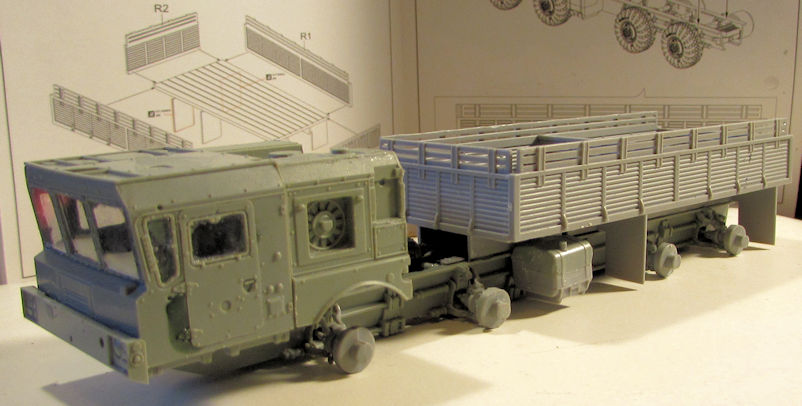
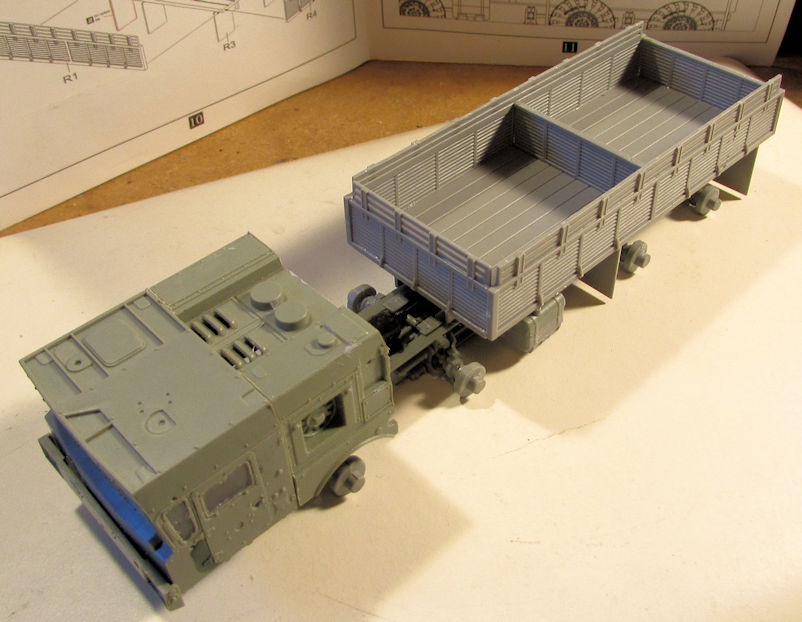
That went well. So, I pulled out my KZKT Heavy truck and moved forward on that. Since I'd already had the cab built for this, I installed it onto the chassis along with the rear cab and the cargo bed:
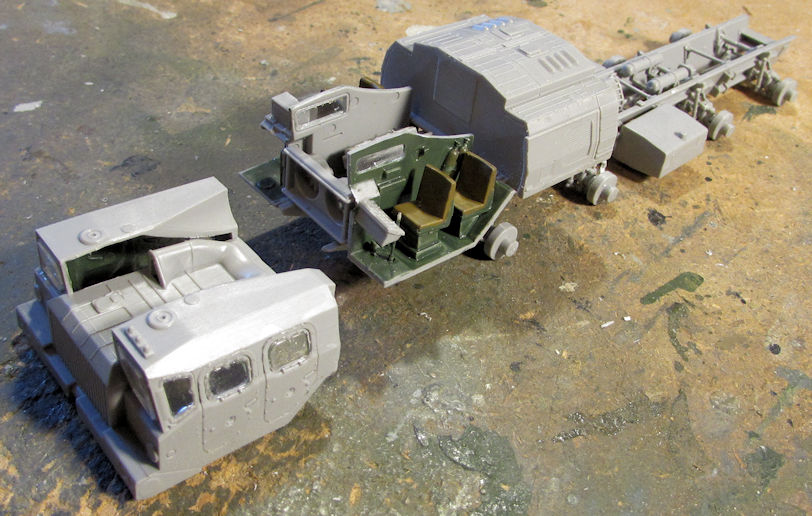
After that, I pulled out my MAZ Heavy truck. Since I had already had the axles installed on the chassis of this truck, I went to work installing the cabin. This time I decided to try assembling it the way the instructions showed. This required me to cement the rear cab first, then add the two forward interior sub-assemblies to each side of the chassis. It took some doing getting them lined up and straight, given there were no attachment points on the chassis for these parts. Finally, I got them done well enough. Here it is with the exterior cab shell in front of it:
Finally when that was dry, I slid the exterior cab shell over it and cemented everything in place. I then added the rear cargo bed too. It was slightly harder to do the driver's cab this way than the way I did it: assembling the full driver's cab all the way before installing it. You can see where I had to add some filler to a couple very small seams:
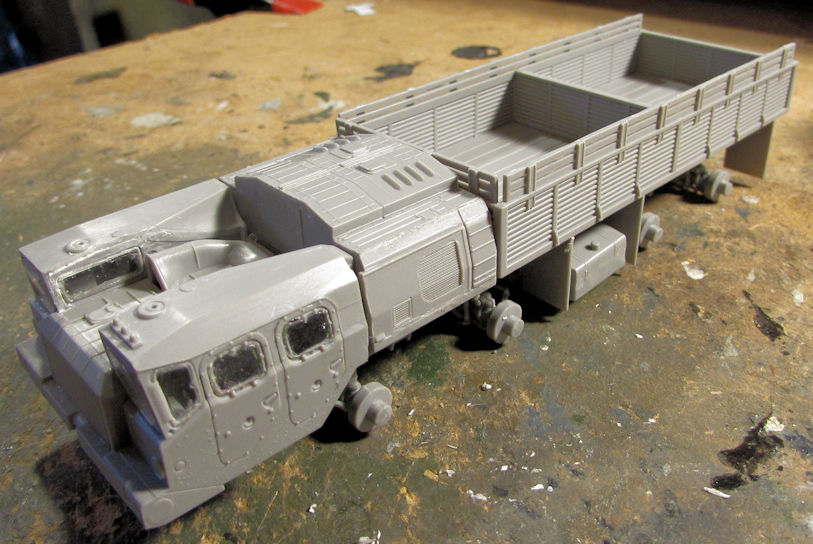
Those three trucks are now ready for P/E detail parts and then paint, along with my BMPT Terminator.
Finally I was getting tired of the Leopold rail gun sitting around my workbench. It was time to get it finished. So, I pulled it out and assembled the interior elevating mechanism:
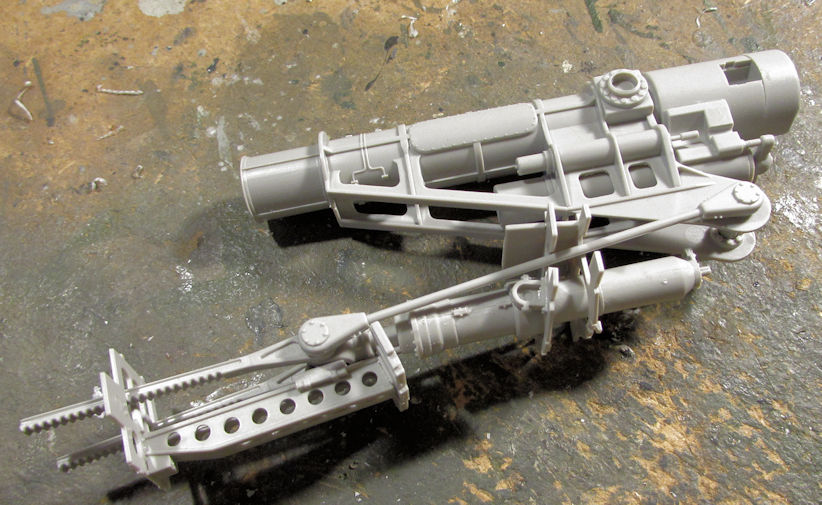
Later I had to install that and several bulkheads inside of the interior main gun carriage. That took some fiddling around and fighting parts to line up; widening holes and trying to keep things from breaking as I assembled this interior. Finally I fought this to a standstill:
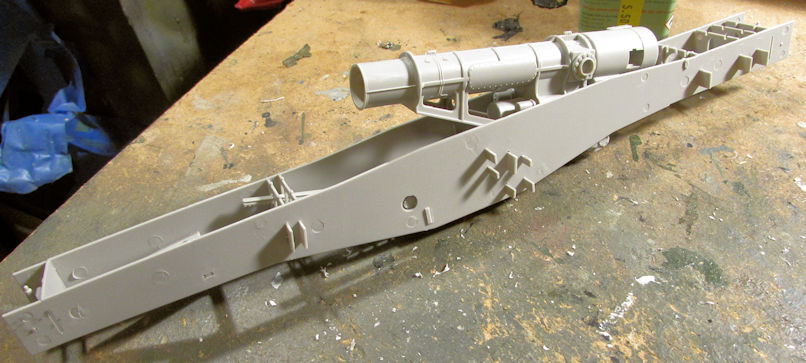
And just to show you how big this is, here's a shot of it next to an Exacto knife:
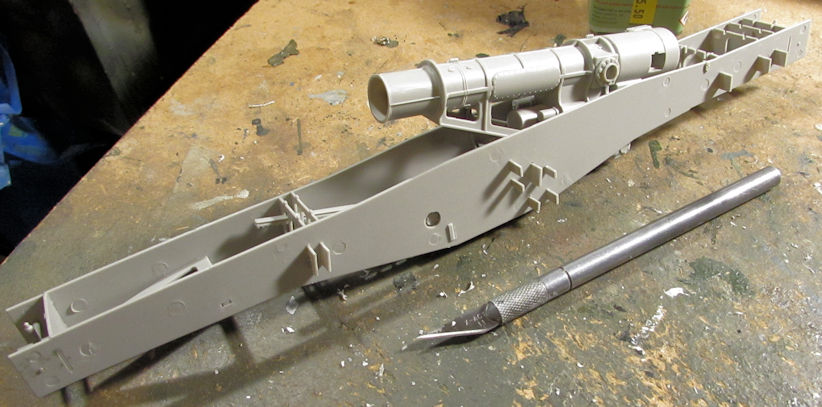
After assembling this, I had to slip it inside the exterior gun carriage superstructure and hopefully it would sit right so the top plate would go on solid. Of course it didn't. So, I started gluing and clamping this on one end to get it to sit right:
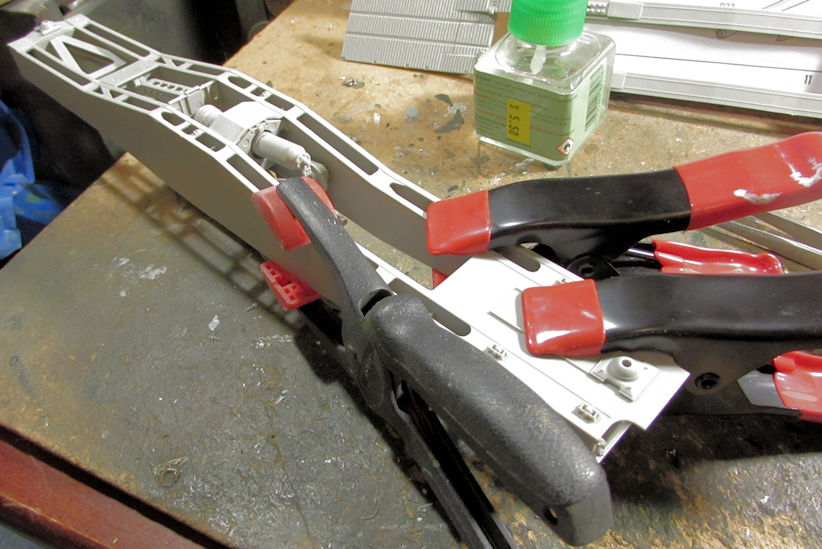
After much fussing and fighting and more clamps later, I got it all glued and clamped together to fit right(I hope!!!):
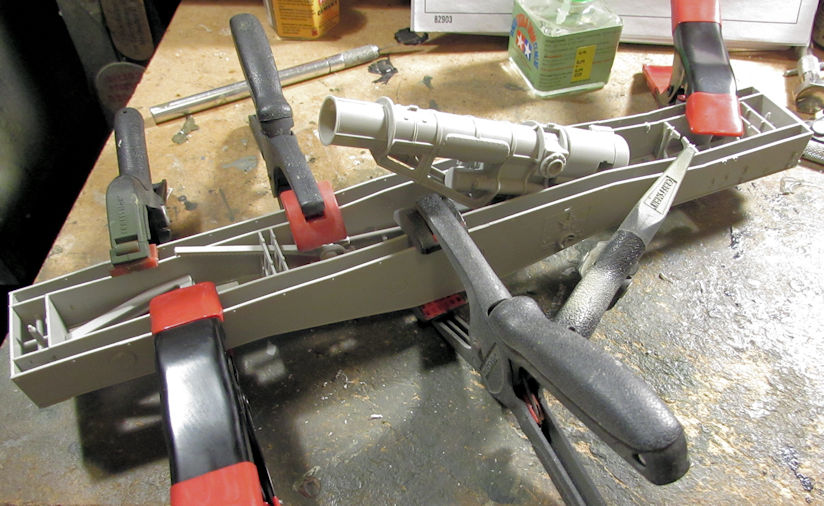
That's three hours of my time I won't get back!
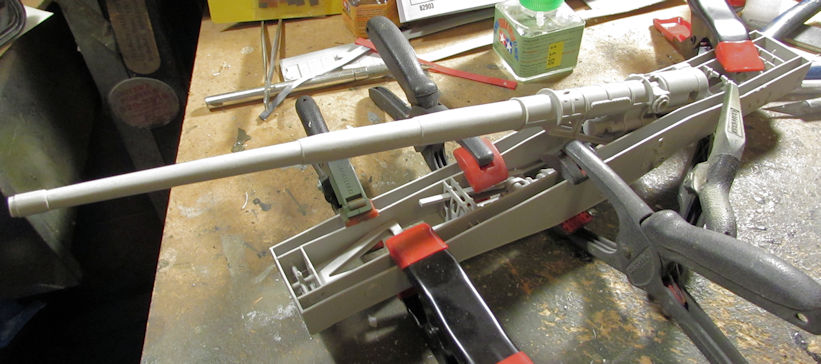
After that, I pulled out my flex-i-file and sanded the seams of the main gun. Once that was done well enough, I just had to dry it it to the previous assembly to see how it looked:
And that is everything I got done over the past four or five days in between baking pies, shopping with the wife, singing with my choir, and attending the in-law's for Thanksgiving dinner; then more shopping with the wife and more singing in the choir.... Wow, imagine how much I could have done if my wife had been working....
Anyway, that completes my short update. Feel free to comment; they are always welcome and motivating. Thanks for looking in.
I'll start with the unexpected setback I had when I was preparing to paint the interiors of my Russian truck cabs. I didn't use much pressure and I sure wasn't gripping this too hard, but this is what happened anyway:

Fortunately I had another bottle of that same paint which had been used so I was able to filter the remaining paint from the broken jar into the other one:

So, after that was done I painted the seats on the interior of some of the trucks. While they dried, I pulled out my German railroad flatcar which I'd already painted with a light tan. I then gave it a heavy dark brown wash:

After that, I decided I didn't want to work on axles and bogies so I started another German Cabriolet car from ACE. I started with the chassis/undercarriage. I got only a little progress when one of the springs shot out of the tweezers and disappeared. After spending too much time searching, I said 'screw it!' and cut a piece of sprue to the same length as the first spring. While sizing that and getting it ready to glue; it snapped off and disappeared. A second one also did. Finally, the third one went on:

That's it. I was done with that! It ain't gonna be seen with the wheel on anyway!
Axles and bogies didn't look so bad after that ordeal!
So, I pulled out the MAZ tractor and assembled all the axles and installed them and other bits to the chassis:

Next it called for installing the main driver's cabin and the one behind it. So, I assembled the whole cabin and then mounted that on the chassis. That did present some issues, but it went on well, along with the rear cab:

Another shot from slightly above:

And of course, I just had to shoot this whole thing with the trailer behind it:

That went well. So, I pulled out my KZKT Heavy truck and moved forward on that. Since I'd already had the cab built for this, I installed it onto the chassis along with the rear cab and the cargo bed:


After that, I pulled out my MAZ Heavy truck. Since I had already had the axles installed on the chassis of this truck, I went to work installing the cabin. This time I decided to try assembling it the way the instructions showed. This required me to cement the rear cab first, then add the two forward interior sub-assemblies to each side of the chassis. It took some doing getting them lined up and straight, given there were no attachment points on the chassis for these parts. Finally, I got them done well enough. Here it is with the exterior cab shell in front of it:

Finally when that was dry, I slid the exterior cab shell over it and cemented everything in place. I then added the rear cargo bed too. It was slightly harder to do the driver's cab this way than the way I did it: assembling the full driver's cab all the way before installing it. You can see where I had to add some filler to a couple very small seams:

Those three trucks are now ready for P/E detail parts and then paint, along with my BMPT Terminator.
Finally I was getting tired of the Leopold rail gun sitting around my workbench. It was time to get it finished. So, I pulled it out and assembled the interior elevating mechanism:

Later I had to install that and several bulkheads inside of the interior main gun carriage. That took some fiddling around and fighting parts to line up; widening holes and trying to keep things from breaking as I assembled this interior. Finally I fought this to a standstill:

And just to show you how big this is, here's a shot of it next to an Exacto knife:

After assembling this, I had to slip it inside the exterior gun carriage superstructure and hopefully it would sit right so the top plate would go on solid. Of course it didn't. So, I started gluing and clamping this on one end to get it to sit right:

After much fussing and fighting and more clamps later, I got it all glued and clamped together to fit right(I hope!!!):

That's three hours of my time I won't get back!
After that, I pulled out my flex-i-file and sanded the seams of the main gun. Once that was done well enough, I just had to dry it it to the previous assembly to see how it looked:

And that is everything I got done over the past four or five days in between baking pies, shopping with the wife, singing with my choir, and attending the in-law's for Thanksgiving dinner; then more shopping with the wife and more singing in the choir.... Wow, imagine how much I could have done if my wife had been working....
Anyway, that completes my short update. Feel free to comment; they are always welcome and motivating. Thanks for looking in.
The Duke
Virtuoso of Miniatures
"Do you know what the chain of command is? It's the chain I get and beat you with 'till you understand who's in ruttin' command!"
-Jayne Cobb, Firefly Episode 2 "The Train Job"
We are modelers - the same in spirit, in hunger to insanely buy newly released kits, hustlers in hiding our stash from our better halves and experts in using garbage as replacements for after-market parts.
Virtuoso of Miniatures
"Do you know what the chain of command is? It's the chain I get and beat you with 'till you understand who's in ruttin' command!"
-Jayne Cobb, Firefly Episode 2 "The Train Job"
We are modelers - the same in spirit, in hunger to insanely buy newly released kits, hustlers in hiding our stash from our better halves and experts in using garbage as replacements for after-market parts.