
Thanks guys! I was definitely happy after this trip. Part of it was the relief at being able to catch the target species, which is Bluefin Tuna. I've gotten to the point where I can now taste the difference between Bluefin and Yellowfin and to me, Bluefin is SO much better. But the company on this trip is another factor that makes me smile. It's a charter so all of the people are invited so most of the people are my good friends. On open party trips, you just never know who is going to be fishing next to you. For the most part, I've had positive experiences on open party trips but there have been some bad ones too. Loud,surly drunks are the worst.
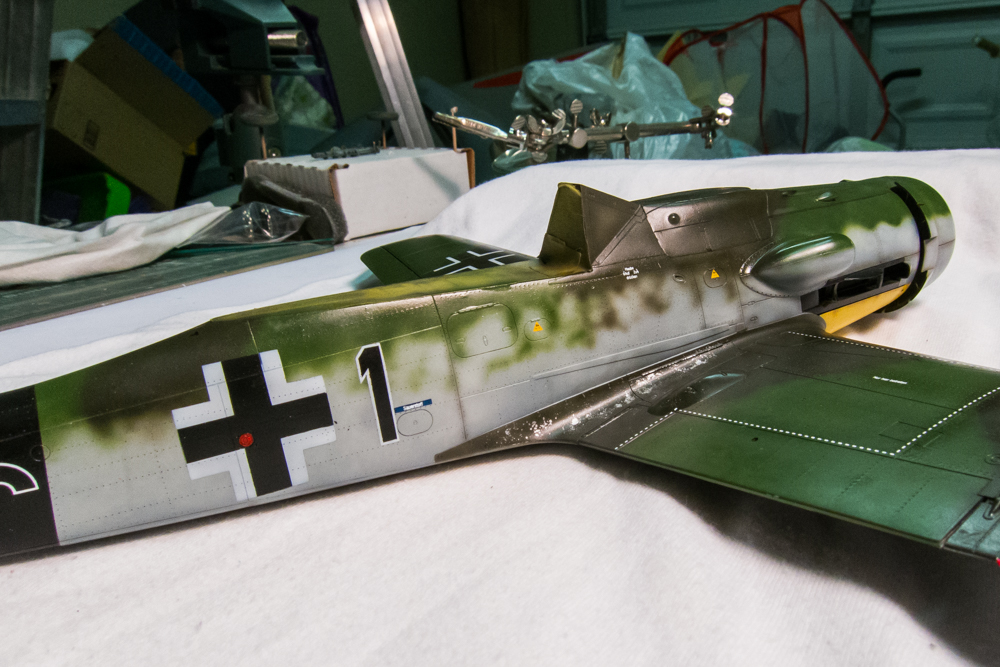
Looking forward to jumping on Black 1 but I have some things I have to attend to first. The weathering on Black 1 is an interesting consideration. Although this particular aircraft saw lots of action, it was also the recipient of a repaint and some retrofit improvements and did not stay in Black 1 form for very long. So I'm thinking the upper surfaces are going to be in better condition than the lower surfaces. But foremost on my mind is the paint lift issue on the starboard side ID stripe. Need to make a decision on that before going any further.
1/32 Hasegawa Fw190D-9 Black One
Re: 1/32 Hasegawa Fw190D-9 Black One
John aka JKim
-----------<><

-----------<><
Re: 1/32 Hasegawa Fw190D-9 Black One
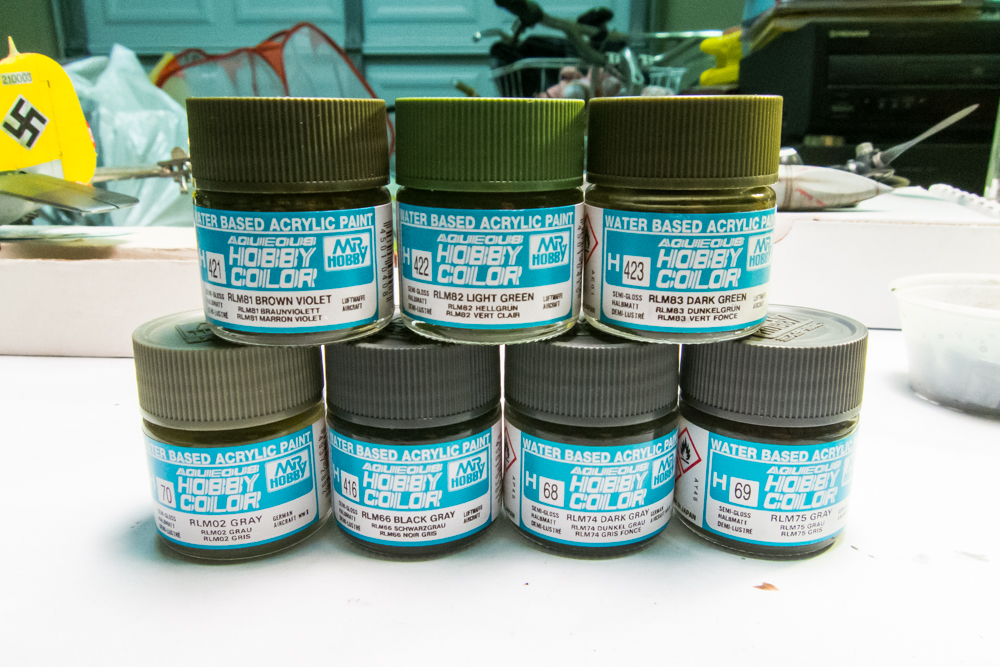
Here are some paints that I ordered a while ago that arrived when I was fishing. I wanted to compare them to the older Gunze-Sangyo acrylics that are similar to the Tamiya acrylics that I normally use. Hopefully, they are similar and they also give me another take on the Luftwaffe colors that I can compare to my Tamiya mixes.
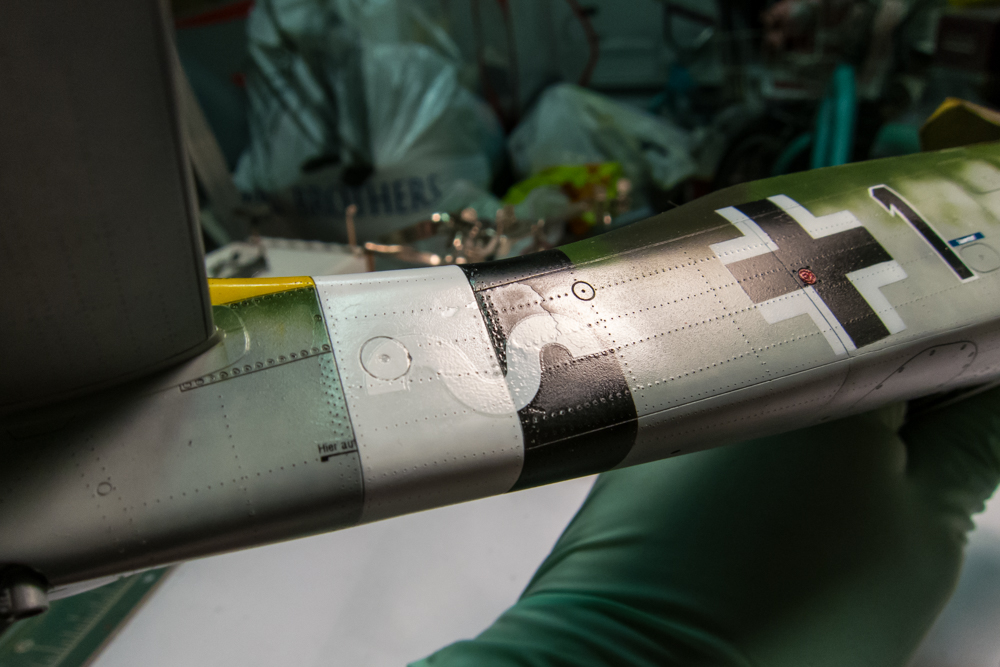
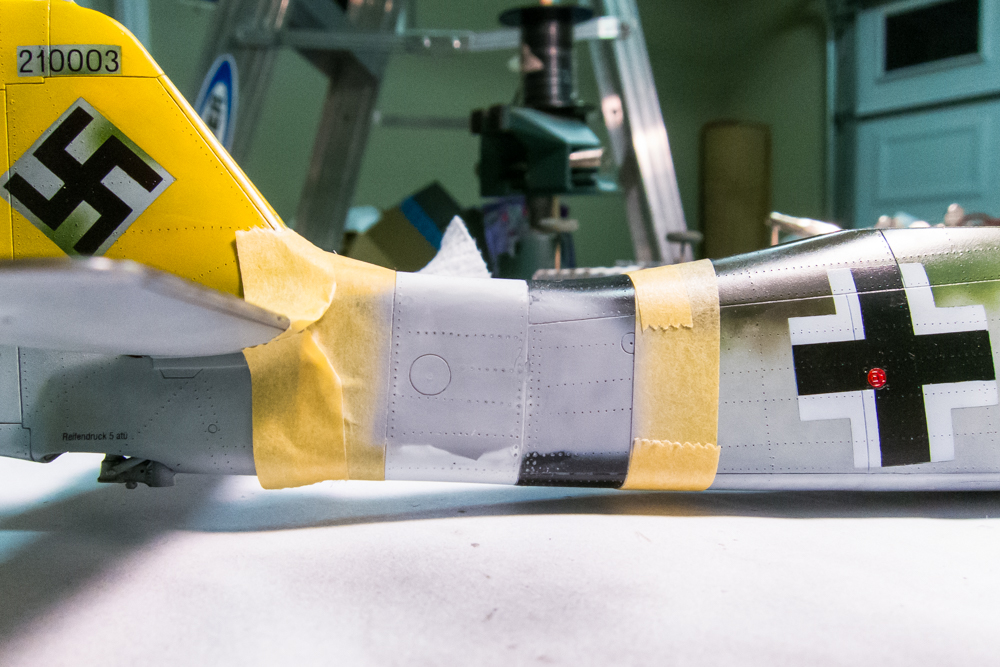
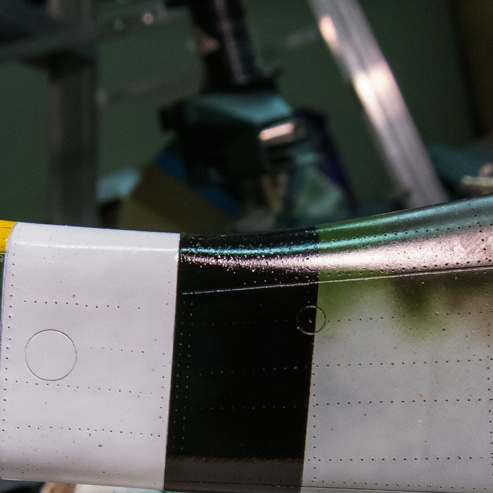
I had a small window of opportunity this evening after dinner so I decided to see if I could address the paint lift issue on the tail ID band. From this angle, you can make out the edges of the removed paint that is bothering me.
I sprayed the port side with Tamiya Clear Flat and determined that the flaws on that side are small enough that they are not noticeable. I have decided to leave this side alone.
On the starboard side, I ratcheted up the removals. The decal was pulled off by masking tape. And then the area was sanded until the edges of the transition were feathered enough not to be noticeable.
The limits of the ID band were masked off. Mr Surfacer 1000 thinned with Tamiya Lacquer Thinner was sprayed onto the repair area. I kept the mix a little thicker than normal so that it would serve as a filler. When dry, I sanded the area again to make sure that no edges were present.
The white area of the band was sprayed on first, followed by the black. After the first coat of white and black, this side was buffed with Micromesh to ensure flatness of the whole area.
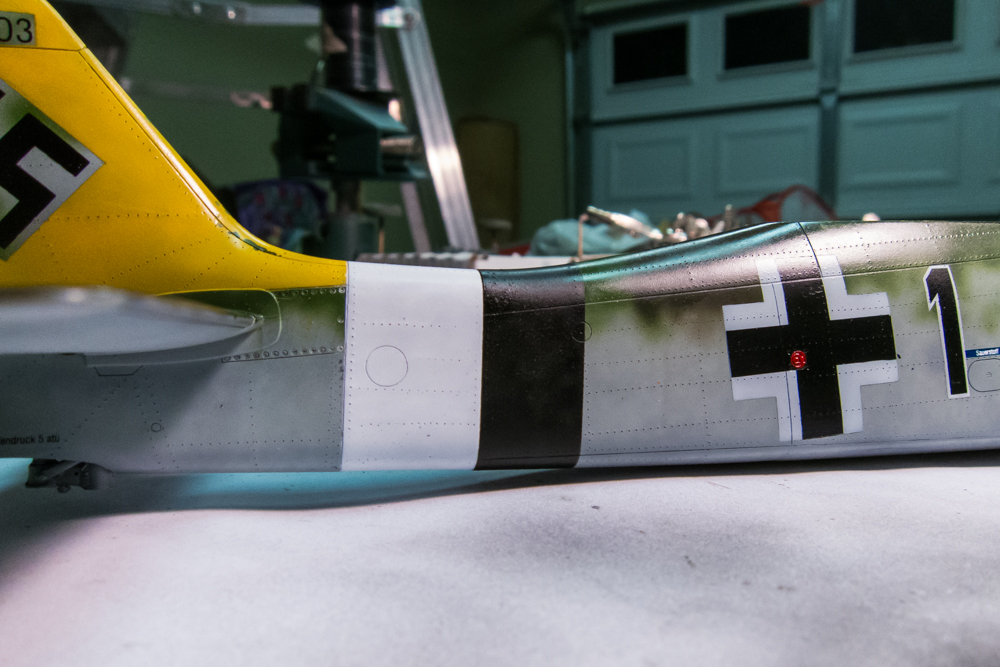
The band was given a coat of Alclad Aqua Gloss in preparation for the welle decal. This area looks much better now. I'll try and remember to get a shot with a glare reflection to show how smooth it is now. It feels good to have addressed this niggling issue once and for all!
I had a small window of opportunity this evening after dinner so I decided to see if I could address the paint lift issue on the tail ID band. From this angle, you can make out the edges of the removed paint that is bothering me.
I sprayed the port side with Tamiya Clear Flat and determined that the flaws on that side are small enough that they are not noticeable. I have decided to leave this side alone.
On the starboard side, I ratcheted up the removals. The decal was pulled off by masking tape. And then the area was sanded until the edges of the transition were feathered enough not to be noticeable.
The limits of the ID band were masked off. Mr Surfacer 1000 thinned with Tamiya Lacquer Thinner was sprayed onto the repair area. I kept the mix a little thicker than normal so that it would serve as a filler. When dry, I sanded the area again to make sure that no edges were present.
The white area of the band was sprayed on first, followed by the black. After the first coat of white and black, this side was buffed with Micromesh to ensure flatness of the whole area.
The band was given a coat of Alclad Aqua Gloss in preparation for the welle decal. This area looks much better now. I'll try and remember to get a shot with a glare reflection to show how smooth it is now. It feels good to have addressed this niggling issue once and for all!
John aka JKim
-----------<><
-----------<><
-
speedgraflex

- Moderator
- Posts: 9756
- Joined: Fri Feb 10, 2017 11:08 pm
- Location: Santa Monica, California
Re: 1/32 Hasegawa Fw190D-9 Black One
Well, John! Looks like you are addressing this area brilliantly! Not to raise an issue but because there is a question in my mind, I must write to ask: everything looks great until the clear spray, and then I see what appears to be pebbling at the top edge of the black — easy to misread this due to the lighting conditions, though — but I would not feel right simply passing quietly over this, and I still think that clear coat is the culprit somehow. I just do. I like to worry.
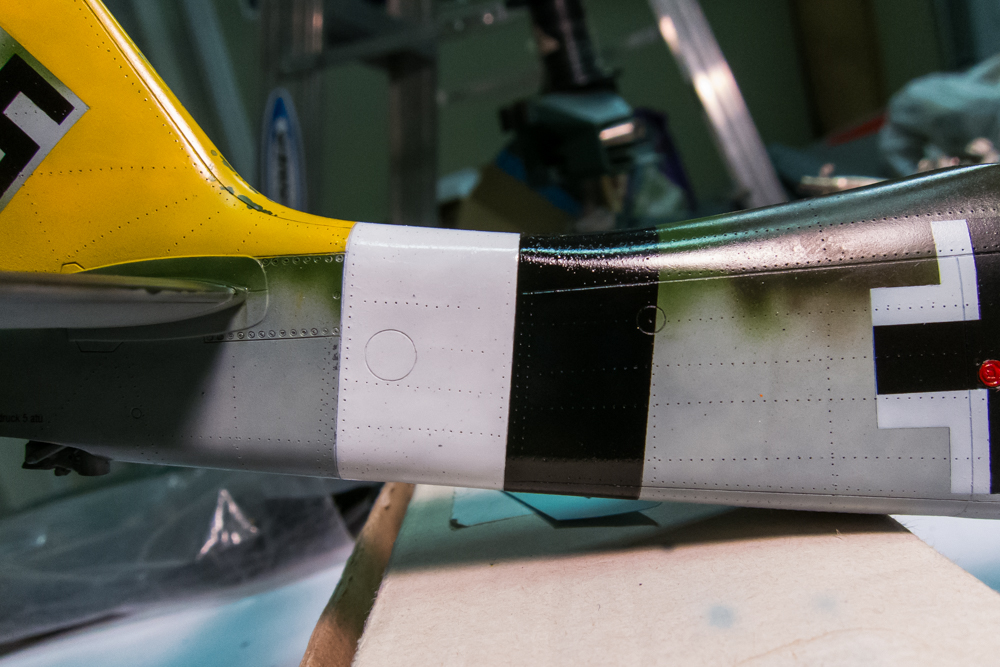
BEFORE AQUA GLOSS
AFTER AQUA GLOSS
Please let me know, John. Thanks in advance!

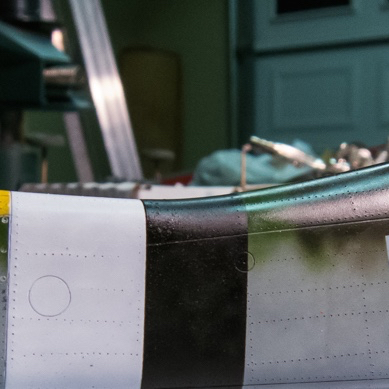
BEFORE AQUA GLOSS
AFTER AQUA GLOSS
Please let me know, John. Thanks in advance!
Bruce / SPEEDGRAFLEX
Re: 1/32 Hasegawa Fw190D-9 Black One
Thanks for the comments Bruce. Those imperfections in the gloss coat are not going to be a factor since this aircraft will be finished with a flat coat overall. The primary function of the gloss coat is to seal the camo finish and provide a smooth surface for the decals. I will usually polish the decal areas with Micromesh to remove any large imperfections. But the slightly pebbly grain to the gloss coat on the areas not to be decaled will disappear with the flat coat.
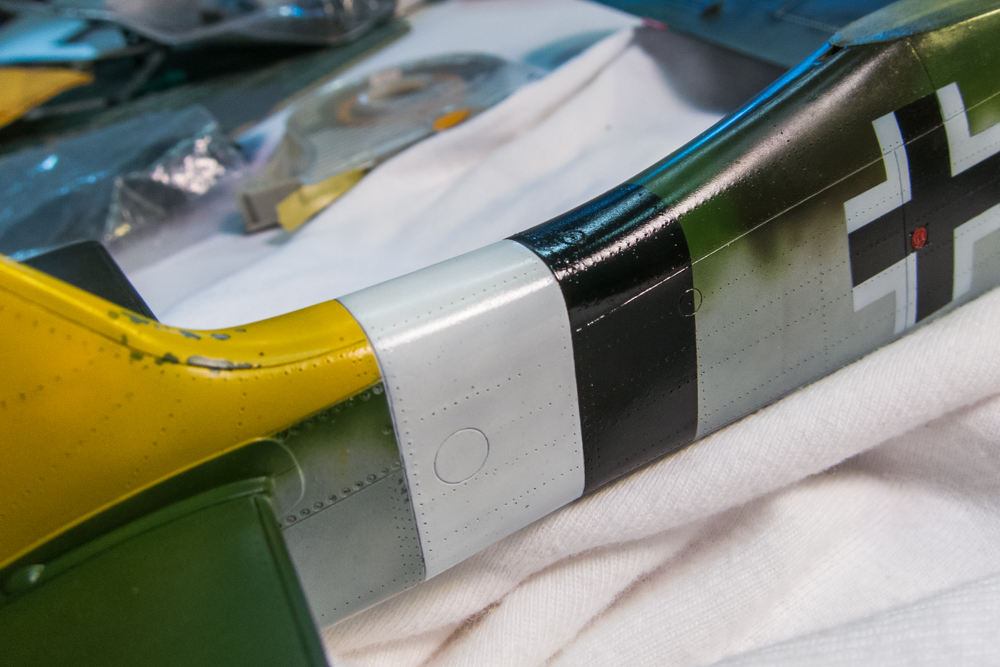
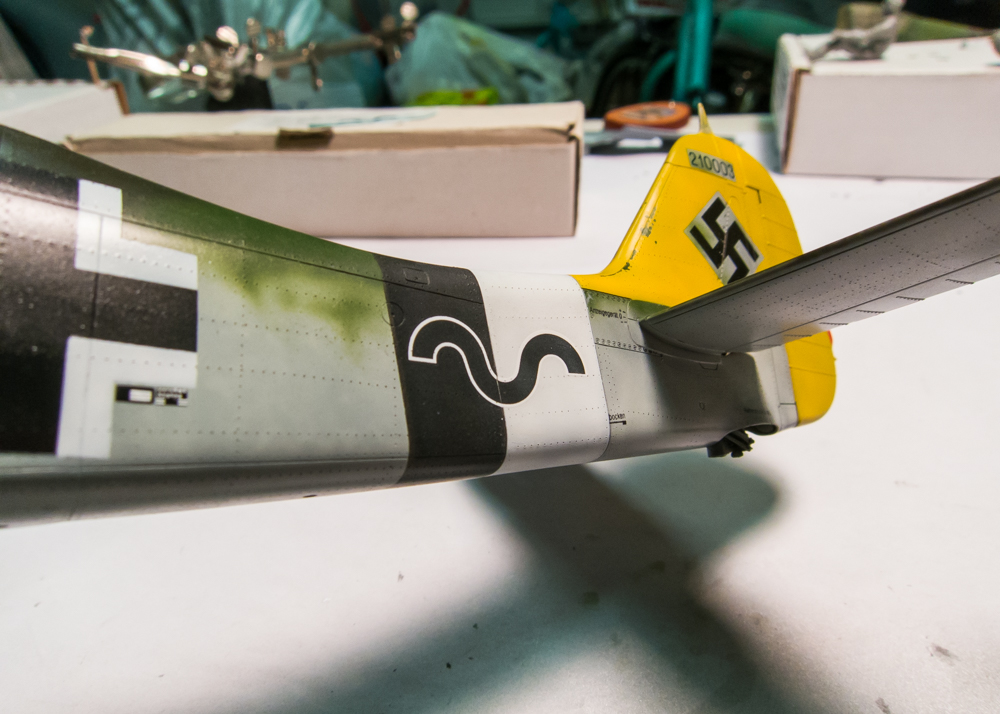
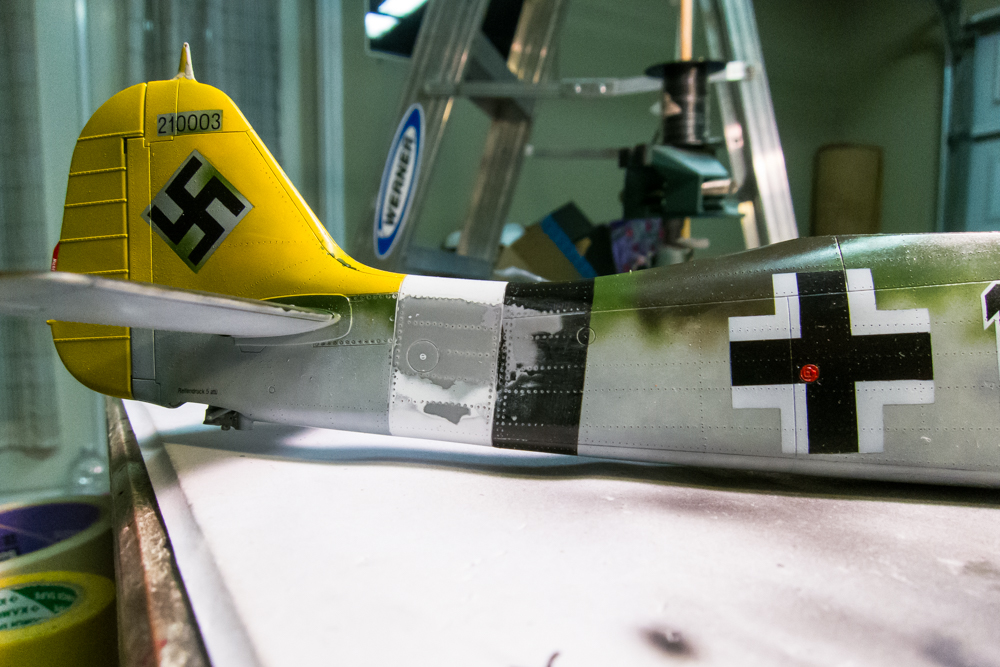
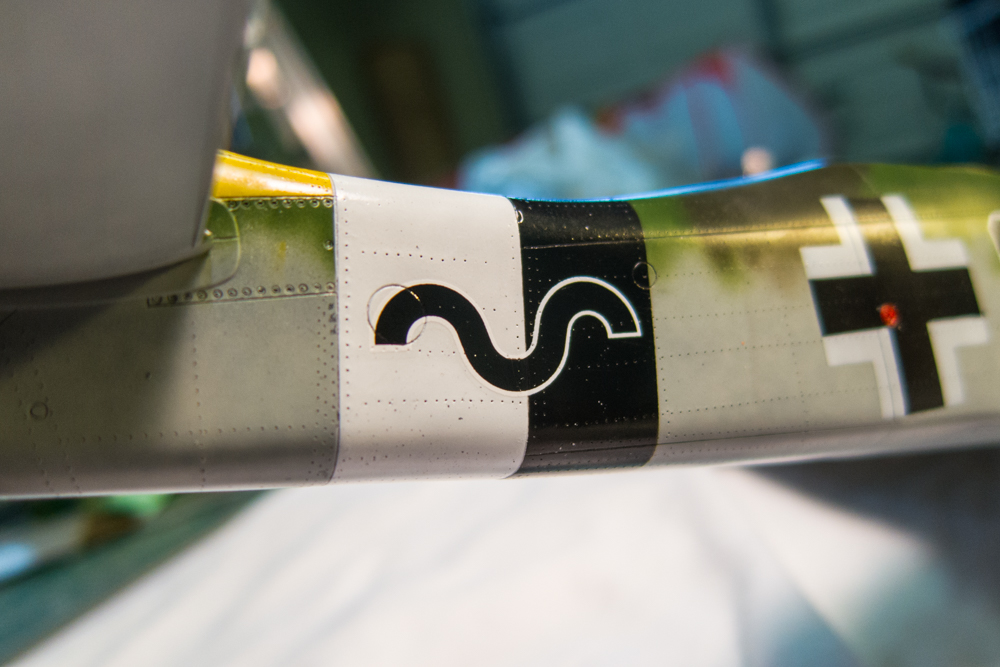
Here is another view of the repaired area to show how the edges of the former repair are now gone.

I have an extra set of Welle decals ready to go.
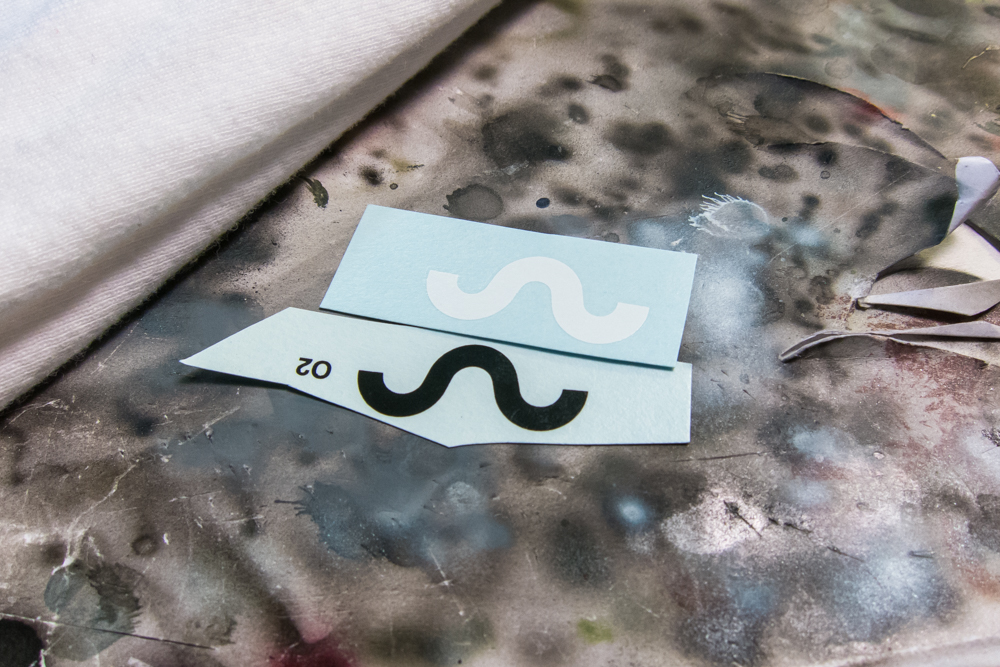
The white Welle decal is applied and Microsol is applied. Notice the wrinkling on the edges of the decal as Microsol temporarily softens and distorts the decal. It is important not to touch the decal at this stage and let Microsol do it thing. I'm going to set this aside for now and then make a run to the fish processor to pick up my tuna fillets! We're going to have a poke/sashimi party tonight!
Here is another view of the repaired area to show how the edges of the former repair are now gone.
I have an extra set of Welle decals ready to go.
The white Welle decal is applied and Microsol is applied. Notice the wrinkling on the edges of the decal as Microsol temporarily softens and distorts the decal. It is important not to touch the decal at this stage and let Microsol do it thing. I'm going to set this aside for now and then make a run to the fish processor to pick up my tuna fillets! We're going to have a poke/sashimi party tonight!
John aka JKim
-----------<><
-----------<><
-
speedgraflex
- Moderator
- Posts: 9756
- Joined: Fri Feb 10, 2017 11:08 pm
- Location: Santa Monica, California
Re: 1/32 Hasegawa Fw190D-9 Black One
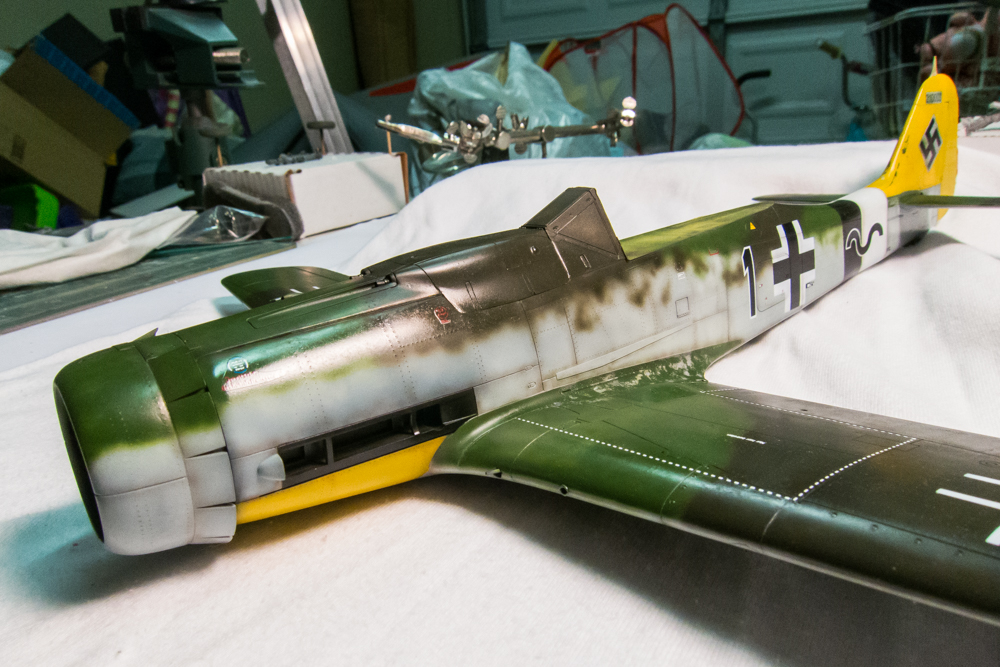
After the white Welle is set, I put on the black decal. The decal broke on me during application and drifted apart during the Microsol stage so there is a paint repair that I must perform. It's always SOMETHING! The white around the circular port is just glare and not a decal mishap.

After a bit of careful masking and a well-focused shot with the airbrush, the starboard Welle marking is finished. Hmmm... I still need to add the Hier Aufbocken stencil. Instead of the whole stencil, I've decided to put on just a half to indicate that the black and white ID band was sprayed over the stencil. You can see that on the port side a few posts back.
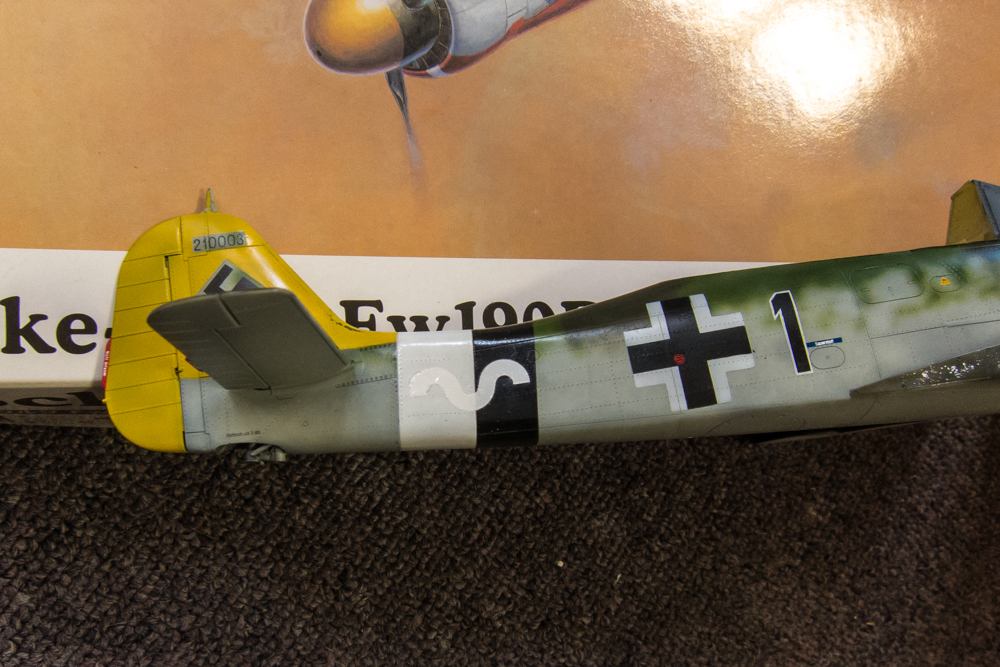
That pretty much concludes this stage of the build. Finally. Now I can start weathering Black 1.
After a bit of careful masking and a well-focused shot with the airbrush, the starboard Welle marking is finished. Hmmm... I still need to add the Hier Aufbocken stencil. Instead of the whole stencil, I've decided to put on just a half to indicate that the black and white ID band was sprayed over the stencil. You can see that on the port side a few posts back.
That pretty much concludes this stage of the build. Finally. Now I can start weathering Black 1.
John aka JKim
-----------<><
-----------<><
-
speedgraflex
- Moderator
- Posts: 9756
- Joined: Fri Feb 10, 2017 11:08 pm
- Location: Santa Monica, California
Re: 1/32 Hasegawa Fw190D-9 Black One
I sense some quiet relief attenuating your last post, John! Job well done, sir! Thank you for addressing my questions along the way. Following a build that is done with such incredible care and attention to all of the crafting details is a rare privilege. I know I have personally become a better craftsman through study of your technique. What may be the single great takeaway I have from your work is your persistence and patience in all areas of construction. What may be the single greatest lesson I have learned from being able to follow you moment to moment is seeing an unflappably optimistic approach towards generating an outcome. Your care in approaching a problem is never undermined by any fluidity of change; you roll with the punches so well. It is always a pleasure to watch you create. I’m sure you enjoyed a great bluefin as well. Take care. Look forward to more.
Bruce / SPEEDGRAFLEX
Re: 1/32 Hasegawa Fw190D-9 Black One
Thanks for the comment, Bruce! The weathering on Black 1 is FINALLY started. I find myself pausing after certain milestones and that ID band repair was definitely something that caused a sigh of relief.
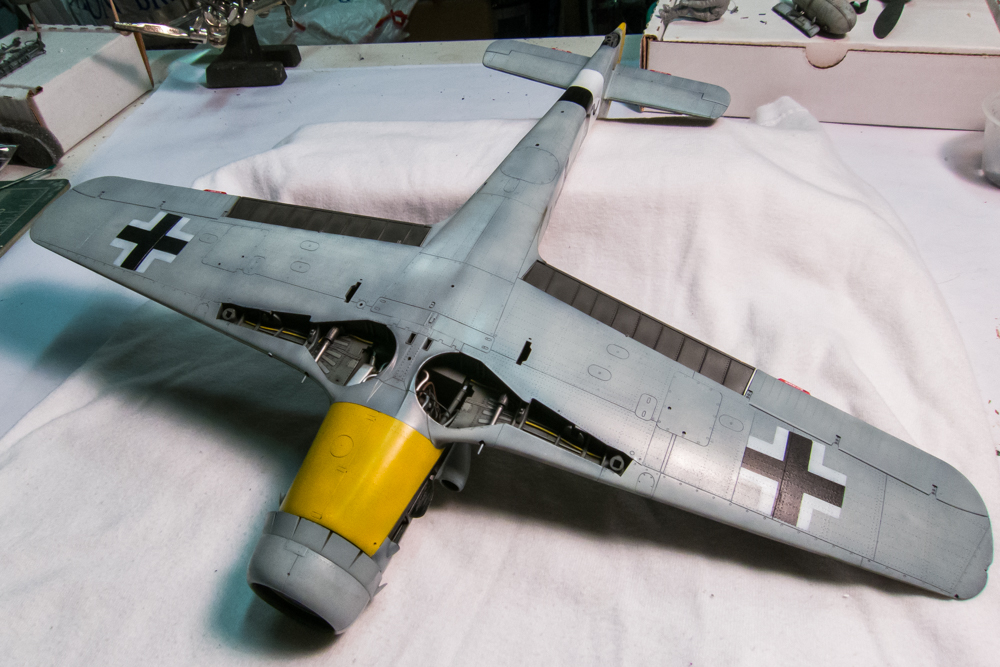
My first step in weathering is some post-shading. I use a very diluted mix of brown/black and highlight the panel lines. The bottom will be more heavily done than the topside due to (a) the dark colors of the top will nullify most post-shading efforts and (b) the fact that the upper surfaces of Black 1 were repainted late in the war.
Here is what the underside looks like prior to the post-shading.
And then the bottom after post-shading. It's best to have a subtle touch at this stage... you want each layer of weathering to contribute to the total effect. In addition to highlighting the panel lines to simulate dirt accumulation, I've also applied some streaking effects. Since the camo colors are protected by multiple clear coats, any mishaps in the post-shading can be easily "erased" by gently rubbing the area with fine Micromesh or sandpaper. After this picture was taken, I removed the post-shading along the yellow undercowling as I did not like how it turned out.
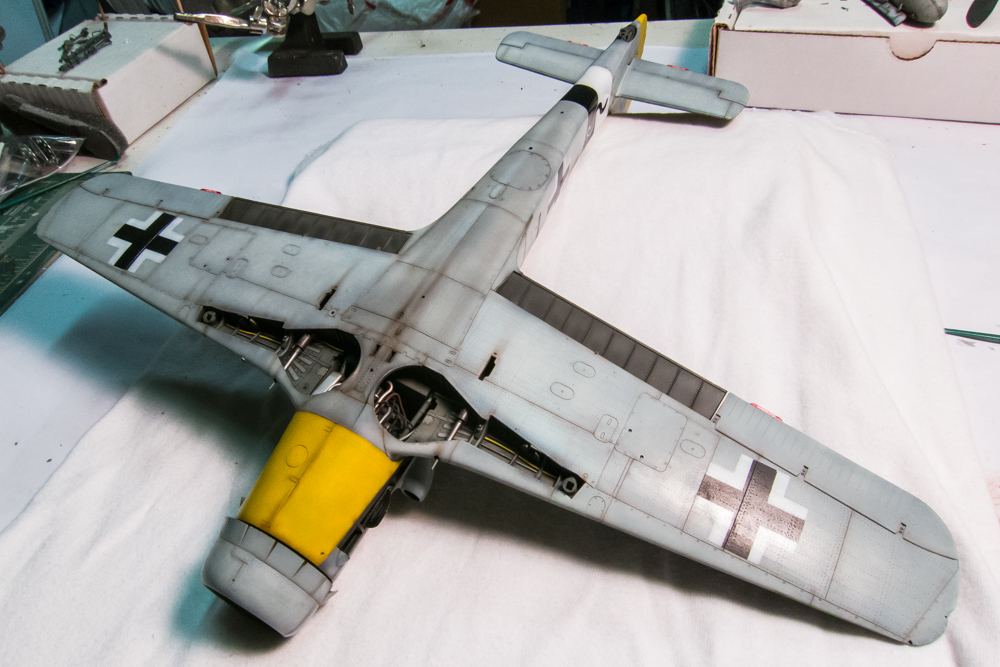
The same approach was applied to the port fuselage sides. I could've elected to start on the exhaust stains but I wanted to research the Dora books to see some examples of the exhaust patterns first. This post-shading step is a good systematic way of adding dirt/wear effects on your model.
I just started on the starboard side when my thinned mix ran out. It was getting late so I decided to stop at this point.
My first step in weathering is some post-shading. I use a very diluted mix of brown/black and highlight the panel lines. The bottom will be more heavily done than the topside due to (a) the dark colors of the top will nullify most post-shading efforts and (b) the fact that the upper surfaces of Black 1 were repainted late in the war.
Here is what the underside looks like prior to the post-shading.
And then the bottom after post-shading. It's best to have a subtle touch at this stage... you want each layer of weathering to contribute to the total effect. In addition to highlighting the panel lines to simulate dirt accumulation, I've also applied some streaking effects. Since the camo colors are protected by multiple clear coats, any mishaps in the post-shading can be easily "erased" by gently rubbing the area with fine Micromesh or sandpaper. After this picture was taken, I removed the post-shading along the yellow undercowling as I did not like how it turned out.
The same approach was applied to the port fuselage sides. I could've elected to start on the exhaust stains but I wanted to research the Dora books to see some examples of the exhaust patterns first. This post-shading step is a good systematic way of adding dirt/wear effects on your model.
I just started on the starboard side when my thinned mix ran out. It was getting late so I decided to stop at this point.
John aka JKim
-----------<><
-----------<><
-
speedgraflex
- Moderator
- Posts: 9756
- Joined: Fri Feb 10, 2017 11:08 pm
- Location: Santa Monica, California
Re: 1/32 Hasegawa Fw190D-9 Black One
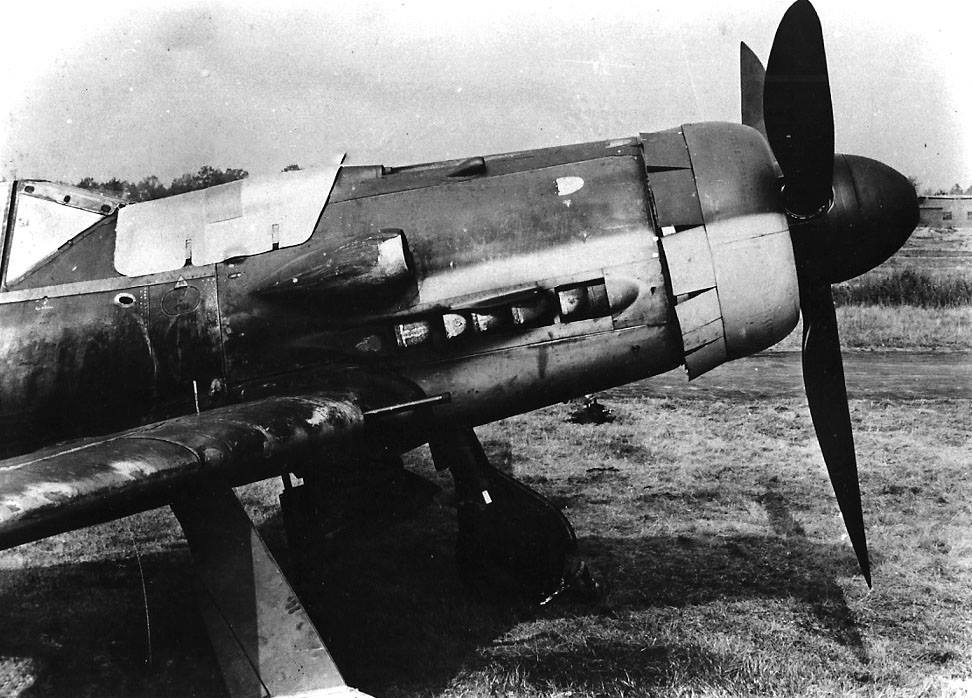
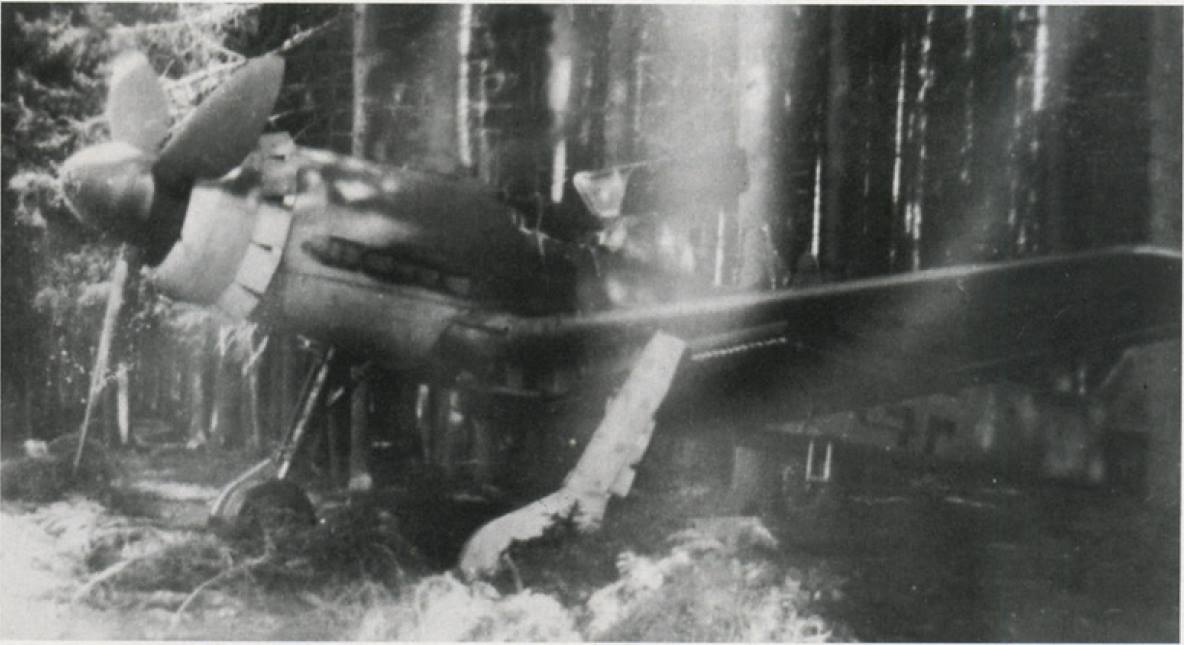
Fw 190 D-9 W.Nr. and unit unknown, Germany, Spring 1945.
Bruce / SPEEDGRAFLEX
-
mustang1989

- Moderator
- Posts: 4903
- Joined: Tue Mar 18, 2014 8:35 pm
Re: 1/32 Hasegawa Fw190D-9 Black One
I really like these yellow tailed birds and you're doing a great job on this one here Kim. That paint section repair came out brilliantly bud. Gotta love those D-9's!!!!