1/32 Hasegawa Bf109K-4 Weisse 8

Post your work in progress of your aircraft builds in here.
User avatar
jkim
Elite Member
Posts: 3929
Joined: Mon Apr 10, 2017 4:03 pm

Re: 1/32 Hasegawa Bf109K-4 Weisse 8

Post by jkim »

After the pre-shading has been established, it's time to apply the camo colors. The lower fuselage of White 8 appears to be the yellow-green variant of RLM 76 (aka RLM 84), in contrast to the standard light blue RLM 76 of the tail unit undersides. For this color, I am using AK Real Colors RLM 76 Late War Version, which is very similar to Mr Hobby Aqueous H74 Sky (Duck Egg Green), which I also have. The color is mixed with Tamiya Lacquer thinner at a 2:1 thinner-to-paint ratio and shot through an Iwata HP-C Plus airbrush.
Image
Image

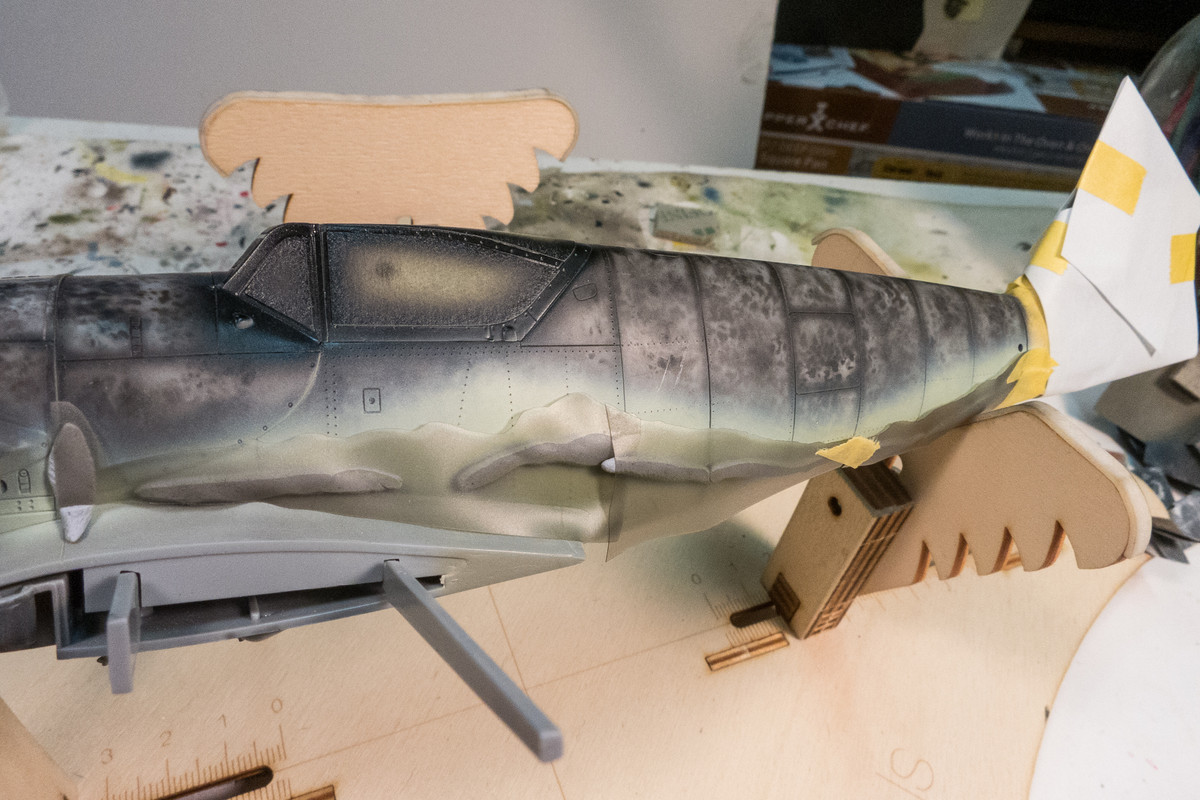
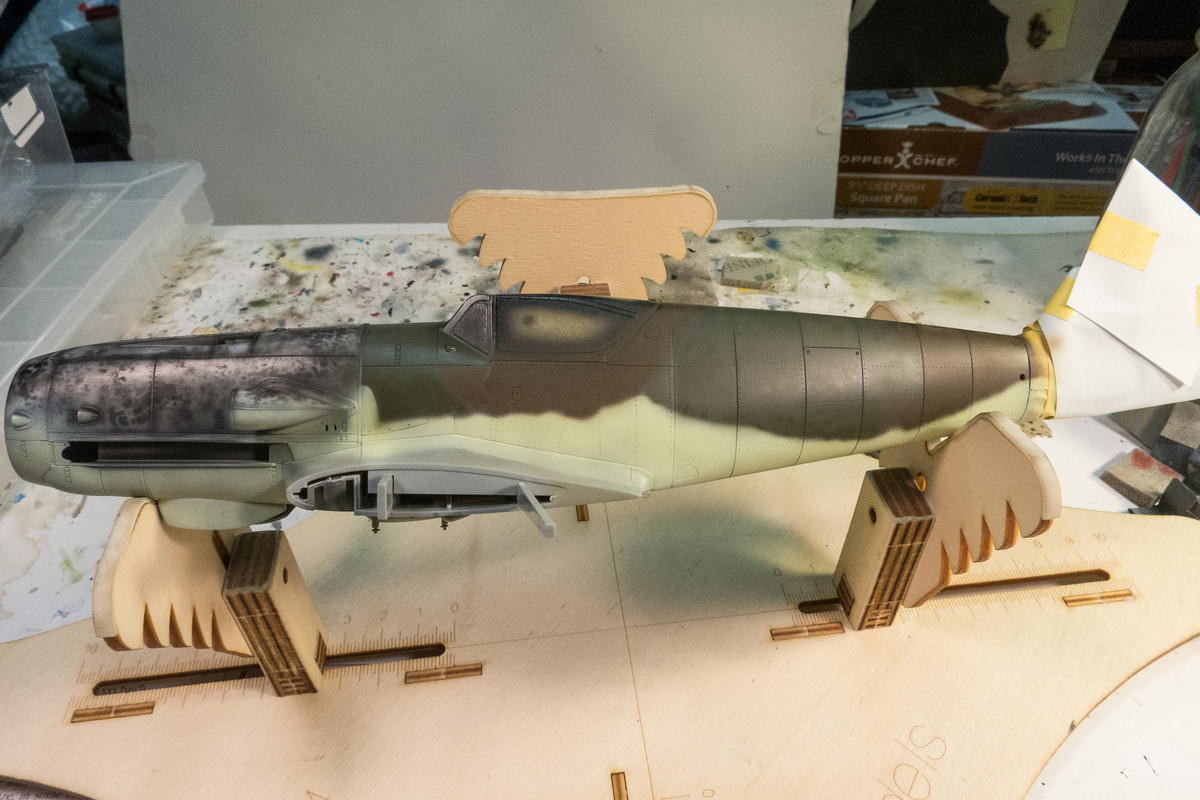
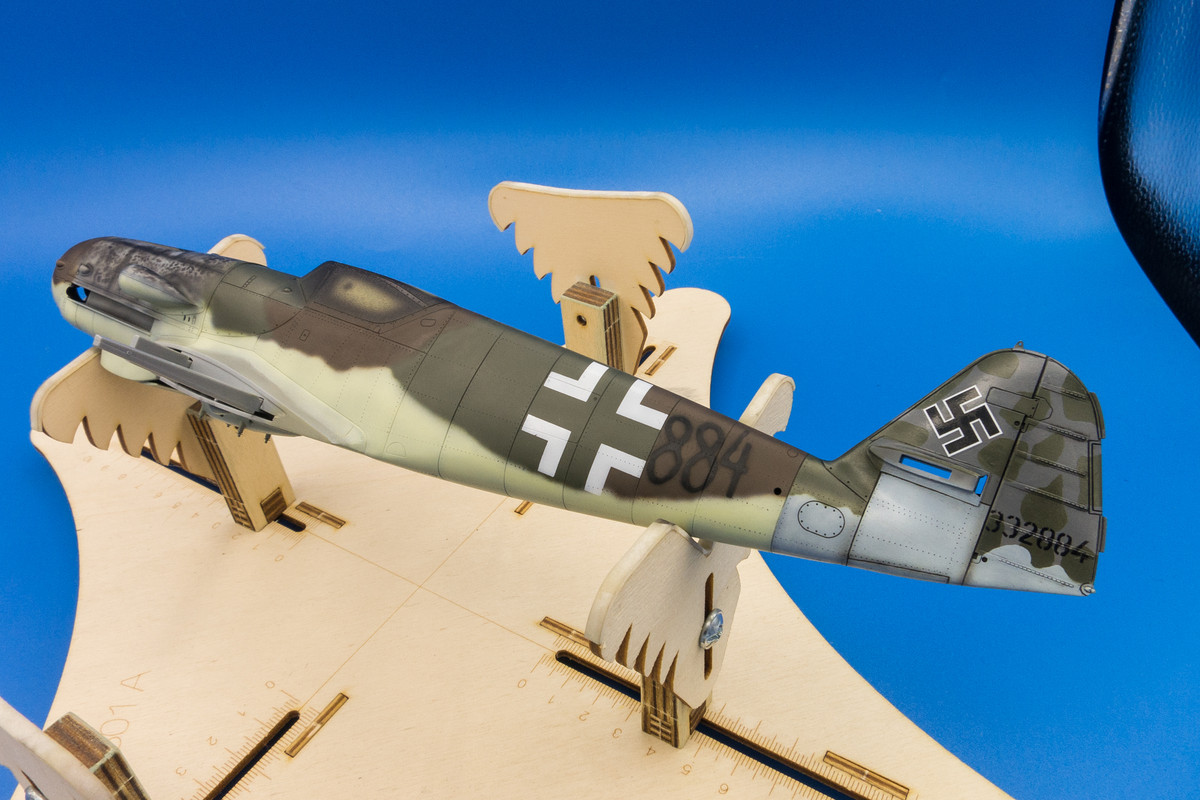
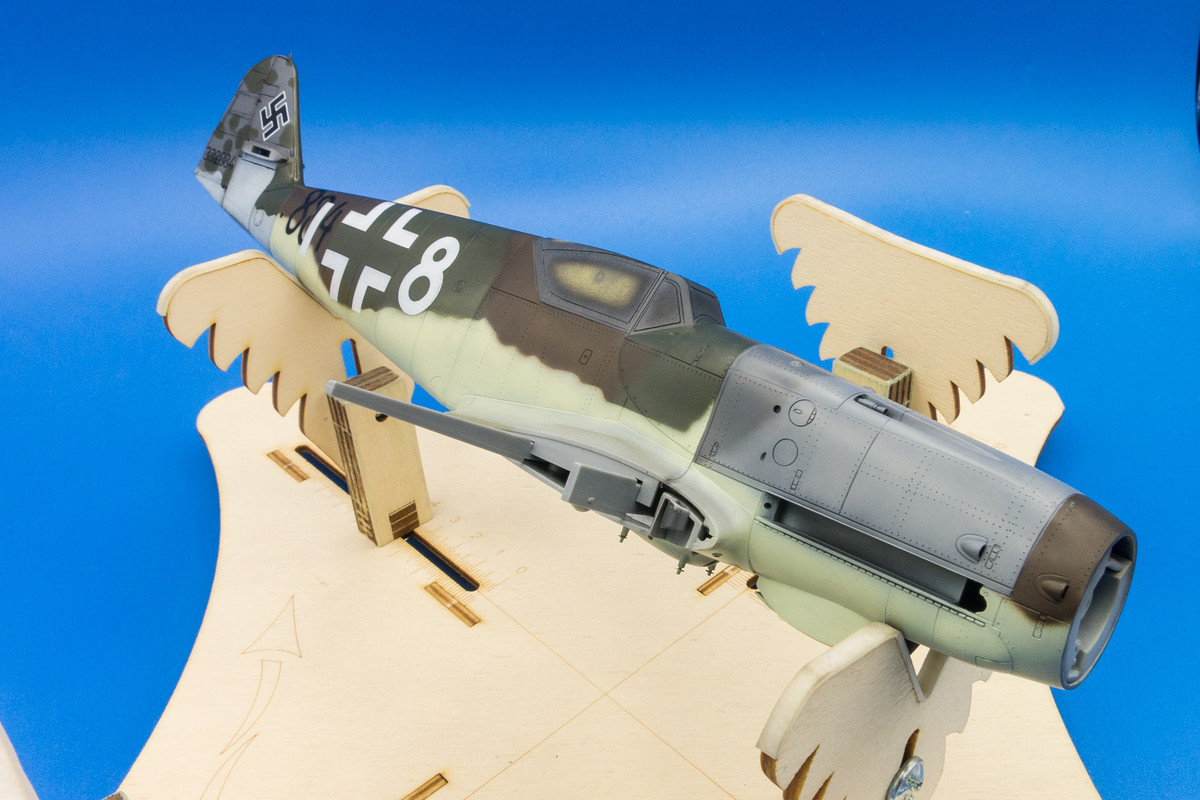
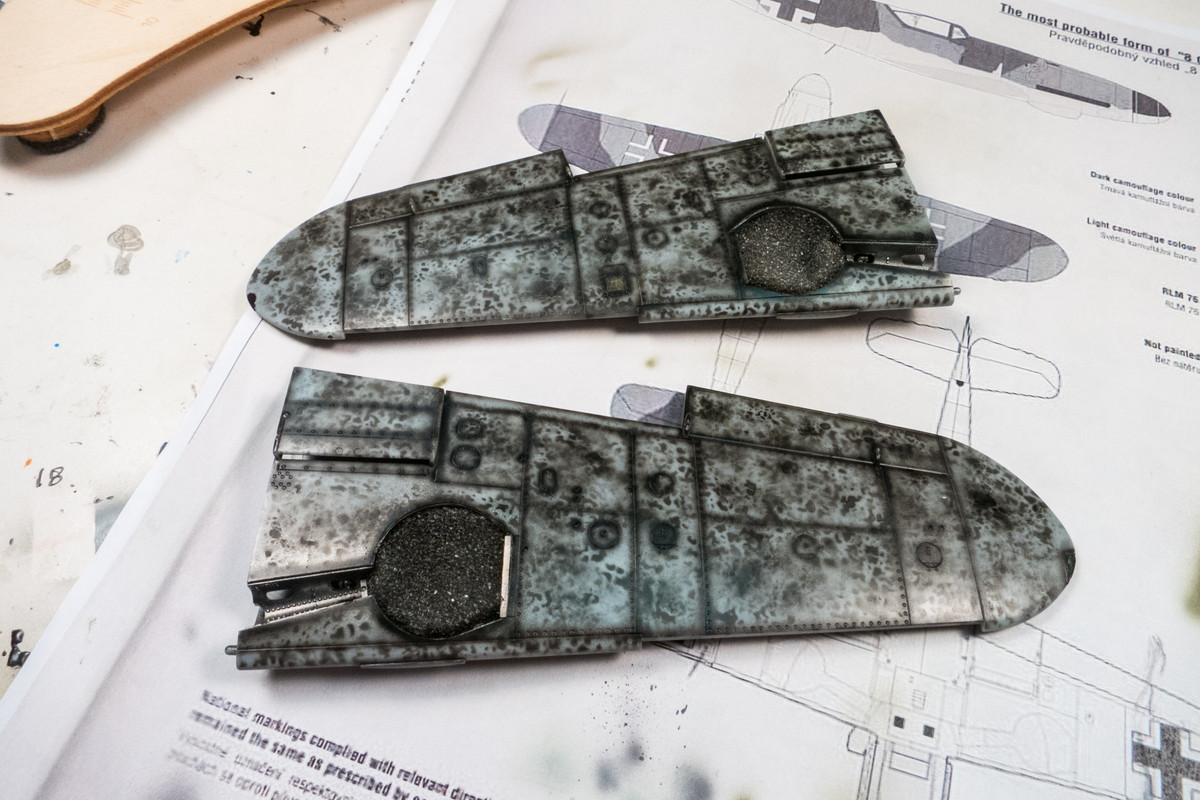
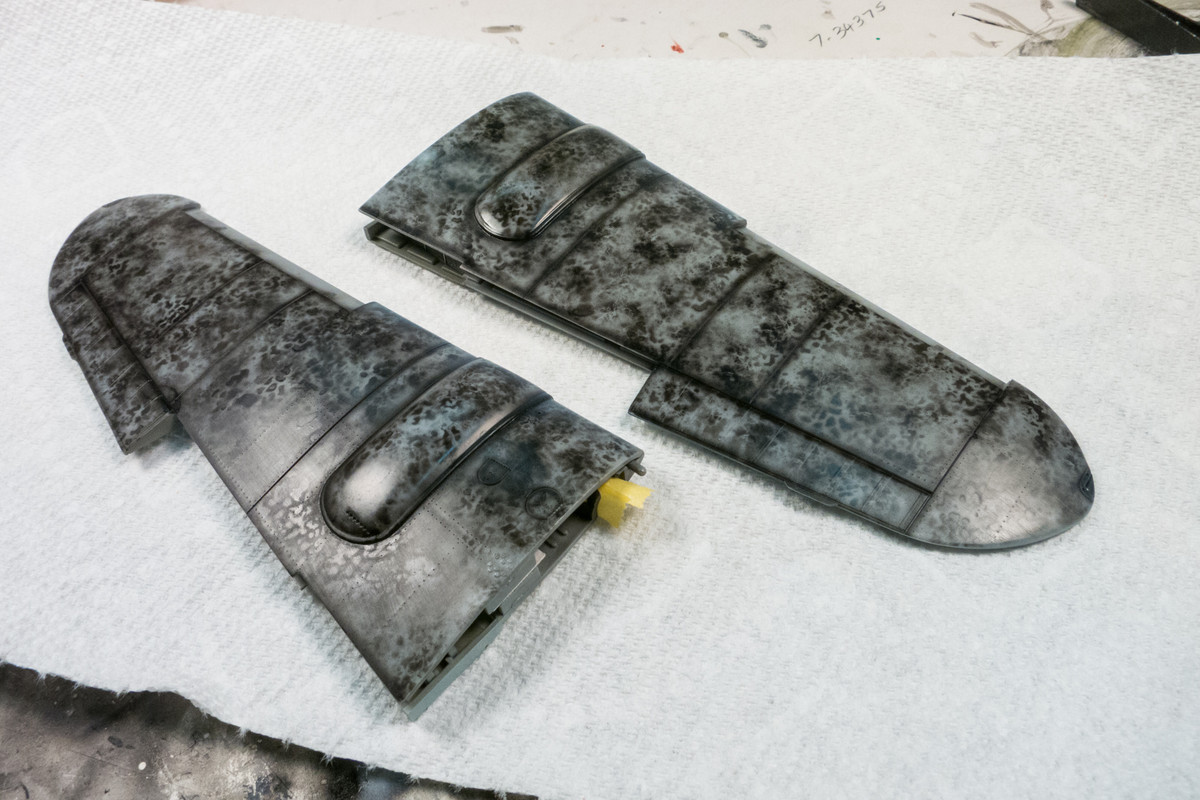
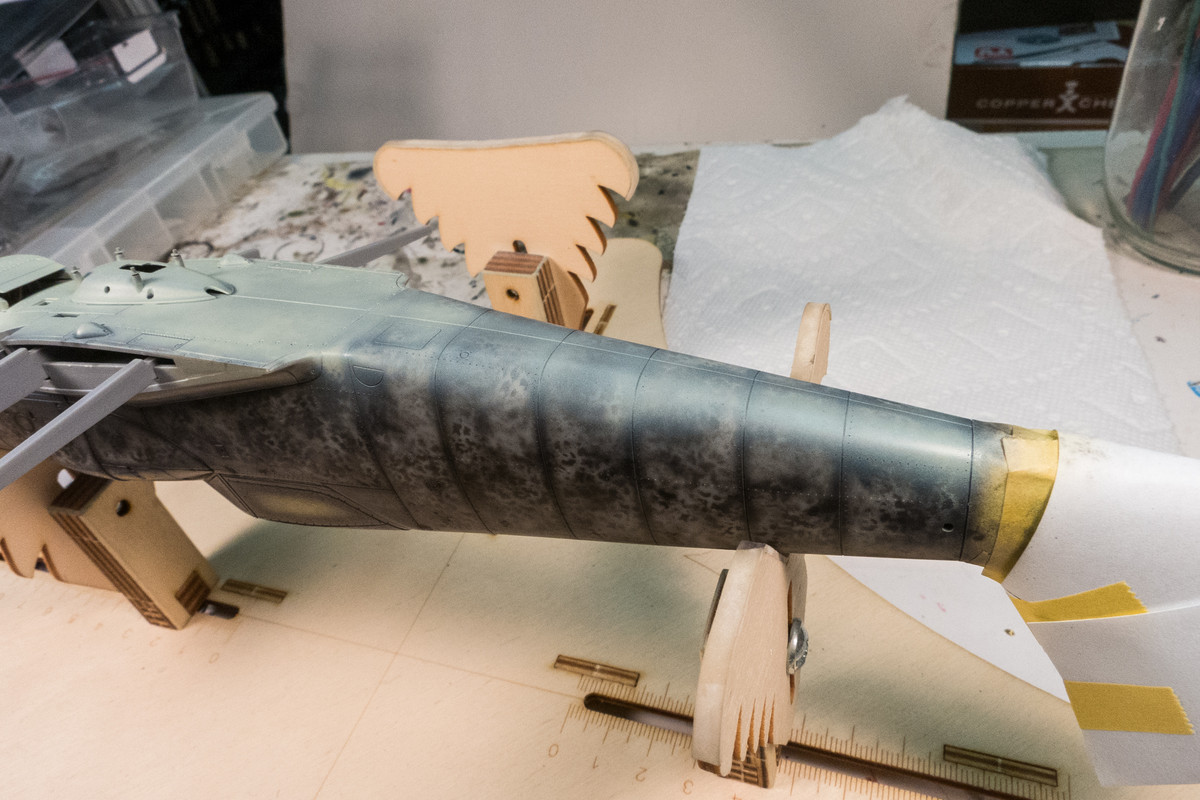
The color is built up slowly, keeping an eye on the pre-shading effects.
Image
Image

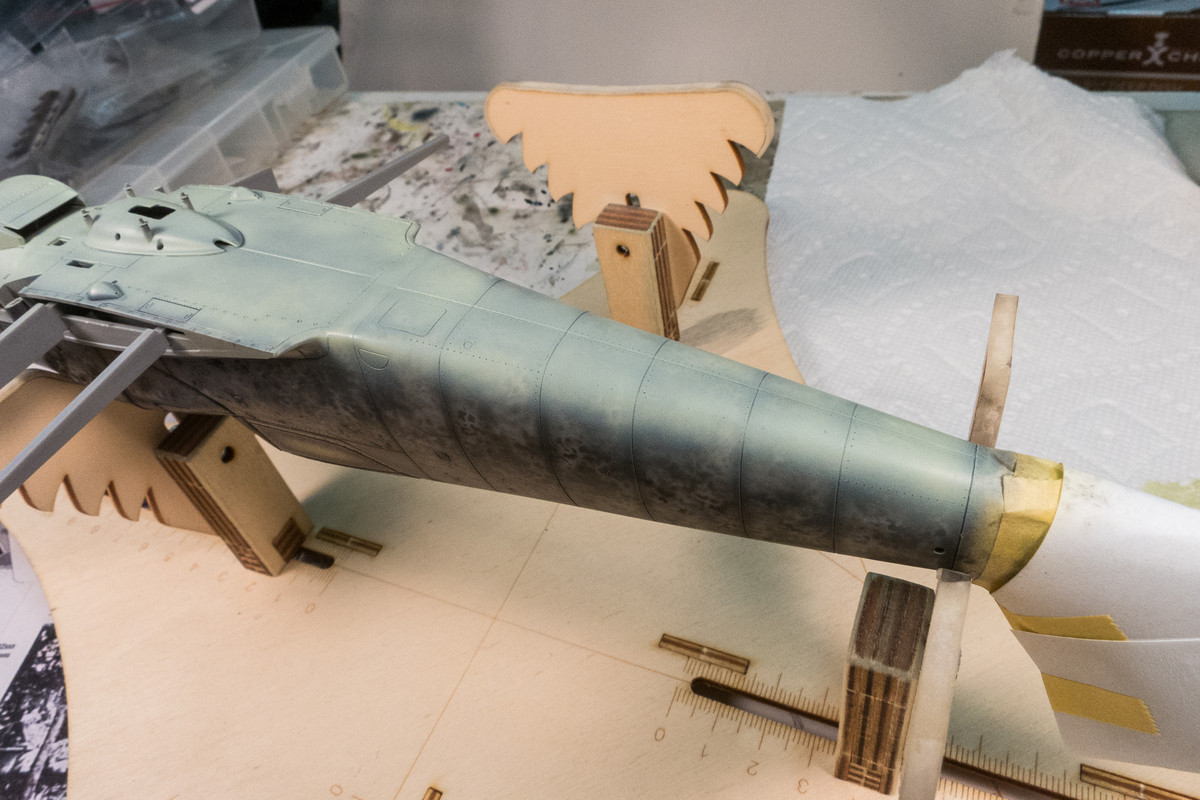
I want to get to a point where the pre-shading is just barely noticeable, with the understanding that there will be more layers of weathering yet to come.
Image

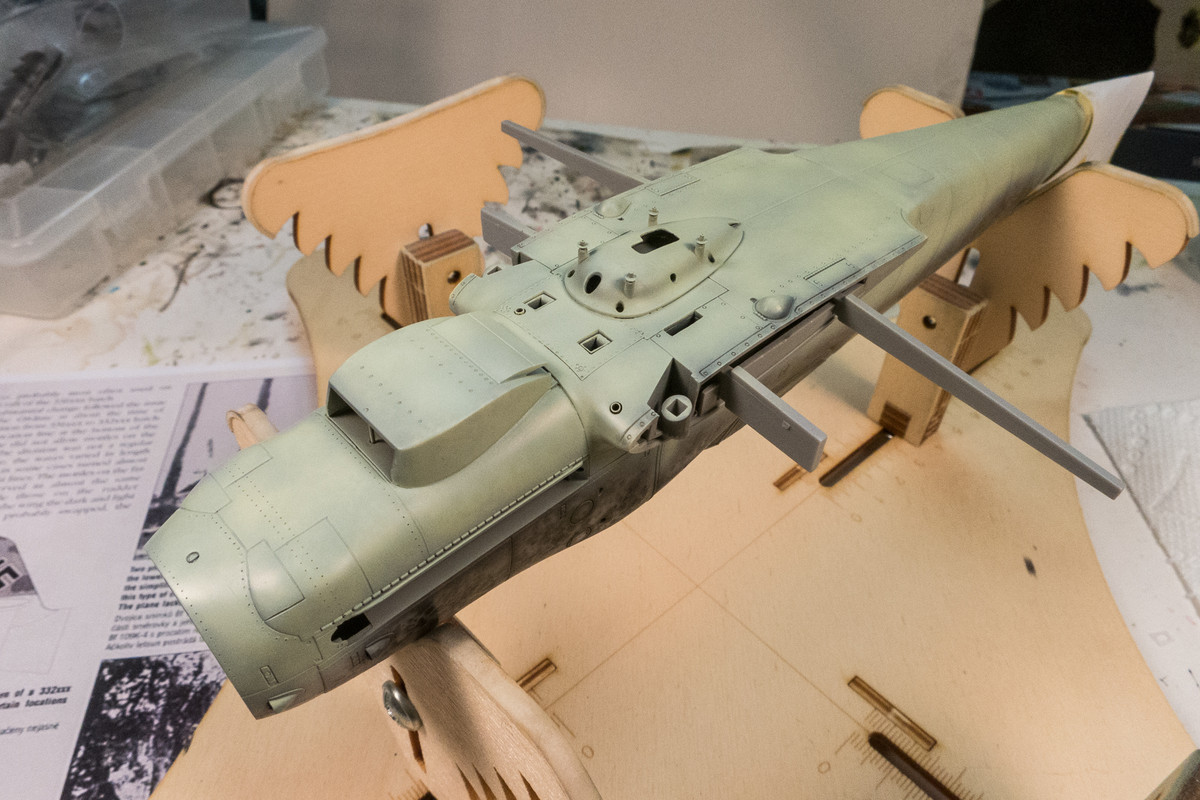
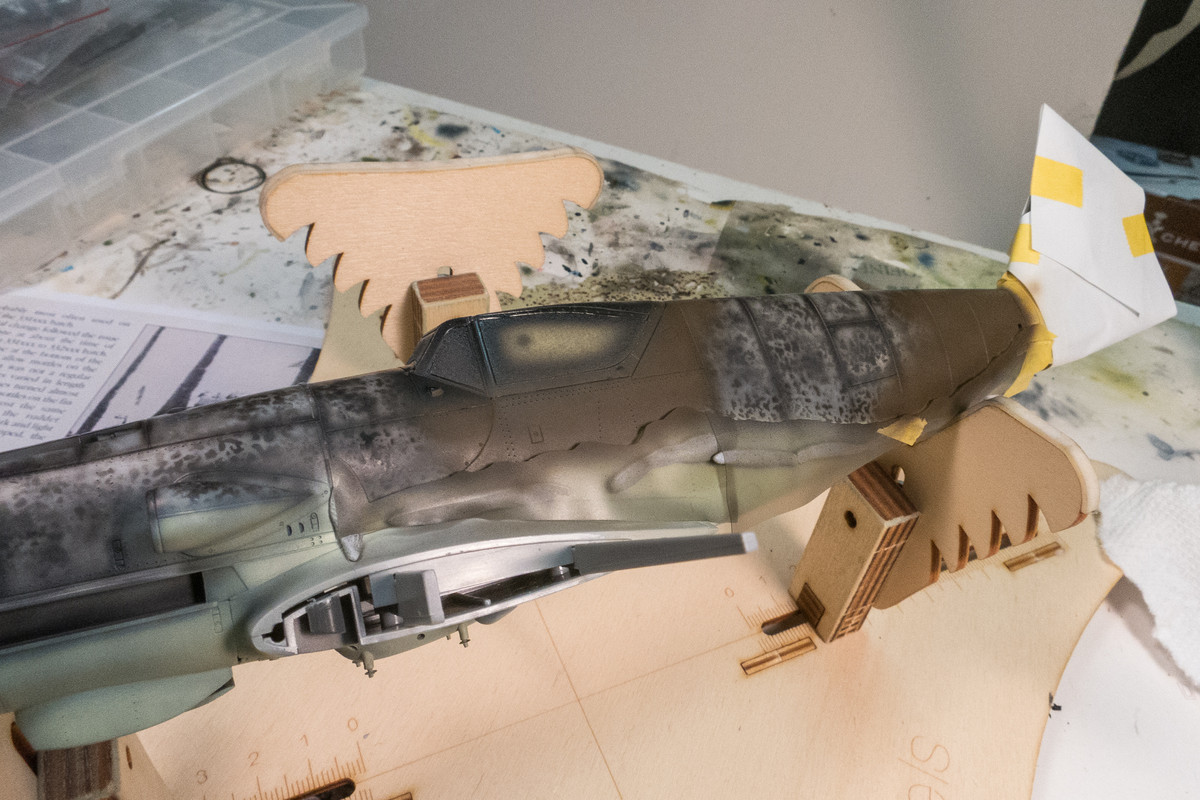
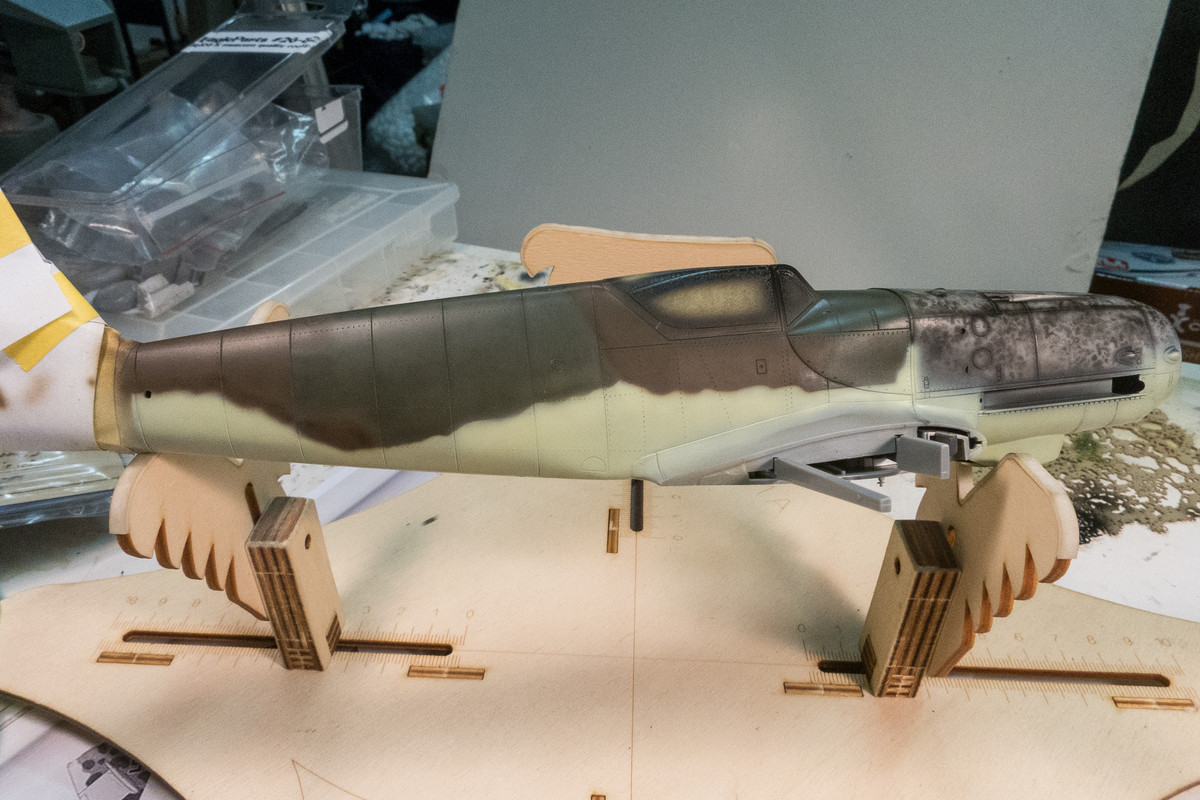
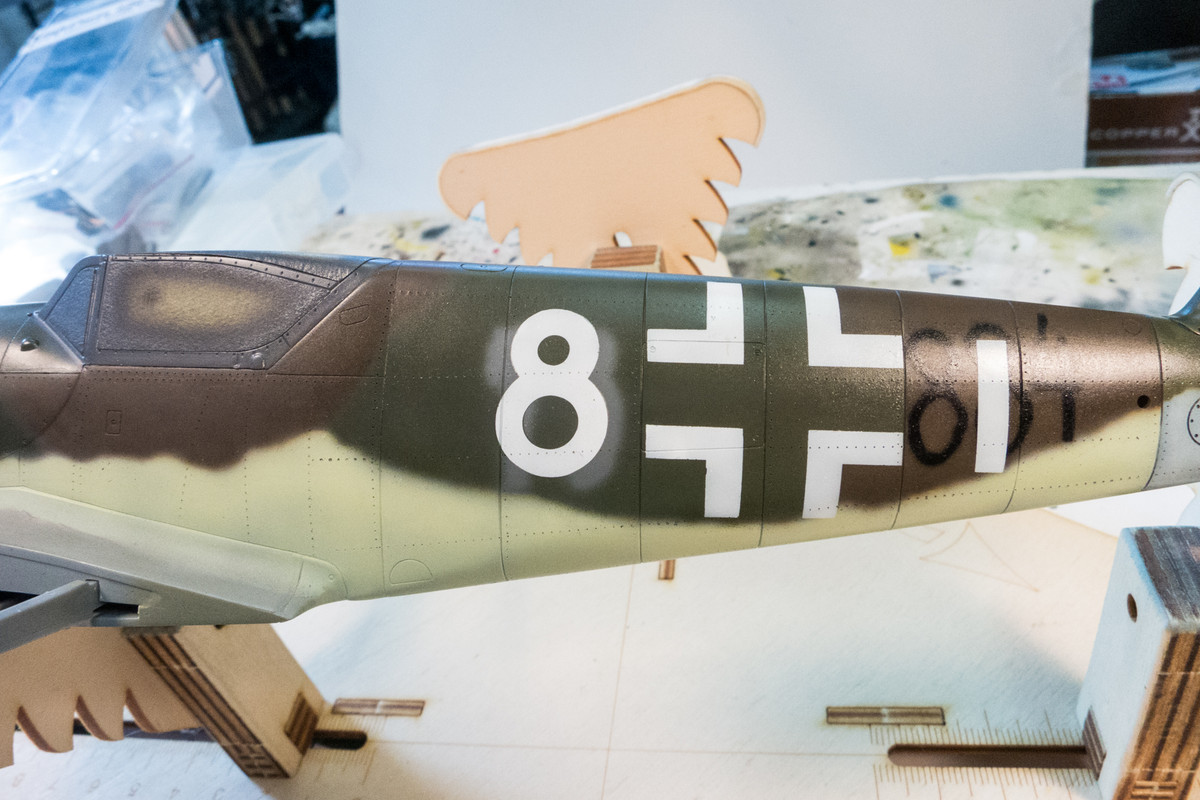
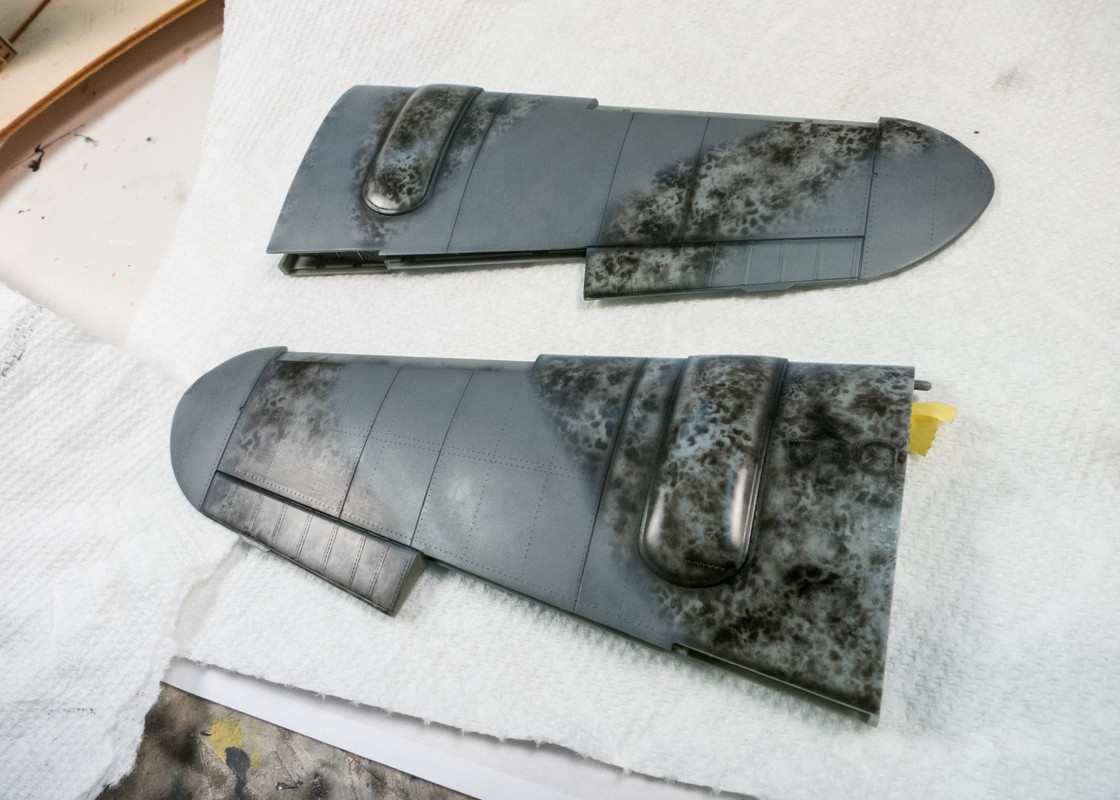
I like how the AK Real Colors spray. They behave very much like Tamiya and Mr Hobby Aqueous and most colors feature a semi-gloss finish instead of flat, which helps reduce the amount of clear gloss that will need to be applied for the upcoming pastel wash.
Image
Image
Image

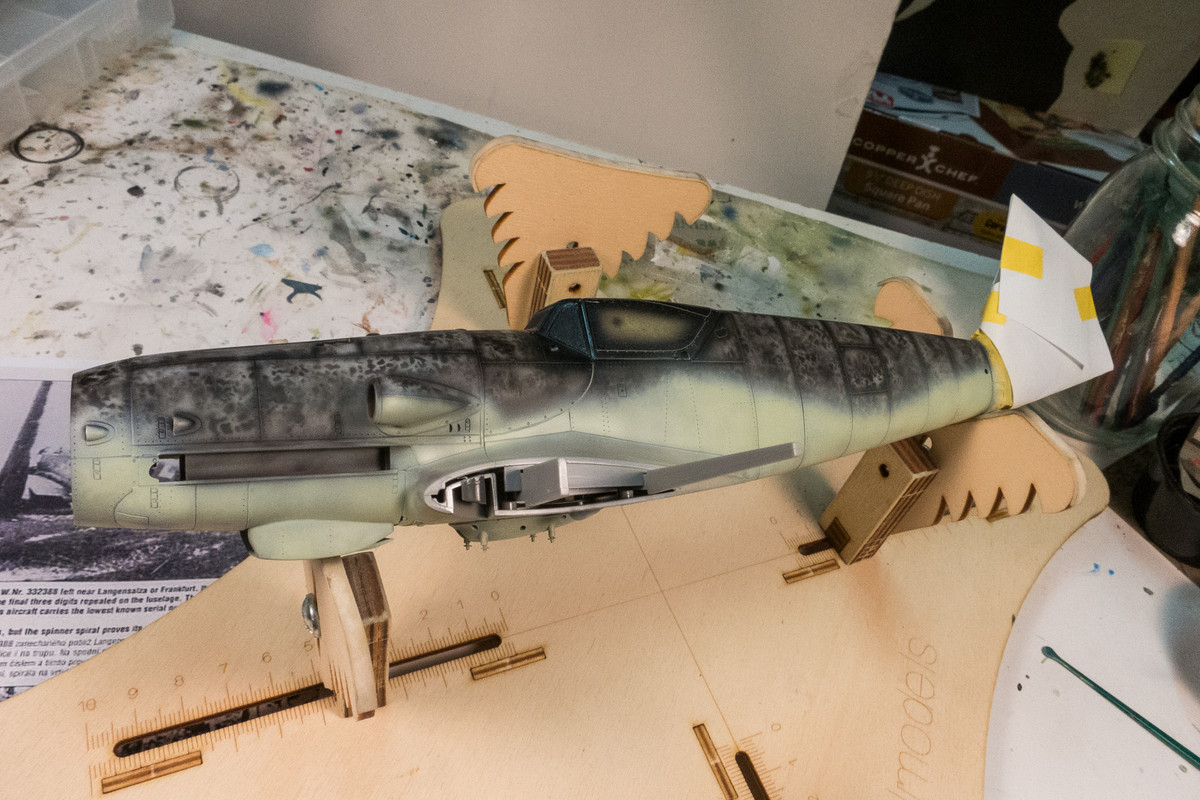
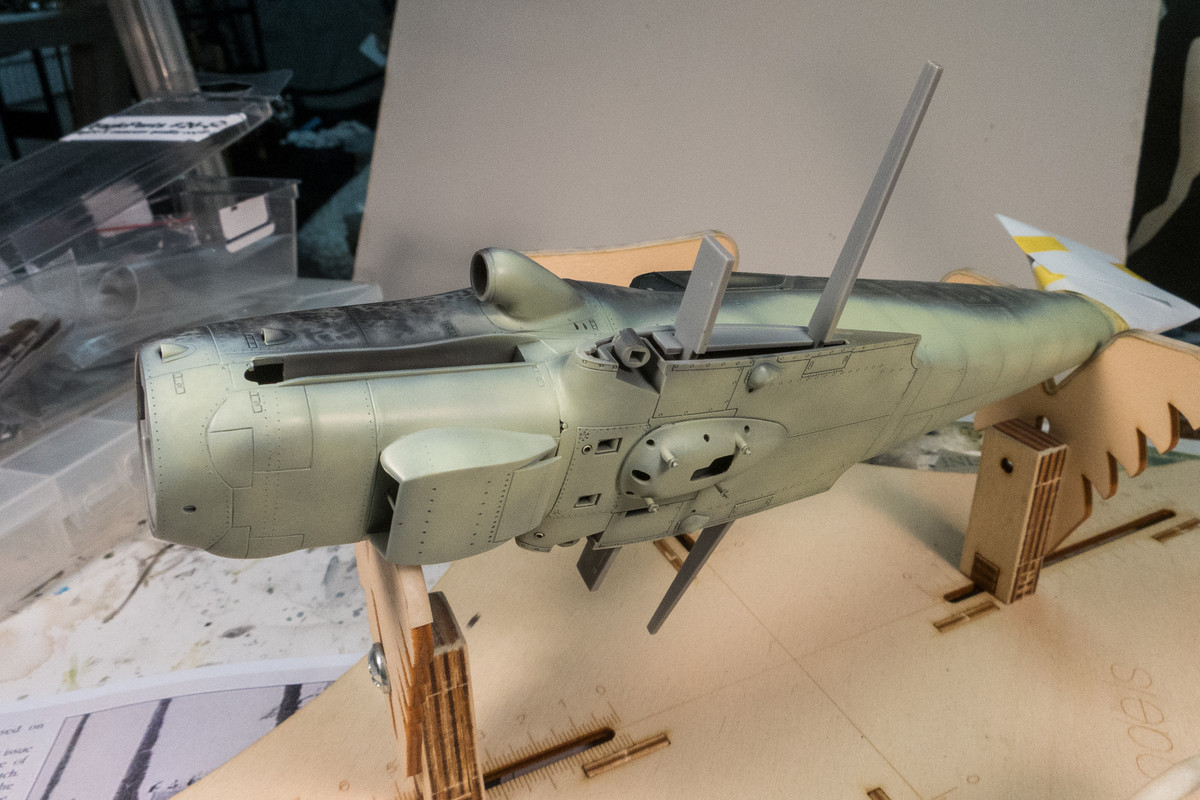
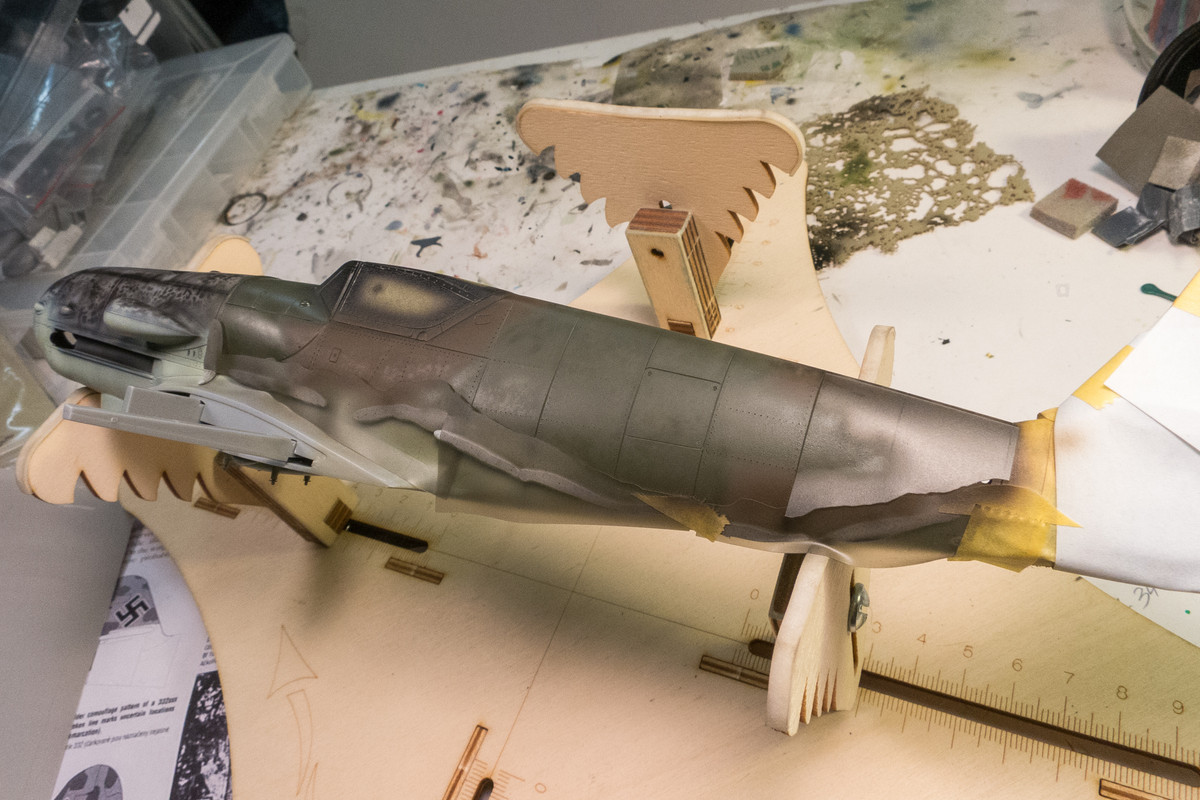
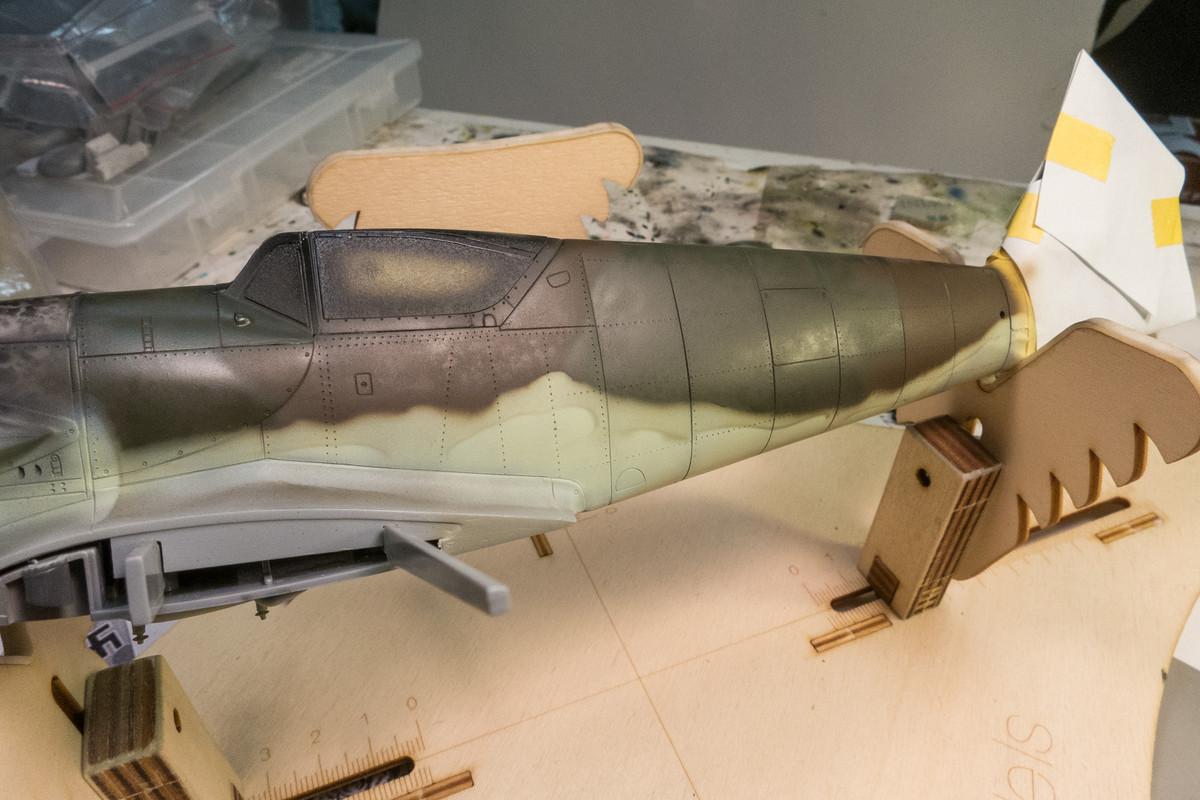
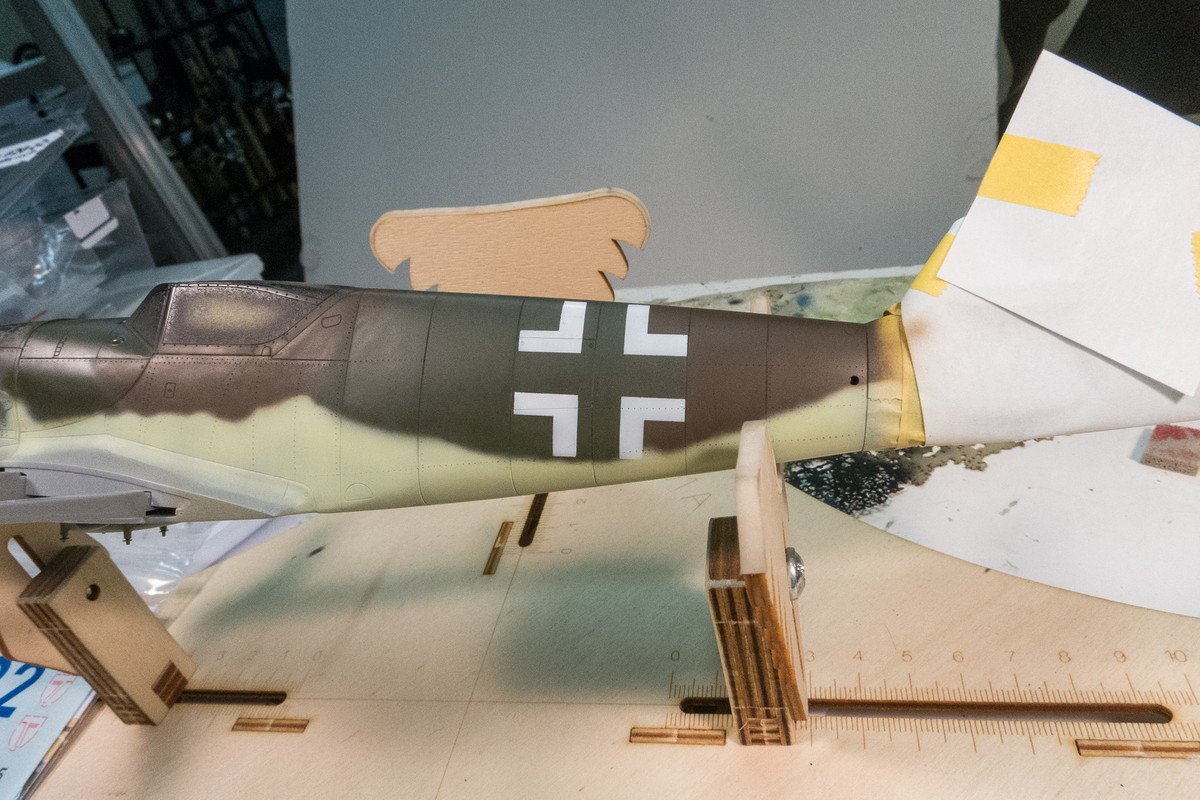
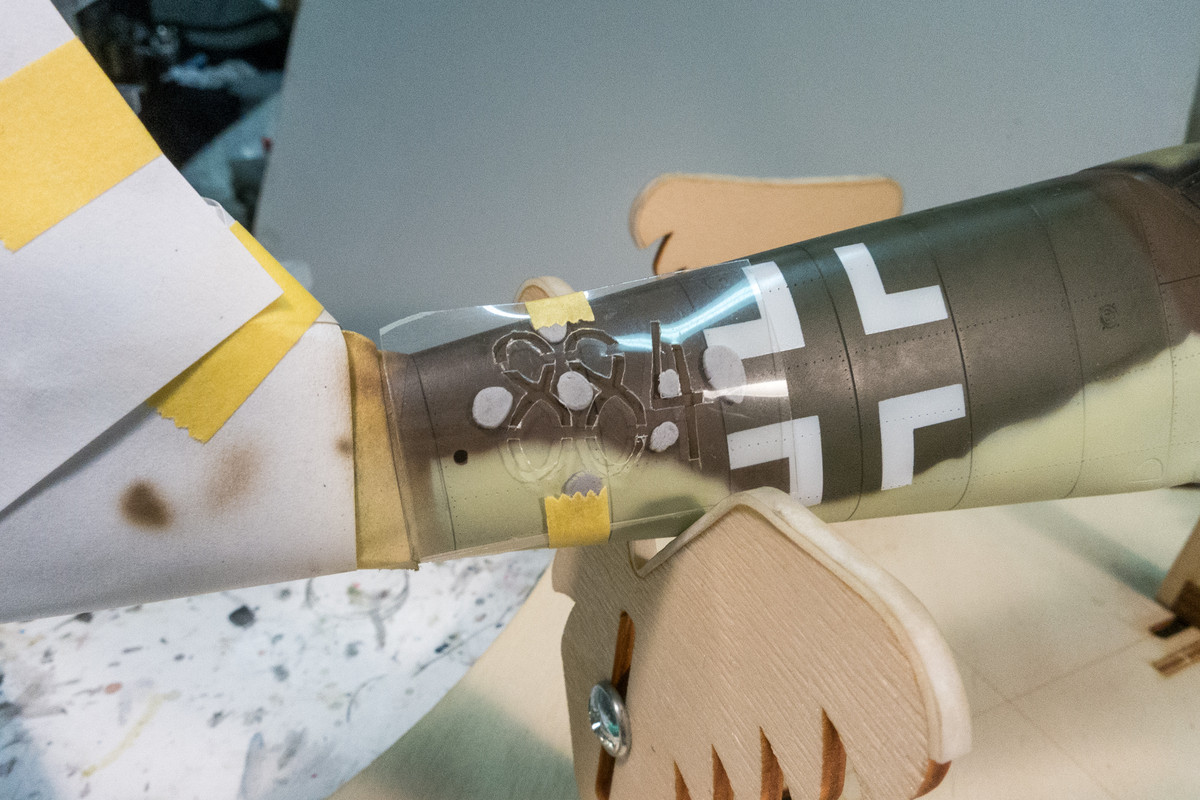
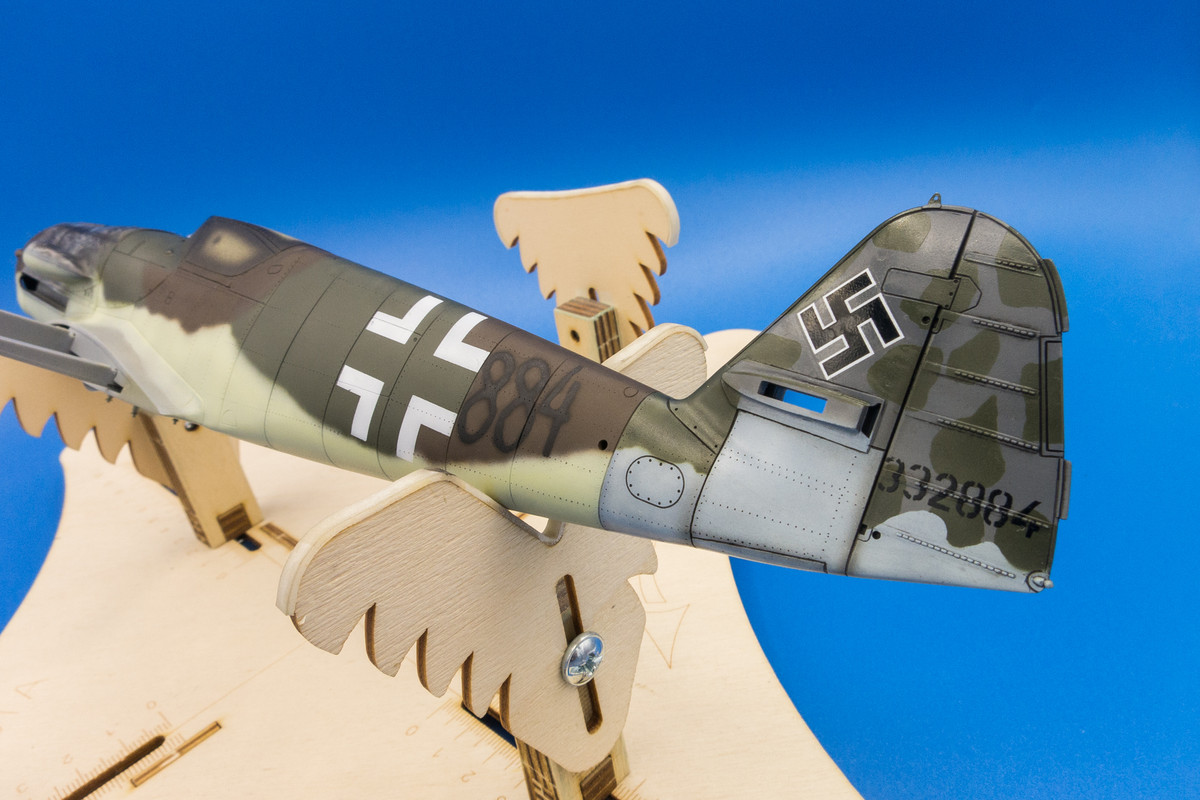
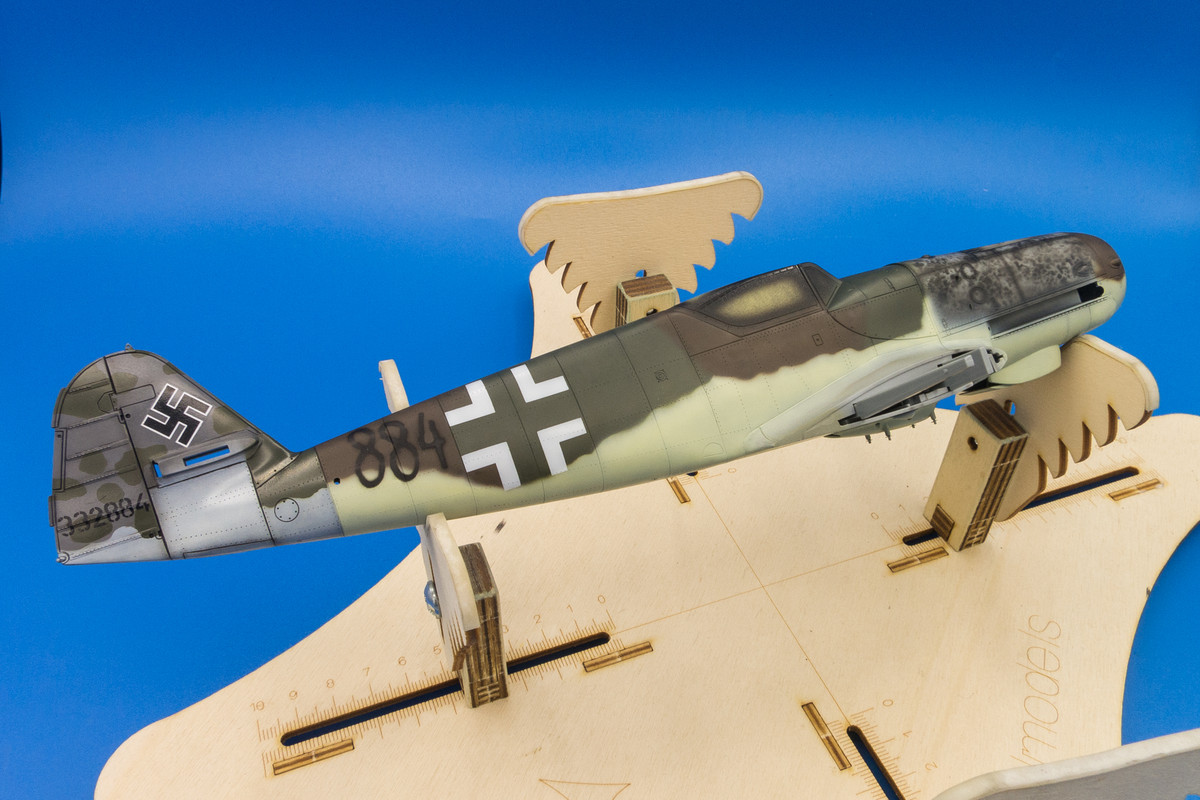
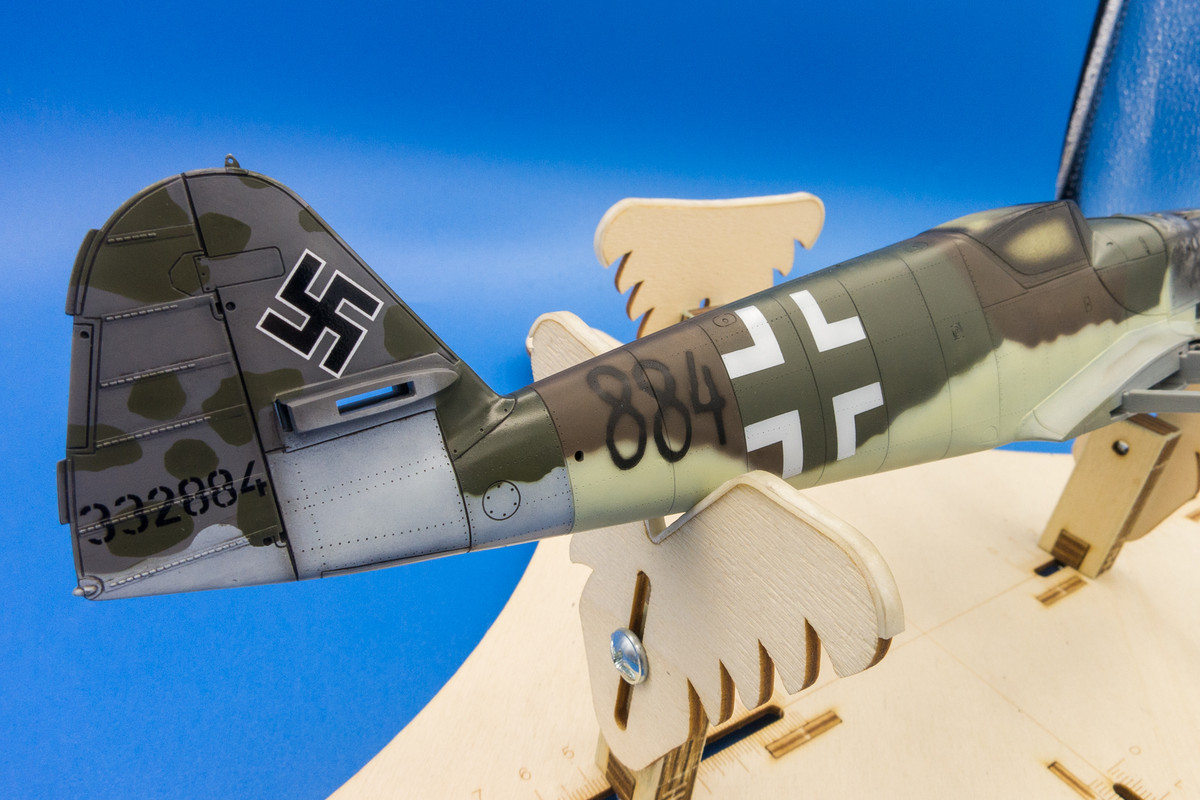
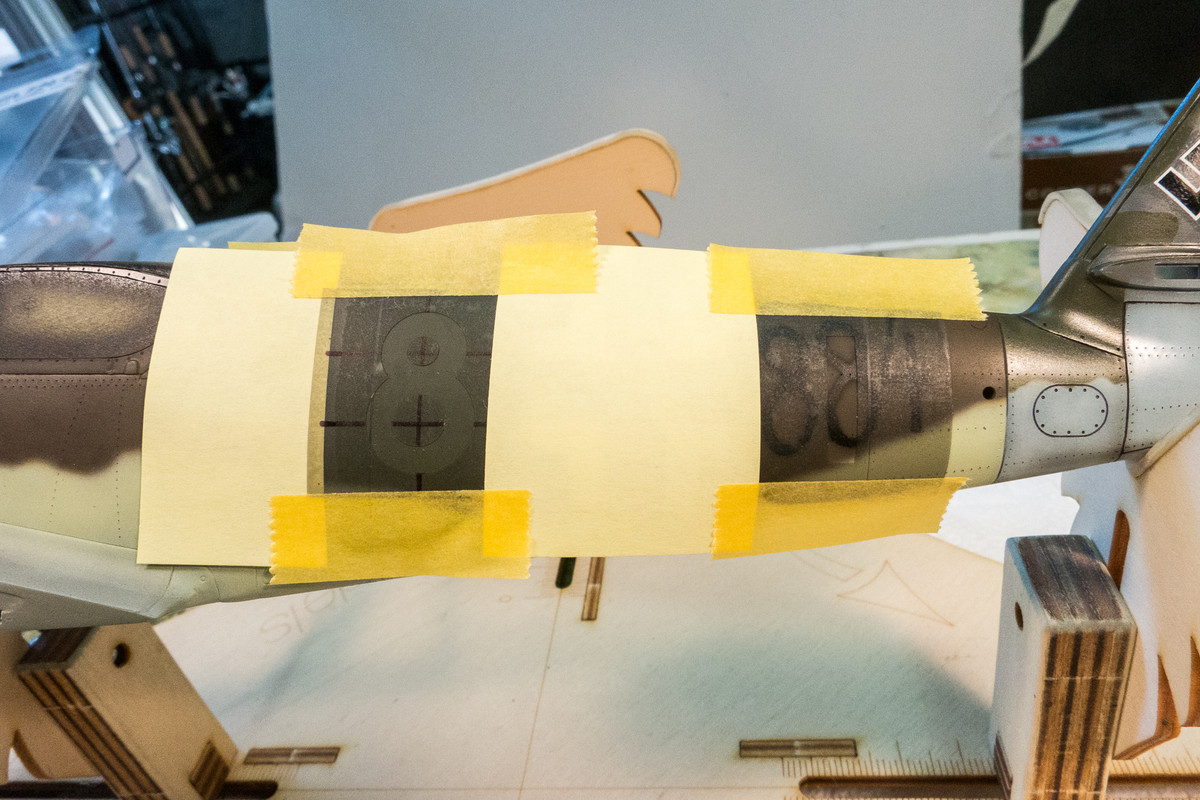
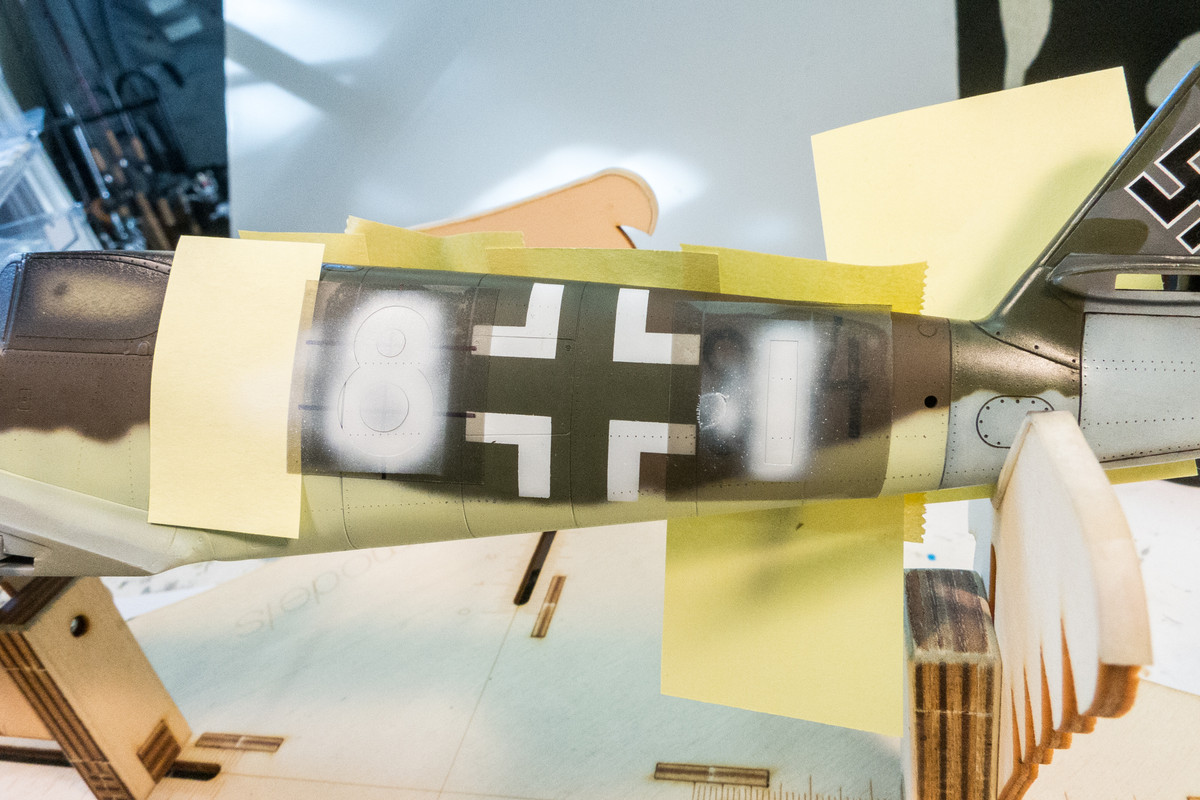
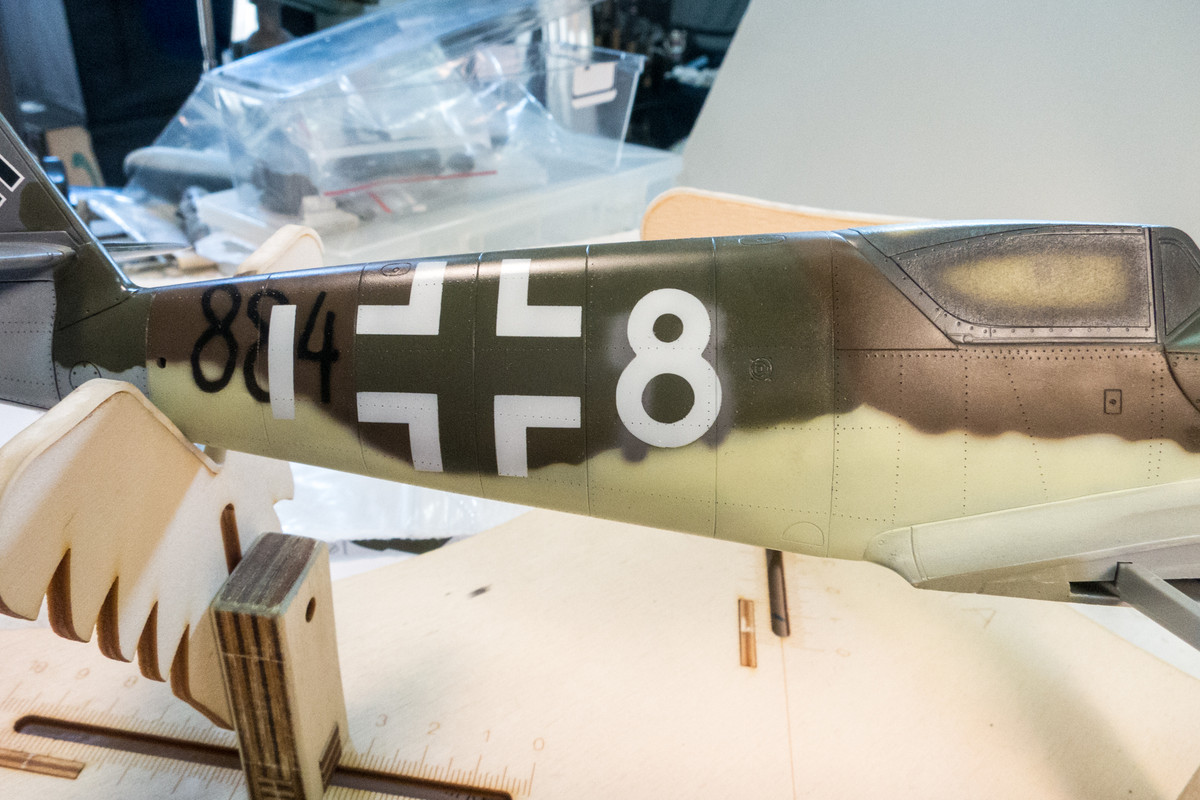
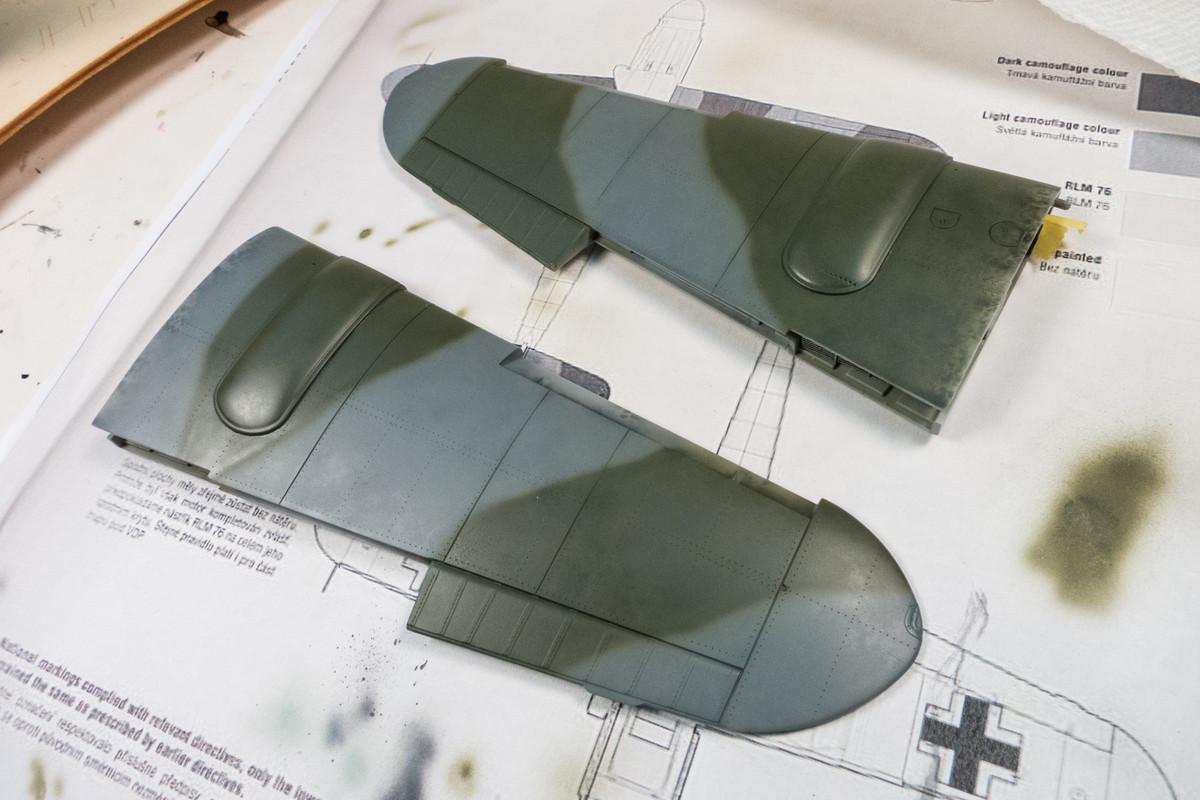
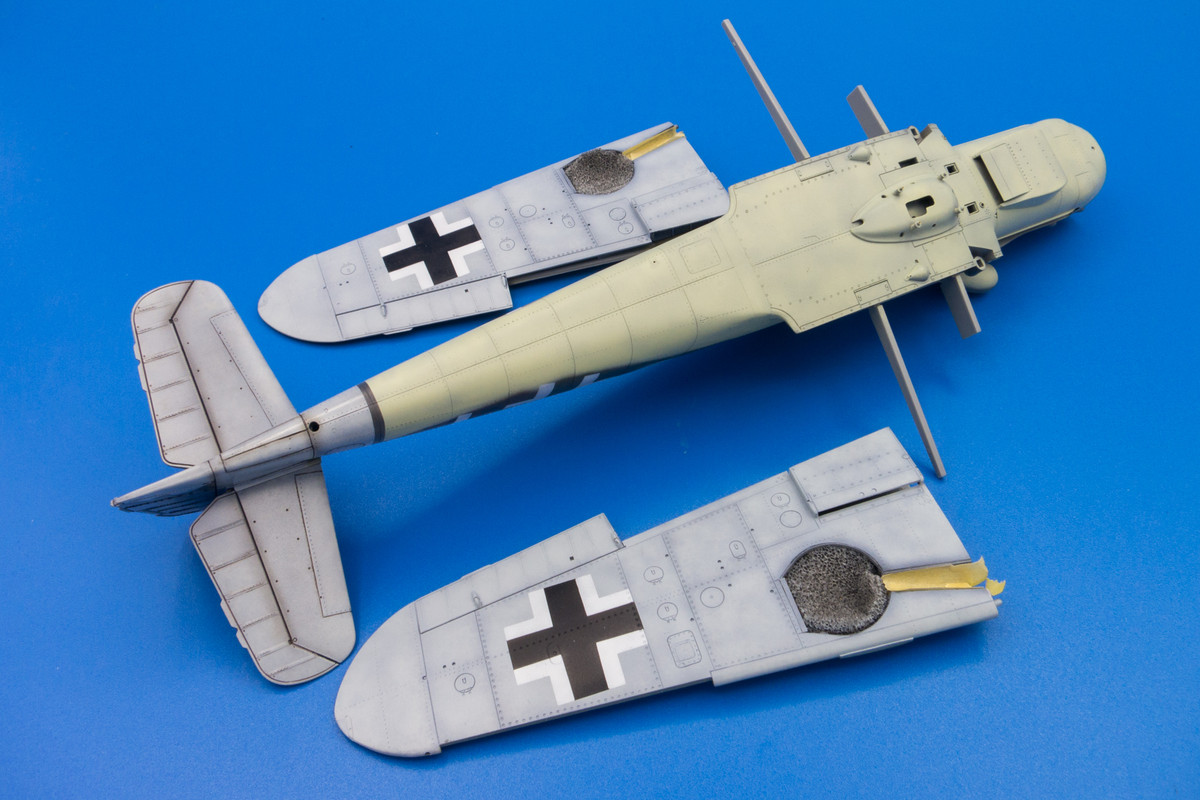
I am going to try and use a template for the demarcation between the upper and lower fuselage colors.
John aka JKim
-----------<><
Image
User avatar
mustang1989
Moderator
Posts: 4903
Joined: Tue Mar 18, 2014 8:35 pm

Re: 1/32 Hasegawa Bf109K-4 Weisse 8

Post by mustang1989 »

Very interesting how you're basing this one. I mean I do like what you're doing and all but I'll be looking on to see how much of it bleeds through when the paint and weathering has been added.
User avatar
jkim
Elite Member
Posts: 3929
Joined: Mon Apr 10, 2017 4:03 pm

Re: 1/32 Hasegawa Bf109K-4 Weisse 8

Post by jkim »

It's like baking a cake... never know how it's going to turn out until it comes out of the oven! :giggles: But since this is not an entirely new technique but simply a variation of what I've been doing before, I have a good idea of how this will end. The big adjustment for me is painting the fuselage before I attach the wings. I have to make sure that I account for the work on the joint areas and not have it adversely affect the paint/weathering steps.
John aka JKim
-----------<><
Image
User avatar
Floki
Elite Member
Posts: 3548
Joined: Wed Dec 12, 2018 2:23 am
Location: Muncie, Indiana

Re: 1/32 Hasegawa Bf109K-4 Weisse 8

Post by Floki »

I'm really liking the patchy look your getting with this, can't wait to see the entire thing painted up.
March as one, Don't look back
Odin's sons... Attack!
Unleash hell! Do not repent! Warfare grants us no lament
Let your weapons slash and tear This is no place for fear
Hold the lines! Move as one! In unity our victory's won
Our shields will form a mighty wall
United we shall never fall
User avatar
jkim
Elite Member
Posts: 3929
Joined: Mon Apr 10, 2017 4:03 pm

Re: 1/32 Hasegawa Bf109K-4 Weisse 8

Post by jkim »

I thought the best way of capturing the demarcation between the upper and lower camo colors was to use a mask. I scanned the 332xxx profiles from the JaPo book, scaled them in AutoCAD to be approximately 1/32 scale and cut masks using the Silhouette cutter. I didn't want a hard demarcation so instead of sticking the mask directly on the model, I used bits of Blue Tack to lift the mask off the surface of the model to get a hard but still sprayed edge.
Image

First, the RLM 81 Brown Violet (AK Real Colors) is sprayed.
Image

And then the RLM 83 Dark Green (Mr Hobby Aqueous).
Image

Remove the masks to reveal... ACK! Overspray (or is it UNDERspray?) leaked under the mask and pooled around the bits of Blue Tack. Bummer... I guess my thin paint mixes aren't the best fit for this type of masking method.
Image

Some detail airbrushing was needed to correct the issue. The bad thing was that I had to add some layers to the bottom color, which increased the intensity of the color and dialed down the pre-shading work a little too much. You can see the difference between the nose and the fuselage.
Image

On the starboard side, I thickened up the paint mixture a bit and made sure that I sprayed perpendicular to the mask but I still got some overspray that had to be corrected like the port side.
Image

The white fuselage crosses were painted using home-cut masks.
Image

The hand-sprayed "884" codes on the rear fuselage were painted using clear acetate masks attached using Blue Tack bits, similar to the fuselage. However, I thickened the paint mix even more to avoid any overspray. The gaps in the mask were touched up with some fine masking work.
Image
Image

Removing the masking from the tail unit, we can see where we currently stand in the painting of White 8.
Image
Image
Image
Image
John aka JKim
-----------<><
Image
User avatar
Floki
Elite Member
Posts: 3548
Joined: Wed Dec 12, 2018 2:23 am
Location: Muncie, Indiana

Re: 1/32 Hasegawa Bf109K-4 Weisse 8

Post by Floki »

despite the problem with the paint under the masks it looks fantastic. I'm sure you can compensate with some more heavy weathering in them areas to blend it all together.
March as one, Don't look back
Odin's sons... Attack!
Unleash hell! Do not repent! Warfare grants us no lament
Let your weapons slash and tear This is no place for fear
Hold the lines! Move as one! In unity our victory's won
Our shields will form a mighty wall
United we shall never fall
User avatar
jkim
Elite Member
Posts: 3929
Joined: Mon Apr 10, 2017 4:03 pm

Re: 1/32 Hasegawa Bf109K-4 Weisse 8

Post by jkim »

Thanks Clint!

Getting some more of the markings into place on the K-4. White 8 and tactical bar are again custom masks cut with my Silhouette Portrait cutter. One of the best investments I've ever made as a modeler.

Image
Image
Image
Image

The engine cowling was masked off and painted. The darker color is RLM 75 grey (Mr Hobby Aqueous) and the lighter grey is simply the RLM 75 with a bit of Tamiya White mixed in.
Image
Image
Image
Image
Image

There was a previous code that was overpainted under the white 8. I am going to use the unused portion of the mask to replicate this but I'm nervous about the white paint lifting.
John aka JKim
-----------<><
Image
User avatar
LyleW
Admin
Posts: 13657
Joined: Fri Dec 13, 2013 7:25 am
Location: Mt. Washington KY

Re: 1/32 Hasegawa Bf109K-4 Weisse 8

Post by LyleW »

John, that is outstanding work! I ha a portrait cutter and I’m still learning it. I use a loT of .jpgs and the Silhouette software.
To make each build less crappy than the last one. Or, put another way, "Better than the last one, not as good as the next one!"..
User avatar
speedgraflex
Moderator
Posts: 9758
Joined: Fri Feb 10, 2017 11:08 pm
Location: Santa Monica, California

Re: 1/32 Hasegawa Bf109K-4 Weisse 8

Post by speedgraflex »

I miss a tiny amount of the exterior chaos from the first series of images (your first series against a blue background) from the opaqueness of the top coat, to be perfectly frank, because the aircraft is such a raw symphony of end of war dynamics, and your round one pause captures that chaos perfectly. I believe you even make a case that the variegated nature of the splatter shot pattern may have been the effect of spray gun usage (there is a difference in the manner of spray guns used in factories which your work captures). However your attention to the smallest details, proper nomenclatures and skill sets are of the greatest magnitude possible, and your second series has an interesting light activated pattern which is quite astounding to see! You are a Master!
Bruce / SPEEDGRAFLEX
User avatar
jkim
Elite Member
Posts: 3929
Joined: Mon Apr 10, 2017 4:03 pm

Re: 1/32 Hasegawa Bf109K-4 Weisse 8

Post by jkim »

Thanks Lyle and Bruce... comments always appreciated!

Using the unused "8" mask, I sprayed the overpainted code.
Image
Image
Image

Since I painted the fuselage, I may as well paint the wings separately too. First the RLM 76 Light Blue on the bottoms... yes, there will be a mismatch between the fuselage bottom and wing bottom colors.
Image
Image

The top colors of the wing are RLM 75 Grey and RLM 83 Dark Green... which, again, does not match the fuselage top colors and is speculative.
Image
Image
Image

The crosses have been painted onto the wings using custom masks.
Image
Image

The major painting has been completed so it is almost approaching the point where I attach the wings to the fuselage.
Image
Image
John aka JKim
-----------<><
Image
Post Reply

Return to “Aircraft Work in Progress”