Thanks guys! This one hasn't quite given up its fight against me yet, I'm afraid. It's getting there but it has been a test of patience and will. After the flat coat, I wanted to give the upper surfaces another layer of depth and added some salt fading. This technique can be quite tricky to pull off. First, you coat the surface with a thin layer of water. And then you sprinkle salt of varying grades onto the wet surface.
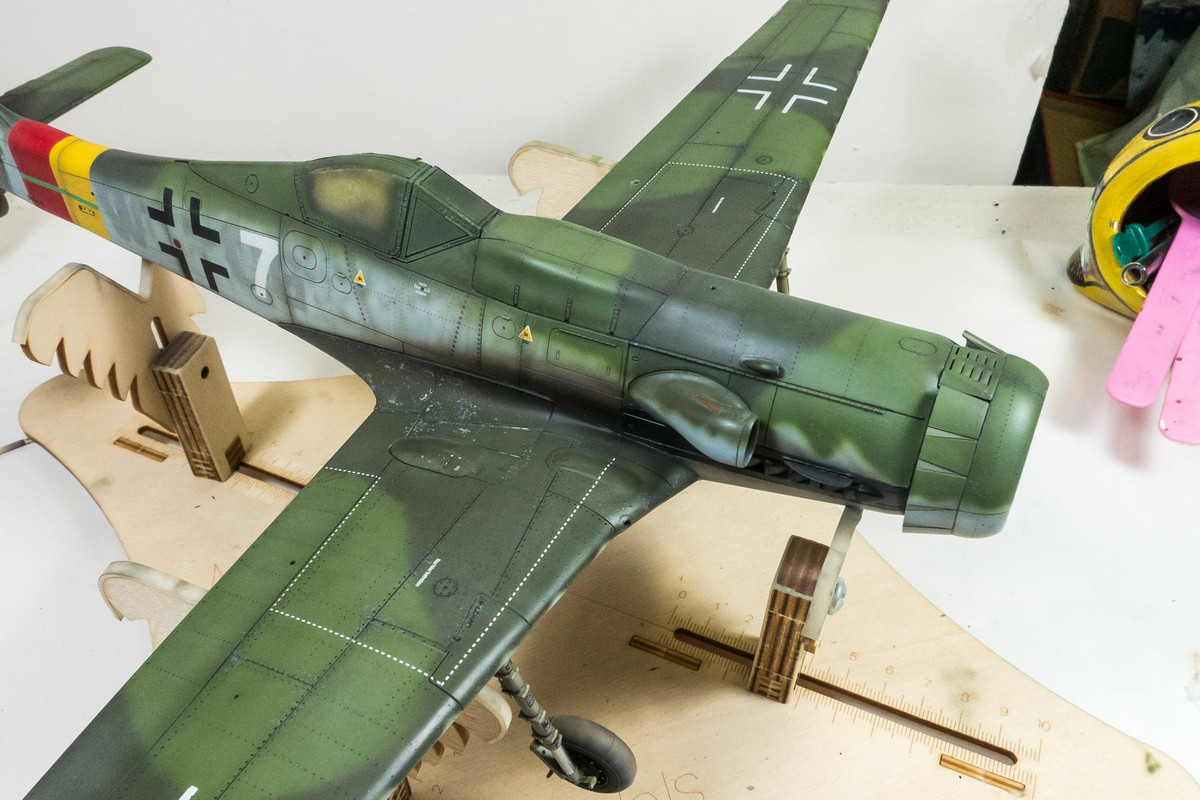
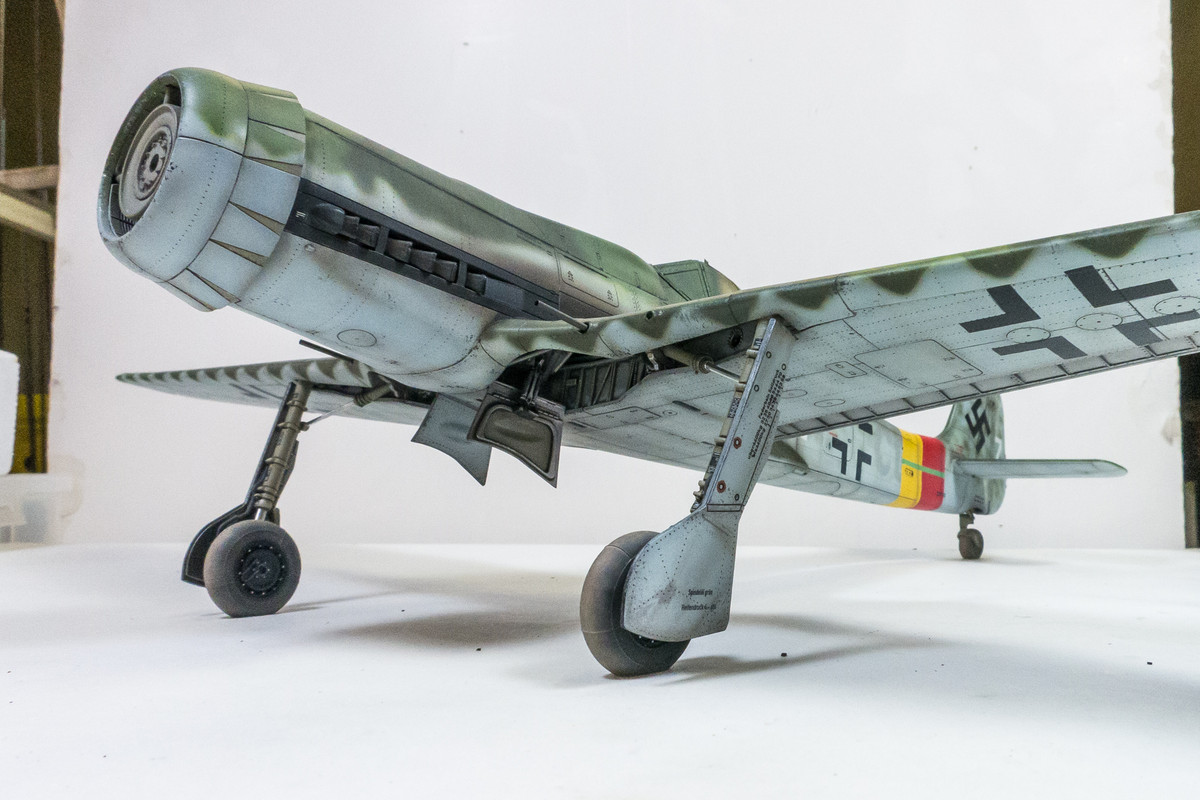
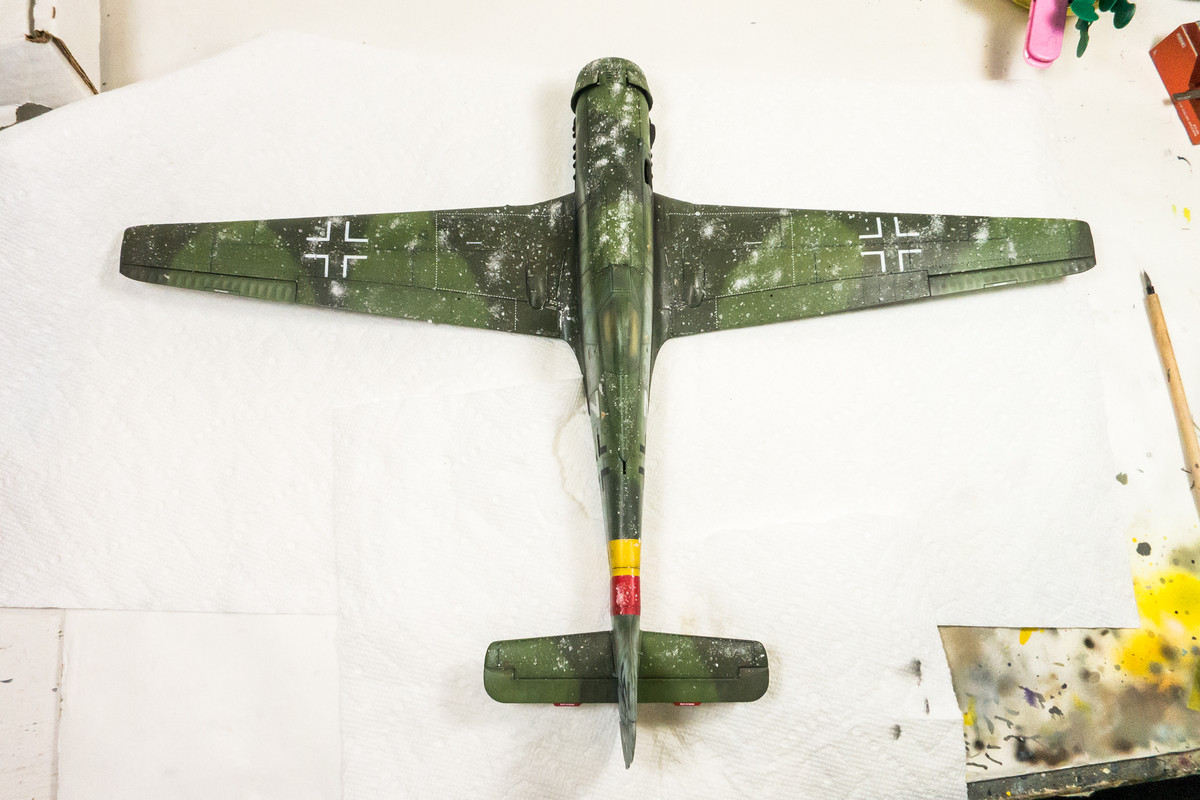
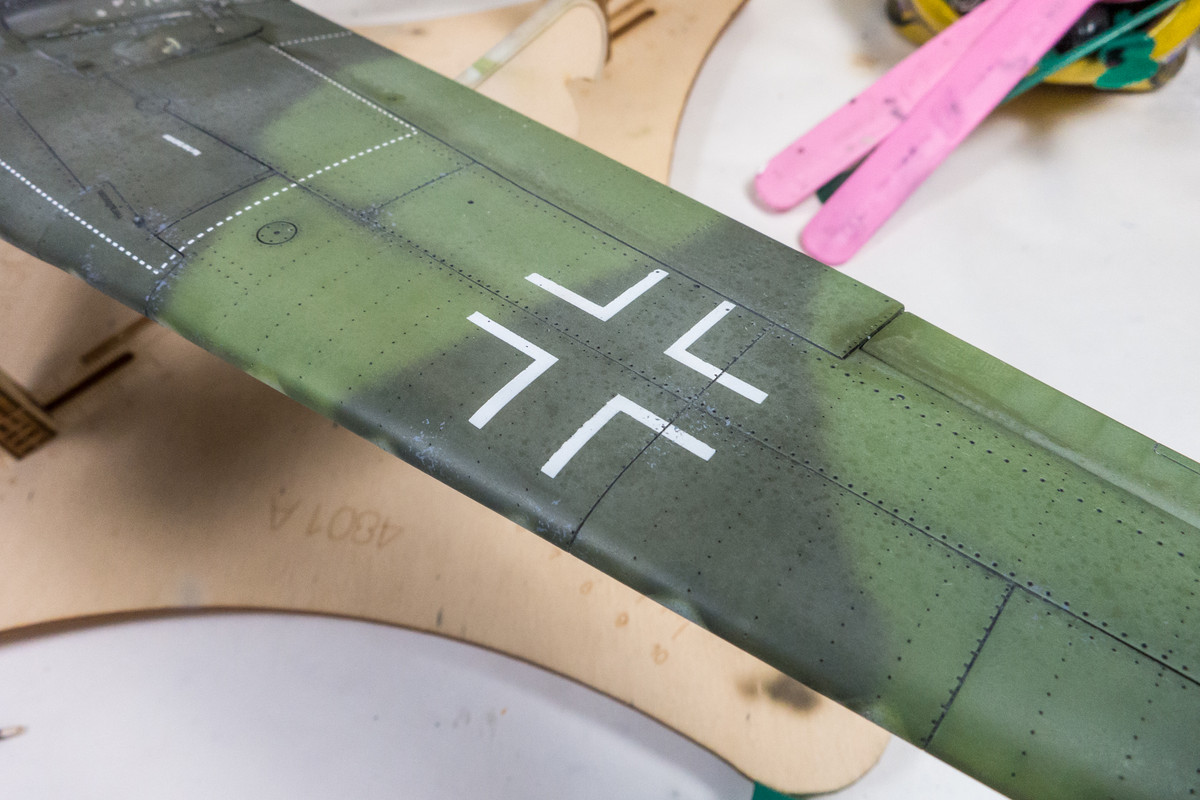
After the water dries completely, you spray a very light coat of color. When you remove the salt after the paint dries, the result should be a random pattern formed by the salt crystals that mimics a surface that has been exposed to the elements. But the line between too subtle and too harsh is difficult to gauge. My first try on the Ta-152H resulted in no visible effect. Too subtle. So I tried one more time. A little more successful but I started to get a little bit of white frost on the finish that I had to beat back by spraying the affected areas with straight lacquer thinner laced with a touch of gloss.
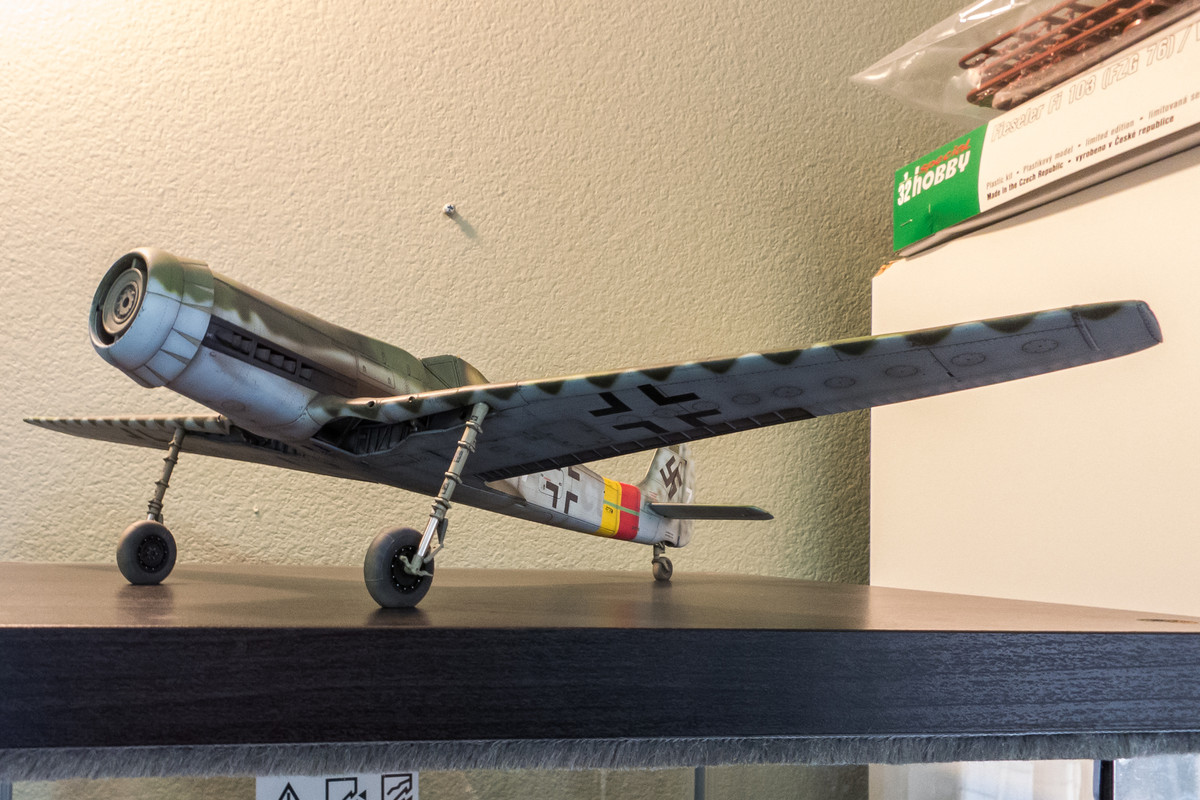
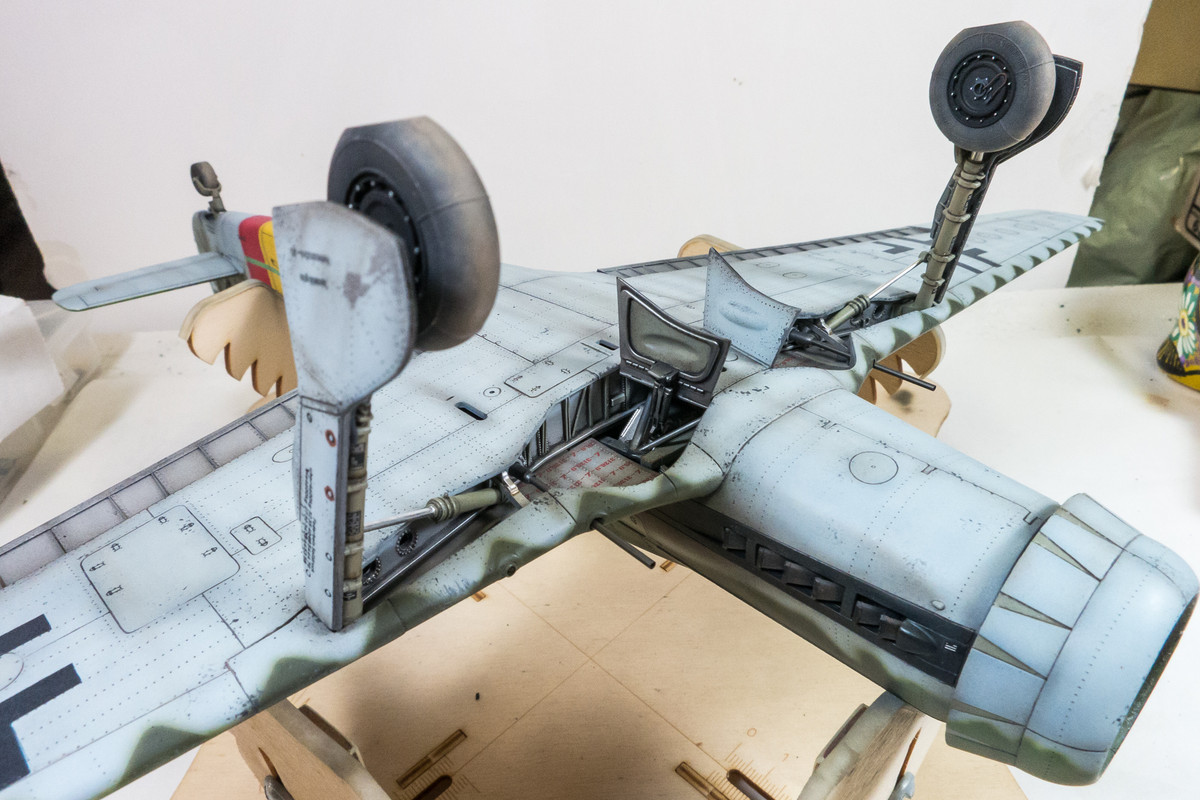
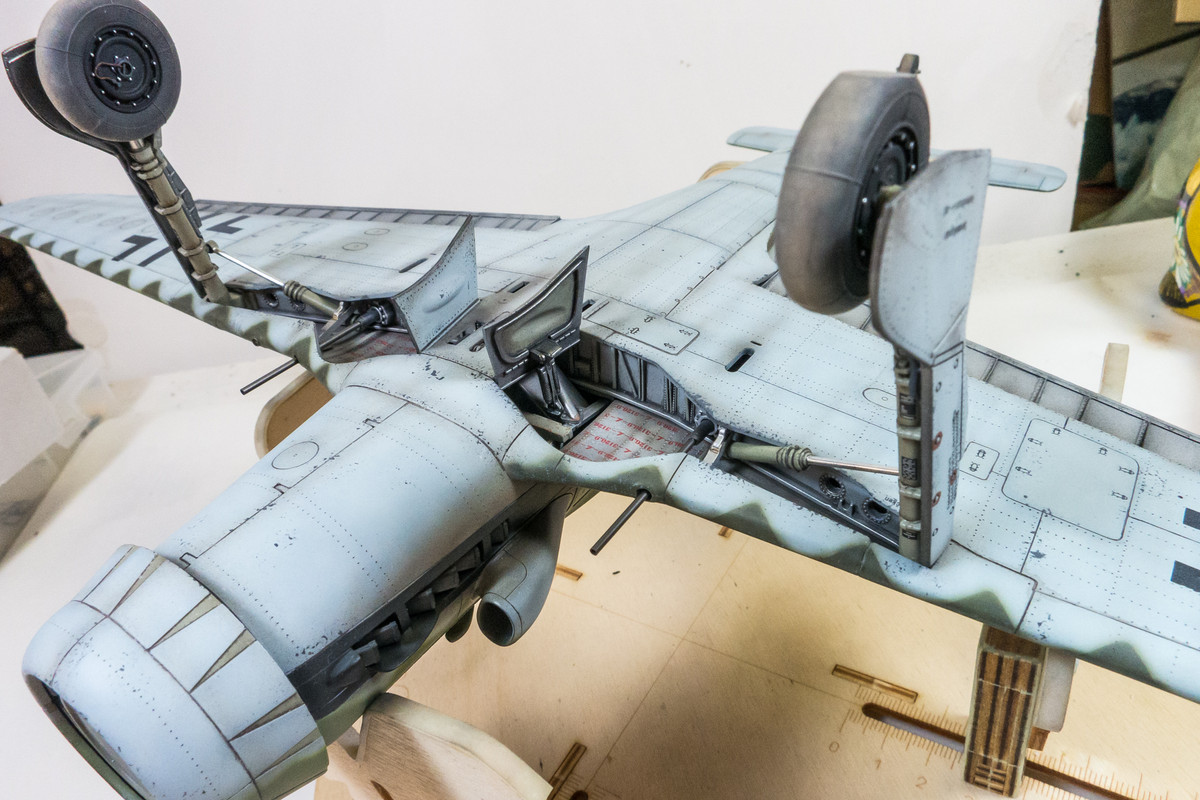
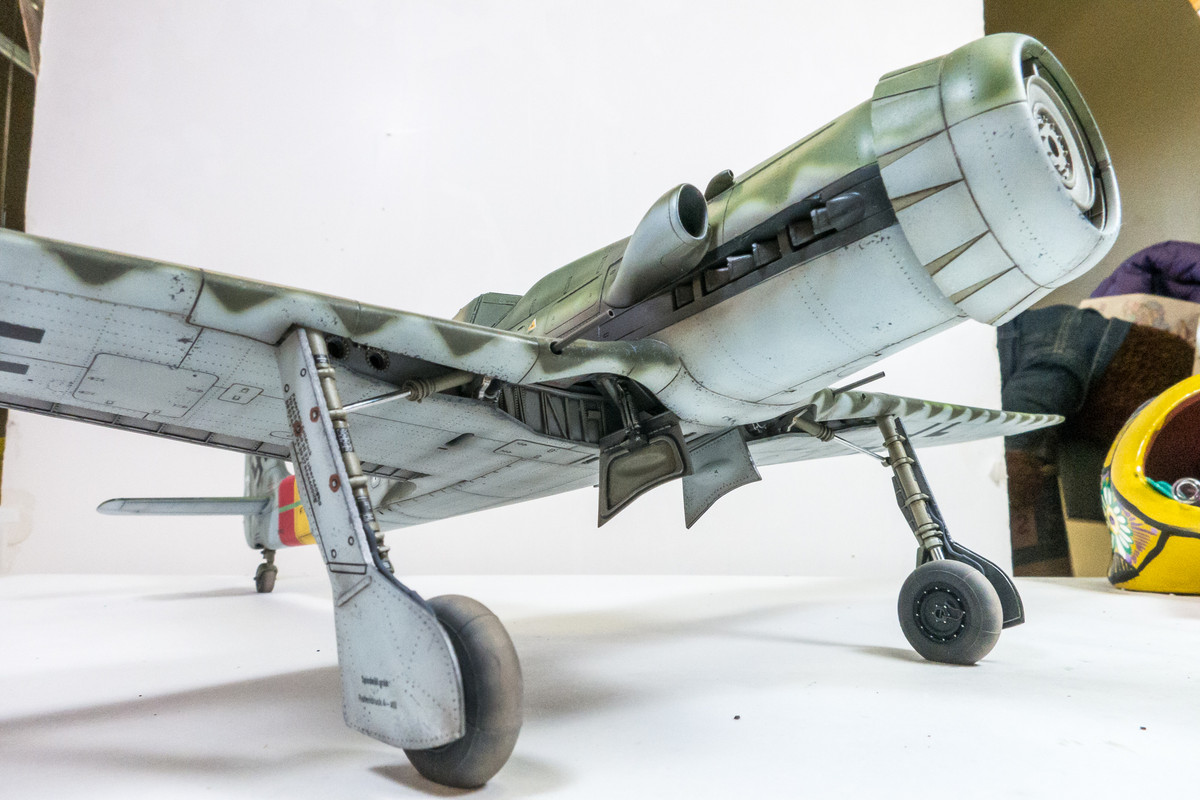
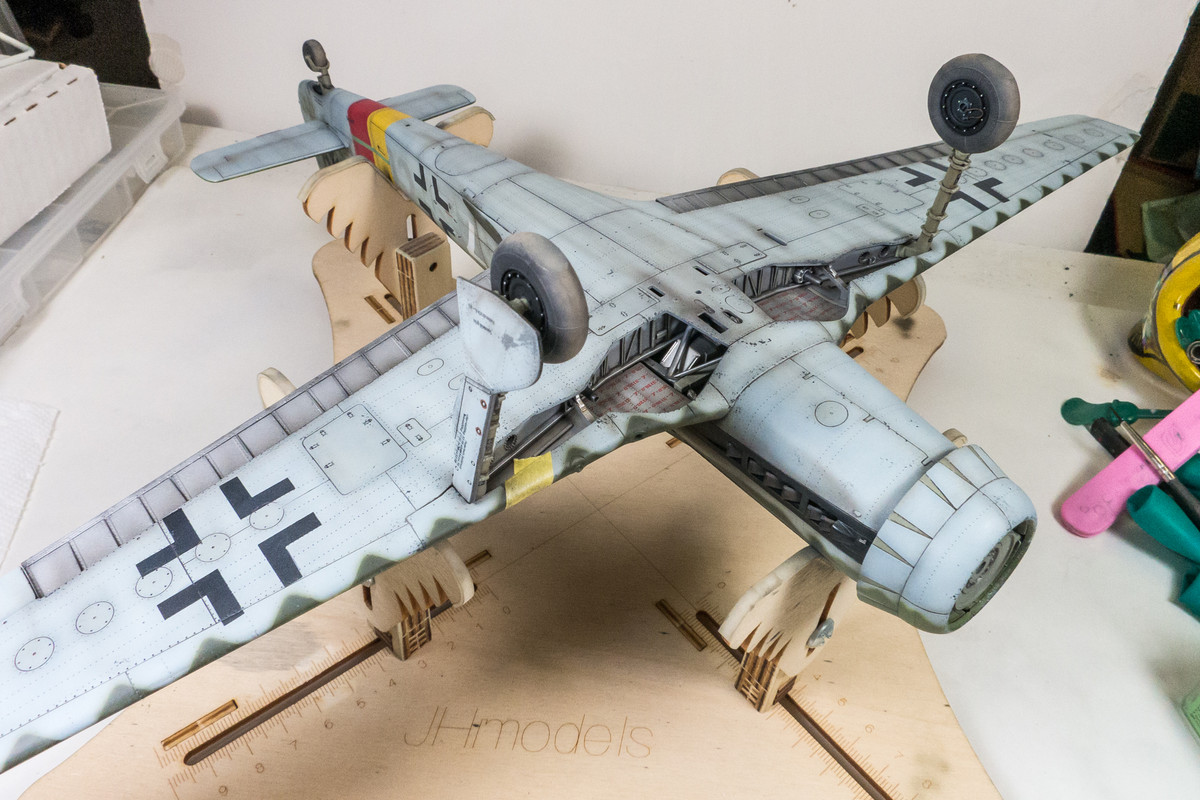
We can take a look at the results of the salt fading a little later but I wanted to move on. I flipped the bird on its back and put in the tail landing gear. No issue there although the connection isn't as rock solid as I would've hoped.
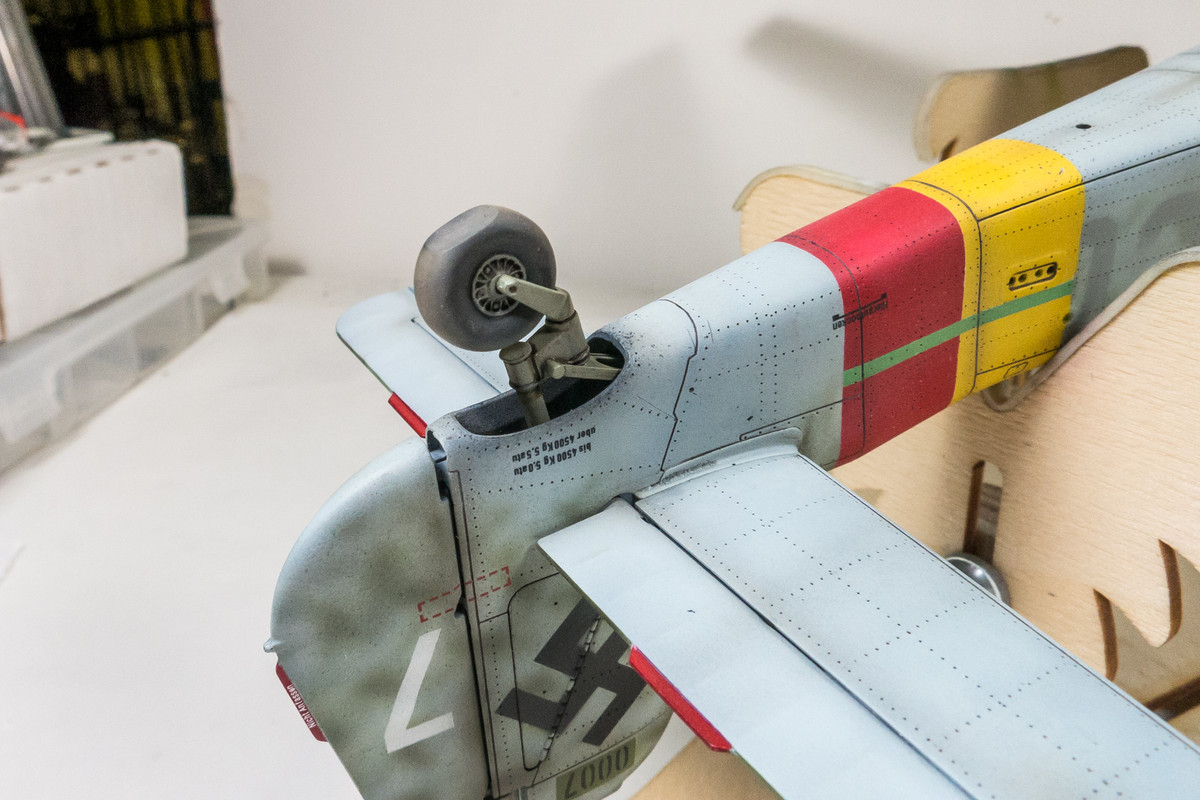
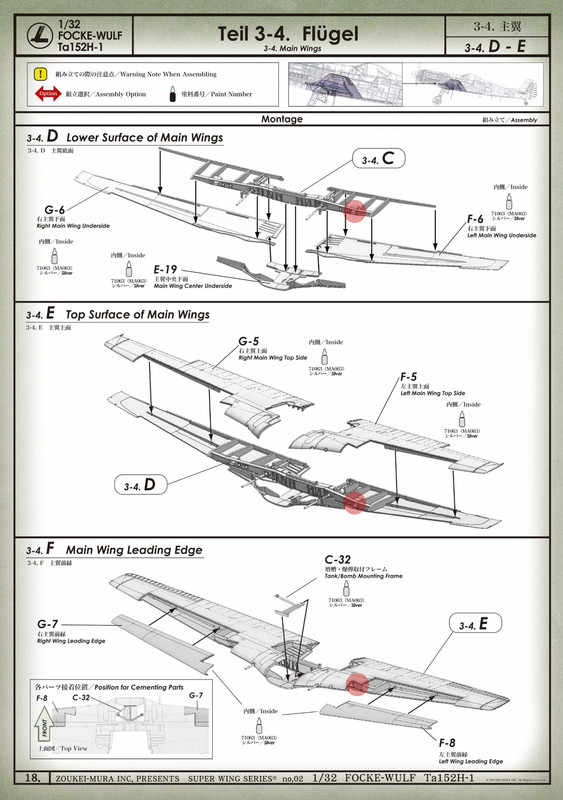
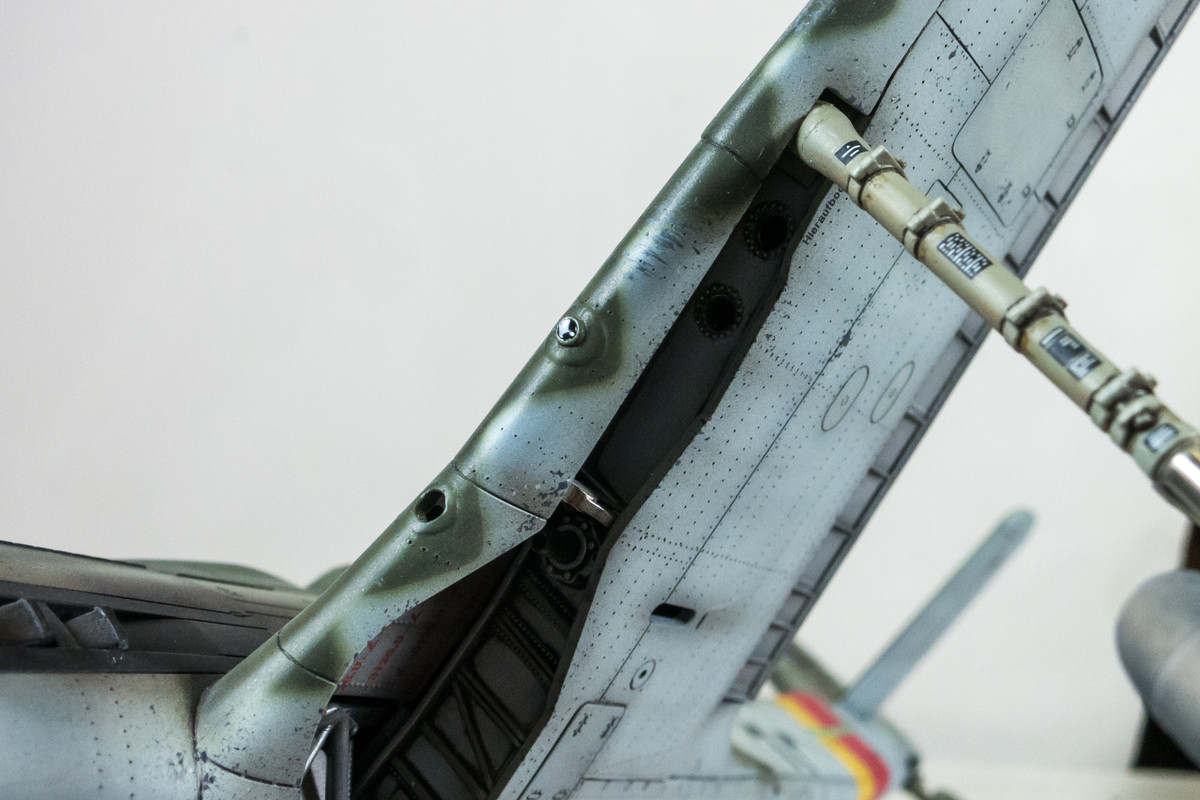
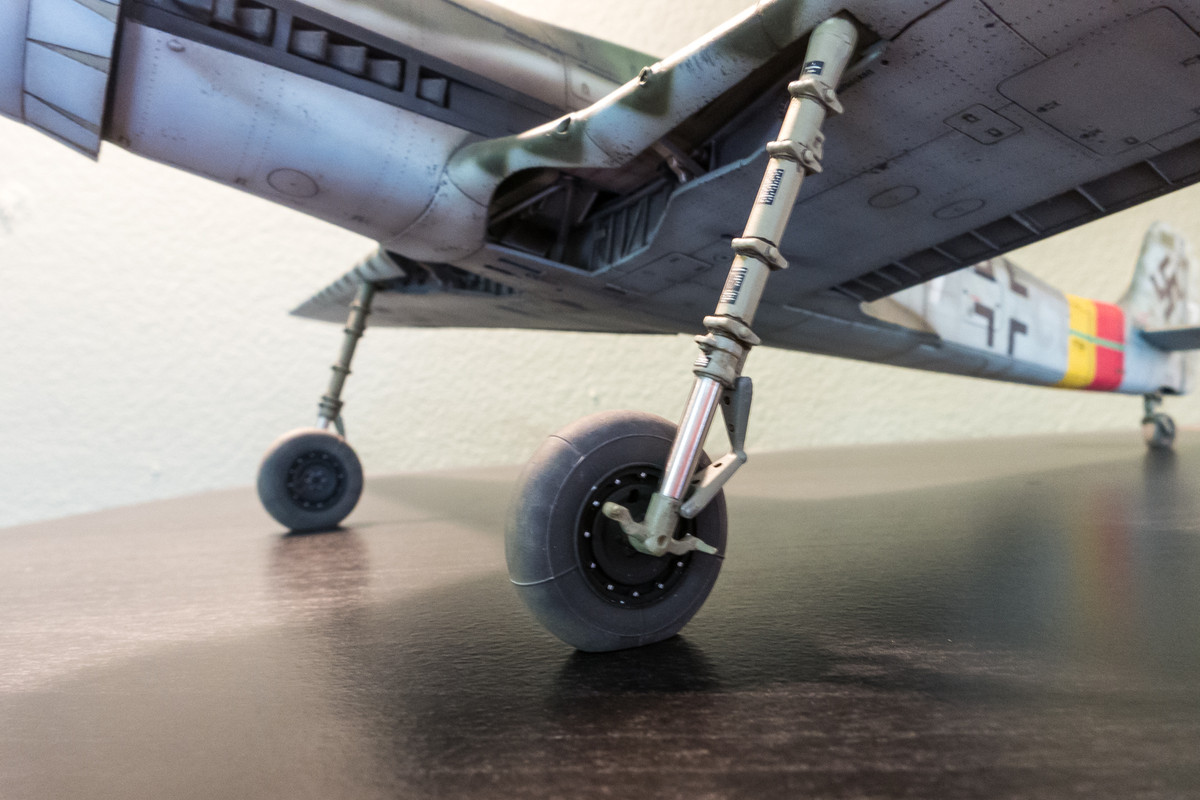
Next I attempted to install the main landing gear. This step has made me nervous ever since I saw the instructions. The fit was going to be super-tight and the way the attachment is designed, I was afraid that any attempt at a dry-fit would've locked the gear in place for good. It's a unusual method of attachment to say the least and involves an insert-and-twist move that is just reeks of potential disaster. Seriously, Z-M?
It took me a few attempts to get this to work. I had no choice but to force the legs in and that ended up crack the adjacent wing joints. Not to a catastrophic degree but enough to require some careful repair on both sides of an already highly repaired joint.
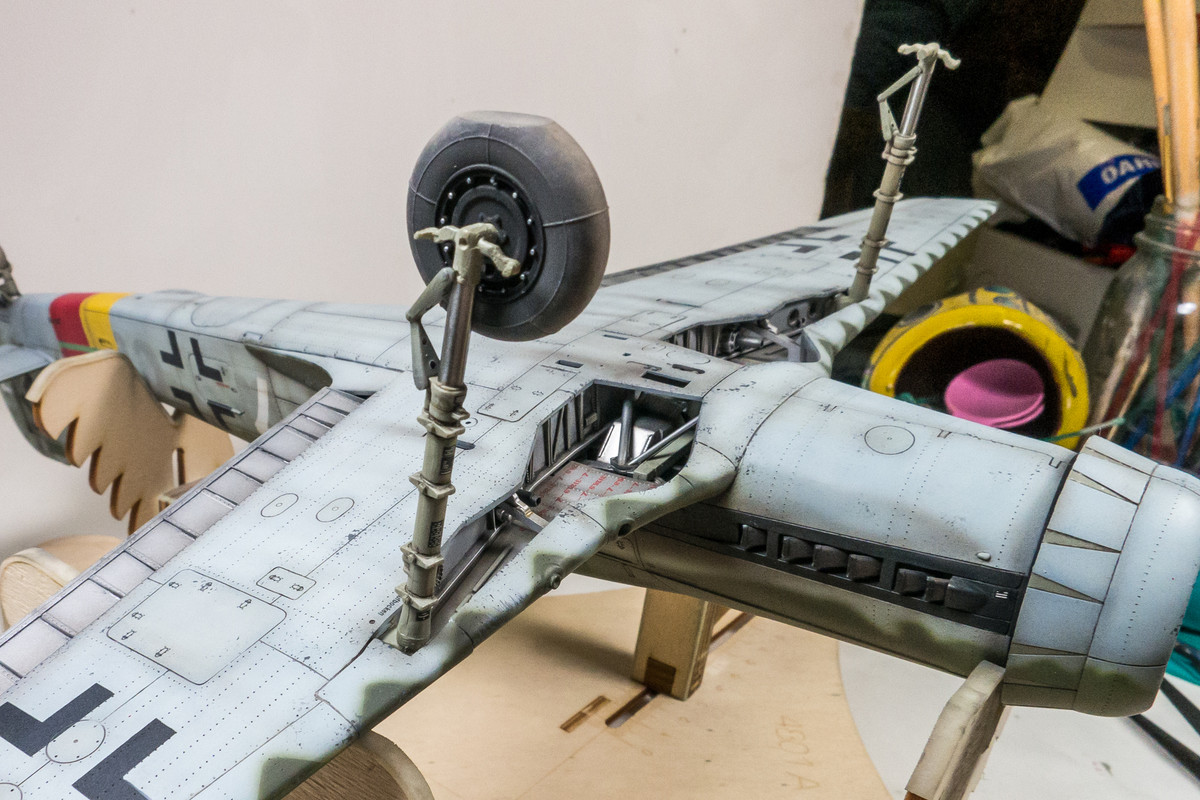
So a momentary pause while I applied liquid glue and hope that I can get a good bond. If not, I'll have to resort to thin CA glue, which I probably should've used off the bat. The tape is over the worst separation.
Good news is that the model is still in one piece.
1/32 Zoukei-Mura Ta152H-0 White 7
Re: 1/32 Zoukei-Mura Ta152H-0 White 7
John aka JKim
-----------<><
-----------<><
Re: 1/32 Zoukei-Mura Ta152H-0 White 7
John, you do not have to go through this just to make me fell better! you handled it well, as always. Good show.
To make each build less crappy than the last one. Or, put another way, "Better than the last one, not as good as the next one!"..
Re: 1/32 Zoukei-Mura Ta152H-0 White 7
She's gonna fight you all the way it seems but I know you will get her to finished in the end.
March as one, Don't look back
Odin's sons... Attack!
Unleash hell! Do not repent! Warfare grants us no lament
Let your weapons slash and tear This is no place for fear
Hold the lines! Move as one! In unity our victory's won
Our shields will form a mighty wall
United we shall never fall
Odin's sons... Attack!
Unleash hell! Do not repent! Warfare grants us no lament
Let your weapons slash and tear This is no place for fear
Hold the lines! Move as one! In unity our victory's won
Our shields will form a mighty wall
United we shall never fall
- Medicman71
- Elite Member
- Posts: 9715
- Joined: Mon Apr 07, 2014 9:32 am
- Location: Houston, Tx
Re: 1/32 Zoukei-Mura Ta152H-0 White 7
You really have to question the reasoning behind things like the way the landing gear legs are attached. Nice work on getting them in with minimal issues. I would have broke more things getting them in.
Mike
Sponsored by Boeing, Lockheed Martin, Northrop Grumman, Saab, BAE, and Dassault
- BlackSheep214
- Elite Member
- Posts: 10407
- Joined: Sun Apr 06, 2014 8:47 pm
Re: 1/32 Zoukei-Mura Ta152H-0 White 7
Knowing me, I’d break the struts and then some along with some courtesy cussing.
It is a very odd way to install the struts. As you’ve already said... Seriously, Z-M?
“Who controls the skies, controls the fate of this Earth”
Author unknown- 352nd Fighter Group, Blue-Nosed Bastards of Bodney
“Send one plane it’s a sortie; send two planes it’s a flight; send four planes it’s a test of airpower. - Richard Kohn
Author unknown- 352nd Fighter Group, Blue-Nosed Bastards of Bodney
“Send one plane it’s a sortie; send two planes it’s a flight; send four planes it’s a test of airpower. - Richard Kohn
- Duke Maddog
- Elite Member
- Posts: 7088
- Joined: Tue Jun 03, 2014 11:22 am
- Location: Rowland Heights, CA
Re: 1/32 Zoukei-Mura Ta152H-0 White 7
Impressive handling of a difficult assembly process. This is the difference between a Master like you and a novice like me. Nicely done!
The Duke
Virtuoso of Miniatures
"Do you know what the chain of command is? It's the chain I get and beat you with 'till you understand who's in ruttin' command!"
-Jayne Cobb, Firefly Episode 2 "The Train Job"
We are modelers - the same in spirit, in hunger to insanely buy newly released kits, hustlers in hiding our stash from our better halves and experts in using garbage as replacements for after-market parts.
Re: 1/32 Zoukei-Mura Ta152H-0 White 7
A bad design choice compounded by a modular wing structure that places multiple glue joints near this high stress area. Some of the joints are visible from both sides, meaning they are on the exterior of the wing surface AND on the visible interior surface of the wheel well.
I think I was lucky to have gotten the legs in without more trauma and was able to repair the exterior surfaces to an acceptable level. But I now have cracks in each of wheel wells that I just don't have the room to repair adequately. I'll hide them superficially with paint but if you look, you'll see them. Easily avoided if Z-M took a more practical approach to the landing gear attachment.
I'm going to breathe a big sigh of relief when this one crosses the finish line.
John aka JKim
-----------<><
-----------<><
- speedgraflex
- Moderator
- Posts: 9756
- Joined: Fri Feb 10, 2017 11:08 pm
- Location: Santa Monica, California
Re: 1/32 Zoukei-Mura Ta152H-0 White 7
That sucks. Perhaps a small applicator?
https://www.micromark.com/mini-hand-tools/applicators
You could try using silver/grey Milliput.
https://www.micromark.com/mini-hand-tools/applicators
You could try using silver/grey Milliput.
Bruce / SPEEDGRAFLEX
Re: 1/32 Zoukei-Mura Ta152H-0 White 7
The cracked joints have been repaired, at least from the outside. This was the worst one.
I couldn't do much with the visible crack on the inside of the wheel well except hide it with dark paint and an enamel wash.
Like I said, I was pretty lucky that I didn't cause more damage with the landing gear insertion.
During the repair process, I added a lens to the wing gun camera using UV epoxy.
Once the repairs were complete, I glued the wheels on using JB Kwik Weld 2-part epoxy. This allows me some time to make sure the flat spots on the tires are correctly oriented on the ground.
The actuating rod and landing gear doors were glued into place.
The Tank fighter is now standing on its own legs. This marks the beginning of the end of this build. Only a few more things to do before I can finally be free of this.
But she is still kicking me in the pants... the boarding ladder is nowhere to be found. I'm thinking it got stuck on a piece of masking tape during the painting process and got inadvertently tossed into the trash can. My first attempt to scratch one failed so I'm gonna have to try again.
John aka JKim
-----------<><
-----------<><
- Medicman71
- Elite Member
- Posts: 9715
- Joined: Mon Apr 07, 2014 9:32 am
- Location: Houston, Tx
Re: 1/32 Zoukei-Mura Ta152H-0 White 7
I'm starting to think that this build doesn't like you. Nice work on the repairs.
Mike
Sponsored by Boeing, Lockheed Martin, Northrop Grumman, Saab, BAE, and Dassault