Page 4 of 30
Re: 1/32 Hasegawa Fw 190D-13 Yellow 10
Posted: Mon May 25, 2020 6:43 pm
by jkim
Thanks guys!
Stikpusher wrote:Those silly engineers had to change the positions of everything...

Nice work on all the changes and upgrades.
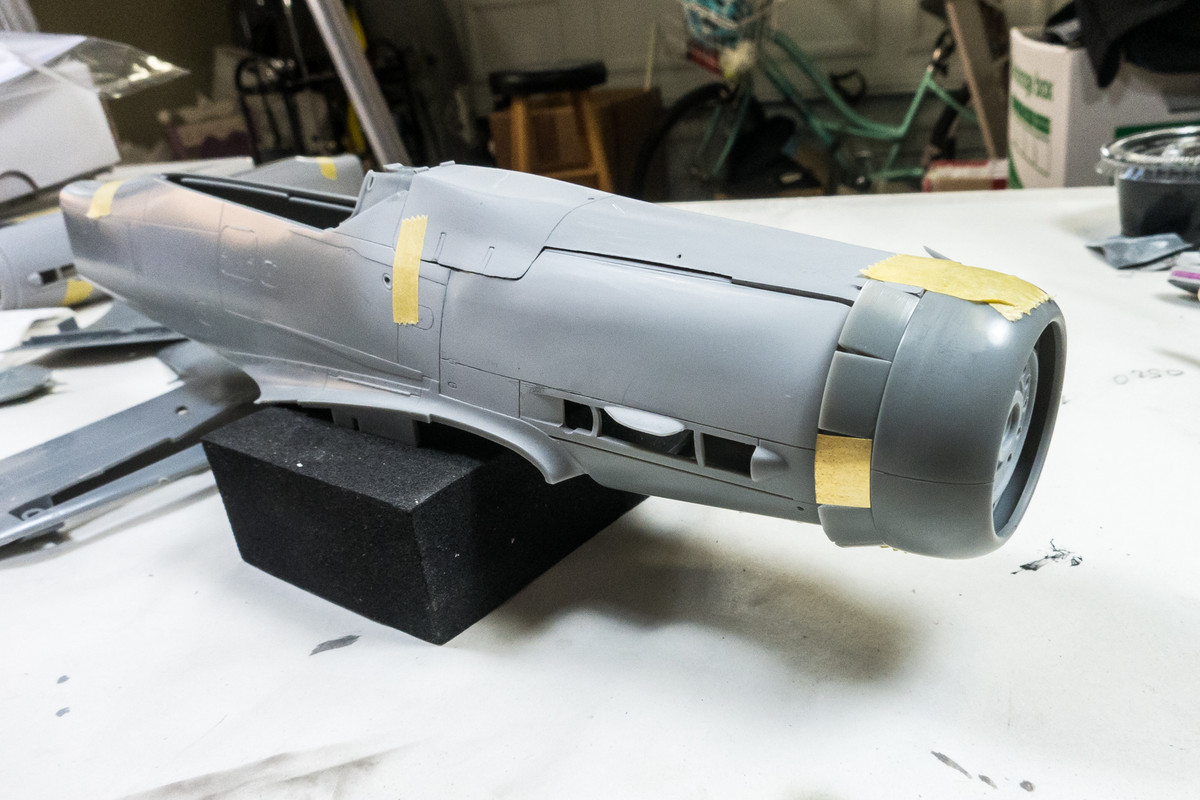
I would never have noticed unless it was specifically called out in the drawings of the D-13 that I was looking at...
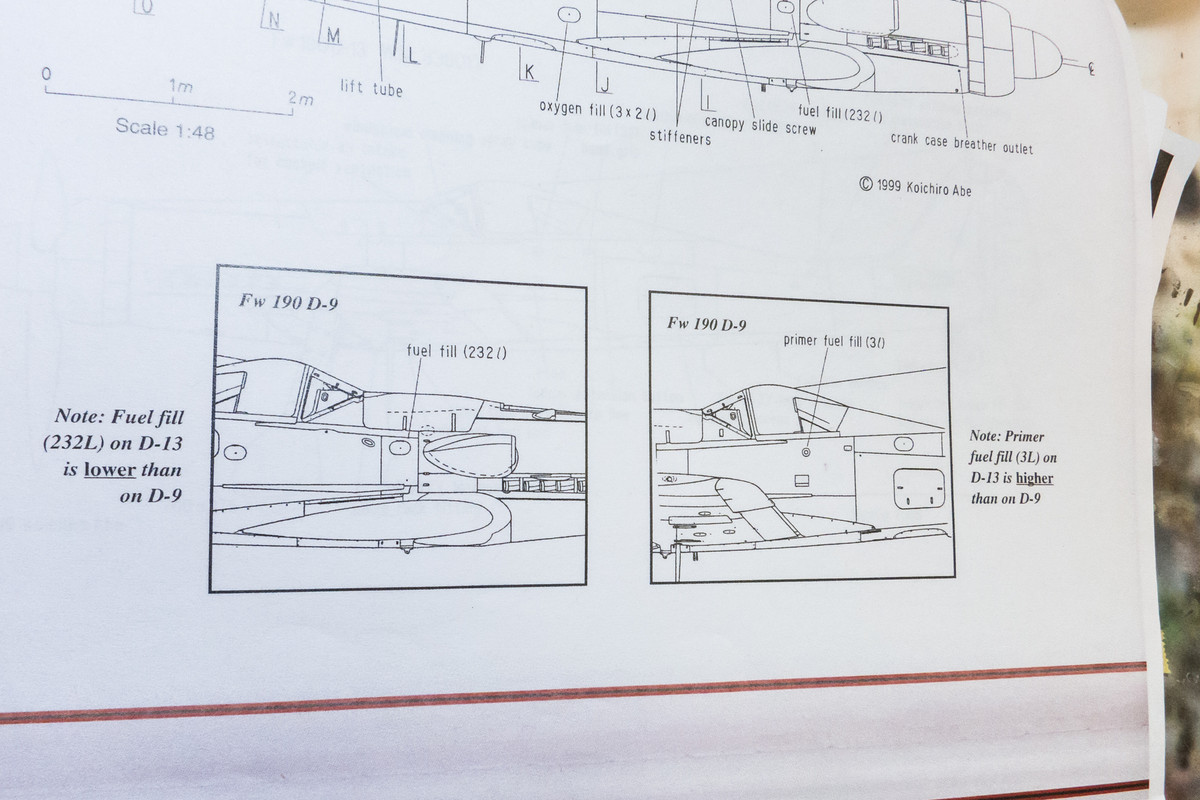
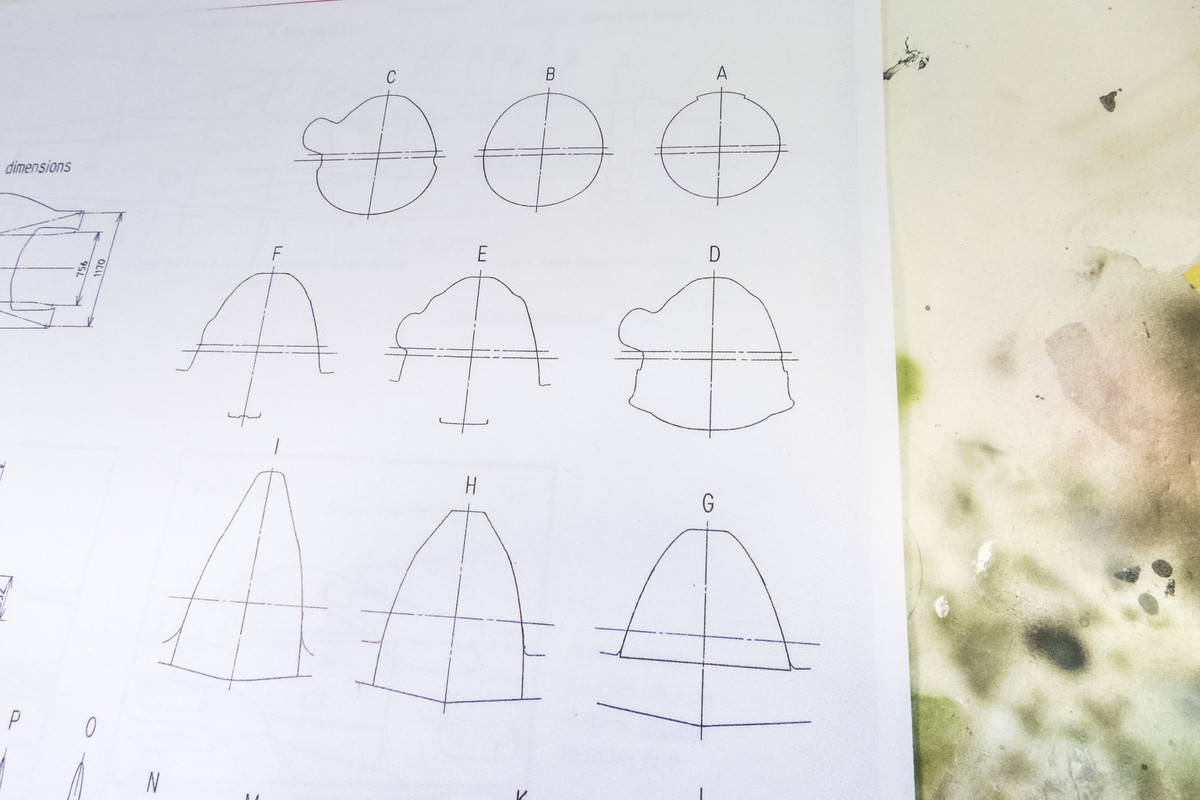
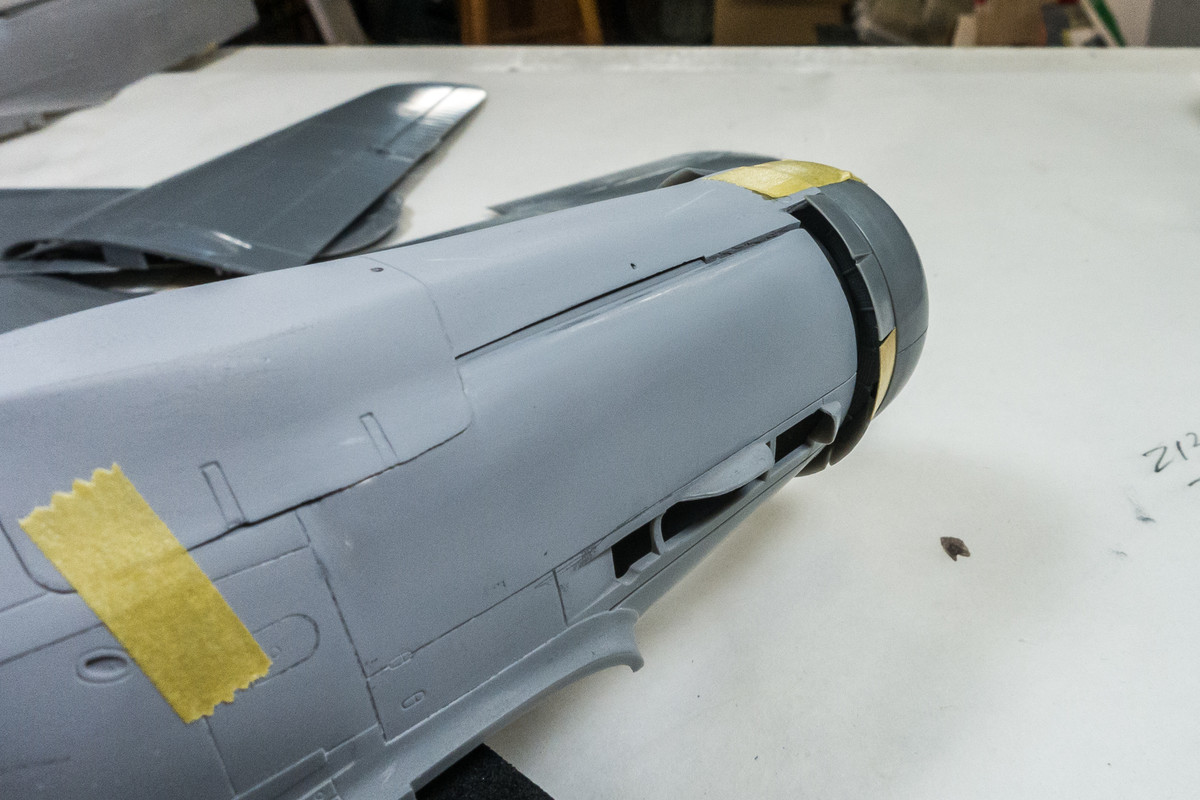
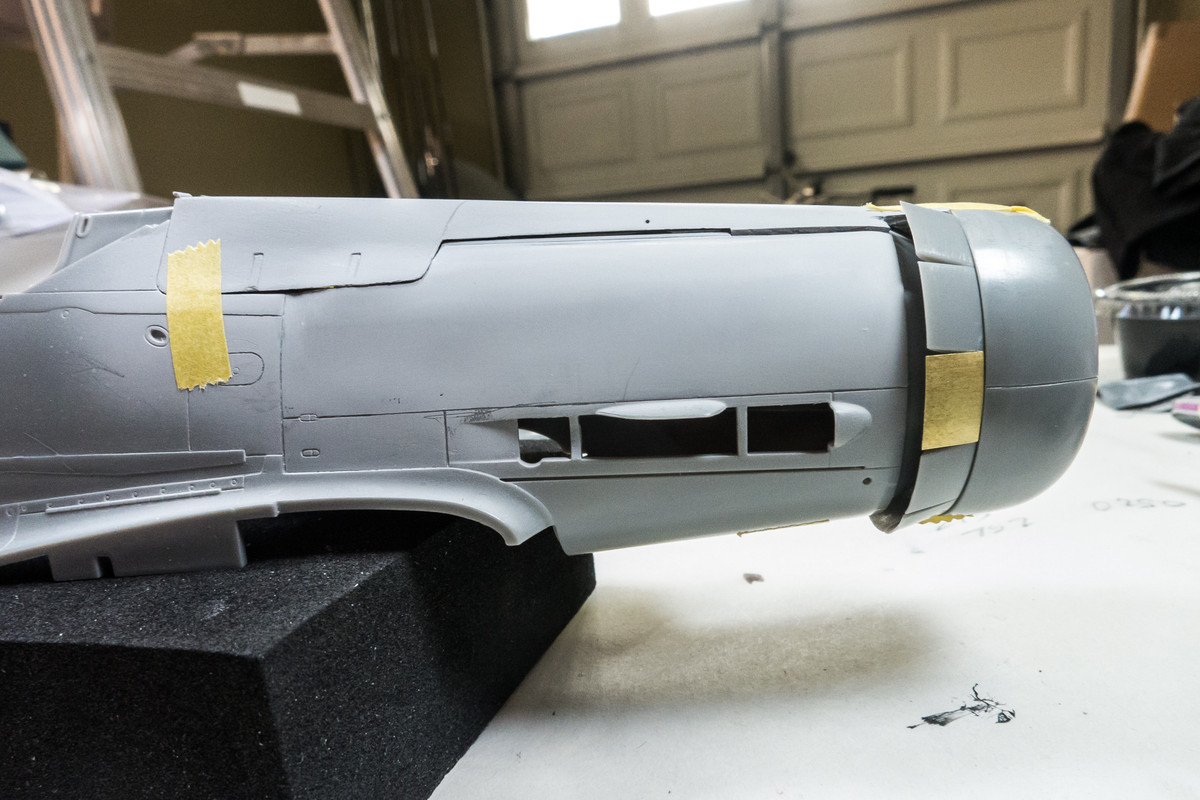
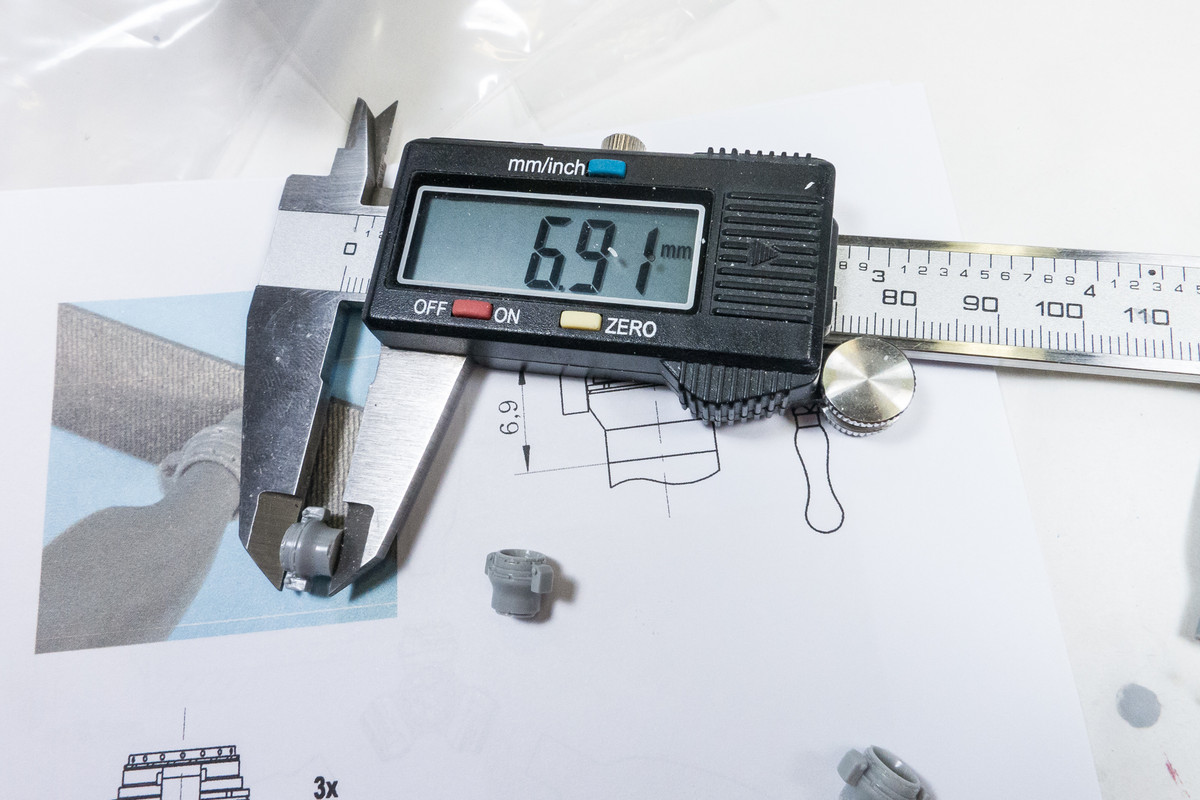
Since we are looking at those drawings, here are the cross-sections that indicate that the bulge was only evident along the top edge and not the bottom as depicted in the GM resin conversion...
I thinned the edges of the cowling flaps. Again, the D-13 is slightly different than the D-9 in that ALL of the cowling flaps are extendable. On the D-9, there is a fixed cowling flap on the starboard side.
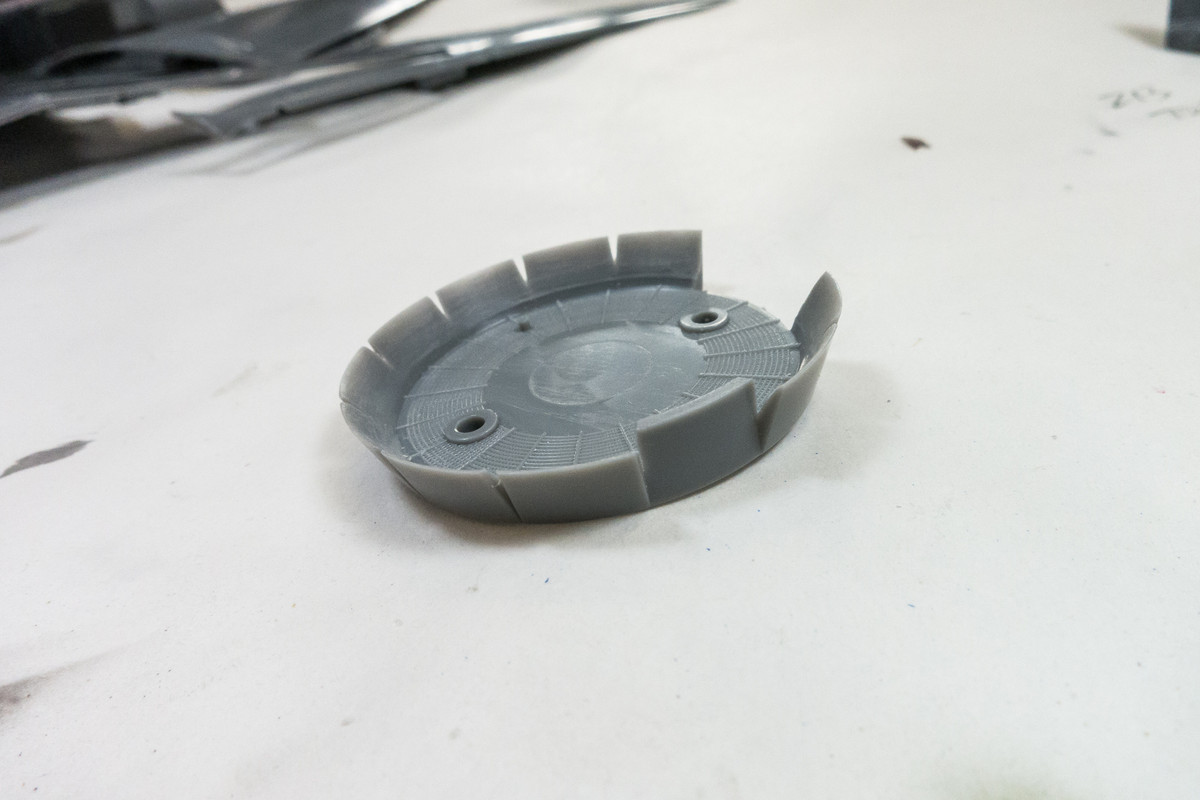
I cut the fixed flap off and replaced it with a piece of brass sheet.
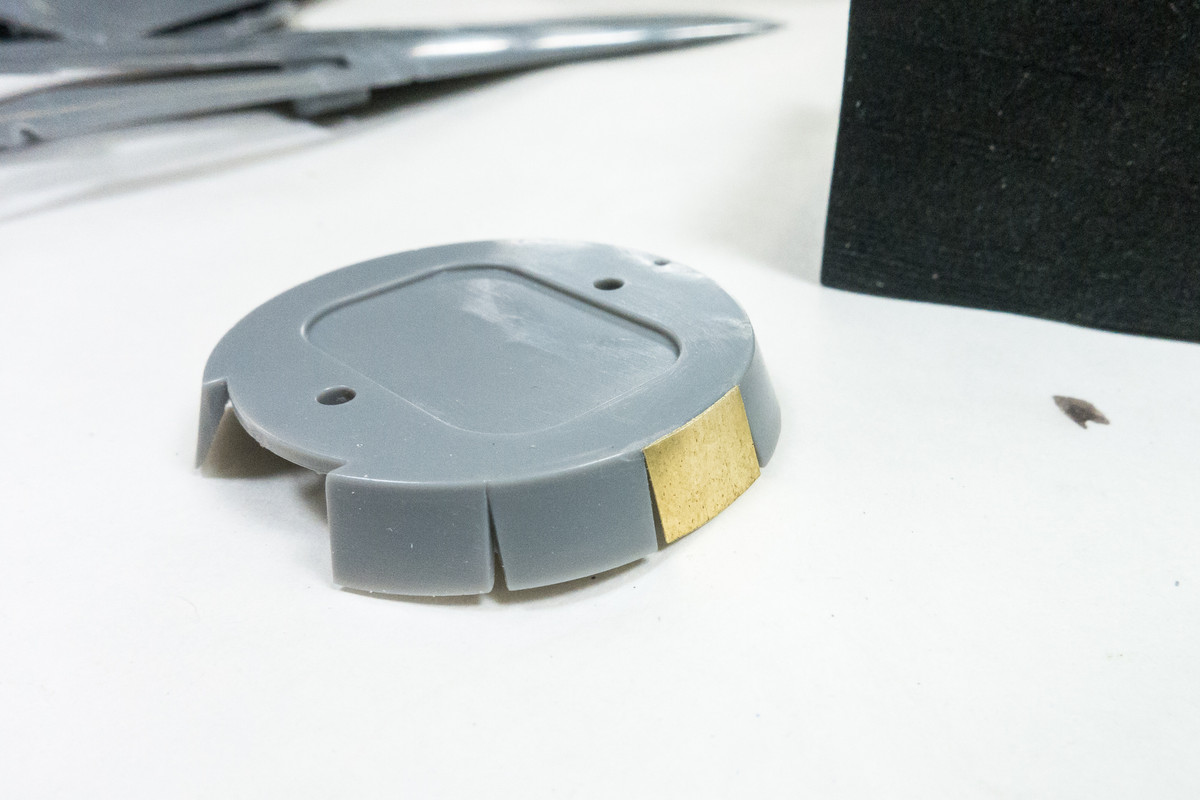
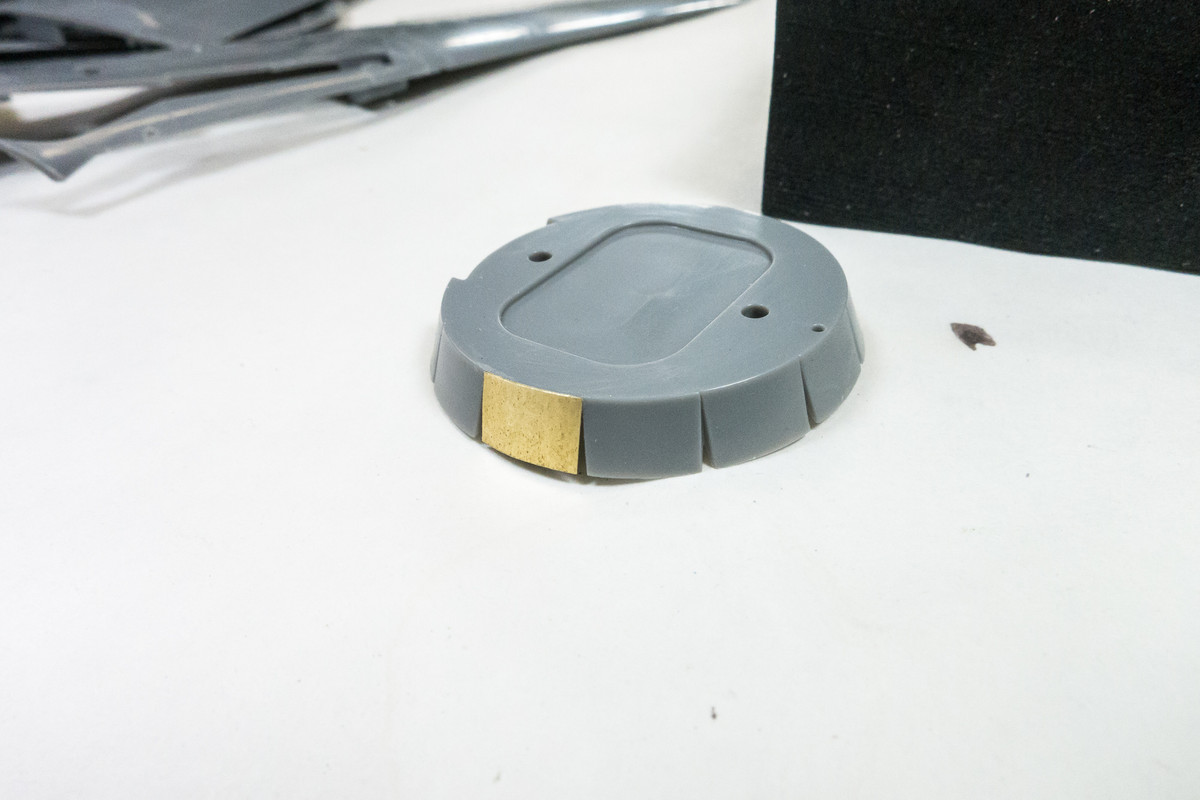
I COULD replace ALL of the flaps with brass sheeting but I elected not to. As long as the trailing edges are thinned, I think the plastic flaps look fine.
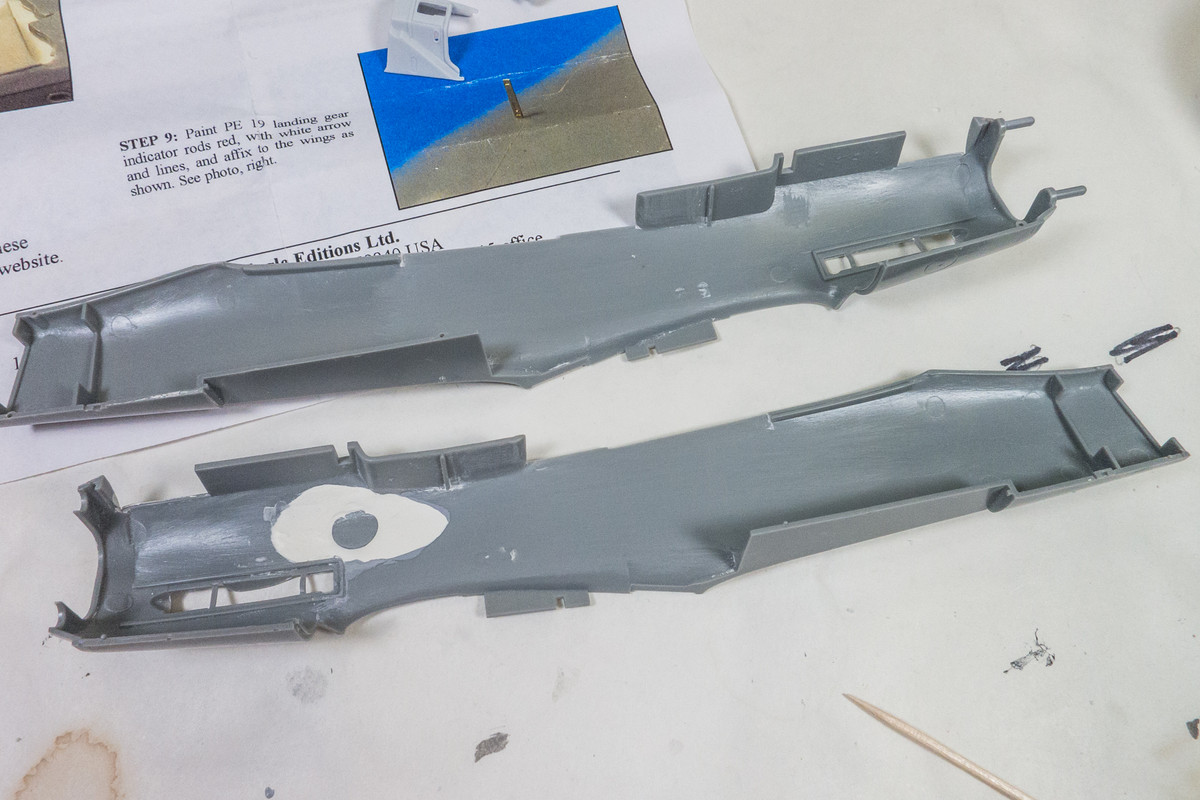
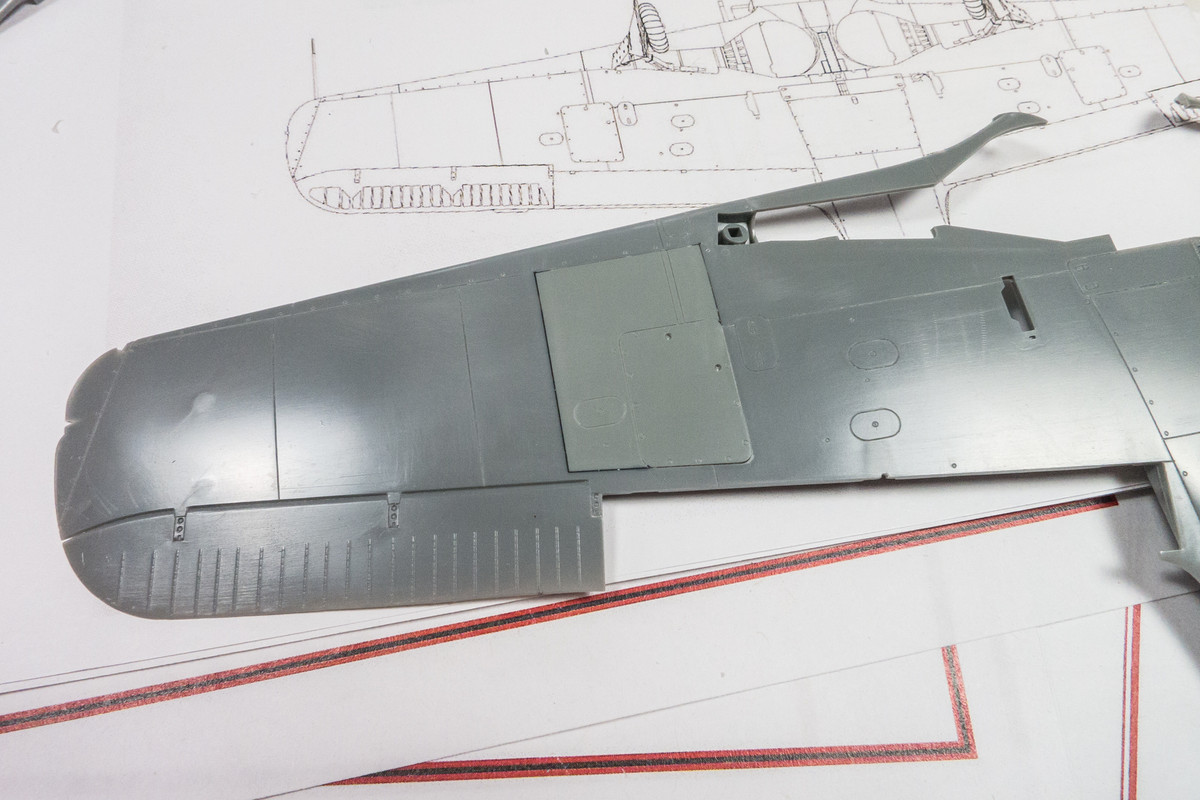
On my past D-9 builds, I erroneously assumed that the outline of the wing insert piece were along panel lines but this is incorrect.
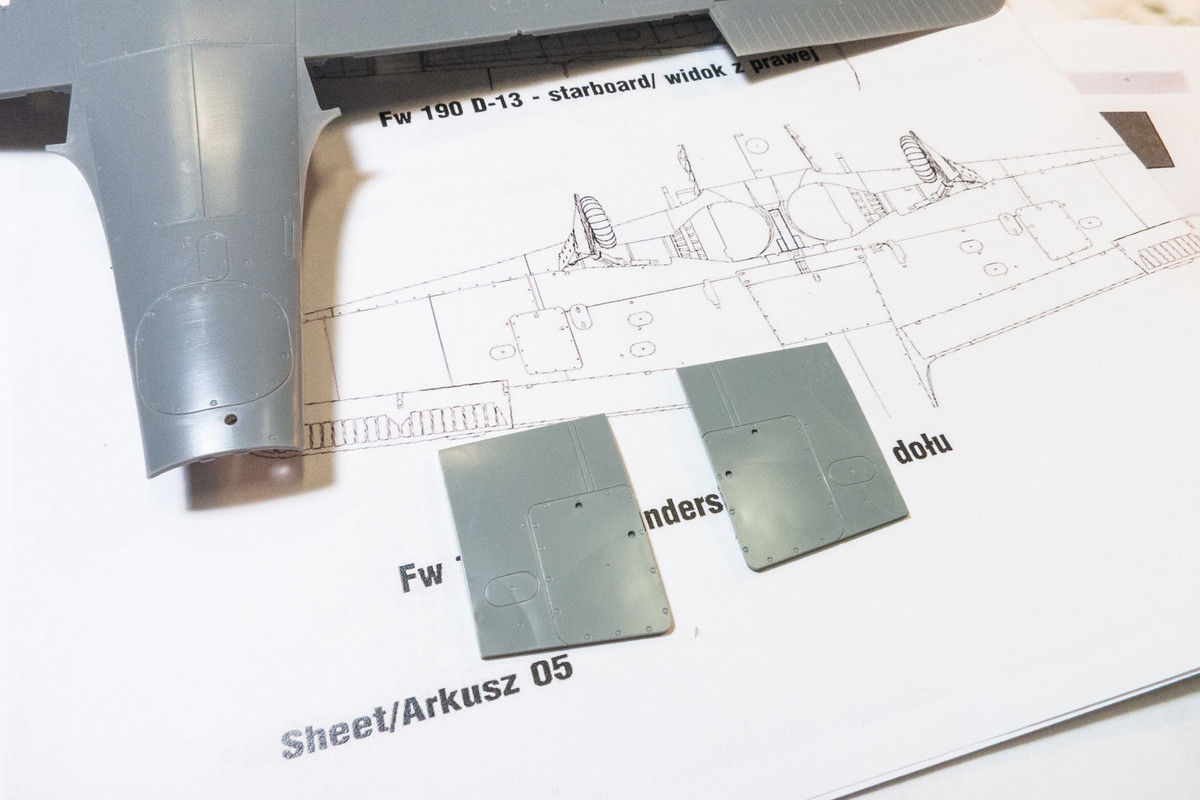
So after I glued the insert pieces into place, I filled the non-panel line joints with black CA glue.
Re: 1/32 Hasegawa Fw 190D-13 Yellow 10
Posted: Tue May 26, 2020 11:00 pm
by jkim
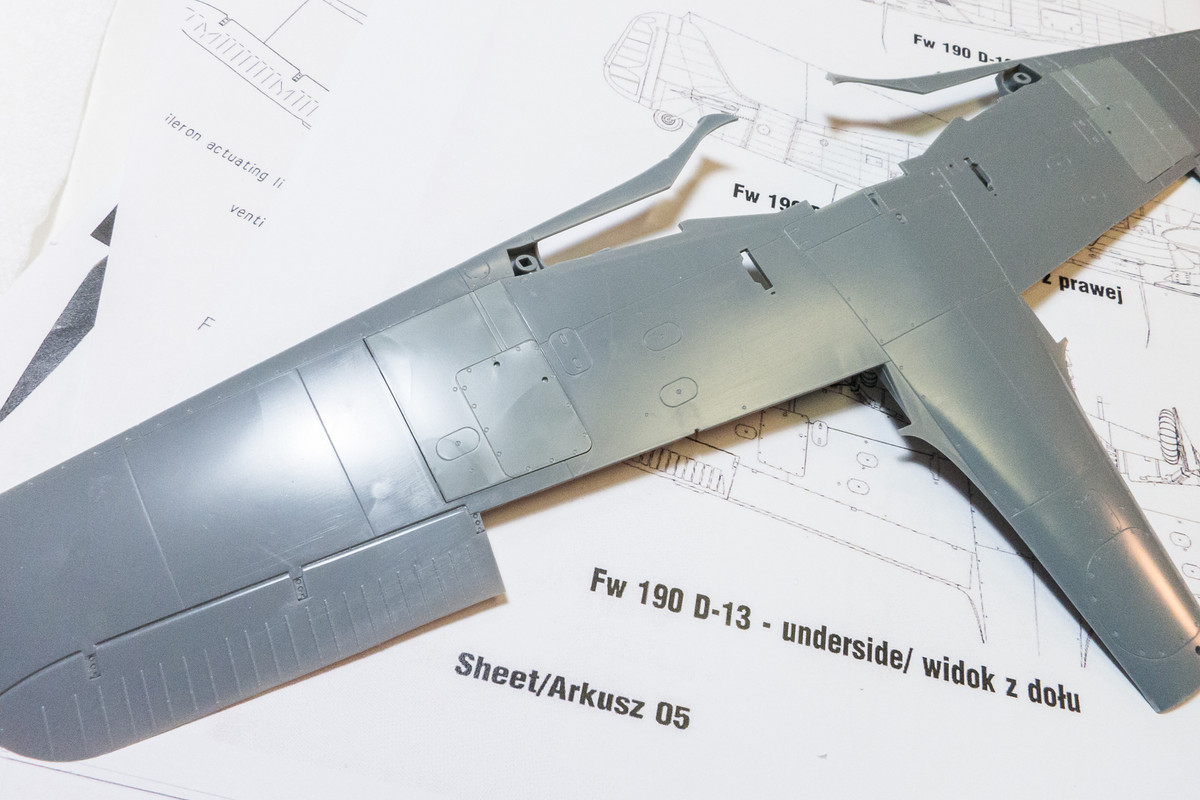
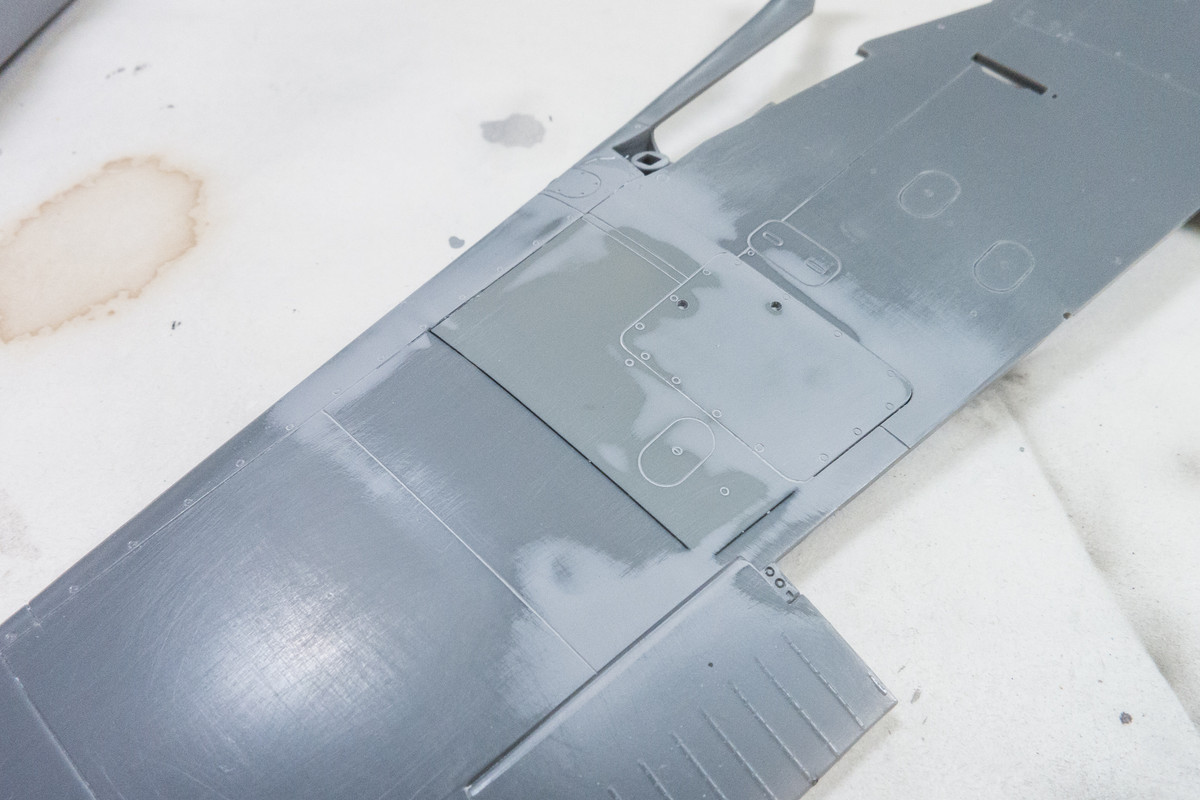
The wing insert panel has been dealt with. Looks a mess now but it should be work out nicely under a coat of paint.
Now I'm going to take a look at the Henri Daehne resin prop. This one is almost identical to the Ta152H prop that I just used except the prop mount is geared toward the Hasegawa D-9 kit. Surprisingly, there is a part missing... the backing washer that aligns the prop shaft from behind the radiator face is missing. Luckily, I have a bunch of HD D-9 props so I fished the missing part from one of those.
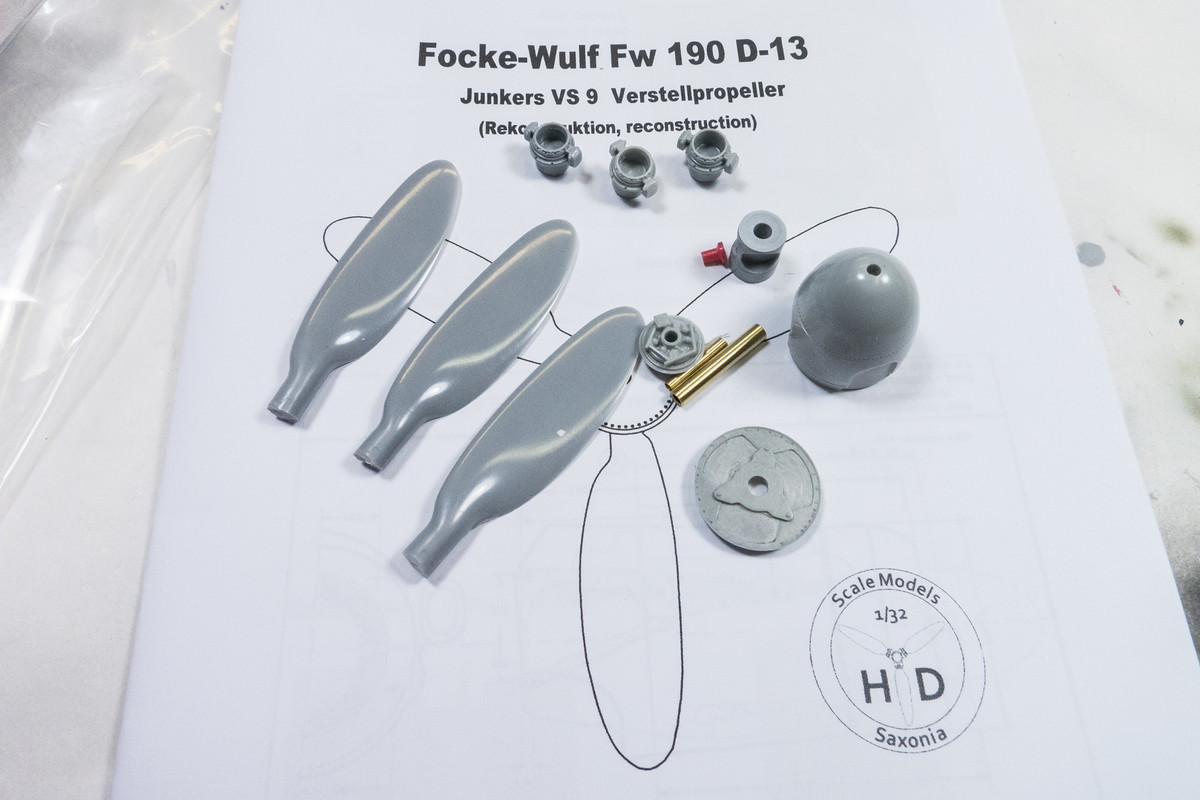
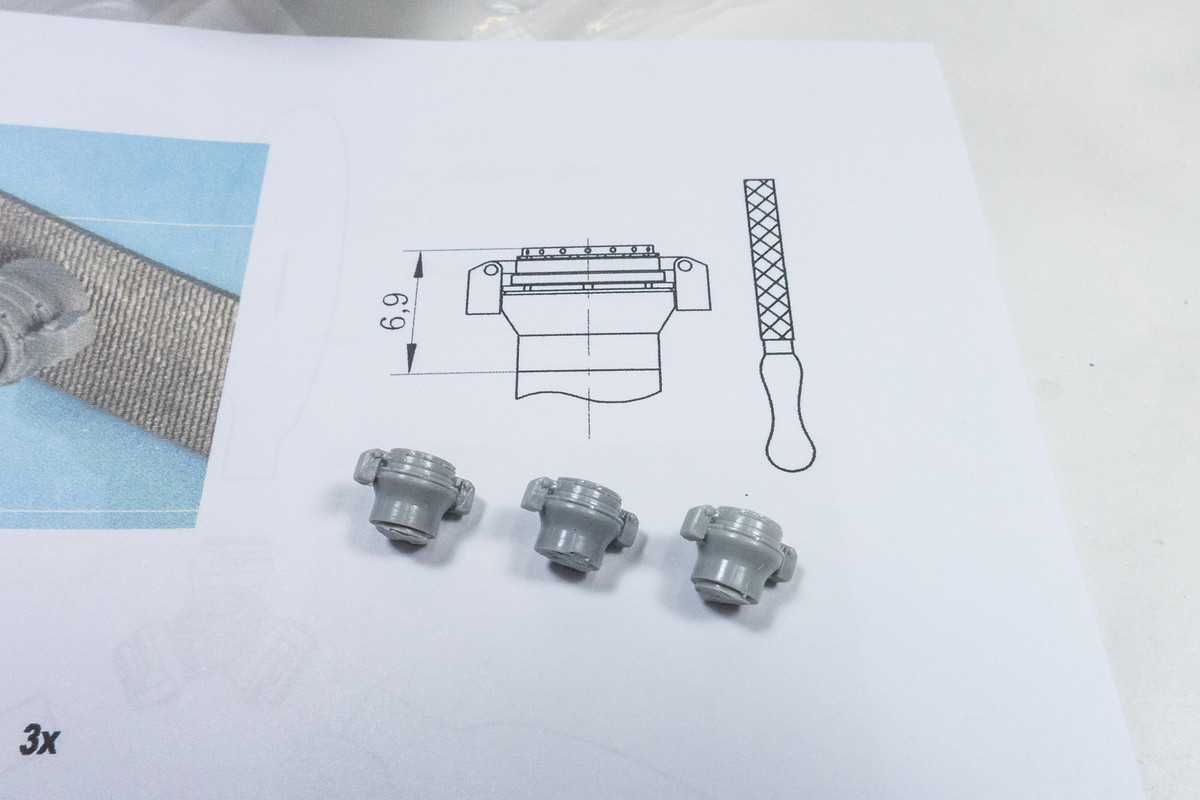
There is some removal of casting blocks to deal with but Mr. Daehne provides a fully detailed instruction sheets with exact dimensions which takes the guessing out of cleanup.
The rounded blade tips are the distinguishing feature between the D-13 and the Ta152H.
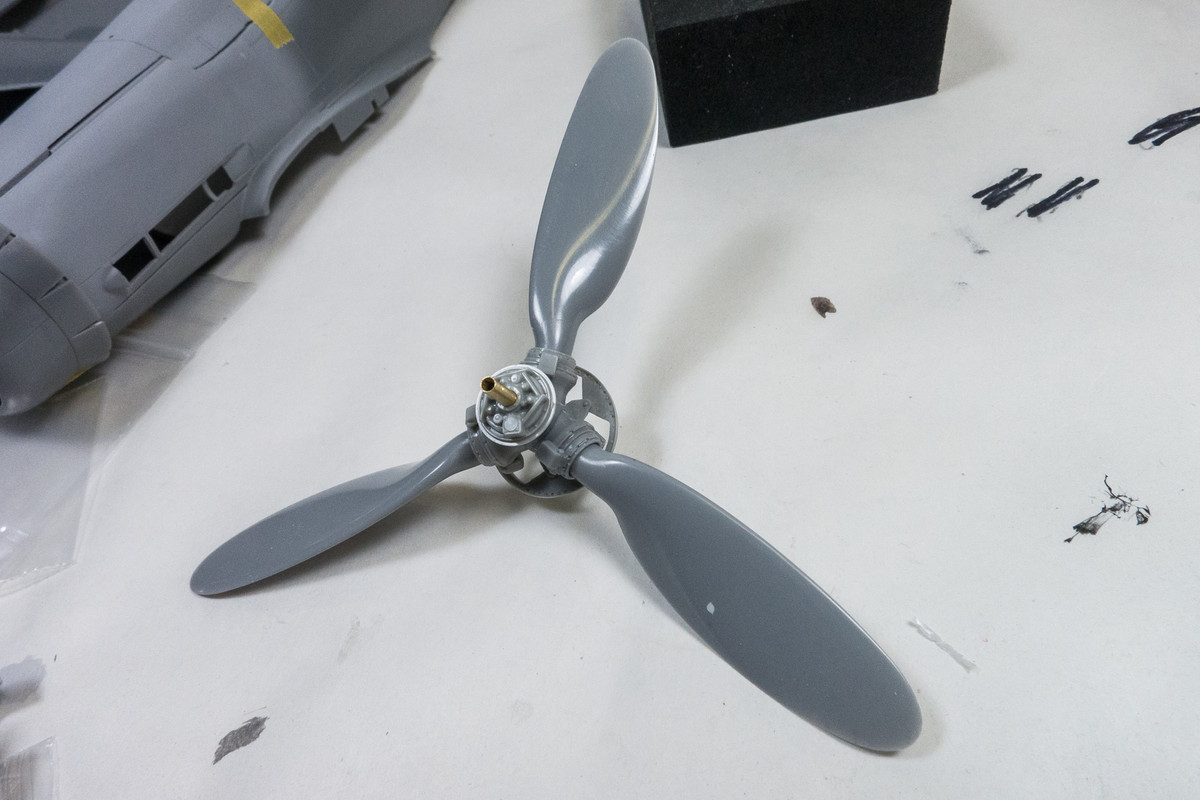
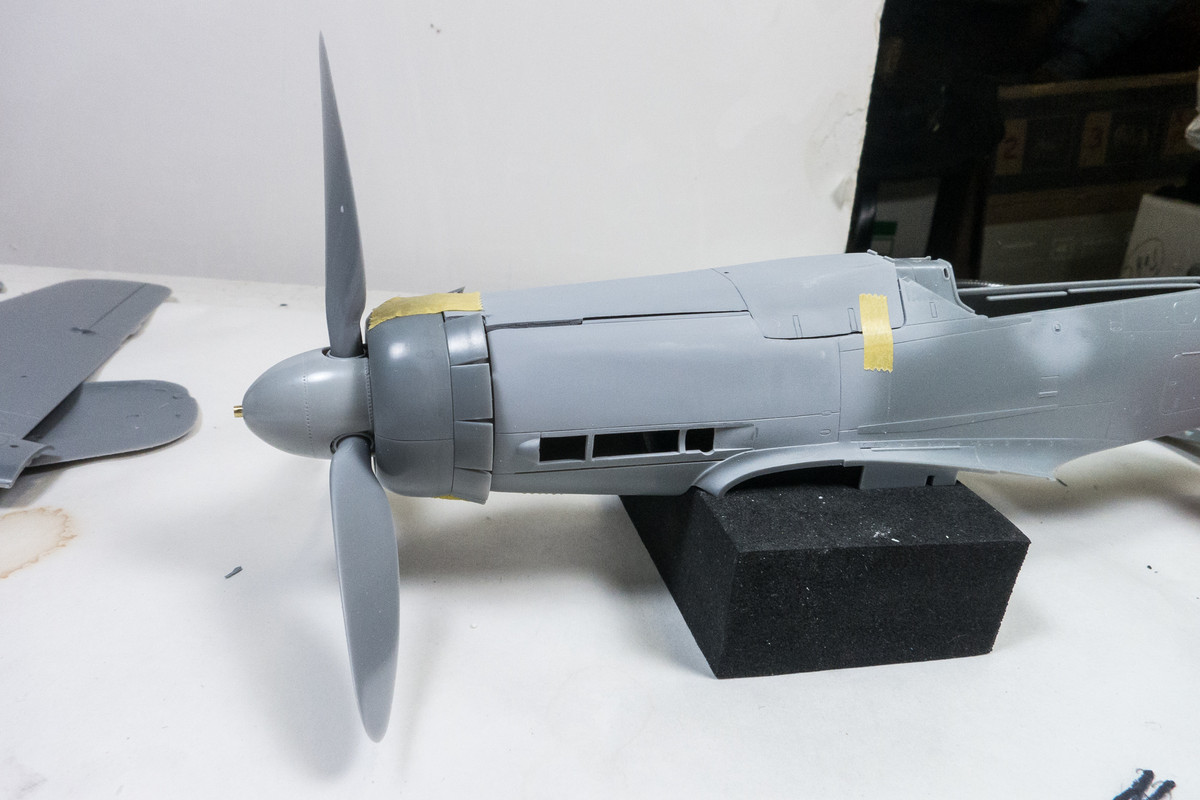
I double check the fit of the HD prop to the fuselage...

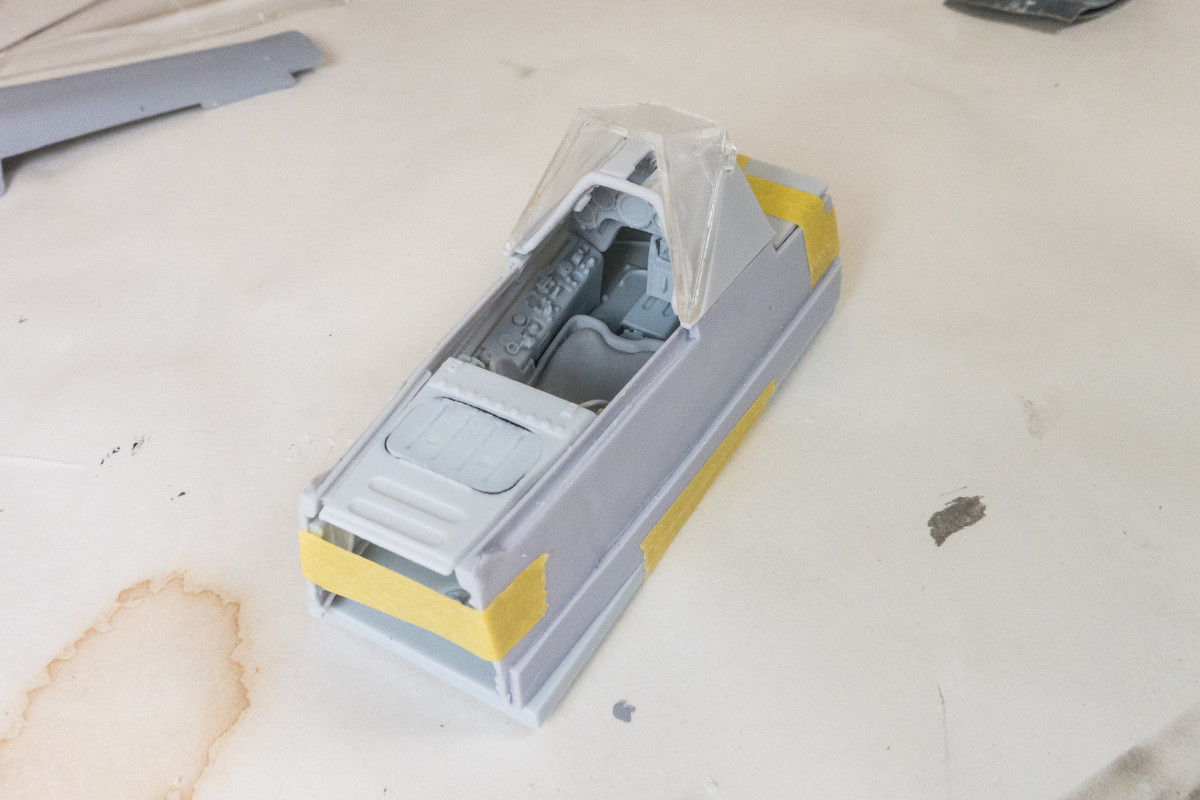
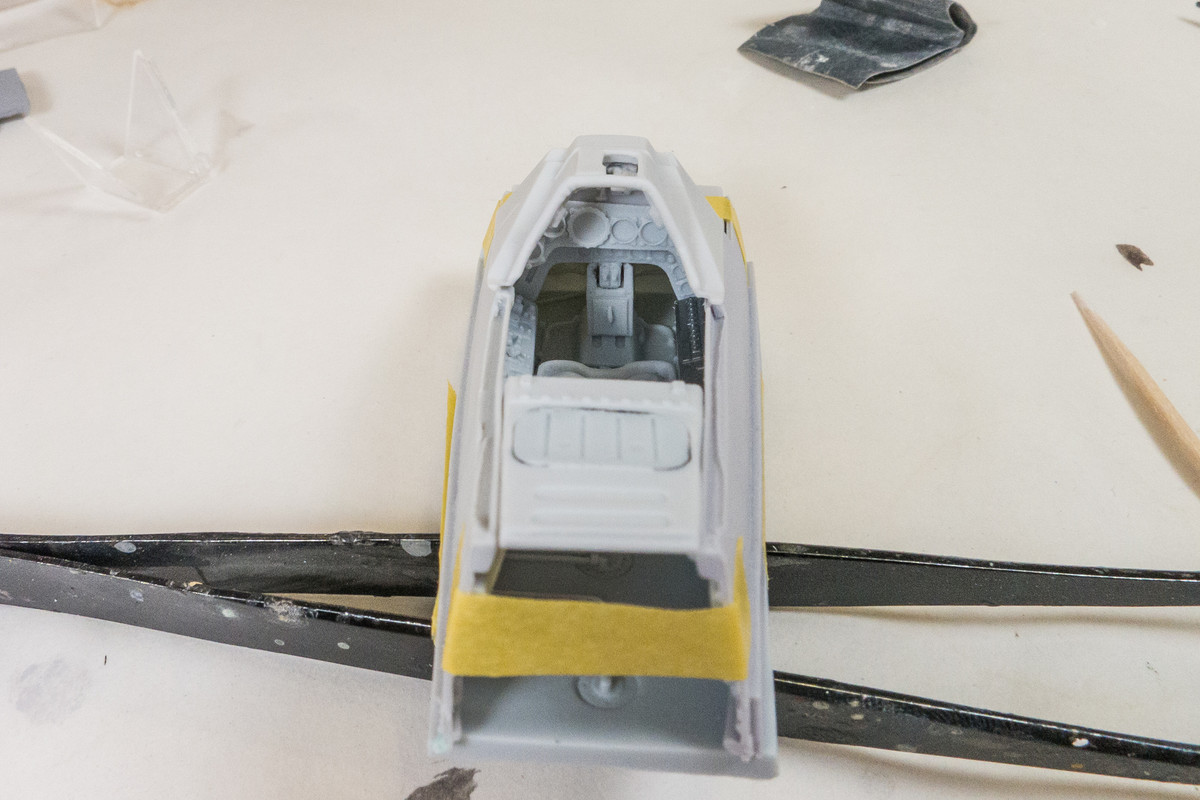
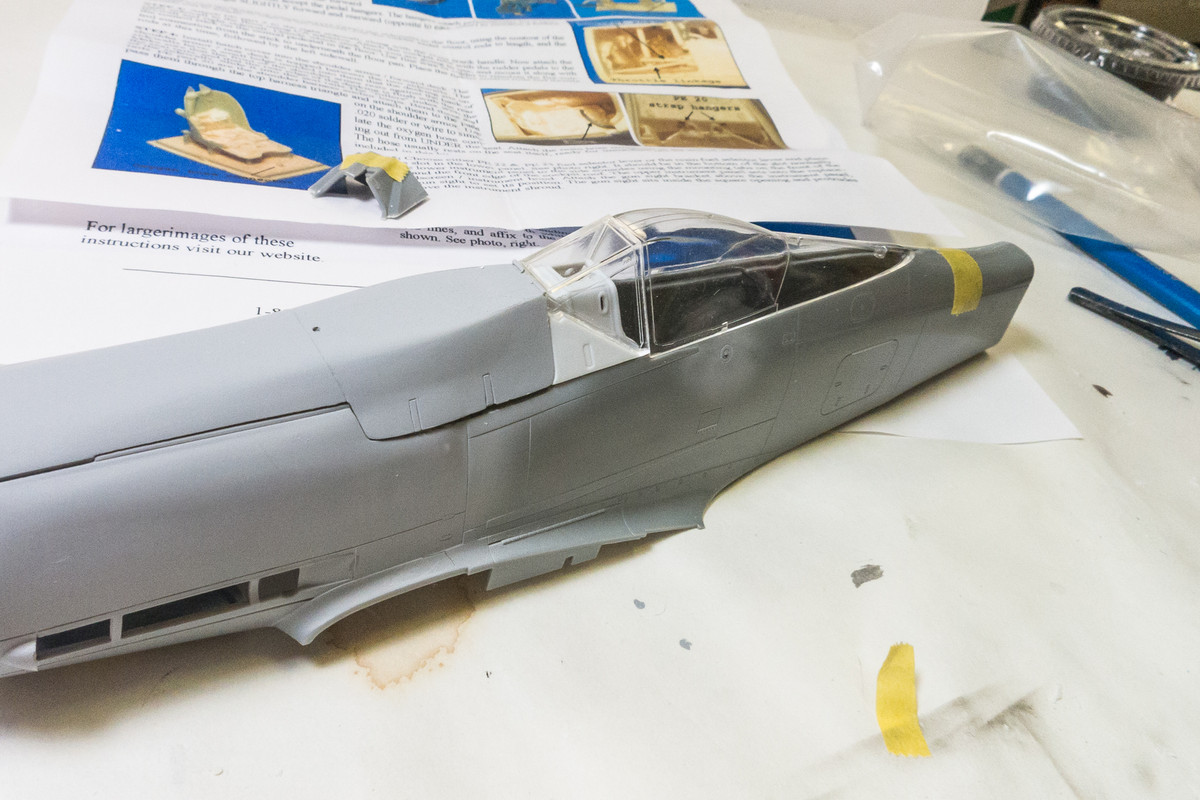
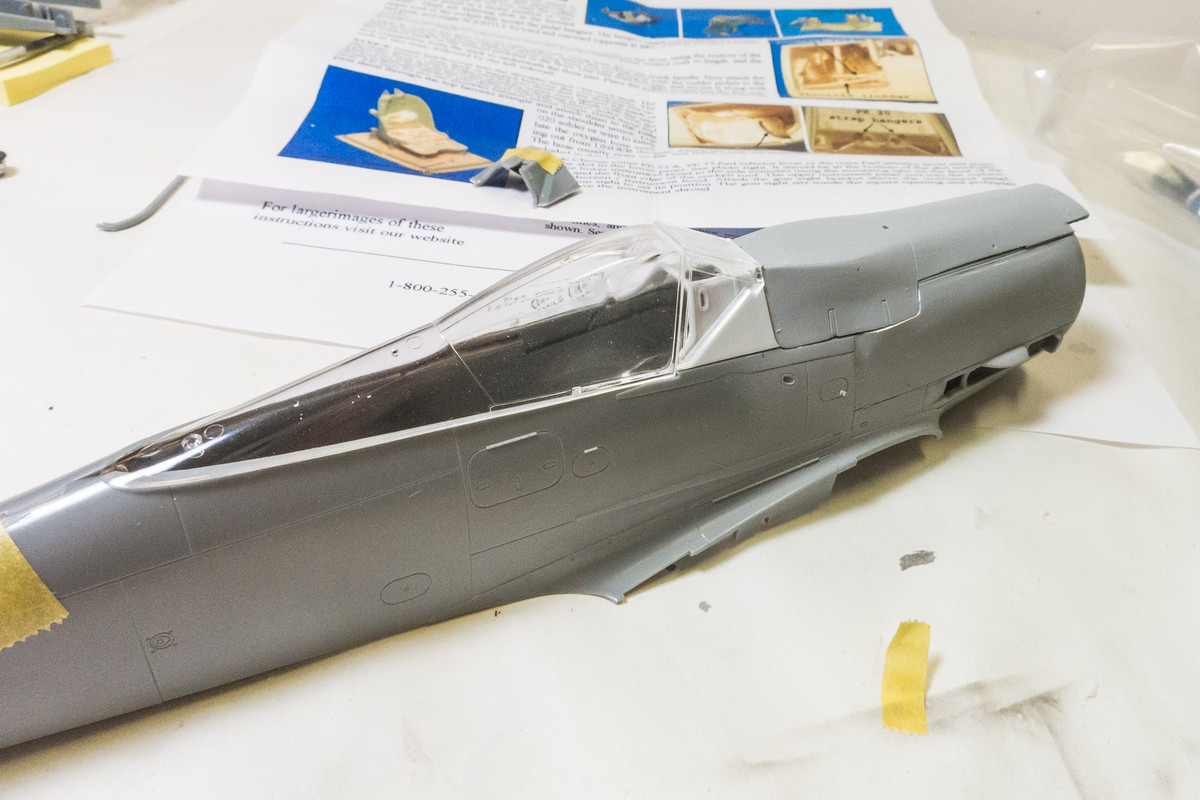
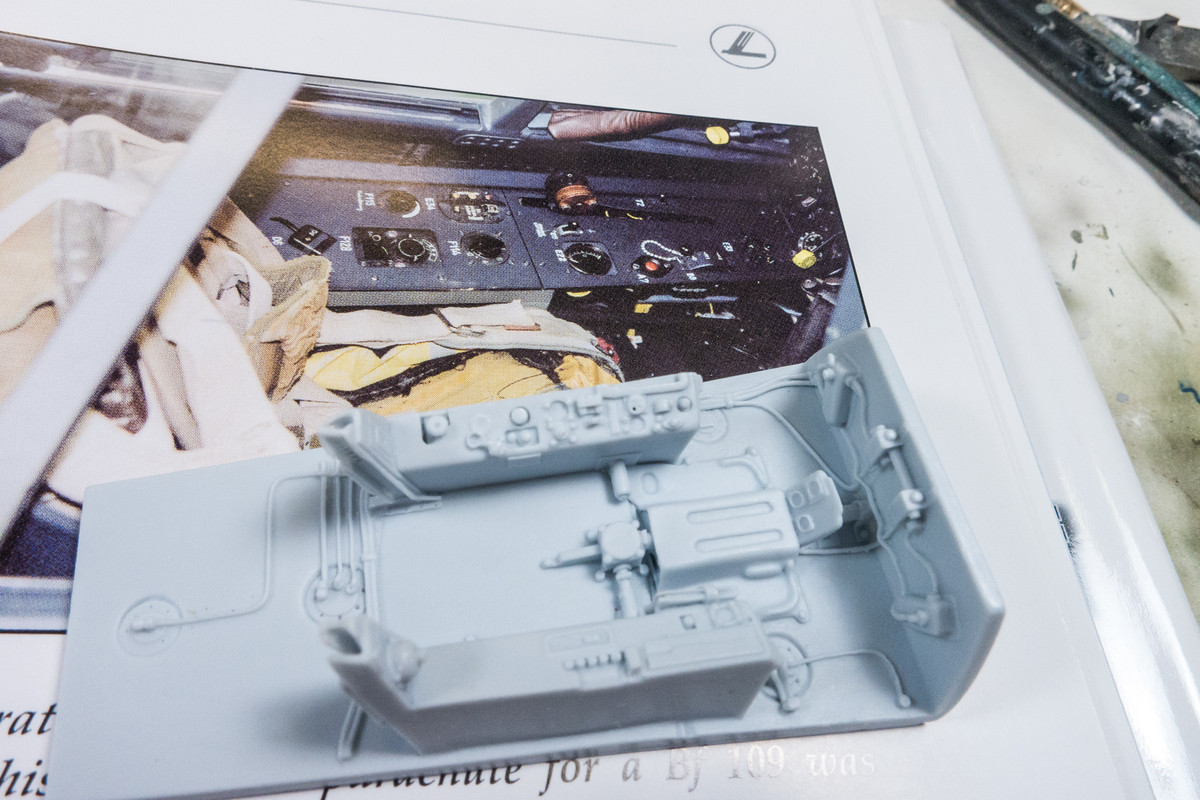
Finally jumping over what's normally the first step of any build... the cockpit! The Eagle Editions cockpit for the D-9 is molded in a light-colored resin. This is not a plug-n-play set and will require some removals and shaving of the fuselage insides to make it fit.
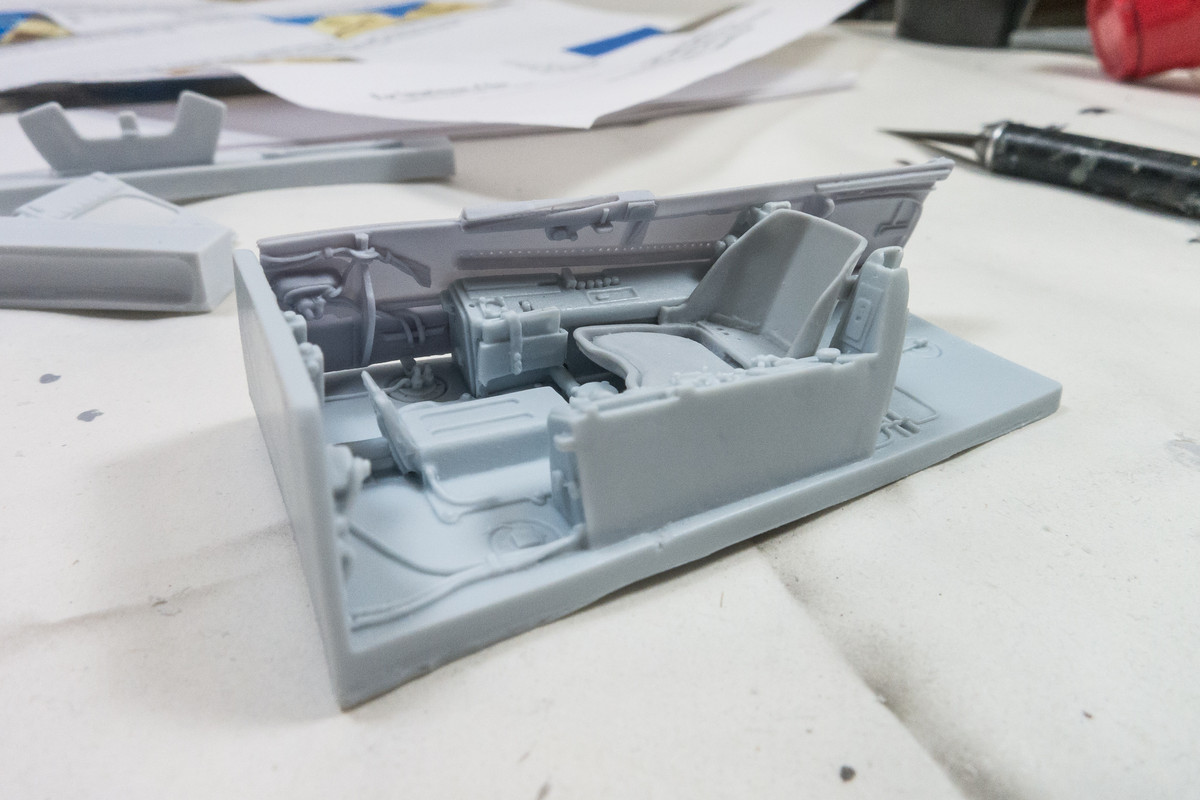
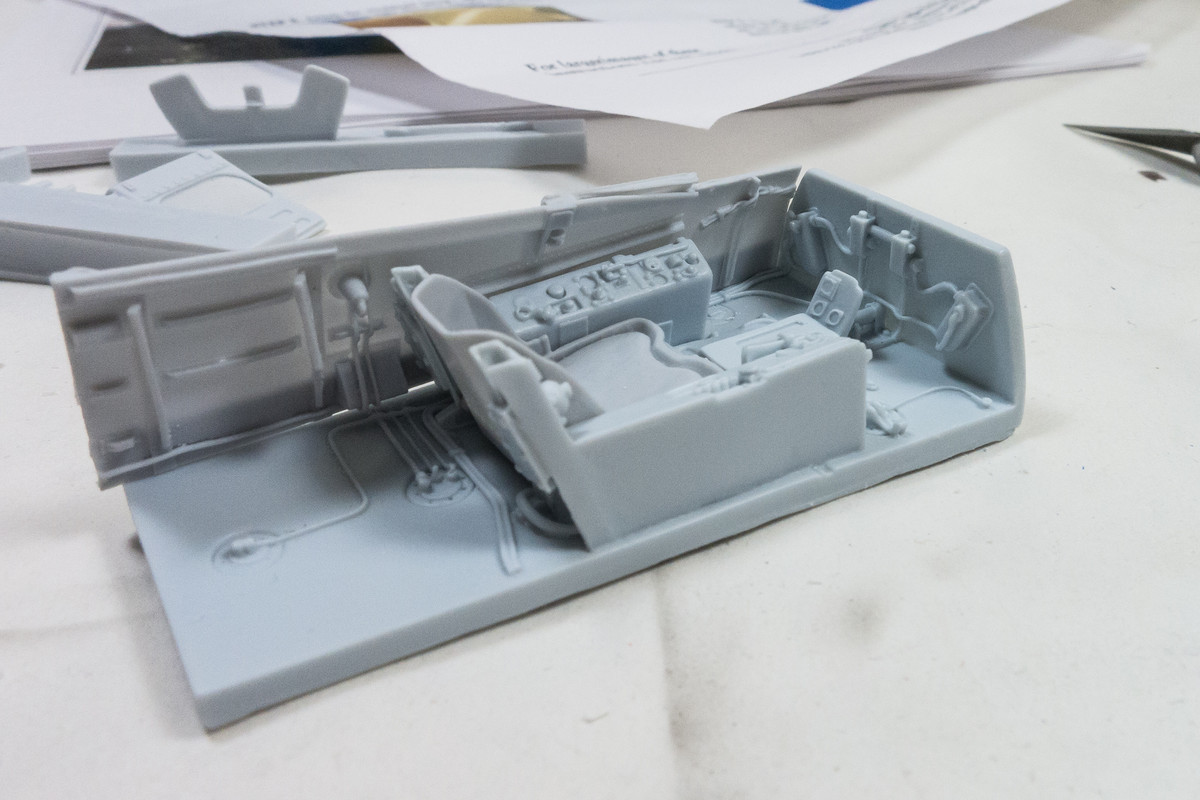

I have limited references on the D-13 cockpit and I'm not sure how accurate these references are. But I went ahead and made some changes based on the photos found in Mr. Crandall's Dora Volume 2.
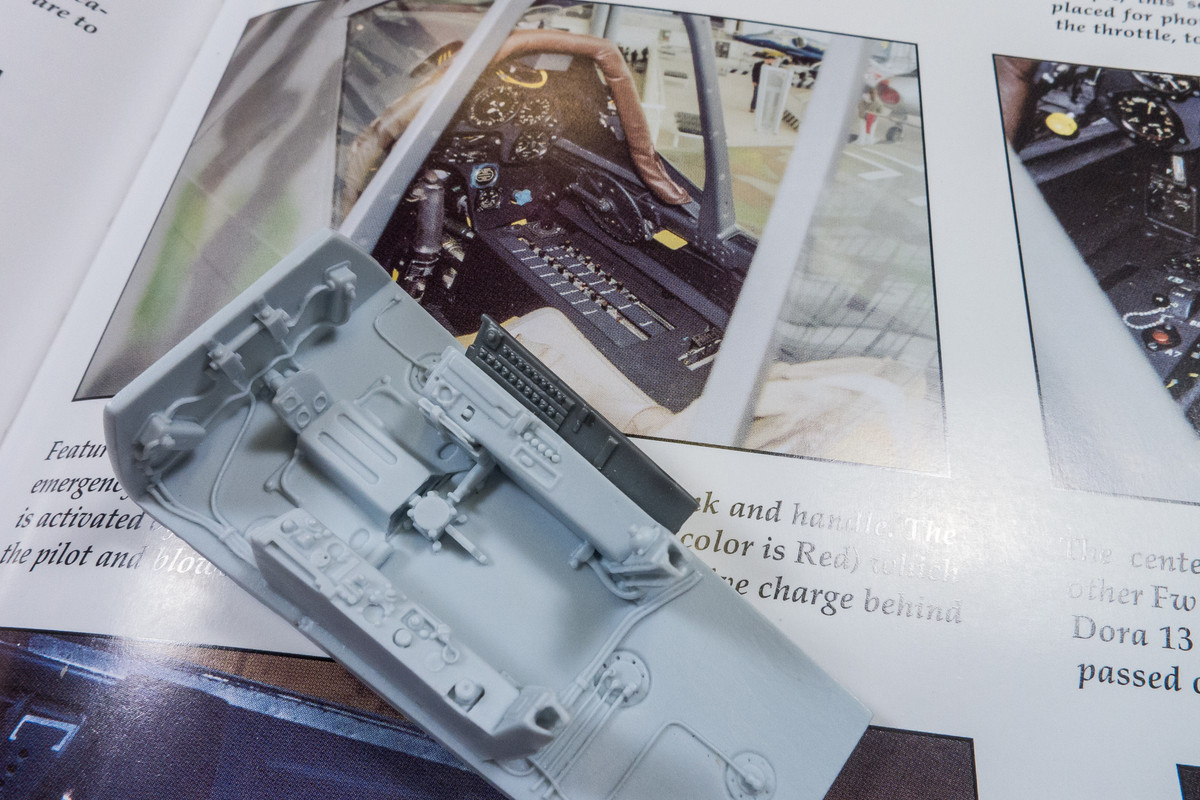
The D-13 has a cannon firing through the spinner and the cannon breech supposedly intrudes into the cockpit between the rudder pedals. I've never seen a photo of this breech but I think the center section of the instrument panel will hide it. The Eagle Editions cockpit comes with a bomb-control panel that seems to sorta kinda of match the panel in the photo.

The starboard console looks very similar to the console in the Ta152H. Coincidentally, I have the kit pieces for both consoles from the Ta152H build since I used the RB Productions photo etch replacements. It's a pretty easy grafting job to put the Ta152H panel onto the D-9 cockpit.
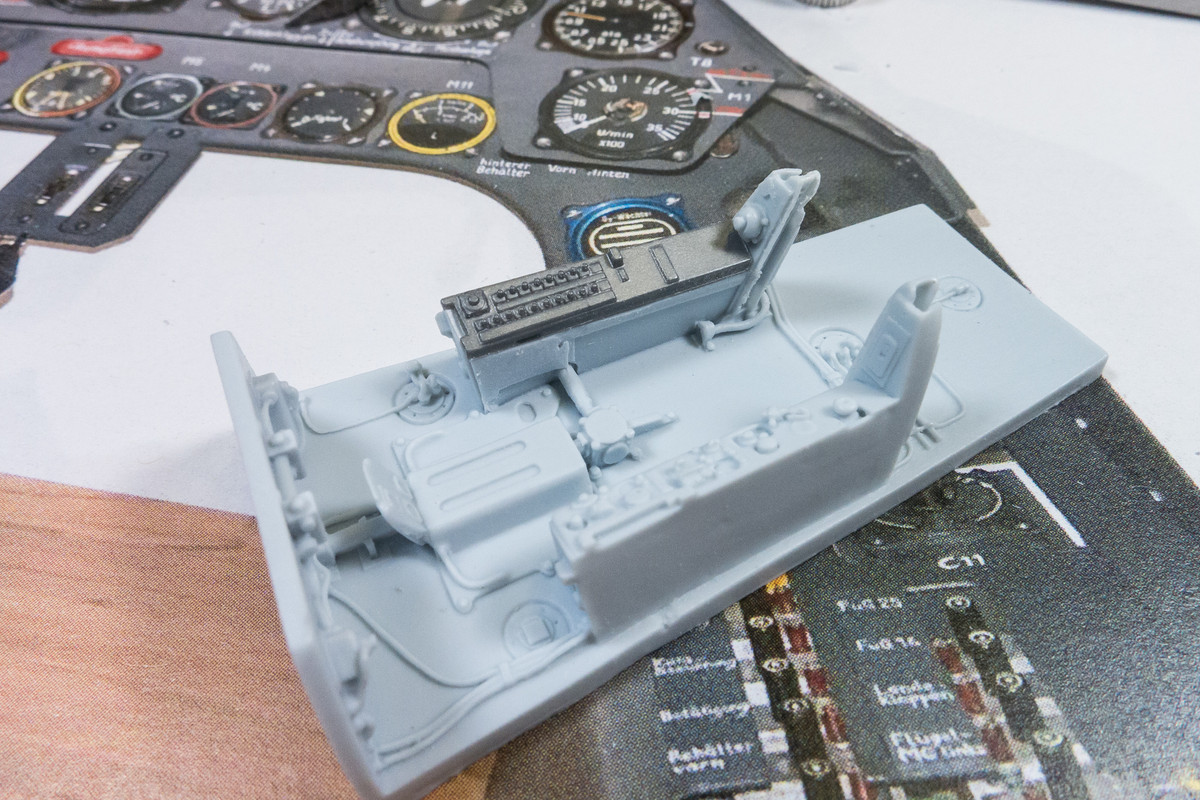
The port console is close enough to keep as is.
Re: 1/32 Hasegawa Fw 190D-13 Yellow 10
Posted: Tue May 26, 2020 11:36 pm
by Floki
Some really nice looking resin. I love seeing them HD props they are so well made. Hope adding the cockpit won't be to much of a headache since you have to modify the kit sidewalls.
Re: 1/32 Hasegawa Fw 190D-13 Yellow 10
Posted: Tue May 26, 2020 11:45 pm
by Stuart
It all looks fantastic John - superb detail work!
Re: 1/32 Hasegawa Fw 190D-13 Yellow 10
Posted: Thu May 28, 2020 10:32 am
by jkim
Re: 1/32 Hasegawa Fw 190D-13 Yellow 10
Posted: Thu May 28, 2020 12:14 pm
by Stikpusher
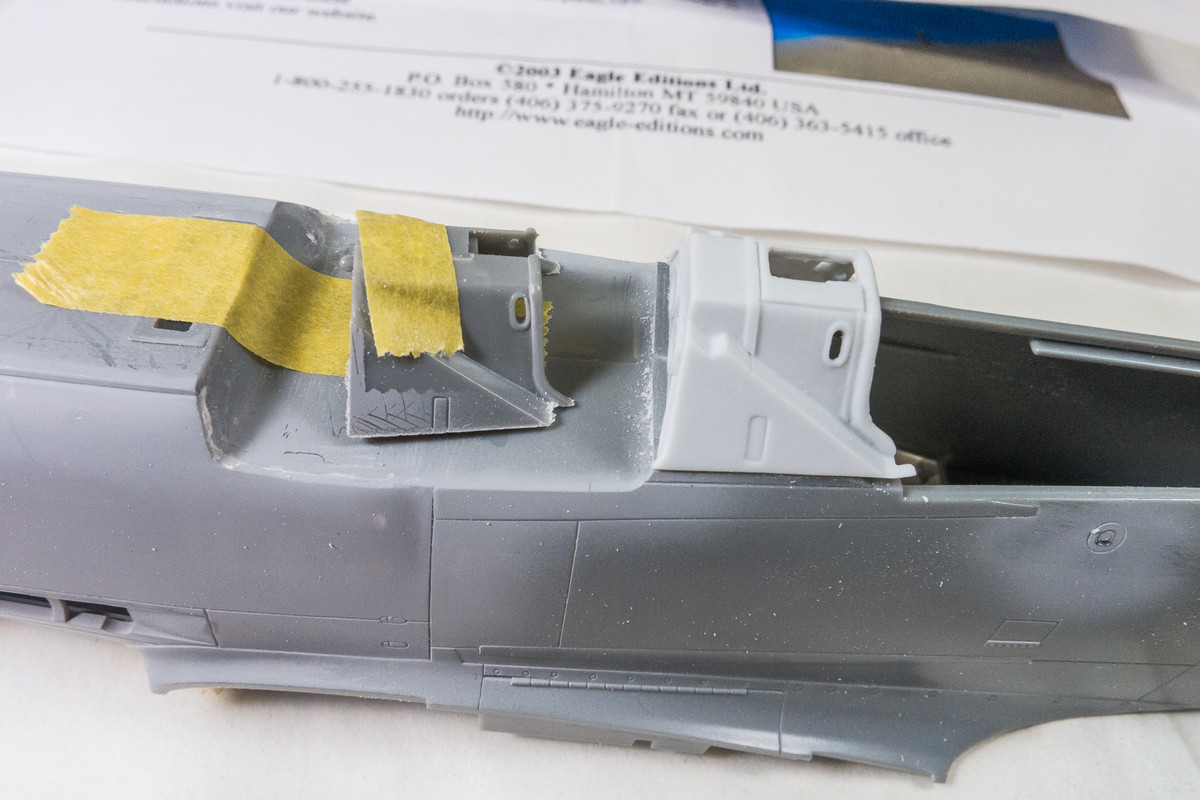
This looks to be progressing very smoothly with the cockpit work. How do plan to thin the fuselage sides? With a motor tool?
Re: 1/32 Hasegawa Fw 190D-13 Yellow 10
Posted: Thu May 28, 2020 1:38 pm
by jkim
I scraped the raised details away with a knife and then went at it with coarse sand paper. I have a hard time maintaining a uniform surface when using the rotary tool that I have. Even at the lowest speed, the heat generated is enough to melt plastic.
Re: 1/32 Hasegawa Fw 190D-13 Yellow 10
Posted: Thu May 28, 2020 3:19 pm
by Stikpusher
Yes, it takes a very light touch to do that sort of work with a grinding bit on the motor tool. Do you use some sort of sanding block with the paper?
Re: 1/32 Hasegawa Fw 190D-13 Yellow 10
Posted: Thu May 28, 2020 5:07 pm
by speedgraflex
John, I am sure you know about this cache of photos of the D-13 restoration but I found these to be useful!
https://gosshawkunlimited.com/services/ ... 90d-13r11/
Apologies for jumping in outta the blue.
Re: 1/32 Hasegawa Fw 190D-13 Yellow 10
Posted: Thu May 28, 2020 6:06 pm
by BlackSheep214
He makes it look too easy.

Seriously, you are a master. I always enjoy watching all your builds come together from start to finish.