Thanks for the awesome replies guys!
Bruce, thanks! I agree with most of what you said there. My feeling is "does it look like the vehicle/aircraft/ship that it is supposed to look like?" I try to do mu best on everything, but there comes a time when I just have to move on. With simpler and more fun kits to build; that becomes easier. I, however, do love to see the detail on my models. Weathering is the toughest for me so I just leave it last on the list.
Thanks for the compliments on my game concept. I don't know how I could put the US or British in the scenario as this is strictly an Eastern Front locale. Some of the German Armored Trains did achieve a speed coming close to 45mph on straight runs, and for all practical purposes, this will be one long, straight run. I don't know how to 'bend' the track and move the bend across the board without tumbling the train off it. Hills would also be difficult as they could potentially disrupt the board. Otherwise, the terrain in the form of trees, rocks, possibly cabins and other obstructions that could easily be moved would certainly make the terrain another character.
As for the players, it will be possible to have two overall 'commanders' and up to four each 'subcommanders'. The overall commanders would command the Russian Aerosans and German train. Meanwhile the subcommanders would command a section of Aerosans; or even one each Aerosan for the Russians; and the German subcommanders would command select cars in the train. Up to ten people could potentially play this game. I do still need to play test it.
Blacksheep, thanks! It s quite small; less than two inches in length.
Maddog Manufacturing 2018 Production
- Duke Maddog
- Elite Member
- Posts: 7082
- Joined: Tue Jun 03, 2014 11:22 am
- Location: Rowland Heights, CA
Re: Maddog Manufacturing 2018 Production
The Duke
Virtuoso of Miniatures
"Do you know what the chain of command is? It's the chain I get and beat you with 'till you understand who's in ruttin' command!"
-Jayne Cobb, Firefly Episode 2 "The Train Job"
We are modelers - the same in spirit, in hunger to insanely buy newly released kits, hustlers in hiding our stash from our better halves and experts in using garbage as replacements for after-market parts.
- speedgraflex
- Moderator
- Posts: 9750
- Joined: Fri Feb 10, 2017 11:08 pm
- Location: Santa Monica, California
- Duke Maddog
- Elite Member
- Posts: 7082
- Joined: Tue Jun 03, 2014 11:22 am
- Location: Rowland Heights, CA
Re: Maddog Manufacturing 2018 Production
No I hadn't. Looks interesting. I might have to search that one out and acquire it. Thanks Bruce.
The Duke
Virtuoso of Miniatures
"Do you know what the chain of command is? It's the chain I get and beat you with 'till you understand who's in ruttin' command!"
-Jayne Cobb, Firefly Episode 2 "The Train Job"
We are modelers - the same in spirit, in hunger to insanely buy newly released kits, hustlers in hiding our stash from our better halves and experts in using garbage as replacements for after-market parts.
Virtuoso of Miniatures
"Do you know what the chain of command is? It's the chain I get and beat you with 'till you understand who's in ruttin' command!"
-Jayne Cobb, Firefly Episode 2 "The Train Job"
We are modelers - the same in spirit, in hunger to insanely buy newly released kits, hustlers in hiding our stash from our better halves and experts in using garbage as replacements for after-market parts.
- Duke Maddog
- Elite Member
- Posts: 7082
- Joined: Tue Jun 03, 2014 11:22 am
- Location: Rowland Heights, CA
Re: Maddog Manufacturing 2018 Production
Okay, here is a long update, focusing on all I did over the past few weeks when I had the time.
I'll start with my Mirage IIICZ for the African campaign I'm doing on another Forums. They call "Group Builds" campaigns over there.This past couple weeks I tried to focus on finishing a couple of those campaigns and this is the result.
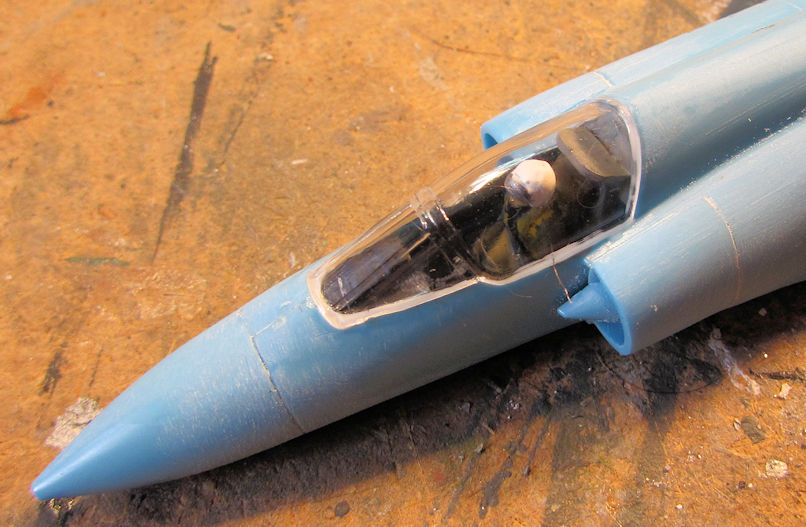
Last you saw I had the whole thing closed up. After that I painted the pilot in situ and then closed him up under the canopy:
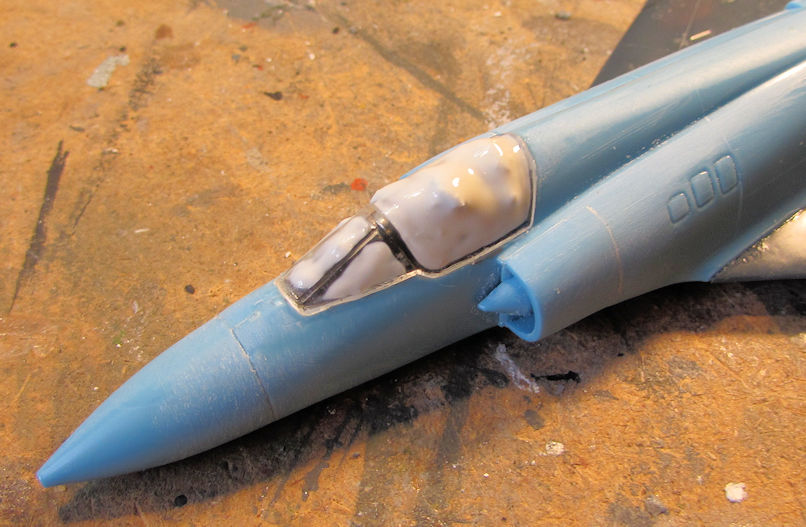
Later I masked the canopy to prepare for painting:
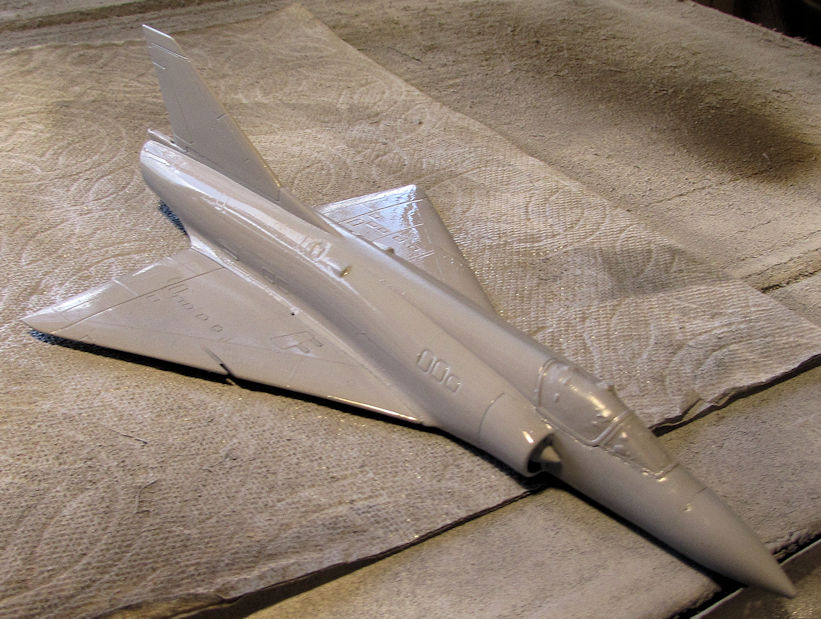
After that dried, I shot the top of the plane with primer. It is still wet in this pic:
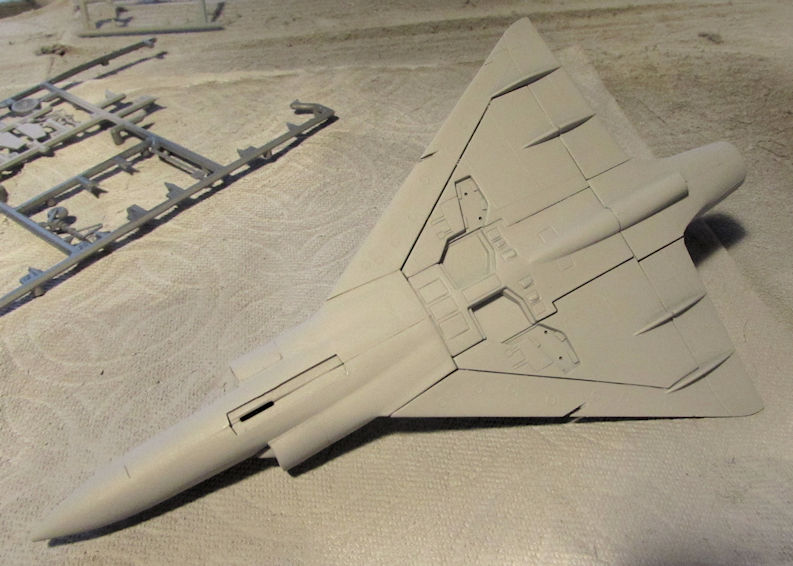
The bottom was sprayed later once the top dried:
Over all that, I shot a coat of Tamiya Bare Metal Silver right out of the rattle can:
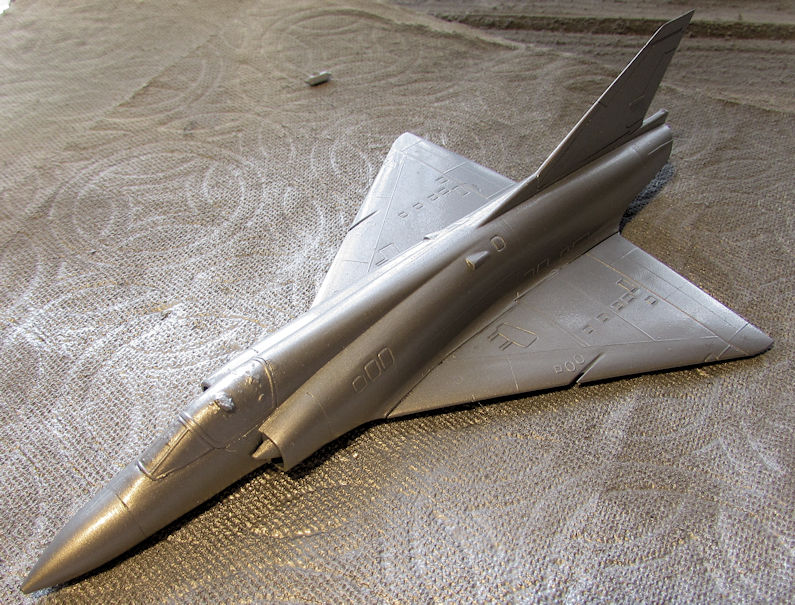
Man that stuff shoots on smooth....
I was then ready to start applying the decals to this, but then I looked at the version I wanted to do:
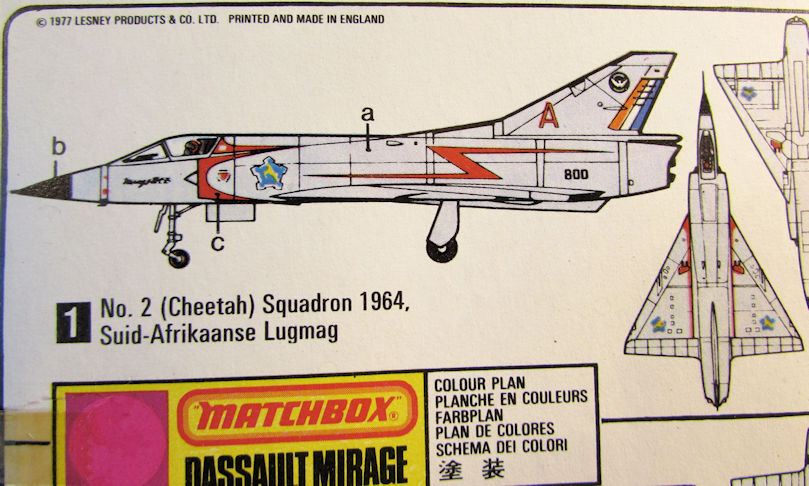
The red lines behind the cockpit, on the edges of the intakes, and down the wing roots were not included as decals. Out came the masking tape.....
I masked off the lines, as well as the nose cone in preparation for paint:.
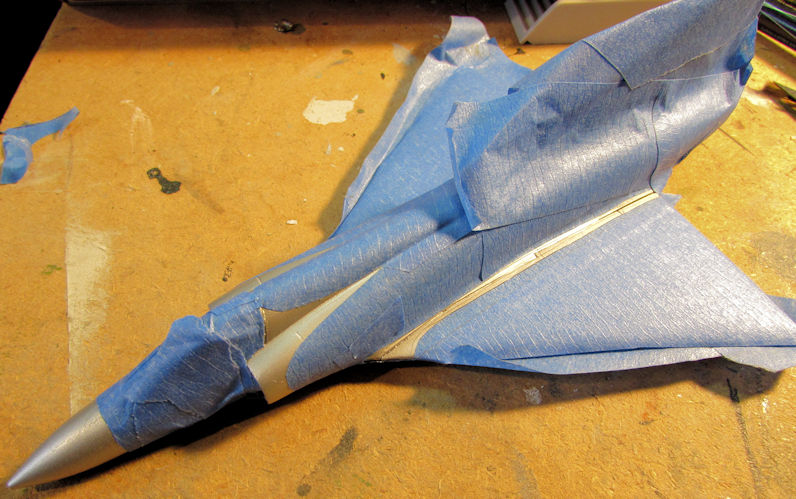
First I shot the nose cone:
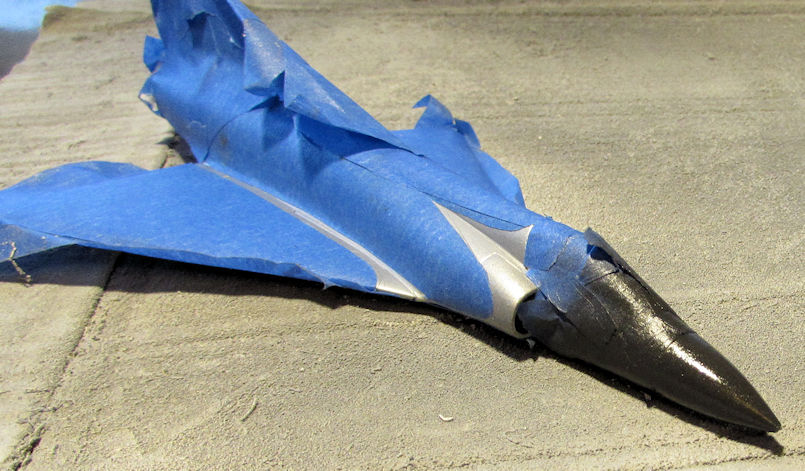
Then I shot the red lines:
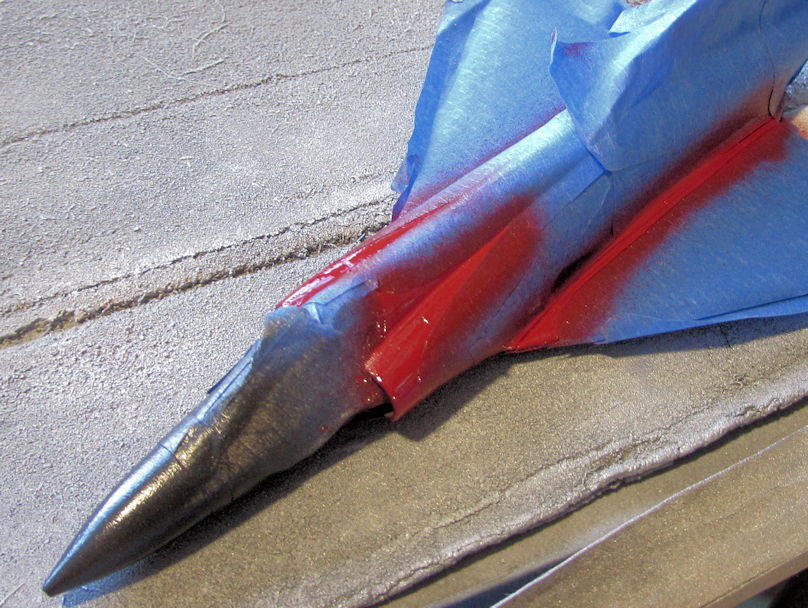
It turned out better than I had hoped it would:
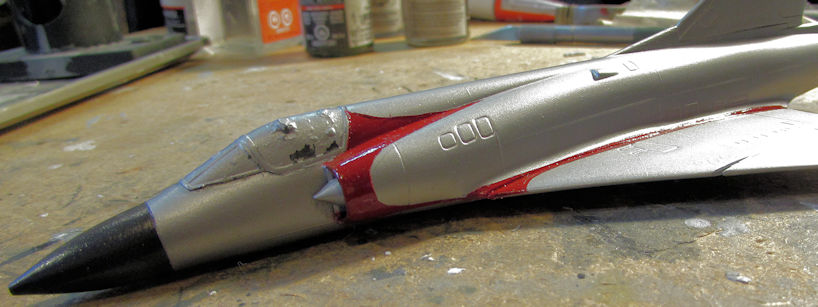
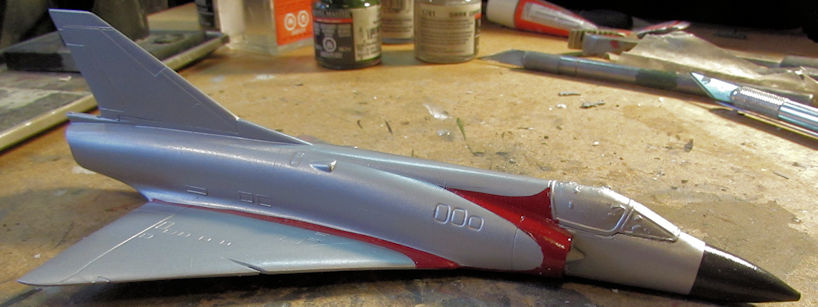
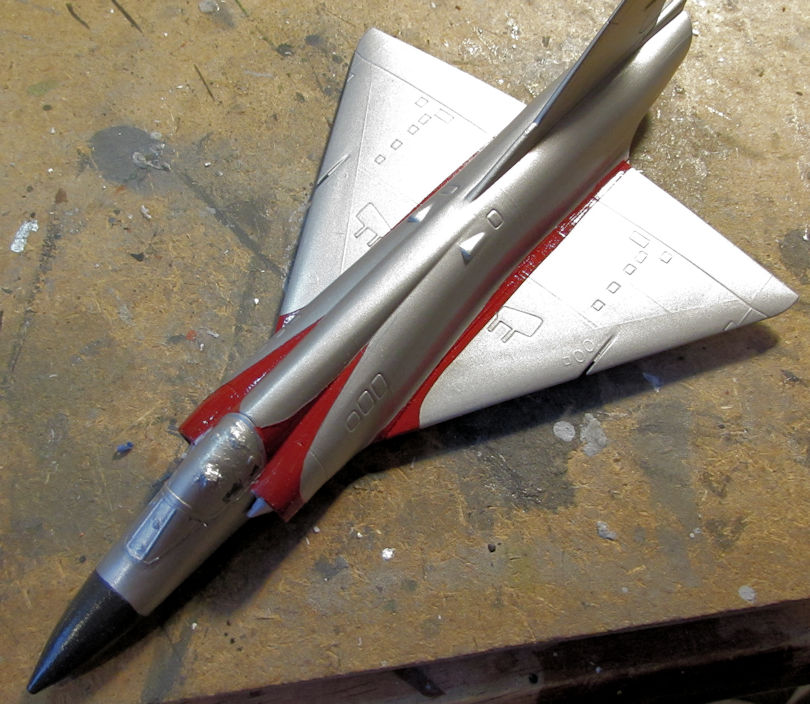
After that, I applied the decals, added the landing gear and gear doors and finished it up. Finished pics will be in the completed aircraft Forum.
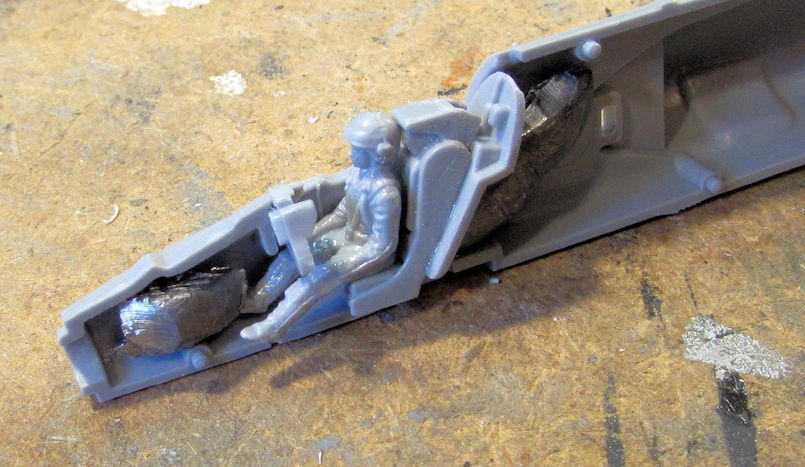
I was doing this South African Mirage so quickly that I found another Mirage in the stash that had South African markings on it. So, I pulled out this Mirage F.1C and got started on it. First I added the pilot to his seat, then cemented his seat to the rear bulkhead, and then cemented the whole assembly inside the fuselage half along with the IP. That was all the cockpit this kit gave me. I also added some weight in the nose to keep this bird on her feet:
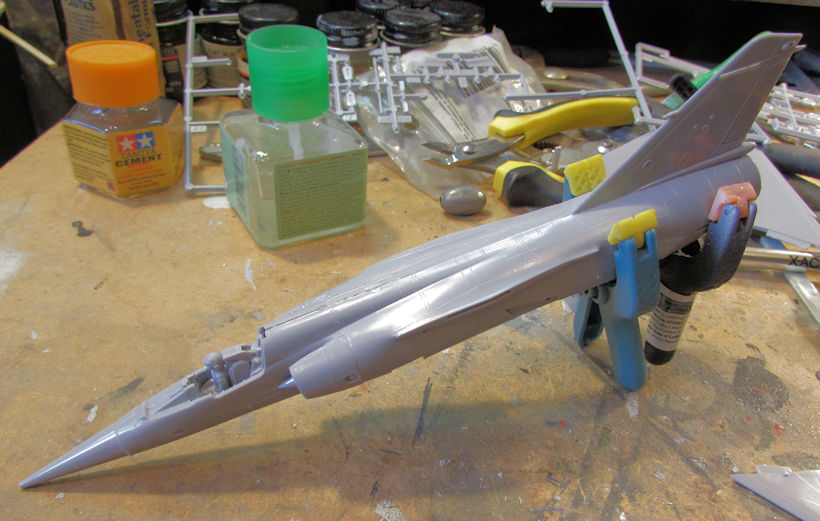
After that was dry, I closed up the fuselage halves and clamped them to seal them as best I could:
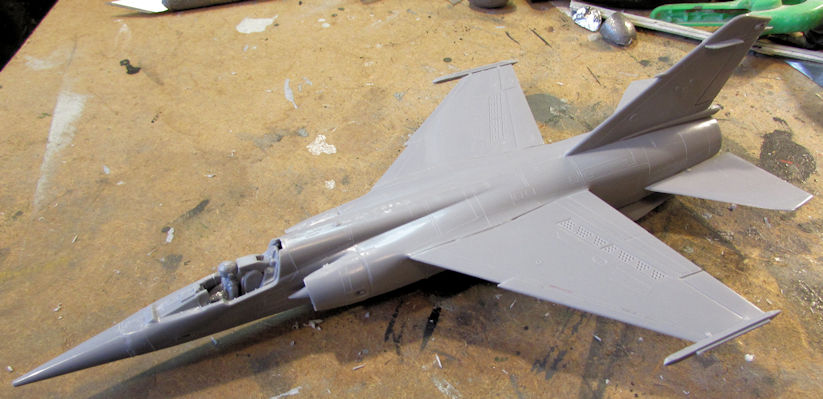
Naturally the wings and tail surfaces came next:
Once that was dry, I painted the pilot, seat and IP inside the fuselage and then added Mr. Surfacer 500 to the seams that most needed attention:
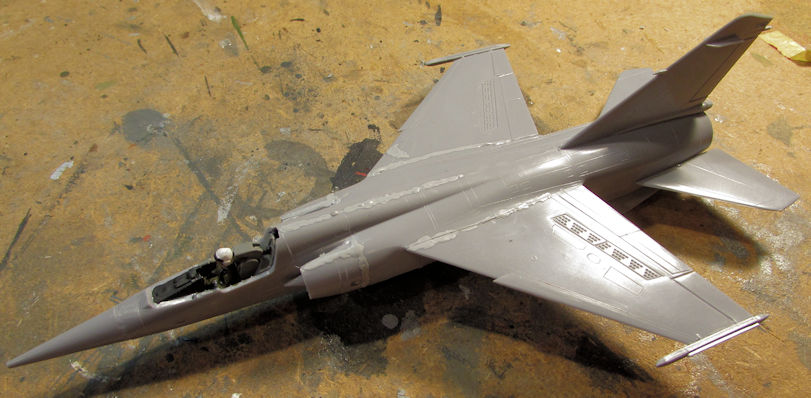
That is drying now so I'll give it some attention later.
On to my armor....
In armor, I also focused on my campaign model, this one is for the Micro Modeling Month campaign that challenges one to try and finish a (small) model in one month. I was trying to finish my T-80UM1 before the end of this month. As you may recall, I had done most of the turret and hull. Looking at the turret, I noticed a lot of sink marks on the lower shielding on the turret. I applied a few dabs of Mr. Surfacer 500 to the sink holes and waited for it to dry:
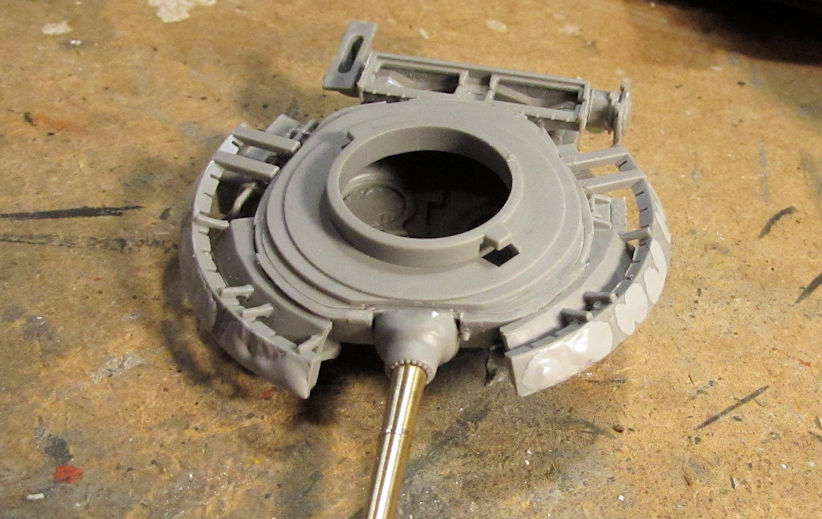
It sanded out quite nicely afterward....
I also finished almost all the fiddly bits and such for the hull and turret in preparation for P/E:
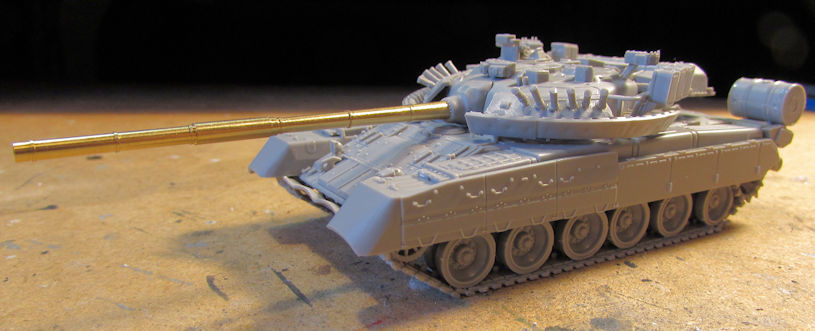
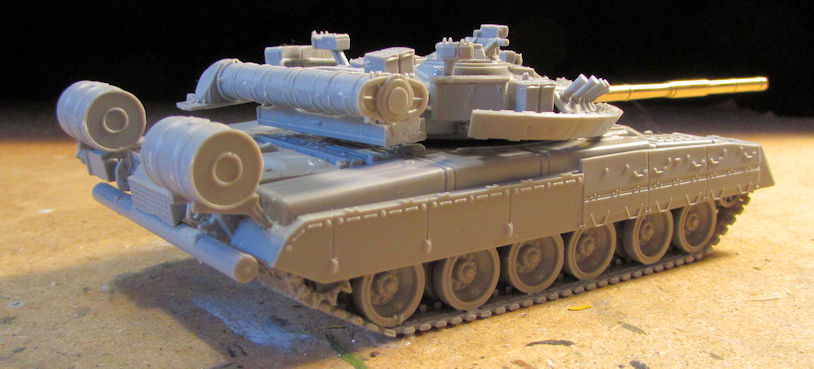
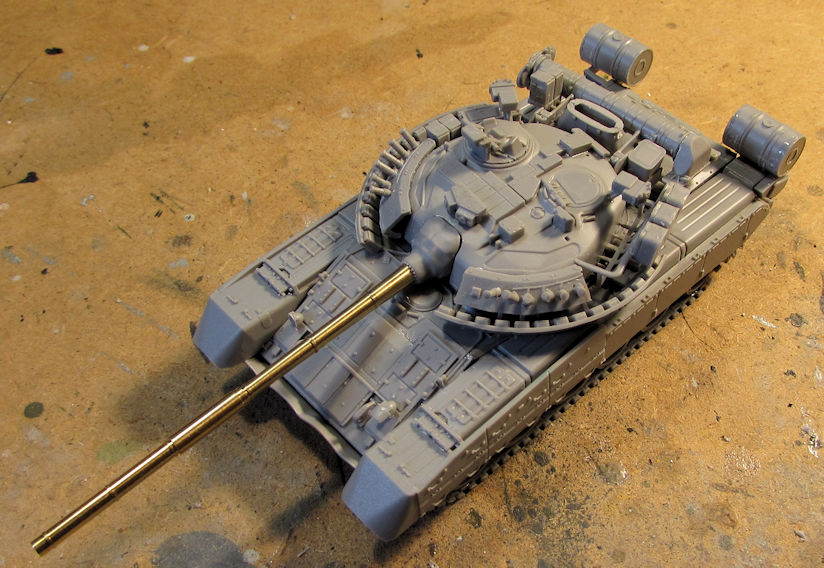
You can see that I used the metal barrel this time. It glued far better than the previous T-80 barrel did.
Here it is after I added all the P/E to it:
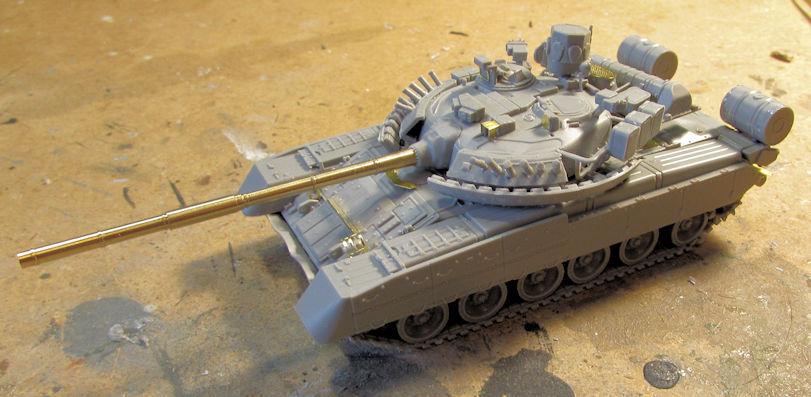
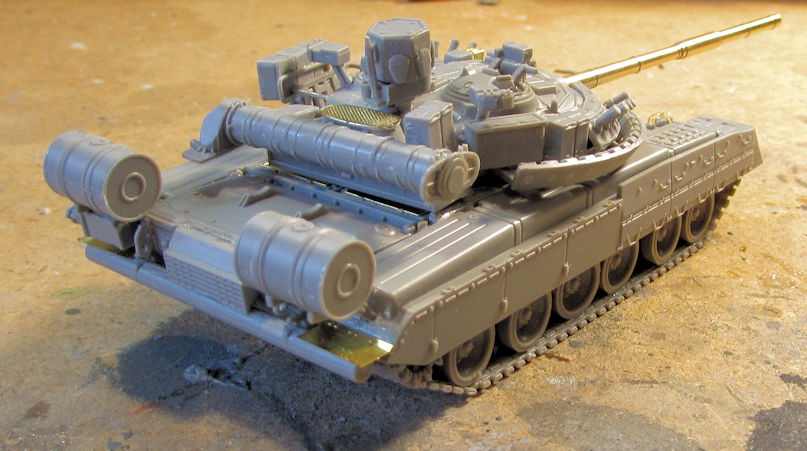
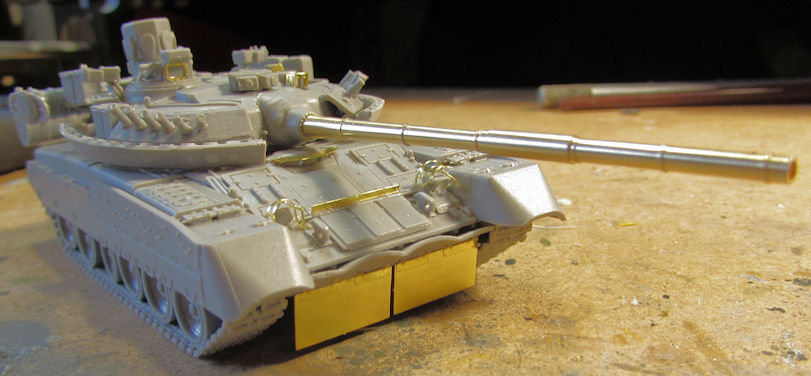
Finally this was ready for paint. Into the "spray booth" it went, getting it's first basecoat of primer to seal the P/E and allow the paint to stick to it:
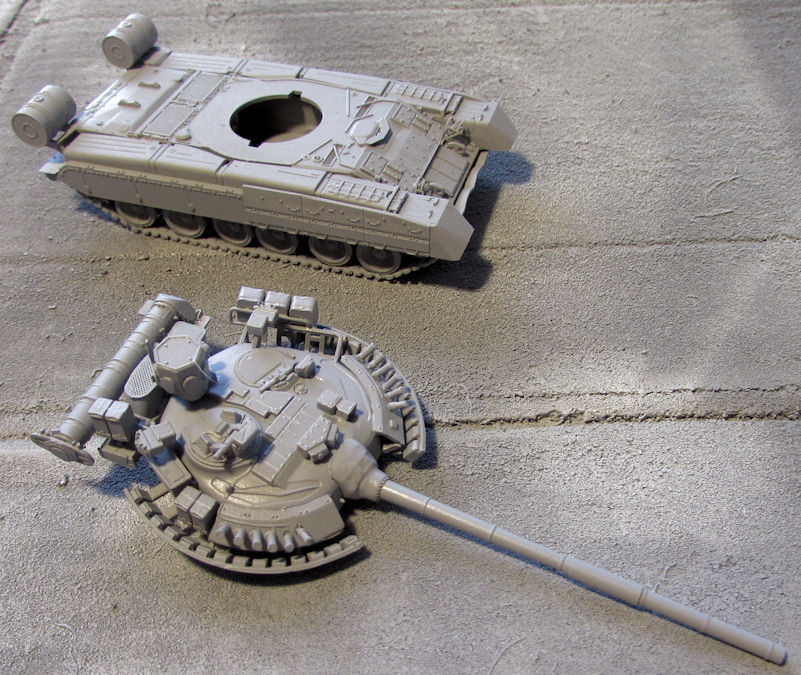
When that was sufficiently dry, I shot the base coat of green on this:
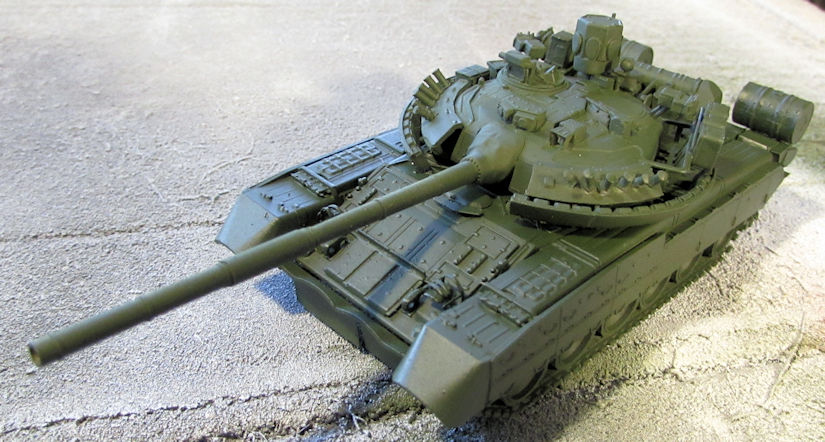
Afterward I completed the camouflage pattern:
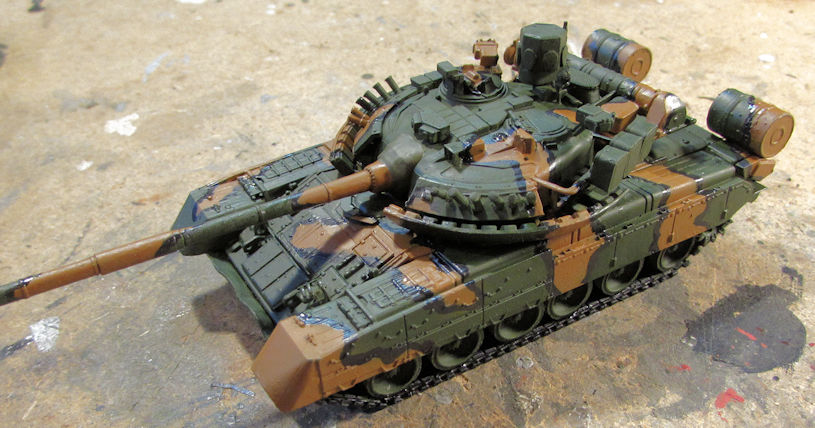
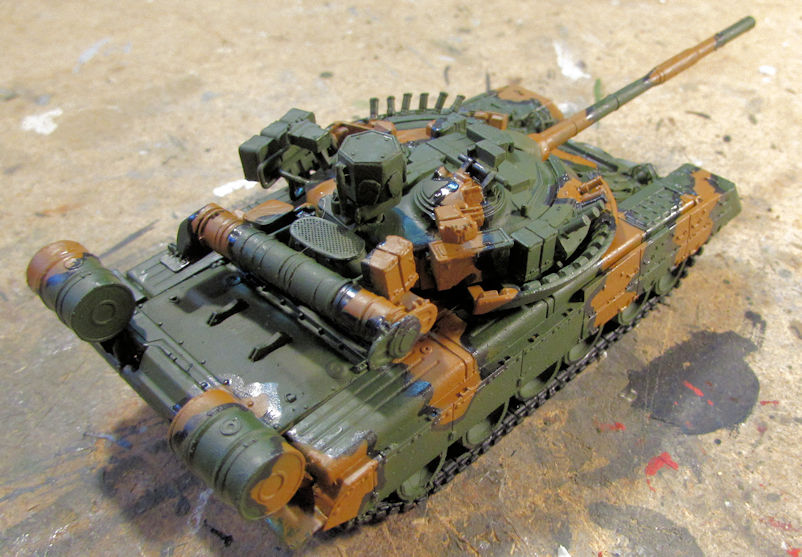
The black lines are still shiny in these pics....
A gloss coat later and this was sporting it's number after I applied the decals:
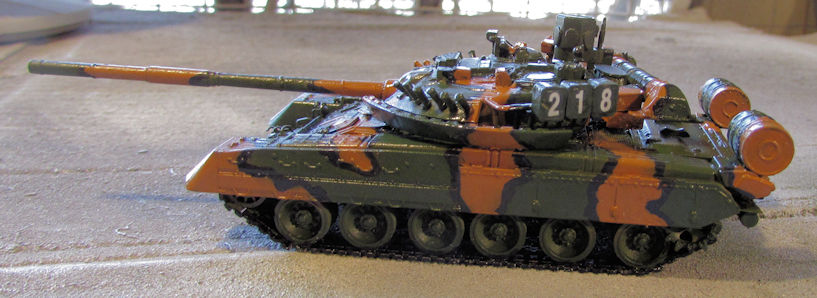
I also applied a wash to this. Then I shot a dullcoat when it was dry again. Afterward I weathered this, dusting it up a bit with some Russian Earth Brown:
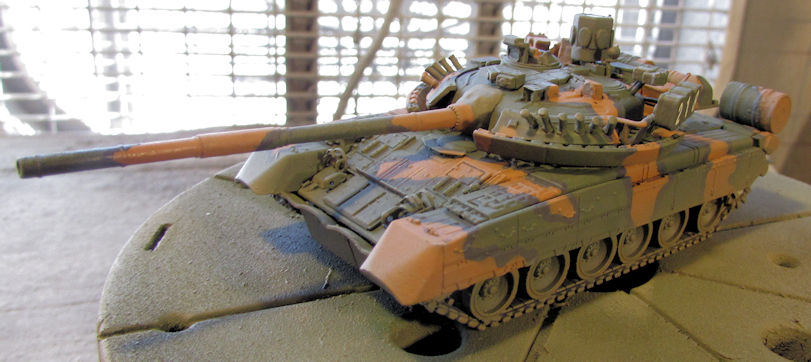
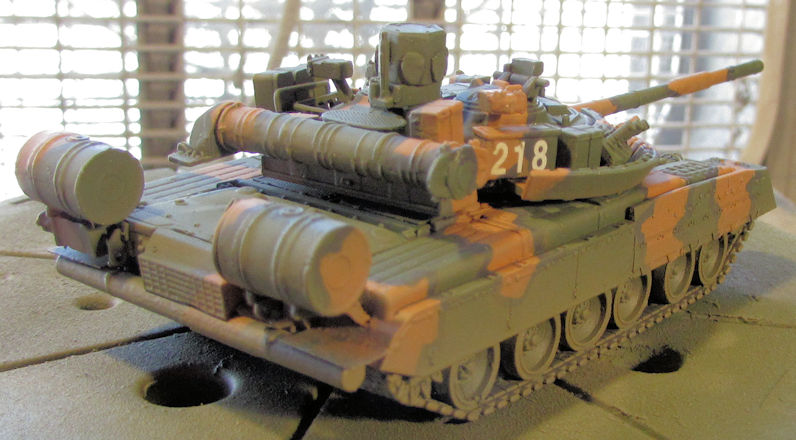
All that was left was to install the machine gun on top and it was done!
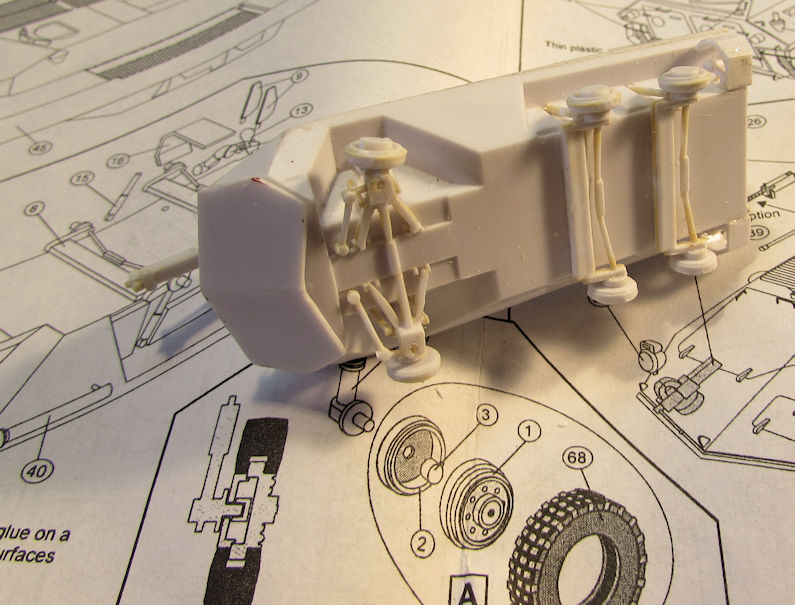
While working on all this, I also made progress on what was for me; a fun little model that helped me keep it real. My Canadian Husky got it's lower suspension on:
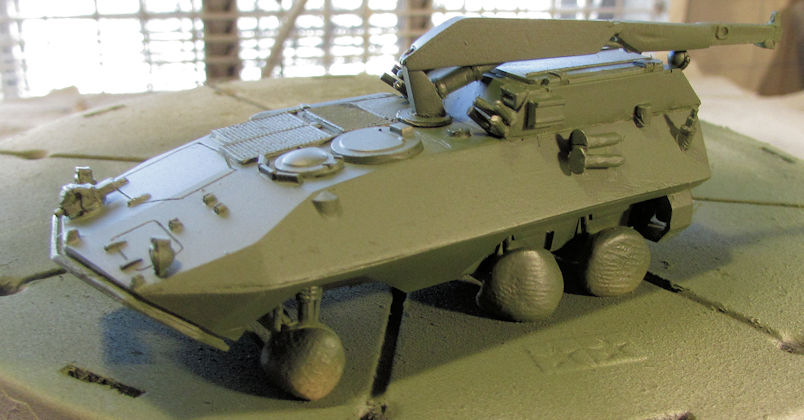
Afterward, I added some Silly Putty to the hubs and shot the first coat of green on this. I was already shooting the T-80 so this was perfect to shoot right afterward:
Later on when I was painting the black stripes on the T-80, I shot some black stripes on the Husky. After they dried, I shot a gloss coat over it when I gloss coated the T-80:
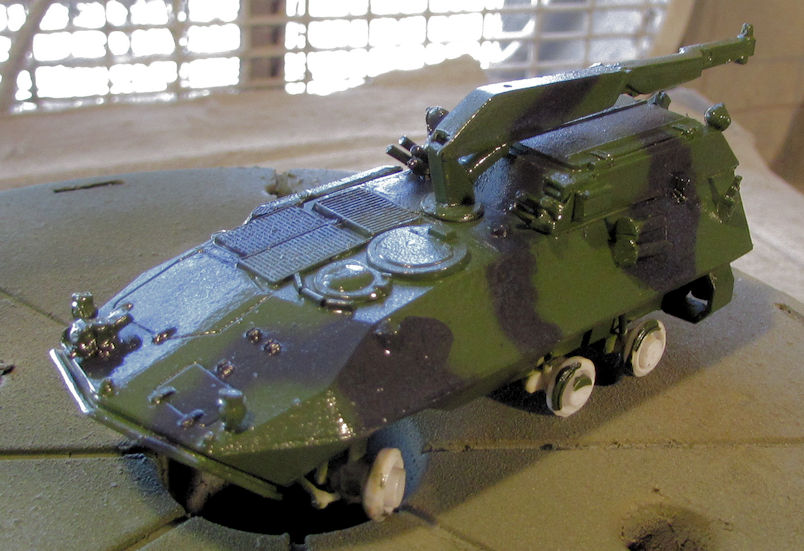
I also found several other long-lost projects when I cleaned my bench a bit so I pulled them out to start as well. But those will be for a subsequent post. I know I bored you all enough with this long one here.
Thanks for looking in, comments are welcome.
I'll start with my Mirage IIICZ for the African campaign I'm doing on another Forums. They call "Group Builds" campaigns over there.This past couple weeks I tried to focus on finishing a couple of those campaigns and this is the result.
Last you saw I had the whole thing closed up. After that I painted the pilot in situ and then closed him up under the canopy:

Later I masked the canopy to prepare for painting:

After that dried, I shot the top of the plane with primer. It is still wet in this pic:

The bottom was sprayed later once the top dried:

Over all that, I shot a coat of Tamiya Bare Metal Silver right out of the rattle can:

Man that stuff shoots on smooth....
I was then ready to start applying the decals to this, but then I looked at the version I wanted to do:

The red lines behind the cockpit, on the edges of the intakes, and down the wing roots were not included as decals. Out came the masking tape.....
I masked off the lines, as well as the nose cone in preparation for paint:.

First I shot the nose cone:

Then I shot the red lines:

It turned out better than I had hoped it would:


After that, I applied the decals, added the landing gear and gear doors and finished it up. Finished pics will be in the completed aircraft Forum.
I was doing this South African Mirage so quickly that I found another Mirage in the stash that had South African markings on it. So, I pulled out this Mirage F.1C and got started on it. First I added the pilot to his seat, then cemented his seat to the rear bulkhead, and then cemented the whole assembly inside the fuselage half along with the IP. That was all the cockpit this kit gave me. I also added some weight in the nose to keep this bird on her feet:

After that was dry, I closed up the fuselage halves and clamped them to seal them as best I could:

Naturally the wings and tail surfaces came next:

Once that was dry, I painted the pilot, seat and IP inside the fuselage and then added Mr. Surfacer 500 to the seams that most needed attention:

That is drying now so I'll give it some attention later.
On to my armor....
In armor, I also focused on my campaign model, this one is for the Micro Modeling Month campaign that challenges one to try and finish a (small) model in one month. I was trying to finish my T-80UM1 before the end of this month. As you may recall, I had done most of the turret and hull. Looking at the turret, I noticed a lot of sink marks on the lower shielding on the turret. I applied a few dabs of Mr. Surfacer 500 to the sink holes and waited for it to dry:

It sanded out quite nicely afterward....
I also finished almost all the fiddly bits and such for the hull and turret in preparation for P/E:


You can see that I used the metal barrel this time. It glued far better than the previous T-80 barrel did.
Here it is after I added all the P/E to it:


Finally this was ready for paint. Into the "spray booth" it went, getting it's first basecoat of primer to seal the P/E and allow the paint to stick to it:

When that was sufficiently dry, I shot the base coat of green on this:

Afterward I completed the camouflage pattern:


The black lines are still shiny in these pics....
A gloss coat later and this was sporting it's number after I applied the decals:

I also applied a wash to this. Then I shot a dullcoat when it was dry again. Afterward I weathered this, dusting it up a bit with some Russian Earth Brown:


All that was left was to install the machine gun on top and it was done!
While working on all this, I also made progress on what was for me; a fun little model that helped me keep it real. My Canadian Husky got it's lower suspension on:

Afterward, I added some Silly Putty to the hubs and shot the first coat of green on this. I was already shooting the T-80 so this was perfect to shoot right afterward:

Later on when I was painting the black stripes on the T-80, I shot some black stripes on the Husky. After they dried, I shot a gloss coat over it when I gloss coated the T-80:

I also found several other long-lost projects when I cleaned my bench a bit so I pulled them out to start as well. But those will be for a subsequent post. I know I bored you all enough with this long one here.
Thanks for looking in, comments are welcome.
The Duke
Virtuoso of Miniatures
"Do you know what the chain of command is? It's the chain I get and beat you with 'till you understand who's in ruttin' command!"
-Jayne Cobb, Firefly Episode 2 "The Train Job"
We are modelers - the same in spirit, in hunger to insanely buy newly released kits, hustlers in hiding our stash from our better halves and experts in using garbage as replacements for after-market parts.
Virtuoso of Miniatures
"Do you know what the chain of command is? It's the chain I get and beat you with 'till you understand who's in ruttin' command!"
-Jayne Cobb, Firefly Episode 2 "The Train Job"
We are modelers - the same in spirit, in hunger to insanely buy newly released kits, hustlers in hiding our stash from our better halves and experts in using garbage as replacements for after-market parts.
Re: Maddog Manufacturing 2018 Production
The masking of the Mirage III was really successful !
- Kari
- Kari
---
On the bench:
Tamiya F-4B Phantom II 1/48
Kinetic F-16A (new tool) 1/48
https://www.facebook.com/GrundAsk-Scale ... 721218708/
On the bench:
Tamiya F-4B Phantom II 1/48
Kinetic F-16A (new tool) 1/48
https://www.facebook.com/GrundAsk-Scale ... 721218708/
- BlackSheep214
- Elite Member
- Posts: 10376
- Joined: Sun Apr 06, 2014 8:47 pm
Re: Maddog Manufacturing 2018 Production
Splendid work on the red stripings.
“Who controls the skies, controls the fate of this Earth”
Author unknown- 352nd Fighter Group, Blue-Nosed Bastards of Bodney
“Send one plane it’s a sortie; send two planes it’s a flight; send four planes it’s a test of airpower. - Richard Kohn
Author unknown- 352nd Fighter Group, Blue-Nosed Bastards of Bodney
“Send one plane it’s a sortie; send two planes it’s a flight; send four planes it’s a test of airpower. - Richard Kohn
- Duke Maddog
- Elite Member
- Posts: 7082
- Joined: Tue Jun 03, 2014 11:22 am
- Location: Rowland Heights, CA
Re: Maddog Manufacturing 2018 Production
Thanks guys! That Mirage was a blast to build.
Continued a little work today but no pics for a few days. Stay tuned, more to come.
Continued a little work today but no pics for a few days. Stay tuned, more to come.
The Duke
Virtuoso of Miniatures
"Do you know what the chain of command is? It's the chain I get and beat you with 'till you understand who's in ruttin' command!"
-Jayne Cobb, Firefly Episode 2 "The Train Job"
We are modelers - the same in spirit, in hunger to insanely buy newly released kits, hustlers in hiding our stash from our better halves and experts in using garbage as replacements for after-market parts.
Virtuoso of Miniatures
"Do you know what the chain of command is? It's the chain I get and beat you with 'till you understand who's in ruttin' command!"
-Jayne Cobb, Firefly Episode 2 "The Train Job"
We are modelers - the same in spirit, in hunger to insanely buy newly released kits, hustlers in hiding our stash from our better halves and experts in using garbage as replacements for after-market parts.
- speedgraflex
- Moderator
- Posts: 9750
- Joined: Fri Feb 10, 2017 11:08 pm
- Location: Santa Monica, California
Re: Maddog Manufacturing 2018 Production
It's really wonderful watching your work come together, Mark; it's soothing and electric as I'm sure it is for you as well. This is one of the best places to be at the end of a long day, catchin' up on the progress by you, sippin' tea, thinkin' about how good your work looks as you mix new and old projects together, new and old kits together, in a multi-layered approach.

Bruce / SPEEDGRAFLEX
- Duke Maddog
- Elite Member
- Posts: 7082
- Joined: Tue Jun 03, 2014 11:22 am
- Location: Rowland Heights, CA
Re: Maddog Manufacturing 2018 Production
Thanks Bruce! That is a most wonderful message to wake up to this fine Easter Sunday morning! I'm thrilled that you enjoy this thread so much. That keeps me motivated even more to add to it. Stay tuned I have more to come.
The Duke
Virtuoso of Miniatures
"Do you know what the chain of command is? It's the chain I get and beat you with 'till you understand who's in ruttin' command!"
-Jayne Cobb, Firefly Episode 2 "The Train Job"
We are modelers - the same in spirit, in hunger to insanely buy newly released kits, hustlers in hiding our stash from our better halves and experts in using garbage as replacements for after-market parts.
Virtuoso of Miniatures
"Do you know what the chain of command is? It's the chain I get and beat you with 'till you understand who's in ruttin' command!"
-Jayne Cobb, Firefly Episode 2 "The Train Job"
We are modelers - the same in spirit, in hunger to insanely buy newly released kits, hustlers in hiding our stash from our better halves and experts in using garbage as replacements for after-market parts.
- Medicman71
- Elite Member
- Posts: 9698
- Joined: Mon Apr 07, 2014 9:32 am
- Location: Houston, Tx
Re: Maddog Manufacturing 2018 Production
Those are some great builds Duke! Really like the paint work you did on the Mirage. 
Mike
Sponsored by Boeing, Lockheed Martin, Northrop Grumman, Saab, BAE, and Dassault
Sponsored by Boeing, Lockheed Martin, Northrop Grumman, Saab, BAE, and Dassault