LOL! Yeah!Stuart wrote:Blooming 'Eck Mark - I've worked on Light aircraft smaller than that!Duke Maddog wrote:Yep! Over a meter long! I am hoping that Hobby Days start up soon again so I can take this in and assemble the wings and tail on the fuselage. I'm not sure I have the room in my crowded Hobby Room!
Maddog Manufacturing 2020 Production
-
Duke Maddog

- Elite Member
- Posts: 7075
- Joined: Tue Jun 03, 2014 11:22 am
- Location: Rowland Heights, CA
Re: Maddog Manufacturing 2020 Production
The Duke
Virtuoso of Miniatures
"Do you know what the chain of command is? It's the chain I get and beat you with 'till you understand who's in ruttin' command!"
-Jayne Cobb, Firefly Episode 2 "The Train Job"
We are modelers - the same in spirit, in hunger to insanely buy newly released kits, hustlers in hiding our stash from our better halves and experts in using garbage as replacements for after-market parts.
-
Duke Maddog
- Elite Member
- Posts: 7075
- Joined: Tue Jun 03, 2014 11:22 am
- Location: Rowland Heights, CA
Re: Maddog Manufacturing 2020 Production
Okay, here it is a week later and I actually have something to show for it. This is another small update for this week.
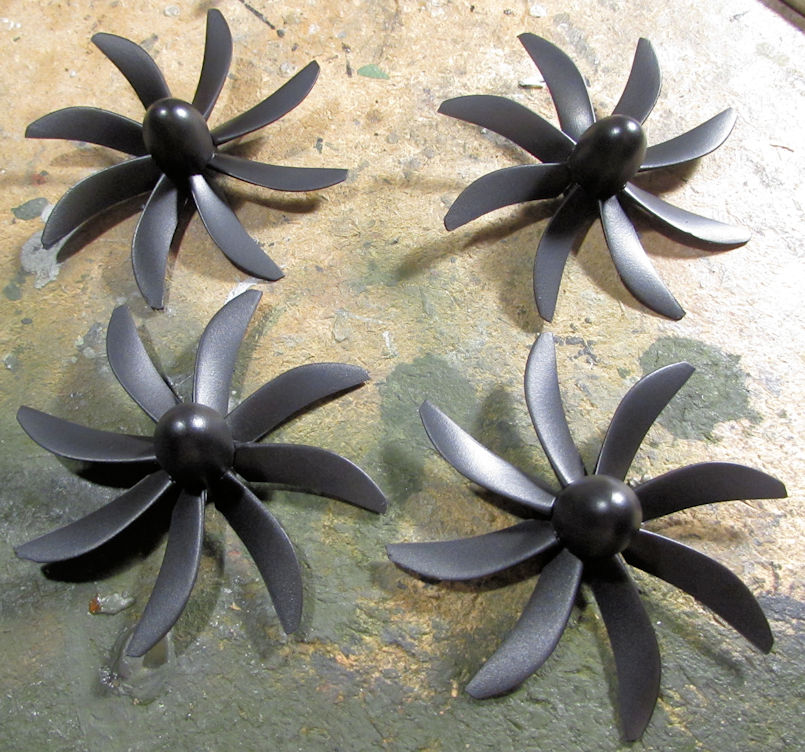
First, I painted the propellers for the A-400 in basic black:
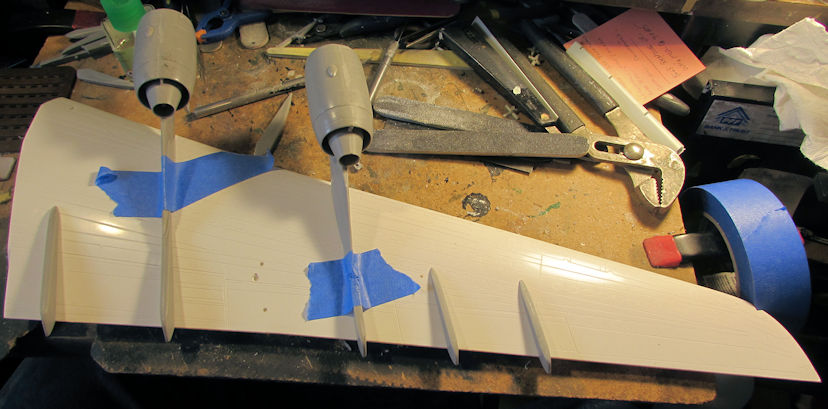
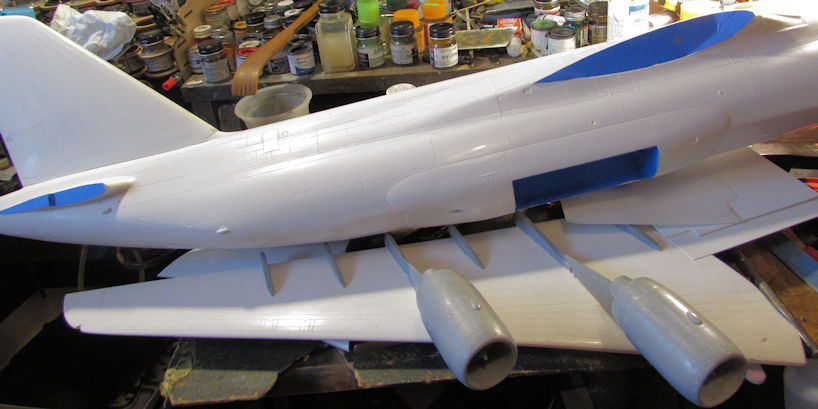
And that's all I did on that plane. I guess I was too interested in moving forward on the An-124 instead because I kept going back to it. To wit: While chatting on the phone with someone, I picked up the one wing and started dry fitting the wing fences and engine pods, mostly to see what kind of adjustments I was going to need to do to make them fit:
Well, I took some time to make whatever adjustments were needed and the next day, I found myself pulling out my two-part epoxy and gluing them all down. I started with the wing fences first as two of them on each wing needed to be fit under the rear of the engine pods:
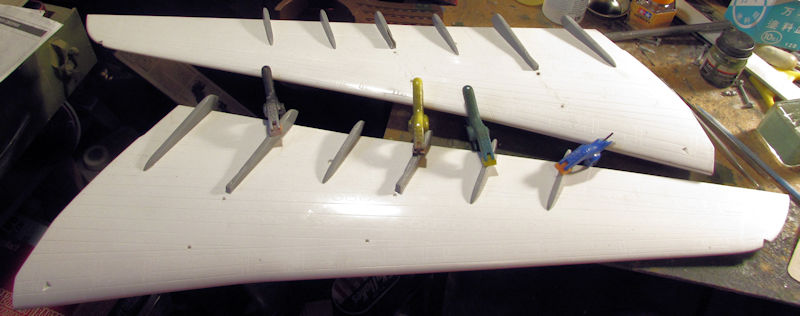
You can see just how big those wings are. They are overhanging my workspace by half!
The next day; after letting the wing fences dry overnight, I added the engine pods:
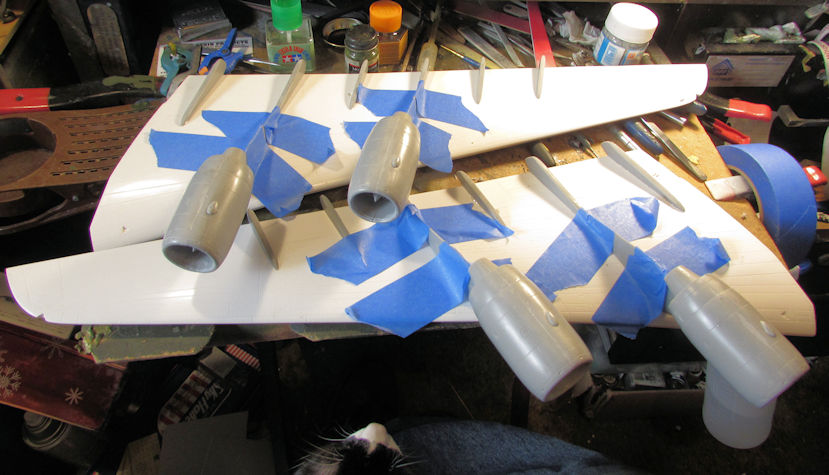
They are still drying there, later I'll have to do some filling and other repair work due to some issues with fit and my not paying enough attention to what I was doing till too late. Meanwhile, I decided to finish the nose section as well. I needed to cut two sections out of the bottom for the nose landing gear. I did that and then proceeded to glue in the nose gear 'bay'... such as it is:
This is all you can see of it from the other side. I guess there is no room for hanging gear doors, so this is what you get:
Hey, at least I don't have to worry about detailing it! LOL! Now all I need to do is find the missing nose gear strut so I can finish building it....
Oh, I also have to remember to put the ten pounds of nose weight in there so this will sit properly.
Now that the wings are done I can actually paint these and the tail feathers a light grey as called for in my chosen paint scheme. After all that work on this monster Russian, I was finally done with planes for a bit.
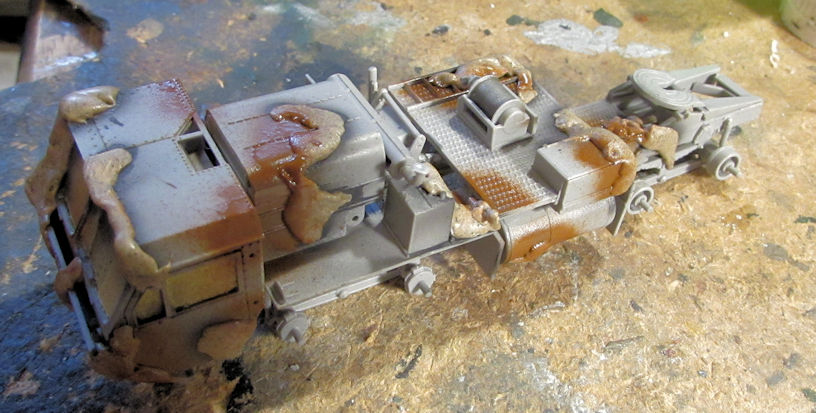
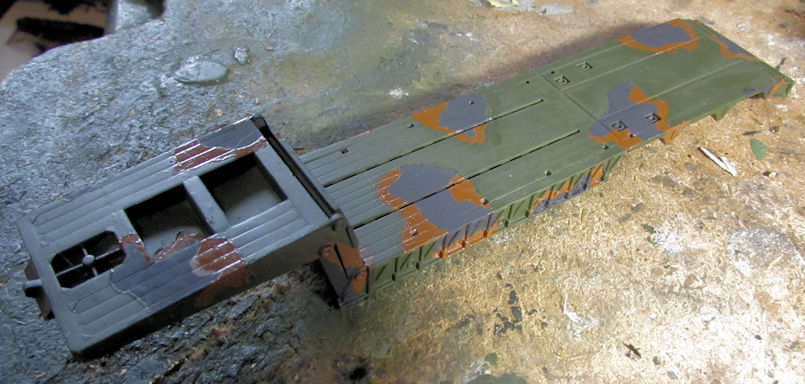
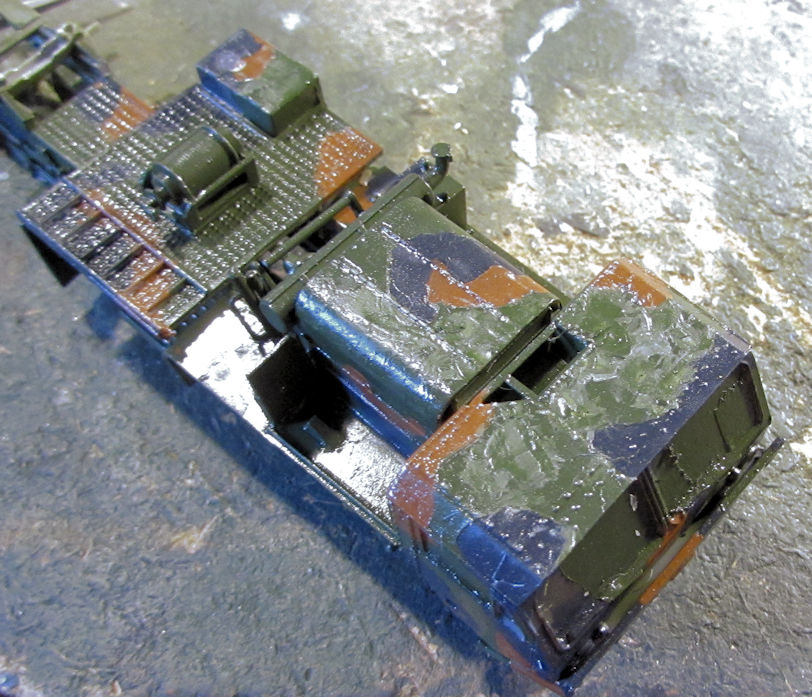
Back on Monday, it was actually cool enough to open my window to vent my airbrush. I jumped at the chance to finish the camouflage on the tank transporters. They were already masked with the Silly Putty so I loaded and shot the brown color onto the tractors and trailers.
First the tractors....
And then the trailers:
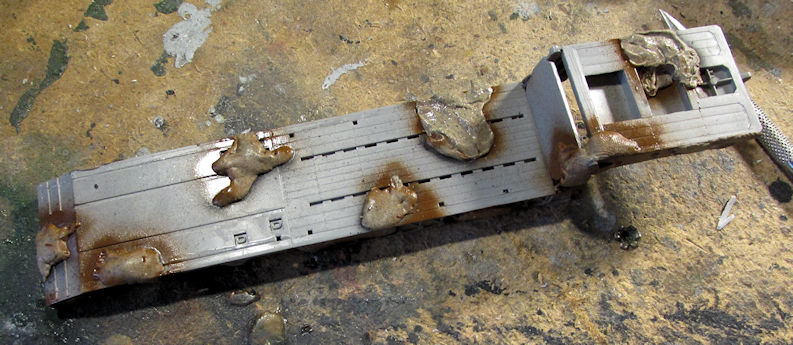
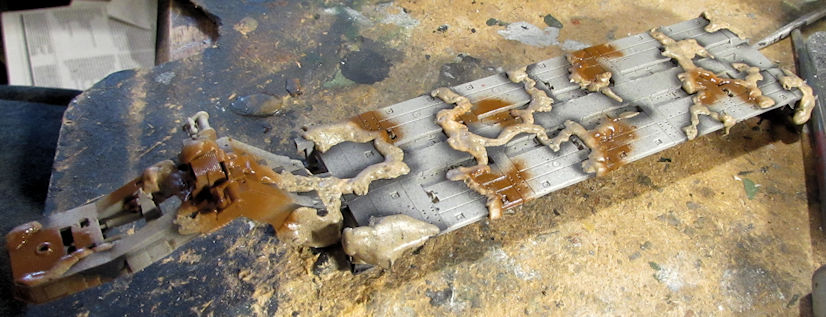
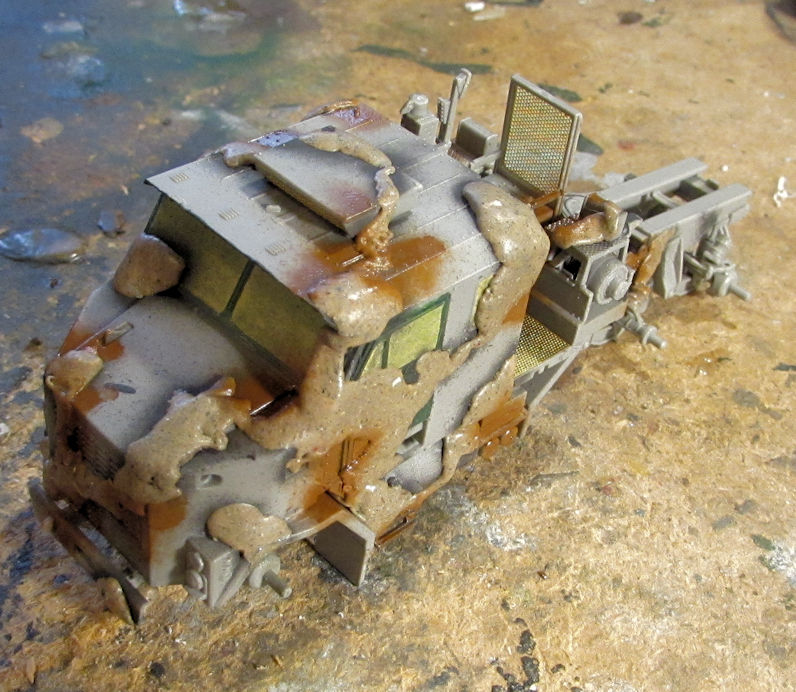
Then I moved and/or added more Silly Putty to cover the brown spots:
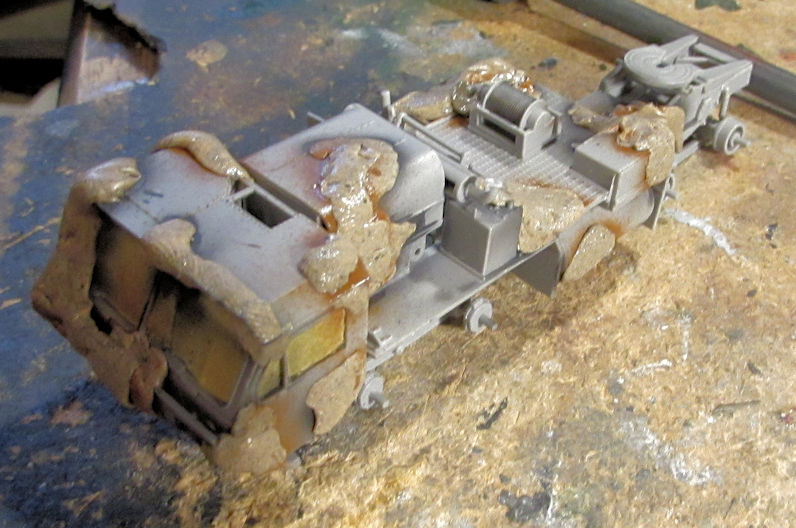
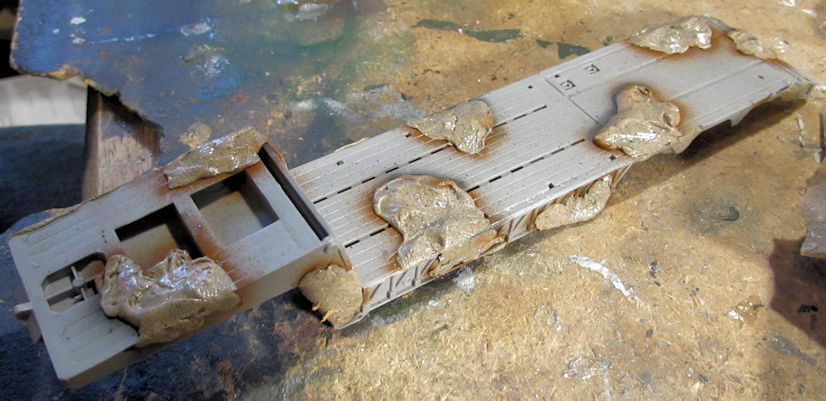
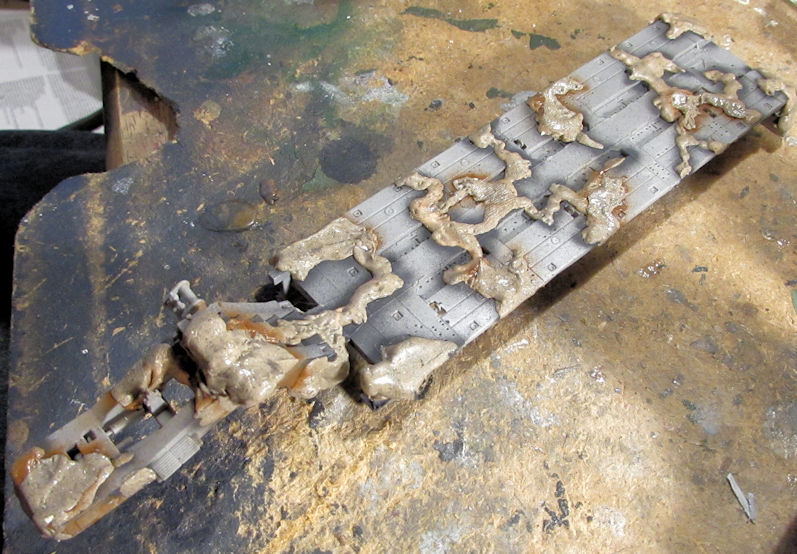
After that I shot the final green color on top:

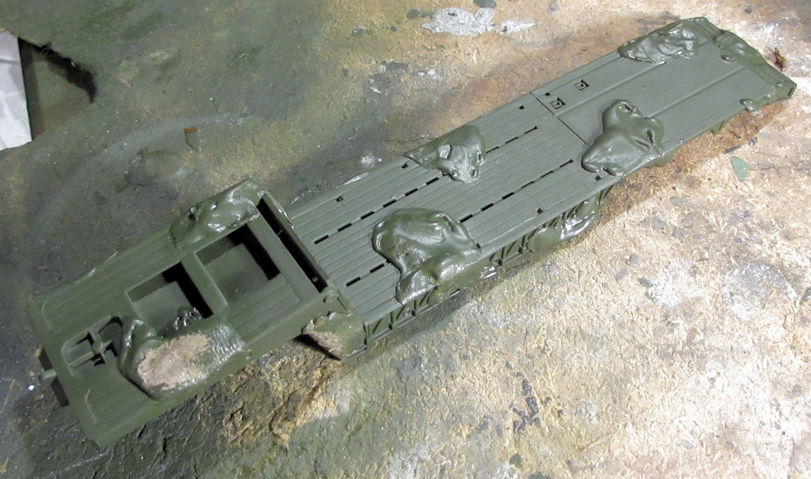
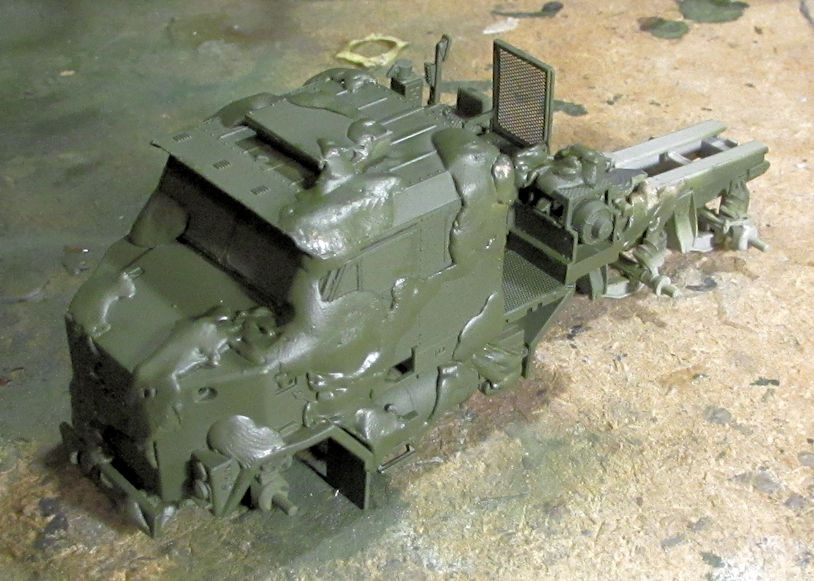
A day later I peeled it all off and was pretty pleased with the results:
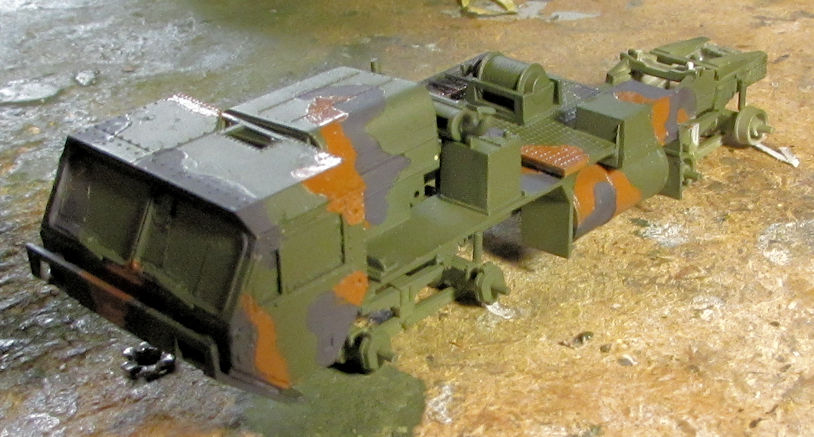

You can see I also lost the trailer hitch pad on the HEMMT tractor. Man, I cannot catch a break! Time to rob another kit for one!
There is still some additional painting and touch ups to be done, but these are getting very close to the clearcoat and decal steps. Finally!
Also, I shot a base coat of green on the BTR, but didn't shoot any pics of it. I'll try to remember to post them in the next update.
And that is a full account of my last week at the workbench. It ain't much, but I'm happy. Hopefully there'll be more to see next week.
Thanks all for looking in, comments are welcome.
First, I painted the propellers for the A-400 in basic black:
And that's all I did on that plane. I guess I was too interested in moving forward on the An-124 instead because I kept going back to it. To wit: While chatting on the phone with someone, I picked up the one wing and started dry fitting the wing fences and engine pods, mostly to see what kind of adjustments I was going to need to do to make them fit:
Well, I took some time to make whatever adjustments were needed and the next day, I found myself pulling out my two-part epoxy and gluing them all down. I started with the wing fences first as two of them on each wing needed to be fit under the rear of the engine pods:
You can see just how big those wings are. They are overhanging my workspace by half!
The next day; after letting the wing fences dry overnight, I added the engine pods:
They are still drying there, later I'll have to do some filling and other repair work due to some issues with fit and my not paying enough attention to what I was doing till too late. Meanwhile, I decided to finish the nose section as well. I needed to cut two sections out of the bottom for the nose landing gear. I did that and then proceeded to glue in the nose gear 'bay'... such as it is:
This is all you can see of it from the other side. I guess there is no room for hanging gear doors, so this is what you get:
Hey, at least I don't have to worry about detailing it! LOL! Now all I need to do is find the missing nose gear strut so I can finish building it....
Oh, I also have to remember to put the ten pounds of nose weight in there so this will sit properly.
Now that the wings are done I can actually paint these and the tail feathers a light grey as called for in my chosen paint scheme. After all that work on this monster Russian, I was finally done with planes for a bit.
Back on Monday, it was actually cool enough to open my window to vent my airbrush. I jumped at the chance to finish the camouflage on the tank transporters. They were already masked with the Silly Putty so I loaded and shot the brown color onto the tractors and trailers.
First the tractors....
And then the trailers:
Then I moved and/or added more Silly Putty to cover the brown spots:
After that I shot the final green color on top:
A day later I peeled it all off and was pretty pleased with the results:
You can see I also lost the trailer hitch pad on the HEMMT tractor. Man, I cannot catch a break! Time to rob another kit for one!
There is still some additional painting and touch ups to be done, but these are getting very close to the clearcoat and decal steps. Finally!
Also, I shot a base coat of green on the BTR, but didn't shoot any pics of it. I'll try to remember to post them in the next update.
And that is a full account of my last week at the workbench. It ain't much, but I'm happy. Hopefully there'll be more to see next week.
Thanks all for looking in, comments are welcome.
The Duke
Virtuoso of Miniatures
"Do you know what the chain of command is? It's the chain I get and beat you with 'till you understand who's in ruttin' command!"
-Jayne Cobb, Firefly Episode 2 "The Train Job"
We are modelers - the same in spirit, in hunger to insanely buy newly released kits, hustlers in hiding our stash from our better halves and experts in using garbage as replacements for after-market parts.
Virtuoso of Miniatures
"Do you know what the chain of command is? It's the chain I get and beat you with 'till you understand who's in ruttin' command!"
-Jayne Cobb, Firefly Episode 2 "The Train Job"
We are modelers - the same in spirit, in hunger to insanely buy newly released kits, hustlers in hiding our stash from our better halves and experts in using garbage as replacements for after-market parts.
-
Stikpusher

- Moderator
- Posts: 18839
- Joined: Sat Apr 05, 2014 8:37 pm
- Location: Ceti Alpha 5
Re: Maddog Manufacturing 2020 Production
Any progress is good progress Mark! Man that Anatov is a monster! How do those wings compare to a B-52? They look much wider in chord, but spanwise?
The camo on your HEMMT Low Boy is looking good!
The camo on your HEMMT Low Boy is looking good!
"Surely I have made my meaning plain? I intend to avenge myself upon you, Admiral. I have deprived your ship of power, and when I swing 'round, I intend to deprive you of your life."
FLSM
FLSM
-
Duke Maddog
- Elite Member
- Posts: 7075
- Joined: Tue Jun 03, 2014 11:22 am
- Location: Rowland Heights, CA
Re: Maddog Manufacturing 2020 Production
I agree Carlos, I am thrilled to have made the progress I have made. While I wanted to get more done, I was pleasantly surprised at how much I actually did.
Yeah, the Antonov is a monster kit! The wings on that bird are much wider in cord than a B-52, but they also stretch about 4.5 inches longer too. I think I'll have to hold up one of the wings next to one of my B-52's and shoot a pic of it. Last night at the SoCal AMPS Zoom meeting someone said the B-36 was still bigger, but I was able to hold the Antonov up to the B-36 I have on my ceiling and show that the Antonov dwarfs the Peacemaker.
As of this morning I've had a slight setback: the Antonov was bumped and the two outer engine pods broke off. The contact apparently wasn't good enough for the two-part epoxy glue to hold. Last night someone recommended JB Weld to hold them so I need to do some shopping.
Thanks for the compliments on the camouflage. I love using Silly Putty for that; it always helps give me a decent clean pattern.
The Duke
Virtuoso of Miniatures
"Do you know what the chain of command is? It's the chain I get and beat you with 'till you understand who's in ruttin' command!"
-Jayne Cobb, Firefly Episode 2 "The Train Job"
We are modelers - the same in spirit, in hunger to insanely buy newly released kits, hustlers in hiding our stash from our better halves and experts in using garbage as replacements for after-market parts.
Virtuoso of Miniatures
"Do you know what the chain of command is? It's the chain I get and beat you with 'till you understand who's in ruttin' command!"
-Jayne Cobb, Firefly Episode 2 "The Train Job"
We are modelers - the same in spirit, in hunger to insanely buy newly released kits, hustlers in hiding our stash from our better halves and experts in using garbage as replacements for after-market parts.

Re: Maddog Manufacturing 2020 Production
Great progress on the Ant Mark, it's brilliant to see it coming together. Sad to hear of your set back but I'm sure you'll get it fixed.
That camouflage looks superb!
That camouflage looks superb!
Stuart Templeton 'I may not be good but I'm slow...'
My blog: https://stuartsscalemodels.blogspot.com/
My blog: https://stuartsscalemodels.blogspot.com/
-
Medicman71

- Elite Member
- Posts: 9684
- Joined: Mon Apr 07, 2014 9:32 am
- Location: Houston, Tx
Re: Maddog Manufacturing 2020 Production
Very nice Mark!
Mike
Sponsored by Boeing, Lockheed Martin, Northrop Grumman, Saab, BAE, and Dassault
Sponsored by Boeing, Lockheed Martin, Northrop Grumman, Saab, BAE, and Dassault
-
Duke Maddog
- Elite Member
- Posts: 7075
- Joined: Tue Jun 03, 2014 11:22 am
- Location: Rowland Heights, CA
Re: Maddog Manufacturing 2020 Production
Thanks Stuart! The Antonov will be an easy fix. I just hope it will be just as easy to paint! Can't see calling it an Ant; it's too freakin' big! LOL! 

Thanks Medic! I hope to get more done soon.
Thanks Medic! I hope to get more done soon.
The Duke
Virtuoso of Miniatures
"Do you know what the chain of command is? It's the chain I get and beat you with 'till you understand who's in ruttin' command!"
-Jayne Cobb, Firefly Episode 2 "The Train Job"
We are modelers - the same in spirit, in hunger to insanely buy newly released kits, hustlers in hiding our stash from our better halves and experts in using garbage as replacements for after-market parts.
Virtuoso of Miniatures
"Do you know what the chain of command is? It's the chain I get and beat you with 'till you understand who's in ruttin' command!"
-Jayne Cobb, Firefly Episode 2 "The Train Job"
We are modelers - the same in spirit, in hunger to insanely buy newly released kits, hustlers in hiding our stash from our better halves and experts in using garbage as replacements for after-market parts.
-
Duke Maddog
- Elite Member
- Posts: 7075
- Joined: Tue Jun 03, 2014 11:22 am
- Location: Rowland Heights, CA
Re: Maddog Manufacturing 2020 Production
Despite recent issues in life, I managed to slowly get some progress worth showing. I'll start with the An-124.
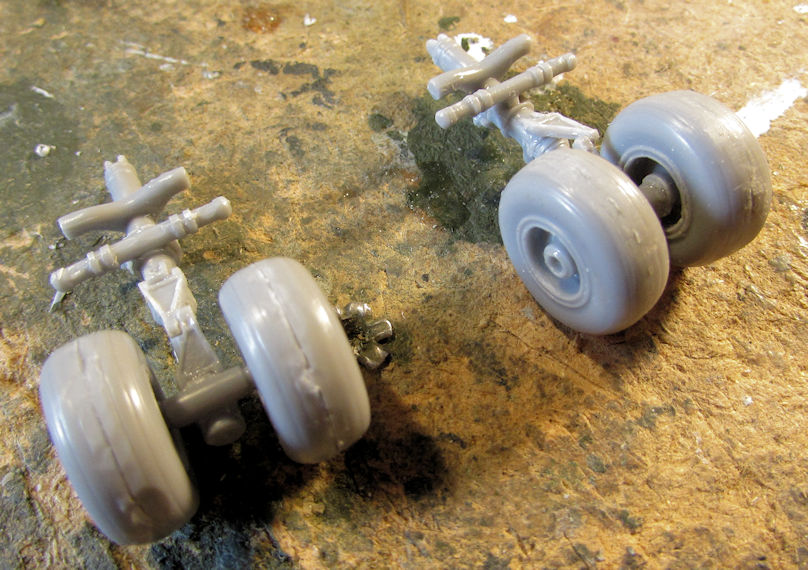
Okay, first off: Hallelujah! I found the second forward landing gear strut and promptly added the wheels to it:
After that, I started to tape off the contact areas on the ends of the wings and tail surfaces.
Horizontal stabilizers:
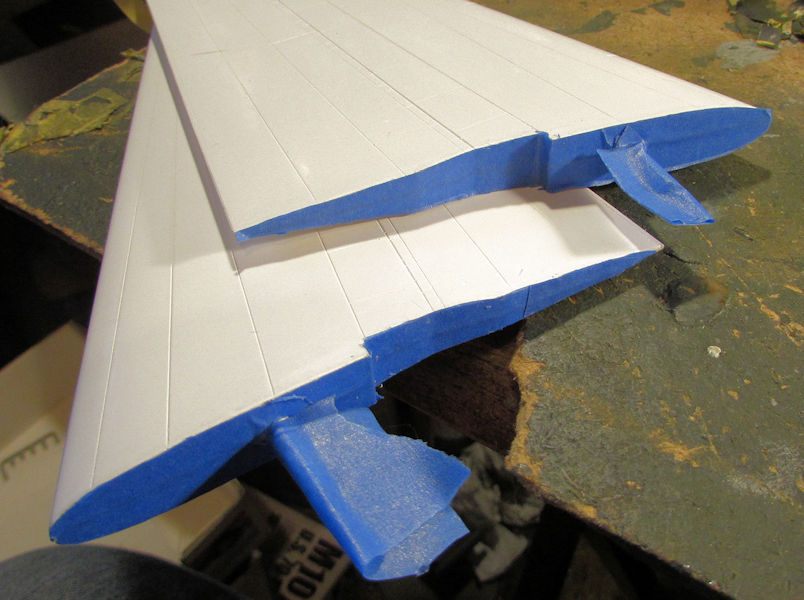
Wings:
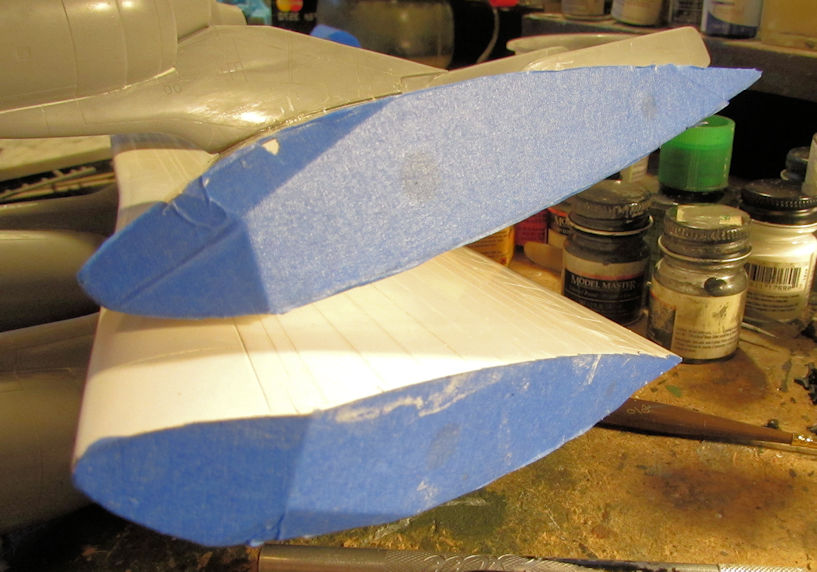
And the fuselage:
Now they are all ready for paint; at least in the masking department. Still, in order to paint the fuselage, I'll need to close up the nose. In order to do that, I have to glue the cockpit into place; then the canopy shroud, and then close up the nose. These are the preparations I made to do all that. First; the cockpit was glued in using the JB weld shown:
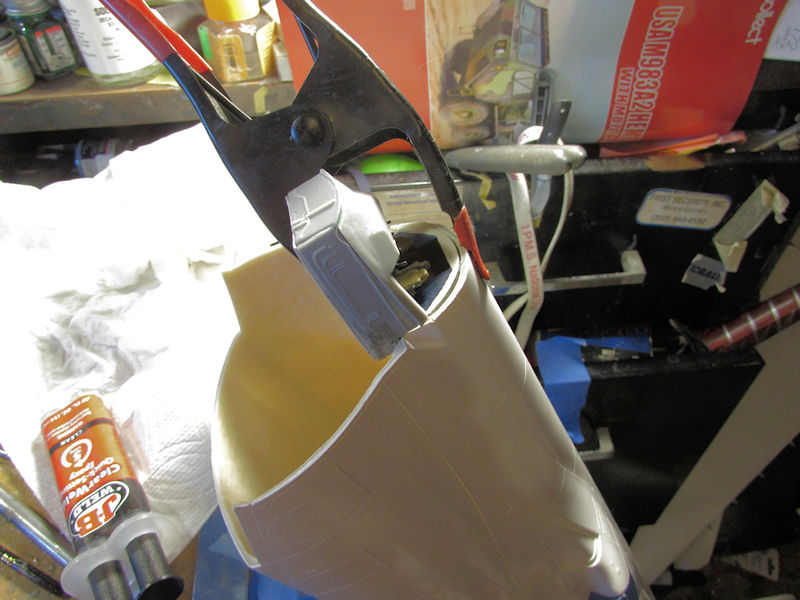
That didn't work. So, I pulled the already loose cockpit out and decided to add a strip of styrene to the underside of the cockpit sub-assembly:
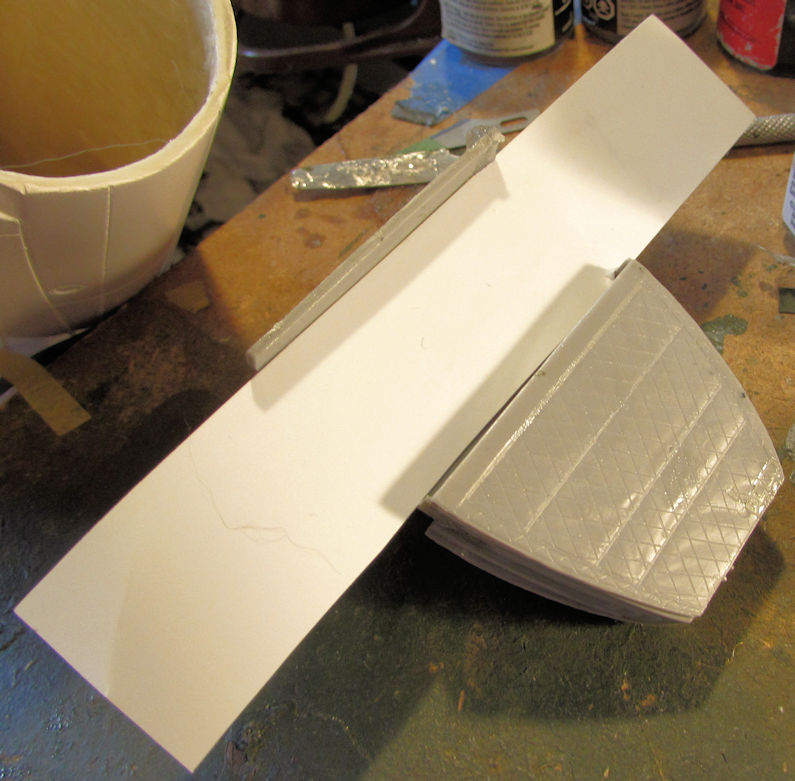
Once that was dry I added some JB Weld to the 'wings' and then clamped them to the insides of the fuselage:
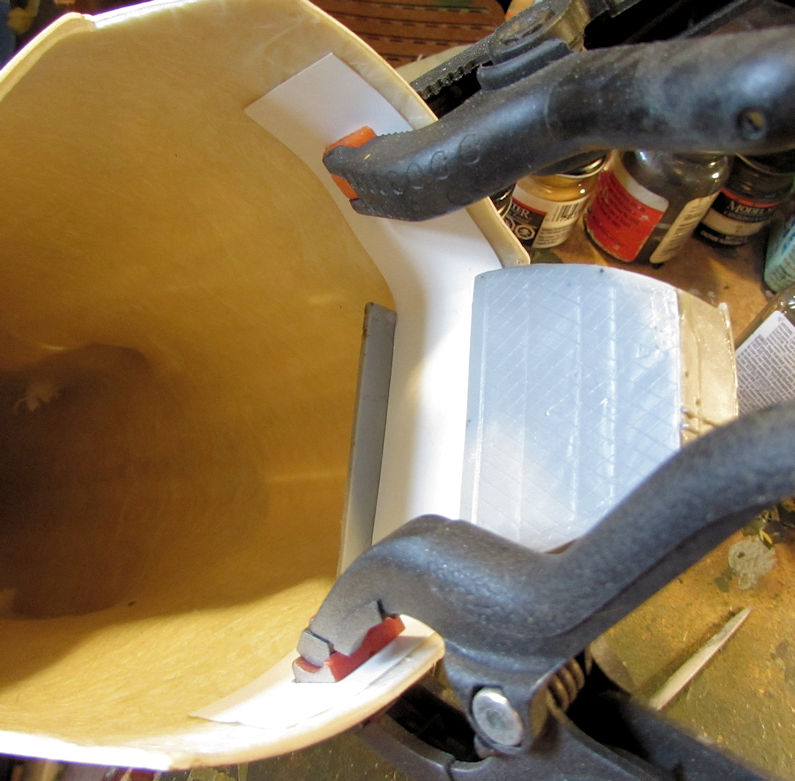
That is still setting now. Afterward, I added some extra reinforcing strips to the sides of the nose to help hold it in place once glued:
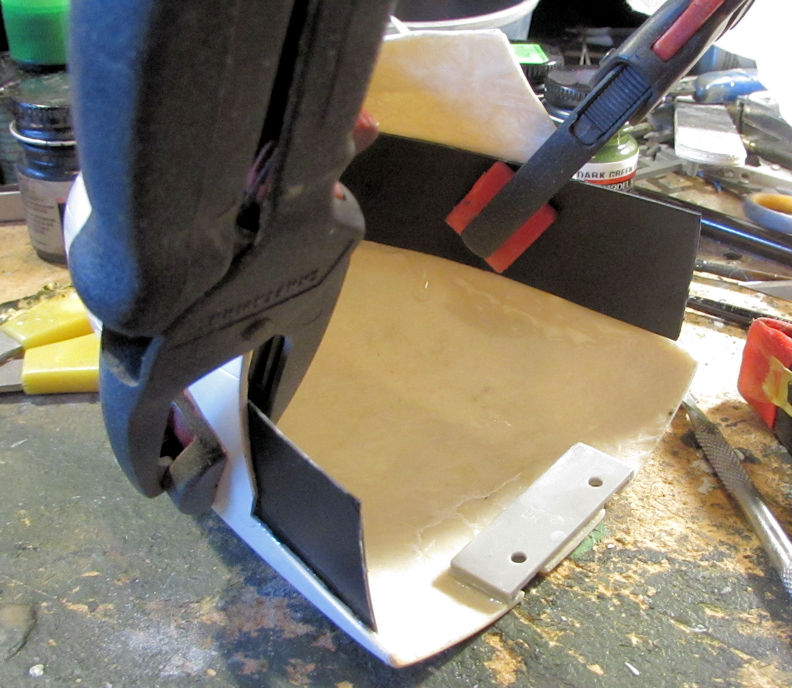
That should hold it better than the butt joint they call for in the instructions.
Oh, and in the middle of all that, I still had to re-glue another engine pod that fell off for the third time. I had glued it with JB Weld twice and I still found it on the ground two days after I'd glued it before. Hopefully the third time is the charm.
Now on to my armor...
So, first in the lineup is the Churchill Mk III AVRE. All I really did here was to apply the decals and add the tracks to this:
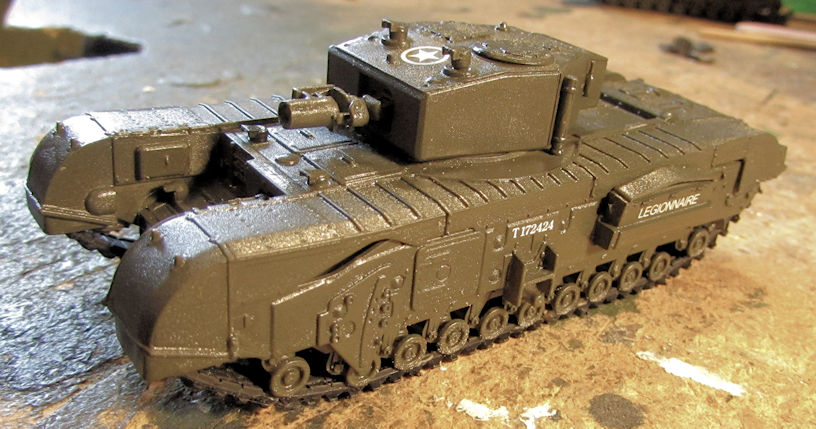
And the same for the Churchill Mk IV:
Both of those have since been shot with a dullcoat. Yep, after weathering these, they will be done!
After that, I decided to work on a Shelf Queen that has been languishing for a couple years while I tried to score another HVSS Sherman kit. Since I got one from the stash sale, it was time to pull it out and get my M-51 Isherman moving again!
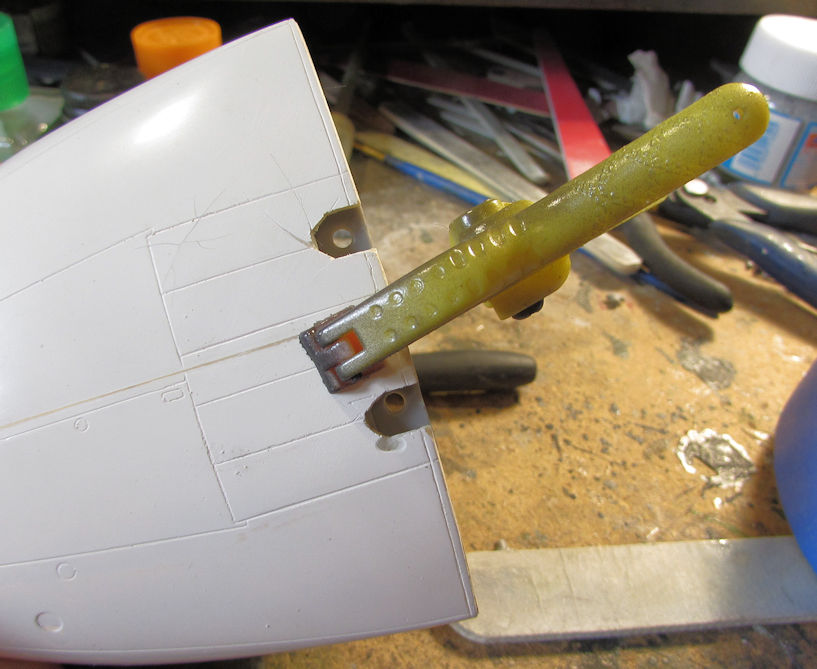
As a reminder, this plate was missing; pinged off into the Netherworld years ago:
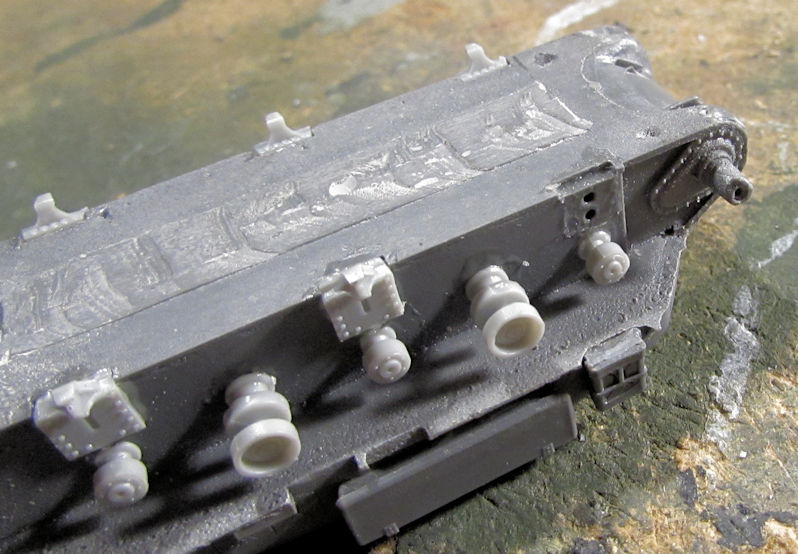
I then installed the last one and then added the idlers and some other detail parts to the hull:
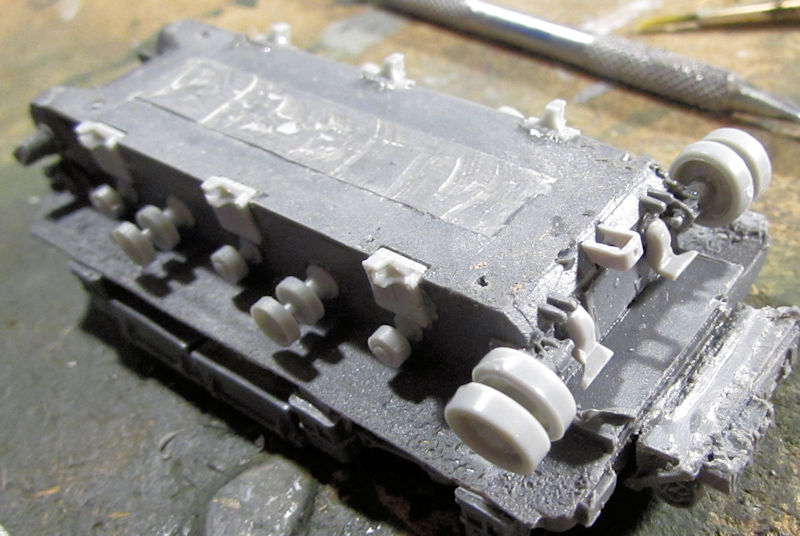
Now I should be able to add the bogies and the drive sprockets to this and then get it painted.
Next up on the tour is the Japanese Type 73 tank transporter. I added the decals to this as well:

I then installed all the wheels on this:
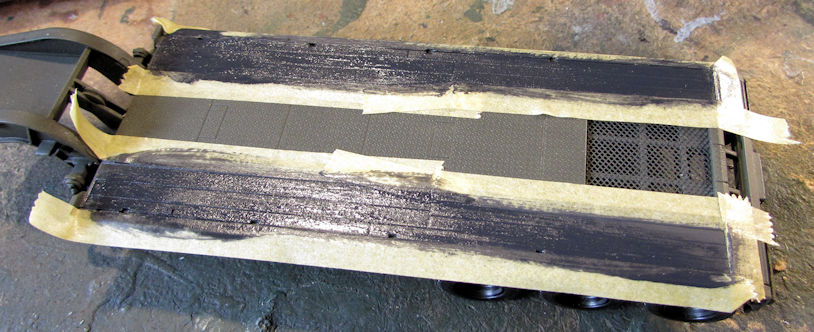
So, I then looked at the instructions and noticed the deck of the trailer needed to be painted. So, I masked off and painted the black wooden planks first:
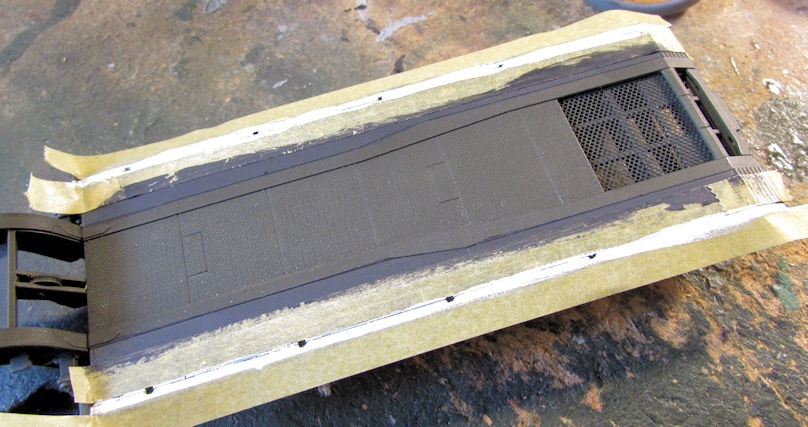
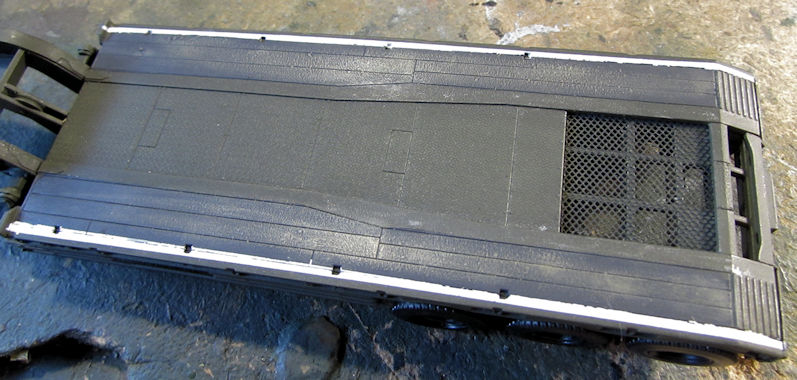
When that was dry, I masked again and added the white guidelines to the sides:
This really looks pretty cool this way!
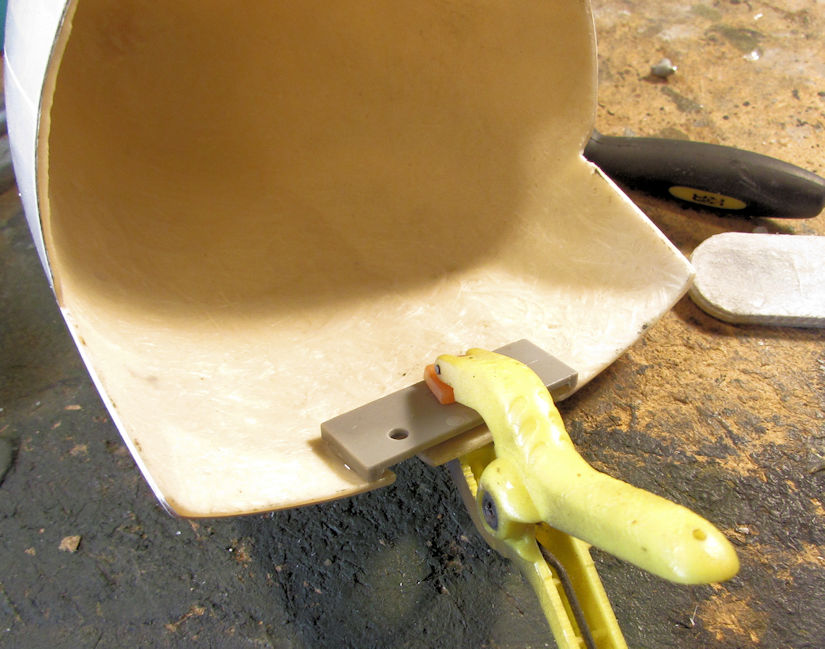
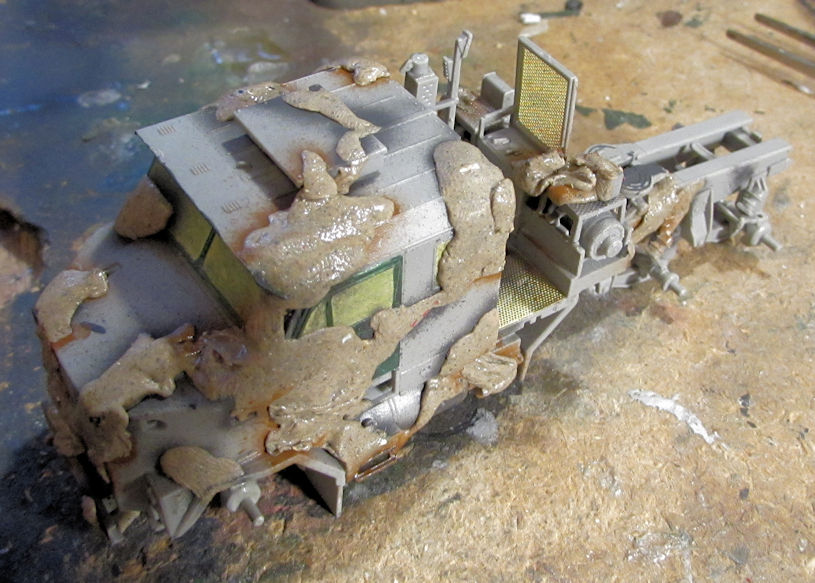
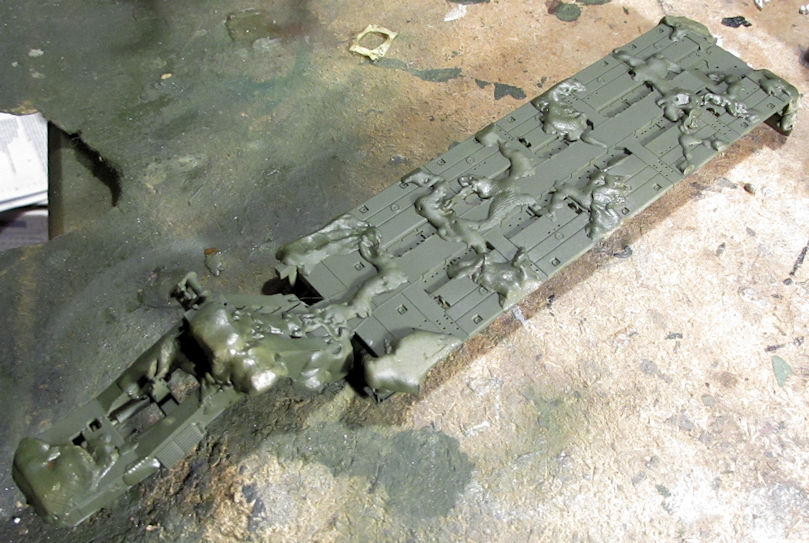
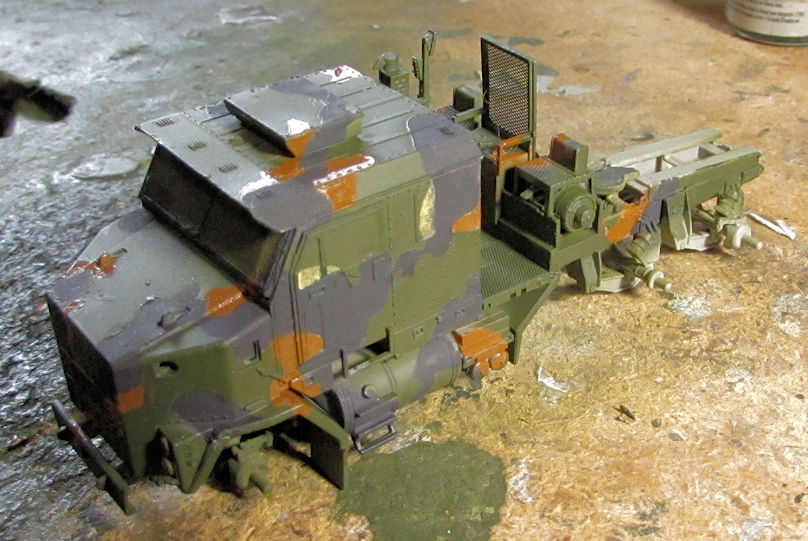
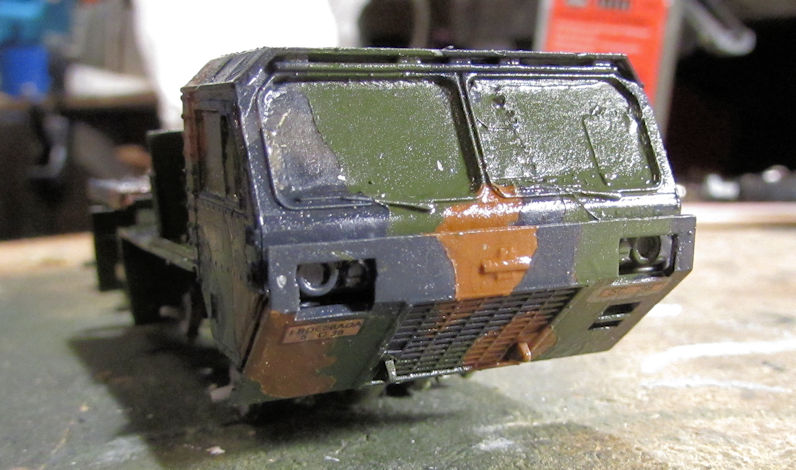
Next on the tour is my problem project. This HEMMTT tank transporter has been broken and rebuilt at least three times! The first thing to go wrong was the clearcoat wrinkled! So, I shaved off the raised wrinkles and re-painted this:
After that I stole a trailer hitch plate from another kit and installed it in the back:
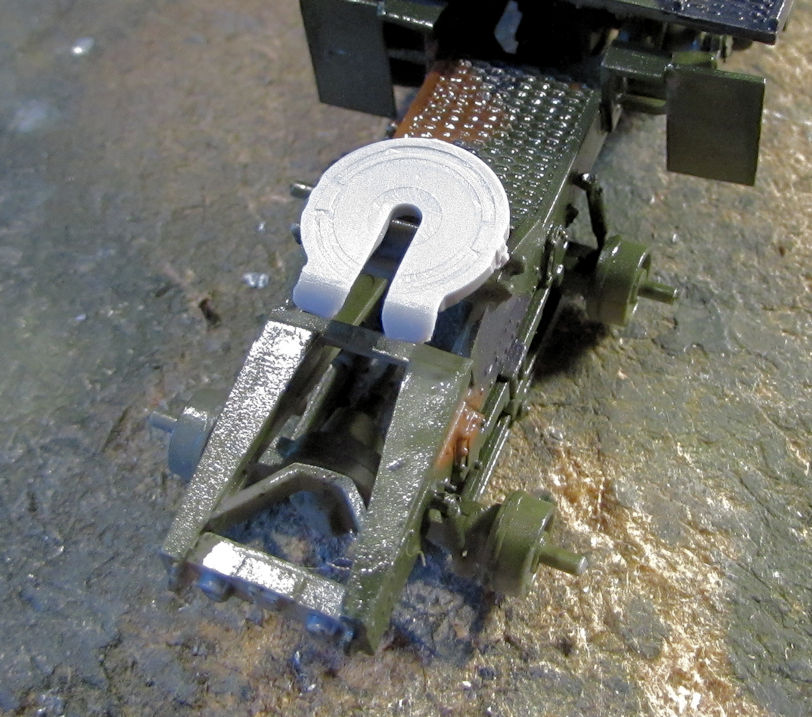
Two days after that happened, I found the original in a spot on the floor that I had looked at at least seventeen times before while searching for this and other lost parts! Needless to say, that is now in my parts box!
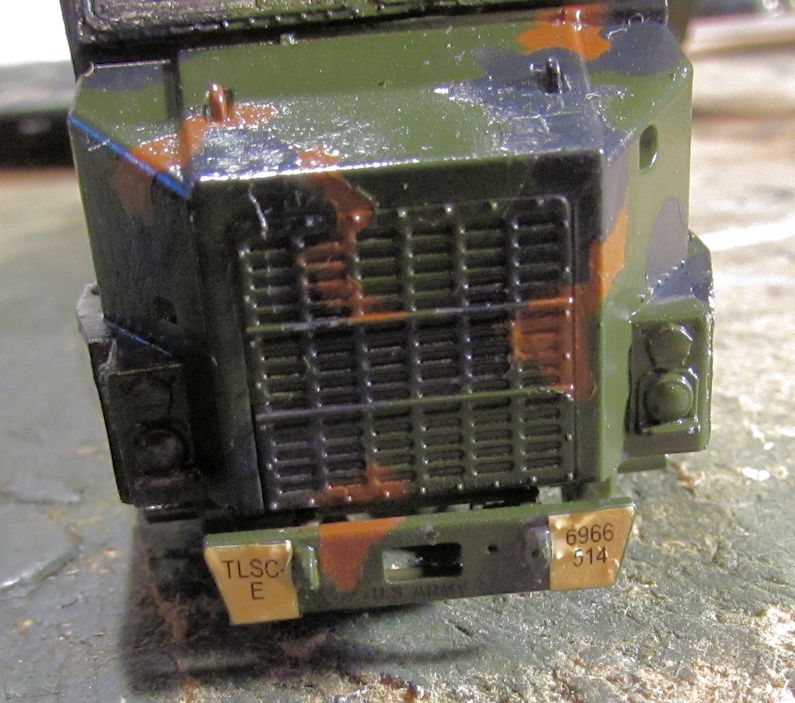
This was decaled along with the rest of the models. You can see them just below the angry-looking headlights:
Later I added the wheels to this whole model. The marble strip this is sitting on was used to insure all tires touched the ground:
I've since had to repair two of those wheels.... twice each!
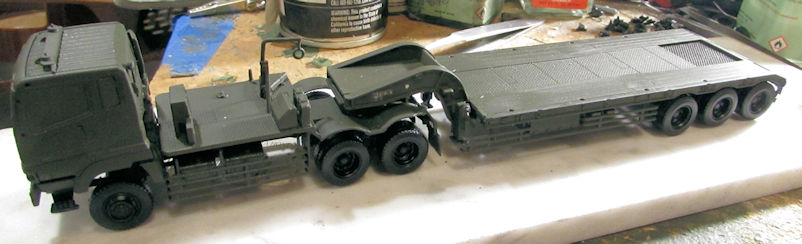
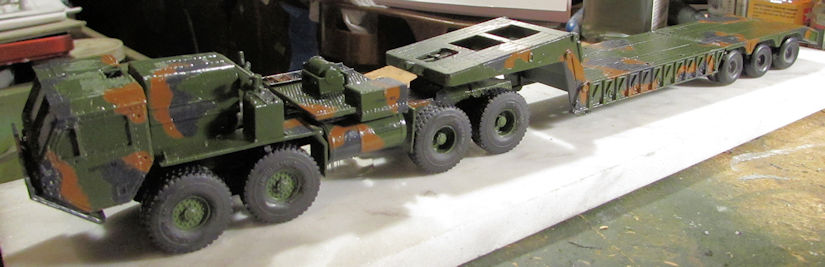
This last one is the M-1070 tank transporter and trailer. While decaling everything else, I also decaled this:

Yeah, that decal is crooked. Nothing I can do about it now. I never did expect this to be an award winning model; I just wanted to build it for my collection. Moving on...
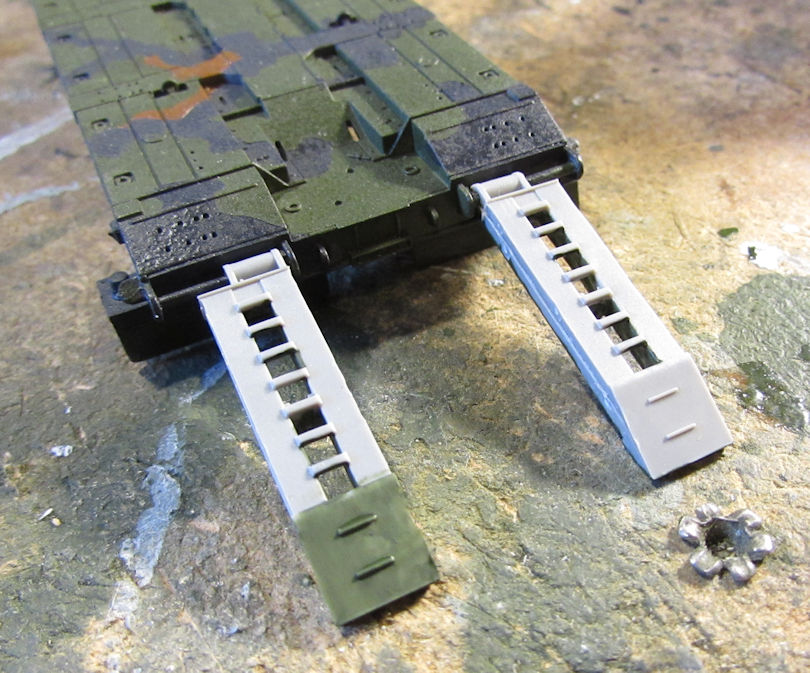
I realized I still hadn't added the ramps to the back of the trailer. Fixed that and started to paint them in this pic:
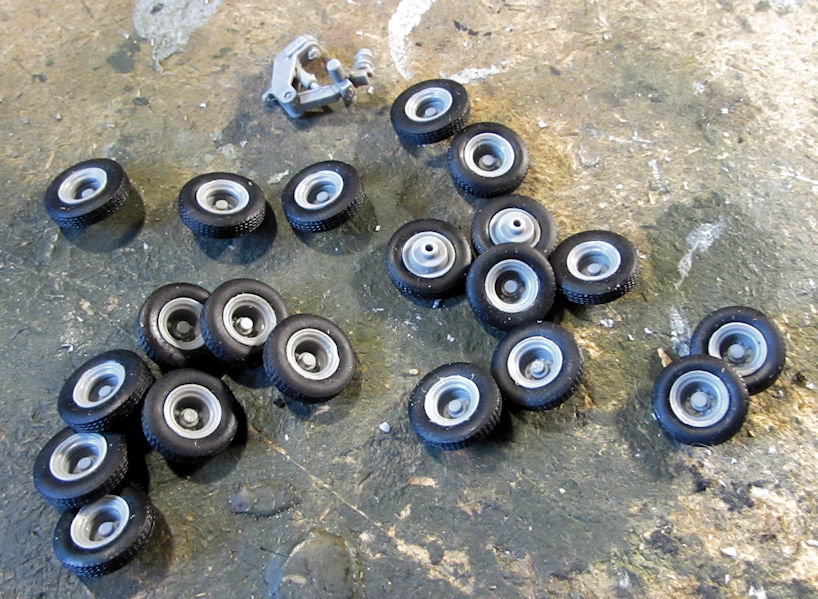
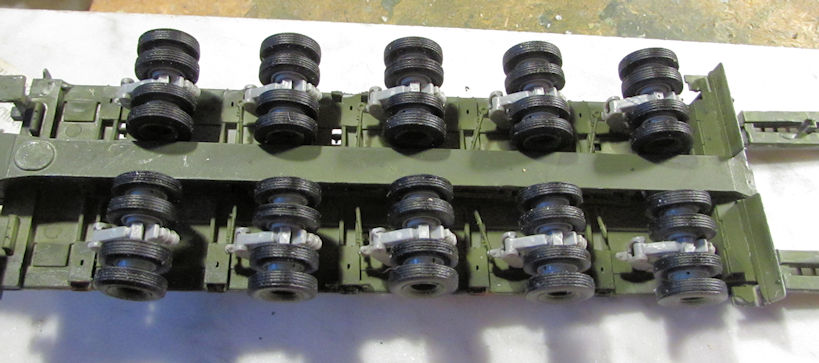
Next it was time for some fun! I assembled all the wheels for the trailer. You can see them all here with one of the trailer axles:
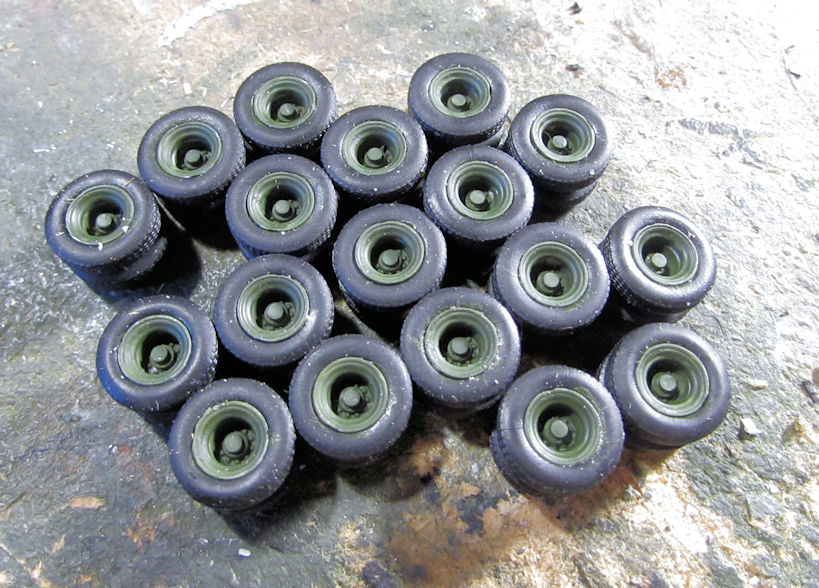
I then painted the hubs:
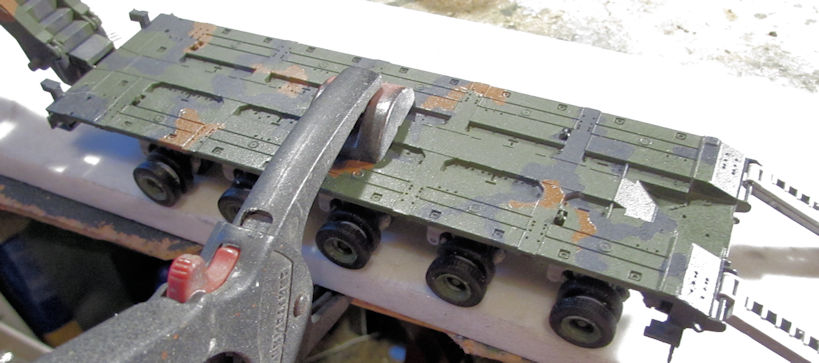
Here they are all installed under the trailer:
Using an adjustable clamp, I then clamped this to the marble slab to insure all wheels touched:
After that, installing the wheels on the tractor was easy:

I then started to assemble the P/E rear view mirrors using Gator Grip Glue:
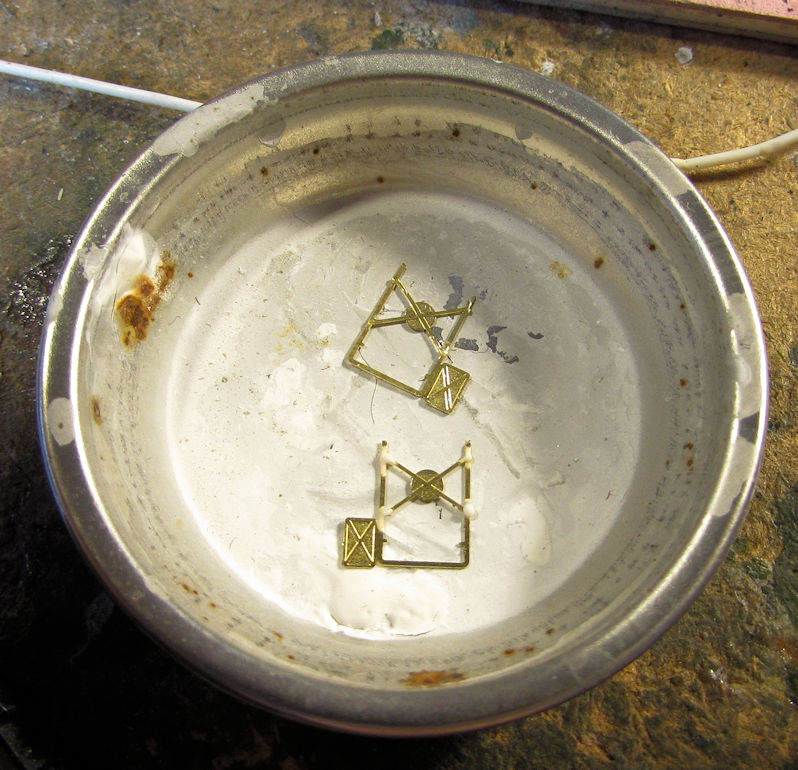
While those are drying, I installed all the final detail parts to the tractor:
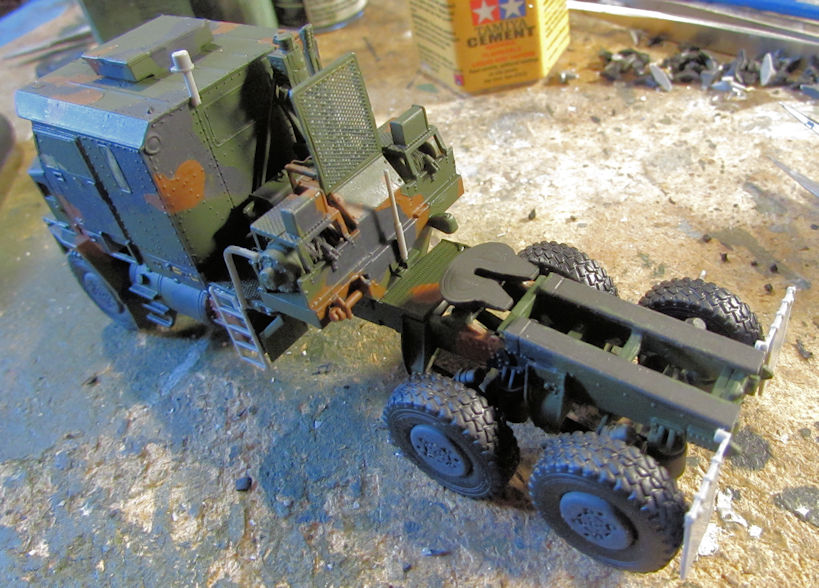
Here she is all assembled wearing her new shoes:
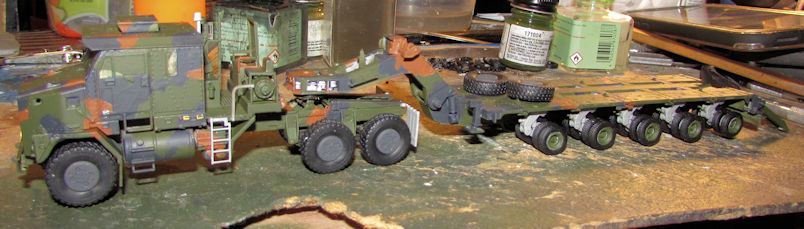
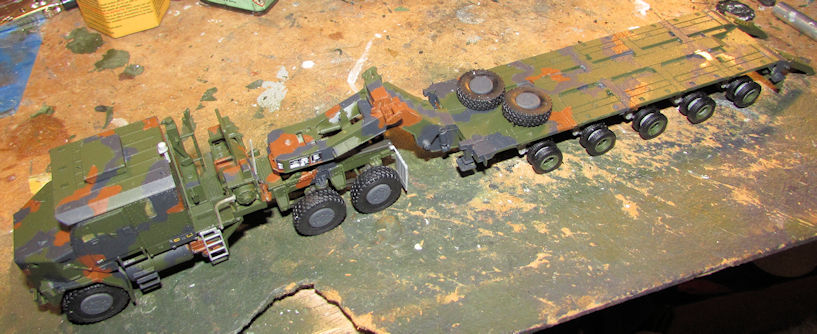
The two wheels on the trailer deck are the last two wheels I'll have to add once I find that lost axle assembly.
Well, that completes this latest tour of Maddog Manufacturing. I hope you enjoyed it. Comments are always welcome. Thanks for riding with us!
Okay, first off: Hallelujah! I found the second forward landing gear strut and promptly added the wheels to it:
After that, I started to tape off the contact areas on the ends of the wings and tail surfaces.
Horizontal stabilizers:
Wings:
And the fuselage:
Now they are all ready for paint; at least in the masking department. Still, in order to paint the fuselage, I'll need to close up the nose. In order to do that, I have to glue the cockpit into place; then the canopy shroud, and then close up the nose. These are the preparations I made to do all that. First; the cockpit was glued in using the JB weld shown:
That didn't work. So, I pulled the already loose cockpit out and decided to add a strip of styrene to the underside of the cockpit sub-assembly:
Once that was dry I added some JB Weld to the 'wings' and then clamped them to the insides of the fuselage:
That is still setting now. Afterward, I added some extra reinforcing strips to the sides of the nose to help hold it in place once glued:
That should hold it better than the butt joint they call for in the instructions.
Oh, and in the middle of all that, I still had to re-glue another engine pod that fell off for the third time. I had glued it with JB Weld twice and I still found it on the ground two days after I'd glued it before. Hopefully the third time is the charm.
Now on to my armor...
So, first in the lineup is the Churchill Mk III AVRE. All I really did here was to apply the decals and add the tracks to this:
And the same for the Churchill Mk IV:
Both of those have since been shot with a dullcoat. Yep, after weathering these, they will be done!
After that, I decided to work on a Shelf Queen that has been languishing for a couple years while I tried to score another HVSS Sherman kit. Since I got one from the stash sale, it was time to pull it out and get my M-51 Isherman moving again!
As a reminder, this plate was missing; pinged off into the Netherworld years ago:
I then installed the last one and then added the idlers and some other detail parts to the hull:
Now I should be able to add the bogies and the drive sprockets to this and then get it painted.
Next up on the tour is the Japanese Type 73 tank transporter. I added the decals to this as well:
I then installed all the wheels on this:
So, I then looked at the instructions and noticed the deck of the trailer needed to be painted. So, I masked off and painted the black wooden planks first:
When that was dry, I masked again and added the white guidelines to the sides:
This really looks pretty cool this way!
Next on the tour is my problem project. This HEMMTT tank transporter has been broken and rebuilt at least three times! The first thing to go wrong was the clearcoat wrinkled! So, I shaved off the raised wrinkles and re-painted this:
After that I stole a trailer hitch plate from another kit and installed it in the back:
Two days after that happened, I found the original in a spot on the floor that I had looked at at least seventeen times before while searching for this and other lost parts! Needless to say, that is now in my parts box!
This was decaled along with the rest of the models. You can see them just below the angry-looking headlights:
Later I added the wheels to this whole model. The marble strip this is sitting on was used to insure all tires touched the ground:
I've since had to repair two of those wheels.... twice each!
This last one is the M-1070 tank transporter and trailer. While decaling everything else, I also decaled this:
Yeah, that decal is crooked. Nothing I can do about it now. I never did expect this to be an award winning model; I just wanted to build it for my collection. Moving on...
I realized I still hadn't added the ramps to the back of the trailer. Fixed that and started to paint them in this pic:
Next it was time for some fun! I assembled all the wheels for the trailer. You can see them all here with one of the trailer axles:
I then painted the hubs:
Here they are all installed under the trailer:
Using an adjustable clamp, I then clamped this to the marble slab to insure all wheels touched:
After that, installing the wheels on the tractor was easy:
I then started to assemble the P/E rear view mirrors using Gator Grip Glue:
While those are drying, I installed all the final detail parts to the tractor:
Here she is all assembled wearing her new shoes:
The two wheels on the trailer deck are the last two wheels I'll have to add once I find that lost axle assembly.
Well, that completes this latest tour of Maddog Manufacturing. I hope you enjoyed it. Comments are always welcome. Thanks for riding with us!
The Duke
Virtuoso of Miniatures
"Do you know what the chain of command is? It's the chain I get and beat you with 'till you understand who's in ruttin' command!"
-Jayne Cobb, Firefly Episode 2 "The Train Job"
We are modelers - the same in spirit, in hunger to insanely buy newly released kits, hustlers in hiding our stash from our better halves and experts in using garbage as replacements for after-market parts.
Virtuoso of Miniatures
"Do you know what the chain of command is? It's the chain I get and beat you with 'till you understand who's in ruttin' command!"
-Jayne Cobb, Firefly Episode 2 "The Train Job"
We are modelers - the same in spirit, in hunger to insanely buy newly released kits, hustlers in hiding our stash from our better halves and experts in using garbage as replacements for after-market parts.

Re: Maddog Manufacturing 2020 Production
Duke, you are a wild an! Awesome work!
To make each build less crappy than the last one. Or, put another way, "Better than the last one, not as good as the next one!"..
-
Stikpusher
- Moderator
- Posts: 18839
- Joined: Sat Apr 05, 2014 8:37 pm
- Location: Ceti Alpha 5
Re: Maddog Manufacturing 2020 Production
Always a feast for the eyes to read thru your latest Maddog Manufacturing update posts.so much to see!  That Anatov is truly one imposing model! I do wish that I would be at the IPMS meeting you will bring it into once completed.
One thing, I think that you accidentally posted two photos of the same Churchill twice, and not the two different builds...
One thing, I think that you accidentally posted two photos of the same Churchill twice, and not the two different builds...
"Surely I have made my meaning plain? I intend to avenge myself upon you, Admiral. I have deprived your ship of power, and when I swing 'round, I intend to deprive you of your life."
FLSM
FLSM