Page 2 of 3
Re: Fw190D-13 Yellow 10
Posted: Fri Feb 14, 2020 9:30 pm
by BlackSheep214
Ambitious indeed. Not to mention a glutton for punishment dealing with resin warpage and such. I'm confident you'll get this done warts and all. I
Re: Fw190D-13 Yellow 10
Posted: Sat Feb 15, 2020 4:03 am
by jkim
The ideal plan is to use as little of the resin parts as possible. And... I have another resin D-13 conversion coming in from the Czech Republic (don't you love how international modeling is?) but I'm guessing it will be even less useful than this set because it ignores the bulges altogether. I'm trying to gather my references to map out a game plan for the modification to the Hasegawa kit parts. Volume 2 of Crandall's Dora Series has some scale drawings of the D-13 including some useful cross sections.
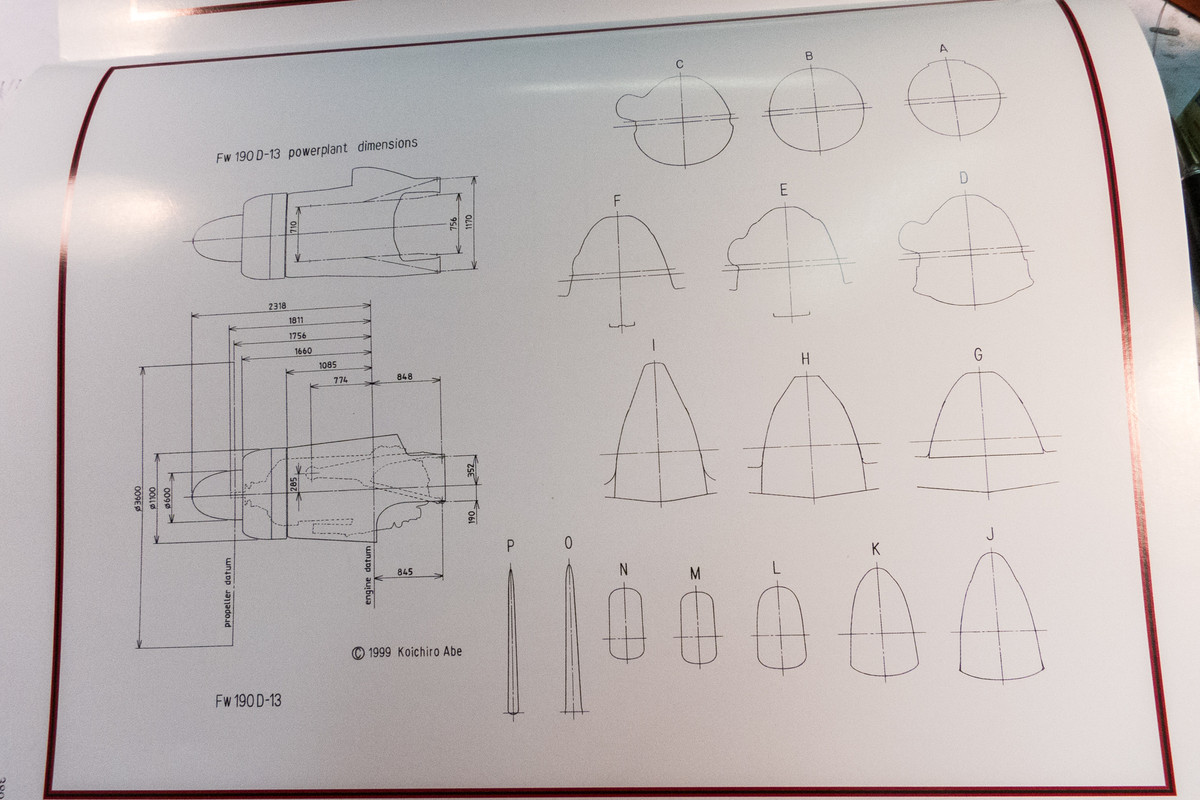
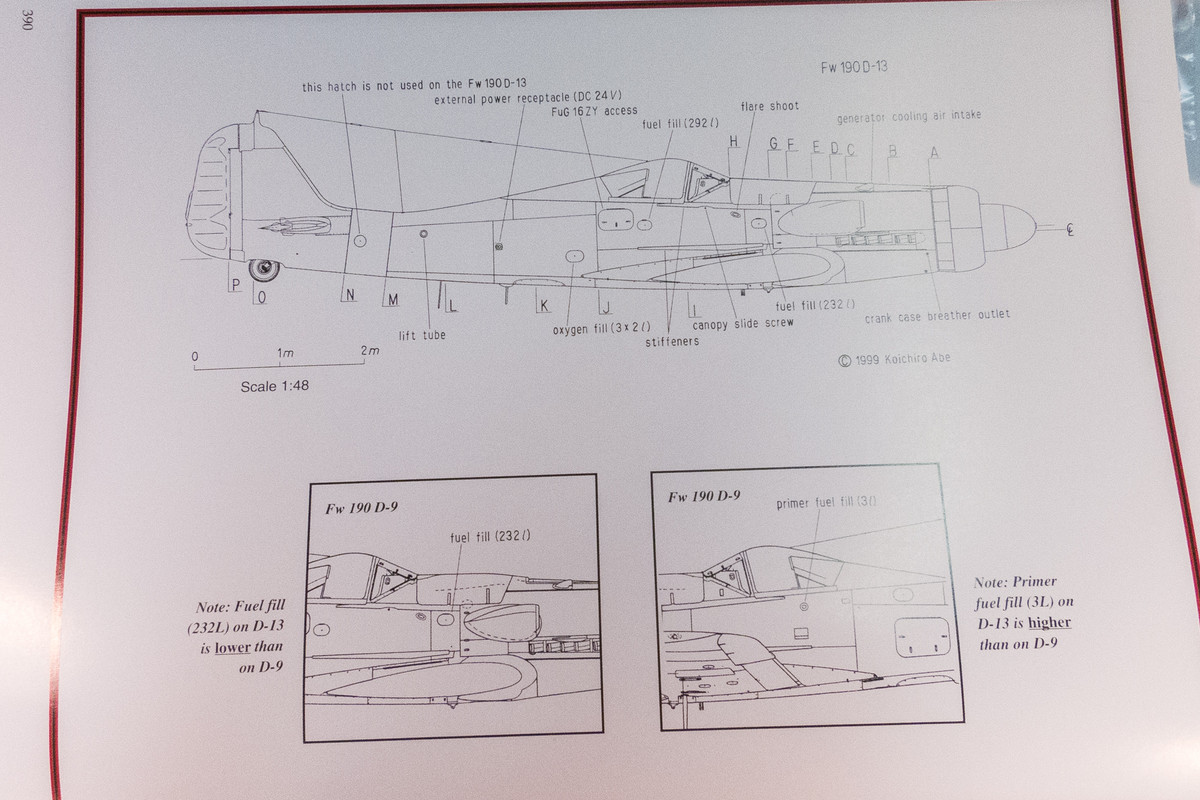
All combined, the photos, the drawings and the Grey Matter fuselage, are starting to give me a more definitive picture of what the bulges look like and where they are located.
Re: Fw190D-13 Yellow 10
Posted: Tue Feb 18, 2020 6:06 am
by Stuart
This is shaping up to be a very in-depth project John. I like your thoughts about using the resin as a guide to modify the kit parts were needed - that sounds like a much better approach.
Best of luck with it.
Re: Fw190D-13 Yellow 10
Posted: Tue Feb 18, 2020 3:52 pm
by mostrich
jkim wrote:... (don't you love how international modeling is?) ...
Oh yes, this is one of the aspects I love the most! It's the simple things that unite us.
Re: Fw190D-13 Yellow 10
Posted: Tue Feb 18, 2020 6:00 pm
by Stikpusher
Likewise! A common interest in assembling styrene bits, plus other things, into all sorts of miniature creations, both real and imagined.
Re: Fw190D-13 Yellow 10
Posted: Wed Feb 19, 2020 4:03 am
by Stuart
Stikpusher wrote:mostrich wrote:
Oh yes, this is one of the aspects I love the most! It's the simple things that unite us.
Likewise! A common interest in assembling styrene bits, plus other things, into all sorts of miniature creations, both real and imagined.
Yeah it's funny isn't it. I ended up having a conversation (via google translate) with the French chap that sold me the Mirage N about modelling - really nice guy.
Re: Fw190D-13 Yellow 10
Posted: Thu Feb 20, 2020 3:08 pm
by mostrich
See? You even start talking to French as a modeller.

Re: Fw190D-13 Yellow 10
Posted: Thu Feb 20, 2020 4:19 pm
by Stikpusher
Re: Fw190D-13 Yellow 10
Posted: Thu Feb 27, 2020 10:30 am
by jkim
Speaking of international, the Real Model D-13 conversion finally arrived from the Czech Republic. Since the JR/GM conversion is much more comprehensive and acknowledged as fundamentally accurate, the Real Model stuff is just for comparative purposes. In terms of components, it is similar to the GM conversion minus the fuselage.
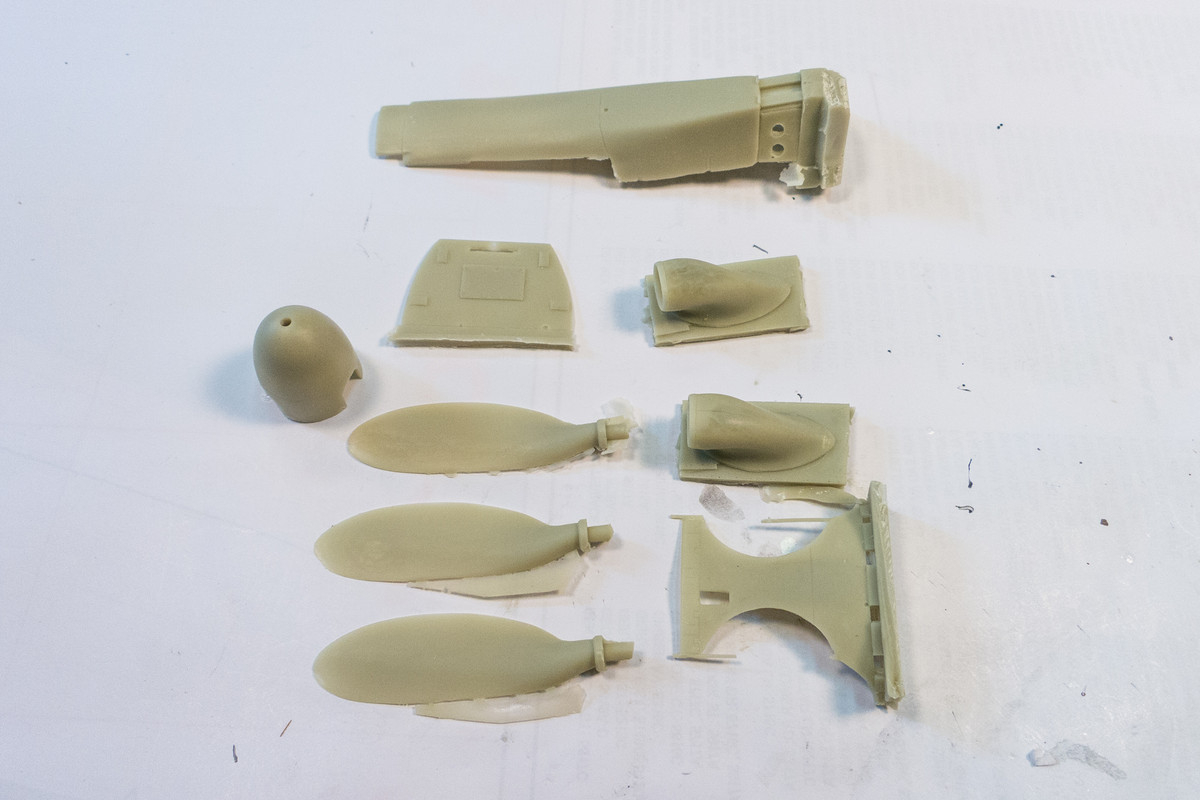
I've not really looked at this set in great detail but the top cowling seem to be very similar to the GM version. So it looks like I have some valid choices when it comes to this component. Since I have nothing to lose, I may still try to sculpt the kit cowling into shape.
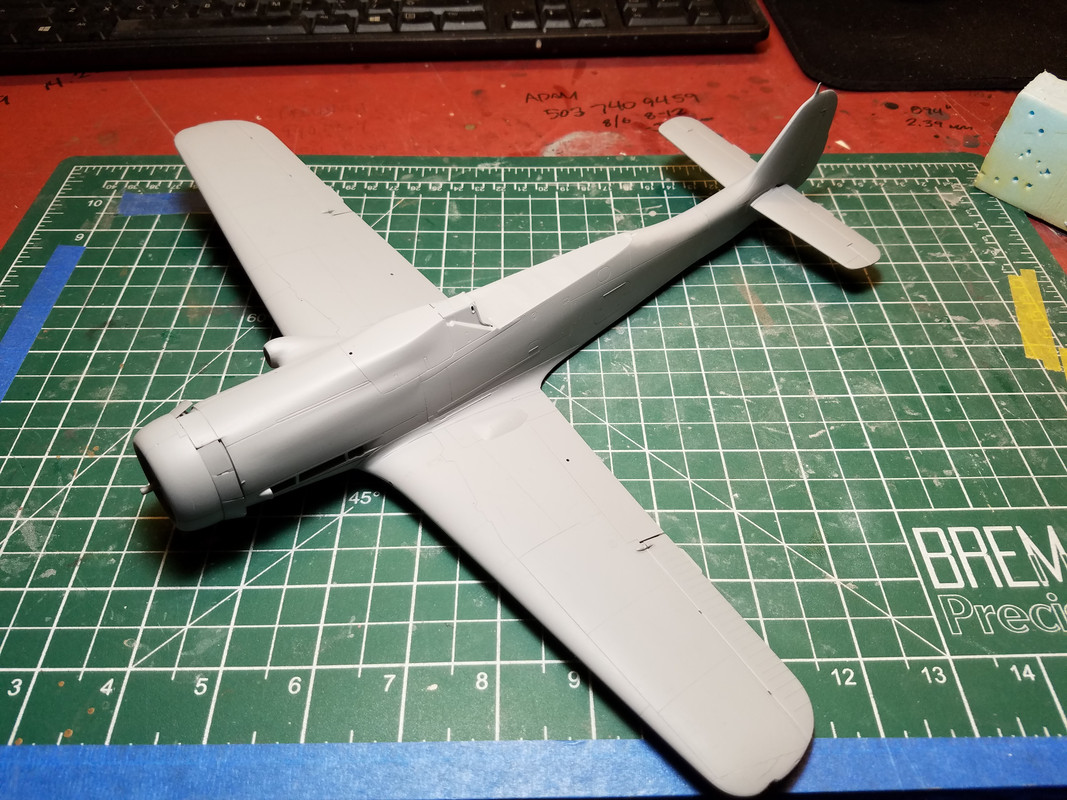
There is a current build over at LSP that is using the GM D-13 conversion. He's incorporated the resin components very cleanly as you can see. With that coat of primer on, you can readily make out the bulge on the forward fuselage that I am thinking about replicating.
Re: Fw190D-13 Yellow 10
Posted: Thu Feb 27, 2020 8:59 pm
by jkim
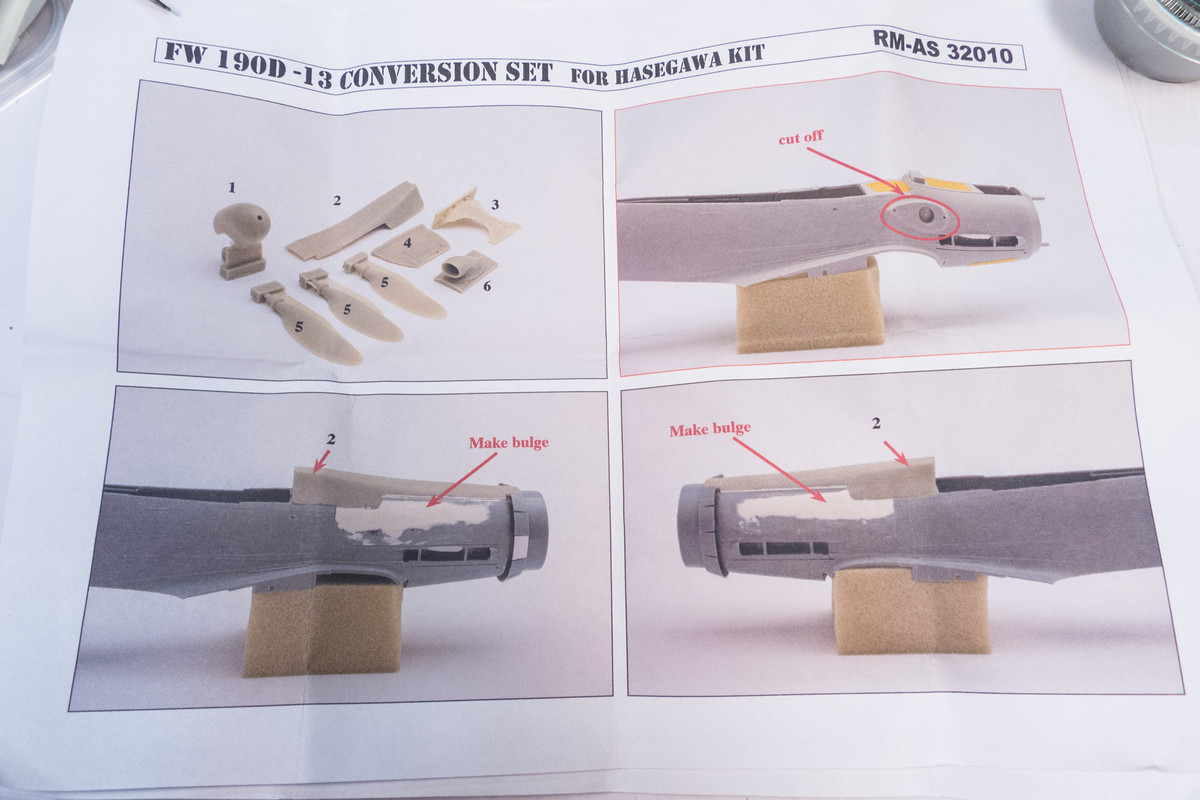
Looking at the Real Model D-13 conversion set, we see that it comes with a set of instructions. These instructions illustrate the type of corrections that I was thinking of performing myself. The only "issue" I see here is the removal of the existing supercharger intake base on the starboard side and re-implementation of a larger base for the new supercharger. A few steps more complicated than the port side but nothing I don't think I can handle.
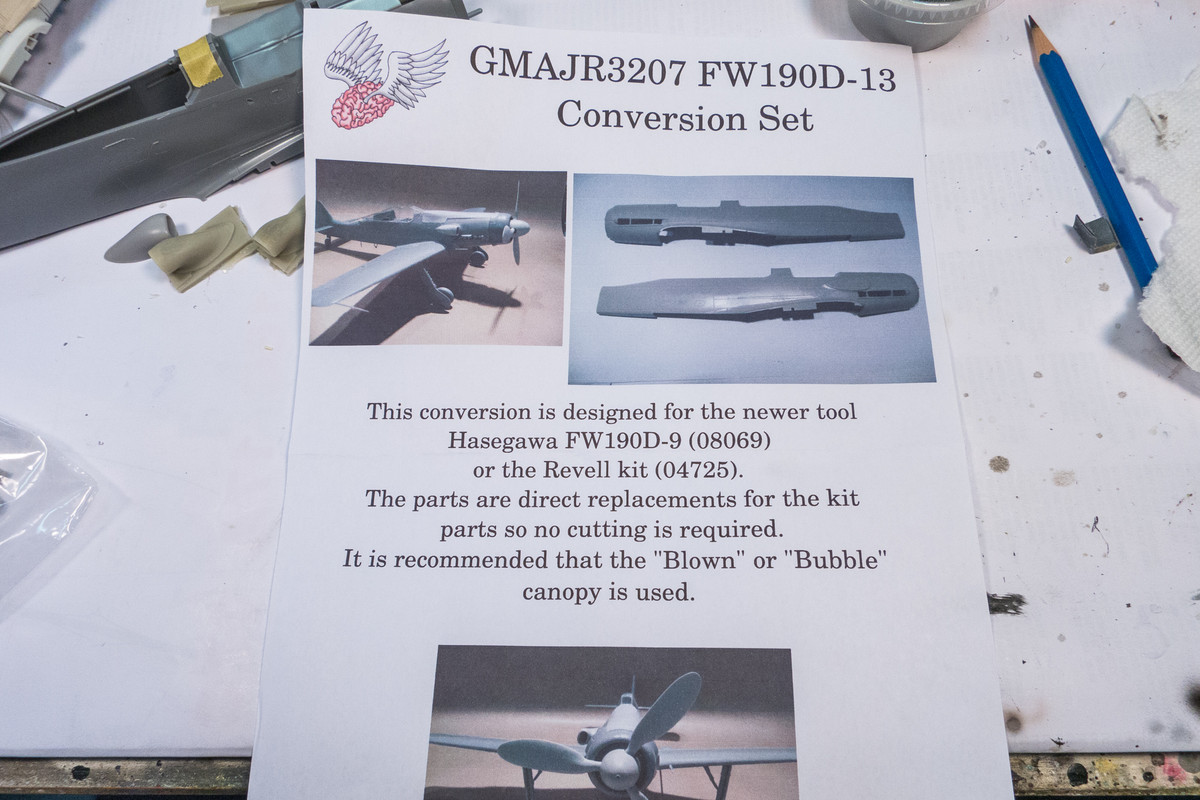
The Grey Matter D-13 conversion comes with no instructions but this informational sheet, which claims "no cutting is required". Obviously aimed at the more experienced modeler.
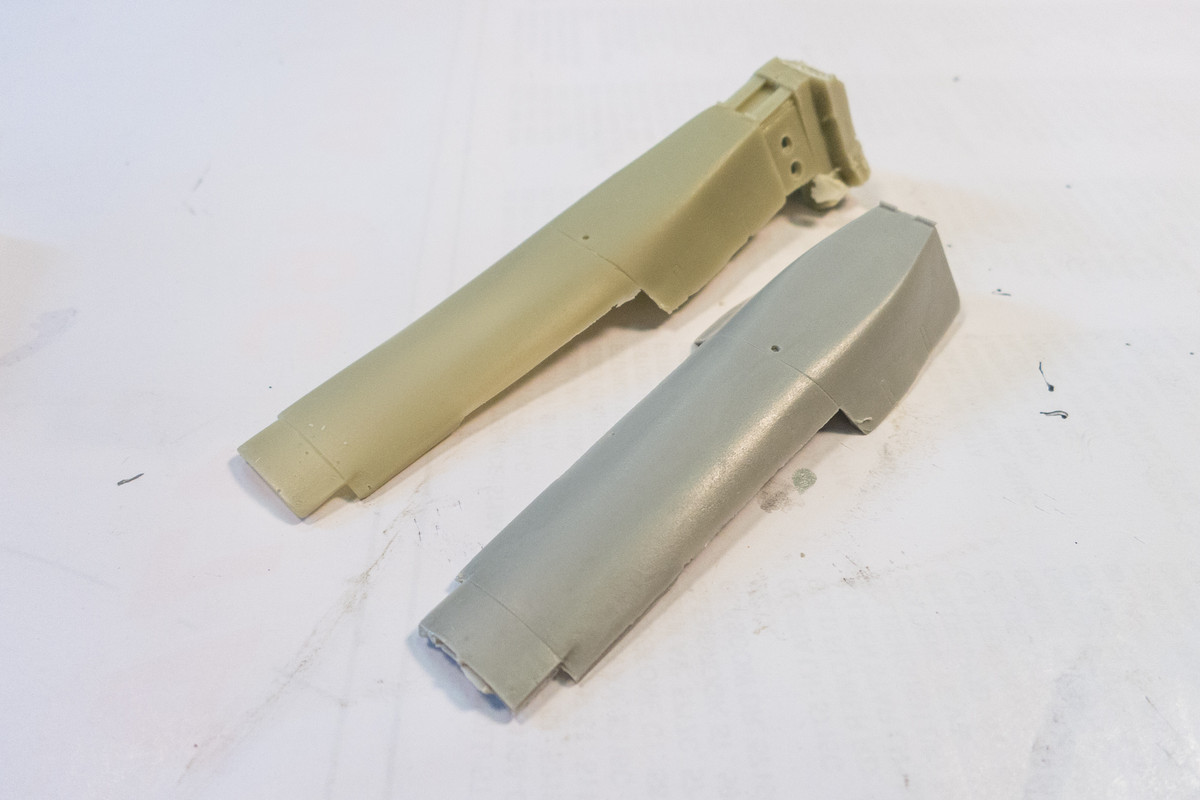
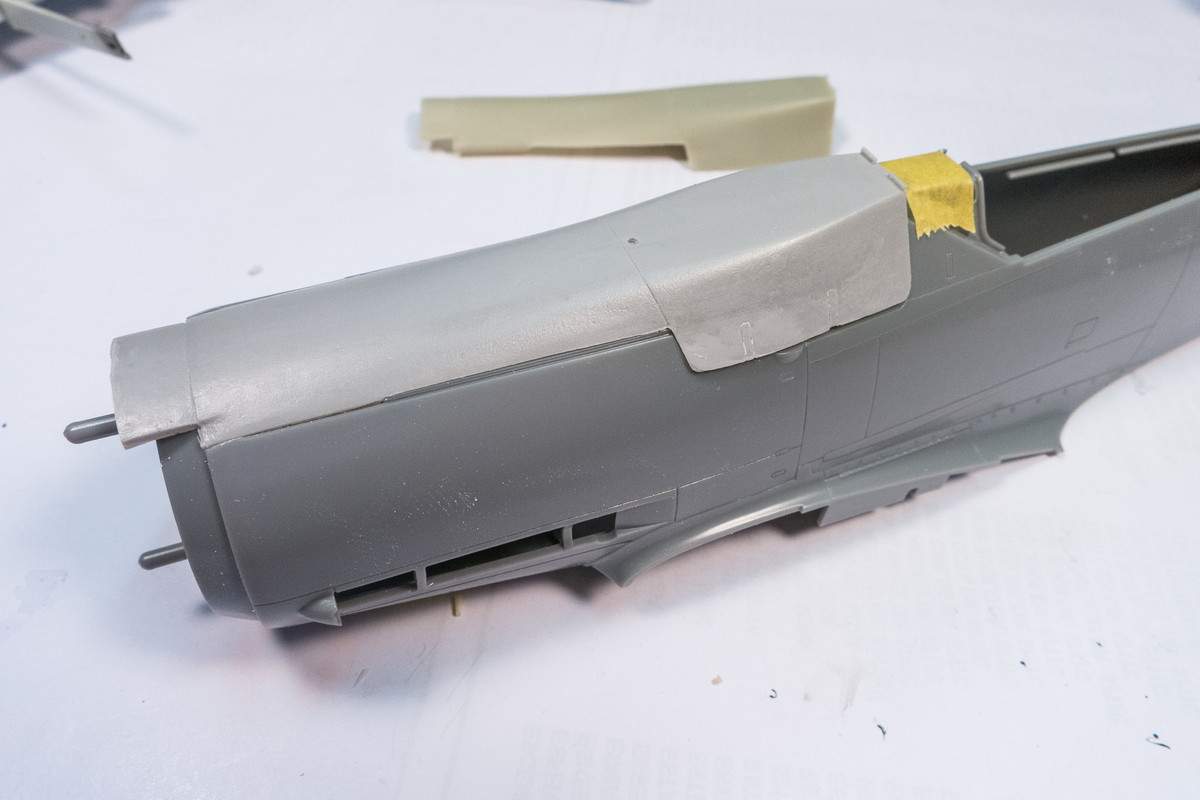
I sawed off the RM cowling from its casting block, cleaned it up and mounted it on the Hasegawa D-9 fuselage. It took some extra trimming on the cowling ends to get it to fit, length-wise. It appears that the bottom rear edge of the cowling is narrower than the fuselage, resulting in a noticeable step that would need to be corrected.
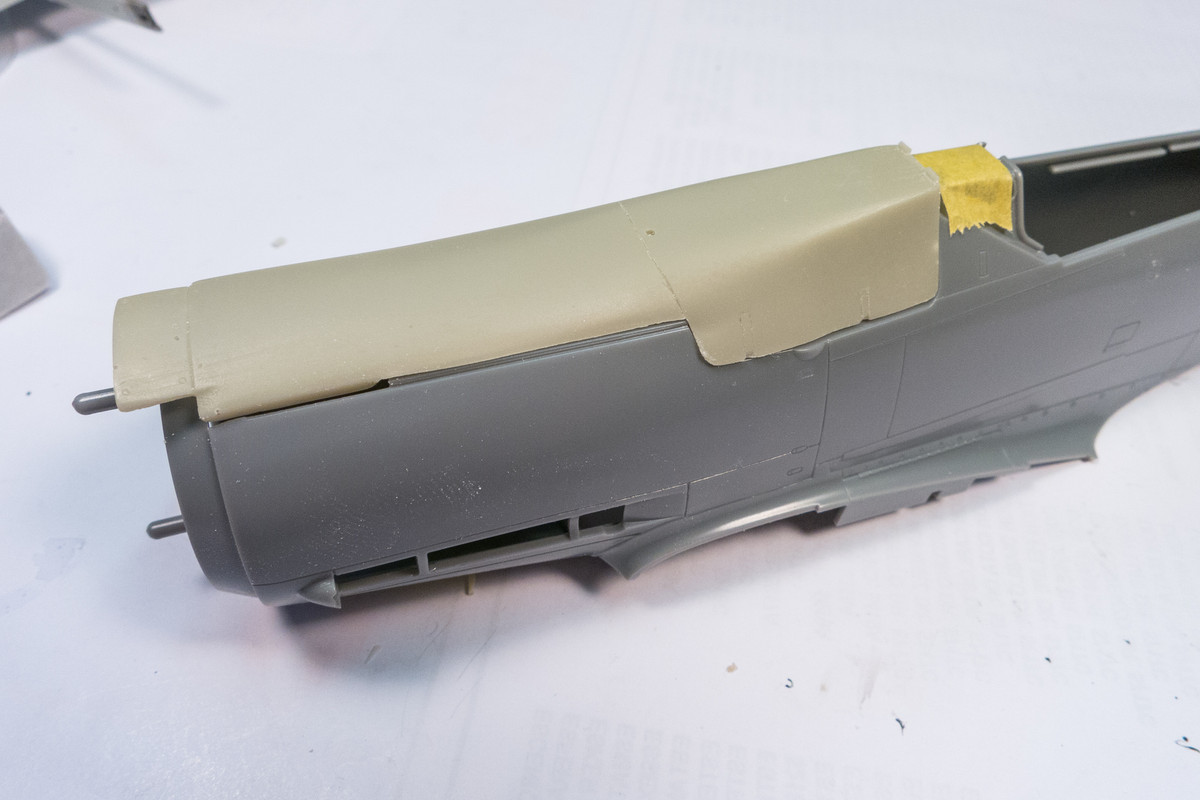
The GM cowling, although not perfect, fits much better than the RM cowling. Dimensions seem to correspond more accurately to the Hasegawa fuselage which will require less remedial work.
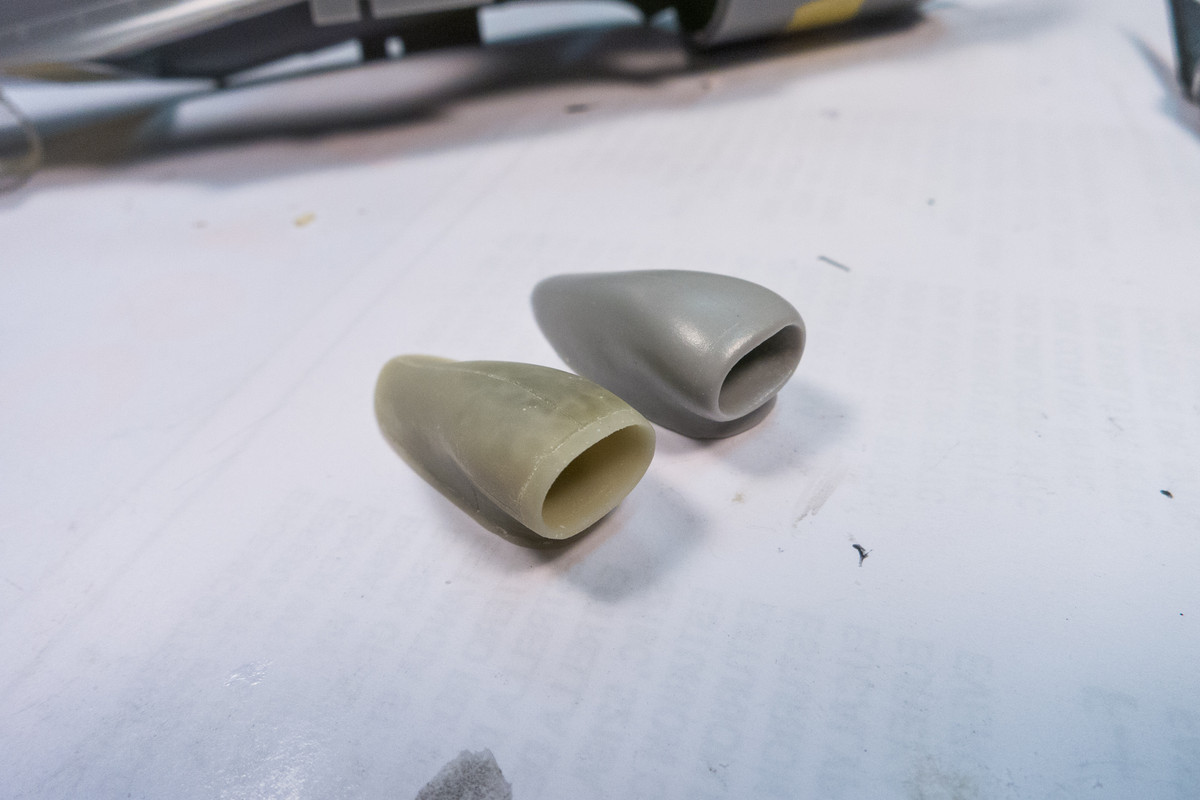
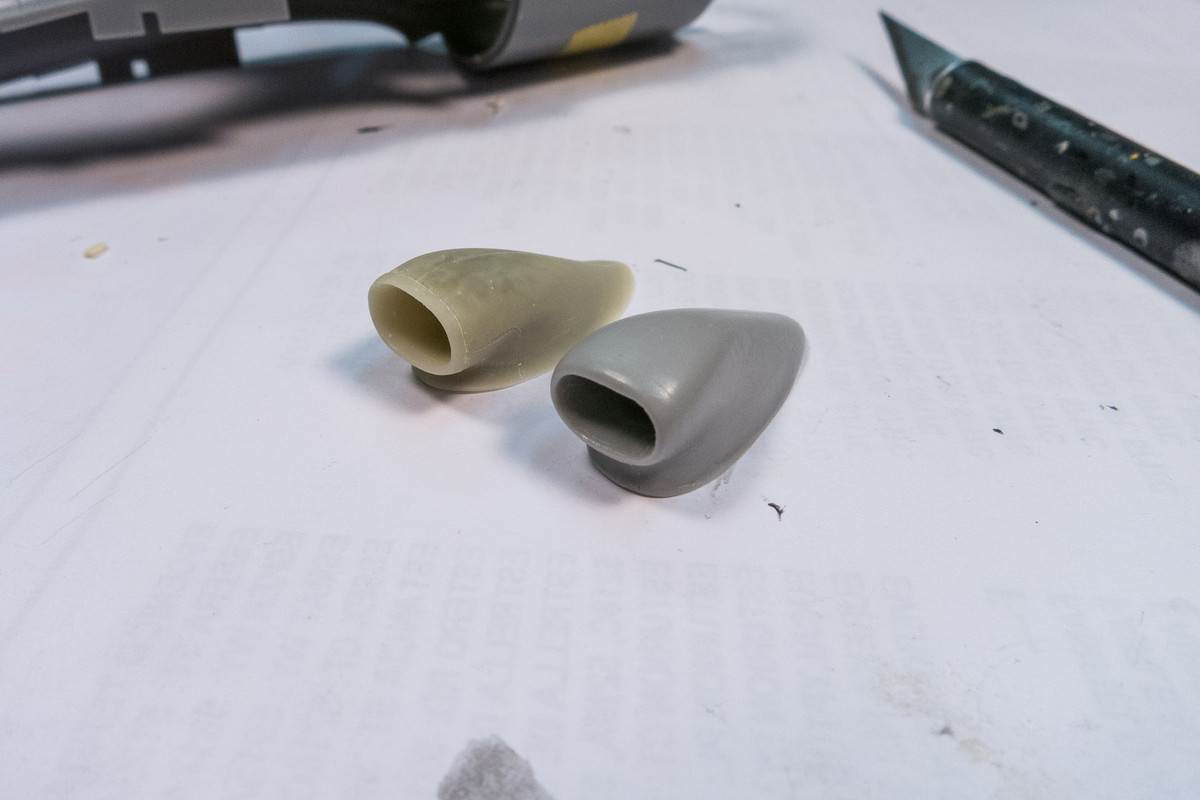
The two supercharger intakes are slightly different in shape. The RM intake has a leaner look with a thinner lip around the intake opening. It also has some recessed panel line details missing from the GM intake. I would say that the RM intake looks more appealing but I'll have to compare with photos to see which one is more accurate.
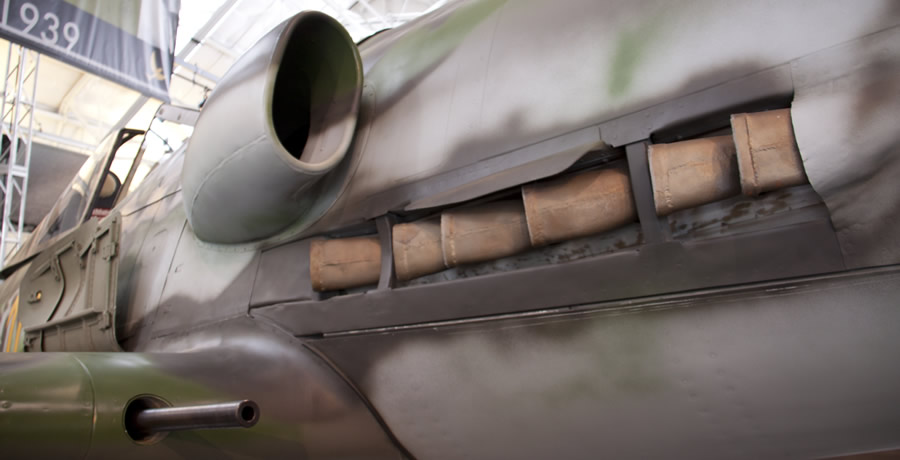
Here is a photo of the real deal...
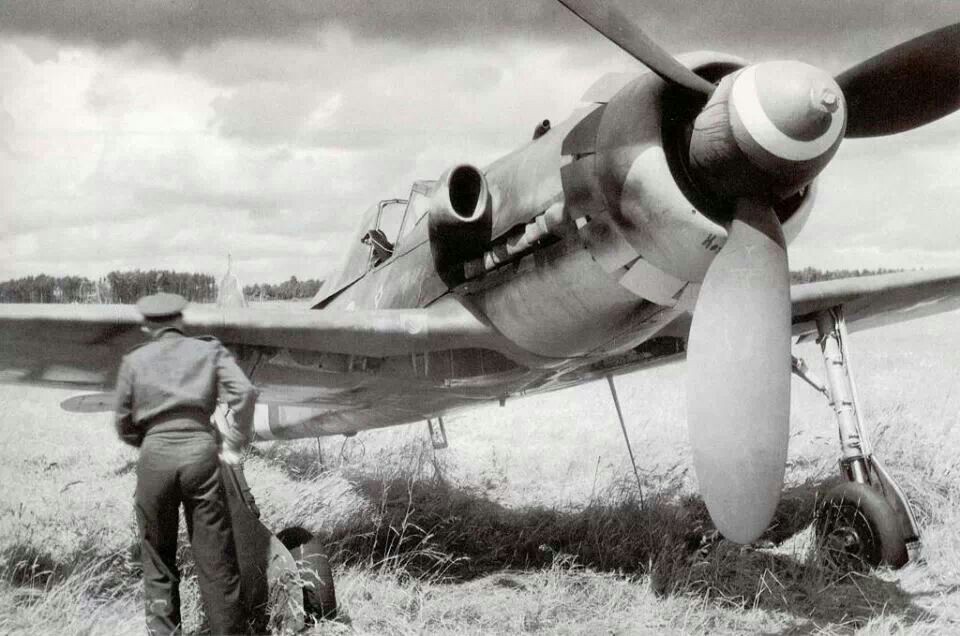
And some pics of the restored aircraft. I think the supercharger was fabricated since I read that the original supercharger was hacked off by an axe-wielding drunkard in the 60's.
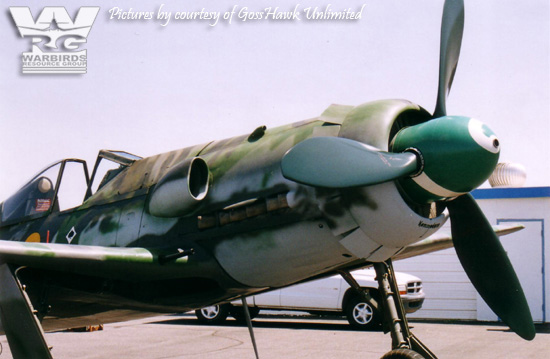
I am leaning toward the RM supercharger.