1/32 Hasegawa N1K2-J Shiden Kai
-
Medicman71

- Elite Member
- Posts: 9730
- Joined: Mon Apr 07, 2014 9:32 am
- Location: Houston, Tx
Re: 1/32 Hasegawa N1K2-J Shiden Kai
Very nice!
Mike
Sponsored by Boeing, Lockheed Martin, Northrop Grumman, Saab, BAE, and Dassault
Sponsored by Boeing, Lockheed Martin, Northrop Grumman, Saab, BAE, and Dassault

Re: 1/32 Hasegawa N1K2-J Shiden Kai
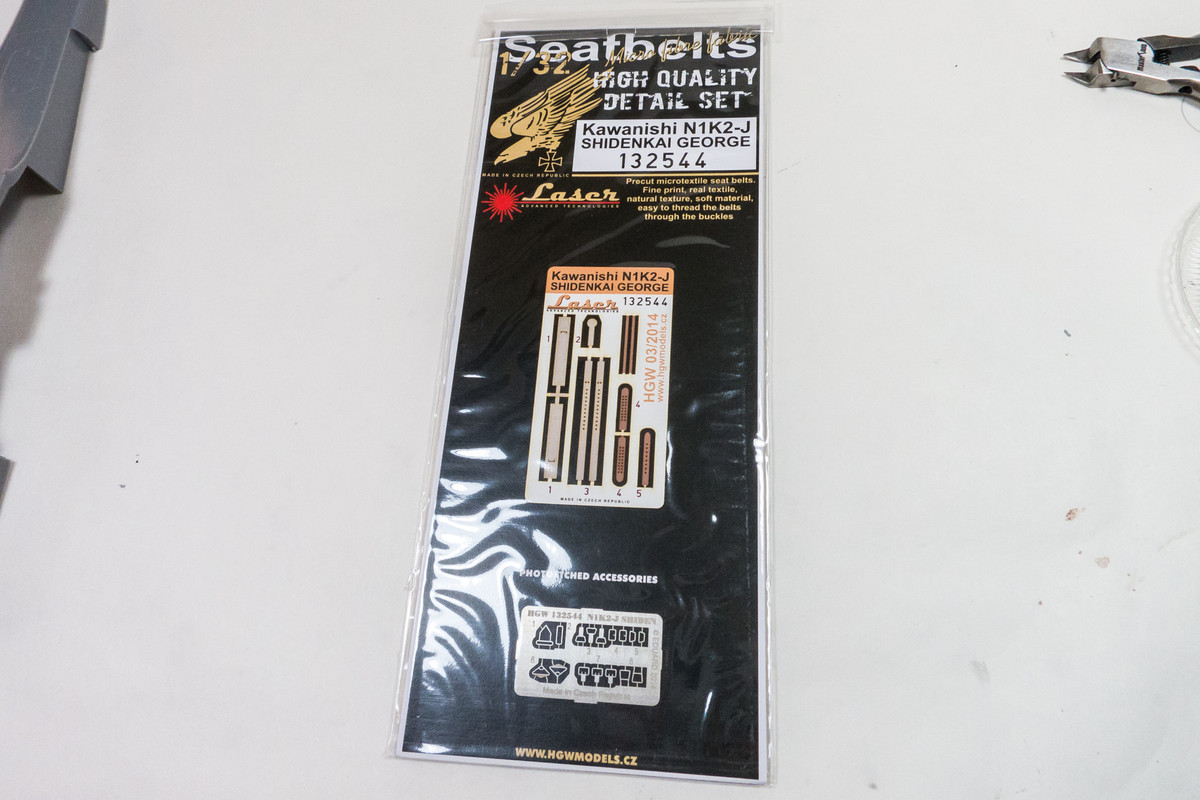
Thanks guys! I haven't updated in a while because I was busy with other things. I FINALLY received the HGW seatbelts from the Czech Republic so at least that is not holding me up anymore.
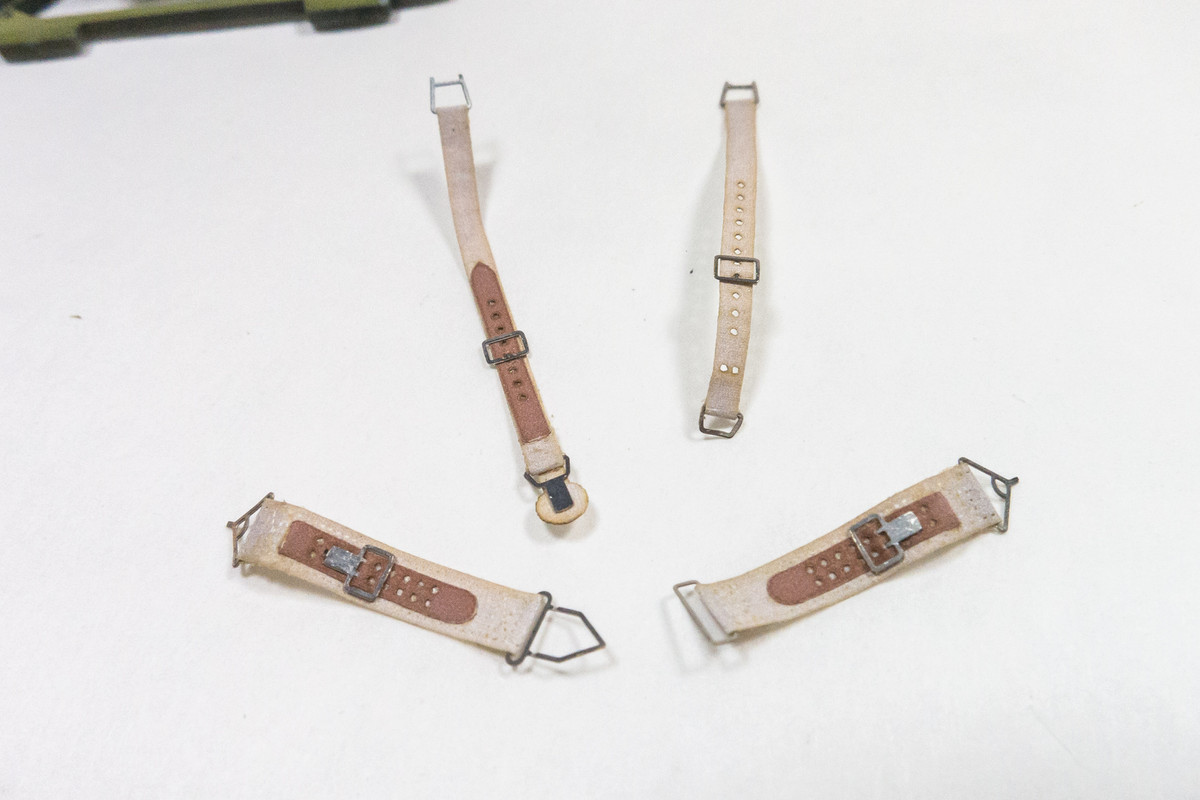
Less components than a typical Luftwaffe harness system so assembly was relatively simple.
Even though the fabric material is much more flexible than brass, it's still difficult to drape these things in a realistic manner. And is it just me but don't all of the seatbelt representations, whether they are fabric or brass, seem a tad OVERscale? Would the lap belts really fill up the bucket of the seat so completely?
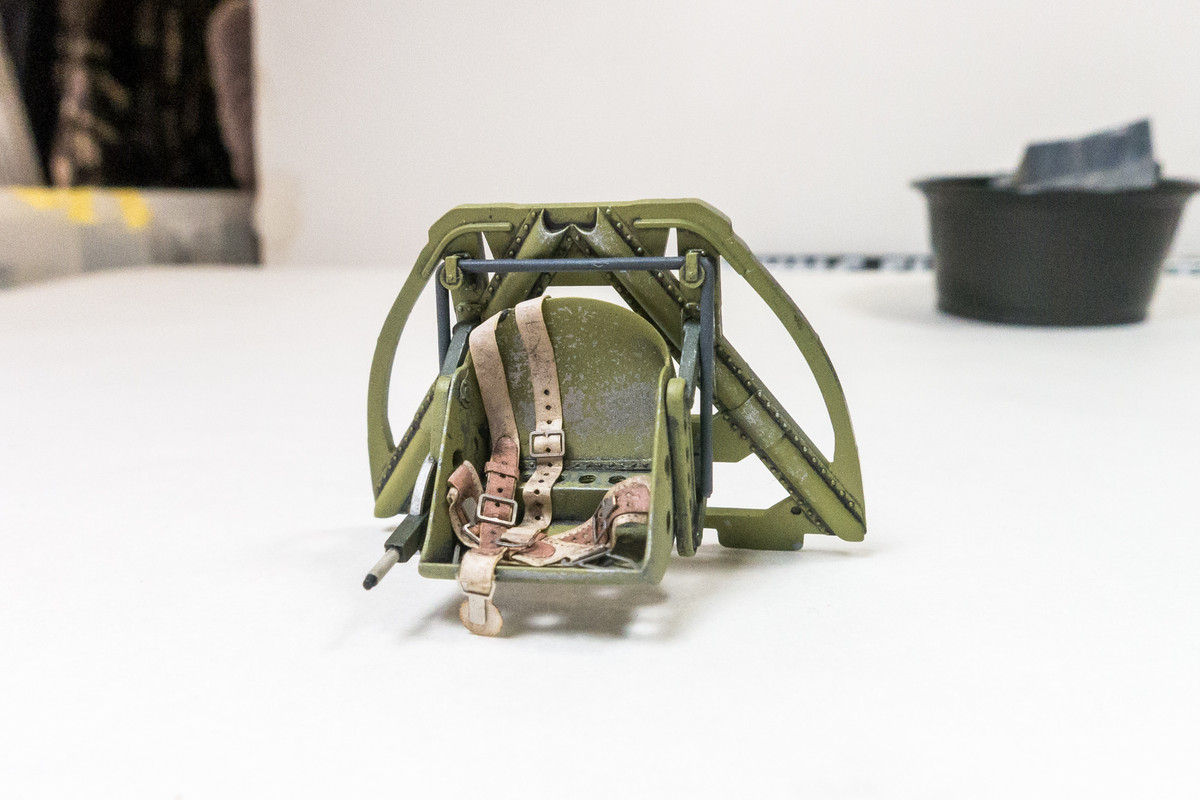
Anyways... now that the seat is complete, I can take a few more pics of the cockpit.
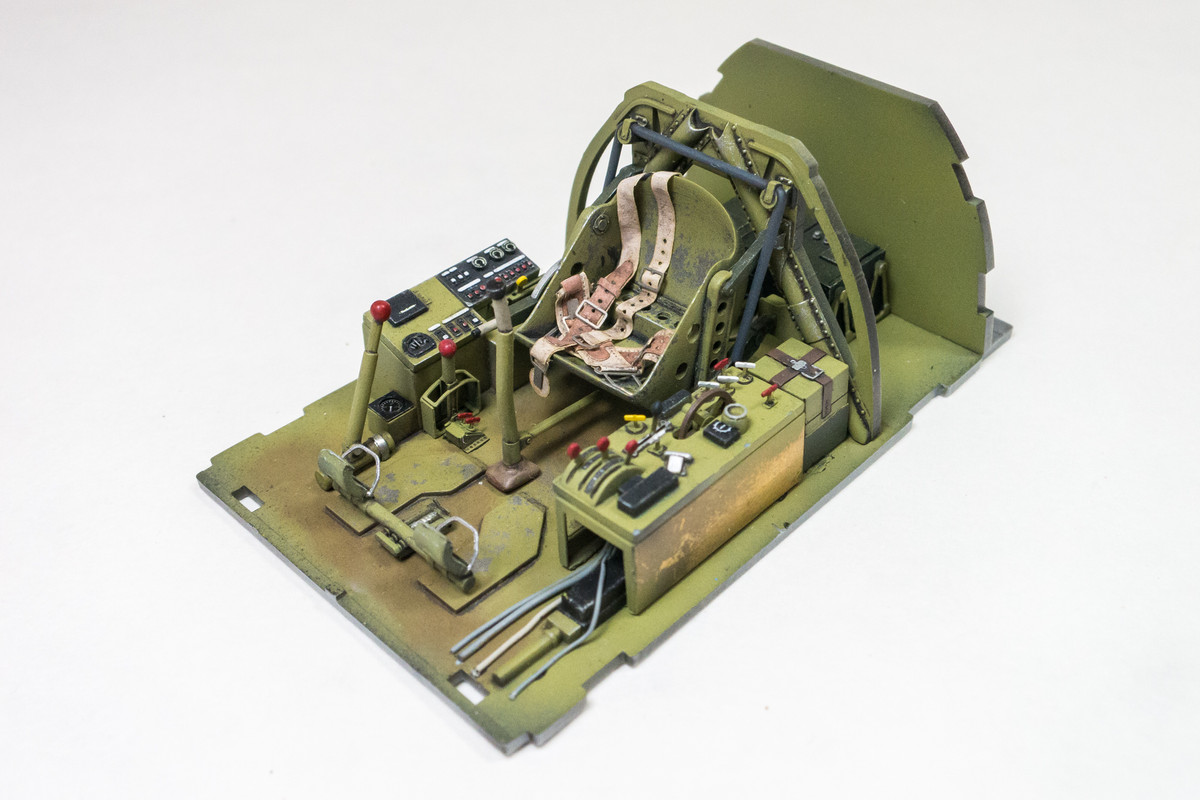
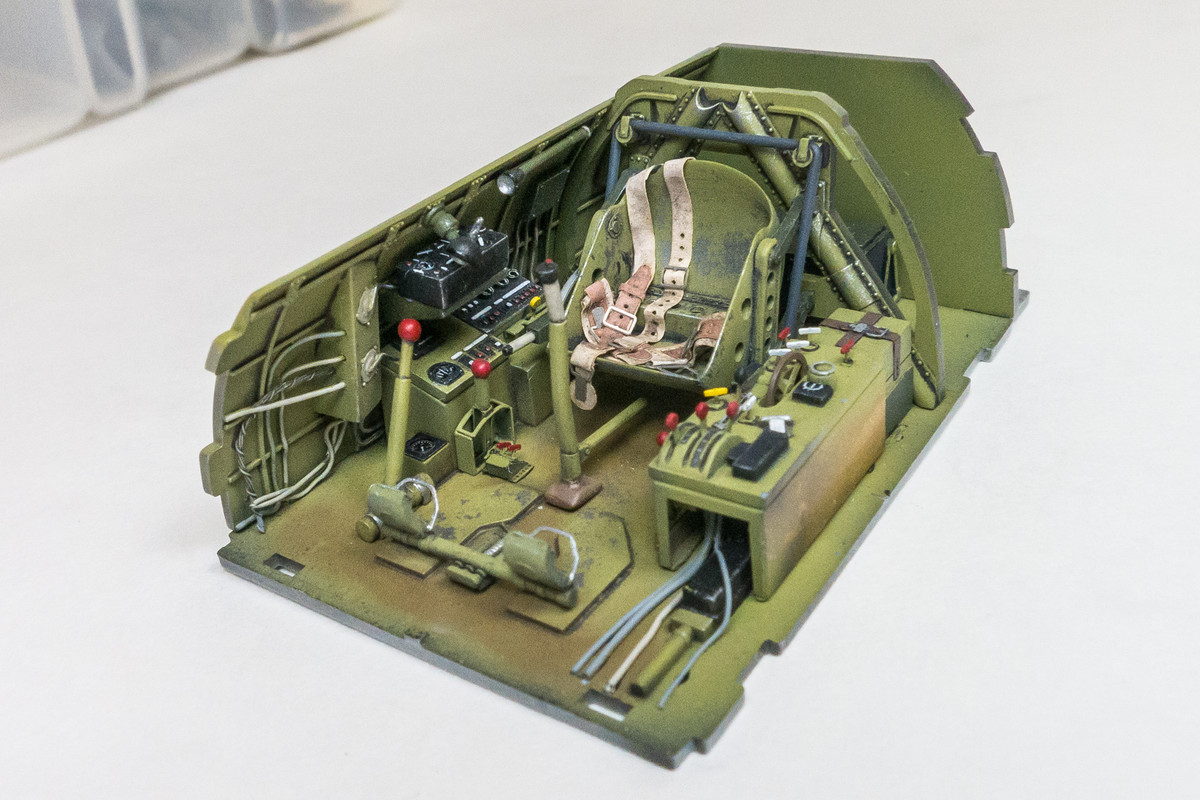

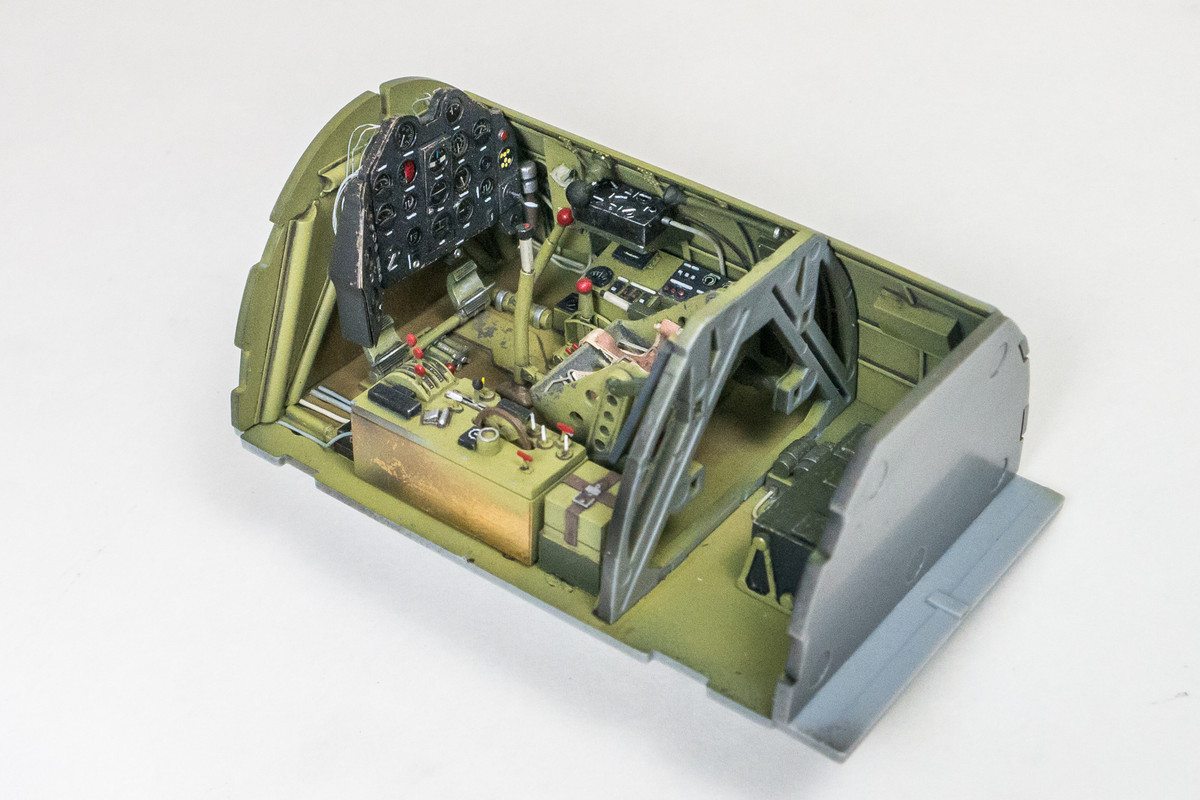
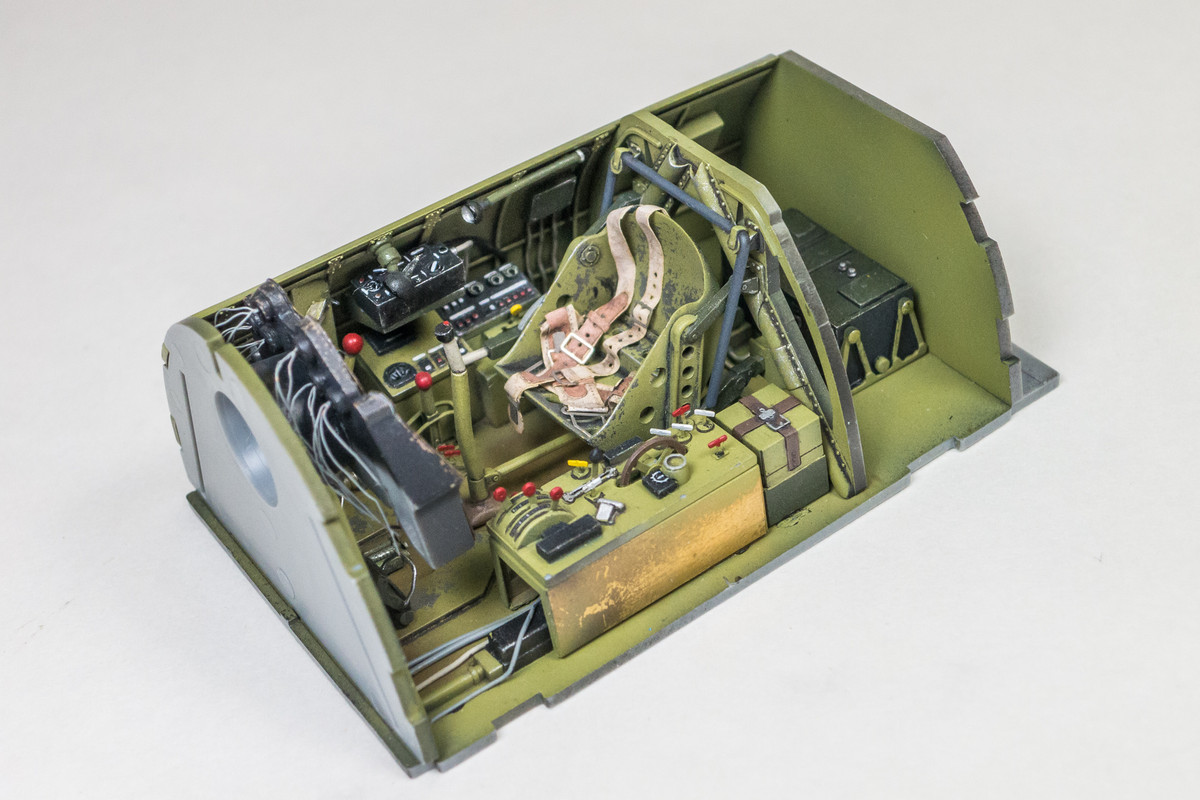

Overscale or not, the seatbelts add a nice finishing touch to the cockpit. Now I have to start getting serious about riveting. I just received another set of Galaxy Tools riveters with the wider spacing. Same vendor as before but instead of having to wait over 60 days, transit time was only 11 days.
Less components than a typical Luftwaffe harness system so assembly was relatively simple.
Even though the fabric material is much more flexible than brass, it's still difficult to drape these things in a realistic manner. And is it just me but don't all of the seatbelt representations, whether they are fabric or brass, seem a tad OVERscale? Would the lap belts really fill up the bucket of the seat so completely?
Anyways... now that the seat is complete, I can take a few more pics of the cockpit.
Overscale or not, the seatbelts add a nice finishing touch to the cockpit. Now I have to start getting serious about riveting. I just received another set of Galaxy Tools riveters with the wider spacing. Same vendor as before but instead of having to wait over 60 days, transit time was only 11 days.
John aka JKim
-----------<><

-----------<><
-
jeaton01

- Elite Member
- Posts: 2072
- Joined: Thu Apr 23, 2020 9:20 am
- Location: Northern California
- Contact:
Re: 1/32 Hasegawa N1K2-J Shiden Kai
The shoulder belts in the Stearman were about 2 inches wide, the lap belts were about 3 inches. They were government surplus of course. So in 1/32 that would be 1/16 and 3/32. Can't help you with the WW II Japanese stuff, didn't fly those! Yes, they often do seem wide, especially in 1/72.
Beautiful cockpit!
Beautiful cockpit!

Re: 1/32 Hasegawa N1K2-J Shiden Kai
Them belts sure look good in the cockpit. I often wonder about German belts looking over scale when installed.
March as one, Don't look back
Odin's sons... Attack!
Unleash hell! Do not repent! Warfare grants us no lament
Let your weapons slash and tear This is no place for fear
Hold the lines! Move as one! In unity our victory's won
Our shields will form a mighty wall
United we shall never fall
Odin's sons... Attack!
Unleash hell! Do not repent! Warfare grants us no lament
Let your weapons slash and tear This is no place for fear
Hold the lines! Move as one! In unity our victory's won
Our shields will form a mighty wall
United we shall never fall
-
Stikpusher

- Moderator
- Posts: 18880
- Joined: Sat Apr 05, 2014 8:37 pm
- Location: Ceti Alpha 5
Re: 1/32 Hasegawa N1K2-J Shiden Kai
Beautiful work John!  I agree with your thoughts about the harness and how much that they really take up on a seat. But we do make our scale modeling compromises. Representation vs scale fidelity.
"Surely I have made my meaning plain? I intend to avenge myself upon you, Admiral. I have deprived your ship of power, and when I swing 'round, I intend to deprive you of your life."
FLSM
FLSM

Re: 1/32 Hasegawa N1K2-J Shiden Kai
I demand to see those little, tiny people you have building this! I don’t see how it is humanly possible. Someday, I’d love to see a video of this happening.
To make each build less crappy than the last one. Or, put another way, "Better than the last one, not as good as the next one!"..
-
BlackSheep214

- Elite Member
- Posts: 10425
- Joined: Sun Apr 06, 2014 8:47 pm
Re: 1/32 Hasegawa N1K2-J Shiden Kai
Very nice!
“Who controls the skies, controls the fate of this Earth”
Author unknown- 352nd Fighter Group, Blue-Nosed Bastards of Bodney
“Send one plane it’s a sortie; send two planes it’s a flight; send four planes it’s a test of airpower. - Richard Kohn
Author unknown- 352nd Fighter Group, Blue-Nosed Bastards of Bodney
“Send one plane it’s a sortie; send two planes it’s a flight; send four planes it’s a test of airpower. - Richard Kohn
Re: 1/32 Hasegawa N1K2-J Shiden Kai
Thanks guys! The cockpit is basically finished but I can't put it into the fuselage until the riveting is done. I've been procrastinating on this for a while now because the Shiden Kai happens to have a ton of rivets. Now that I've received the New Galaxy rivet tool in the preferred 1.00mm spacing, I had no excuses left to fall back on.

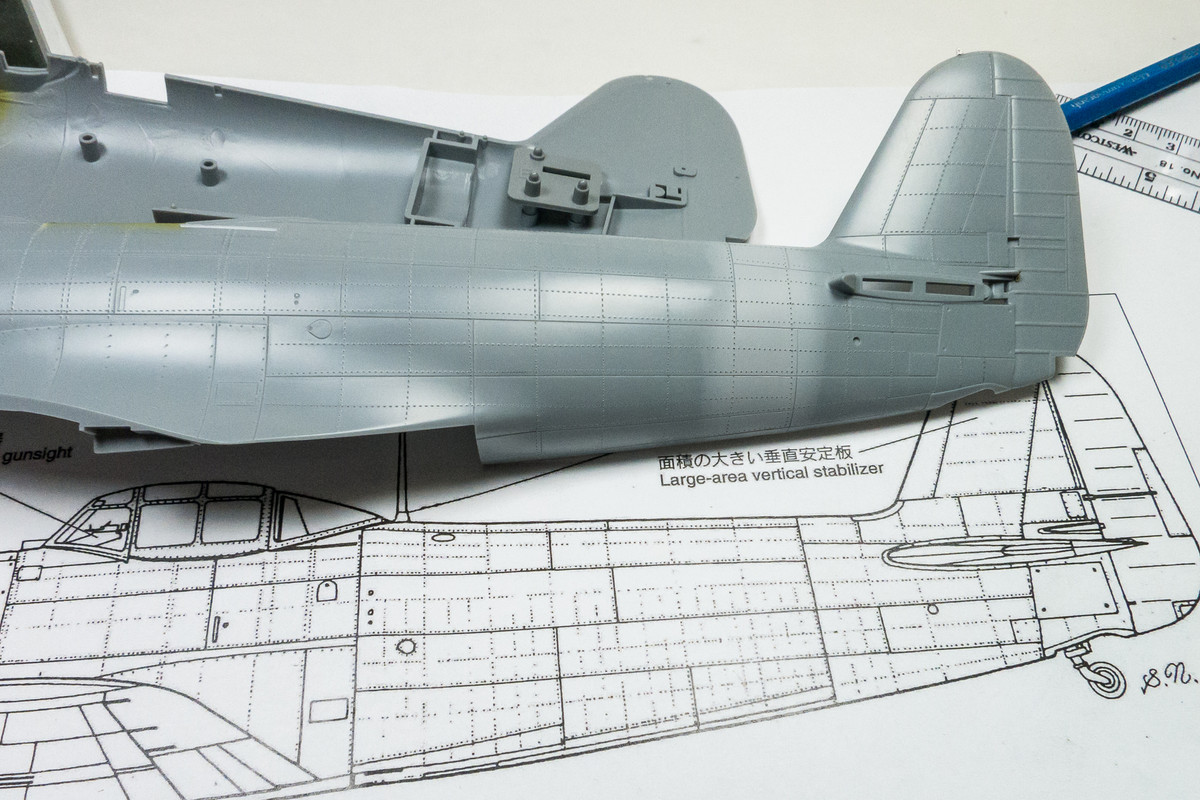
The first step is to draw the rivet guide lines onto the model using reference drawings, a flexible ruler and a soft-lead pencil. Because there are so many rivets, the lines started smearing. I decided to hold off on the more tightly spaced "intermediate" rivet lines and get the main grid lines in first.
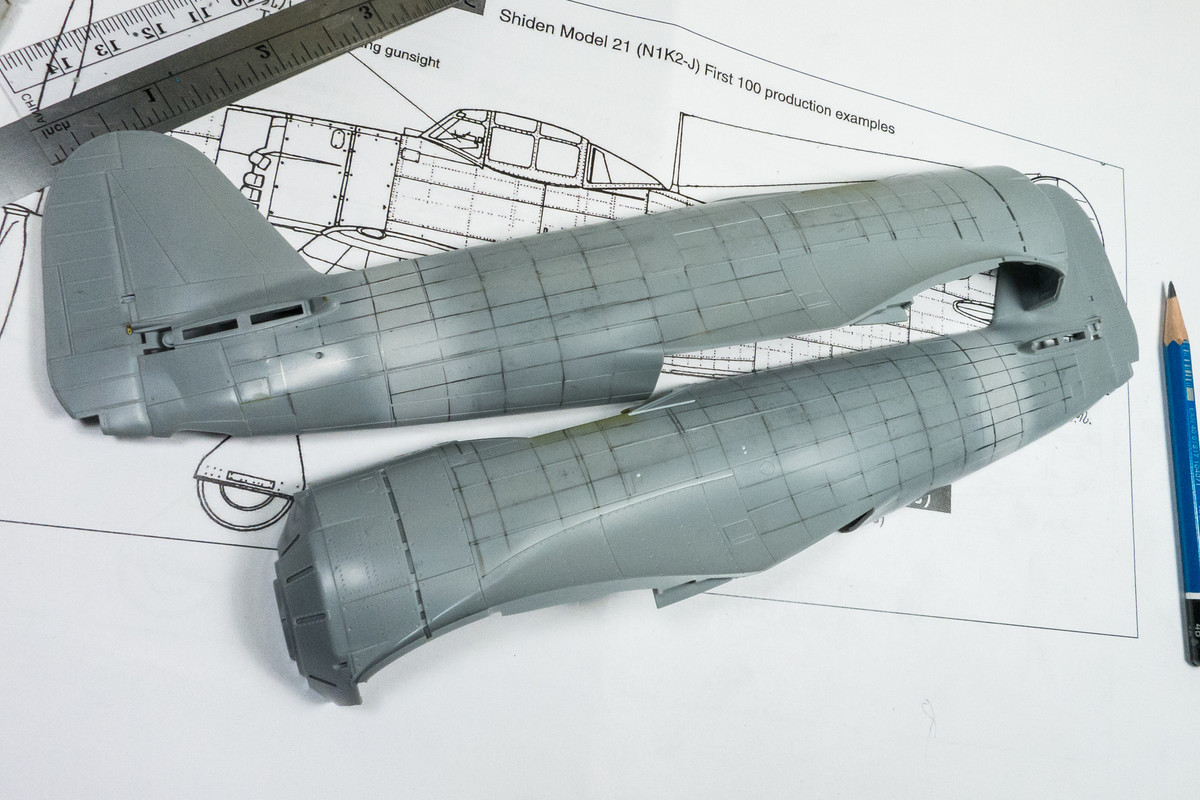
Once the lines are drawn, I simply roll the rivet tool over the lines. A decent amount of pressure is needed to make holes in the plastic and my rear fuselage joints buckled in a few places.

After riveting, I removed the pencil lines with Windex. At this point, I was thinking about leaving the intermediate rivet lines off. I mean, who is really going to notice?

Of course, I was compelled to complete the job and I put the intermediate rivets on as well.
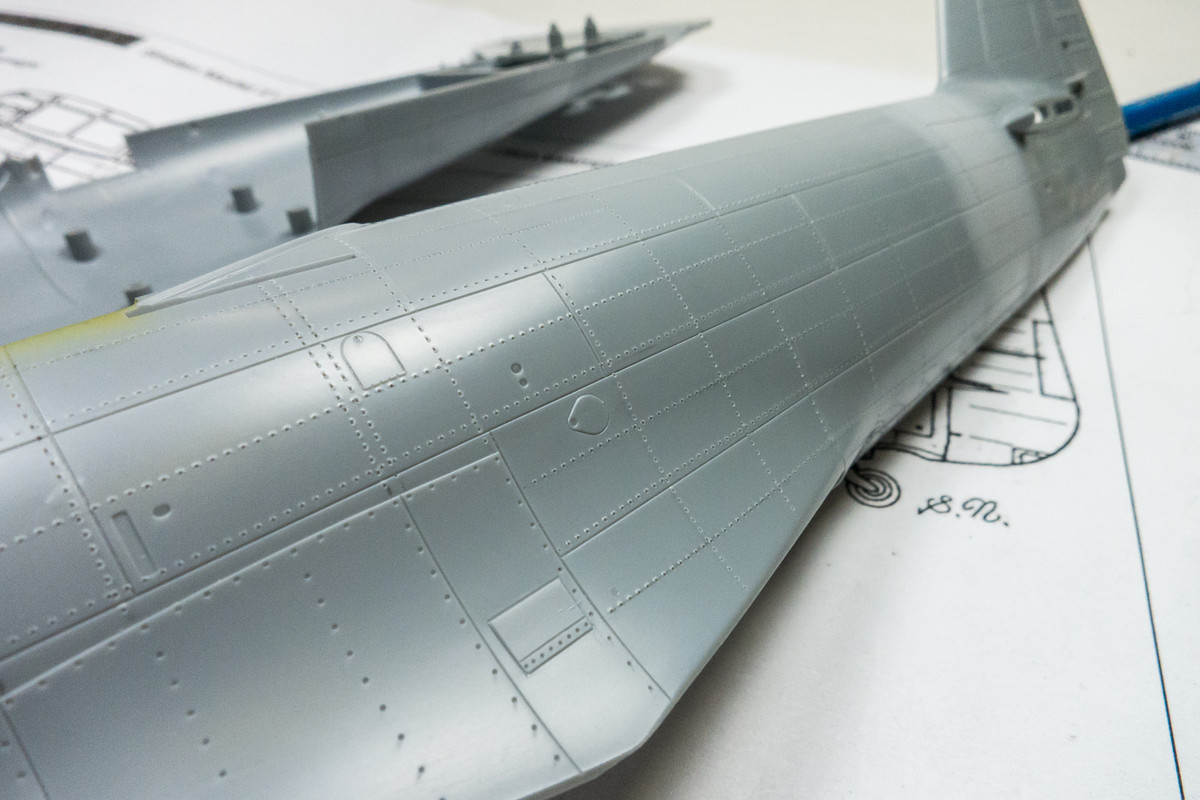
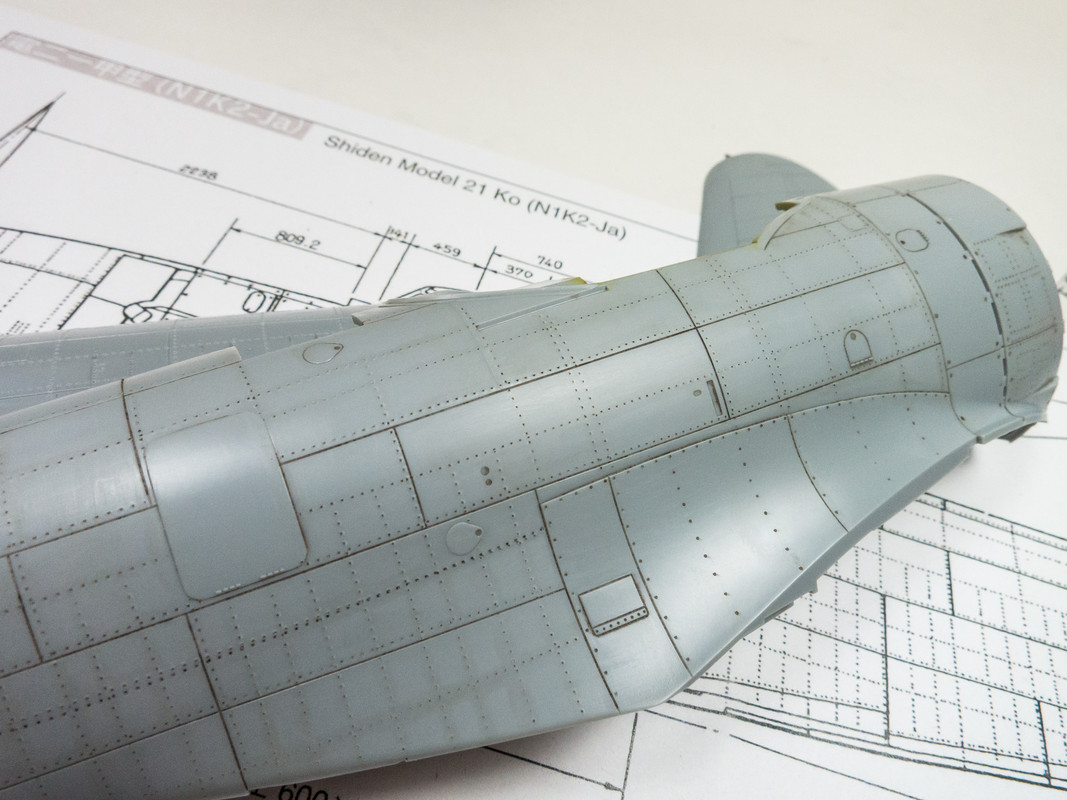
At this point, the rivets are like little pimples... each hole is surrounded by a mound of raised plastic. I don't like how this looks so I try to sand off the mounds and leave only the holes. It's another step in the process but I think the results is worth the effort.
The first step is to draw the rivet guide lines onto the model using reference drawings, a flexible ruler and a soft-lead pencil. Because there are so many rivets, the lines started smearing. I decided to hold off on the more tightly spaced "intermediate" rivet lines and get the main grid lines in first.
Once the lines are drawn, I simply roll the rivet tool over the lines. A decent amount of pressure is needed to make holes in the plastic and my rear fuselage joints buckled in a few places.
After riveting, I removed the pencil lines with Windex. At this point, I was thinking about leaving the intermediate rivet lines off. I mean, who is really going to notice?
Of course, I was compelled to complete the job and I put the intermediate rivets on as well.
At this point, the rivets are like little pimples... each hole is surrounded by a mound of raised plastic. I don't like how this looks so I try to sand off the mounds and leave only the holes. It's another step in the process but I think the results is worth the effort.
John aka JKim
-----------<><
-----------<><
-
Medicman71
- Elite Member
- Posts: 9730
- Joined: Mon Apr 07, 2014 9:32 am
- Location: Houston, Tx
Re: 1/32 Hasegawa N1K2-J Shiden Kai
Man those rivets look great. One of these days I'll learn how to do that.
Mike
Sponsored by Boeing, Lockheed Martin, Northrop Grumman, Saab, BAE, and Dassault
Sponsored by Boeing, Lockheed Martin, Northrop Grumman, Saab, BAE, and Dassault
Re: 1/32 Hasegawa N1K2-J Shiden Kai
Rivets are pretty easy to do... just time consuming!
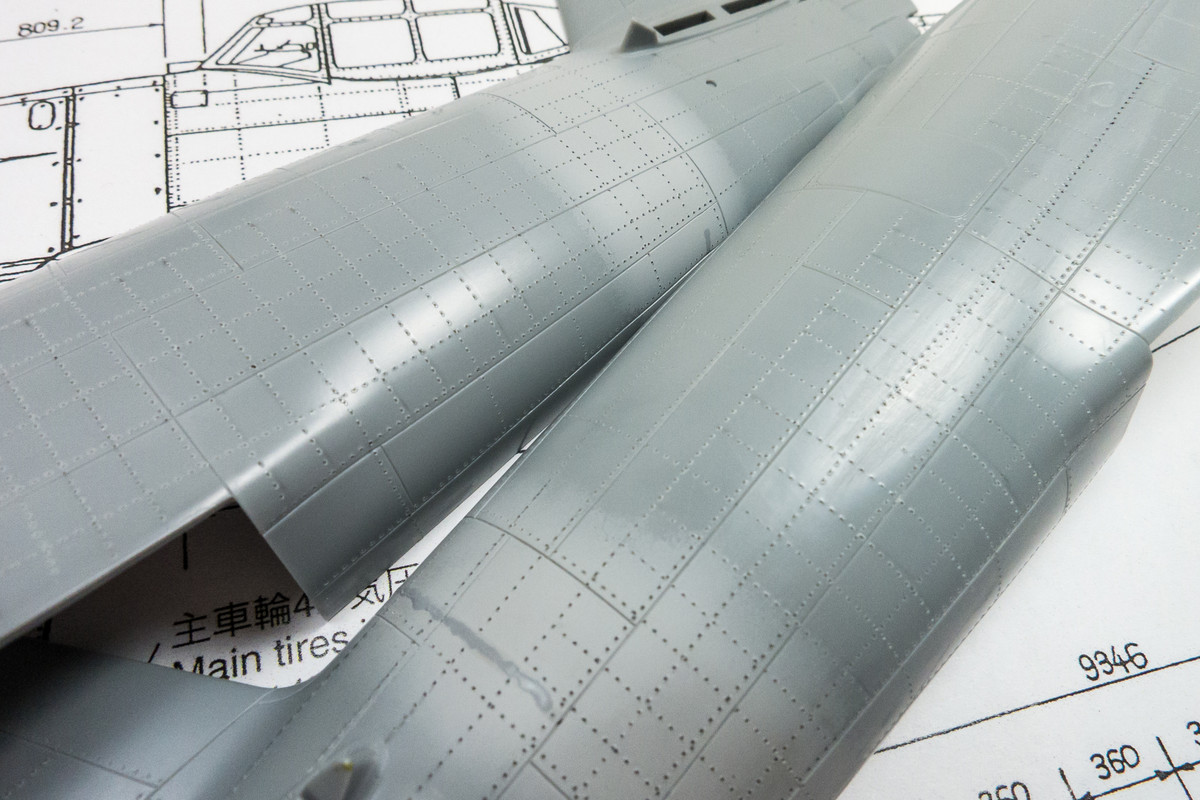
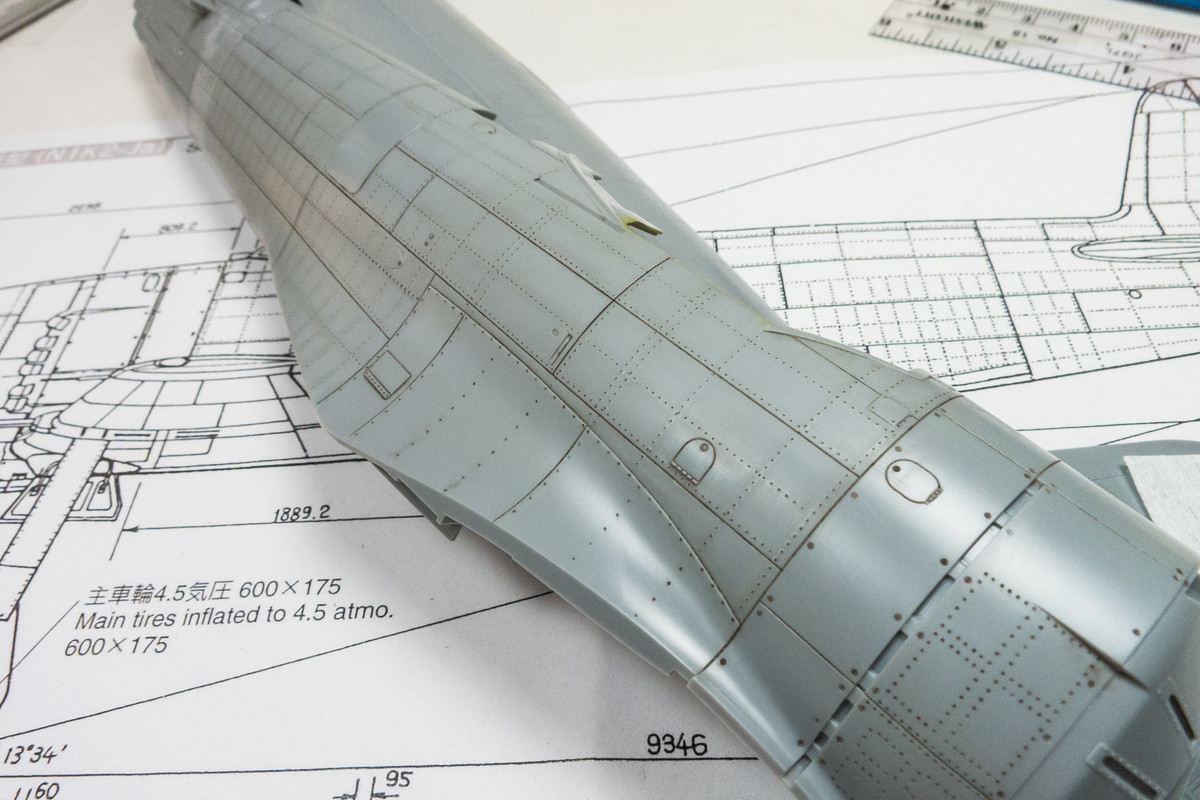
After the starboard side was sanded, I did the same to the port fuselage half.

One thing bothers me about the riveting process. All of the debris from the wet and dry sanding gets stuck into the rivets and by the time the multiple layers of paint go on, some of rivets get filled up and won't hold a wash. Does anyone know a good way to remove sanding debris from holes and crevices? I've tried soaking the parts in water but that doesn't seem to dislodge the stuff very well.
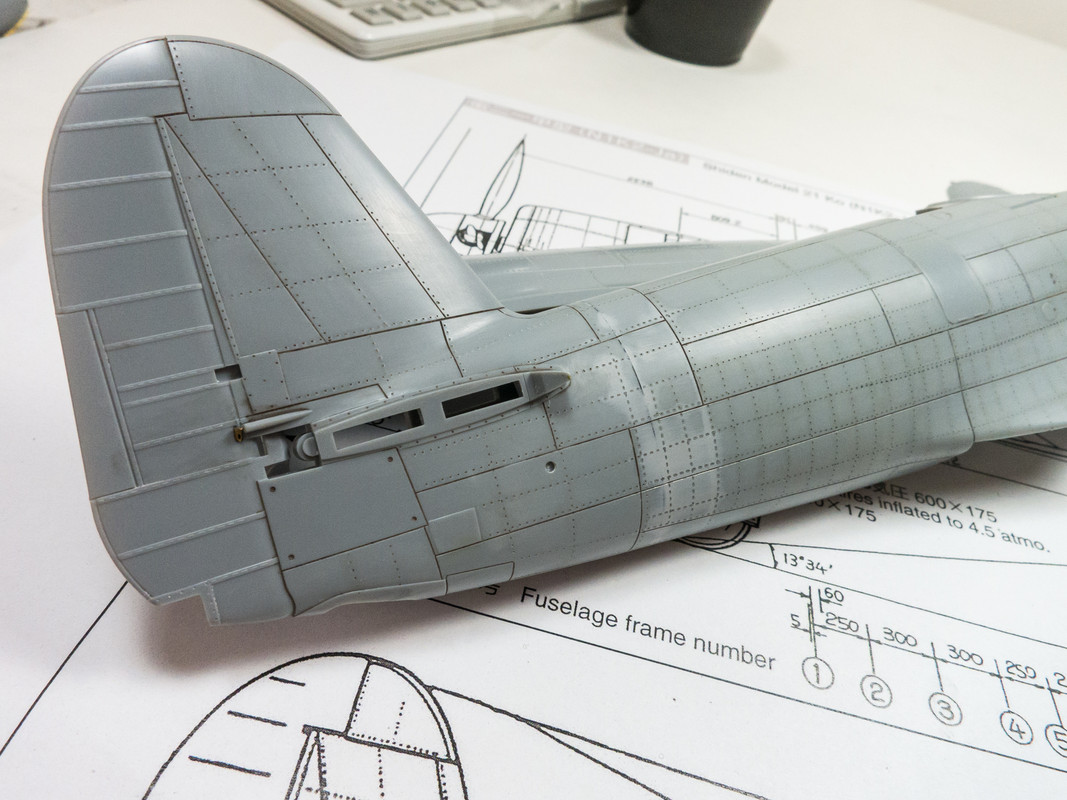
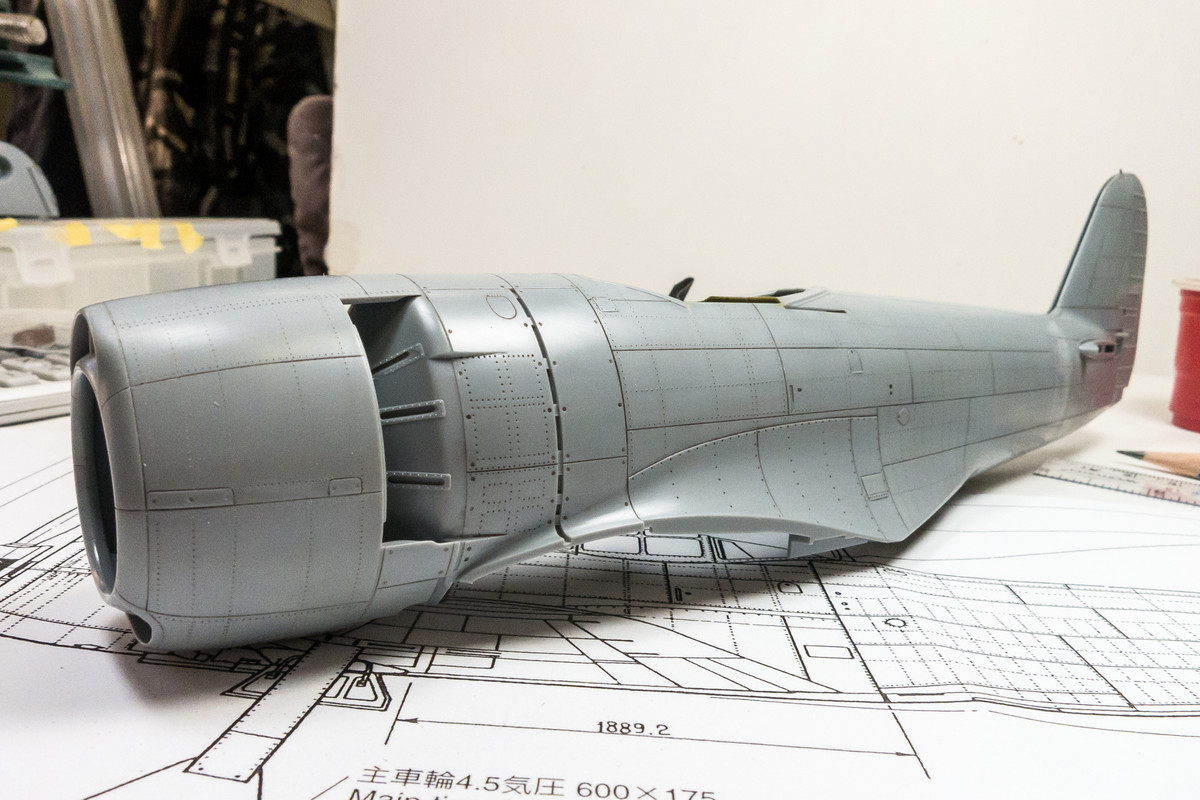
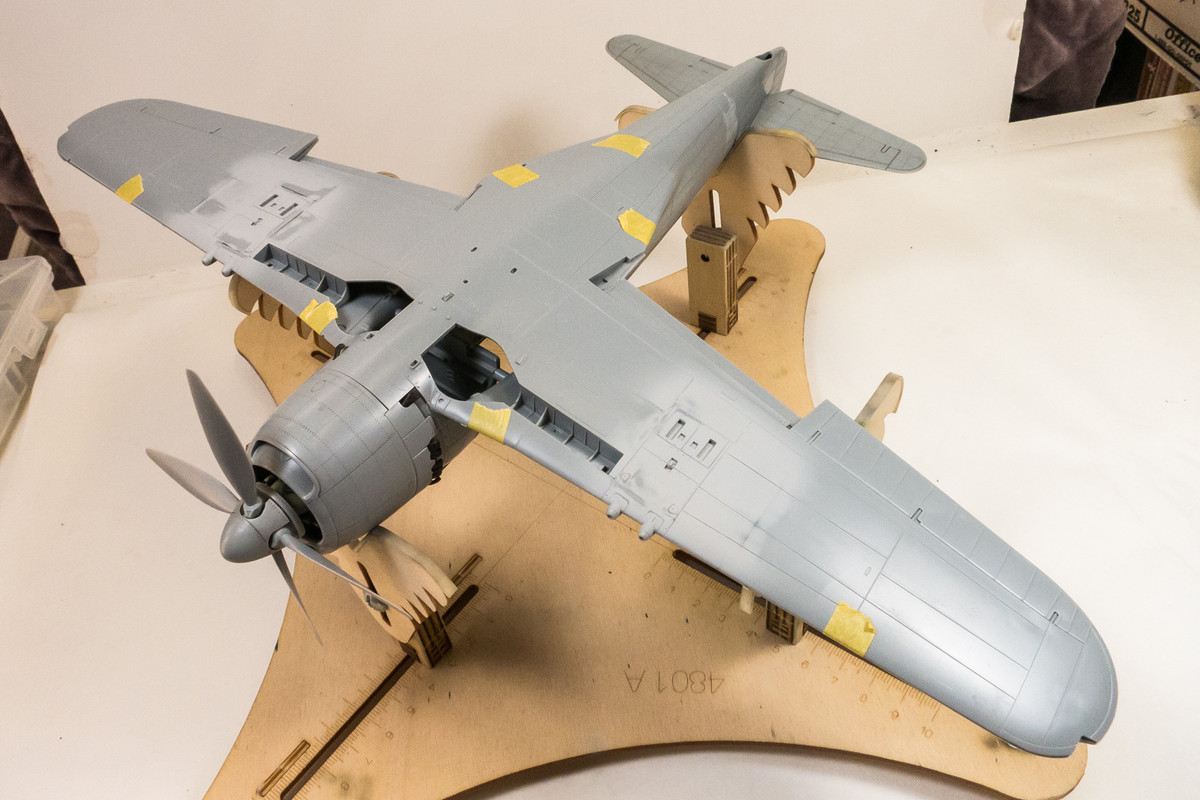
With the riveting done, the fuselage halves can be glued together. Hasegawa wants to ensure the best possible fit between the wings and fuselage, especially since the fuselage is so wide at the base, so they provide not one or two but three internal bulkheads.
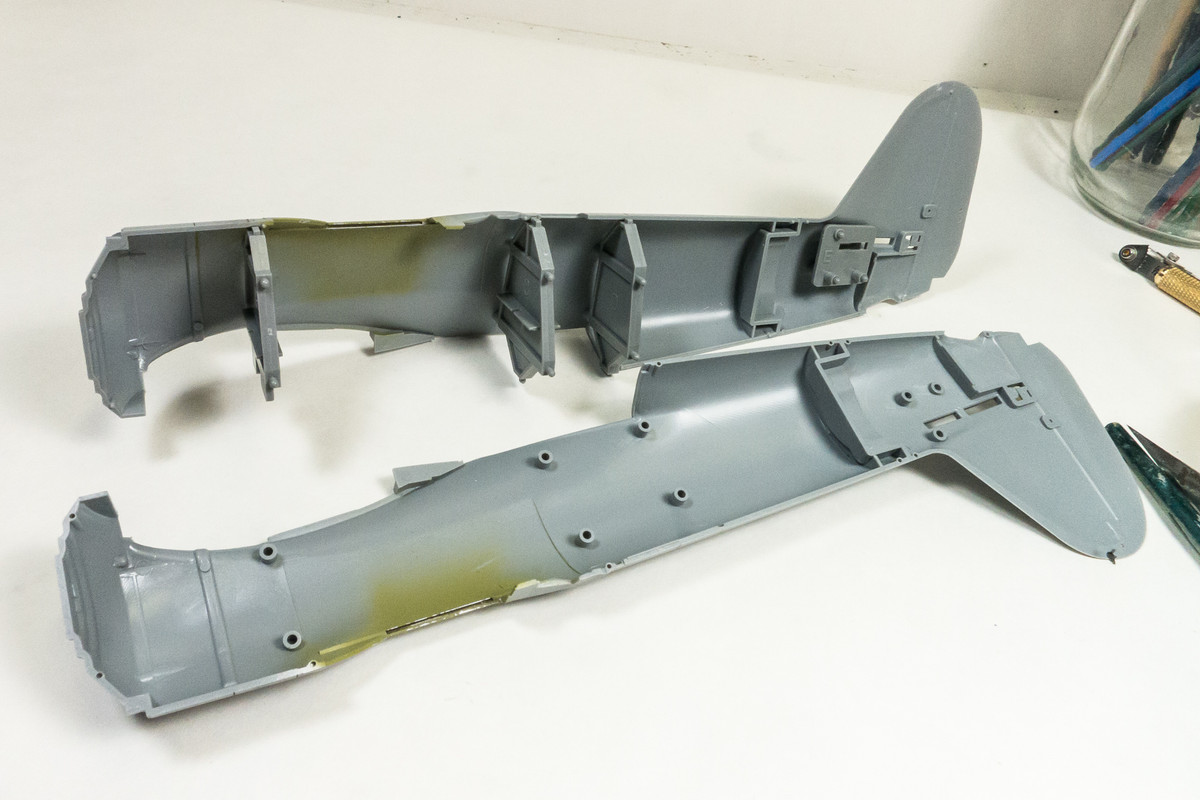
Those bulkheads, along with the sleeve for the tail stabilizers, make the fuselage come together very positively. Fit has been uniformly excellent on this kit.
Fit of the horizontal stabilizers was improved by a little trimming along the contact joint of the stabilizers. I left the interlocking tabs alone.
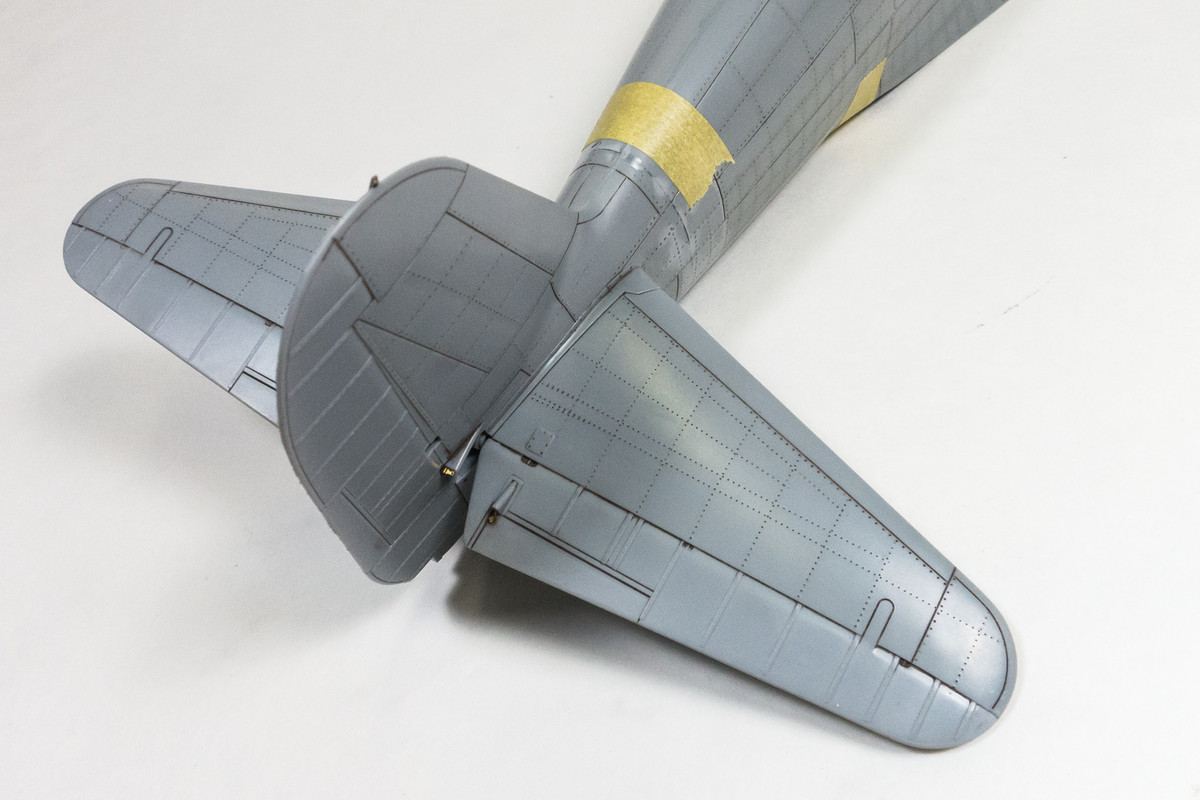
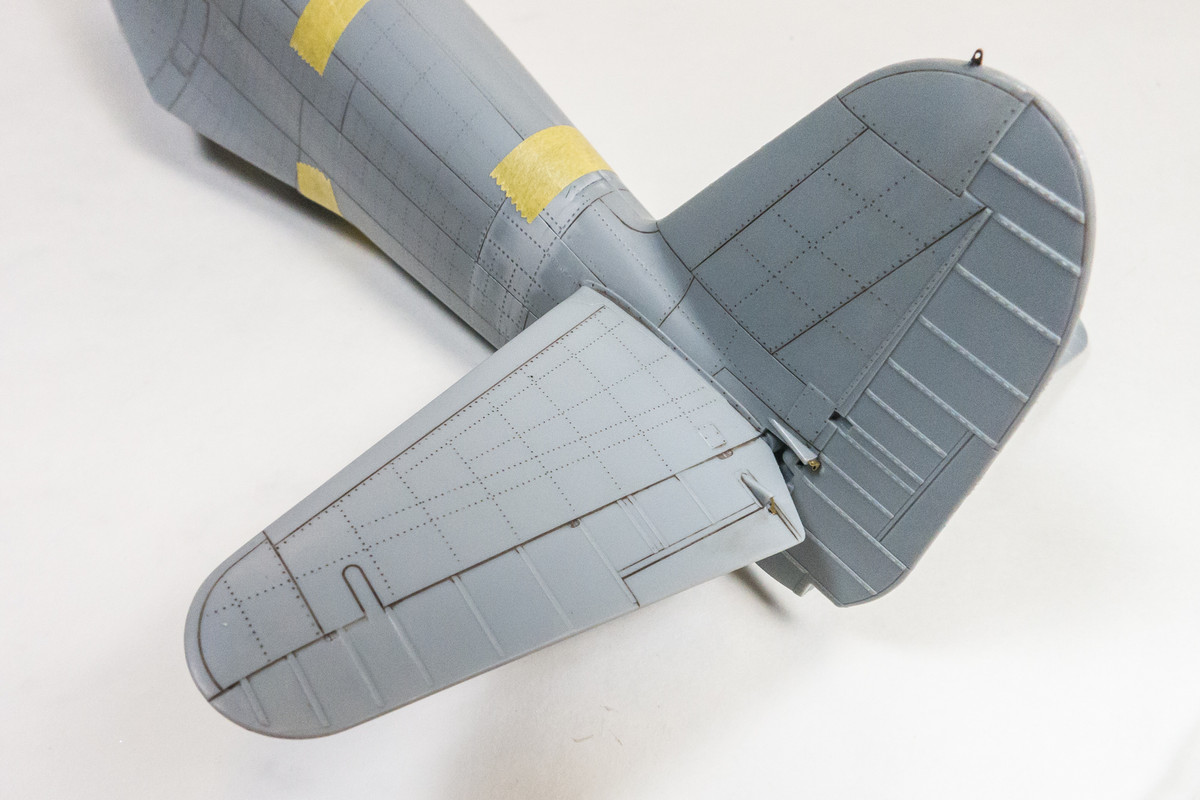
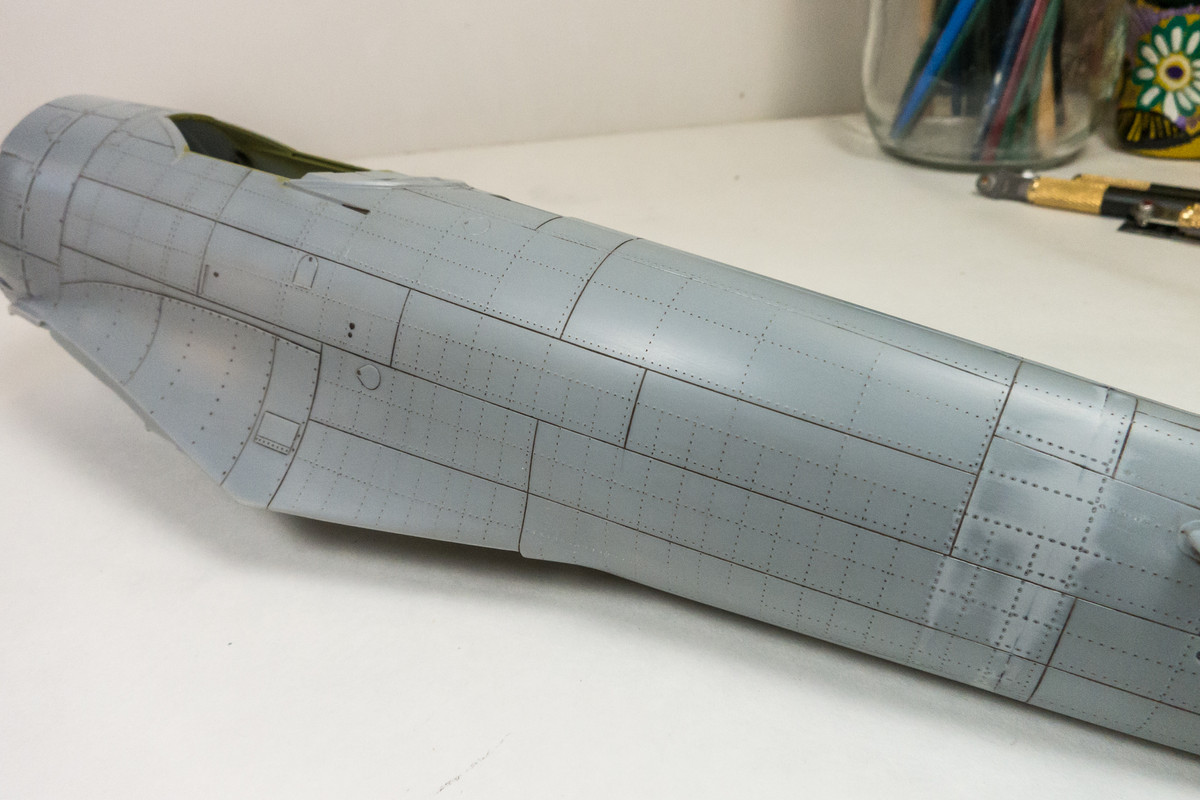
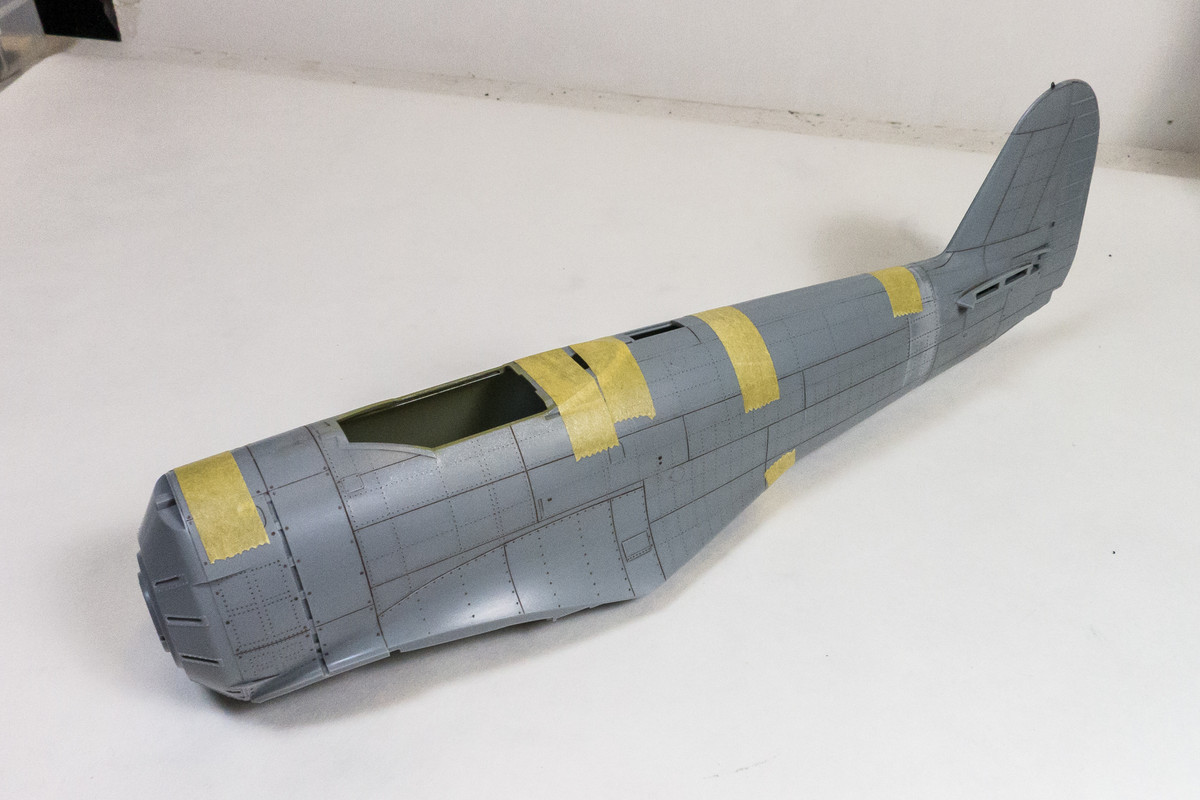
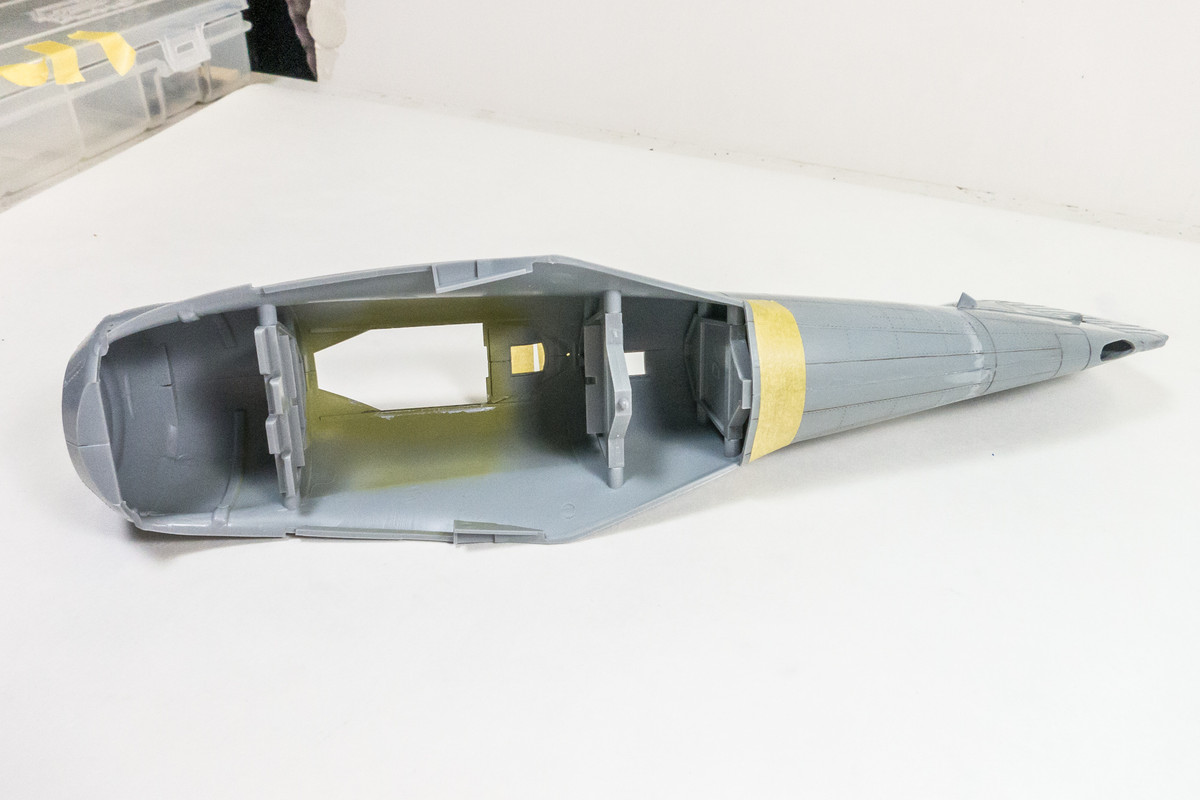
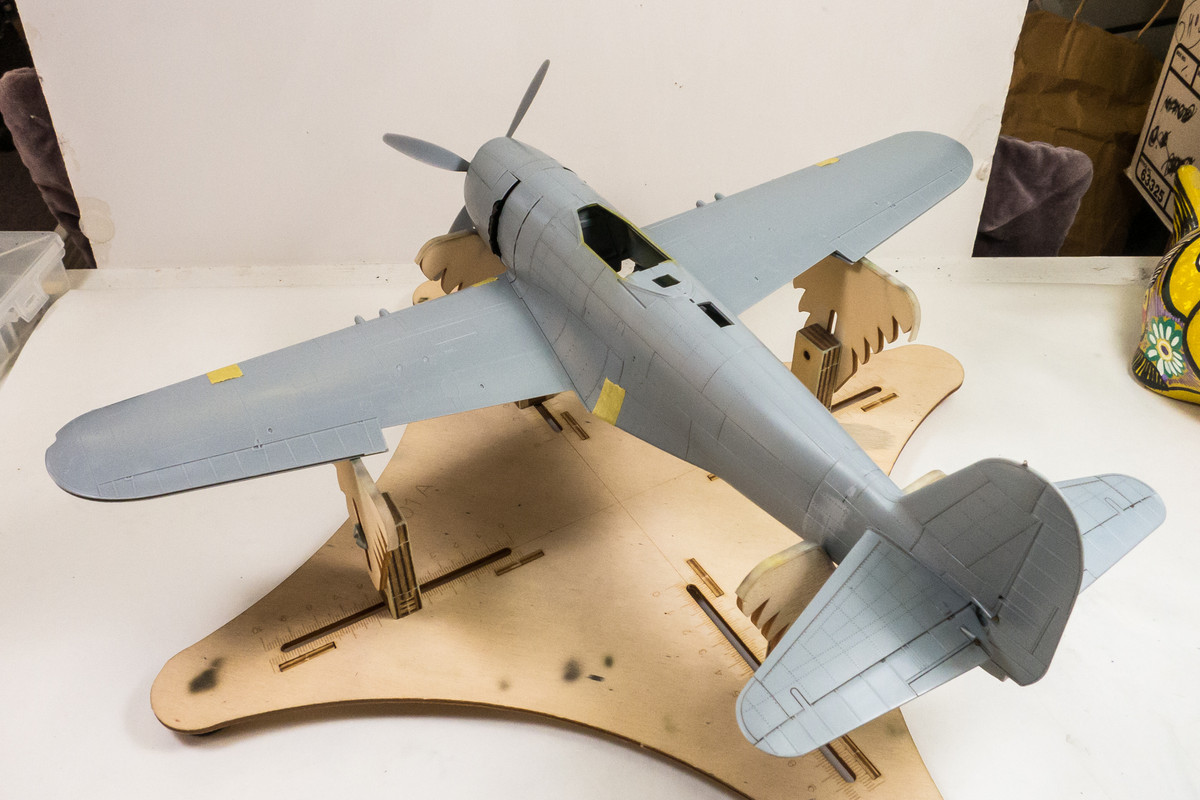
The fuselage seams were cleaned up with a bit of Mr Surfacer 1000 and some sanding. Afterwards, the fuselage assembly was given a washing in my kitchen sink. I performed a dry fit of the major components to check things. This gives one sense of the purposeful proportions and lines of this fighter. The wings, both upper and lower, need to be riveted still.
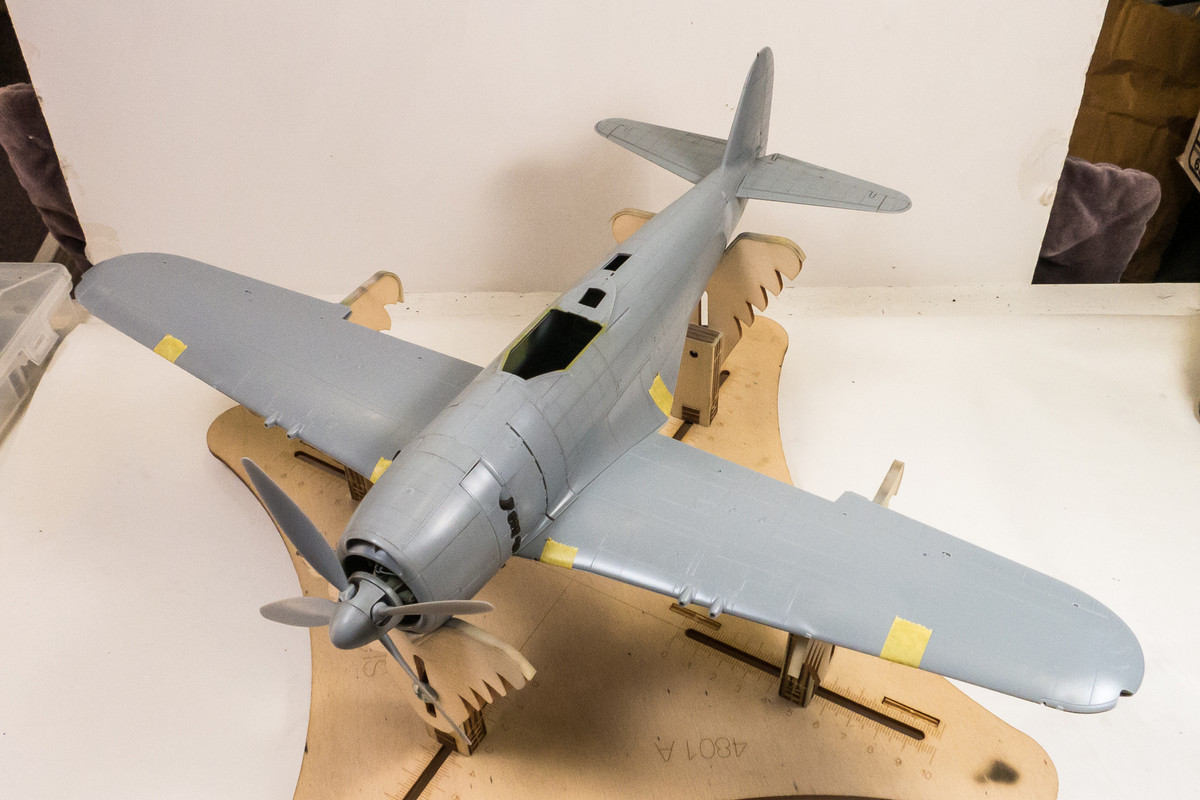

Similar to the Tamiya Corsair, Hasegawa provides two rear canopy pieces. One is designed to show the canopy in the closed position. The top edges between the sliding canopy and rear part are flush.
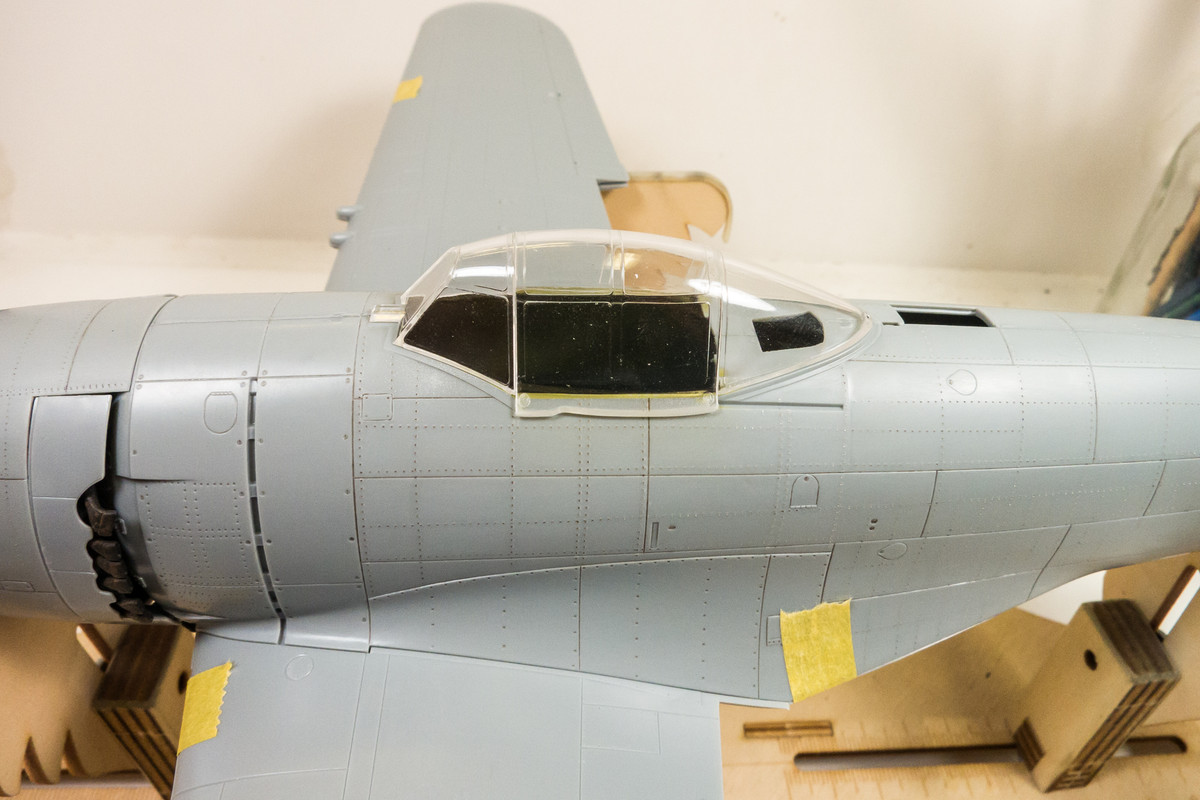
The second piece takes into account the thickness of the plastic parts when placing the canopy in the open position. When closed, there is a step between the two parts.
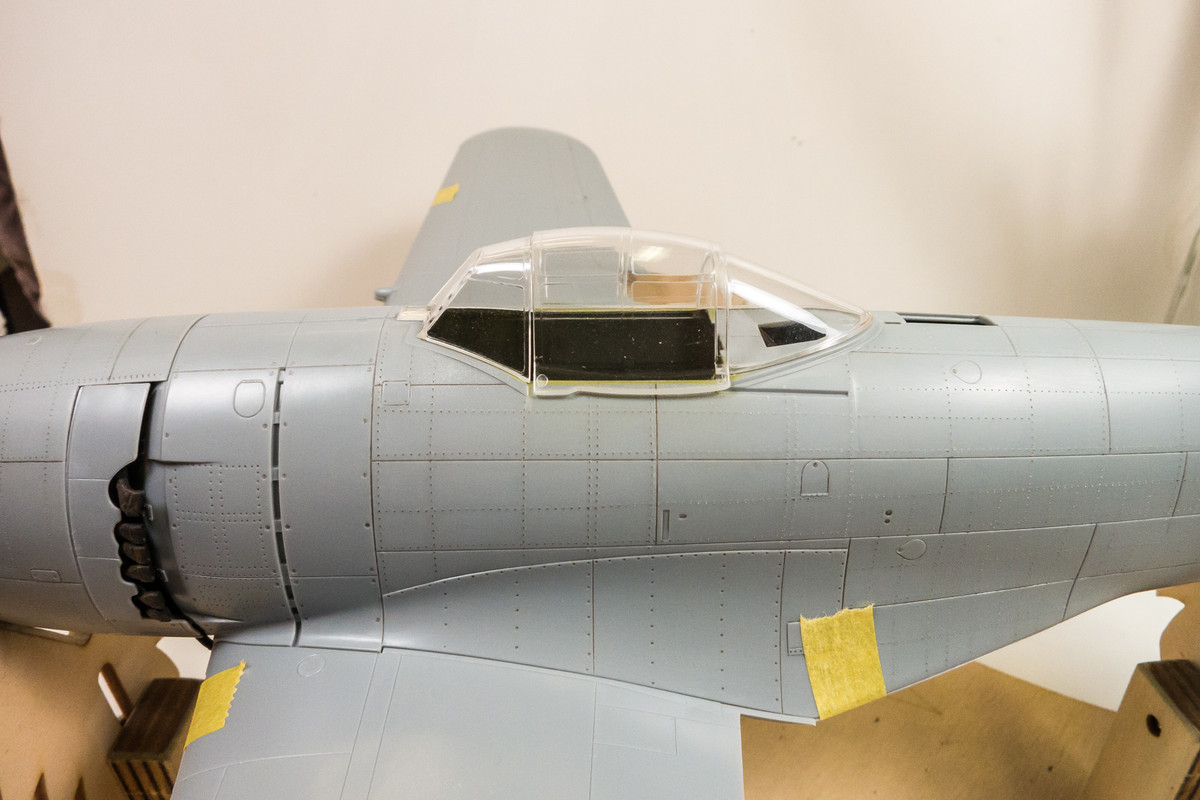
I personally don't think the difference is very noticeable and choosing the second allows me to keep the sliding part unglued and posing it either closed or open.
After the starboard side was sanded, I did the same to the port fuselage half.
One thing bothers me about the riveting process. All of the debris from the wet and dry sanding gets stuck into the rivets and by the time the multiple layers of paint go on, some of rivets get filled up and won't hold a wash. Does anyone know a good way to remove sanding debris from holes and crevices? I've tried soaking the parts in water but that doesn't seem to dislodge the stuff very well.
With the riveting done, the fuselage halves can be glued together. Hasegawa wants to ensure the best possible fit between the wings and fuselage, especially since the fuselage is so wide at the base, so they provide not one or two but three internal bulkheads.
Those bulkheads, along with the sleeve for the tail stabilizers, make the fuselage come together very positively. Fit has been uniformly excellent on this kit.
Fit of the horizontal stabilizers was improved by a little trimming along the contact joint of the stabilizers. I left the interlocking tabs alone.
The fuselage seams were cleaned up with a bit of Mr Surfacer 1000 and some sanding. Afterwards, the fuselage assembly was given a washing in my kitchen sink. I performed a dry fit of the major components to check things. This gives one sense of the purposeful proportions and lines of this fighter. The wings, both upper and lower, need to be riveted still.
Similar to the Tamiya Corsair, Hasegawa provides two rear canopy pieces. One is designed to show the canopy in the closed position. The top edges between the sliding canopy and rear part are flush.
The second piece takes into account the thickness of the plastic parts when placing the canopy in the open position. When closed, there is a step between the two parts.
I personally don't think the difference is very noticeable and choosing the second allows me to keep the sliding part unglued and posing it either closed or open.
John aka JKim
-----------<><
-----------<><