1/32 Hasegawa Bf109K-4 Weisse 8
-
tempestjohnny
- Elite Member
- Posts: 3347
- Joined: Sat Oct 15, 2016 4:51 am
- Location: Naples. FL
Re: 1/32 Hasegawa Bf109K-4 Weisse 8
The mismatch of parts looks Great.

Re: 1/32 Hasegawa Bf109K-4 Weisse 8
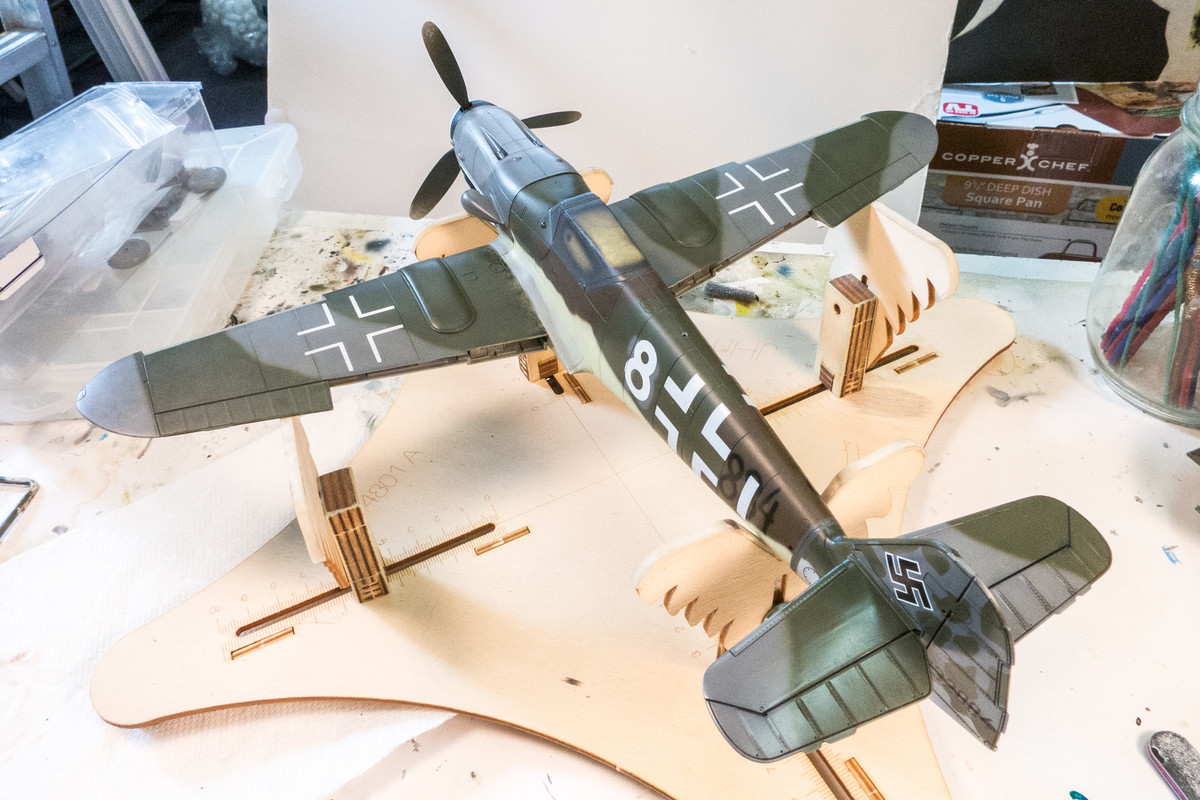
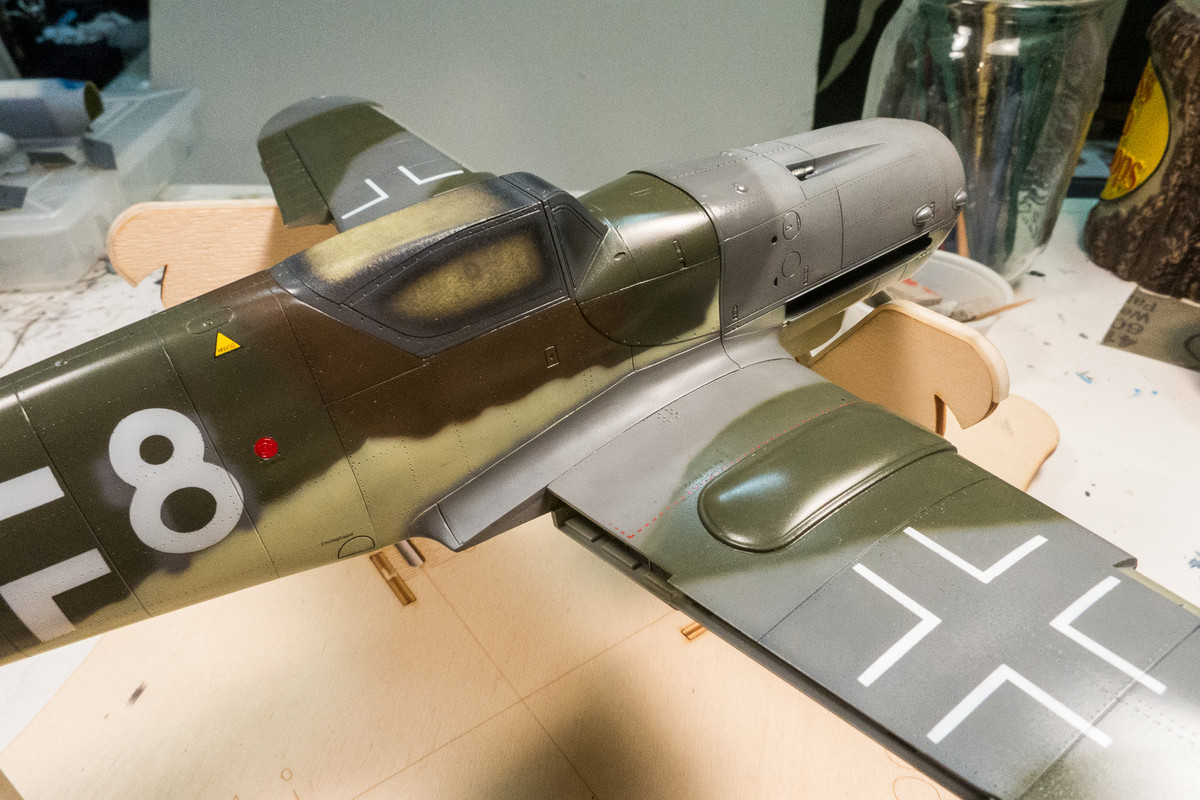
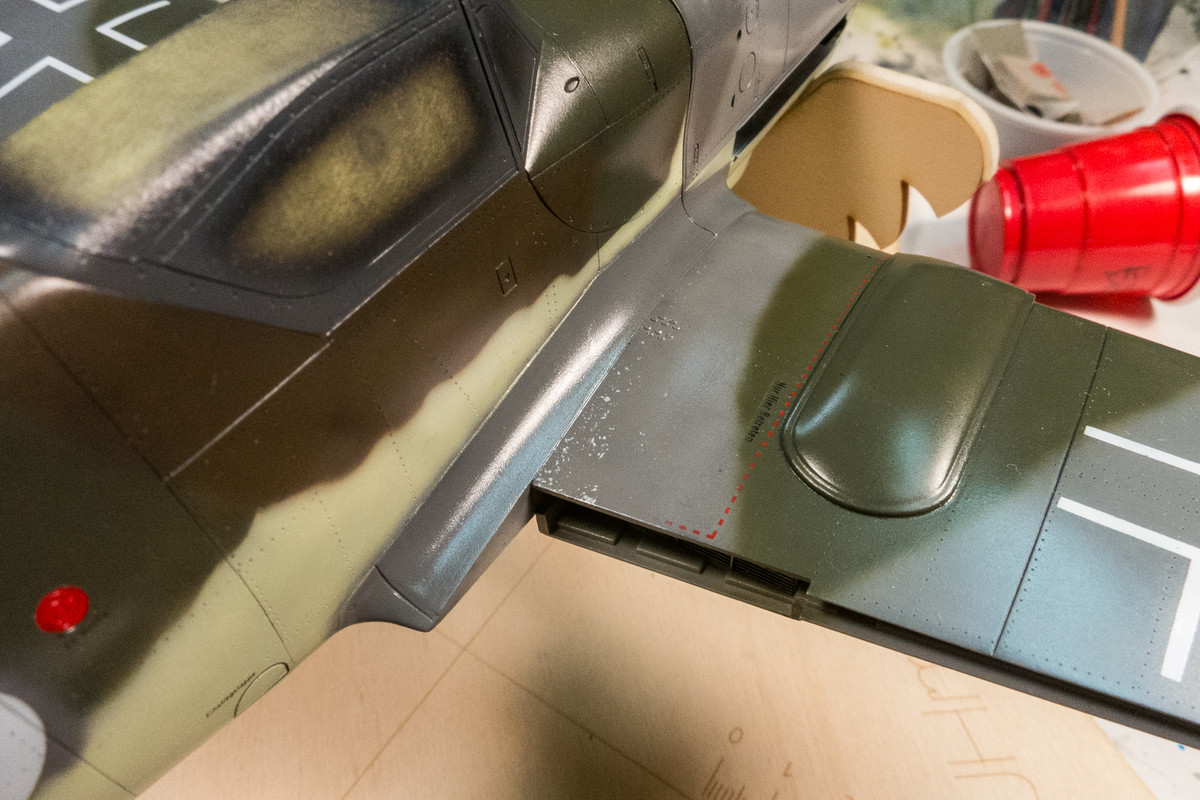
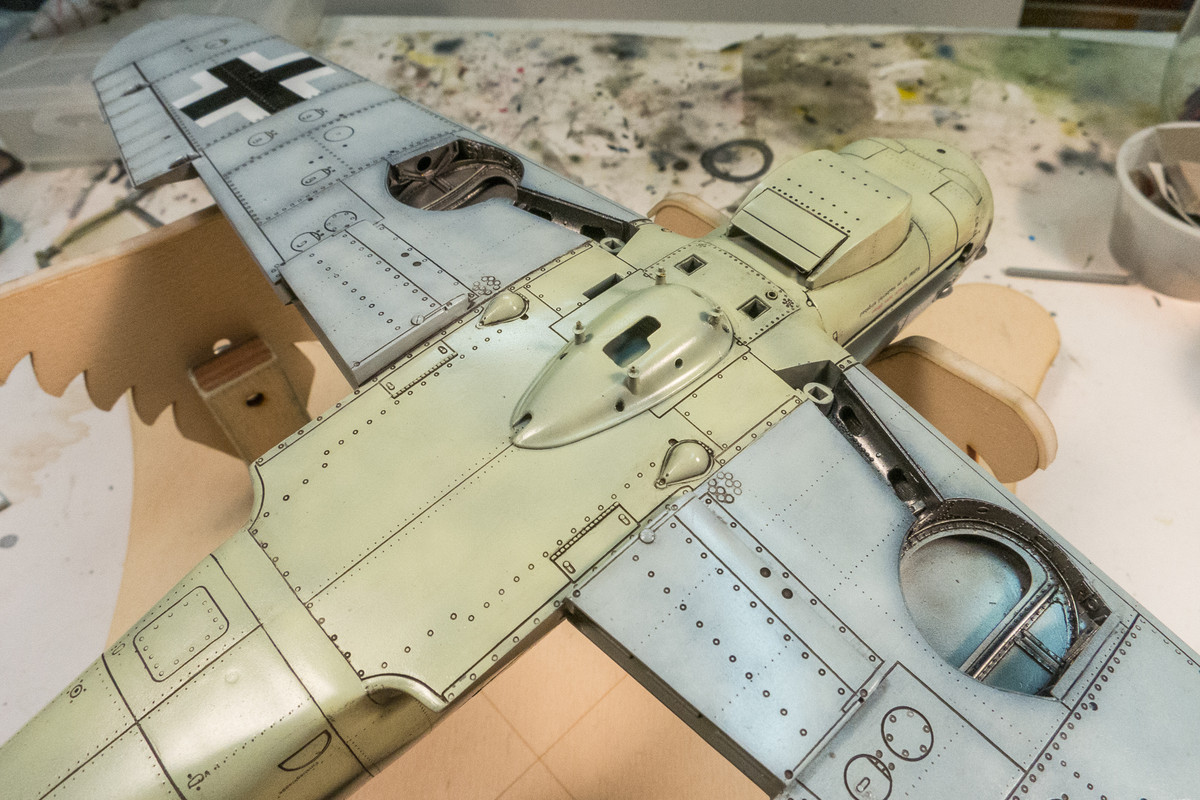
Finally... the port wing is glued into place. I gooped tube glue generously on the wing spars before sliding the wings into place and then used Tamiya Extra Thin to achieve a good bond all around the wing/fuse joint.

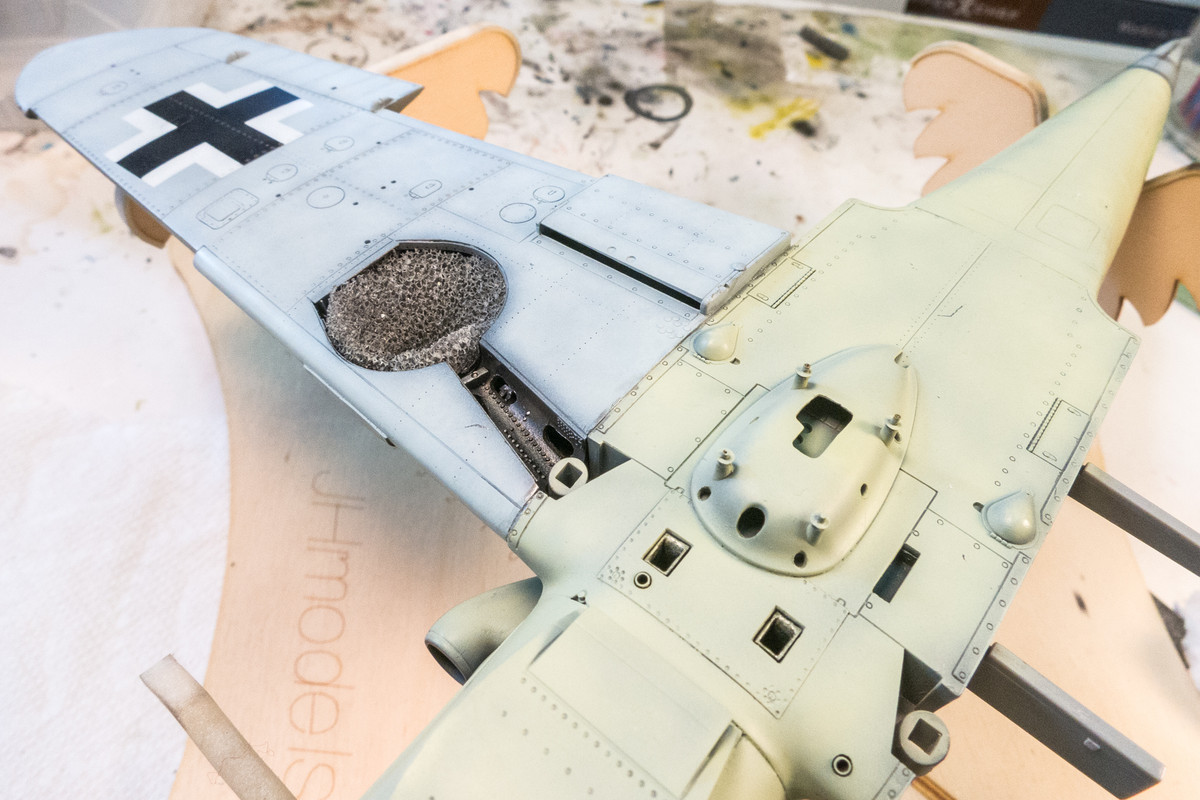
Same deal for the starboard side. I'll have to let this cure completely before I start cleaning up the joints.
In the meantime, a sneak peak of some of the other painted components put into place.
Same deal for the starboard side. I'll have to let this cure completely before I start cleaning up the joints.
In the meantime, a sneak peak of some of the other painted components put into place.
John aka JKim
-----------<><

-----------<><

Re: 1/32 Hasegawa Bf109K-4 Weisse 8
John!
To make each build less crappy than the last one. Or, put another way, "Better than the last one, not as good as the next one!"..
Re: 1/32 Hasegawa Bf109K-4 Weisse 8
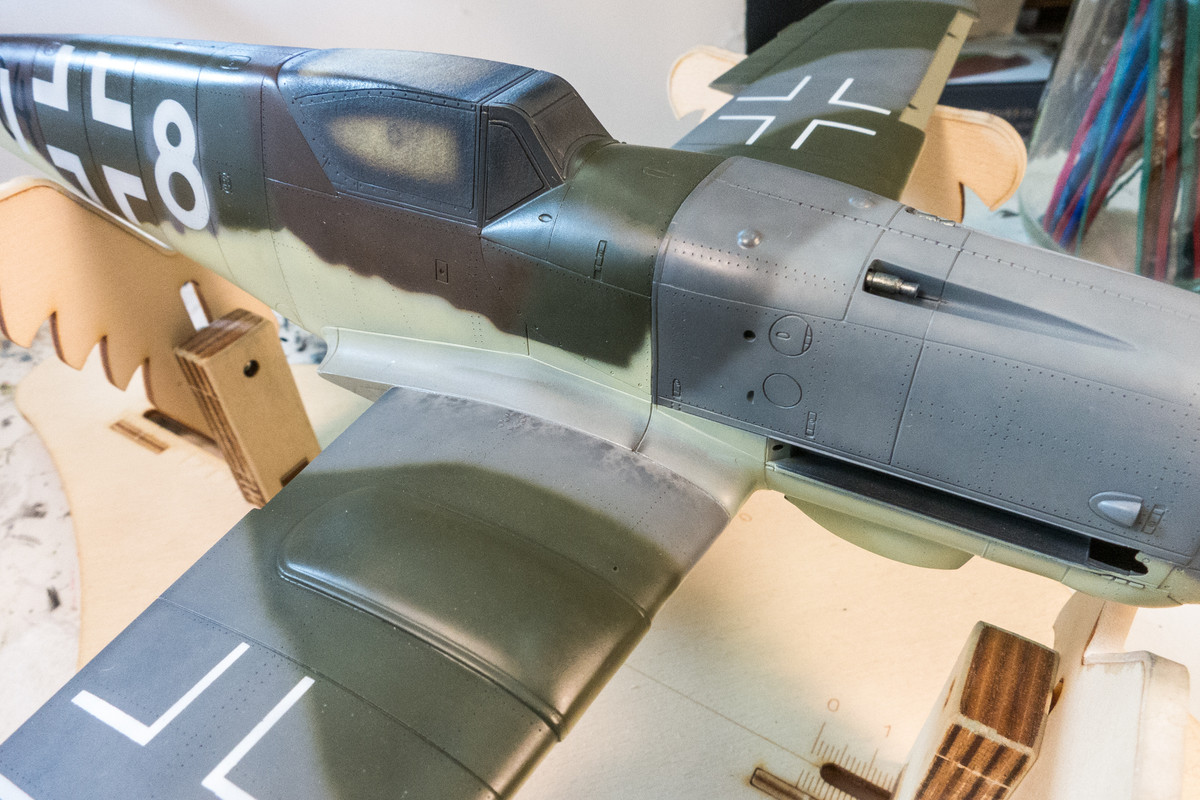
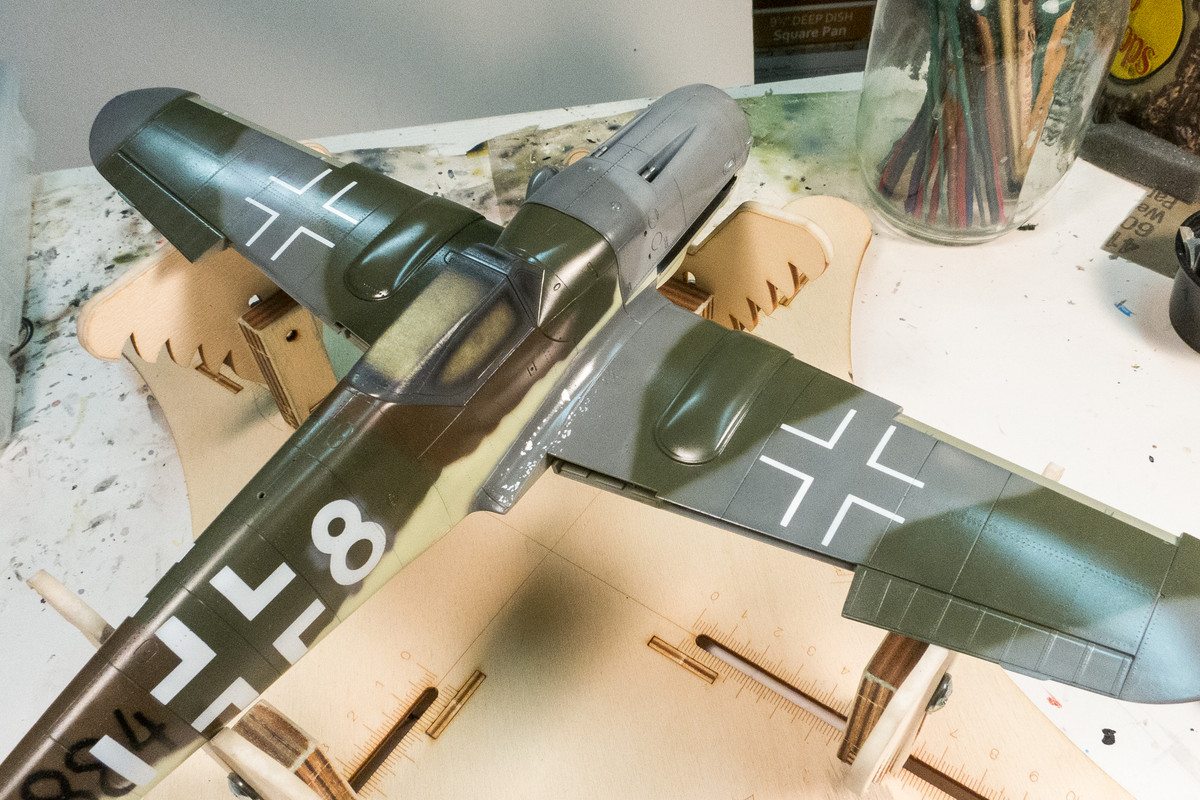
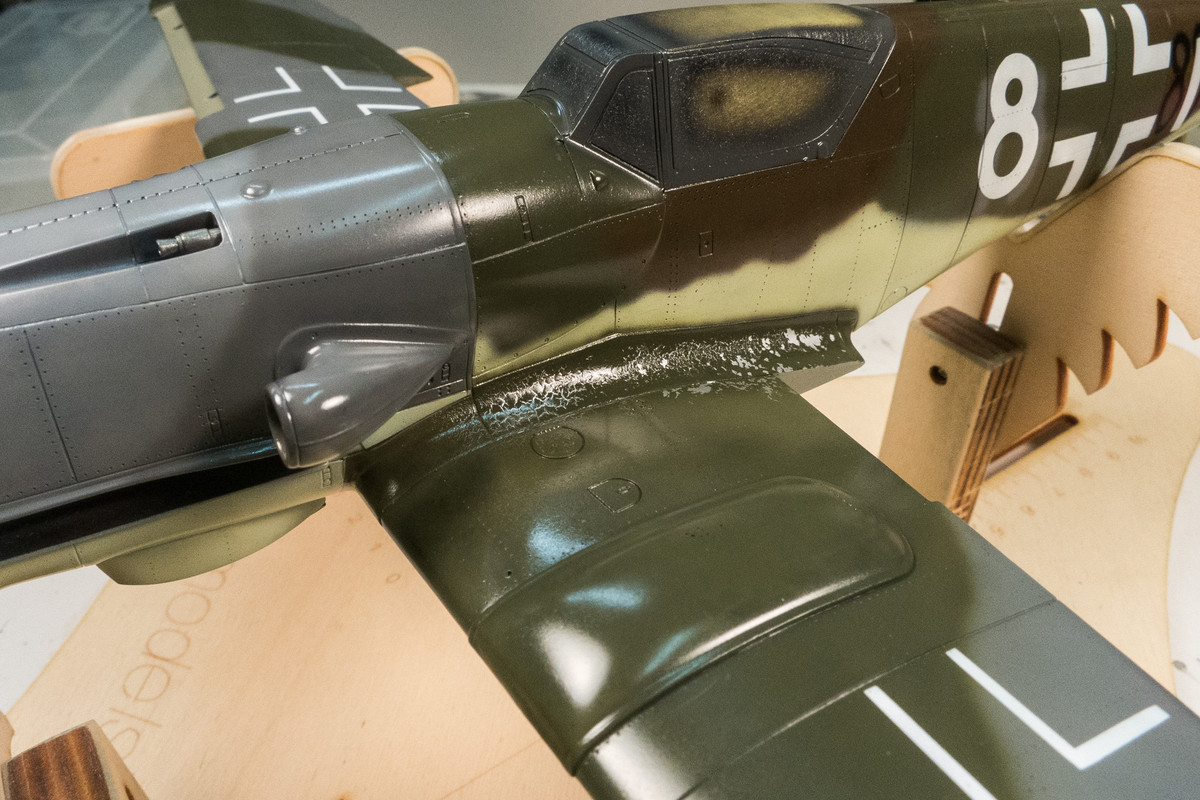
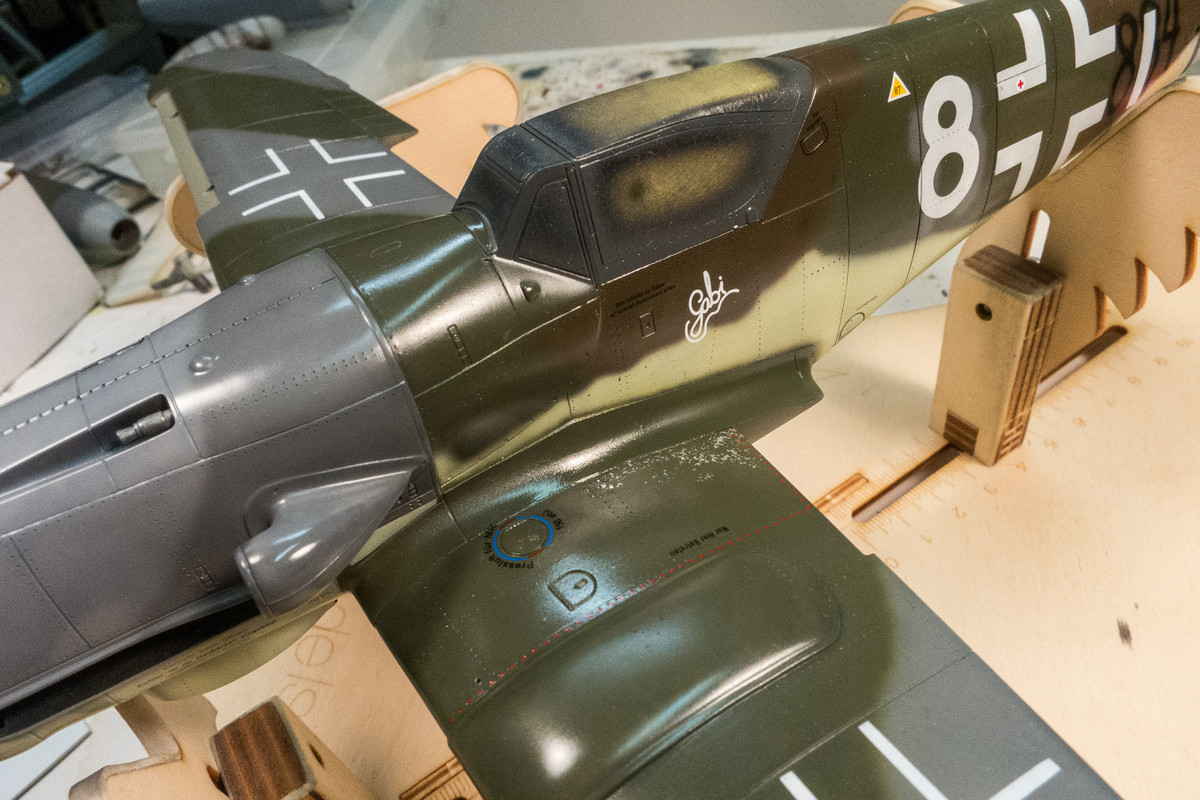
The wing joints have been cleaned up and repainted. I've incorporated a base layer of Tamiya AS-12 Silver along the upper wing root to do some hairspray chipping.
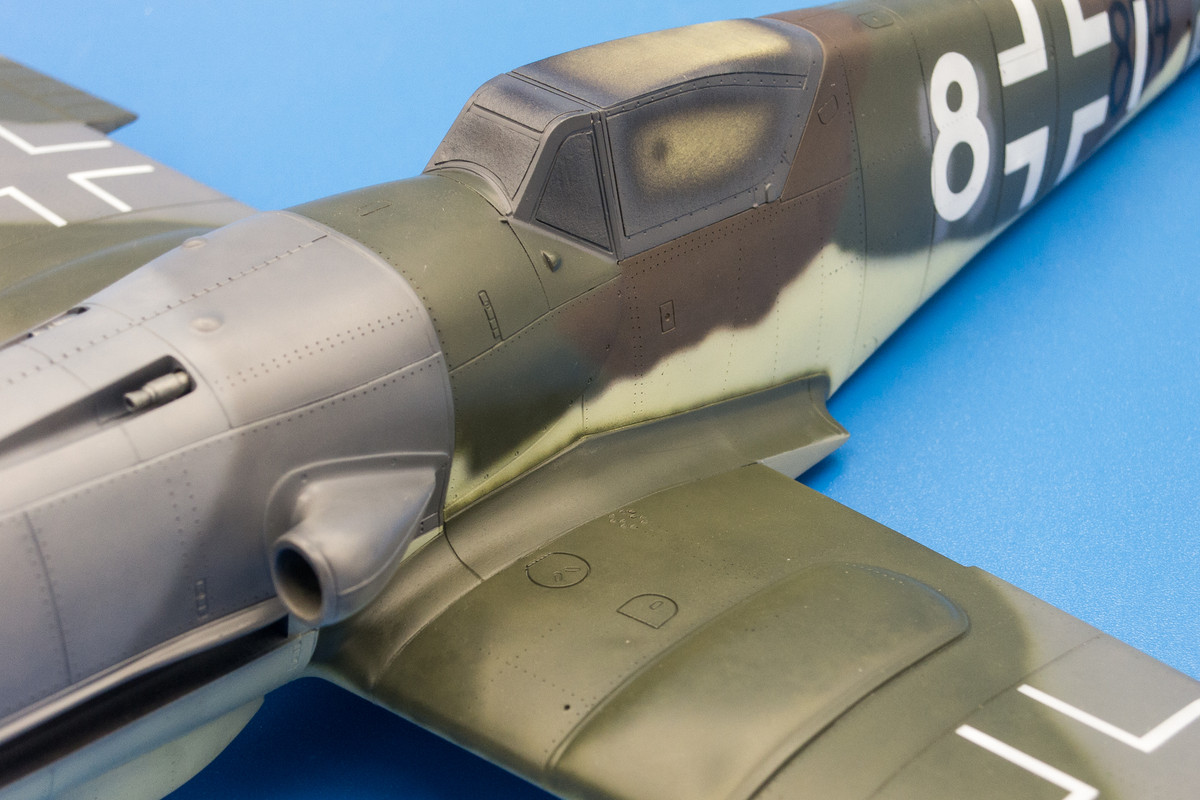

The next big step after the paint chipping will be to seal the paint with a clear gloss and then finish up the decals.
The next big step after the paint chipping will be to seal the paint with a clear gloss and then finish up the decals.
John aka JKim
-----------<><
-----------<><
Re: 1/32 Hasegawa Bf109K-4 Weisse 8
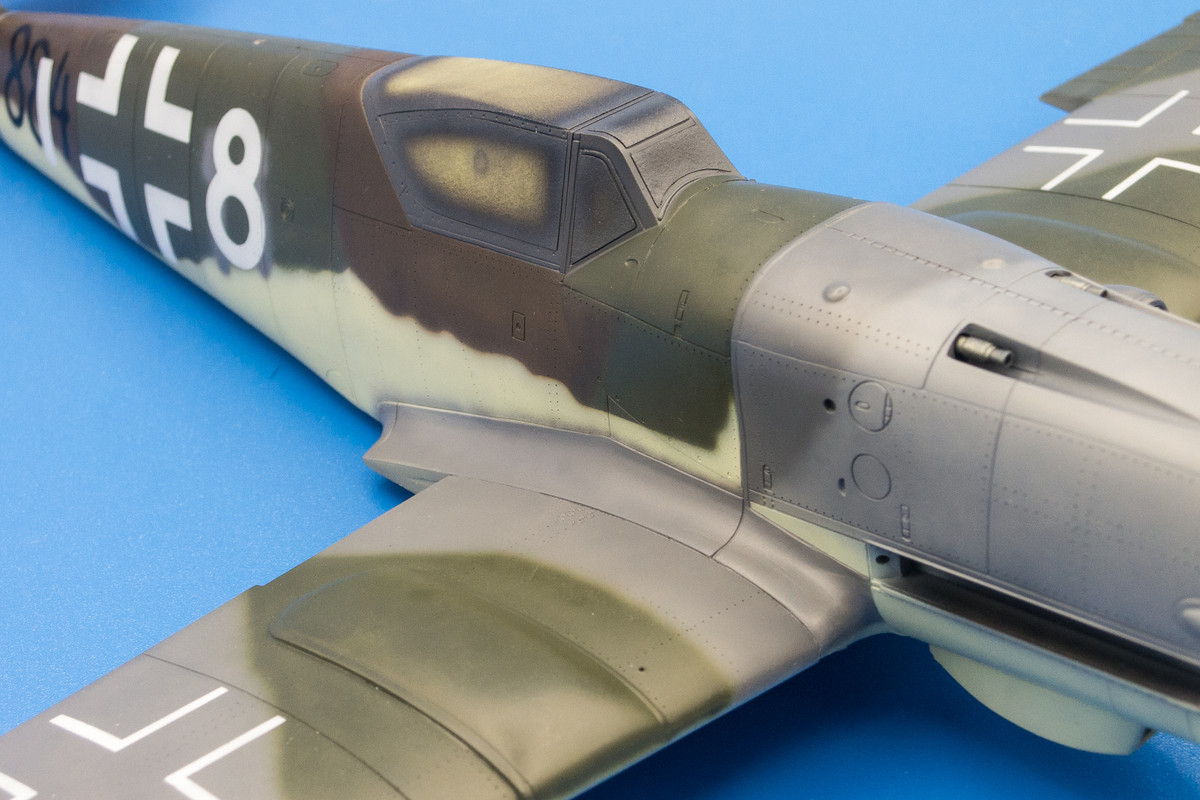
Two coats of MIG Scratches Effect wasn't enough to get good chipping results. The Mr Hobby Aqueous over the metal was extremely stubborn and I had to use a toothpick to get most of the chips, which lead to a less than natural effect. Oh well... I can work with it and augment it later with sponge chipping and colored pencils.
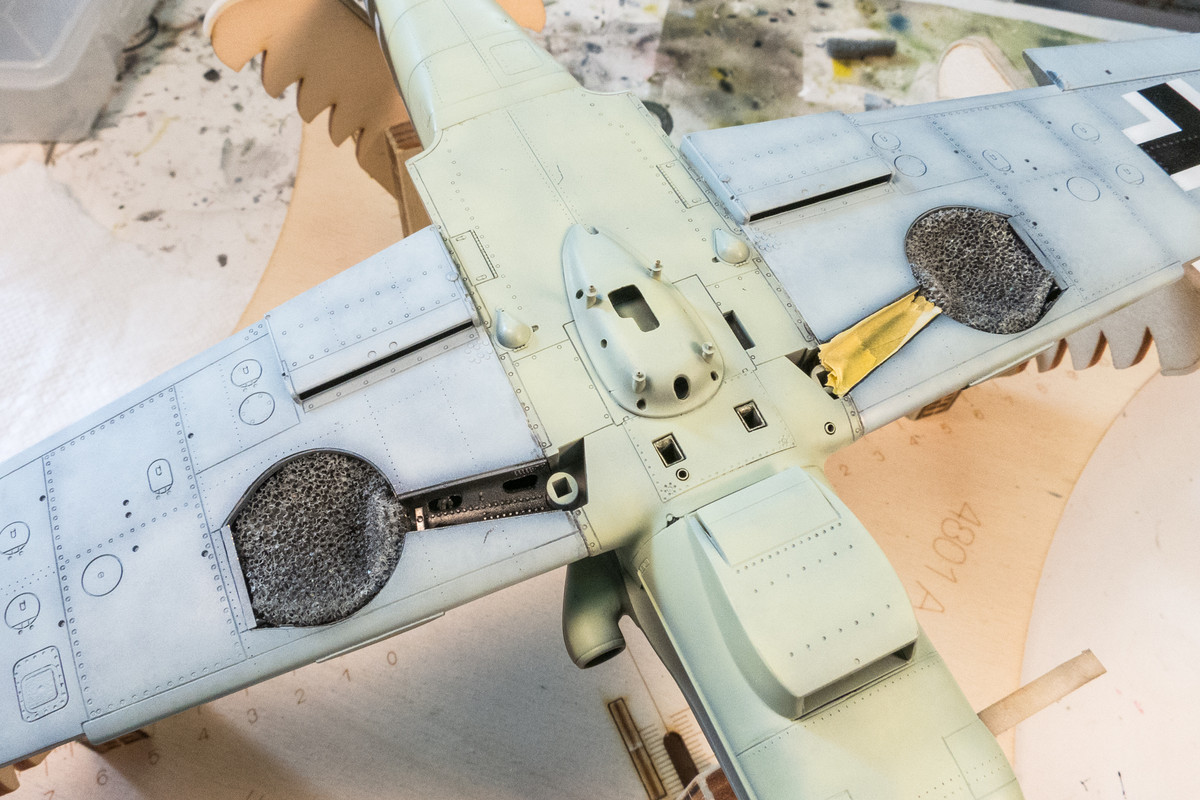
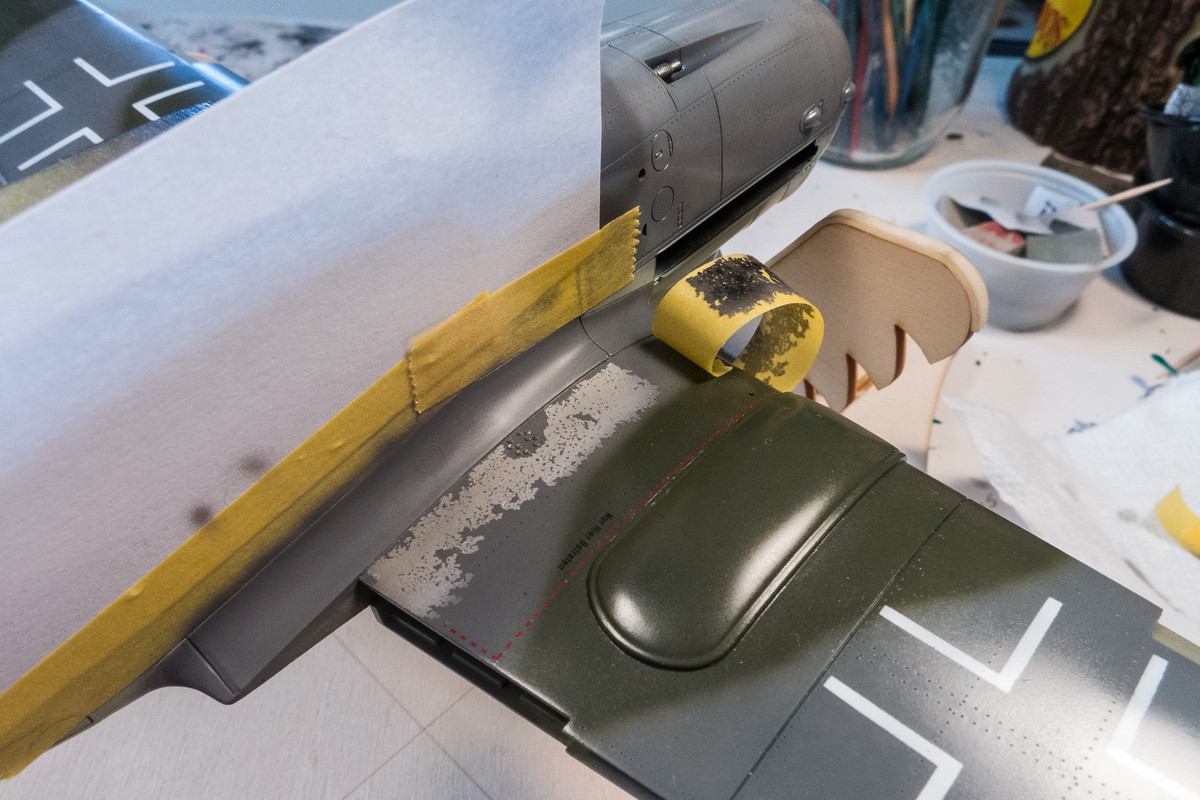
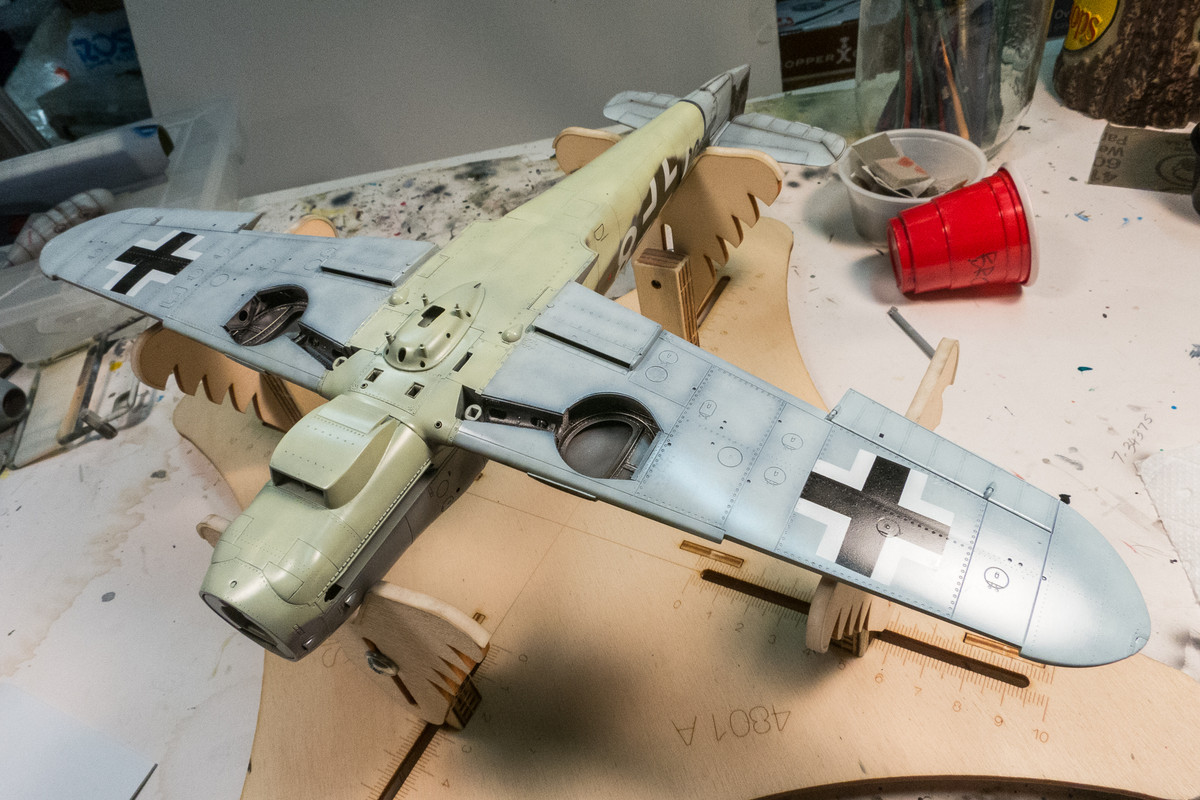
I gave the model a gloss coat (Alclad Aqua Gloss). Removing the masks to check out the landing gear wells.
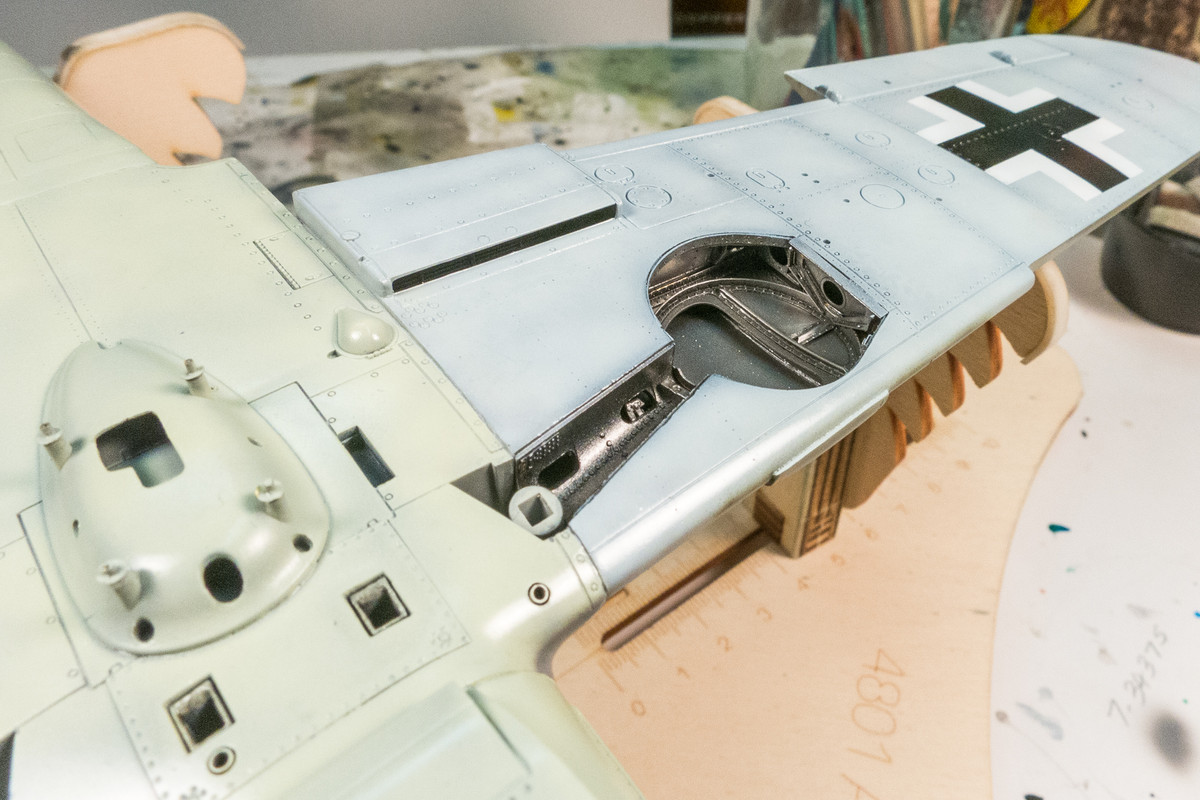
I thinned the Alclad Aqua Gloss with Mr Leveling Thinner and it had a funky effect on chipping area at the port wing root. Gonna have to fix that when the gloss dries.
I gave the model a gloss coat (Alclad Aqua Gloss). Removing the masks to check out the landing gear wells.
I thinned the Alclad Aqua Gloss with Mr Leveling Thinner and it had a funky effect on chipping area at the port wing root. Gonna have to fix that when the gloss dries.
John aka JKim
-----------<><
-----------<><
-
Medicman71

- Elite Member
- Posts: 9729
- Joined: Mon Apr 07, 2014 9:32 am
- Location: Houston, Tx
Re: 1/32 Hasegawa Bf109K-4 Weisse 8
Mike
Sponsored by Boeing, Lockheed Martin, Northrop Grumman, Saab, BAE, and Dassault
Sponsored by Boeing, Lockheed Martin, Northrop Grumman, Saab, BAE, and Dassault
-
BlackSheep214

- Elite Member
- Posts: 10417
- Joined: Sun Apr 06, 2014 8:47 pm
Re: 1/32 Hasegawa Bf109K-4 Weisse 8
Whoa... I immediately noticed the funky spider web effect on the port side. No doubt you’ll fix this. Everything else looks incredible.
“Who controls the skies, controls the fate of this Earth”
Author unknown- 352nd Fighter Group, Blue-Nosed Bastards of Bodney
“Send one plane it’s a sortie; send two planes it’s a flight; send four planes it’s a test of airpower. - Richard Kohn
Author unknown- 352nd Fighter Group, Blue-Nosed Bastards of Bodney
“Send one plane it’s a sortie; send two planes it’s a flight; send four planes it’s a test of airpower. - Richard Kohn
-
mustang1989

- Moderator
- Posts: 4903
- Joined: Tue Mar 18, 2014 8:35 pm
Re: 1/32 Hasegawa Bf109K-4 Weisse 8
It's all comin' together now with that paint job. Learning all the way.....
-
speedgraflex

- Moderator
- Posts: 9758
- Joined: Fri Feb 10, 2017 11:08 pm
- Location: Santa Monica, California
Re: 1/32 Hasegawa Bf109K-4 Weisse 8
Hi John! First, Happy Holidays! Second, third, fourth, fifth—your work looks incredible. Regarding the wing roots, which I guess is my sixth point, I have seen this reaction usually with enamel top coats when they are somewhat still in their “soft phase,” which lasts for days depending on the ambient temp. I know you will make a quick fix of this so I am not concerned. I did have some alternate thoughts just in case (and frankly no worries if you stop reading) but here goes—first I would warm the model up with a variable heat hairdryer at low setting, then I would let that cool, then try again, let it cool, then I would use a No. 1 chisel brush damp or moistened with thinner to see if the green will lift off, then if so I would clear that green away to the AS-12 but not clear away the silver, just smooth it, then I would make one of your wonderful John Kim brand sanding sticks and abrade the silver just enough to create a sticky surface for your camo.... Whew.
Personally I like painting over silver after I polish it with microfiber cloth - 8000 grit, then I will add color after the abrasive process.
Finally, point seven or whatever, I like tinting Dullcote or Future the way Ralph Riese and Thomas Mayer do this, with brown or grey. That always adds the required dirty touch.
Bruce / SPEEDGRAFLEX
Re: 1/32 Hasegawa Bf109K-4 Weisse 8
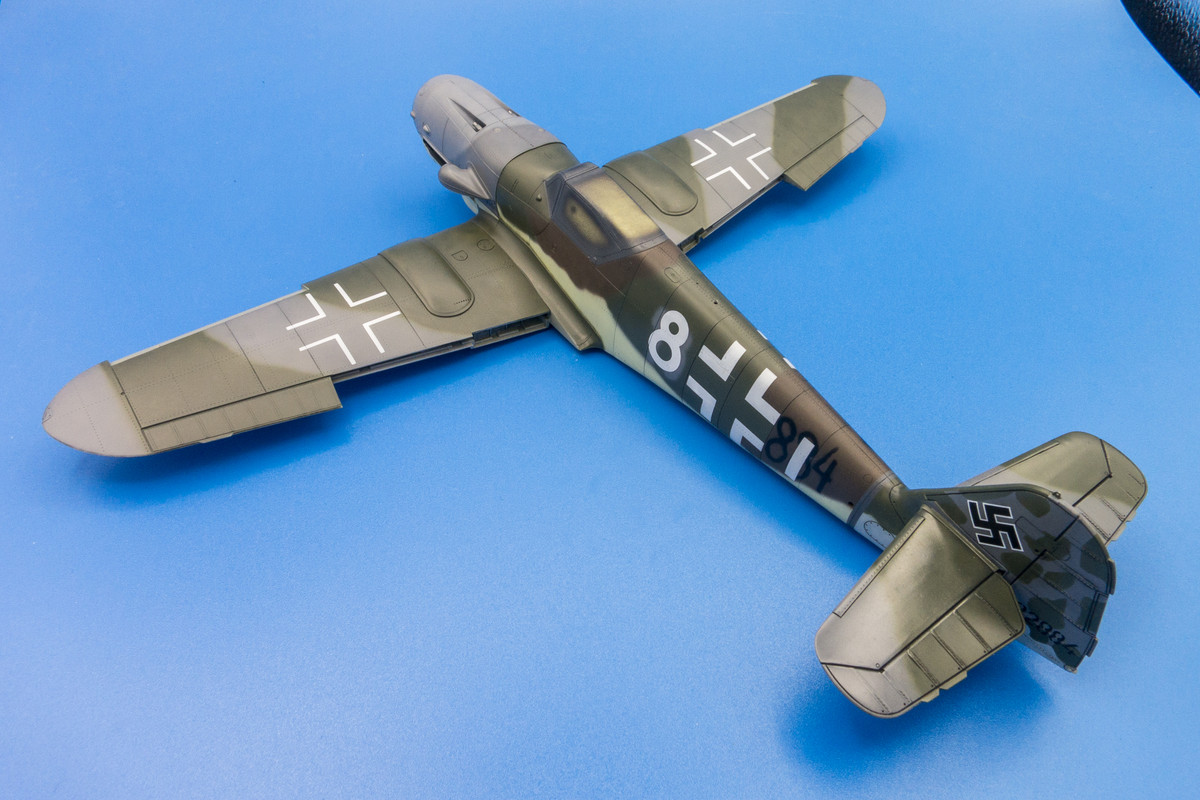
Thanks guys! I addressed the alligator cracks in the wing root the old-fashioned way: sandpaper. Gotta do it dry because moisture will set off the hairspray underneath and make the paint soft. And then I find out that the wing roots on the K-4 are actually made of wood, not metal so no metal chipping! Hairspray chipping removes paint in chunks, which creates an uneven surface. Sponge chipping adds paint, which also creates an uneven surface. So I used sandpaper to smooth things down to a reasonable level and then shot it with primer, a little on the thick side, to fill in the voids and edges. Confining my work area using masking introduced its own hairy adventures...
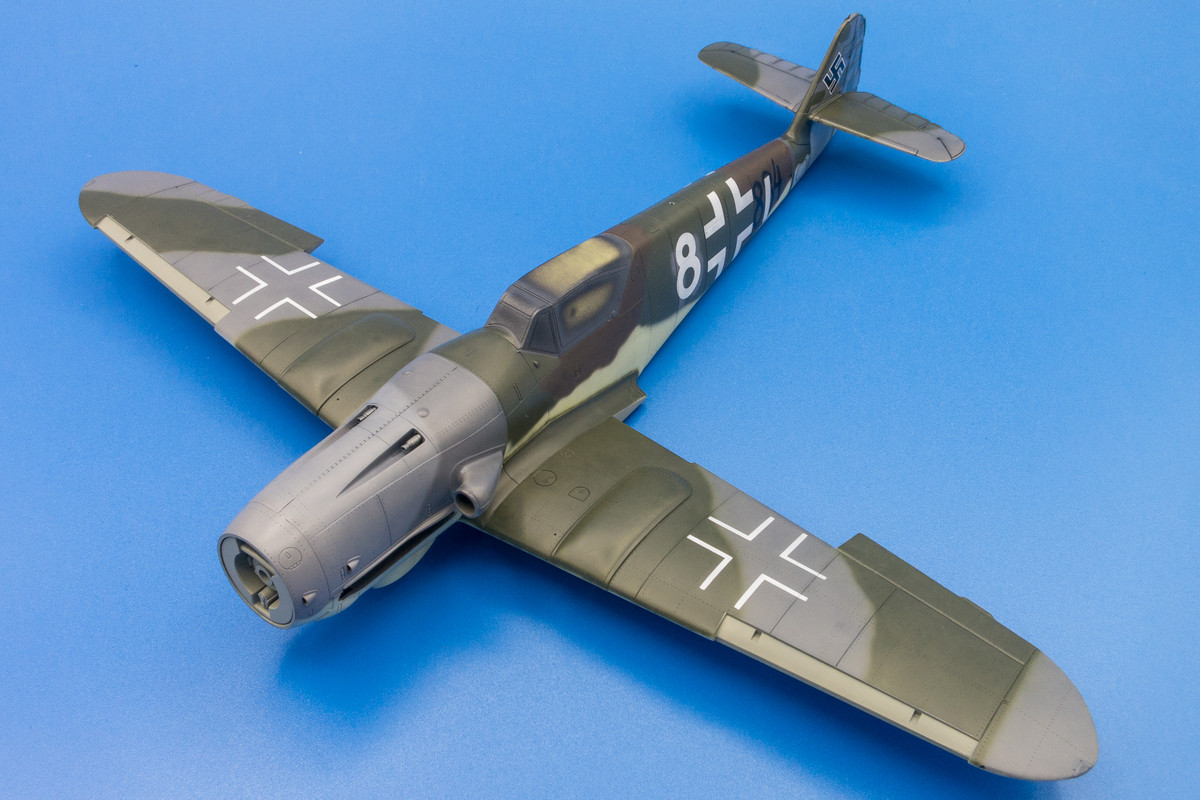
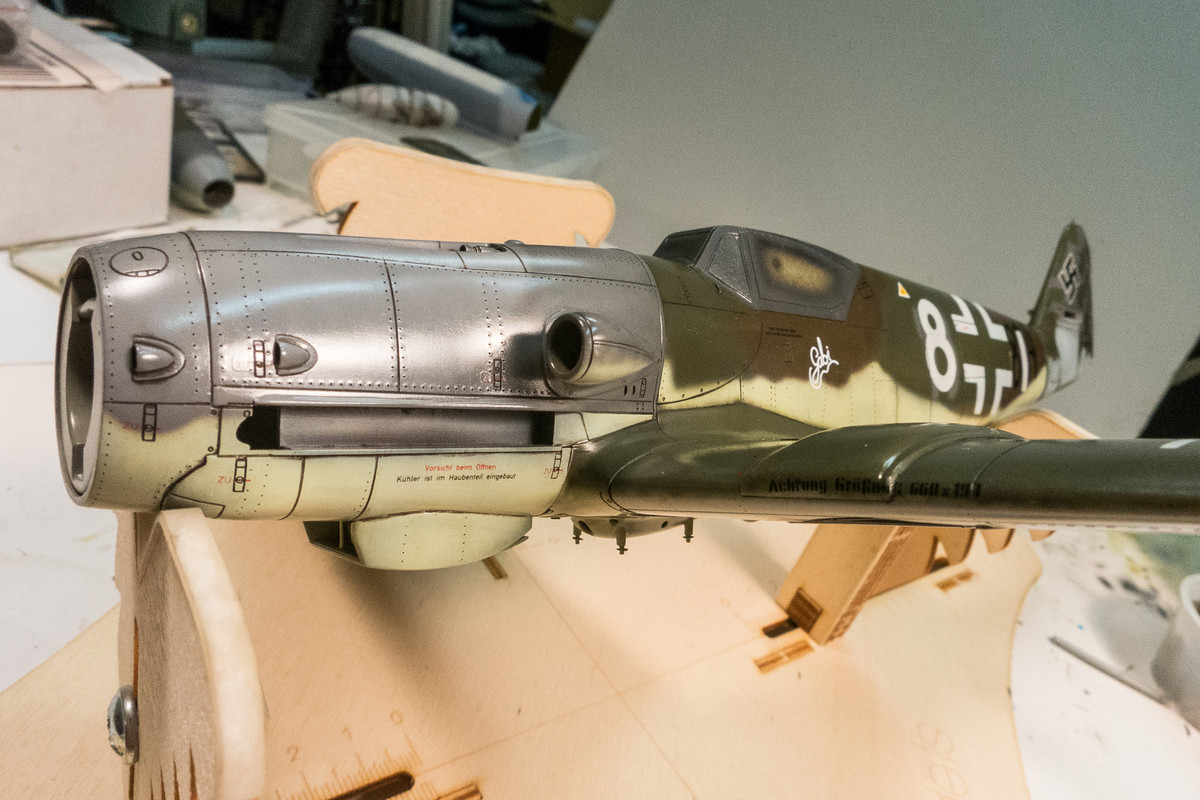
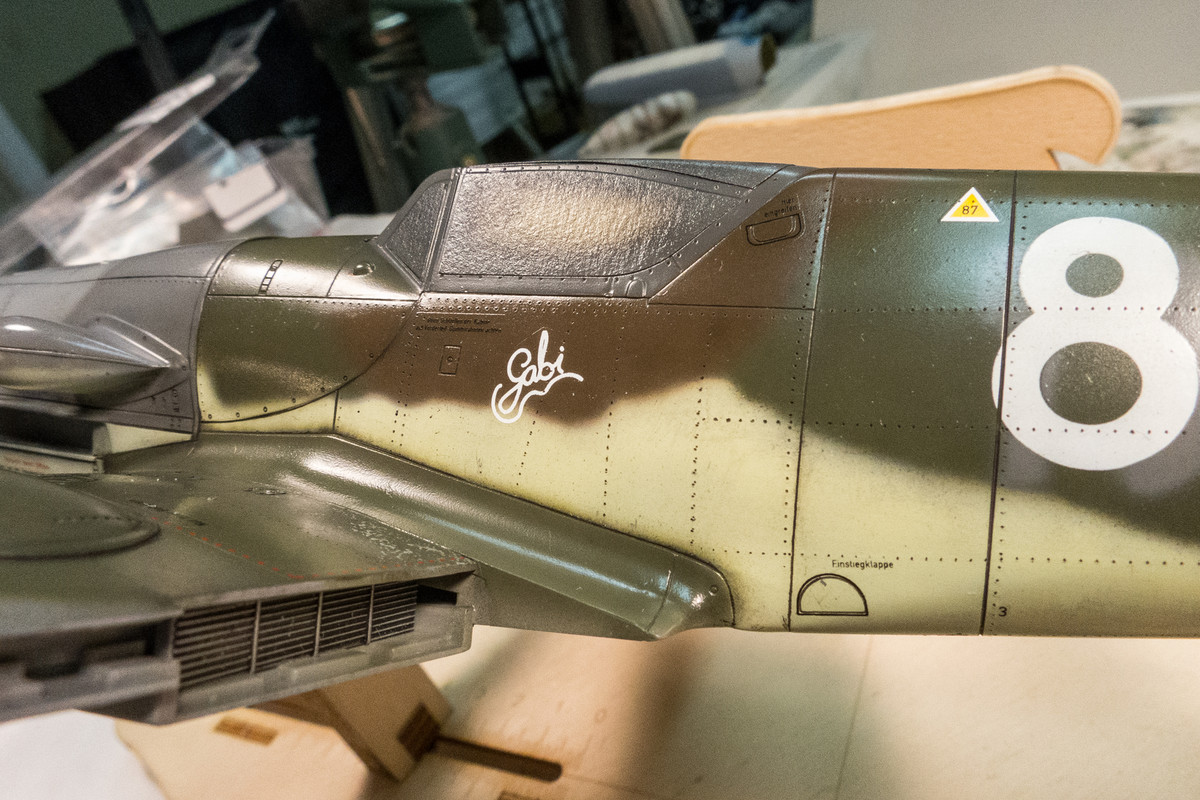
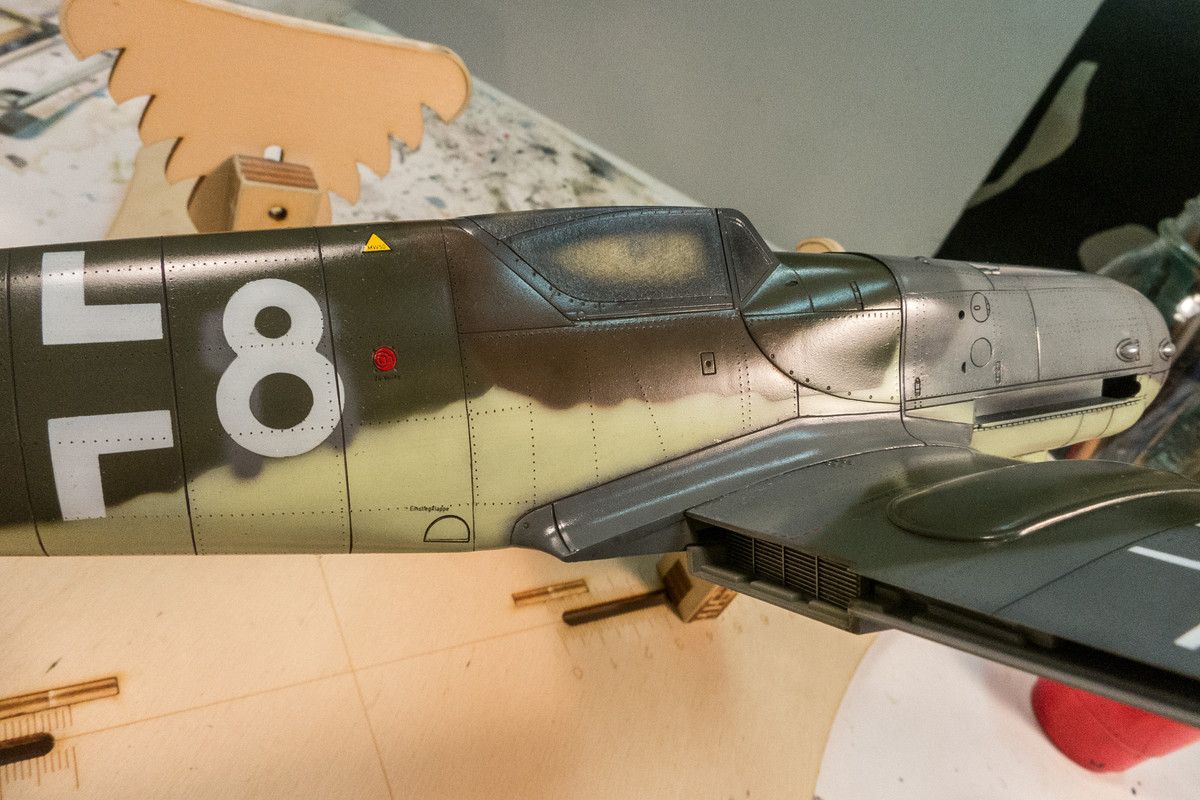
But I eventually got both sides repaired. In the meantime, I was applying the decals so I got that done too.
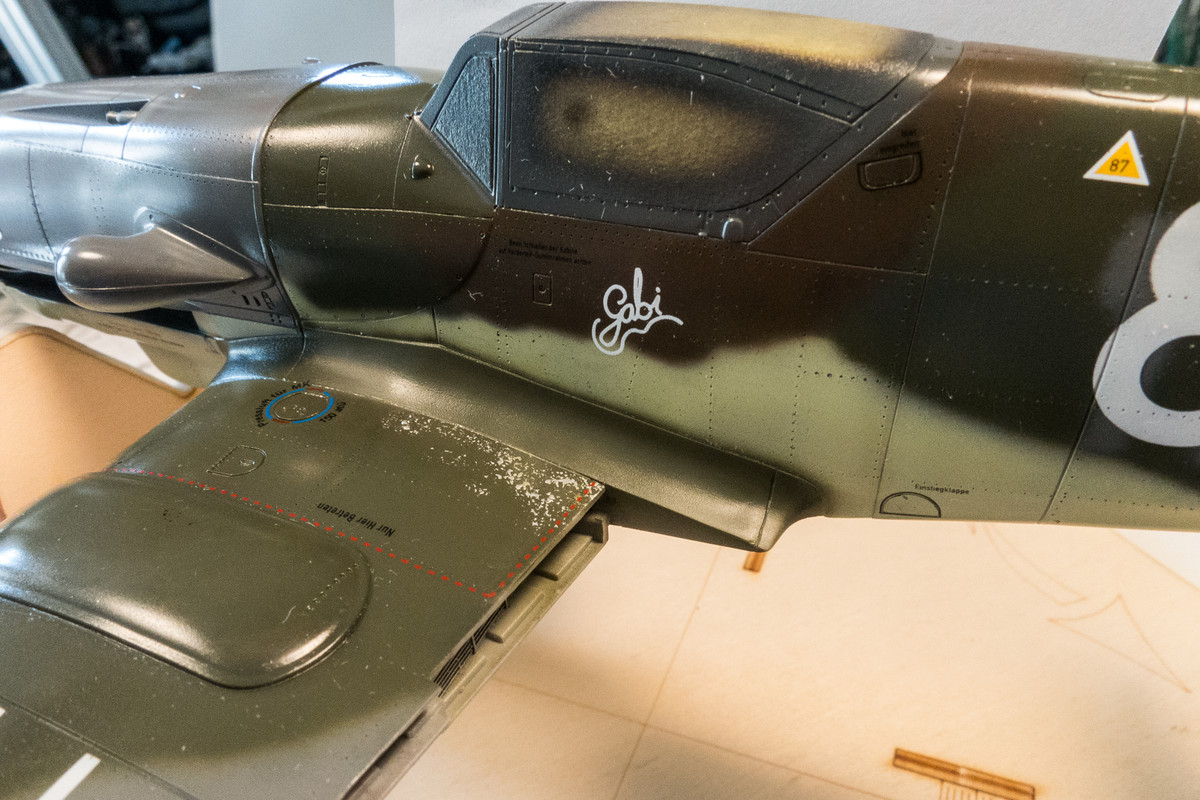
I applied a little bit of sponge chipping to the wing right next to the root but kept it minimal for now. I got nervous that I would somehow mess up the wing roots again and I didn't want to go backwards in this build anymore.
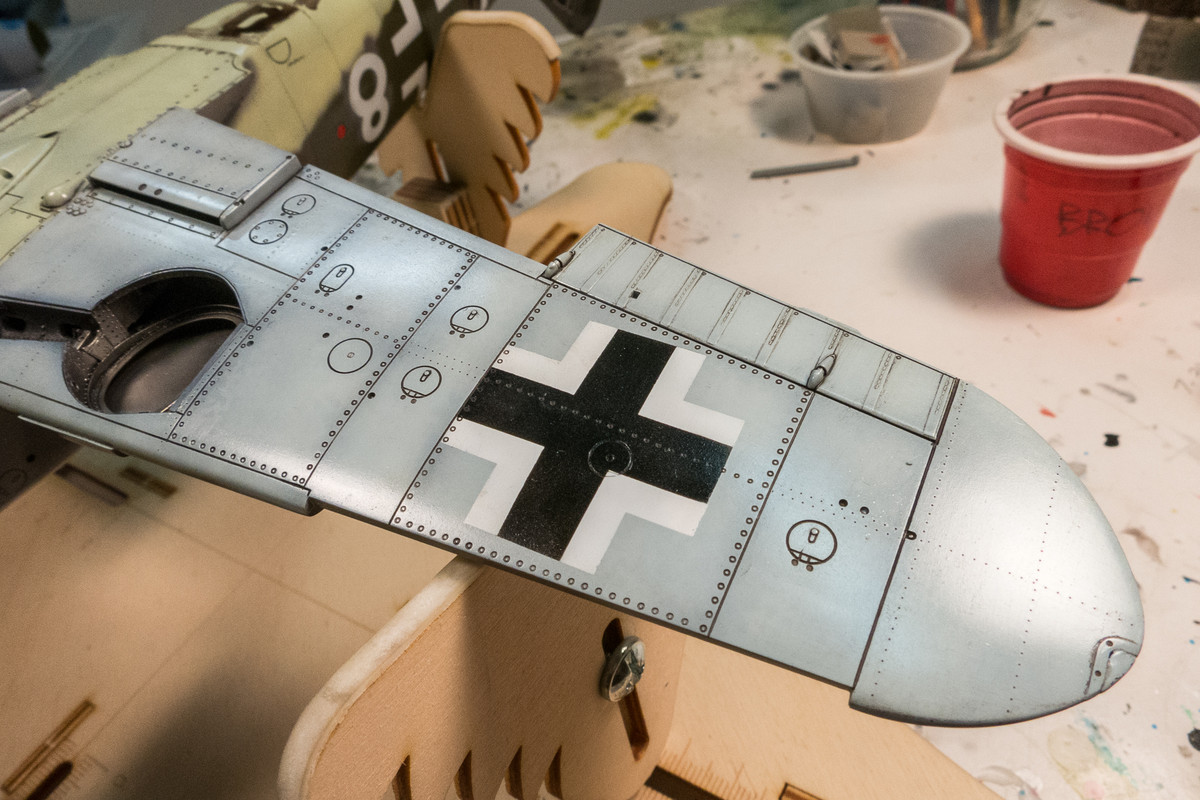
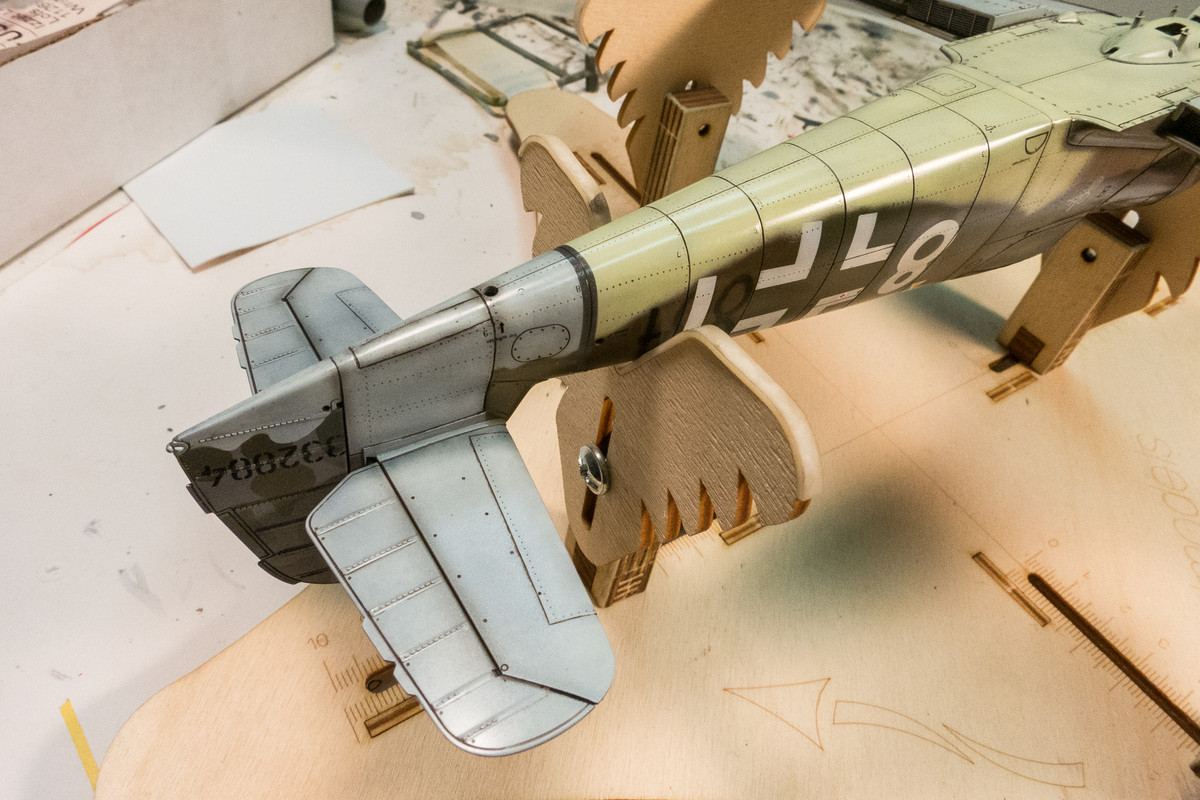
So the markings are done and sealed with a light coat of gloss. The next step forward is to do a panel wash. I mix my own washes using pastel chalk and water.
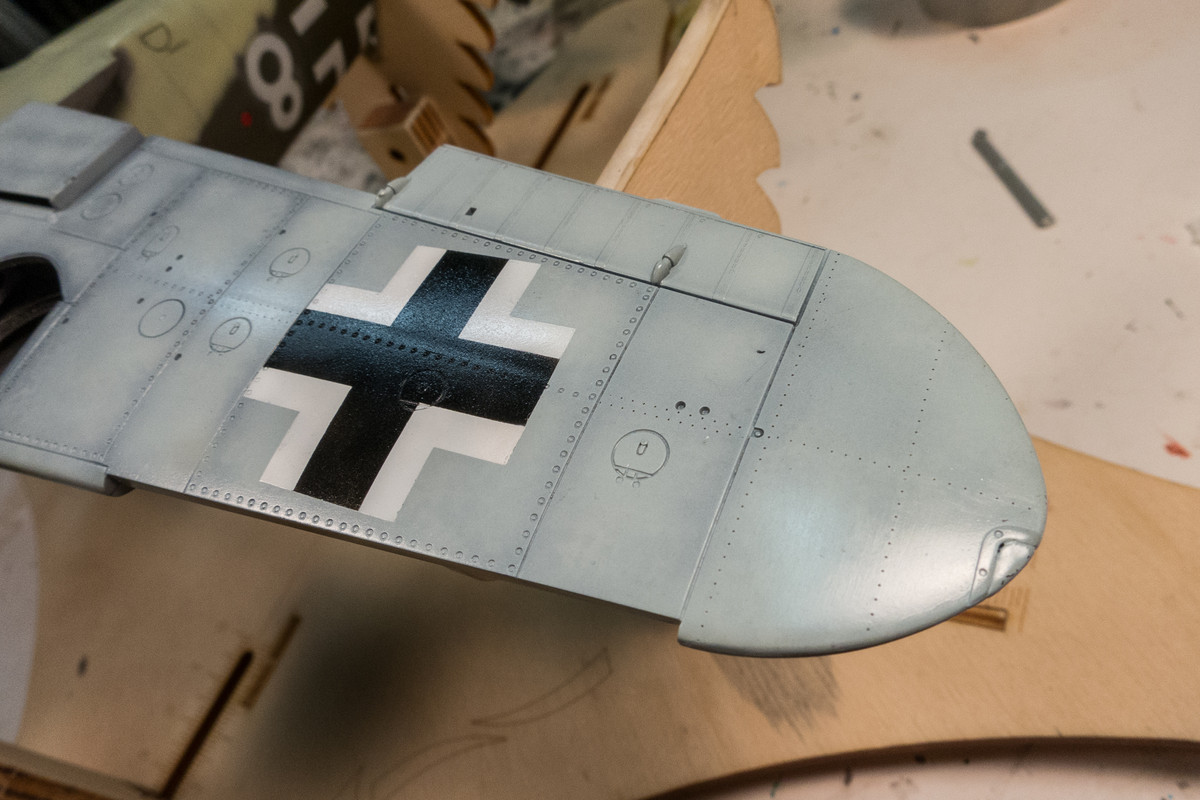
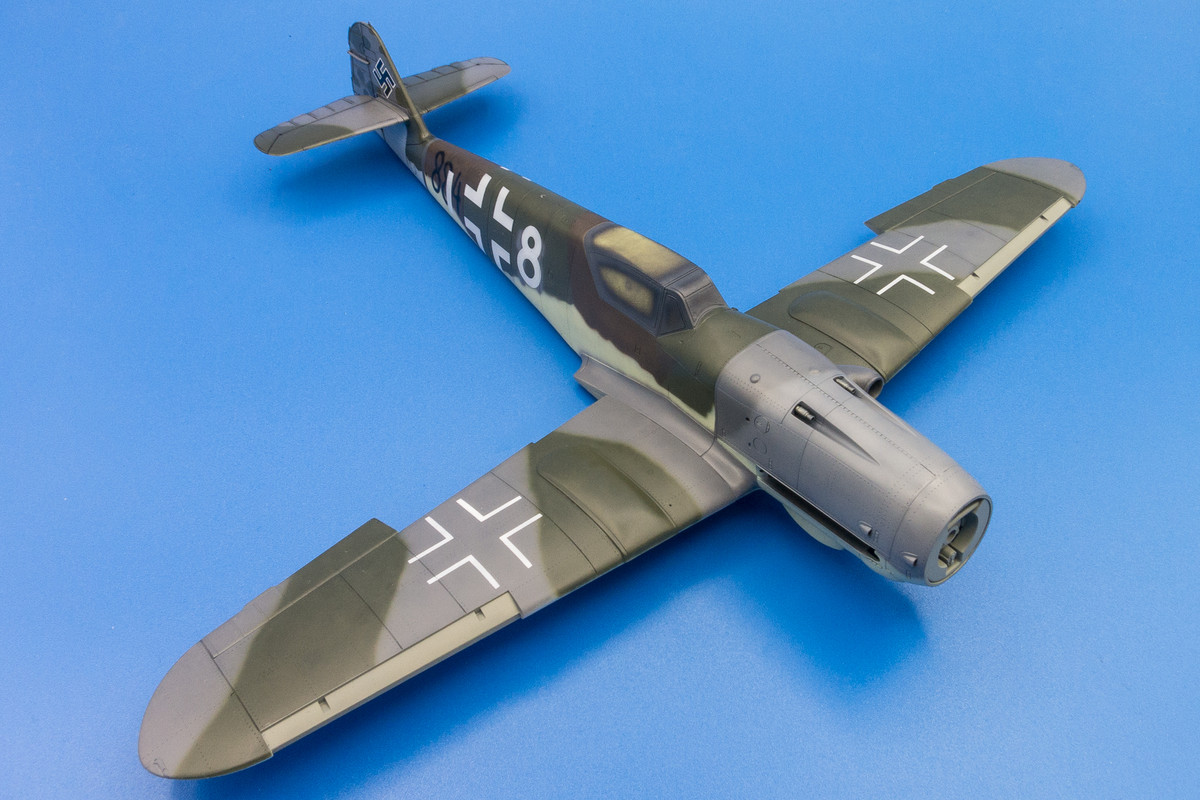
I used a dark brown wash for the under surfaces and upper grey areas.
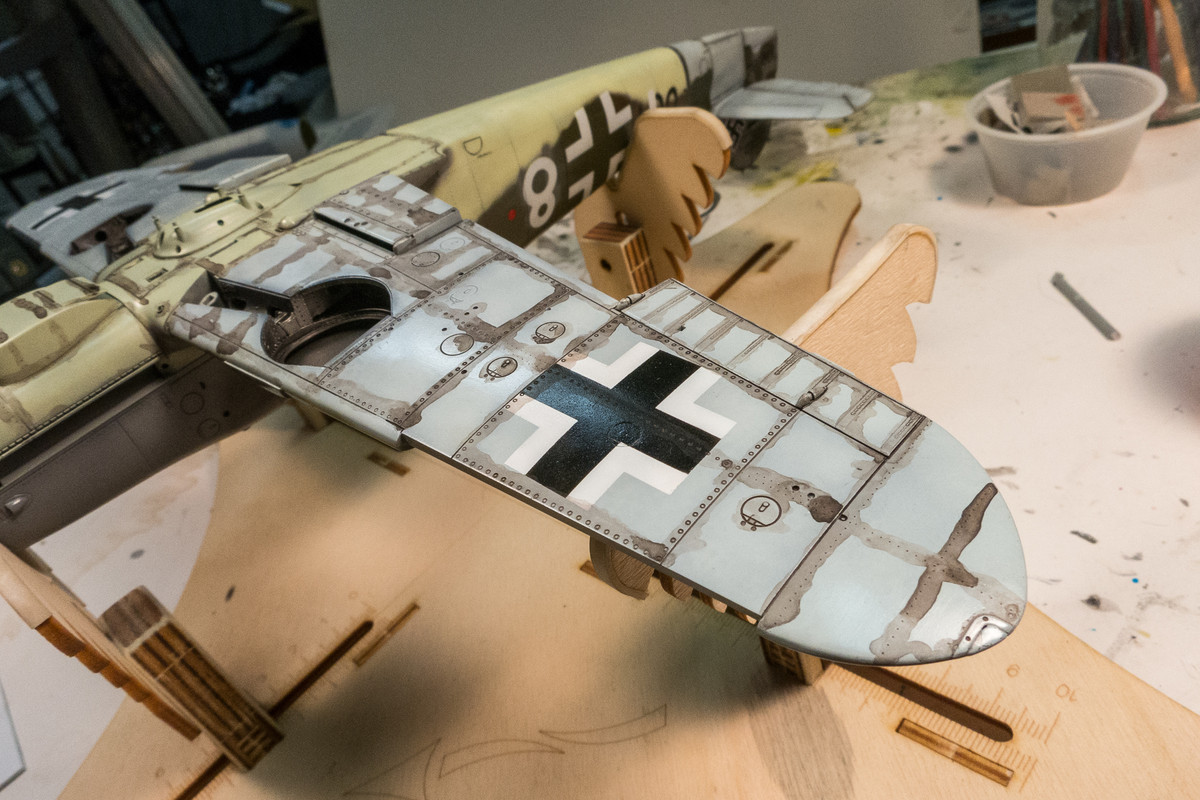
A more blackish shade of brown is used on the dark green areas.
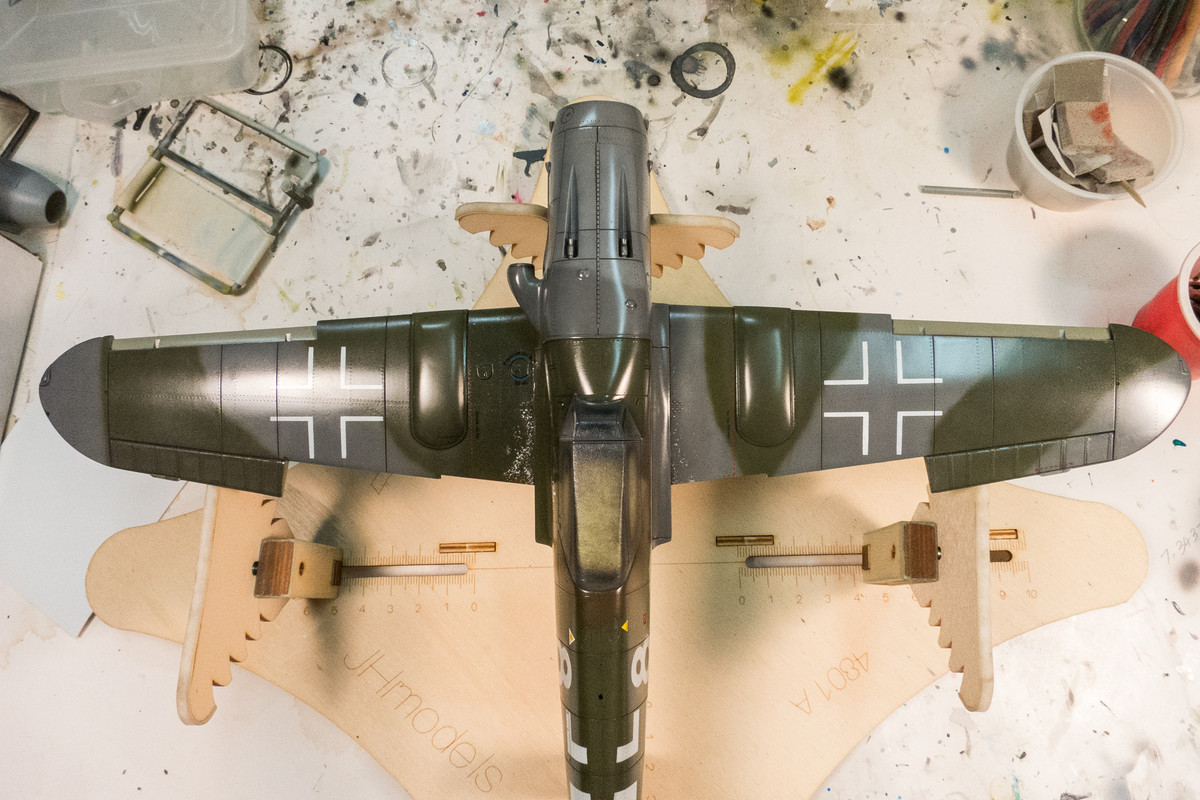
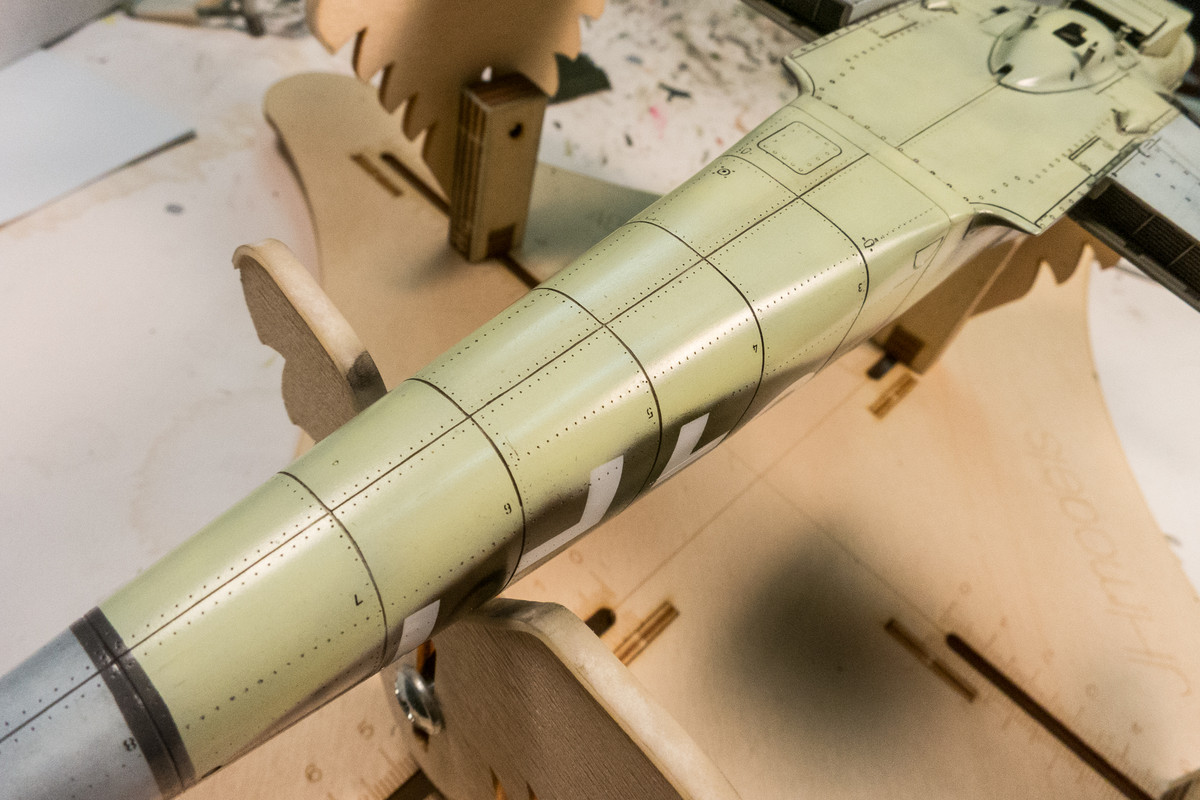
The panel wash is finished. I'm going to sleep on it and take a fresh look tomorrow to make sure that I remove any smudges or excess wash that I may have missed.
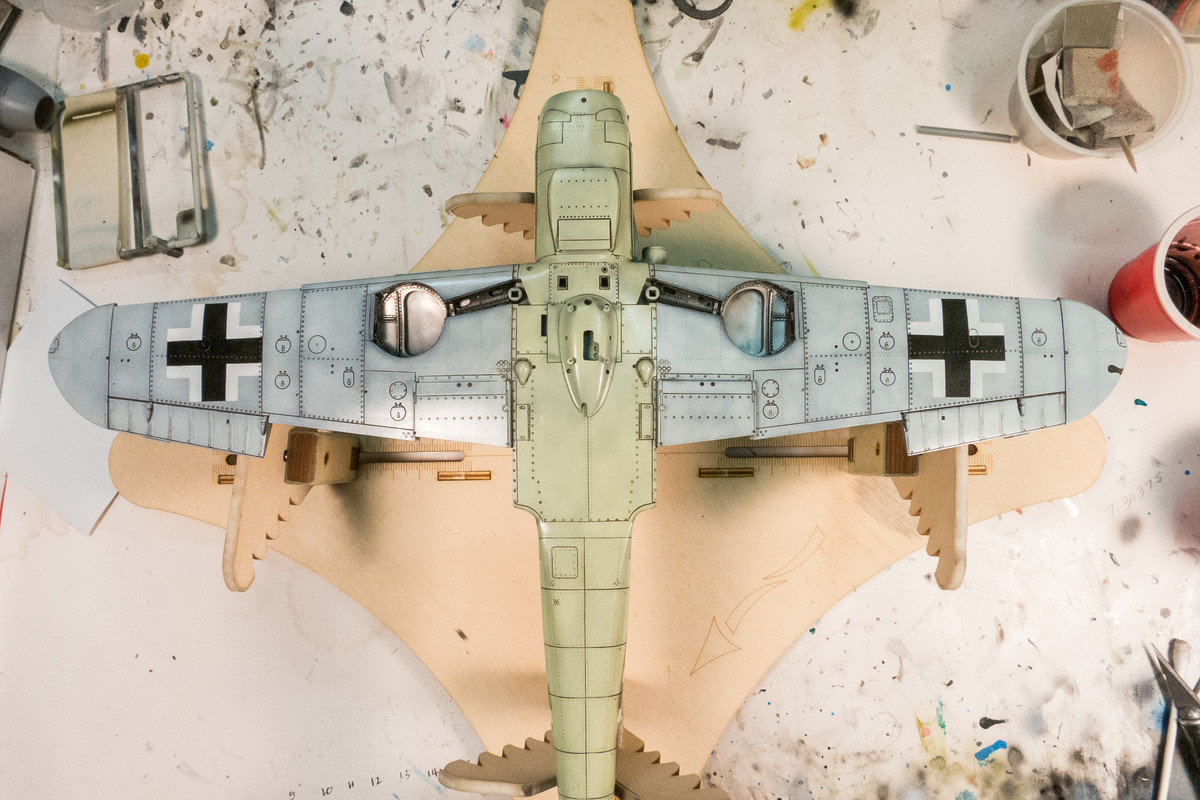
The next step, besides wiping off all of the dust and paper towel particles, is to do some airbrush post-shading. Especially on the bottom.

But I eventually got both sides repaired. In the meantime, I was applying the decals so I got that done too.
I applied a little bit of sponge chipping to the wing right next to the root but kept it minimal for now. I got nervous that I would somehow mess up the wing roots again and I didn't want to go backwards in this build anymore.
So the markings are done and sealed with a light coat of gloss. The next step forward is to do a panel wash. I mix my own washes using pastel chalk and water.
I used a dark brown wash for the under surfaces and upper grey areas.
A more blackish shade of brown is used on the dark green areas.
The panel wash is finished. I'm going to sleep on it and take a fresh look tomorrow to make sure that I remove any smudges or excess wash that I may have missed.
The next step, besides wiping off all of the dust and paper towel particles, is to do some airbrush post-shading. Especially on the bottom.
John aka JKim
-----------<><
-----------<><