Page 17 of 24
Re: Here Kitty Kitty - Tamiya Leopard A4
Posted: Wed Sep 19, 2018 9:54 am
by Duke Maddog
Yes, I'm still interested. This is a great tank, and your work is looking fantastic. Thanks for the info on the badger paints. I'm learning so much here.
Re: Here Kitty Kitty - Tamiya Leopard A4
Posted: Wed Sep 19, 2018 11:32 am
by Stikpusher
Thanks Mark. I suspect that the Badger paints are formulated for airbrushing straight from the bottle. We shall see...
Re: Here Kitty Kitty - Tamiya Leopard A4
Posted: Fri Sep 21, 2018 10:20 pm
by Medicman71
Very nice Stik! Paints can be a finicky lot. Sometimes they work right, other times they don't.
Re: Here Kitty Kitty - Tamiya Leopard A4
Posted: Fri Sep 21, 2018 10:44 pm
by Stikpusher
Very true Doc. Perhaps it’s the pigments in these, or maybe the carrier, who knows? I was hoping for a more grayish tone of dried mud. This one came out a bit too yellowish for what I wanted. But once all is done with the next level or two of weathering, it should be where I want it.
Re: Here Kitty Kitty - Tamiya Leopard A4
Posted: Fri Oct 05, 2018 2:10 pm
by Stikpusher
Well, I actually have been making progress on this project over the past week or so....
First up I tried a new route and made up a mud slurry with pigments for the lower hull and suspension.
First effort was with a dark earth
Then I added a second lighter color, rubble dust

then I finished painting the tracks, put them on, and added a thinner wash of the rubble dust to select areas
And then it was time to finally glue the upper hull in place! (And the tow cables into their clamps)

More to come soon....
Re: Here Kitty Kitty - Tamiya Leopard A4
Posted: Fri Oct 05, 2018 2:48 pm
by speedgraflex
Carlos—yours is such beautiful modeling work, in part due to the style of contrasts between the camo, the factory paint and now the weathering—all done with great verve and subtlety both. Your paint work is as important to see as your build work, truly. Solid surfaces have weight, paint stretches over metal plates and curvilinear surfaces, and I like your wheel rollers much better than mine! Congratulations, my friend! Cheers!
Re: Here Kitty Kitty - Tamiya Leopard A4
Posted: Fri Oct 05, 2018 4:01 pm
by Stikpusher
Thank you Bruce. Working with the pigments in this manner has given me an idea of how to do a field applied mud camo in the future.

Not to mention the follow up weathering to blend it all together. Aside from the opacity issues with the Badger paint, the tone of the color is not quite what I want... but like Sir Bedevere, I have a plan....
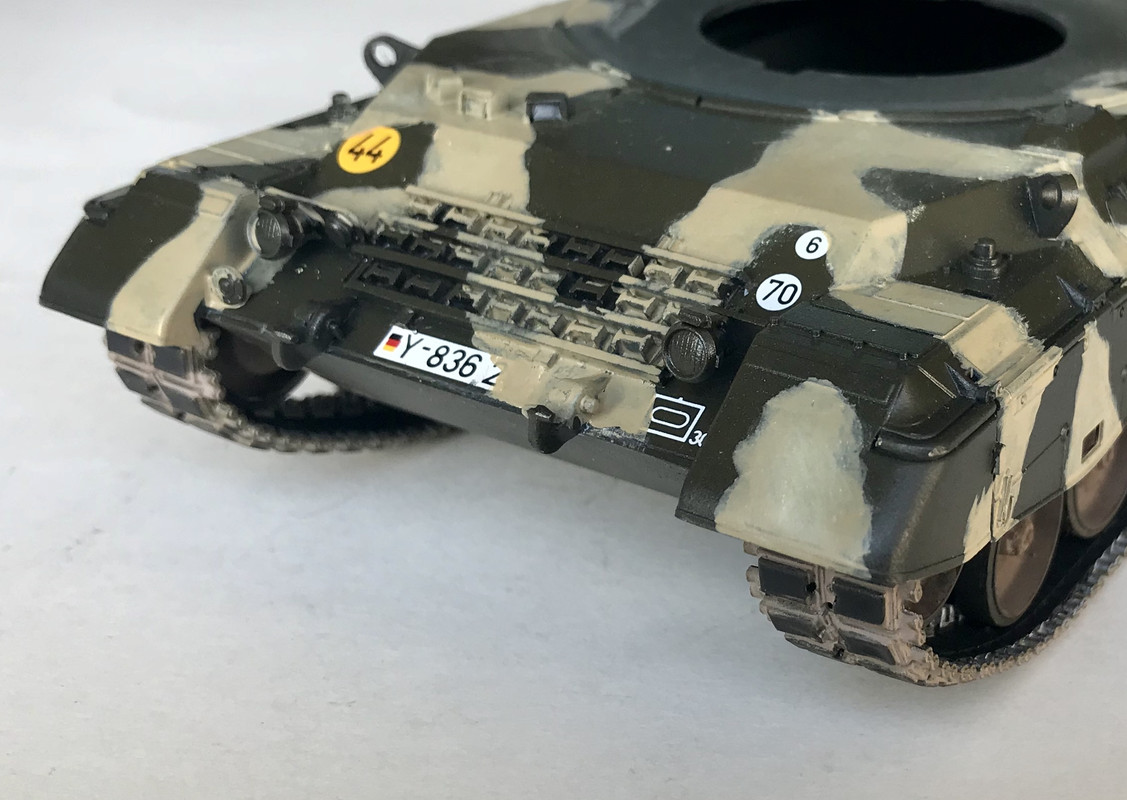
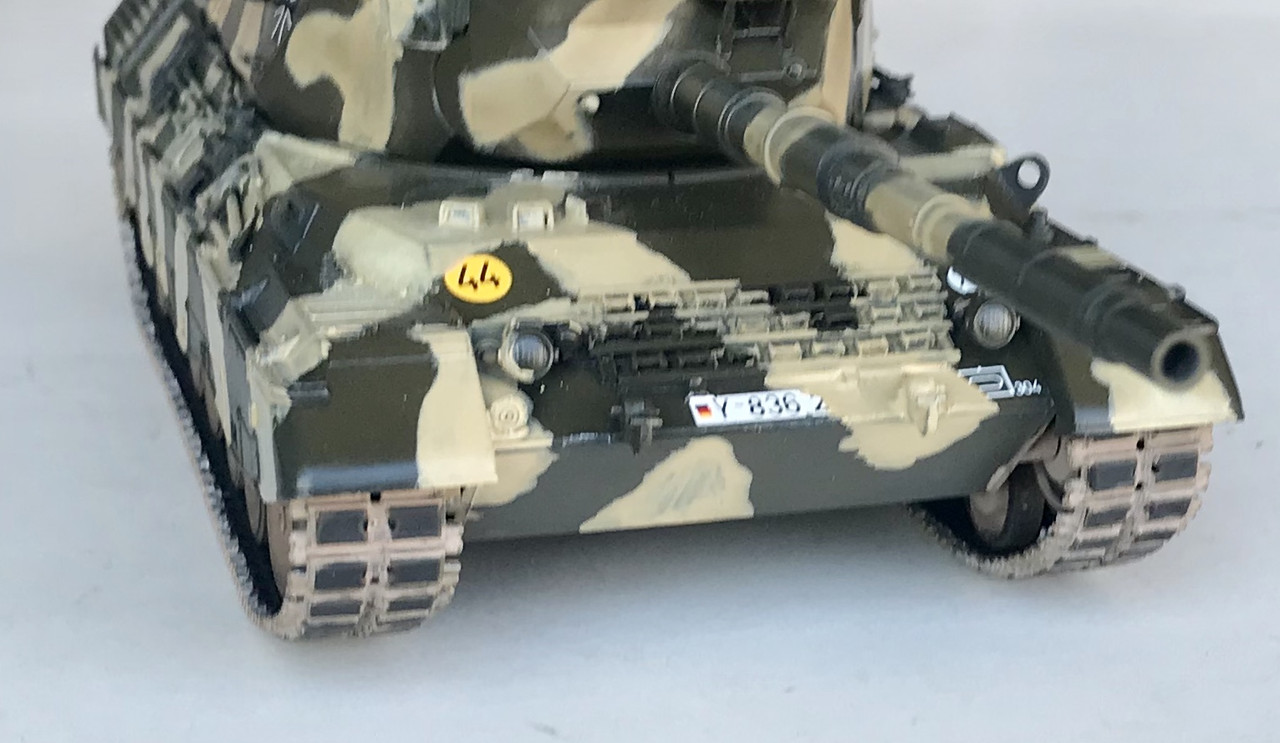
Anyways back to my progress update from the past week- after the upper hull had dried in place Inwas able to add the missing bit on the front and rear of the mud camo. I still need to do a second coat to be sure of coverage on the hull sides, front, and rear. But at least now it’s gaining its’ final basic appearance.
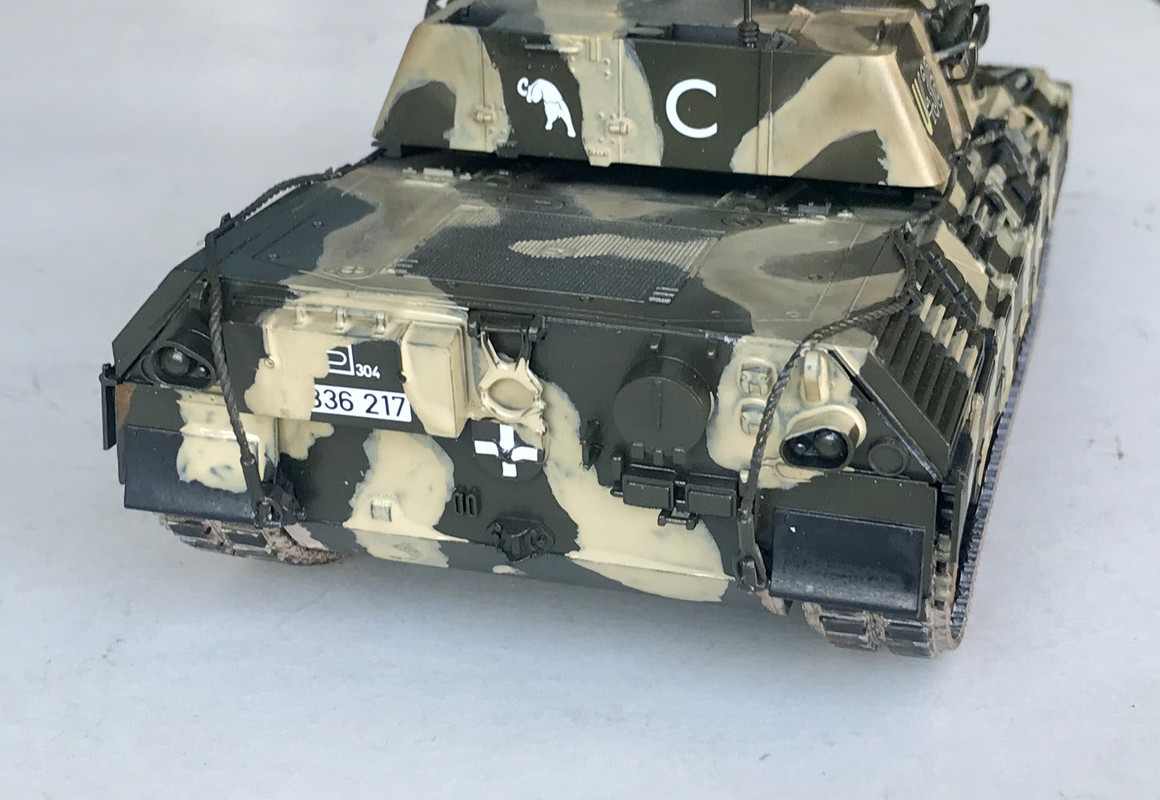
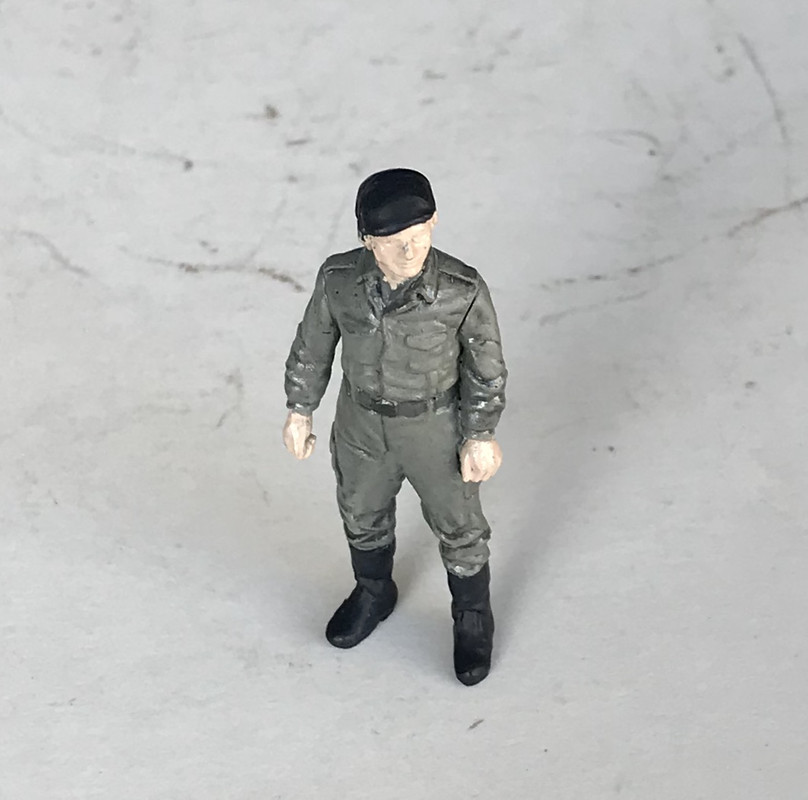
I also added a dark wash onto the crewman’s uniform... Hallo Thomas!
that’s all for now...
Re: Here Kitty Kitty - Tamiya Leopard A4
Posted: Fri Oct 05, 2018 9:38 pm
by speedgraflex
I have to go back to read how you made your tow cables, Carlos! Those look really spectacular. So does Thomas. Watching this all come together eagerly now, very excited to see what happens next!
Re: Here Kitty Kitty - Tamiya Leopard A4
Posted: Fri Oct 05, 2018 11:09 pm
by Stikpusher
Thanks Bruce. The tow cables are nylon cord, with aluminum rod and tube for the eyes and colllars.
I need to start working on Thomases flesh areas. The boy looks so pale!
Re: Here Kitty Kitty - Tamiya Leopard A4
Posted: Sat Oct 06, 2018 3:44 am
by mostrich
Stikpusher wrote:Thank you Bruce. Working with the pigments in this manner has given me an idea of how to do a field applied mud camo in the future.
Not to mention the follow up weathering to blend it all together. Aside from the opacity issues with the Badger paint, the tone of the color is not quite what I want... but like Sir Bedevere, I have a plan....
The Badger paint is super opaque, right? I'm sure you're running a plan on how to get things more back in the direction of what you originally intended it to look like. So to say
post processing.
Michael Rinaldi had an open discussion round going on on his FB page about the process of "mapping". I'll quote his explanations right here:
Michael Rinaldi - Rinaldi Studio on FB wrote:What mapping is designed for is to work up layers of a color using a reduction in area with each step. Think of a geographical contour map and how the lines are stepped back the higher the elevation, this is where the term gets it's name from.
When applied to modeling, it means we are adding another layer of color (it's usually the color underneath, such as a whitewash or layers of rust, but can also be the base colors), and each layer is smaller than the previous one. Therefore the more opaque it becomes, the smaller that area ends up being. Hopefully, that makes more sense for what mapping actually is. It's an often misused term or not fully understood, pictures help and I'll add a few below.
A simple example is winter camo, mapping is perfect to build up more opacity and not cover the lower layers completely. Why we use it? It's to show depth of layers of paint and how top layers are worn off leaving more faded and worn layers exposed underneath. This happens in real life when a section is being worn away, but not all of it since some part of the area may be hidden or not receive the direct contact that causes the wear.
I'm in the early stages of understanding this whole technique by myself. It's a new world for me and a completely different approach of how to optain certain effects and looks. So much to learn.
Don't know if this helps on your specific task, Carlos. Sorry for flooding your area anyway.

