
Stikpusher wrote:That is a beautifully molded pilot figure!I can’t wait to see how he looks all painted up.
1/32 Hasegawa N1K2-J Shiden Kai
Re: 1/32 Hasegawa N1K2-J Shiden Kai
March as one, Don't look back
Odin's sons... Attack!
Unleash hell! Do not repent! Warfare grants us no lament
Let your weapons slash and tear This is no place for fear
Hold the lines! Move as one! In unity our victory's won
Our shields will form a mighty wall
United we shall never fall
Odin's sons... Attack!
Unleash hell! Do not repent! Warfare grants us no lament
Let your weapons slash and tear This is no place for fear
Hold the lines! Move as one! In unity our victory's won
Our shields will form a mighty wall
United we shall never fall

Re: 1/32 Hasegawa N1K2-J Shiden Kai
Doh... I've gone as far as I've promised to go! But yeah, that figure is begging to be painted, isn't it? We'll see if I can work myself up to an attempt.Stikpusher wrote:That is a beautifully molded pilot figure!
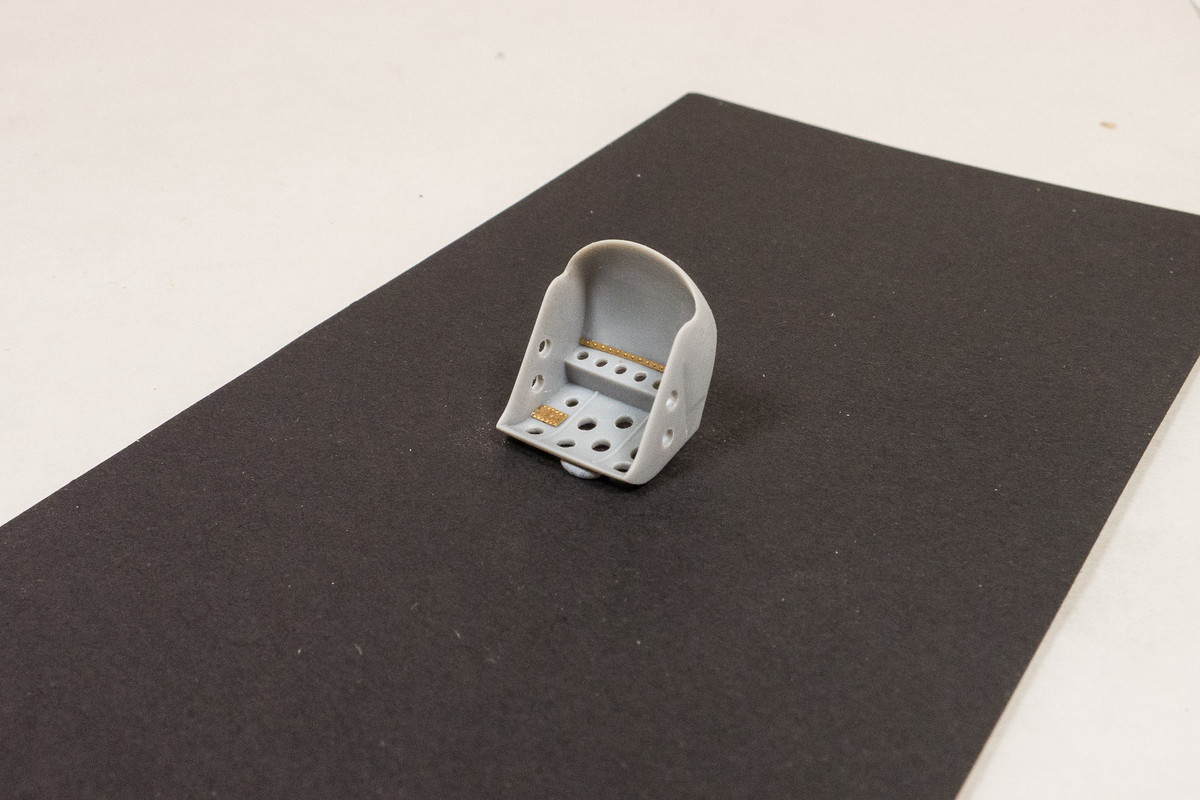
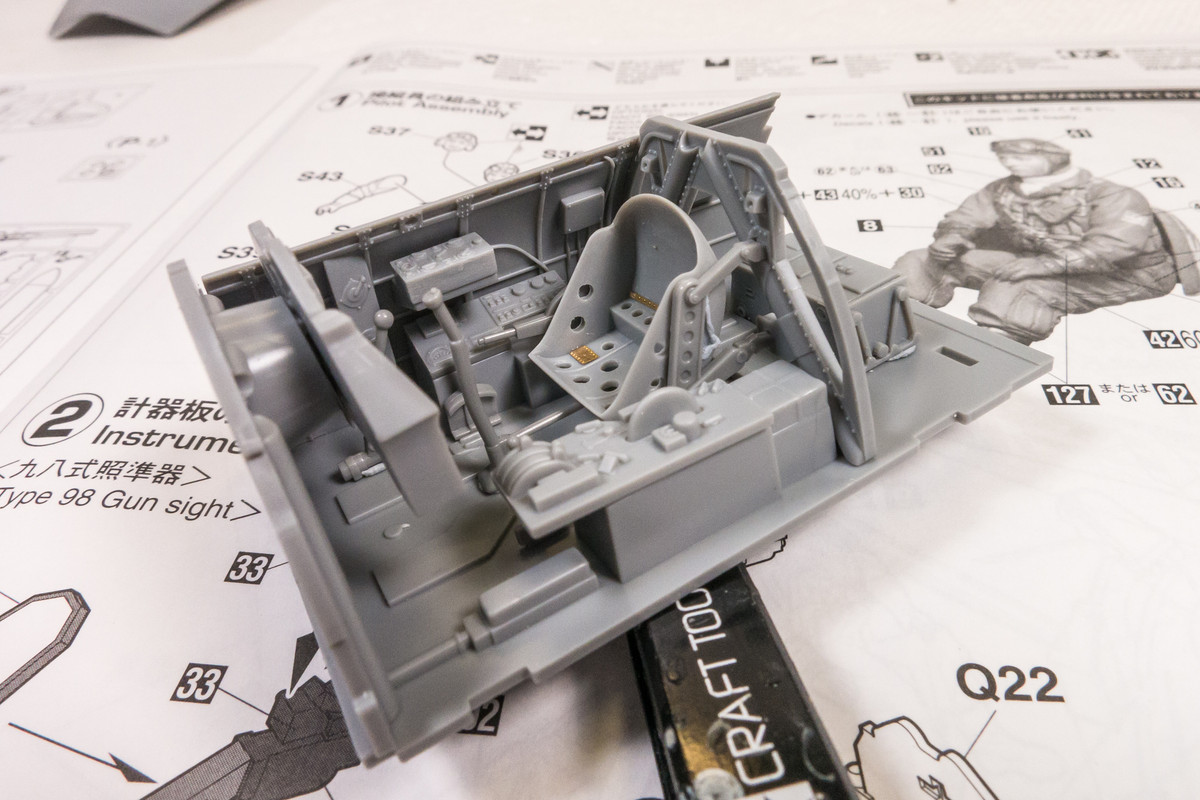
In the meantime, let's concentrate on the seat some more! Thanks to my lovely reference book, I've notice some more lightening holes in the sides of the bucket seat so I drilled those out.
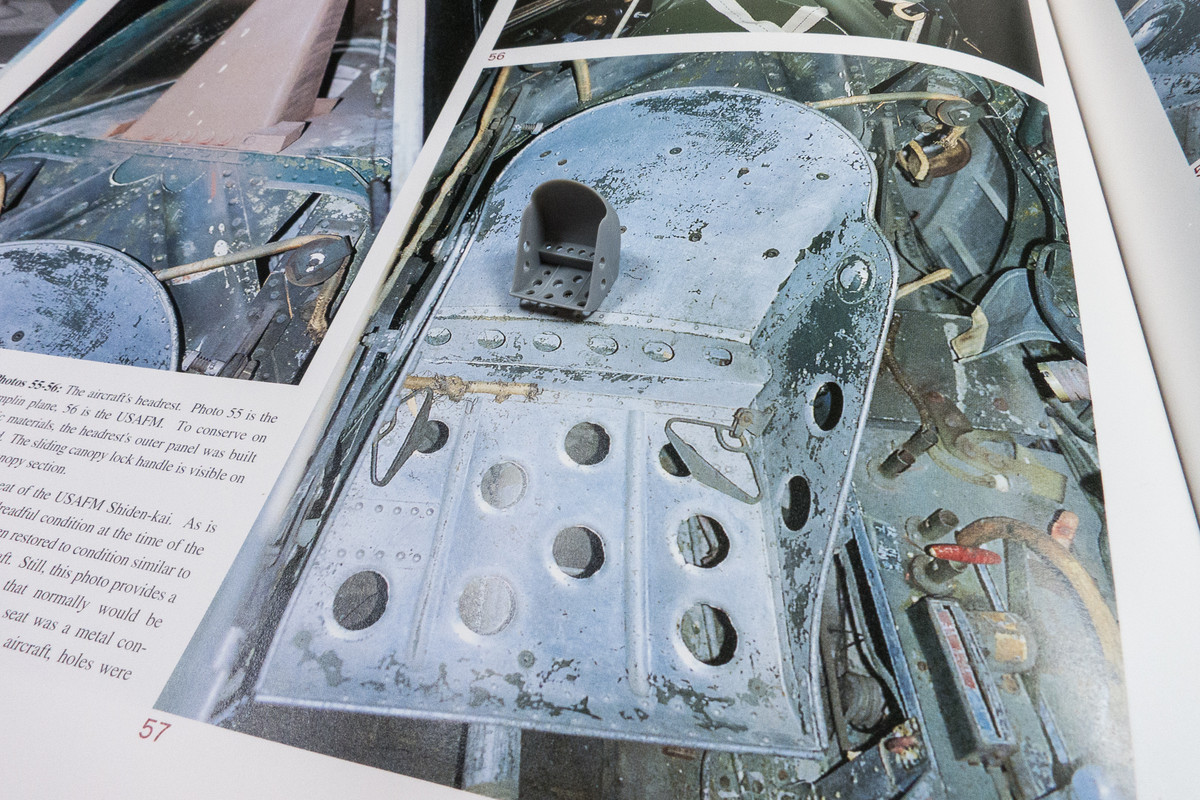
There are some seat enhancements in the Brengun brass set so I can add those.
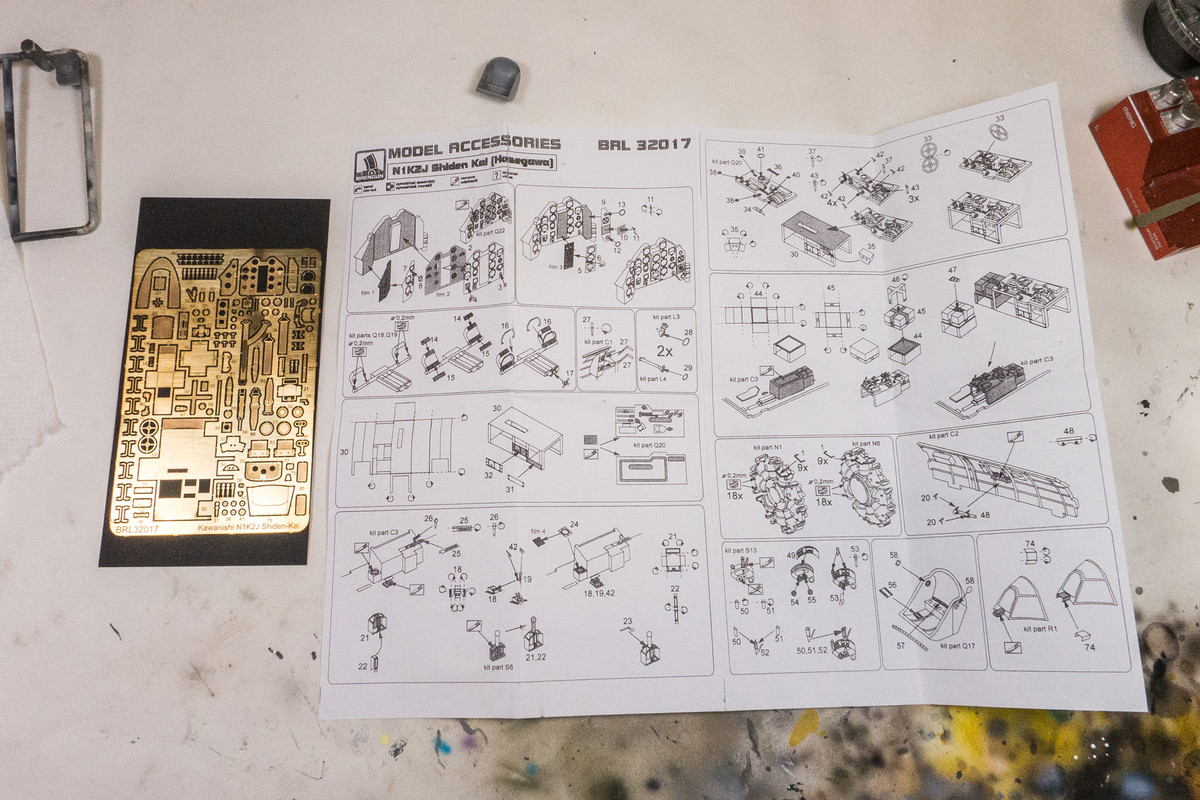
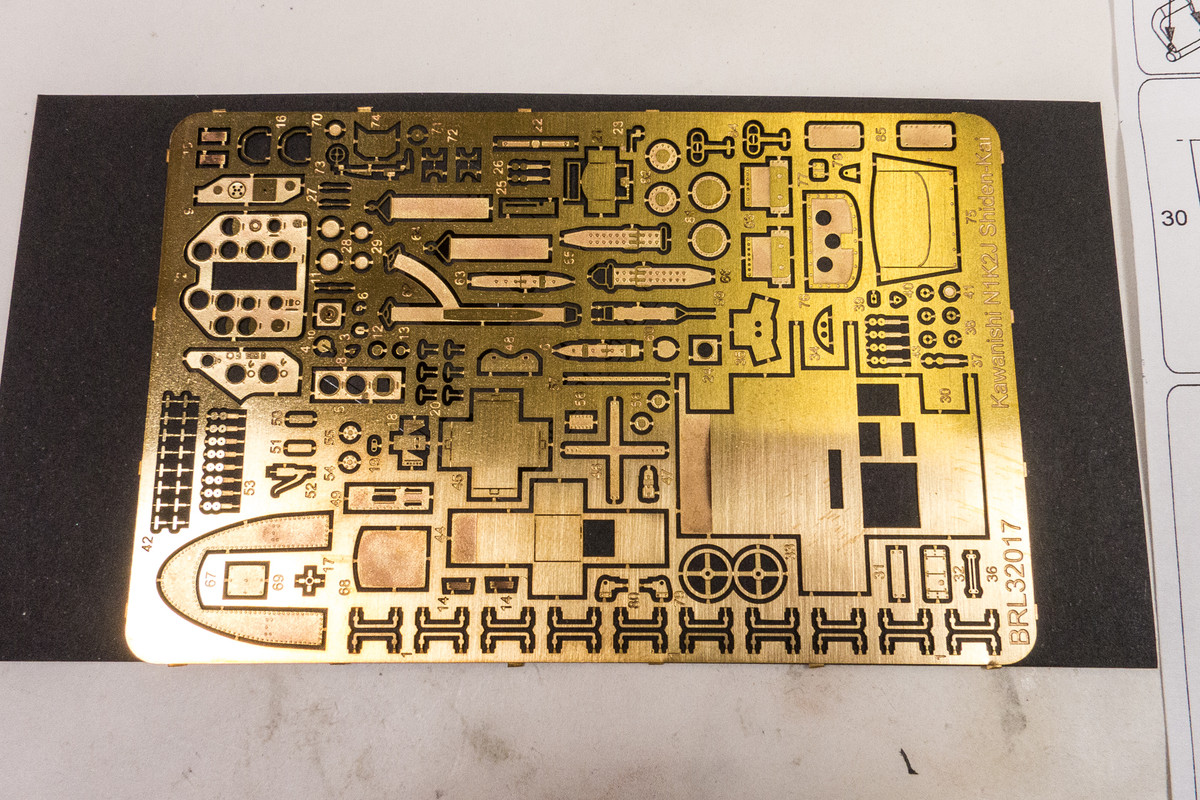
One of the biggest challenges is finding the right piece on the busy fret.
Two bits of brass that will probably get covered up by the seat harnesses.
Brengun proposes some very interesting origami challenges. In such cases, I never remove or destroy the kit part until the replacement is satisfactorily assembled.

John aka JKim
-----------<><

-----------<><
-
speedgraflex

- Moderator
- Posts: 9758
- Joined: Fri Feb 10, 2017 11:08 pm
- Location: Santa Monica, California
Re: 1/32 Hasegawa N1K2-J Shiden Kai
I was entranced by the figure sculpt. I think there is a nice photo of a pilot seated in a rattan chair next to this aircraft. That might be something for you to add to the project as a final flourish.
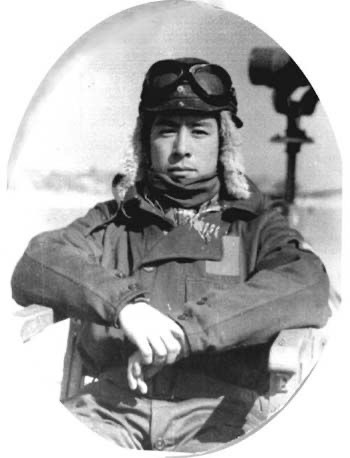
Kunio Iwashita
Squadron Commander
1944
Kunio Iwashita
Squadron Commander
1944
Bruce / SPEEDGRAFLEX
Re: 1/32 Hasegawa N1K2-J Shiden Kai
Seat is looking really good and like always Bruce finds a fantastic photo.
https://m.youtube.com/watch?v=cO3PjztDGVQ&t=378s
Ian E. On YouTube has helped me a lot when it comes to painting figures. Here is a link to one of his videos. If you have time check out his channel.
https://m.youtube.com/watch?v=cO3PjztDGVQ&t=378s
Ian E. On YouTube has helped me a lot when it comes to painting figures. Here is a link to one of his videos. If you have time check out his channel.
March as one, Don't look back
Odin's sons... Attack!
Unleash hell! Do not repent! Warfare grants us no lament
Let your weapons slash and tear This is no place for fear
Hold the lines! Move as one! In unity our victory's won
Our shields will form a mighty wall
United we shall never fall
Odin's sons... Attack!
Unleash hell! Do not repent! Warfare grants us no lament
Let your weapons slash and tear This is no place for fear
Hold the lines! Move as one! In unity our victory's won
Our shields will form a mighty wall
United we shall never fall
Re: 1/32 Hasegawa N1K2-J Shiden Kai
The figure has that hand-on-the- joystick pose that might be out of place outside of the cockpit. And I haven't decided whether to paint it or not.
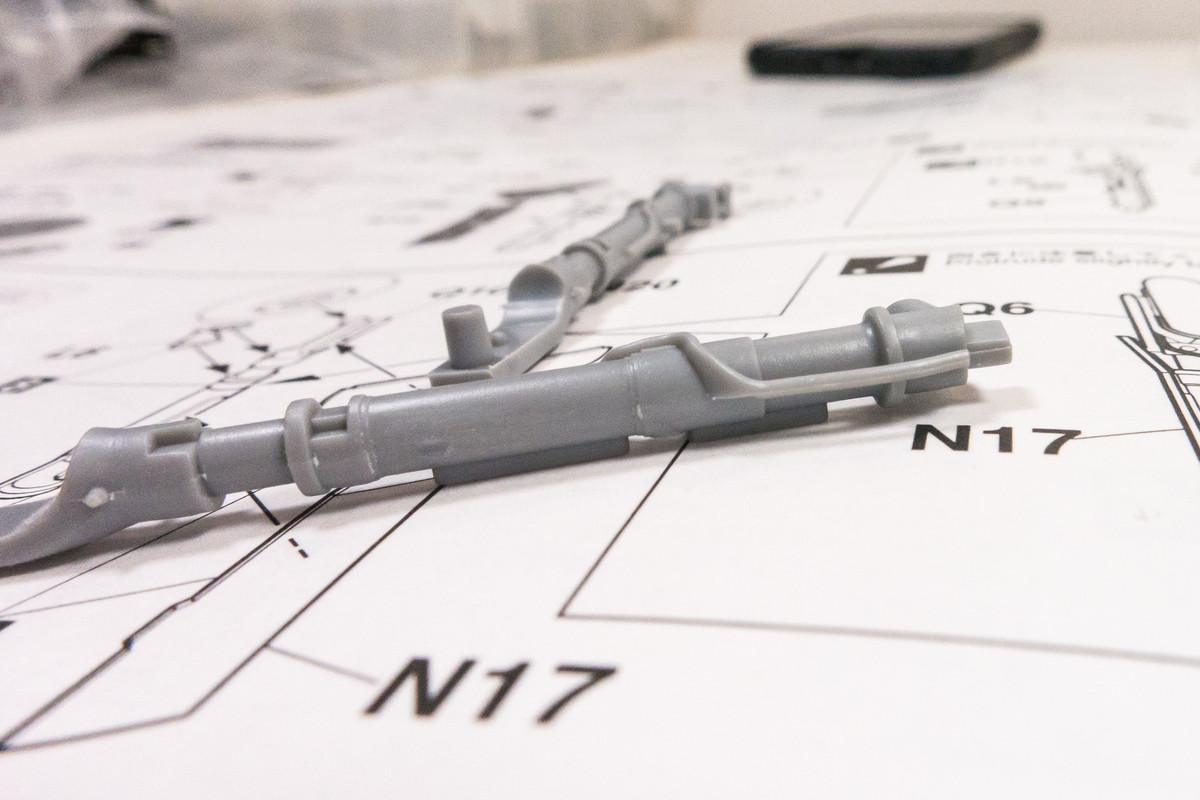
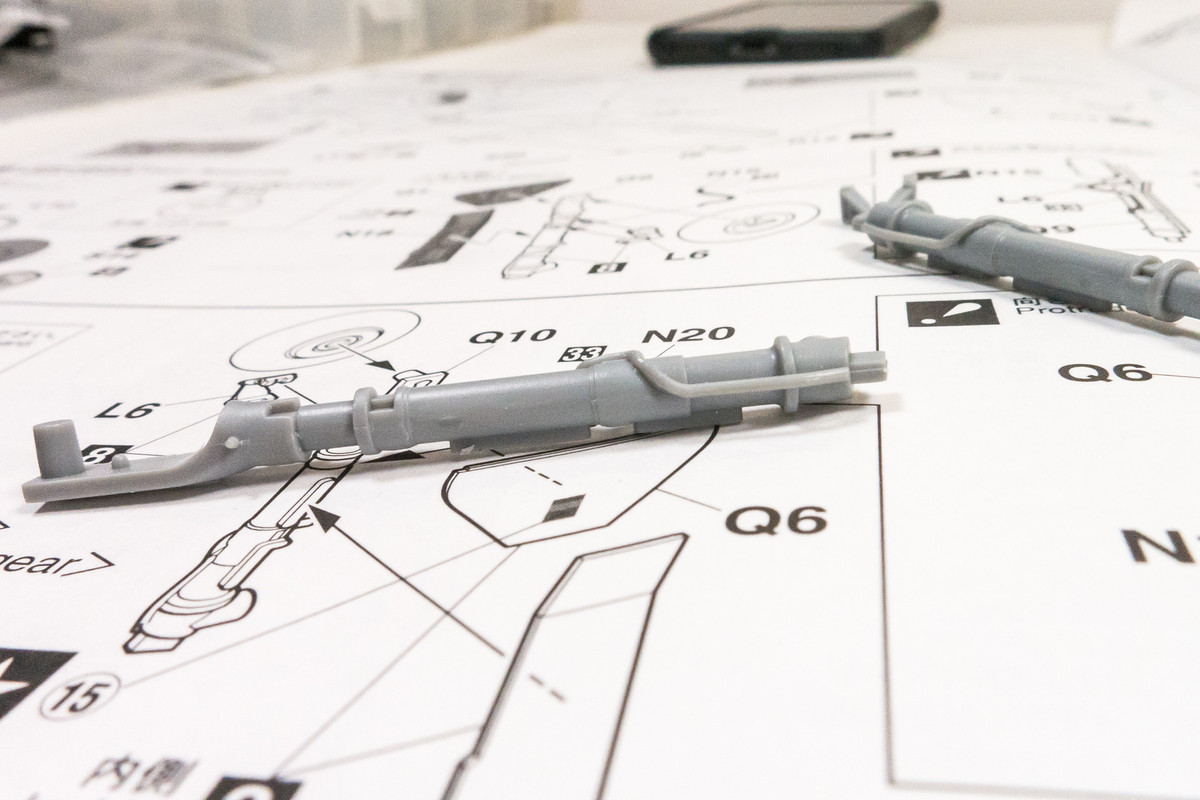
Let me draw your attention away from that figure once again, and point out some work on the landing gear legs. As I mentioned in my spue review, Hasegawa thoughtfully included a brake line on the leg AND molded it with a round cross-section, which is pretty impressive. Upon closer inspection, that round cross-section isn't consistent. I guess there are limitations to the injection molding process. There are a couple of spots where this happens. Here's one...
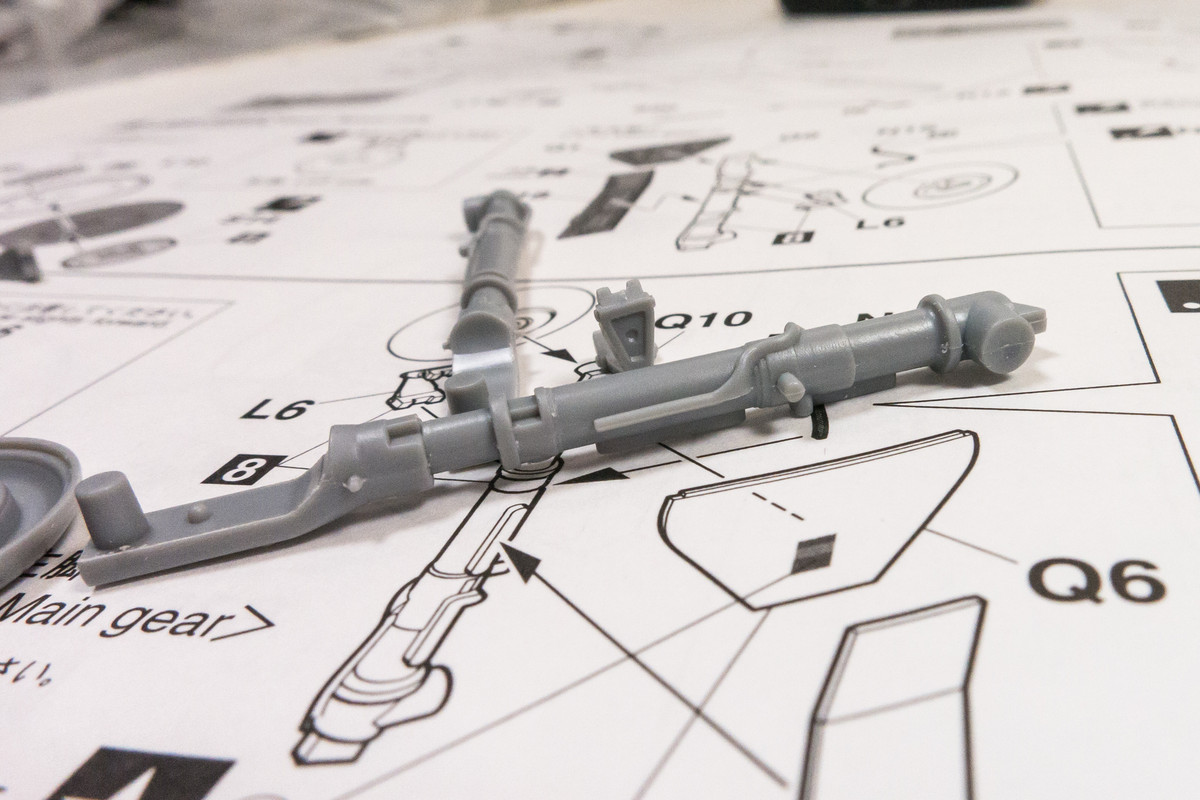
A bit of careful carving renders the plastic into a more convincing brake line.
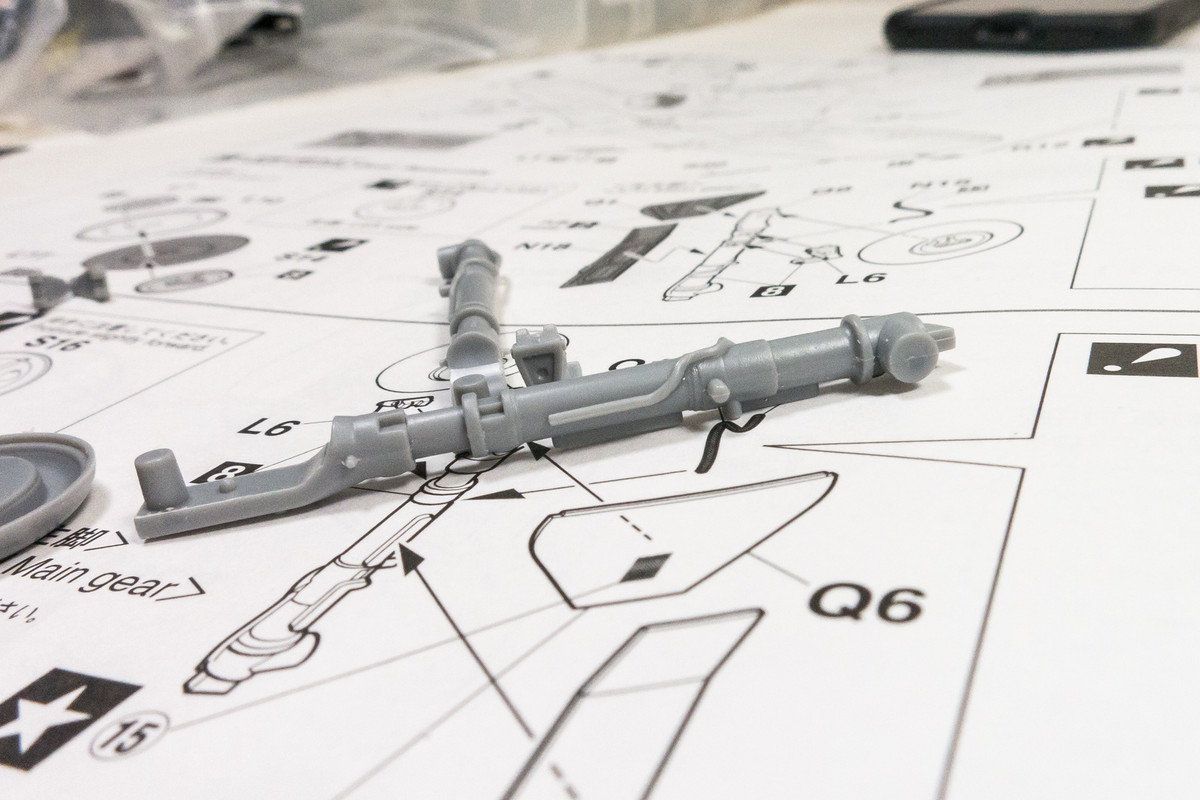
Here is the other spot. Ah, the things one can improve when you have the time and inclination!
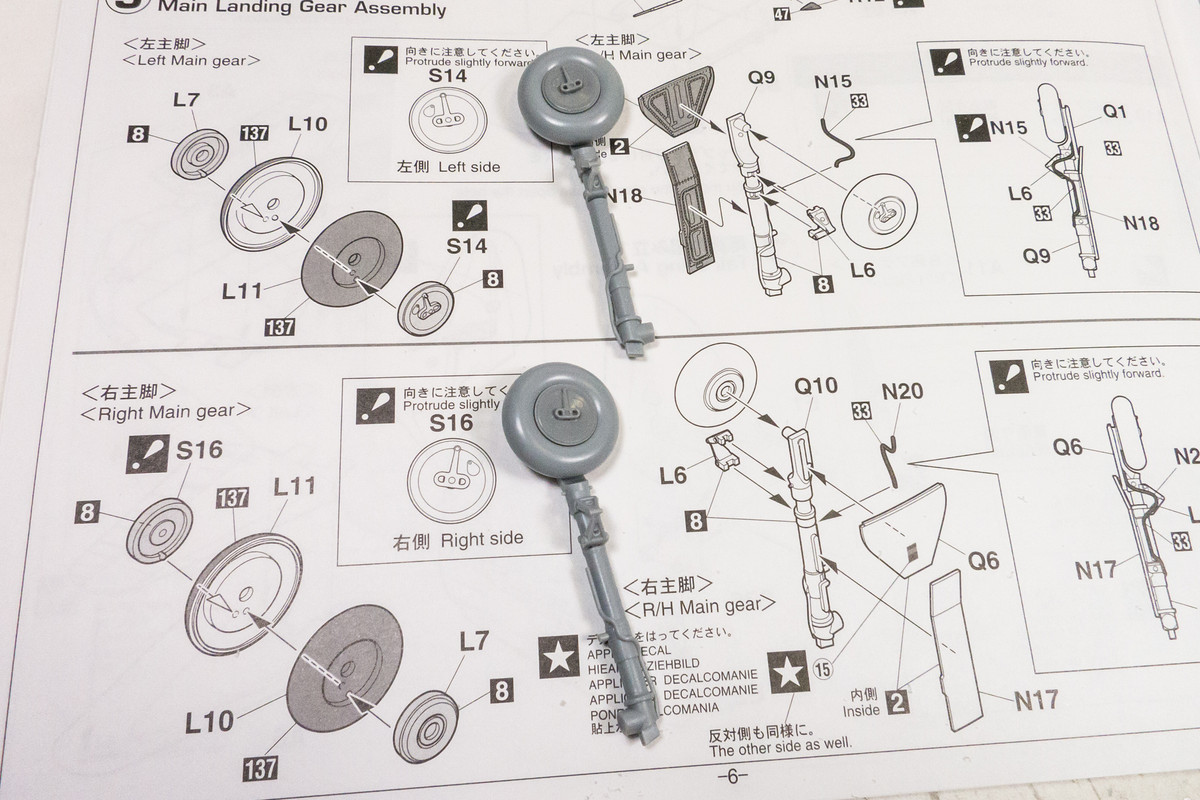
The wheels are comprised of four parts: the two tire halves, one inner wheel cover and one outer wheel cover. Each component is keyed so that the outer wheel cover has a specific orientation to the gear leg. Instead of using the keys and trying to guess the location of the tire flat spot in relation to this position, I'm going to remove the keys and glue the outer wheel cover last after I've oriented the flat spot on the ground.
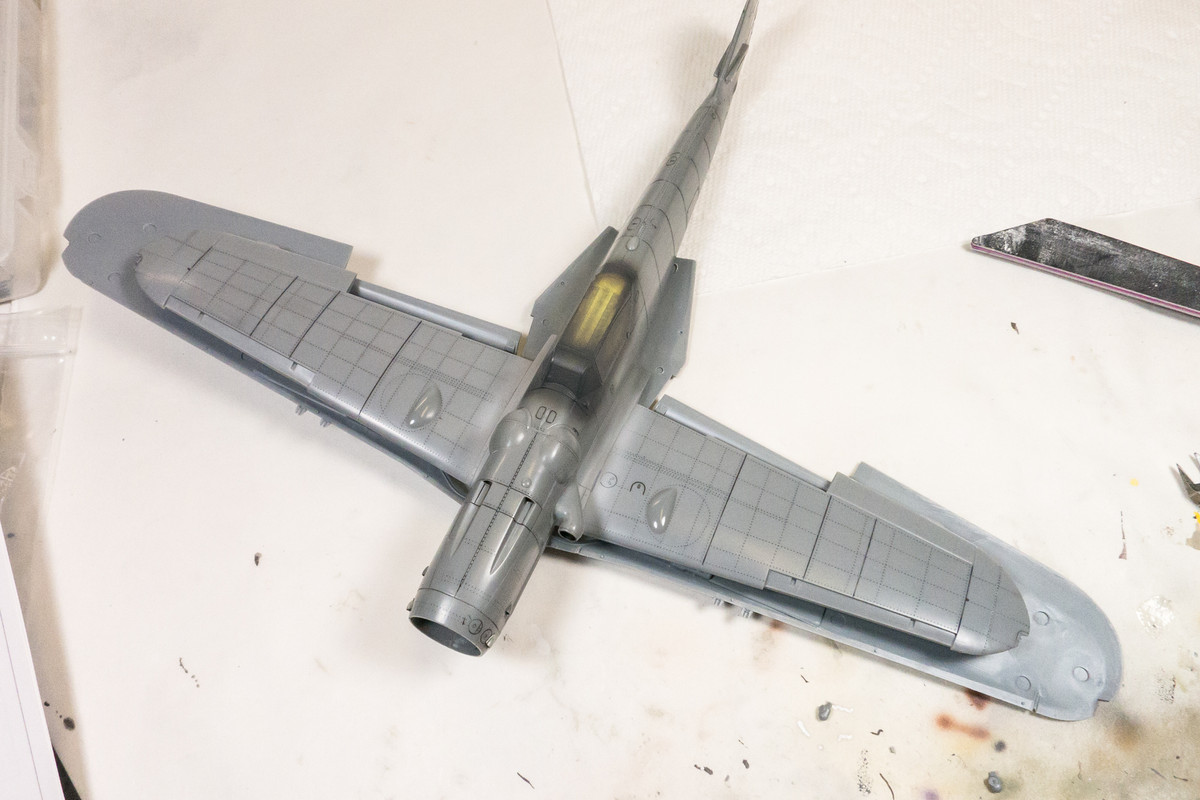
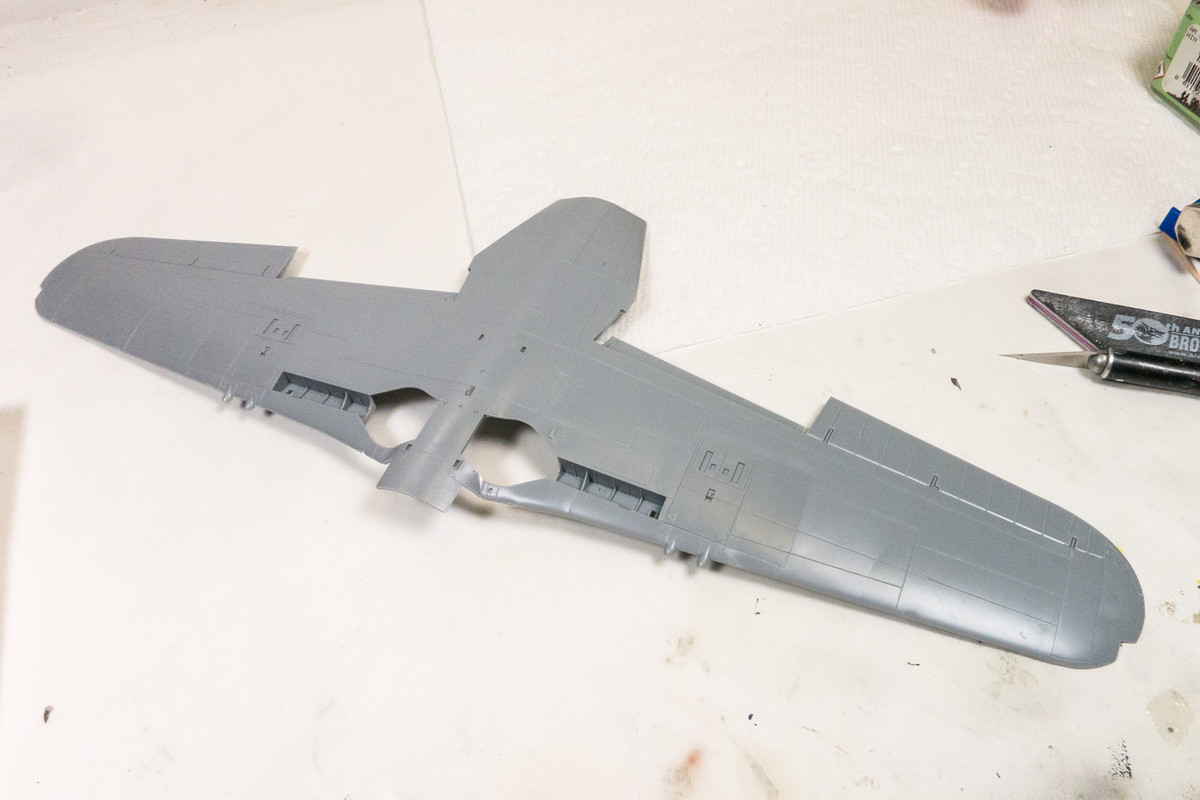
One tedious task that can be addressed now is the insert for the bottom of the wing. I think, based on my reference, there are differences in this area between the N1K2-J and N1K2-Ja (Late Version) and hence the insert. The wing itself gives an indication of the size of the Shiden Kai.
The wing inserts are a tight but not quite exact fit. Unlike Tamiya, who boldly mold external panels along actual panel line joints because they are confident that the fit will be good enough without having to use putty, Hasegawa is more realistic and figures, "hey if you're going to have to use putty, you may as well fill the joint completely". Tamiya's approach is the best but only Tamiya seems capable of pulling it off. Without Tamiya's engineering and molding prowess, Hasegawa's alternative s an acceptable to this modeler.
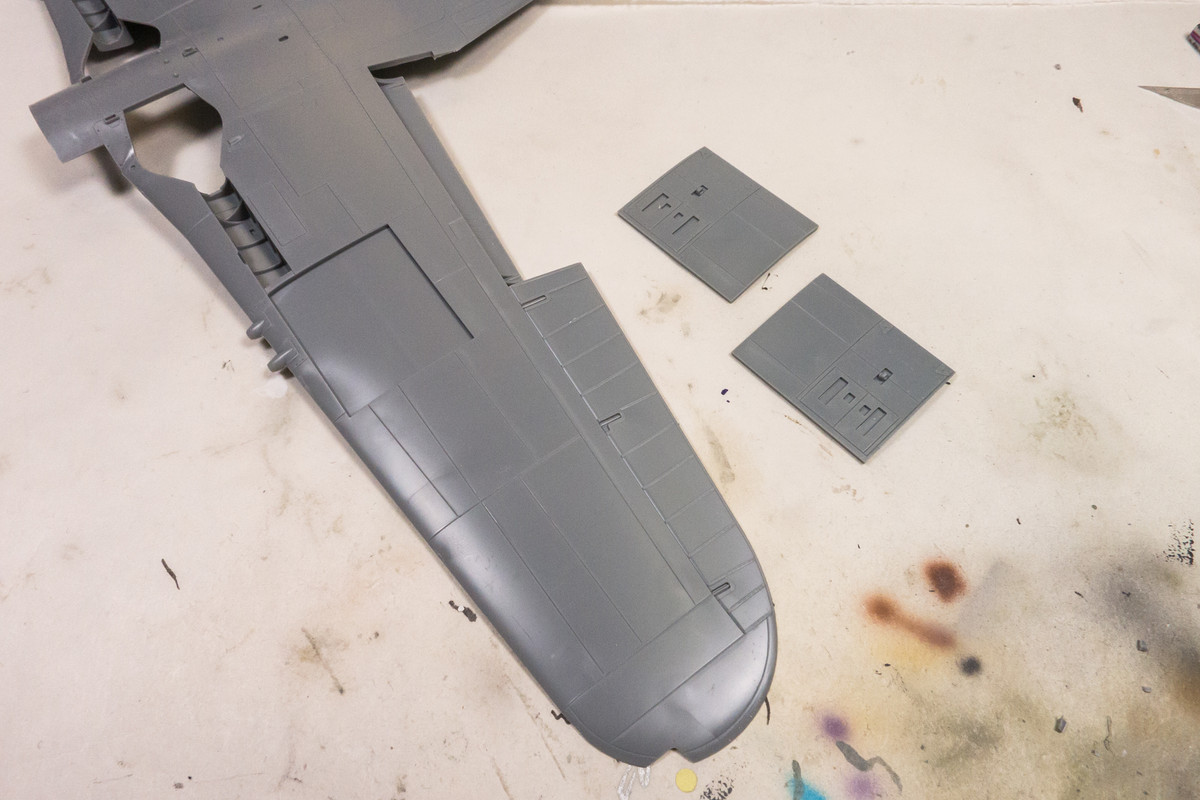
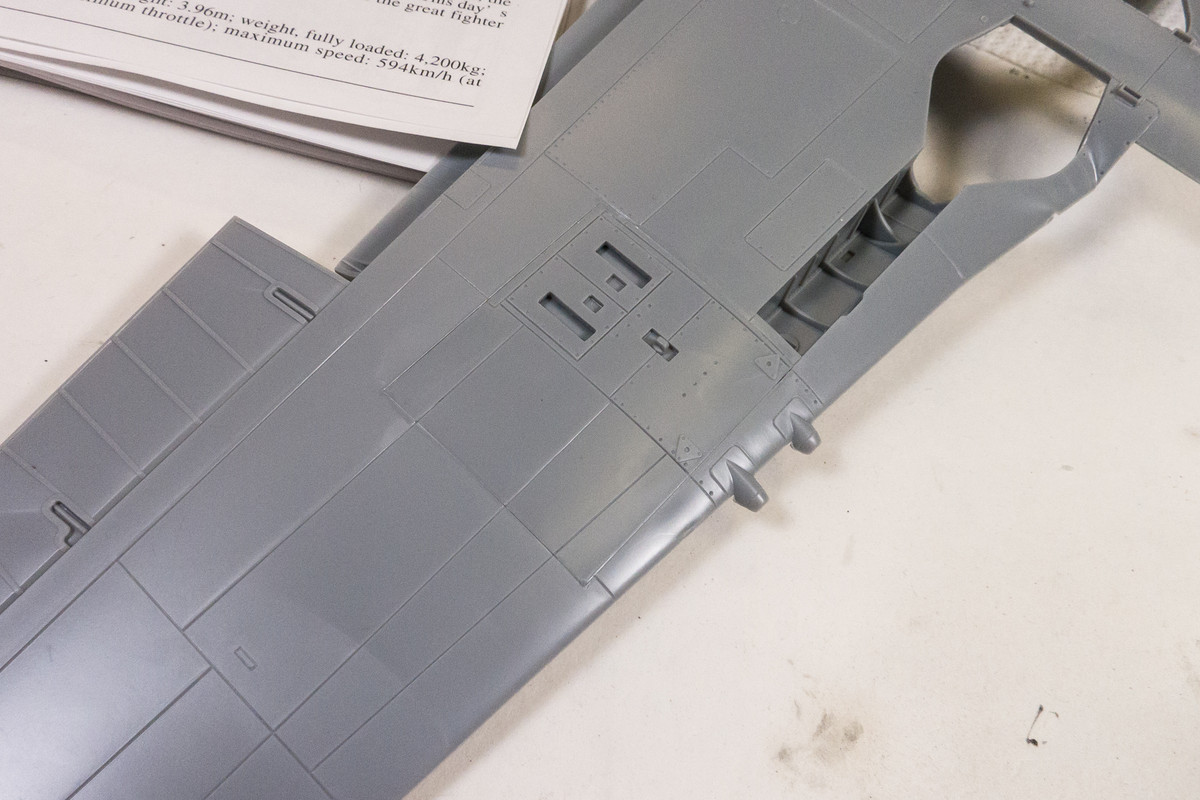
The ammo ejection chutes are doubly blocked by the insert itself and the wing.

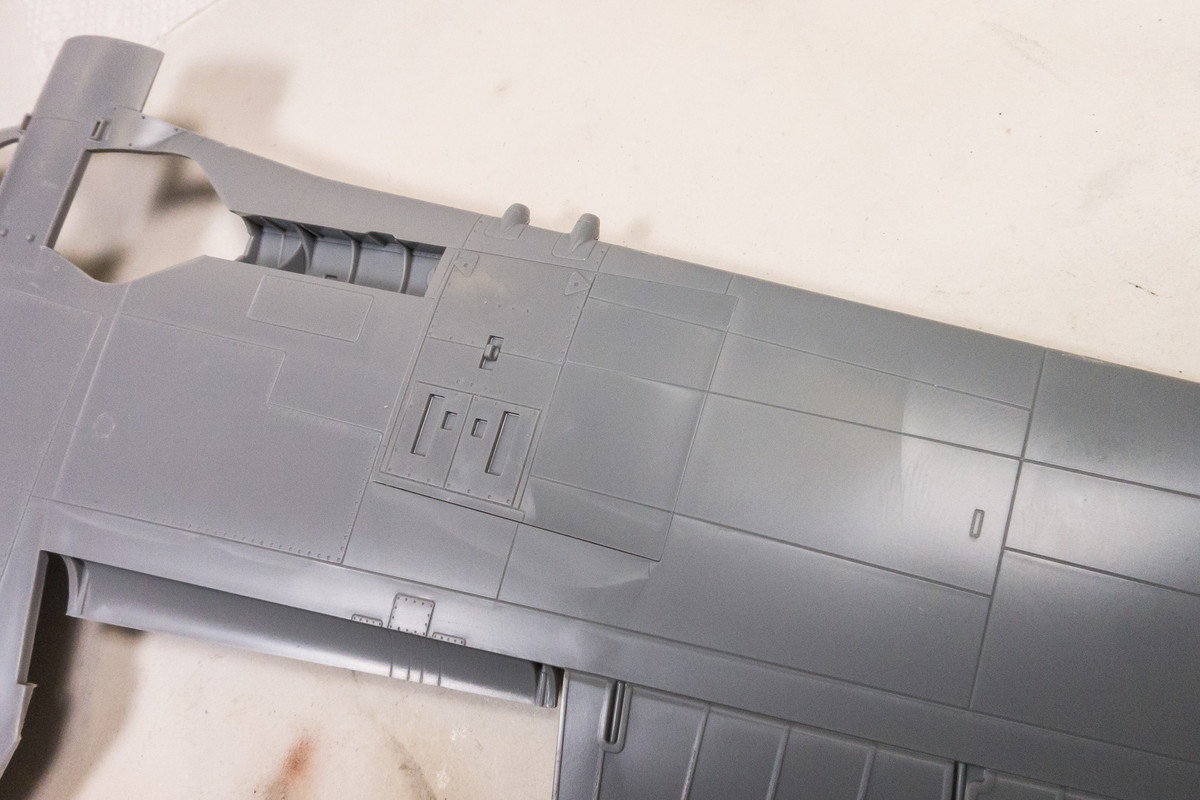
I removed the first layer of blockage by opening up the chutes on the insert.
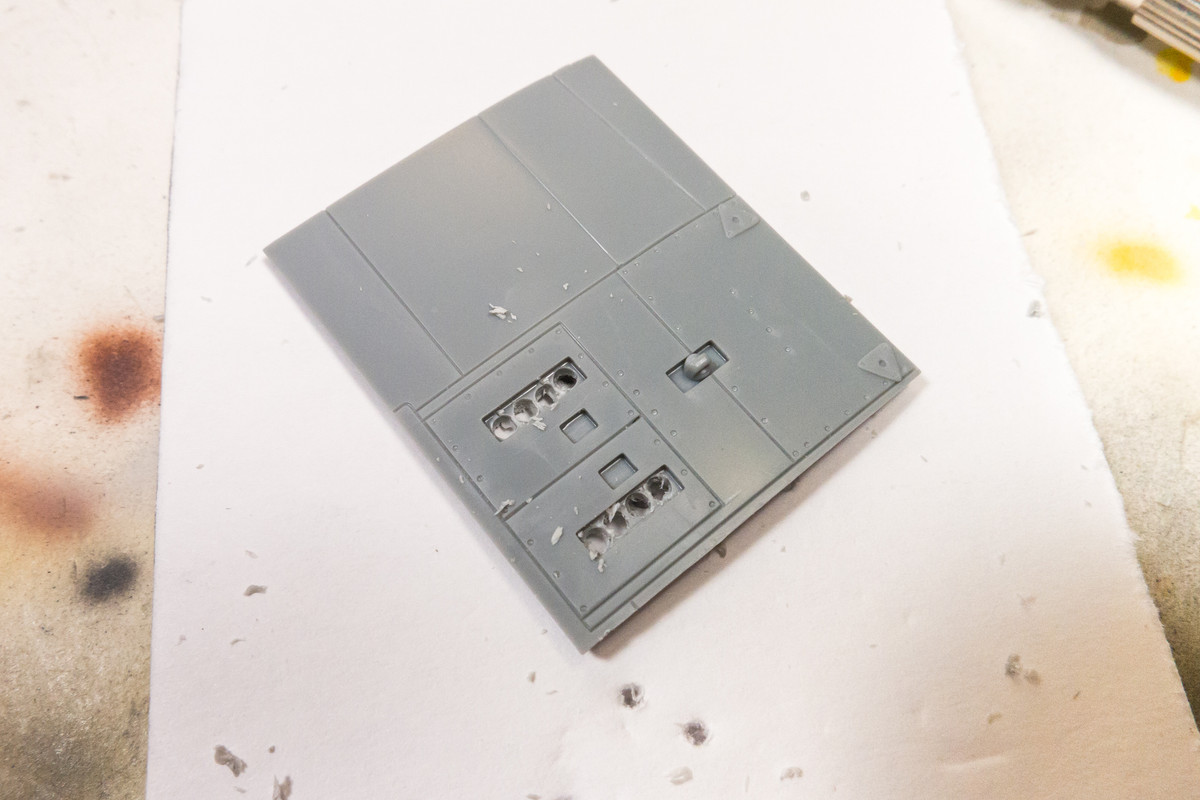
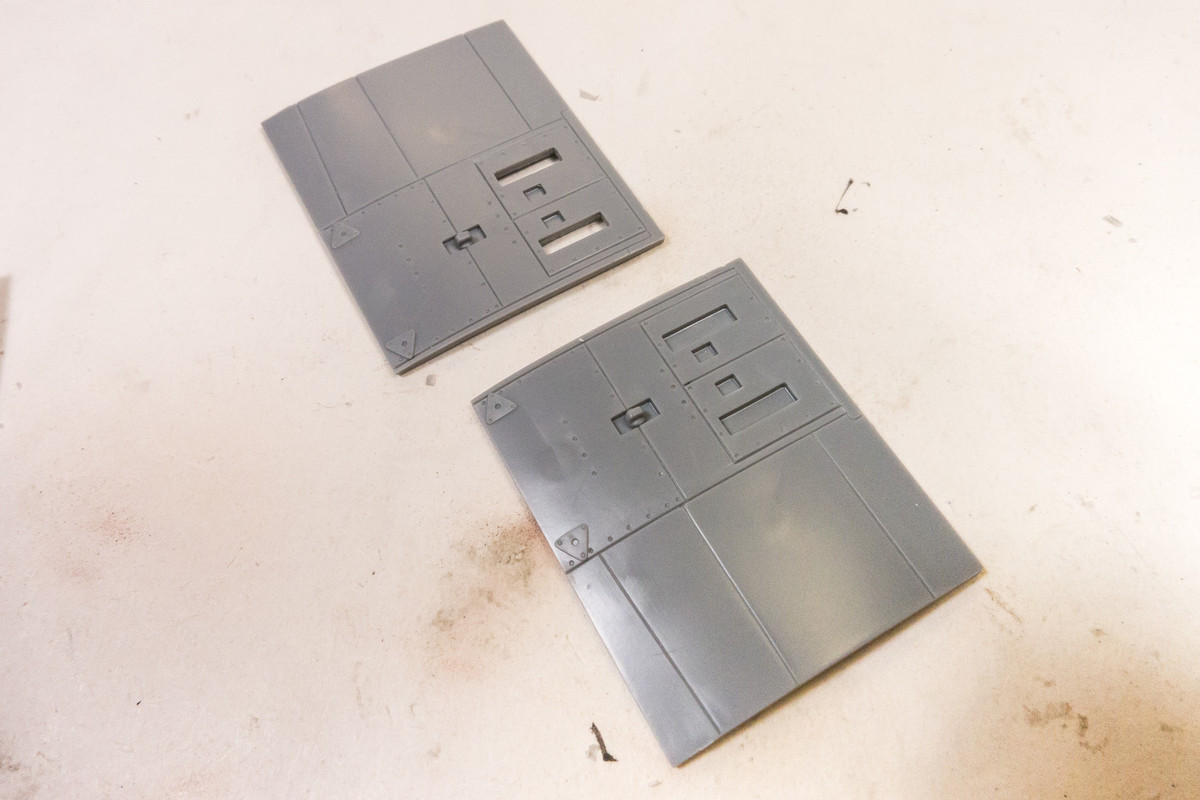
That makes the chute less shallow but still blocked.
I started to chain drill the second layer through the wing bottom but I stopped after one hole.
Need to check my references first. Obviously there is a gun body somewhere in that hole that I'm not going to represent. Is it better to open up the hole completely or should I block them off somehow?
Let me draw your attention away from that figure once again, and point out some work on the landing gear legs. As I mentioned in my spue review, Hasegawa thoughtfully included a brake line on the leg AND molded it with a round cross-section, which is pretty impressive. Upon closer inspection, that round cross-section isn't consistent. I guess there are limitations to the injection molding process. There are a couple of spots where this happens. Here's one...
A bit of careful carving renders the plastic into a more convincing brake line.
Here is the other spot. Ah, the things one can improve when you have the time and inclination!
The wheels are comprised of four parts: the two tire halves, one inner wheel cover and one outer wheel cover. Each component is keyed so that the outer wheel cover has a specific orientation to the gear leg. Instead of using the keys and trying to guess the location of the tire flat spot in relation to this position, I'm going to remove the keys and glue the outer wheel cover last after I've oriented the flat spot on the ground.
One tedious task that can be addressed now is the insert for the bottom of the wing. I think, based on my reference, there are differences in this area between the N1K2-J and N1K2-Ja (Late Version) and hence the insert. The wing itself gives an indication of the size of the Shiden Kai.
The wing inserts are a tight but not quite exact fit. Unlike Tamiya, who boldly mold external panels along actual panel line joints because they are confident that the fit will be good enough without having to use putty, Hasegawa is more realistic and figures, "hey if you're going to have to use putty, you may as well fill the joint completely". Tamiya's approach is the best but only Tamiya seems capable of pulling it off. Without Tamiya's engineering and molding prowess, Hasegawa's alternative s an acceptable to this modeler.
The ammo ejection chutes are doubly blocked by the insert itself and the wing.
I removed the first layer of blockage by opening up the chutes on the insert.
That makes the chute less shallow but still blocked.
I started to chain drill the second layer through the wing bottom but I stopped after one hole.
Need to check my references first. Obviously there is a gun body somewhere in that hole that I'm not going to represent. Is it better to open up the hole completely or should I block them off somehow?
John aka JKim
-----------<><
-----------<><
-
speedgraflex
- Moderator
- Posts: 9758
- Joined: Fri Feb 10, 2017 11:08 pm
- Location: Santa Monica, California
Re: 1/32 Hasegawa N1K2-J Shiden Kai
Hi! I’m sure you’ve seen the Goshawk restoration photos. Here’s one or two:
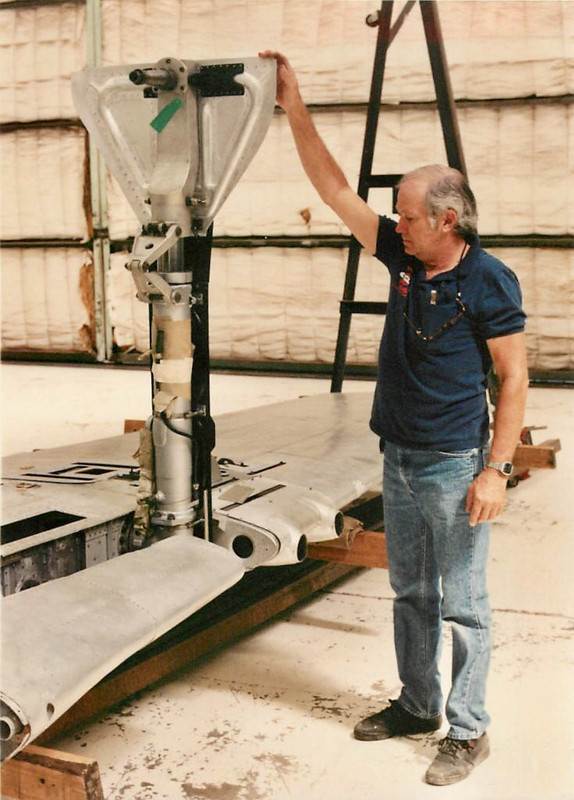
Obviously the pre-restoration photos offer the best aging back opportunities for model building:
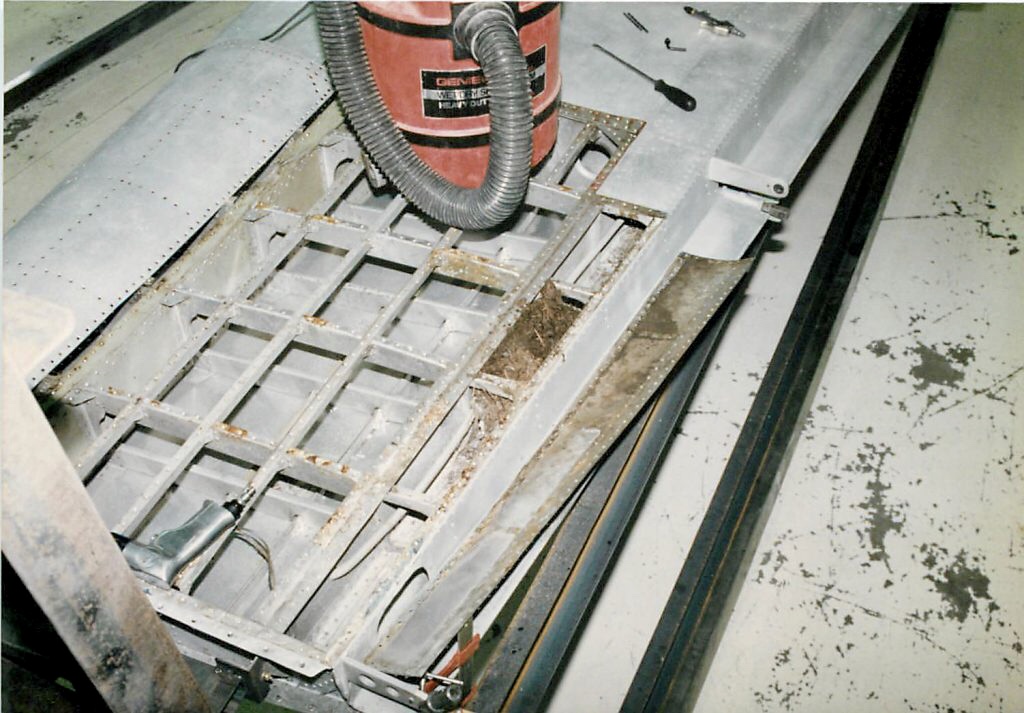
Obviously the pre-restoration photos offer the best aging back opportunities for model building:
Bruce / SPEEDGRAFLEX
Re: 1/32 Hasegawa N1K2-J Shiden Kai
Those are awesome photos, Bruce. Especially the one with the landing gear leg... so big!
I spent the day wiping off my first paint job on those landing gear legs. Didn't like a number of things so I decided to wipe the paint off, clean up the legs a little more and try again.
After that, I start putting together the kit cockpit to see how she looks. It's pretty complete but I have the Brengun photoetch that proposes to replace a lot of this stuff. I haven't put everything into place but the major components have been tacked into position either by friction or Blue Tack.
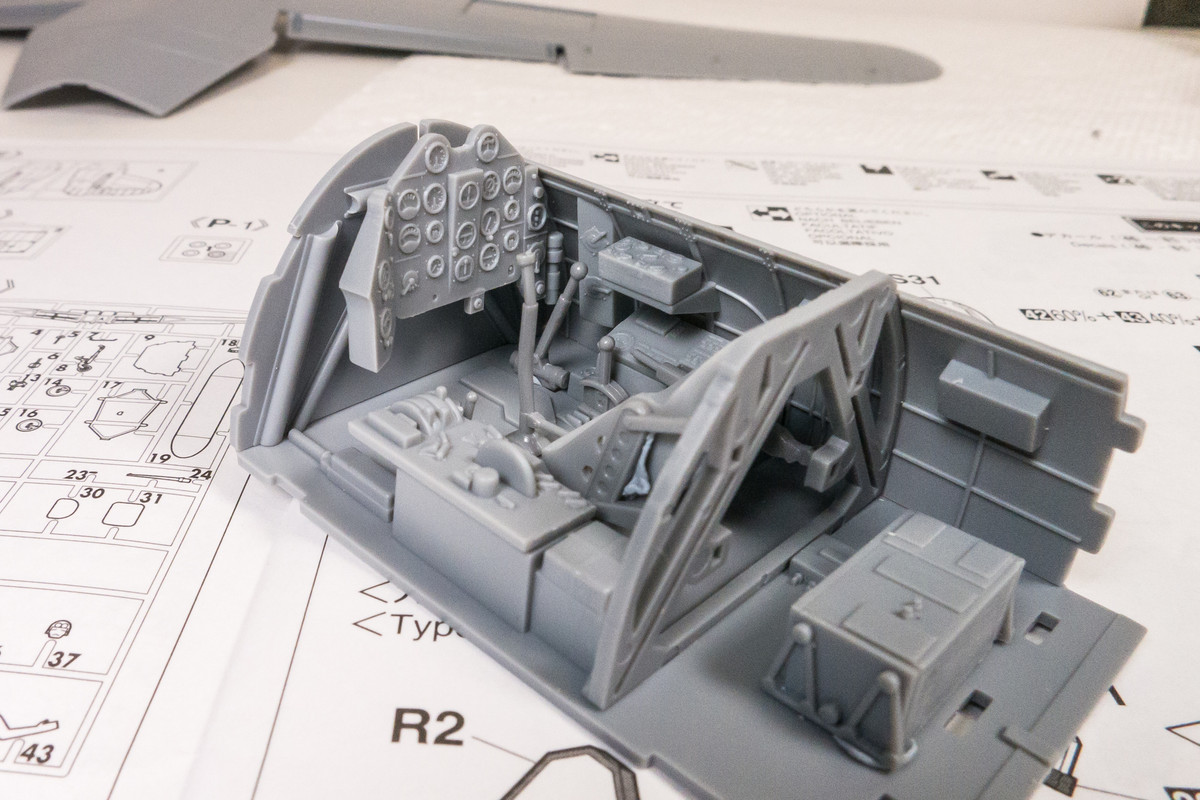
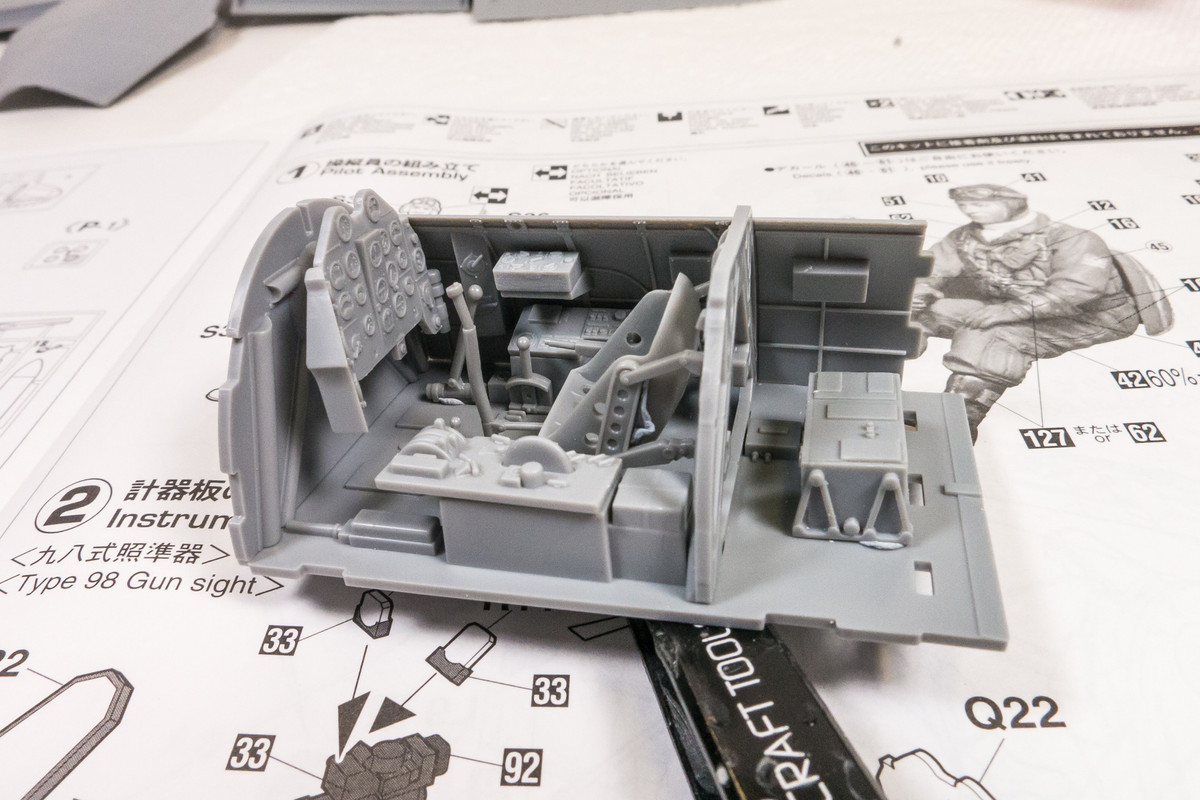
When the other sidewall is put into place, you get the sobering reality of a very limited view into that spacious cockpit.
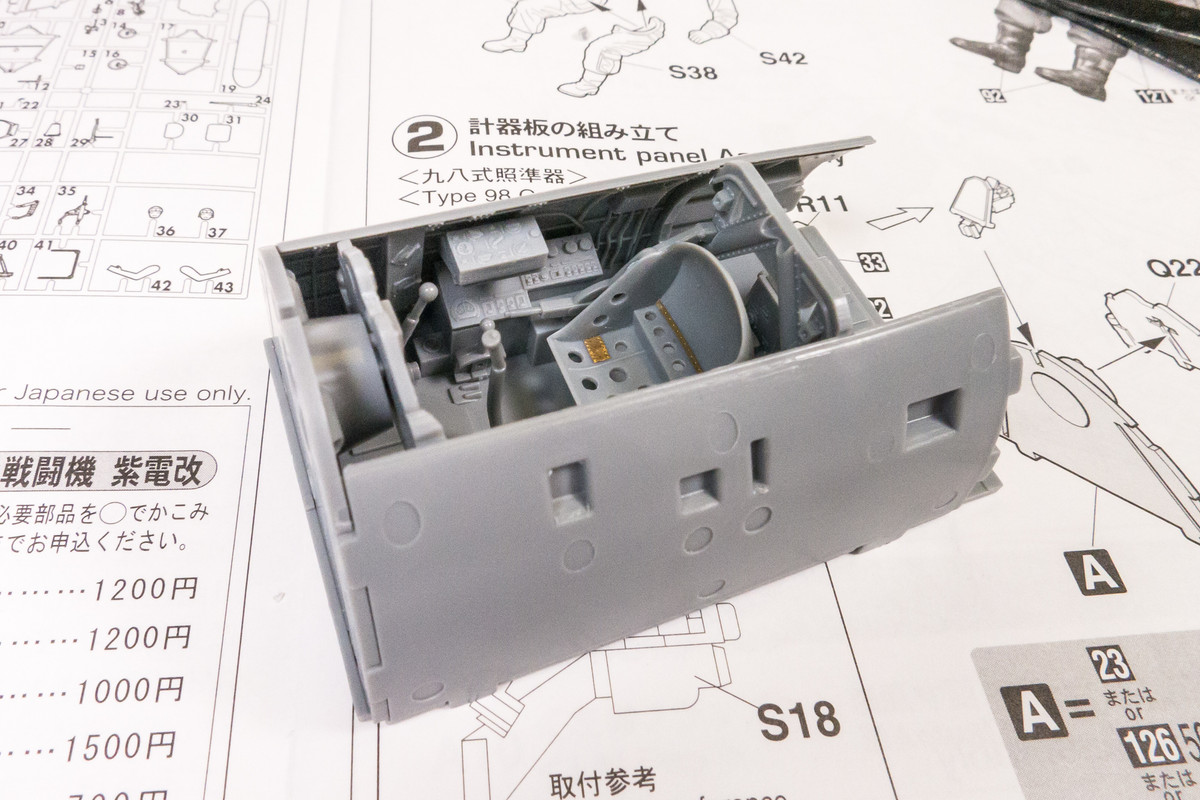
I'll have to think about the Brengun photoetch and any other additions that I had in the back of my mind like more wiring.
I spent the day wiping off my first paint job on those landing gear legs. Didn't like a number of things so I decided to wipe the paint off, clean up the legs a little more and try again.
After that, I start putting together the kit cockpit to see how she looks. It's pretty complete but I have the Brengun photoetch that proposes to replace a lot of this stuff. I haven't put everything into place but the major components have been tacked into position either by friction or Blue Tack.
When the other sidewall is put into place, you get the sobering reality of a very limited view into that spacious cockpit.
I'll have to think about the Brengun photoetch and any other additions that I had in the back of my mind like more wiring.
John aka JKim
-----------<><
-----------<><
Re: 1/32 Hasegawa N1K2-J Shiden Kai
I think the view up into the ammo chutes are blocked off so I'm going to repair the single hole and leave the chutes as is. After painting, I'll mask them off and spray a dark color.
John aka JKim
-----------<><
-----------<><
-
speedgraflex
- Moderator
- Posts: 9758
- Joined: Fri Feb 10, 2017 11:08 pm
- Location: Santa Monica, California
Re: 1/32 Hasegawa N1K2-J Shiden Kai
I started searching for high quality Air Force restoration photos which may be helpful. You may already have these, but I am seeing them only through old links to the Air Force Museum website. Since this question crops up when I start following your projects, how do you search for information with particular emphasis on less documented subjects by modelers? I was wondering if there are any Japanese modeling sites which are useful, forums or historical sites.
There is a word press site which has basic information tracking the existing airframes, status of restoration (including technical issues necessary to overcome), and photos taken by the author of each aircraft in its museum setting.
There is a word press site which has basic information tracking the existing airframes, status of restoration (including technical issues necessary to overcome), and photos taken by the author of each aircraft in its museum setting.
Bruce / SPEEDGRAFLEX
Re: 1/32 Hasegawa N1K2-J Shiden Kai
It depends on the subject and the kit. Since there are four restored Shiden Kai's in existence and it seems obvious that Hasegawa referred to some of these restorations in the design of the kit, I am pretty confident that Hasegawa's model is quite accurate. Based on the resources that I have listed, I have no shortage of photos of the four restored Shiden Kai's. What's lacking are wartime photos of the N1K2 and there is nothing I can do about that. The kit looks to be very complete so there are really no significant question marks or omissions that I am aware of. It is closest to an out-of-the-box build that I can remember.
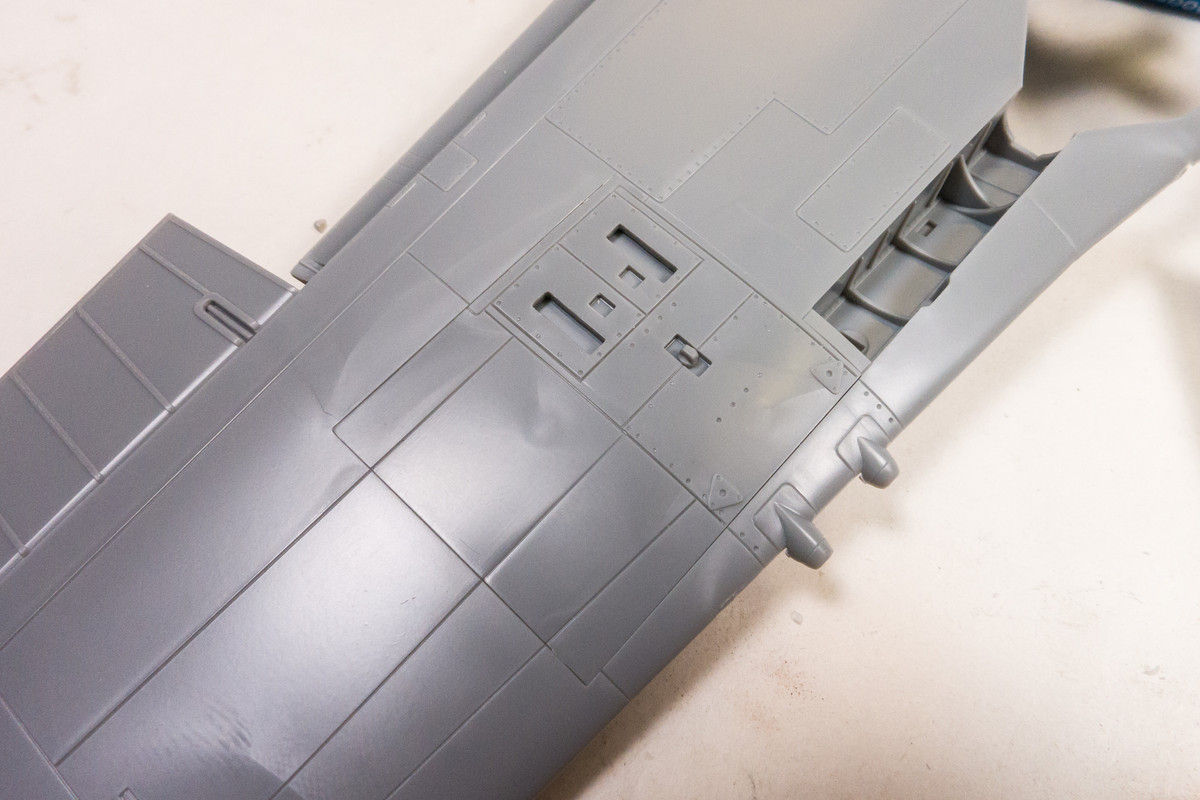
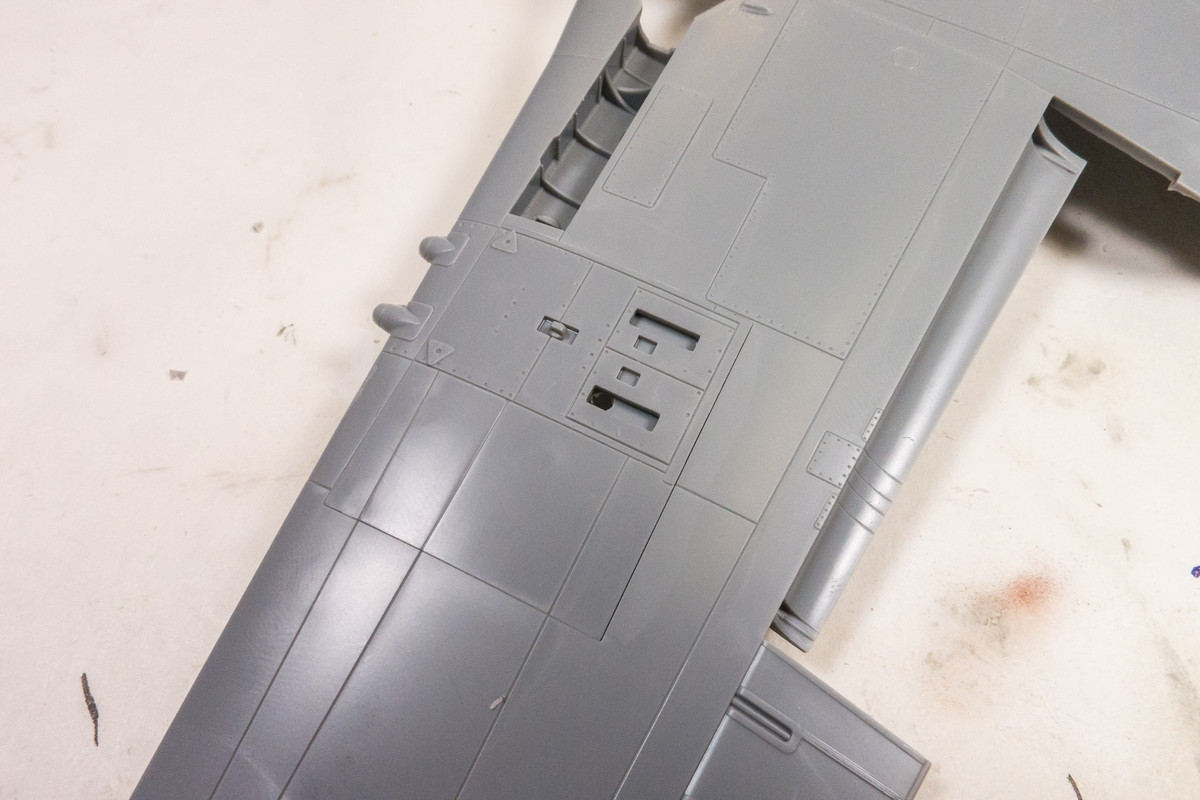
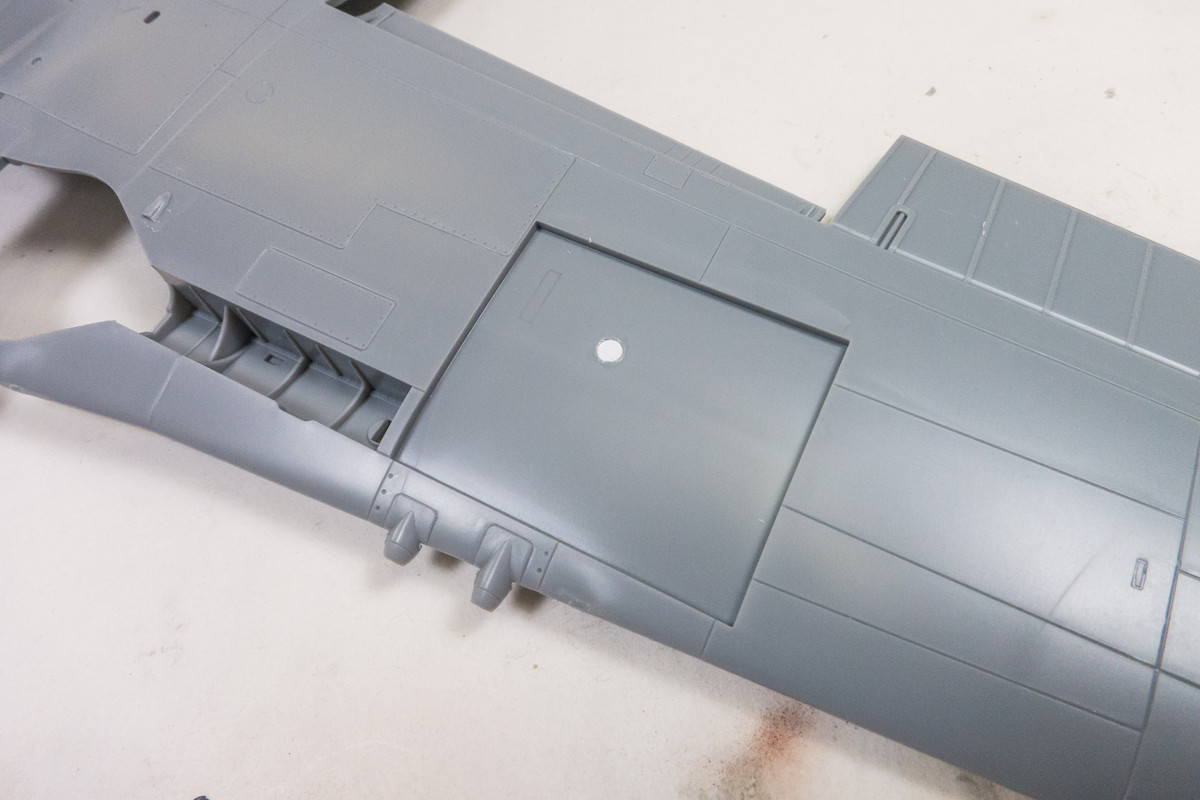
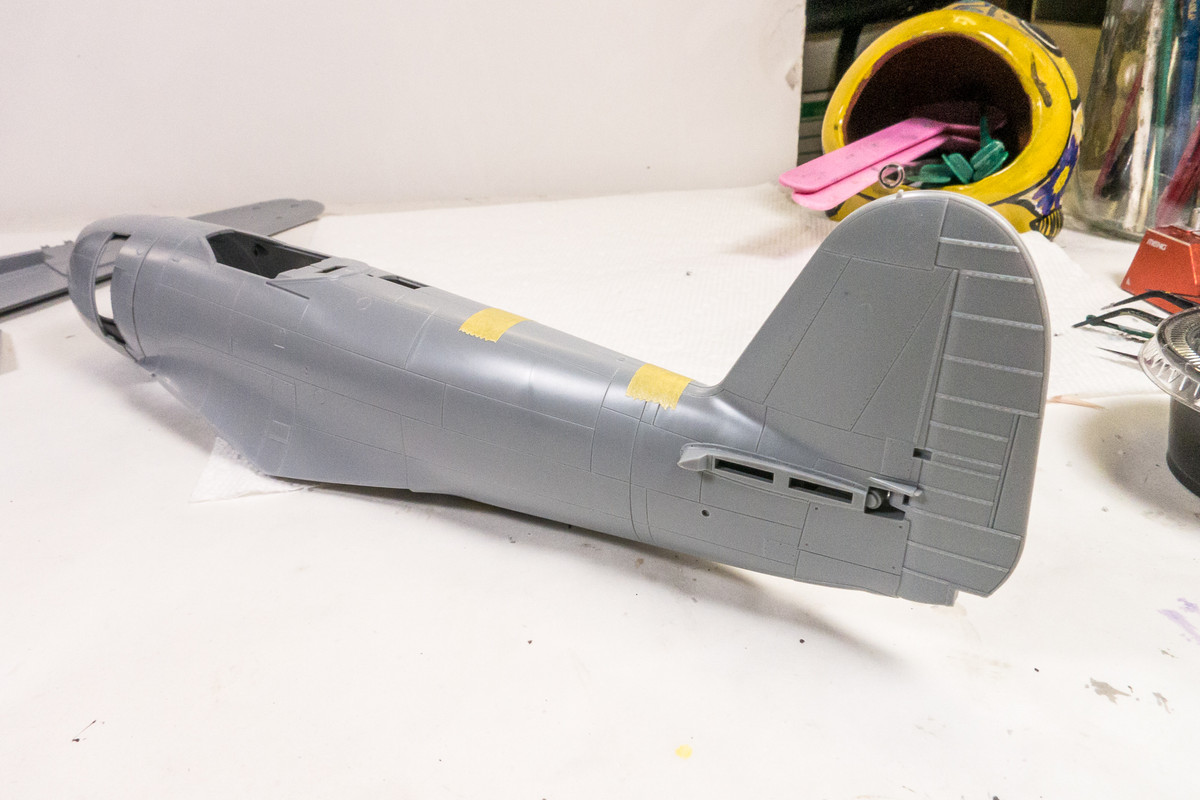
The one unresolved question that I have is about the life raft access panel on the starboard side of the fuselage just aft of the cockpit. The Hasegawa instructions say that this panel should be removed. I've looked at the instructions for the N1K2 Late (N1K2-Ja) kit with the smaller tail and it has no such instructions. So Hasegawa's assumption is that this access panel is specific to the small-tail N1K2. But I could find no references that confirm this. I have not seen any N1K2-J photos or drawings of the starboard side. All of the restored Shiden Kai's are N1K2-Ja's and have the small tail AND that access panel. Does it stay or does it go? I'm opting, at this point, to leave it on as this requires the least work. If I could find conclusive evidence that supports Hasegawa's assumption, I'd be forced to reconsider.
I've glued in the wing inserts. When the glue is dry, I'll fill the joints with CA glue since they do not correspond to any panel lines.
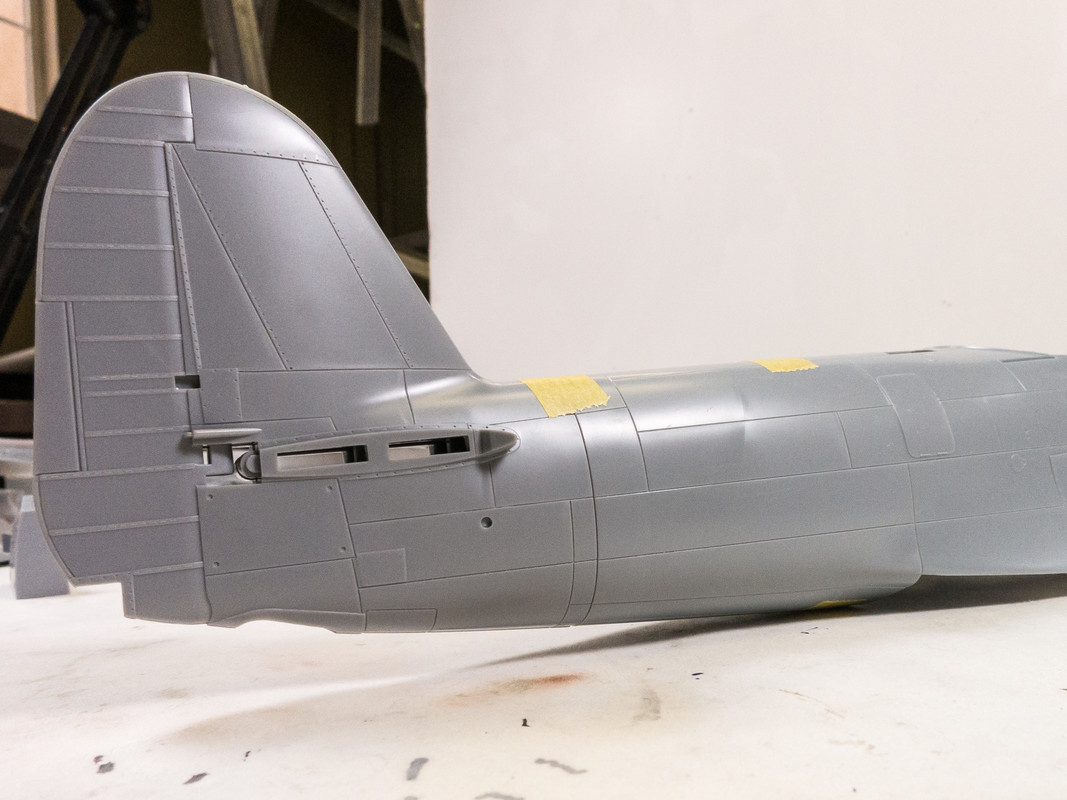
I was curious about the fit of the major components so I cut the pieces out for a dry fit. The tail unit features an internal baffle, presumably to help align the horizontal stabilizers correctly.
Fit is very good but again, the joint does not correspond to any panel lines so the joint needs to be totally smoothed out. Instead of gluing the tail assembly as a unit, I will glue the left tail to the left fuselage and right to right first. This will ease the cleanup process and help facilitate the riveting that will occur later.
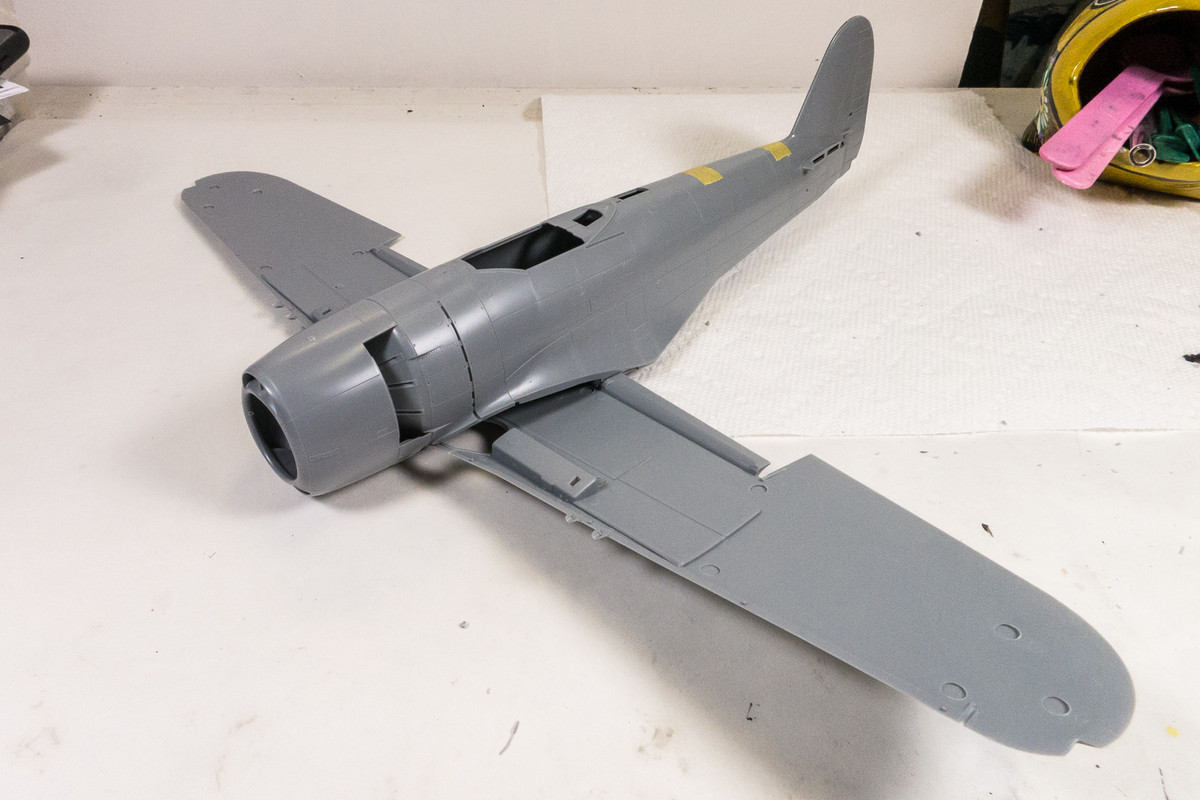
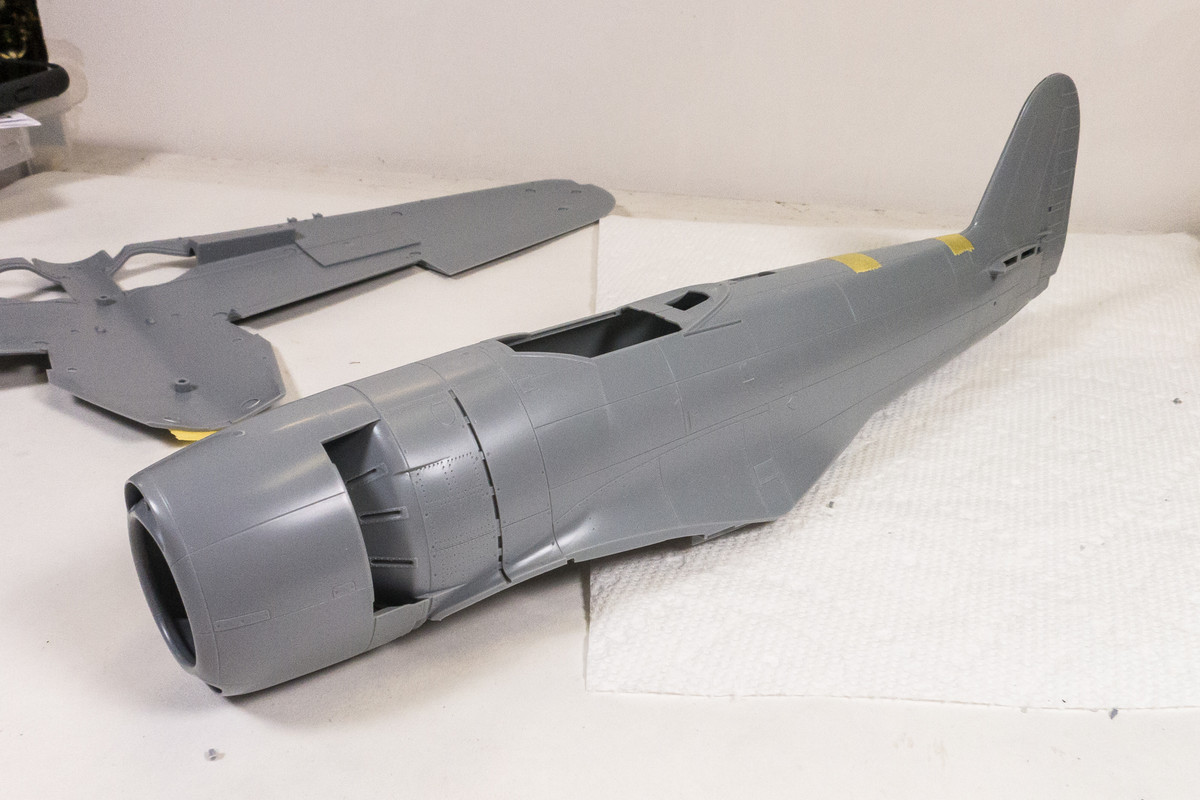
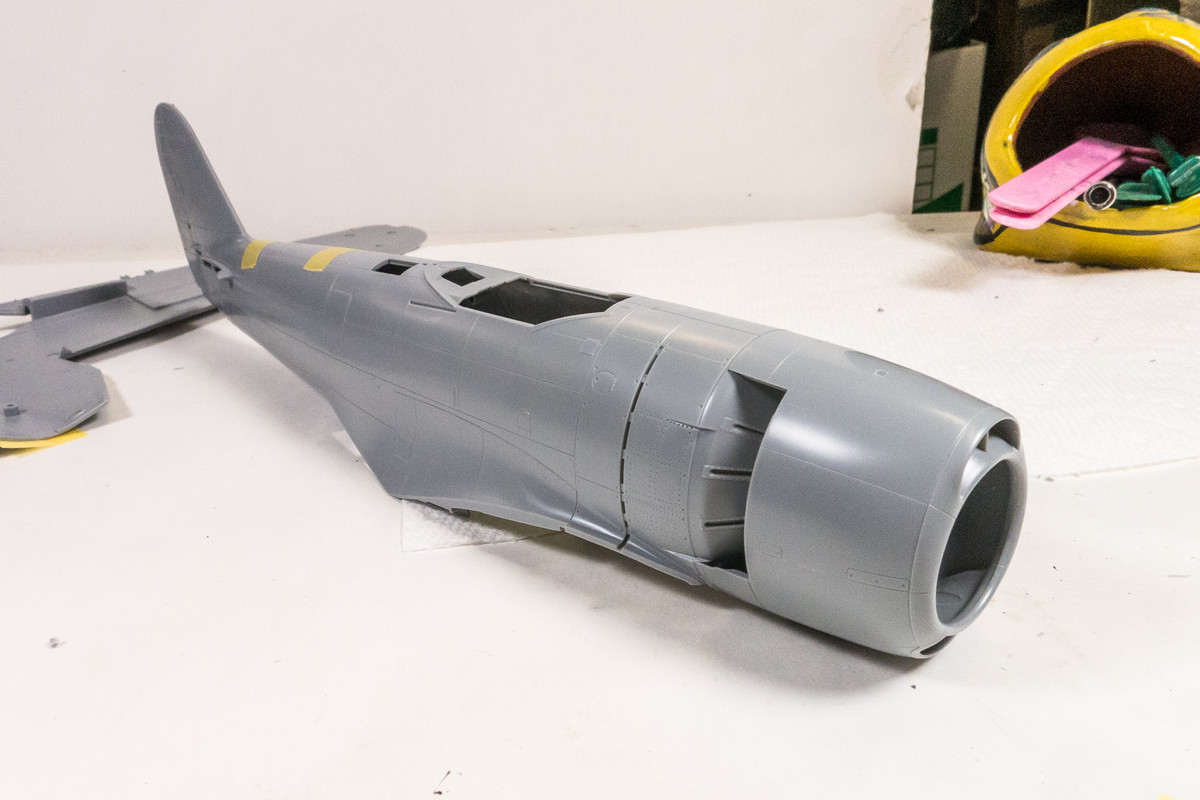
I placed the fuselage with engine cowling onto the lower wings to get a sense of the size of the model. It is a big bird.
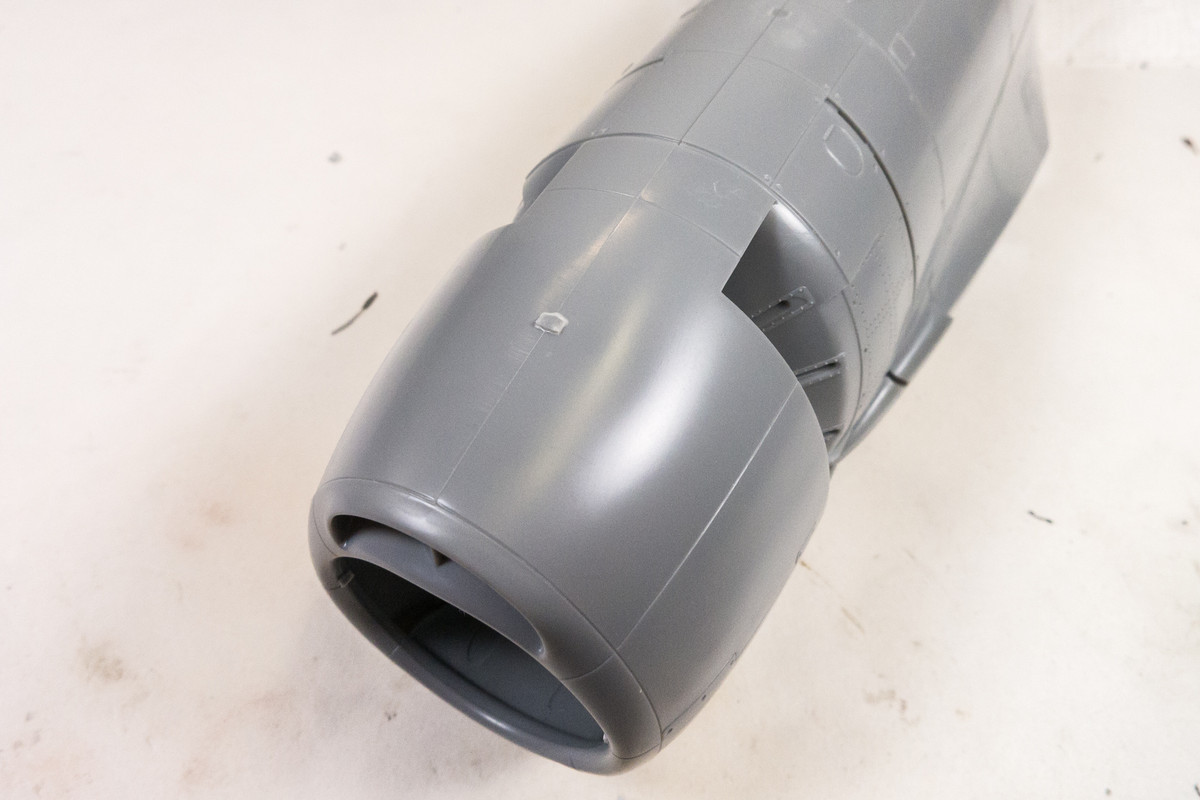
The sprue attachment for the one-piece cowling is in the most obvious and visible of places so I took a lot of care to trim away the remnants as well as mold line.
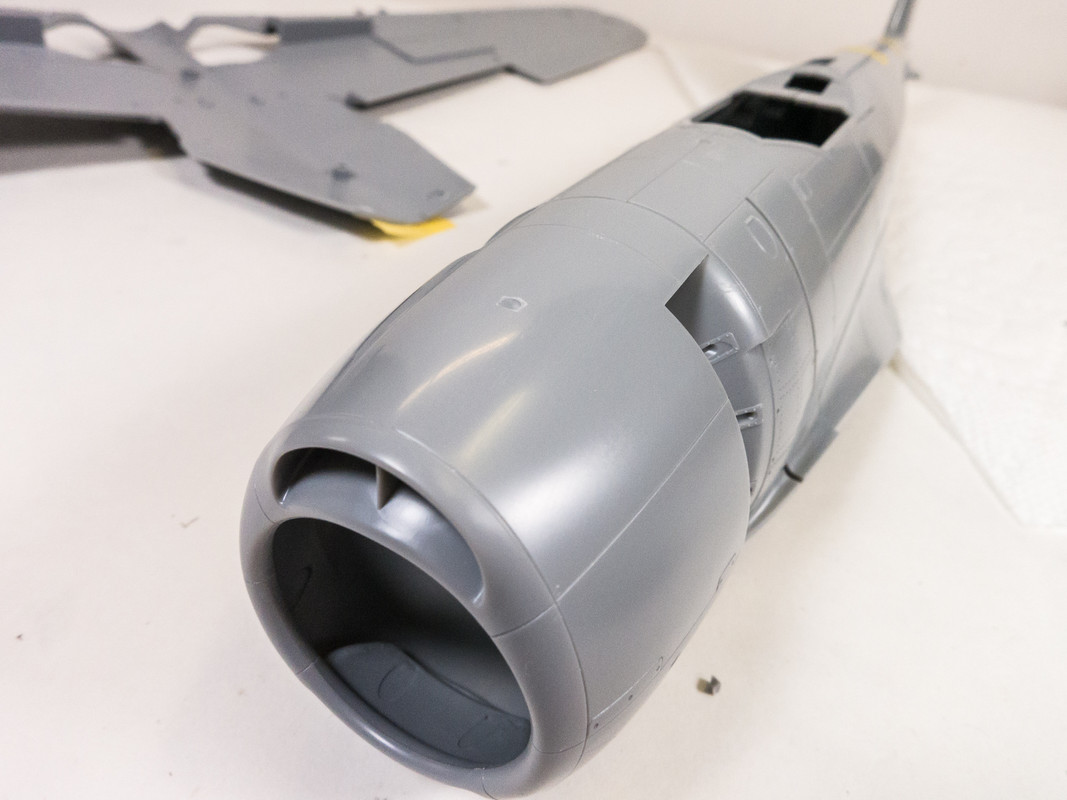
It doesn't have the most graceful lines for a WW2 fighter but there is something appealing and purposeful in its chunkiness.
The one unresolved question that I have is about the life raft access panel on the starboard side of the fuselage just aft of the cockpit. The Hasegawa instructions say that this panel should be removed. I've looked at the instructions for the N1K2 Late (N1K2-Ja) kit with the smaller tail and it has no such instructions. So Hasegawa's assumption is that this access panel is specific to the small-tail N1K2. But I could find no references that confirm this. I have not seen any N1K2-J photos or drawings of the starboard side. All of the restored Shiden Kai's are N1K2-Ja's and have the small tail AND that access panel. Does it stay or does it go? I'm opting, at this point, to leave it on as this requires the least work. If I could find conclusive evidence that supports Hasegawa's assumption, I'd be forced to reconsider.
I've glued in the wing inserts. When the glue is dry, I'll fill the joints with CA glue since they do not correspond to any panel lines.
I was curious about the fit of the major components so I cut the pieces out for a dry fit. The tail unit features an internal baffle, presumably to help align the horizontal stabilizers correctly.
Fit is very good but again, the joint does not correspond to any panel lines so the joint needs to be totally smoothed out. Instead of gluing the tail assembly as a unit, I will glue the left tail to the left fuselage and right to right first. This will ease the cleanup process and help facilitate the riveting that will occur later.
I placed the fuselage with engine cowling onto the lower wings to get a sense of the size of the model. It is a big bird.
The sprue attachment for the one-piece cowling is in the most obvious and visible of places so I took a lot of care to trim away the remnants as well as mold line.
It doesn't have the most graceful lines for a WW2 fighter but there is something appealing and purposeful in its chunkiness.
John aka JKim
-----------<><
-----------<><