Page 11 of 27
Re: 1/32 Hasegawa N1K2-J Shiden Kai
Posted: Sat Jul 11, 2020 12:03 am
by Floki
All the components of the IP come together to make a beautiful looking piece
Re: 1/32 Hasegawa N1K2-J Shiden Kai
Posted: Sat Jul 11, 2020 5:53 am
by Thomas_M
John,
this is just a miracle! By far the most beautiful build, on par with others from you I have had the pleasure to follow. Your modelling skills are first class, the photography just beautiful! You are at a level I dream about to reach, but there is no hope! The Homare is a perfect reproduction of a real engine, I guess there is NOTHING that could be done better!
Such a pleasure to admire your work!!!

Re: 1/32 Hasegawa N1K2-J Shiden Kai
Posted: Sat Jul 11, 2020 10:16 am
by BlackSheep214
Holy Moley... fantastic work. Yeah, I’ve been on a car building spree as of late. Aircraft building has taken a back seat temporarily for the time being.

Re: 1/32 Hasegawa N1K2-J Shiden Kai
Posted: Sun Jul 12, 2020 4:03 pm
by mostrich
The wiring on the engine is exceptionally well done.
Re: 1/32 Hasegawa N1K2-J Shiden Kai
Posted: Mon Jul 13, 2020 11:05 am
by jkim
Re: 1/32 Hasegawa N1K2-J Shiden Kai
Posted: Mon Jul 13, 2020 12:57 pm
by Floki
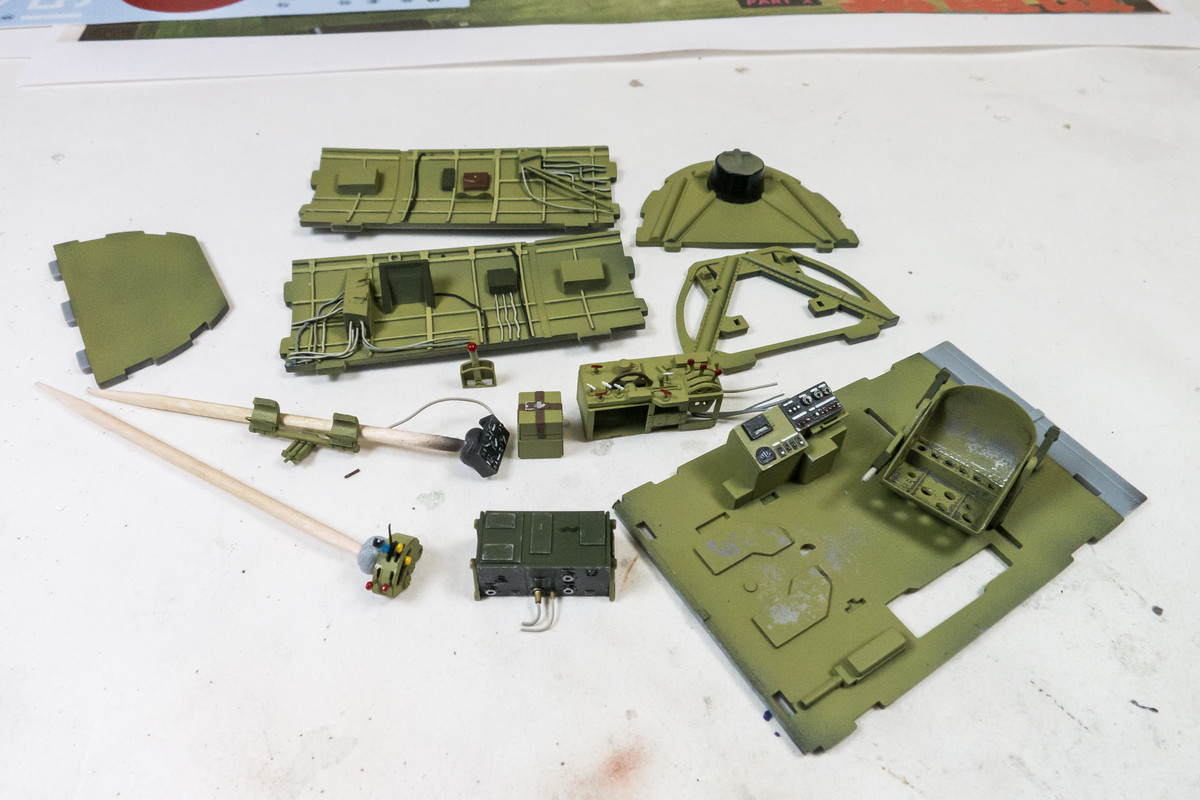
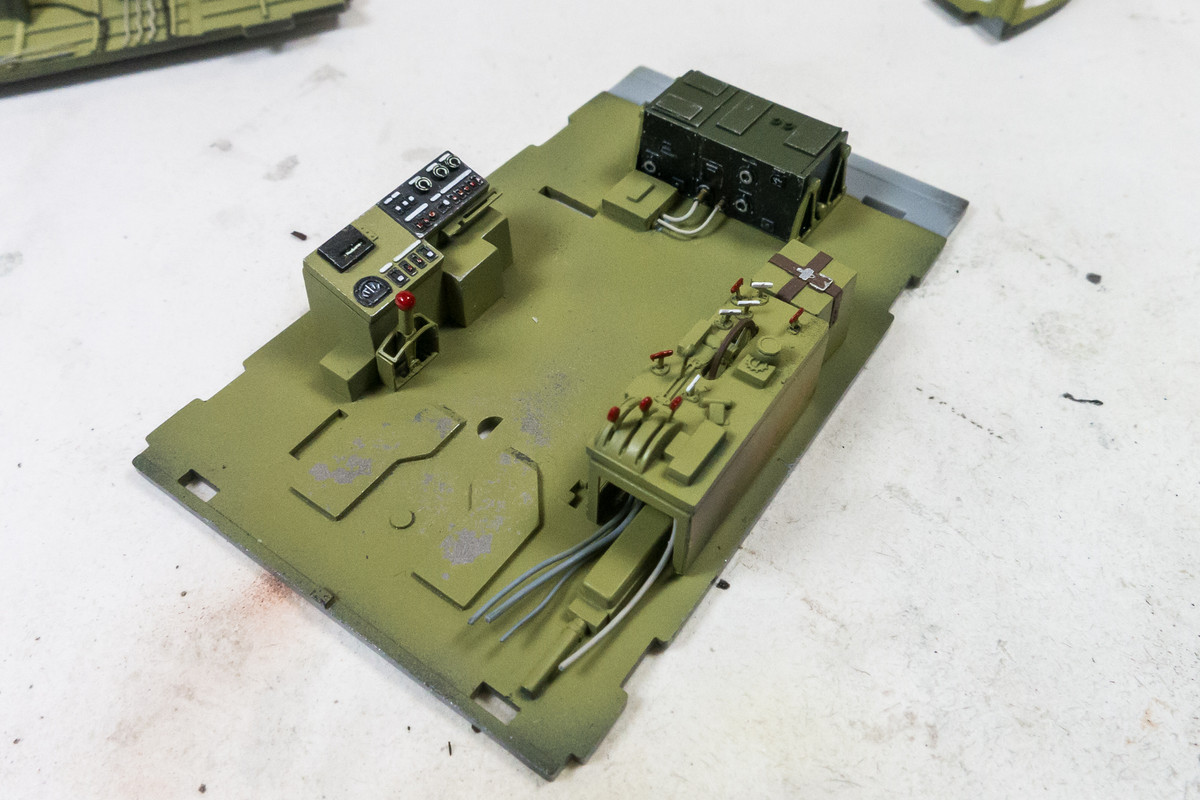
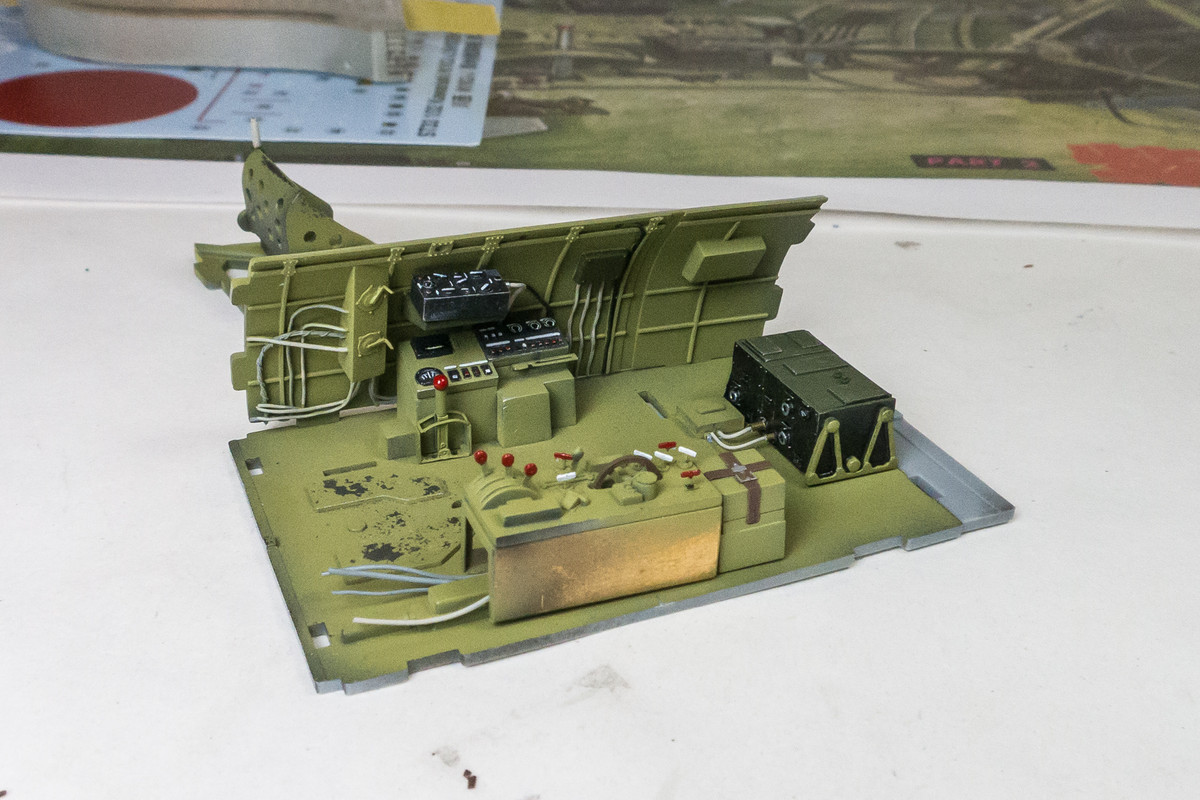
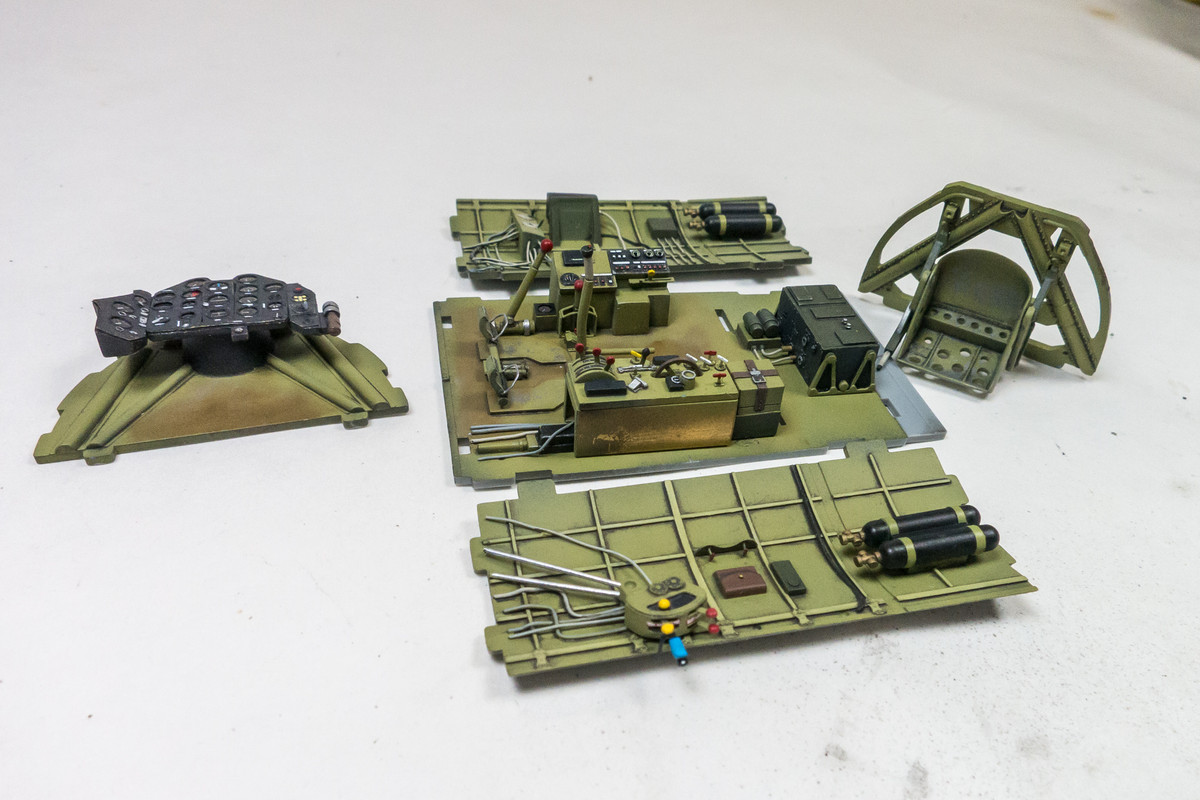
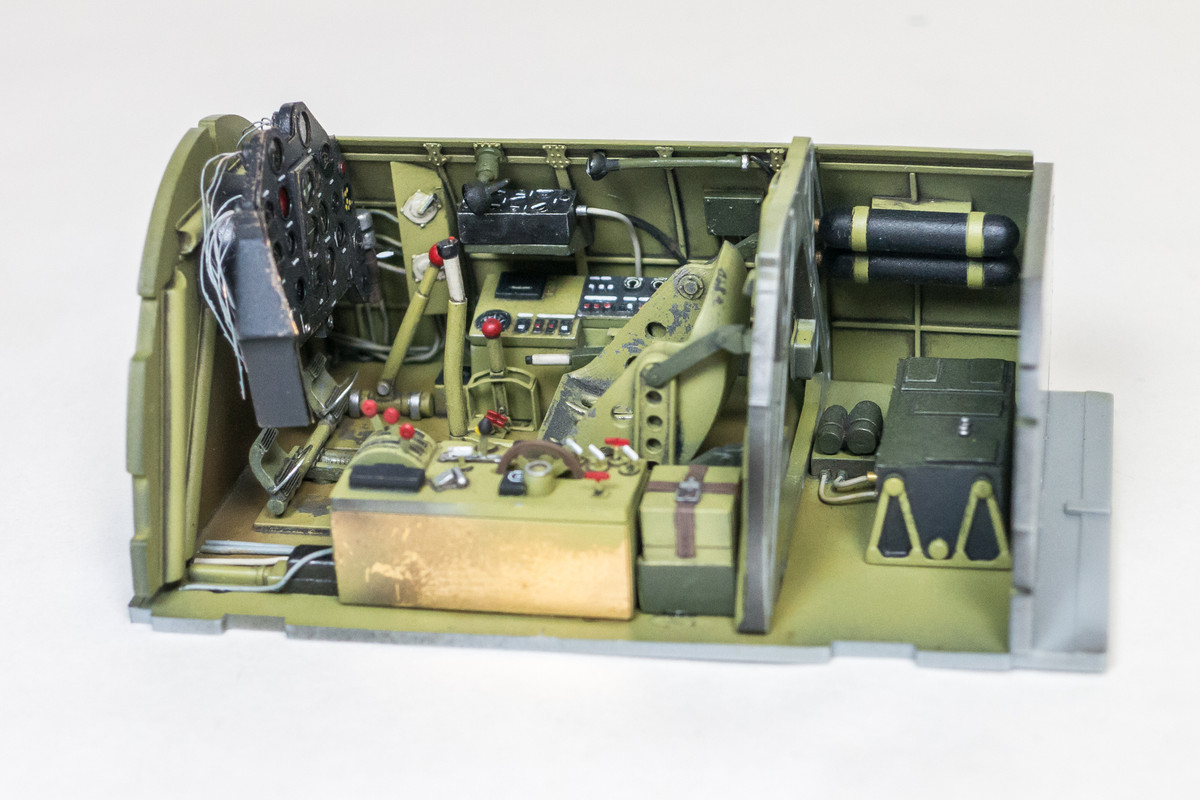
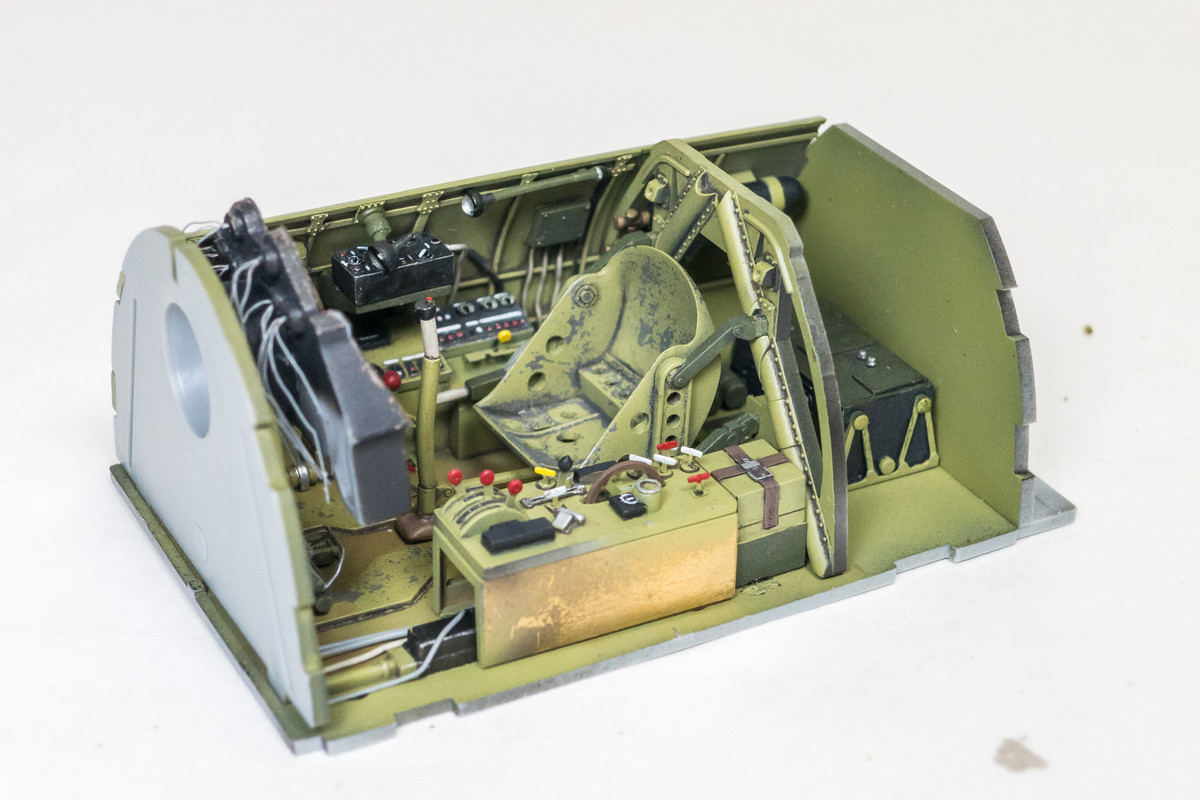
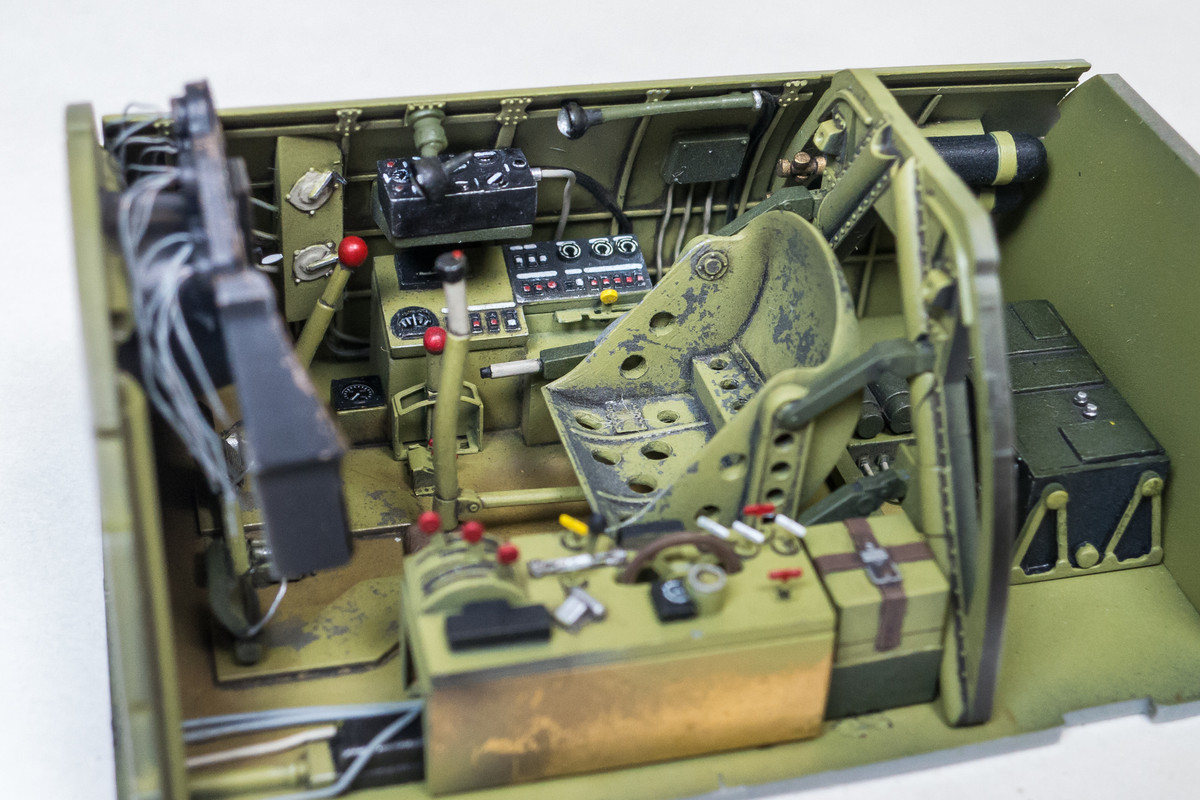
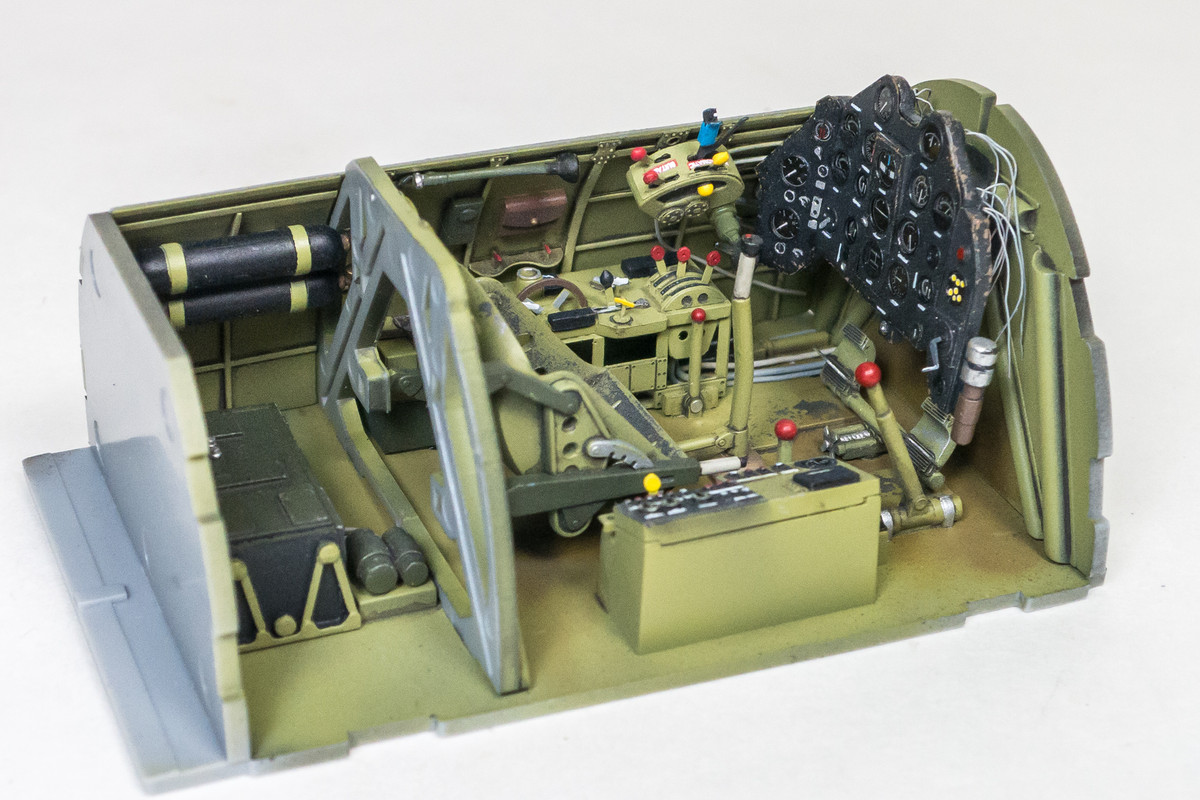
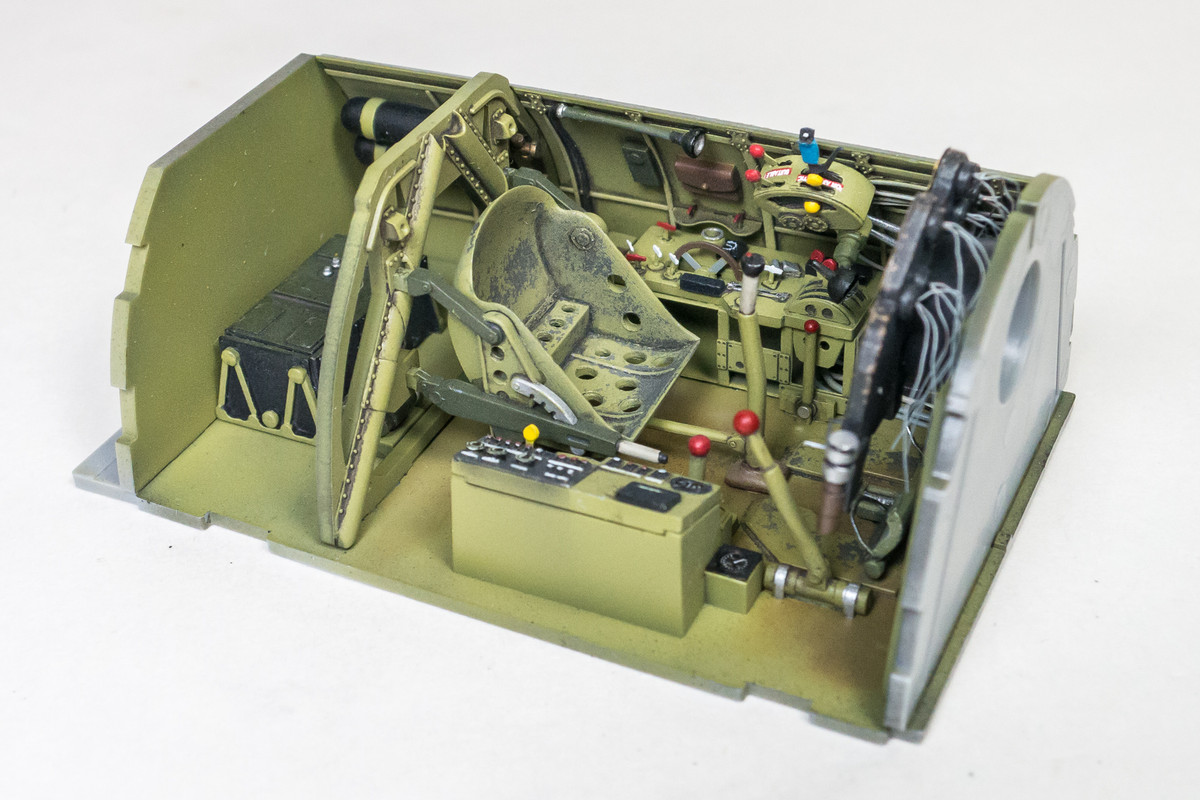
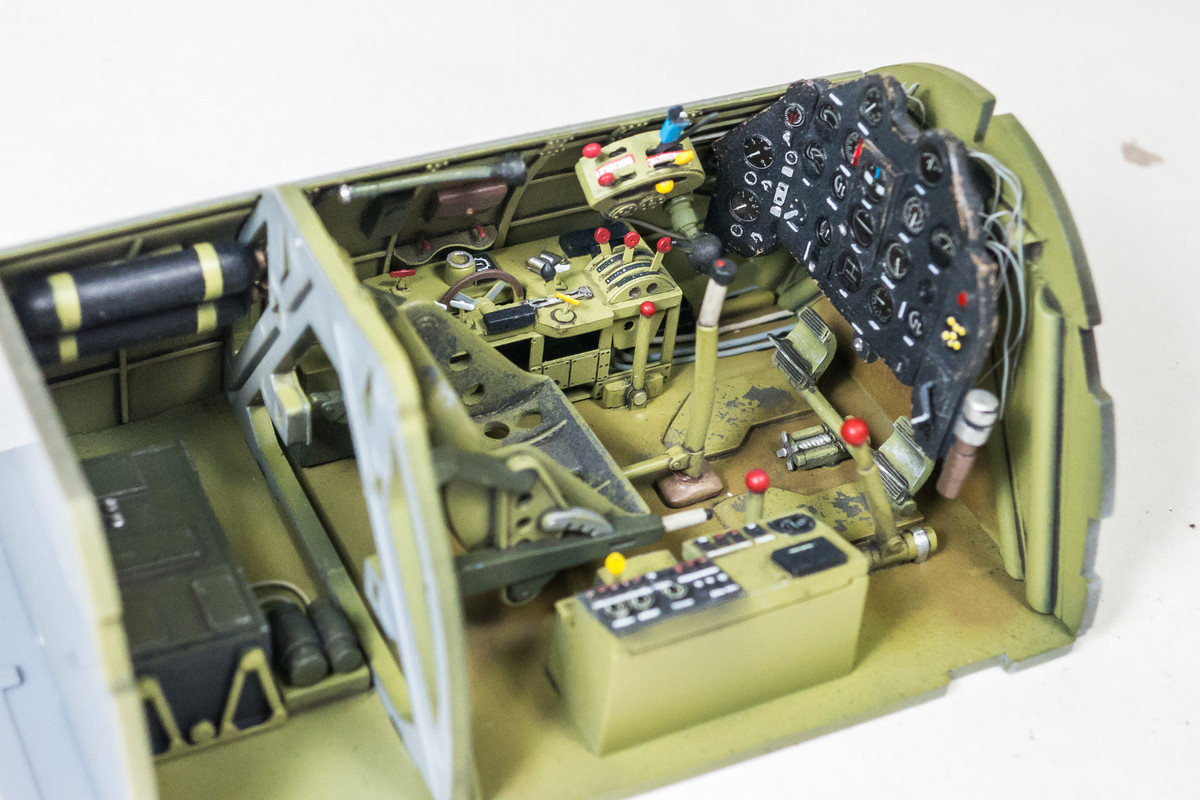
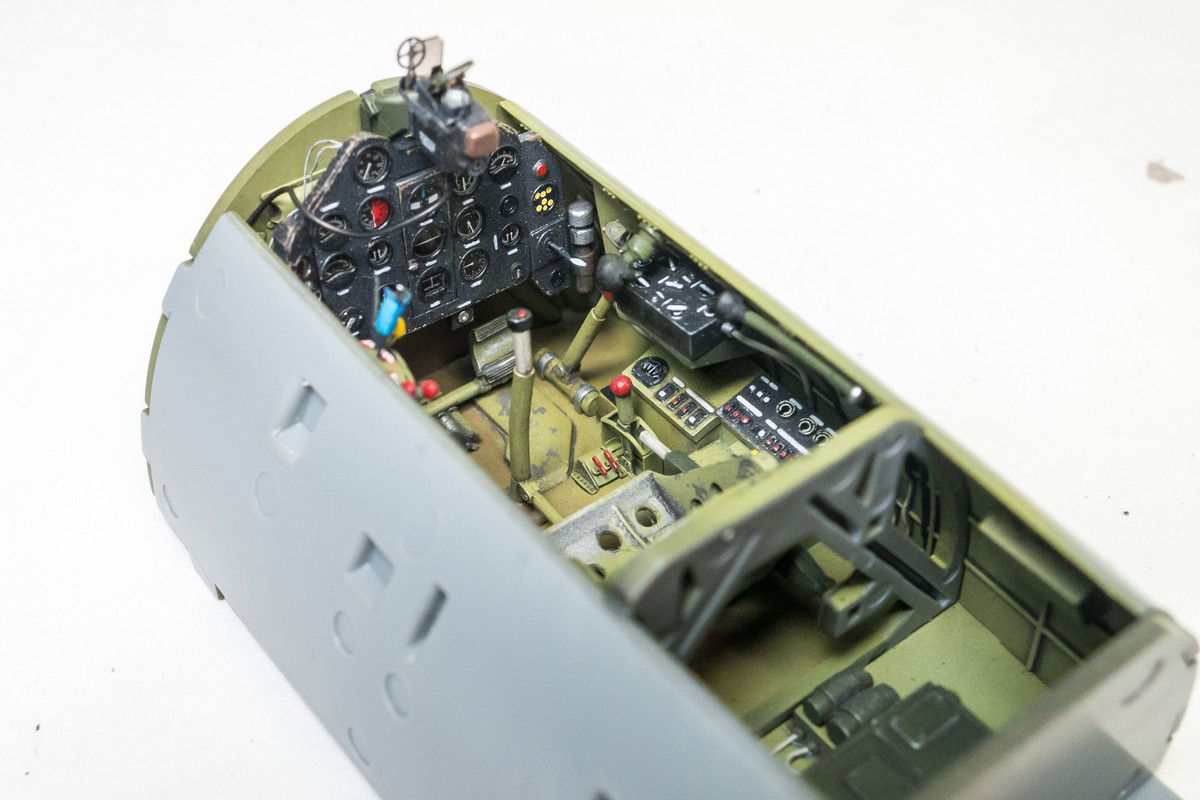
That is a very busy cockpit. Weathering is spot on. What did you use for the dirty brown spots on the floor?
Re: 1/32 Hasegawa N1K2-J Shiden Kai
Posted: Mon Jul 13, 2020 1:34 pm
by jkim
Thanks Clint! The closeup shots are brutal and it has me thinking about my cockpit work in the future.

The floor staining was done by mixing several dots of different colored oil paints.
Re: 1/32 Hasegawa N1K2-J Shiden Kai
Posted: Mon Jul 13, 2020 2:44 pm
by Medicman71
The cockpit looks incredible!!!
Re: 1/32 Hasegawa N1K2-J Shiden Kai
Posted: Wed Jul 15, 2020 12:23 pm
by jkim
Thanks Mike, I appreciate the comment!
Hopefully the HGW seatbelts arrive soon so that I can complete the cockpit.
Re: 1/32 Hasegawa N1K2-J Shiden Kai
Posted: Sat Jul 18, 2020 4:47 pm
by jeaton01
Is there ever a time that sharp photos don't bring out every little fault? I think it looks very nice, but the seat is not convincing to me, it looks more worn than I would expect. Not that I could equal how well you do this stuff. I have one of these to build but perhaps I shouldn't show it here