Page 12 of 27
Re: 1/32 Hasegawa N1K2-J Shiden Kai
Posted: Sun Jul 19, 2020 7:25 pm
by jkim
jeaton01 wrote:Is there ever a time that sharp photos don't bring out every little fault? I think it looks very nice, but the seat is not convincing to me, it looks more worn than I would expect. Not that I could equal how well you do this stuff. I have one of these to build but perhaps I shouldn't show it here

Thanks for the comment, John! By all means, you should show the build here... we're all here to share right? I wasn't sure how to respond to your criticism of the seat. Everyone has a different modeling style. To get a different perspective on where you might be coming from, I looked at some of your builds. I didn't see much in the way of weathering, inside or outside. Is that an accurate assessment... you like the clean look? Which is completely fine. But a different approach than mine, obviously. Now I'm not going to levy any critical comments to the cockpits that you've built based on whether or not I think is accurate or convincing since you choose to depict a weather-free model. It's not my aim to convert modelers to build in the same way I do and I hope you aren't applying those types of expectations to me.
As far as the seat goes... I think you have a very valid point. Not necessarily accurate since there aren't many photos of operational Shiden Kai cockpits but certainly, you could be right. But by the same reasoning, the level of wear that I chosen to exhibit could be just as appropriate. And I'm satisfied with it. Hopefully, I'll be getting the HGW seatbelts soon and you'll be happy to see all of that paint chipping get covered up by the belts!
Re: 1/32 Hasegawa N1K2-J Shiden Kai
Posted: Fri Jul 24, 2020 9:42 pm
by jkim
Hmmm... no comment on my reply? I thought I was being polite and inviting of further discussion.
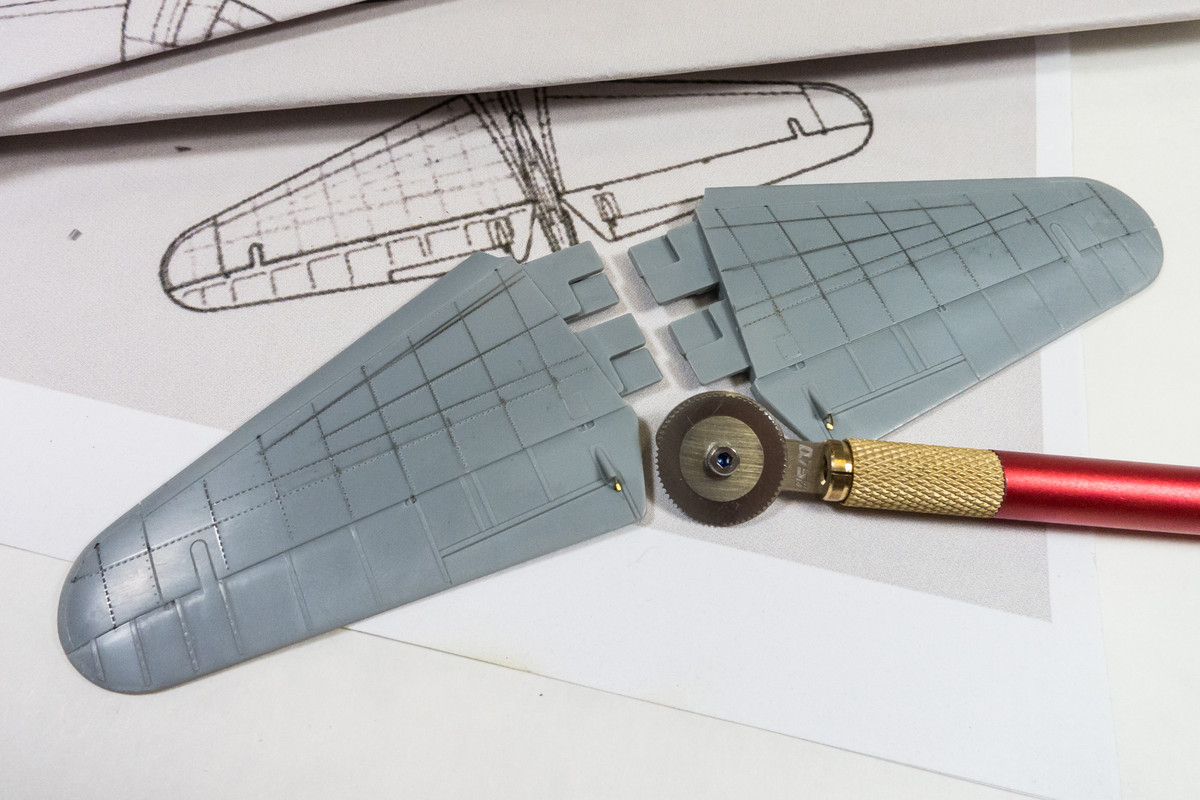
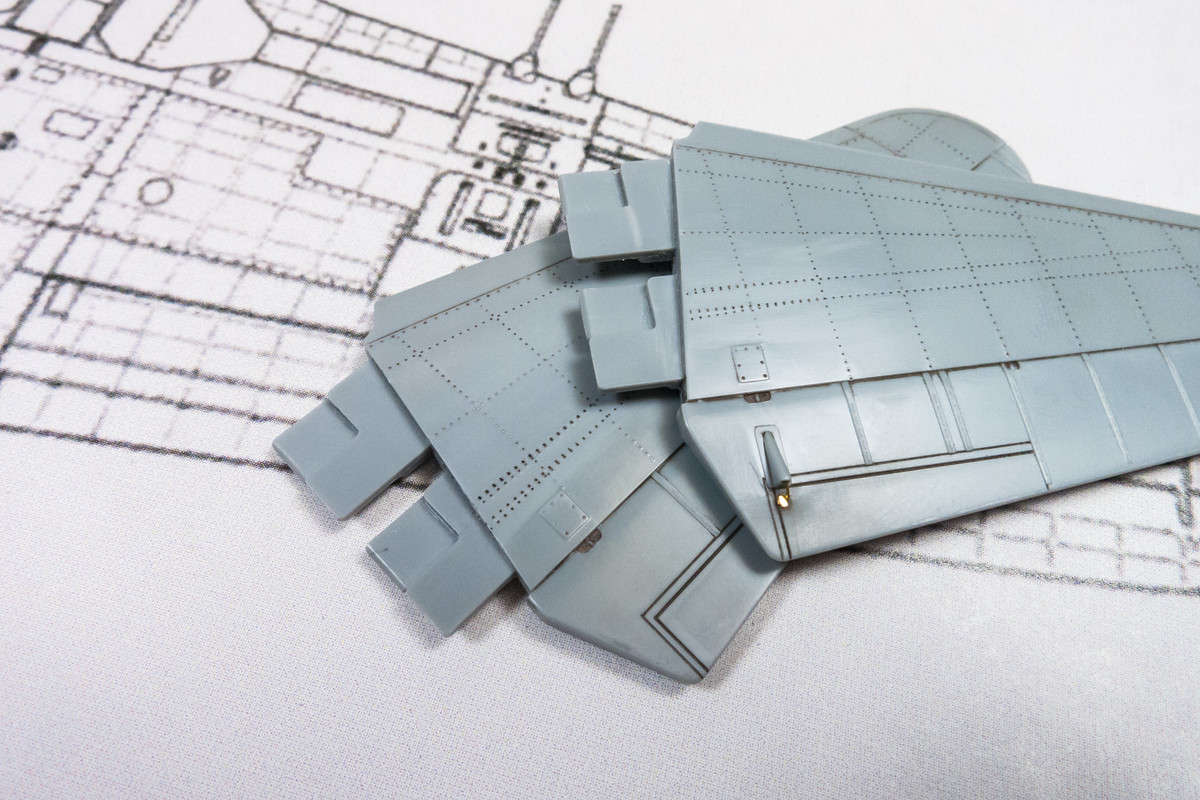
With the G-14 completed, I can jump back onto the Shiden Kai. I decided to try and rivet the horizontal tail planes to test the new rivet tool. Ideally, I think I would've preferred the 1.00mm spacing for this scale but 0.75mm is the largest spacing in this particular set. I have another order in for the 1.00, 1.25 and 1.50mm tools but that'll probably take months to get here. So let's try the 0.75mm rivets.
Using a set of scale drawings from one of my references, I've traced the rivet lines using a flexible ruler and a soft-leaded pencil.
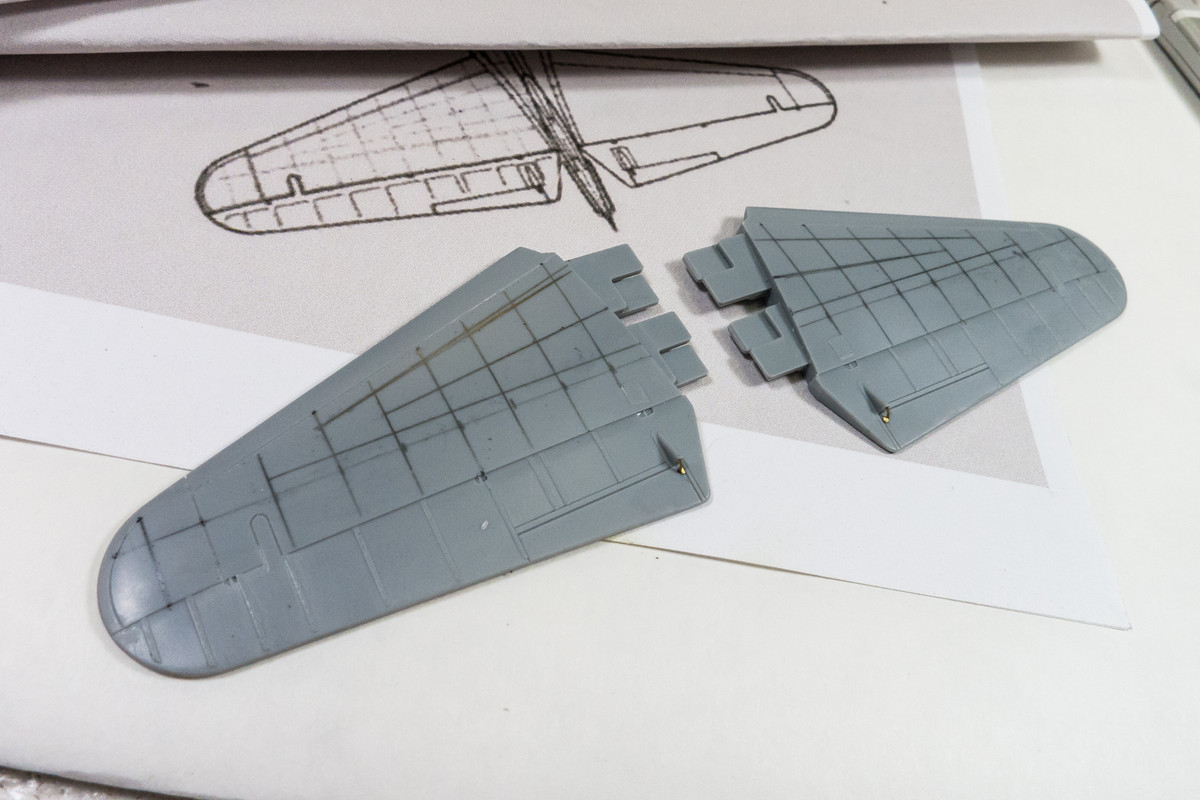
Once the lines are drawn, I simply run the rivet tool over the lines at a constant pressure creating tiny, evenly-spaced holes to represent the rivets.
After the rivets are applied, I wipe off the pencil marks and then use fine sandpaper to get rid of the raised plastic around each hole. Depending on what kind of effect you are after, you can skip this step.
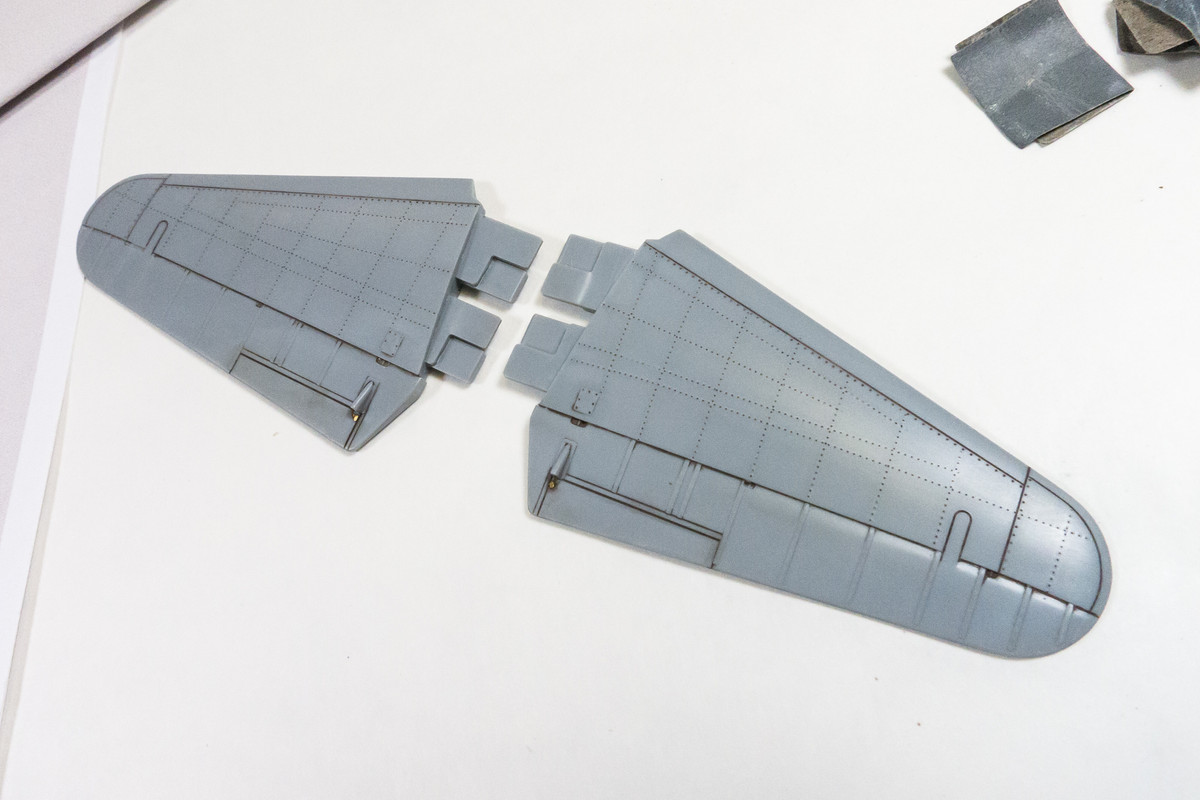
Here's a comparison to show the how the riveted tail plane compares to the unmodified one. The effect is very fine and subtle. Although it is a lot of work, I prefer this to pre-molded rivets.

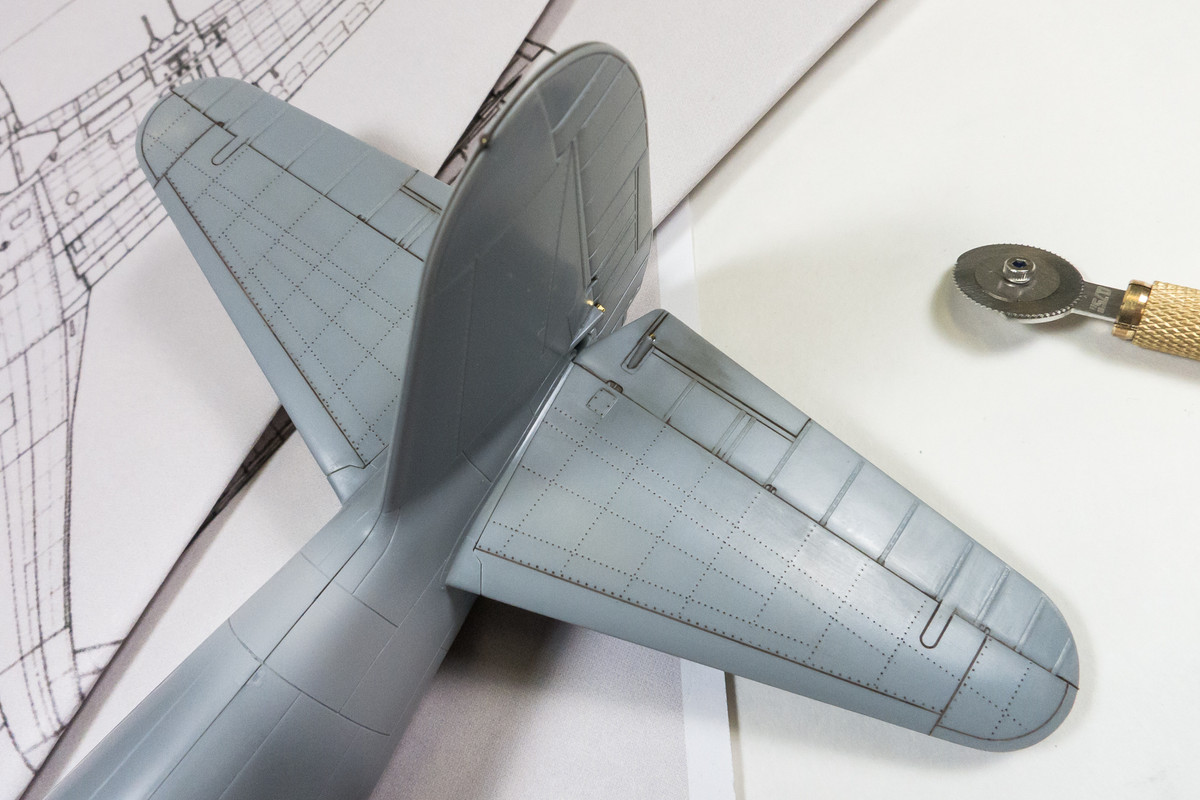
It really takes some concentration to get the rivet lines straight when you run the riveter free-handed. And as you can see, my technique is a little rusty. I don't think rivet lines in real life are perfectly straight but obviously errant rivet lines on a model can be distracting. I may fill some of the more wobbly lines with CA glue and straighten them out.
Re: 1/32 Hasegawa N1K2-J Shiden Kai
Posted: Fri Jul 24, 2020 11:41 pm
by Stikpusher
The riveting is quite an enhancement over the basic kit part. Great looking stuff!

Re: 1/32 Hasegawa N1K2-J Shiden Kai
Posted: Fri Jul 24, 2020 11:44 pm
by Floki
The lines look pretty darn good to me. Your right about in scale any rivet that is out of line will show up where on the 1to1 it wouldn't be that noticable.
Re: 1/32 Hasegawa N1K2-J Shiden Kai
Posted: Sat Jul 25, 2020 6:51 am
by mustang1989
Just went back a page and checked out that detailed and weathered pit. Between that and this rivet job progress your heading towards another epic finish. I've got one of these rivet wheels and used it on my 234. Thing works like a charm.
Re: 1/32 Hasegawa N1K2-J Shiden Kai
Posted: Sat Jul 25, 2020 8:52 am
by jeaton01
John, sorry, I didn't see your reply until now. You're right, I don't do a lot of weathering on many of my models. I have a hard time with the concept probably because I can't make the mental adjustment. I was a working pilot for many years and spent too much time in really well maintained airplanes, as well as I just like that kind of look in my display case. As you say, preferences are personal. I did not mean to be critical with my comment on the seat wear, it was a suggestion that the way the wear looked was different from what I thought wear in a place like that would look, like it came off in a large sheet and that was different from what I am used to seeing in a place like that. I've seen a lot of worn equipment, much of it not airplane related, as a farmer and water well driller. Although I don't weather much, that doesn't mean I don't appreciate other modeler's work that do. Sometimes I even try to copy them, but I am pretty subdued about it. If I ever succeed in doing a well weathered airplane it will have been after a long series of progressively more weathered models, most likely. It's very clear that you consider every element of the weathering process and I enjoy your posting about that. I do think a lot of weathered models are that way because people rely on it to hide faults and I think that retards the process of learning how to model. But that's not where you are!
Re: 1/32 Hasegawa N1K2-J Shiden Kai
Posted: Sat Jul 25, 2020 11:49 am
by BlackSheep214
Re: 1/32 Hasegawa N1K2-J Shiden Kai
Posted: Sat Jul 25, 2020 4:42 pm
by jkim
Thanks for the comeback, John! I appreciate the rationale behind your comments. Painting and weathering model are very subjective things and I would be the first to admit, my choices are not meant to be definitive or even accurate. Just my personal interpretation mixed in the with limitations of the techniques that I'm using.
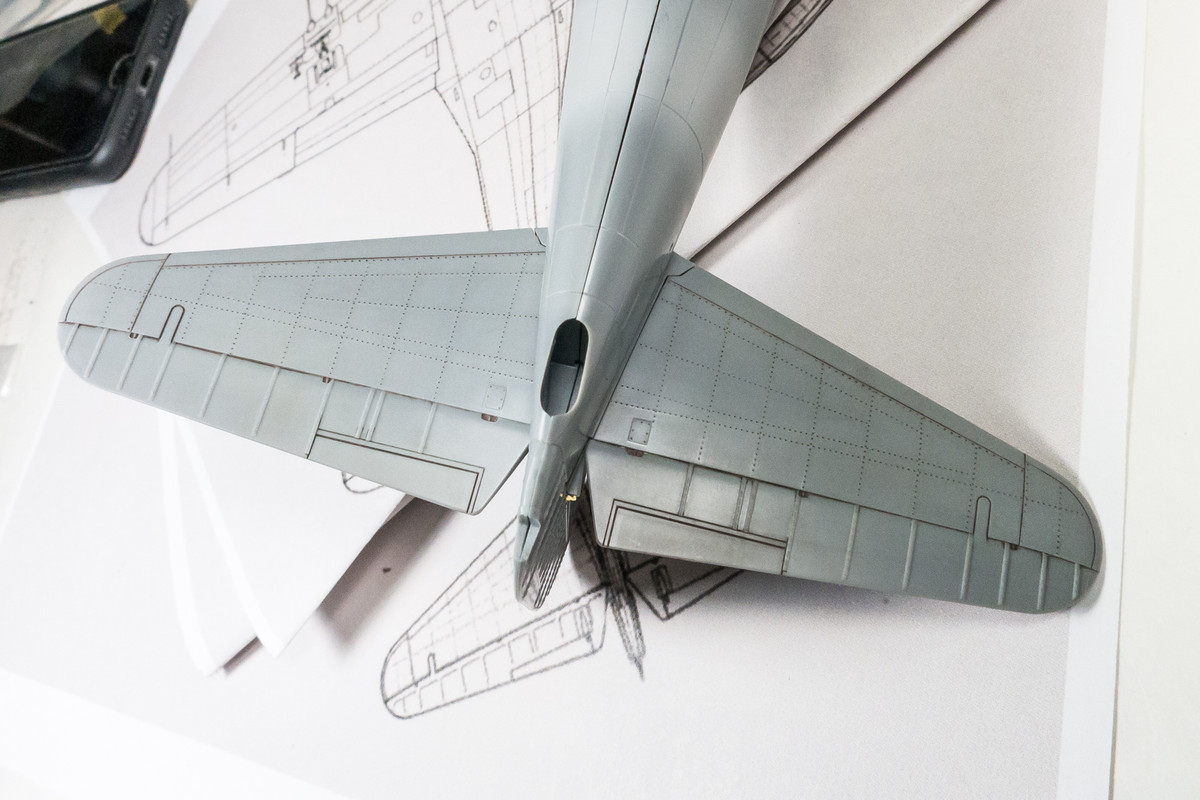
I took the time to straighten out a few of the rivet lines on the tail planes. Since I used black CA glue, the filled holes appear black.
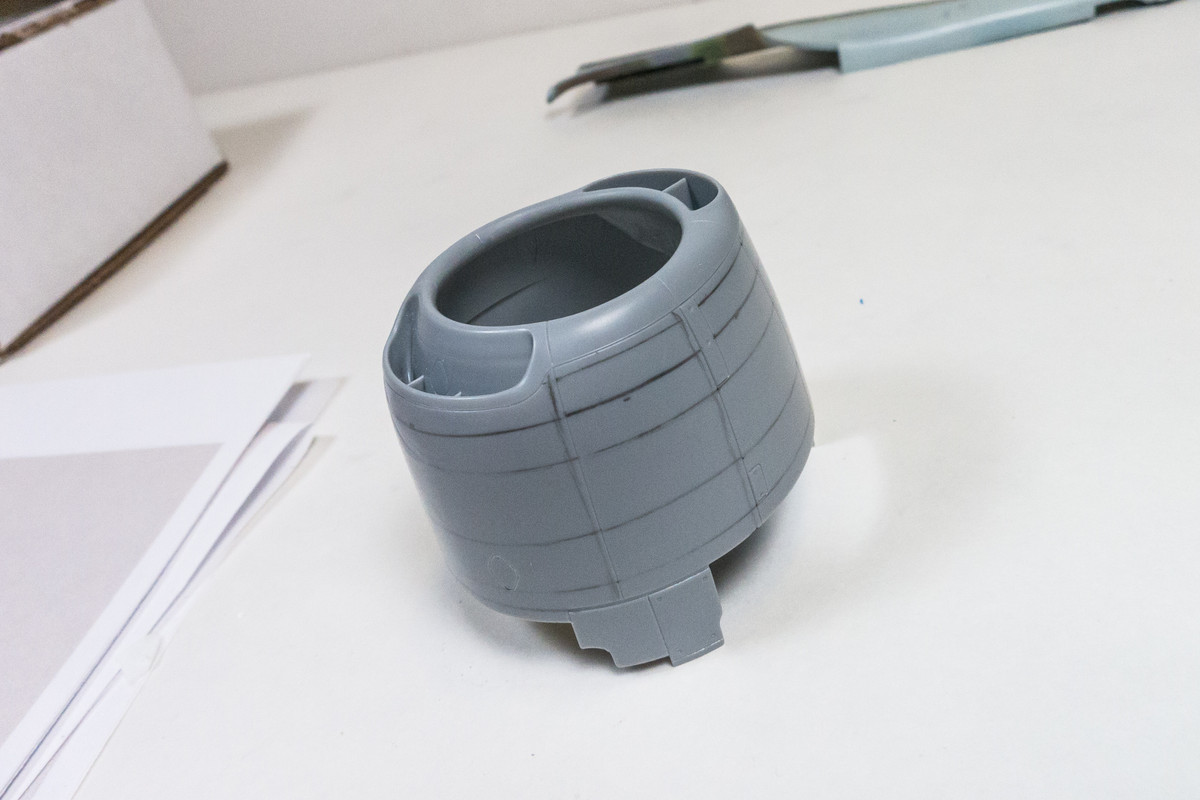
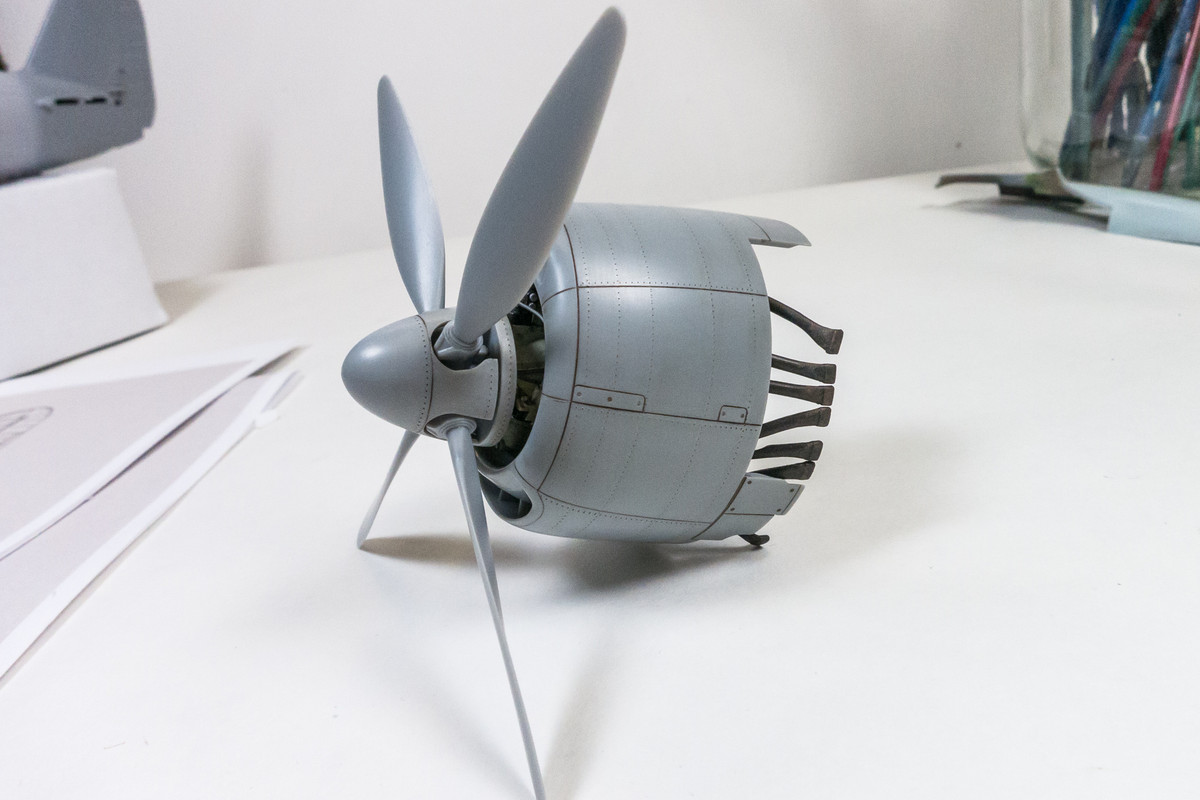
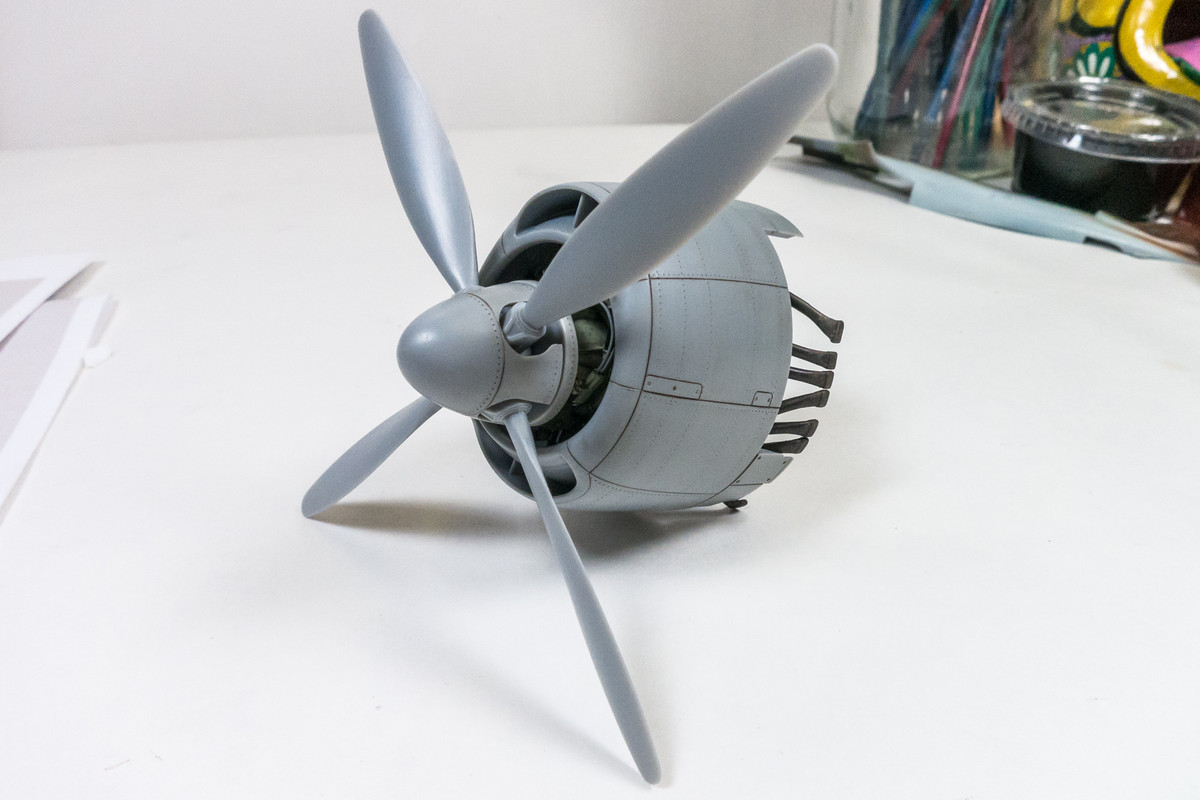
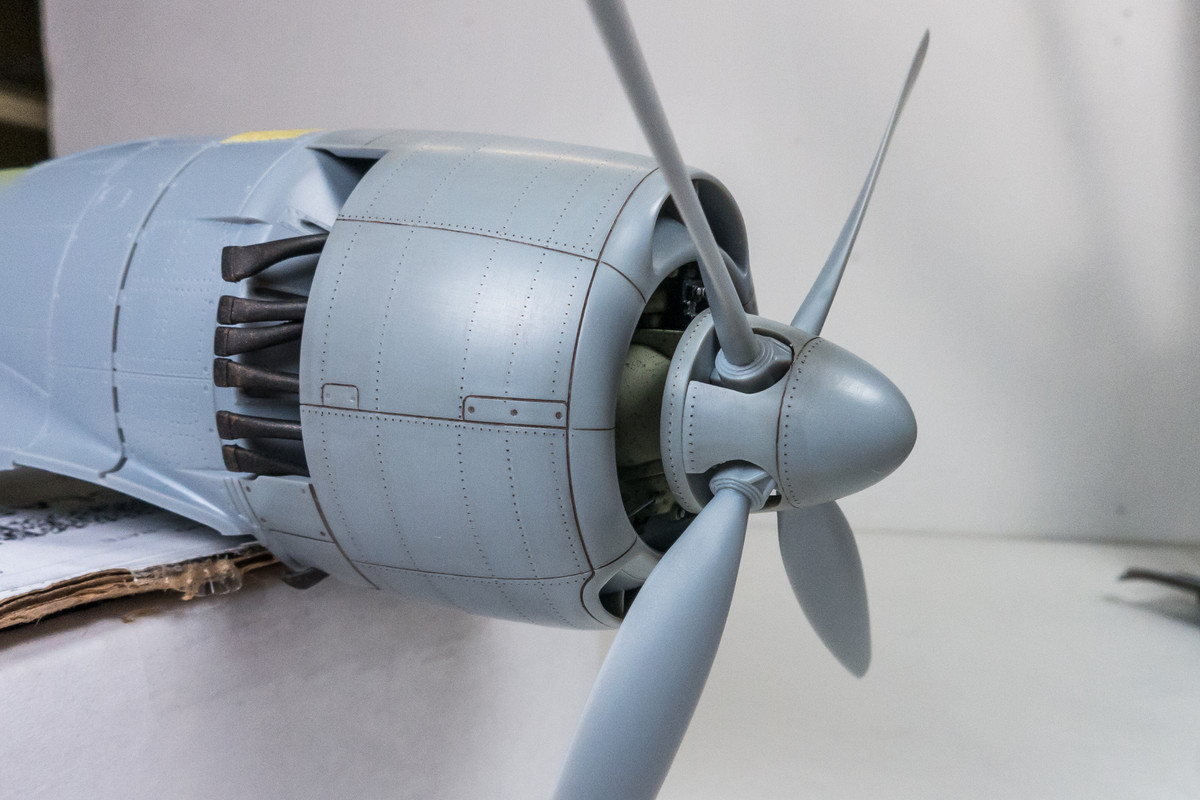
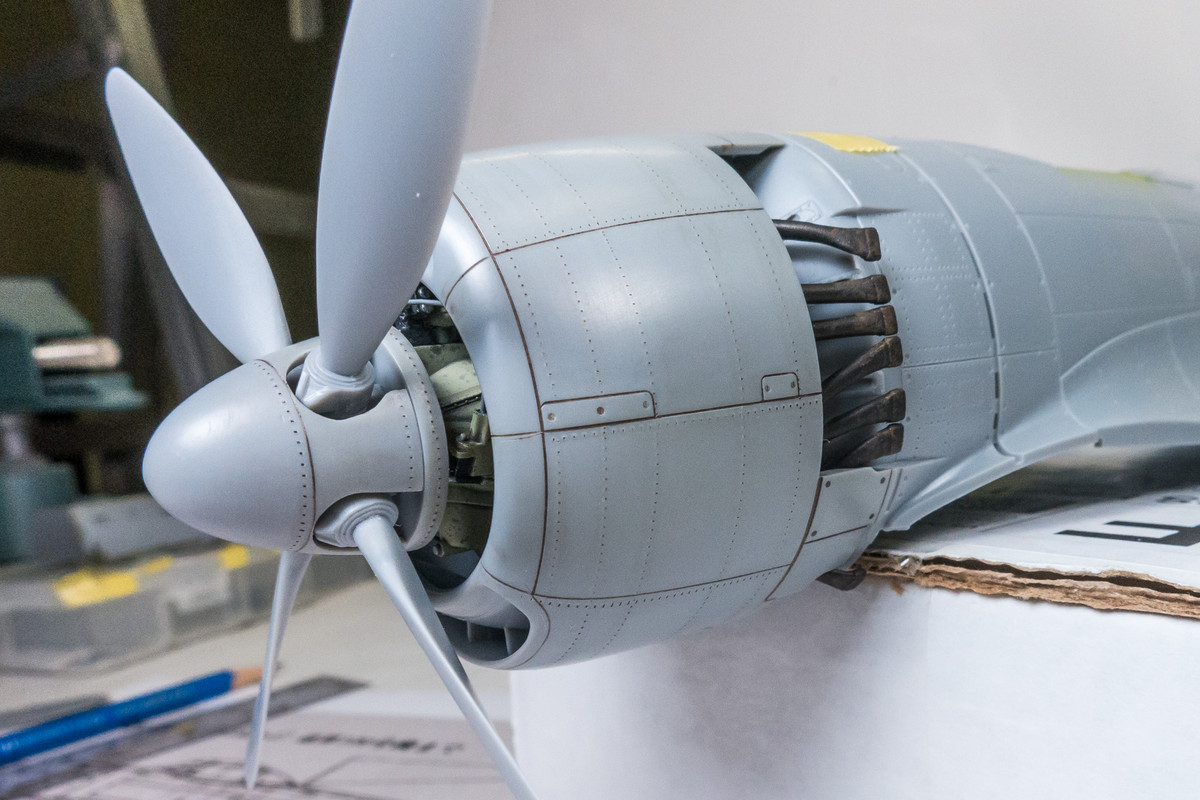
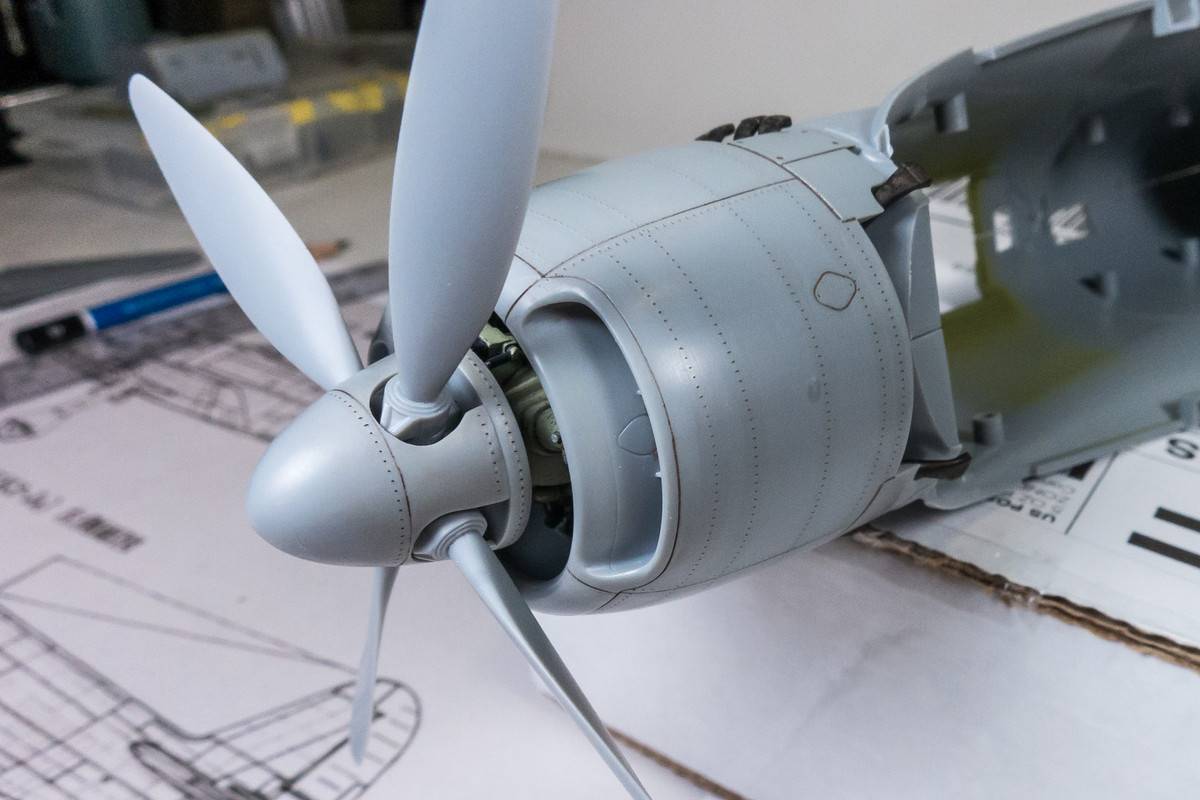
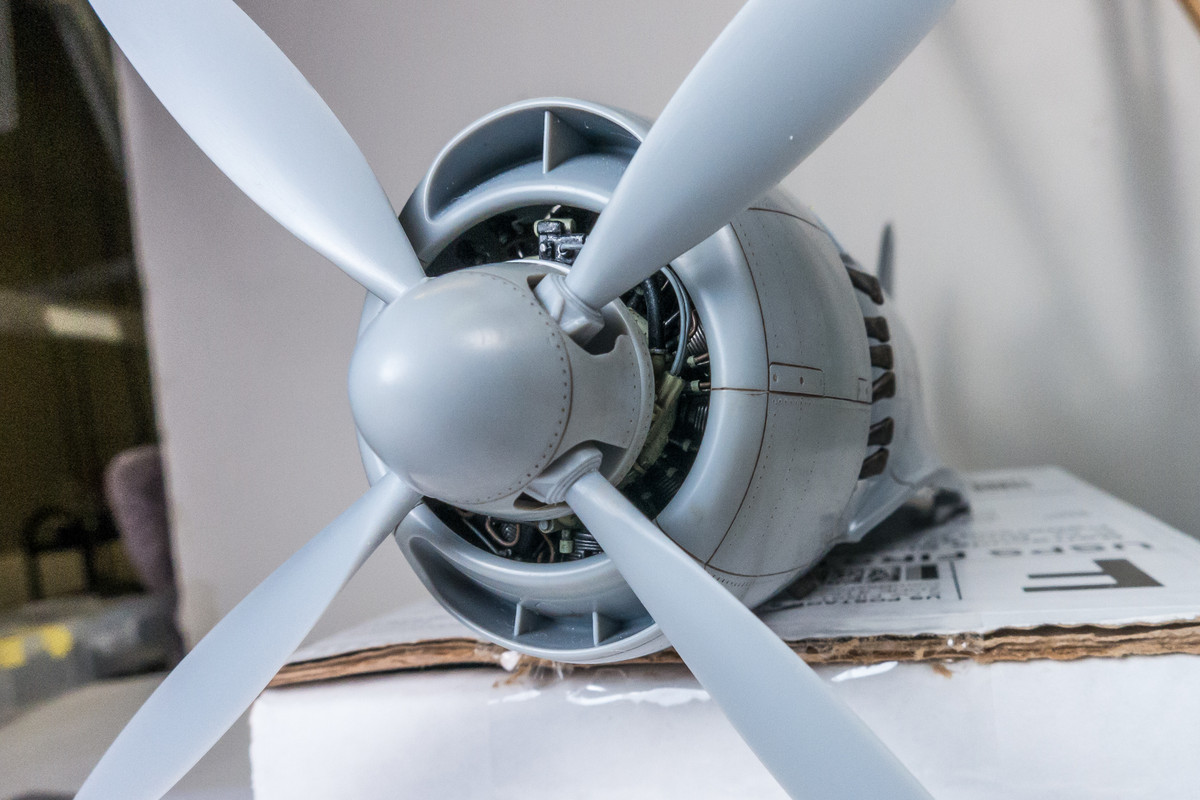
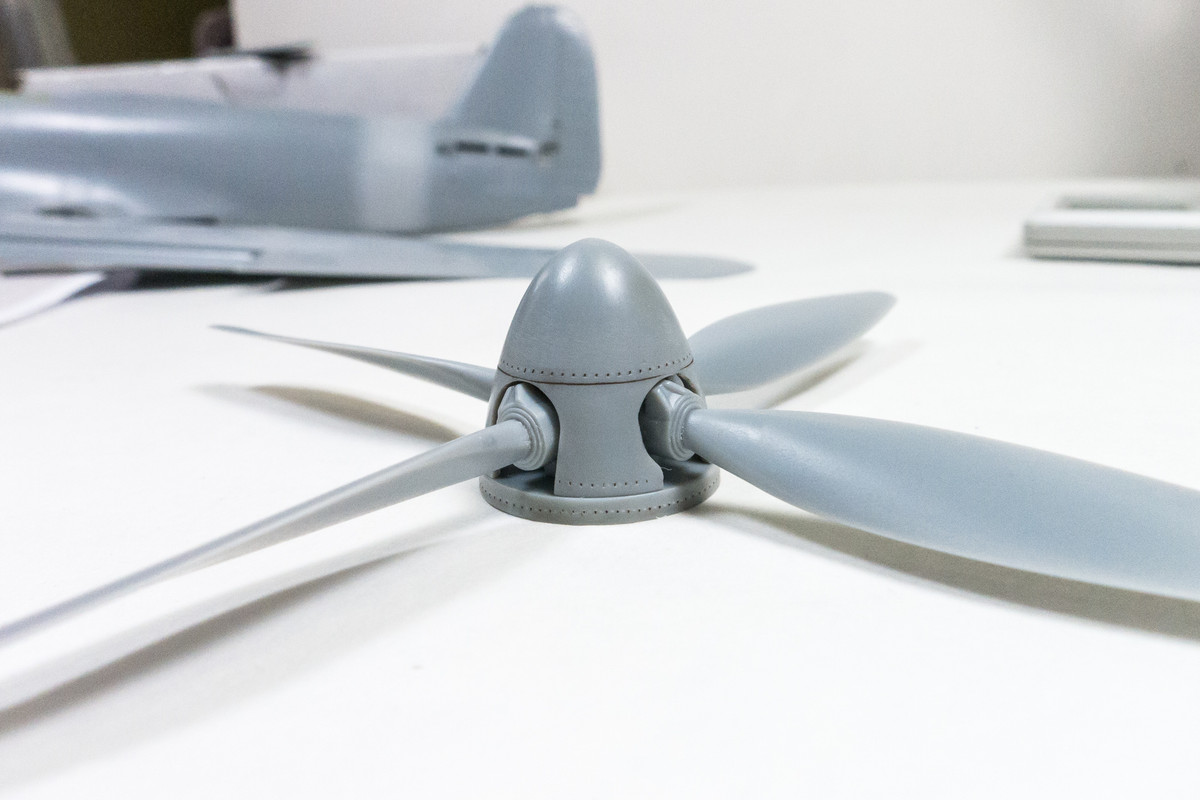
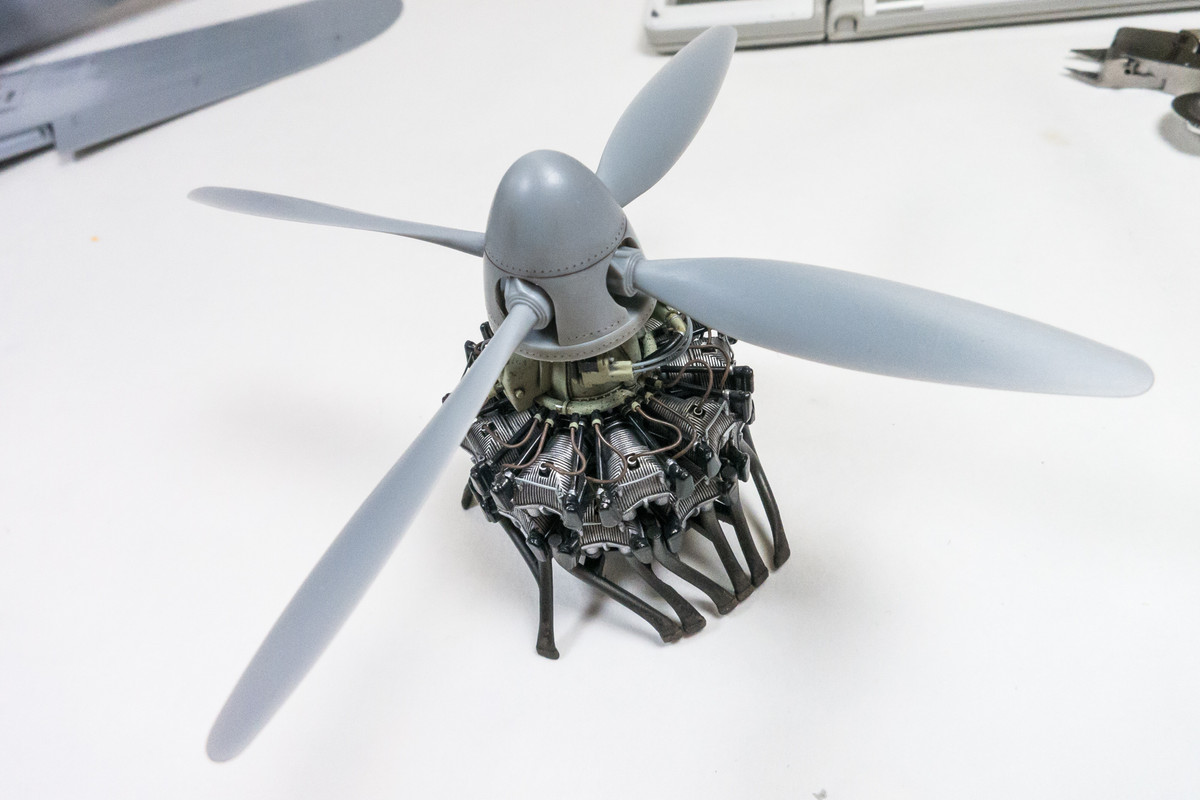
The individual prop blades were glued onto the central prop hub. The hub is sandwiched between the spinner and the backplate. Everything separate so it will make painting easier.
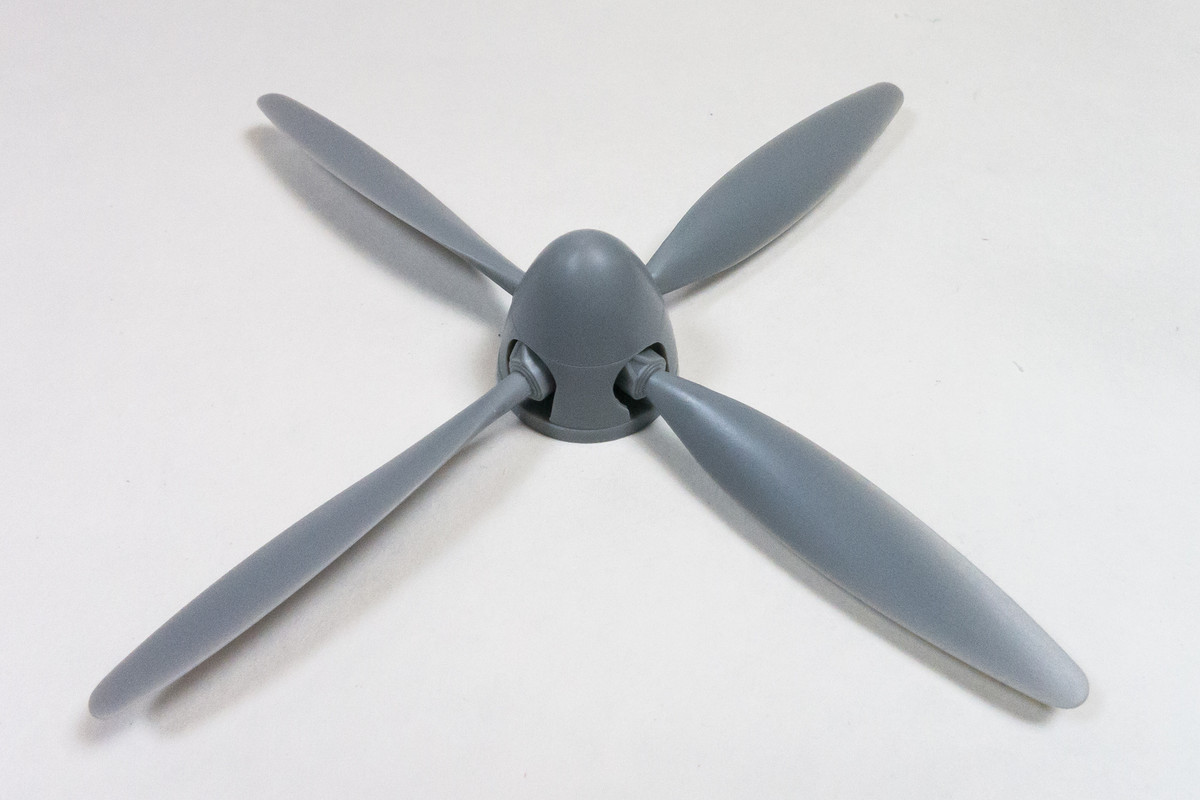
Rivets were added to the spinner and backplate.
Re: 1/32 Hasegawa N1K2-J Shiden Kai
Posted: Sat Jul 25, 2020 10:46 pm
by jkim
Re: 1/32 Hasegawa N1K2-J Shiden Kai
Posted: Sun Jul 26, 2020 4:02 pm
by BlackSheep214