Hasegawa 1/32 Fw 190D-9 Brown 4

Post your work in progress of your aircraft builds in here.
Post Reply
User avatar
jkim
Elite Member
Posts: 3923
Joined: Mon Apr 10, 2017 4:03 pm

Re: Hasegawa 1/32 Fw 190D-9 Brown 4

Post by jkim »

Thank you Carlos! Staying busy with the two builds, which are coincidentally at about the same stage. While I wait for the interior color paint for the Hien to arrive, I was able to finish the Revi 16B gun sight, which was provided as part of the Eagle Editions cockpit. I added my own reflector glass, tinting one with Tamiya Smoke and painting the edges of the other with clear green/blue.
Image
Image

The main components of the cockpit have been painted as well. Nothing added... just careful detail painting of the resin pieces.
Image

These pieces were then scuffed up a bit by drybrushing Testors Silver in strategic areas. A dark pastel wash to highlight some of the recessed detail and then a flat coat to seal it off.
Image
Image
Image
John aka JKim
-----------<><
Image
User avatar
jkim
Elite Member
Posts: 3923
Joined: Mon Apr 10, 2017 4:03 pm

Re: Hasegawa 1/32 Fw 190D-9 Brown 4

Post by jkim »

More views of the cockpit with some additional components that have been painted such as the seat, control stick and foot pedals.
Image
Image
Image
Image

I received a couple of additional sets of Luftwaffe instrument panel decals by Airscale so I finished up the instrument panels. Here is the main instrument panel fresh after applying the punched decals and soaking in Microsol.
Image

Since the resin instrument bevels are deep enough to accommodate this, I like to punch out discs of clear acetate to place over each instrument.
Image

I even did this for the lower instrument panel with the instrument dials as small as 1.0mm
Image

The instrument panels are done!
Image
Image

The cockpit tub and sidewalls have been given additional weathering treatment. I applied a brown pastel wash over a flat finish to purposefully leave some stains. Similar to working with oils except I don't have to wait hours for it to dry.
Image
Image
John aka JKim
-----------<><
Image
User avatar
jeaton01
Elite Member
Posts: 2070
Joined: Thu Apr 23, 2020 9:20 am
Location: Northern California
Contact:

Re: Hasegawa 1/32 Fw 190D-9 Brown 4

Post by jeaton01 »

Excellent, John.
My modelling website, with build logs.

http://goldeneramodel.com/mymodels/mymodels.html
User avatar
Floki
Elite Member
Posts: 3548
Joined: Wed Dec 12, 2018 2:23 am
Location: Muncie, Indiana

Re: Hasegawa 1/32 Fw 190D-9 Brown 4

Post by Floki »

Very sad news to hear the passing of Jerry Crandall a true expert in the field.

The cockpit and IP are looking really good. The switched compass is odd.
March as one, Don't look back
Odin's sons... Attack!
Unleash hell! Do not repent! Warfare grants us no lament
Let your weapons slash and tear This is no place for fear
Hold the lines! Move as one! In unity our victory's won
Our shields will form a mighty wall
United we shall never fall
User avatar
jkim
Elite Member
Posts: 3923
Joined: Mon Apr 10, 2017 4:03 pm

Re: Hasegawa 1/32 Fw 190D-9 Brown 4

Post by jkim »

Thanks guys!

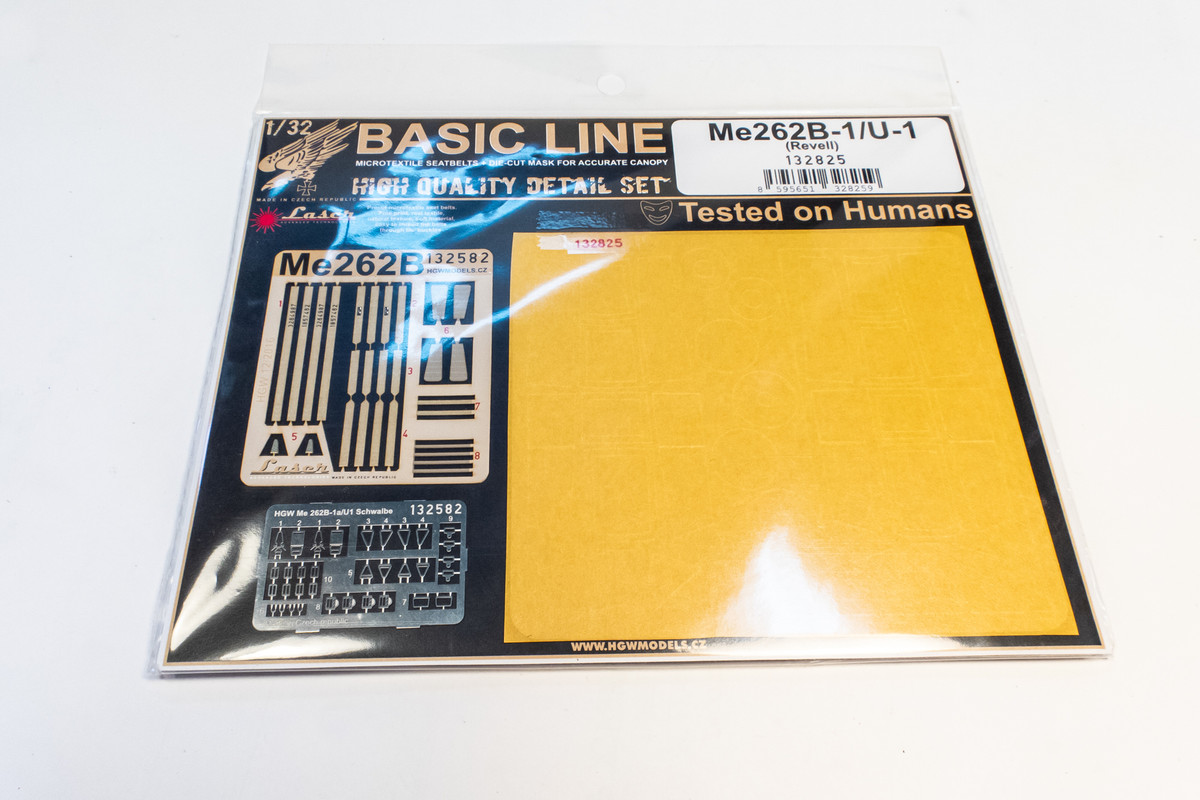
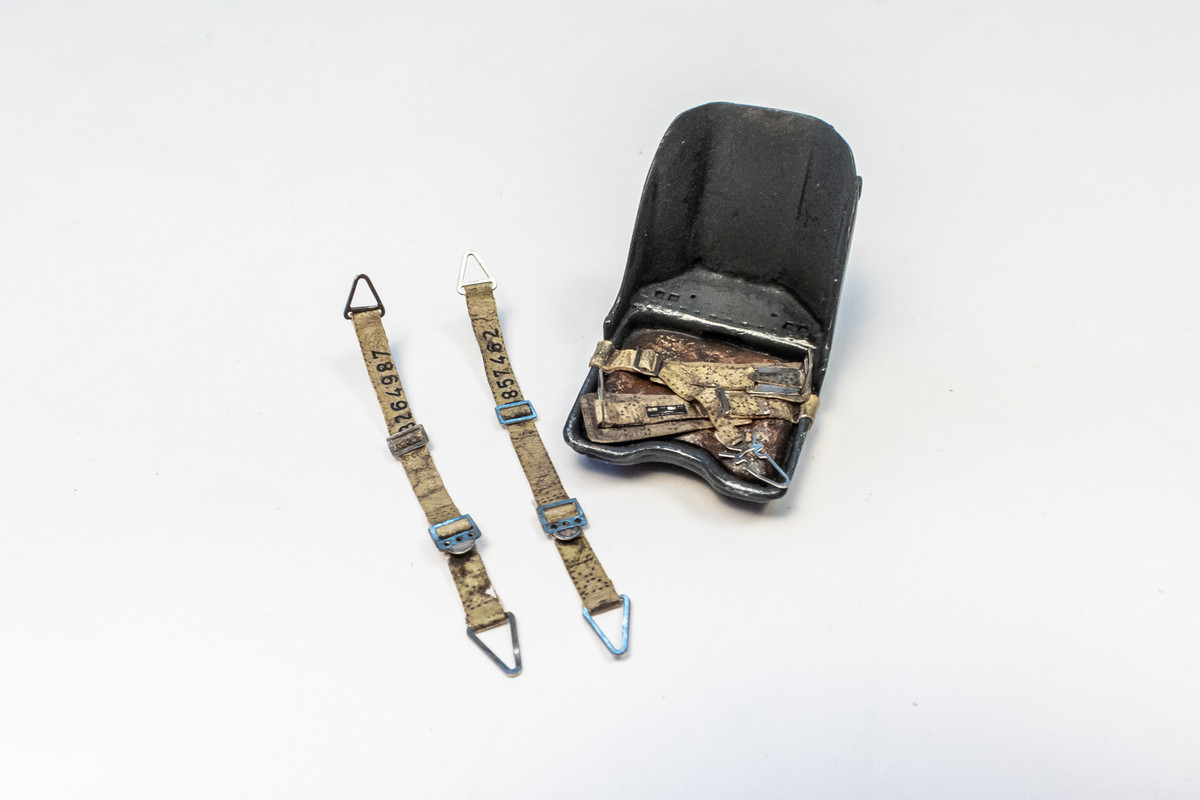
Moving on with the cockpit construction, I am ready to put together the HGW seatbelts. You'll notice the packaging says Me262B... I like to buy Luftwaffe seat harnesses for the two seater because you get two sets of belts instead of one for a similar price. Most Luftwaffe fighters used the same type of harnesses. The mask set? Well, that's all they had in stock.
Image

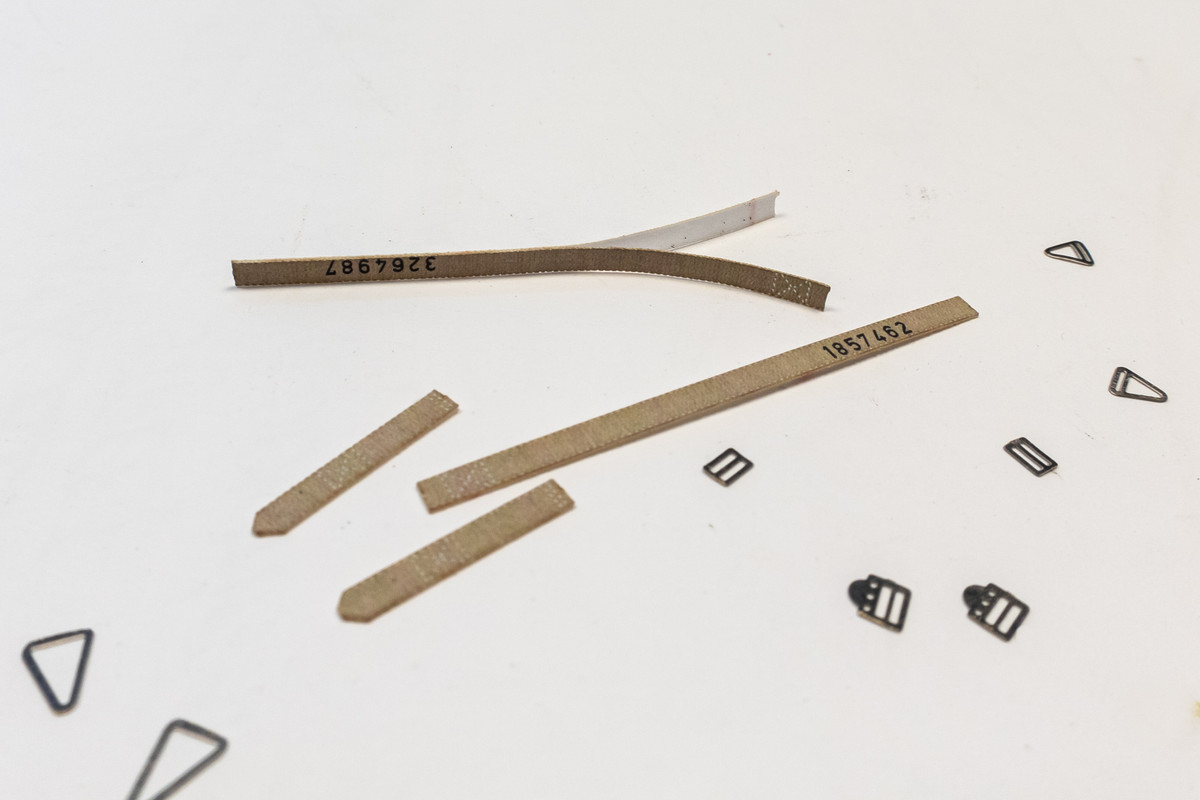
HGW uses some sort of microfiber paper for the belt material and photoetched metal for the buckles.
Image

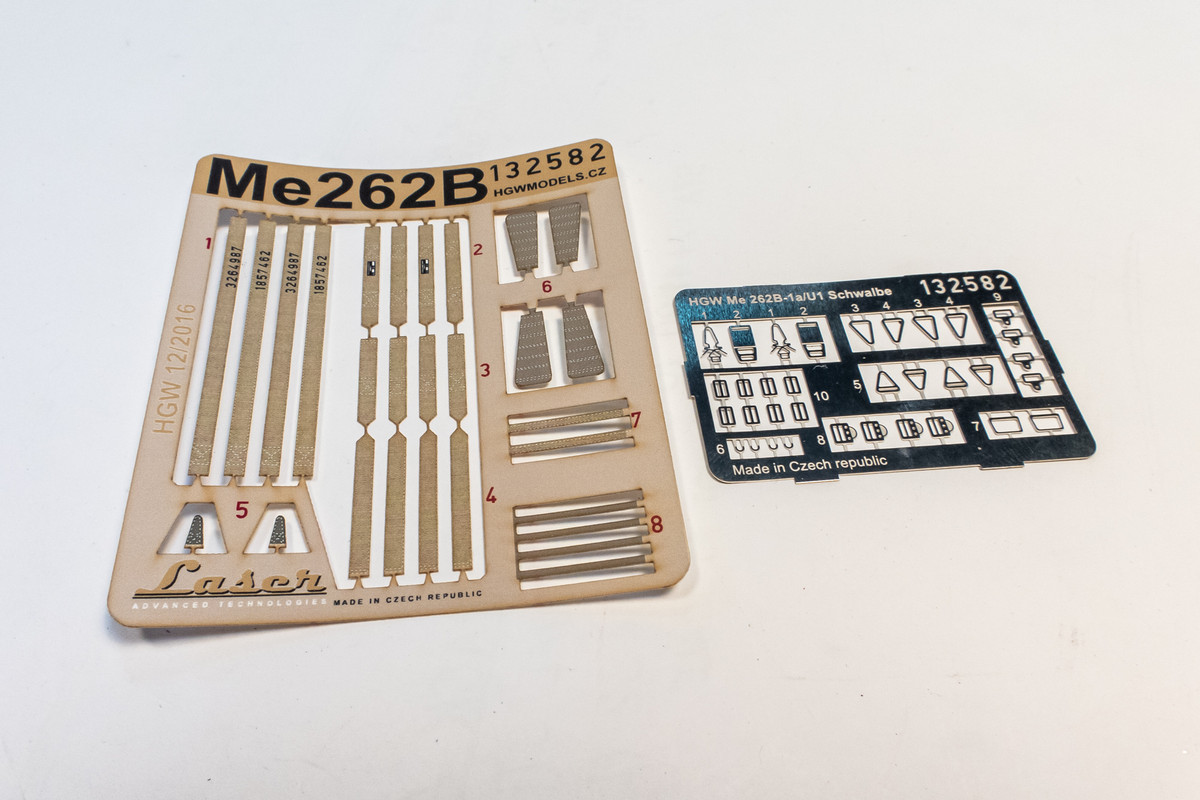
Some people report leaving the buckles on the photoetch frame for easier handling but I like to cut the buckles off and carefully trim off sprue attachment stubs.
Image

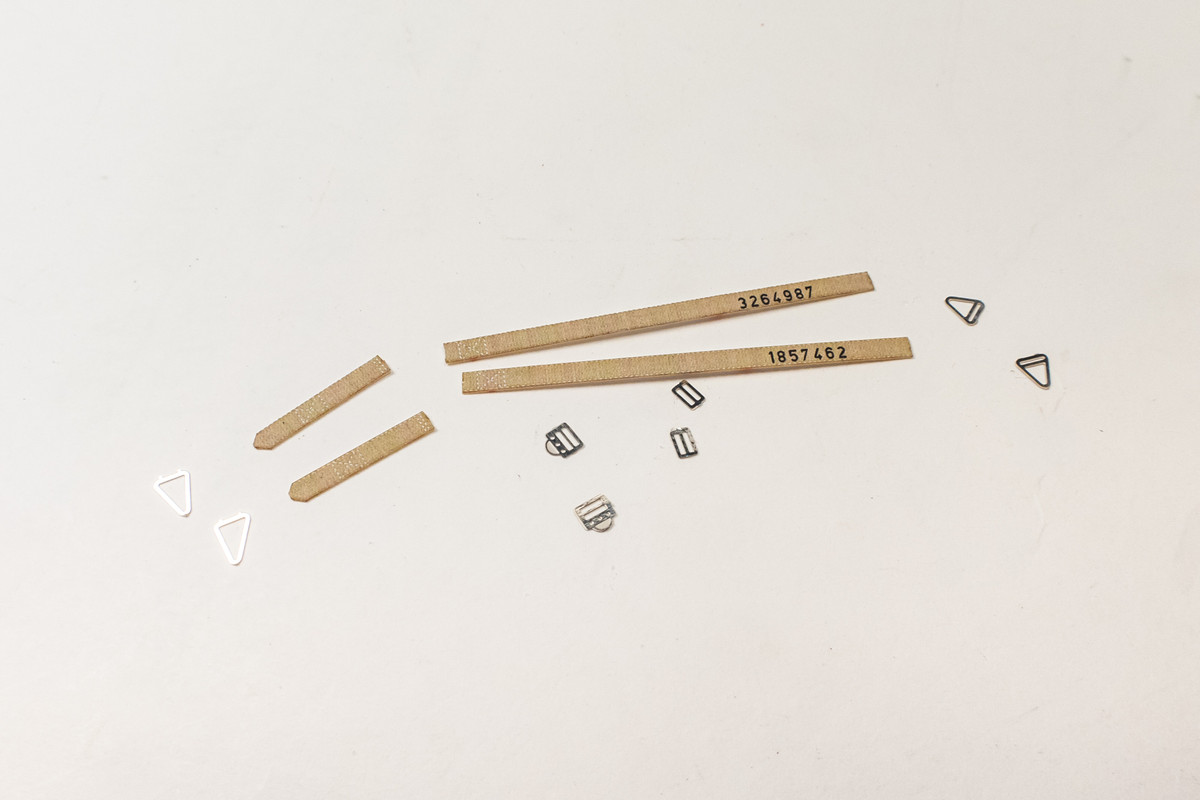
Remember to take off the backing from the harnesses!
Image

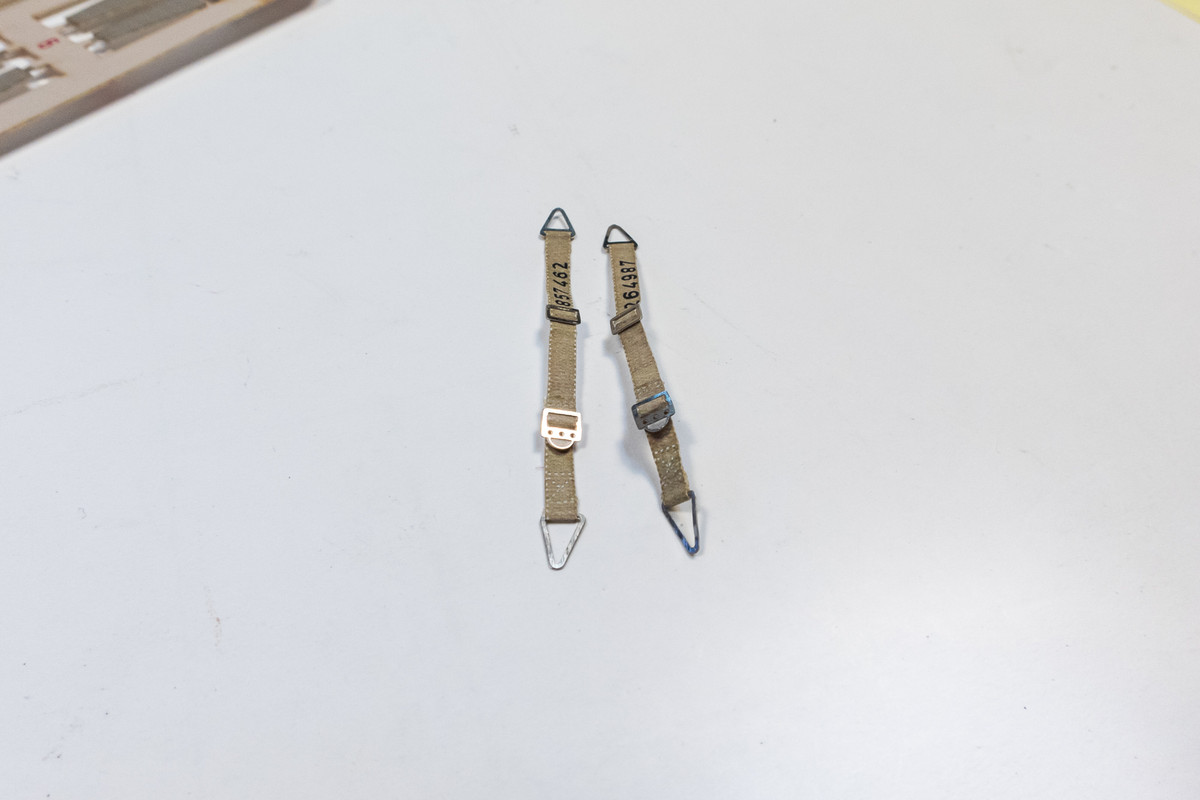
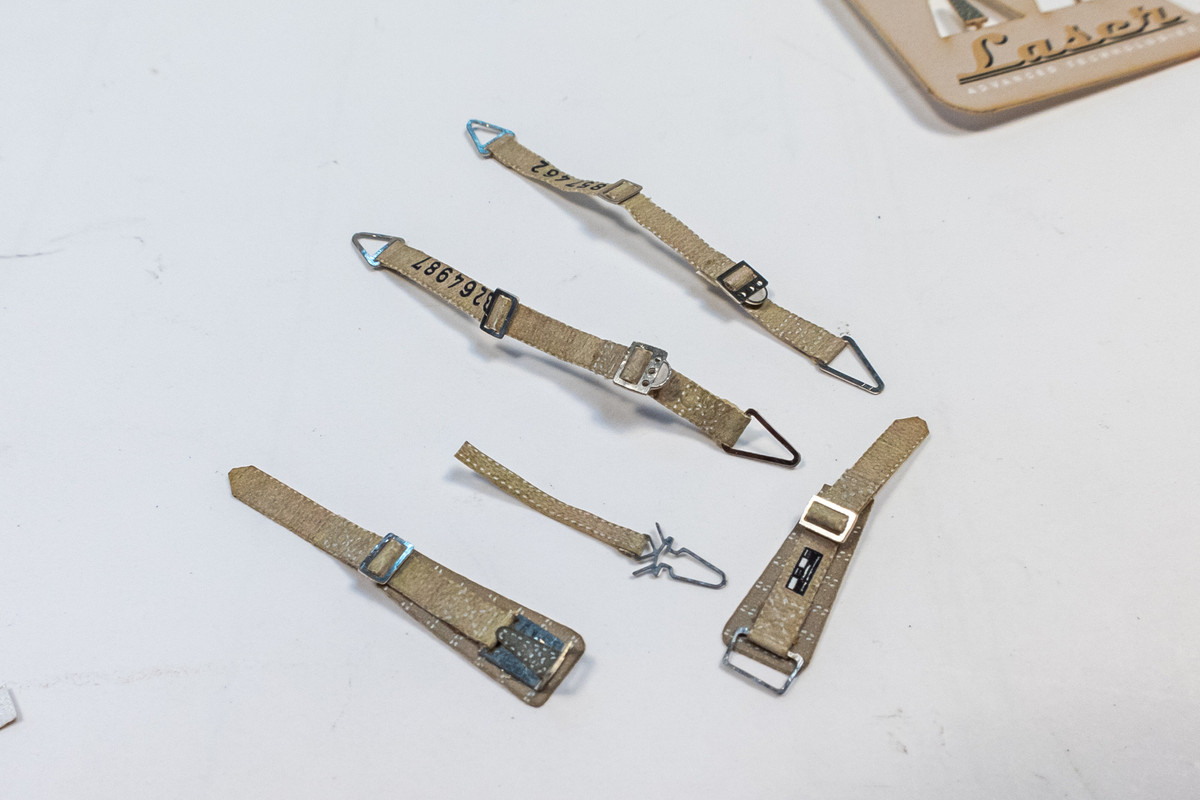
Per HGW recommendations, I like to crumple the harnesses before using. It helps loosen the material up a bit and also introduces some random folds and wrinkles. These effects are most noticeable on the longer pieces and sometimes I don't bother crumpling the shorter sections.
Image
Image

I use PVA glue to secure the harness folds that hold the buckles in place. You could also use CA glue but the PVA allows better alignment of the folds.
Image

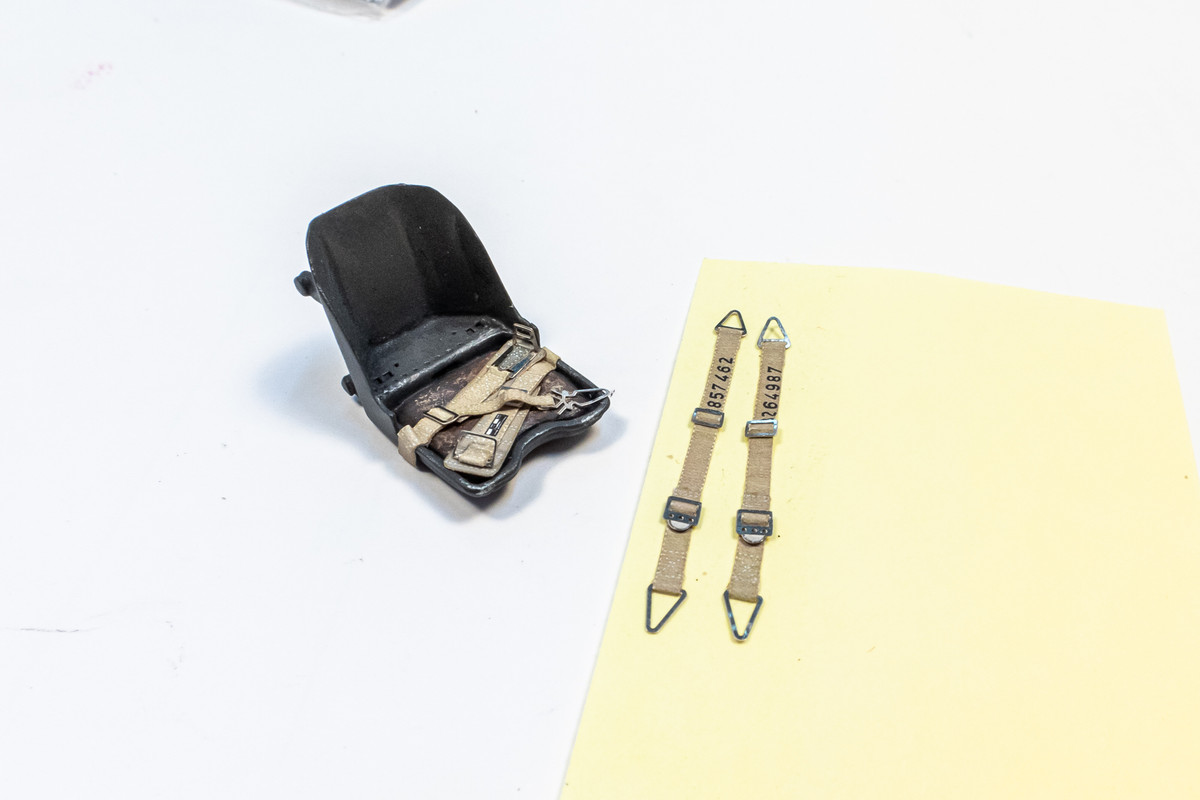
The sticky side of a Post-It is convenient for holding the crinkled harnesses down flat to verify consistent lengths and buckle spacing.
Image

After the shoulder straps are measured against the seat, they are finalized.
Image

The lap belts are constructed next. I've left off the attachment tabs on the seat end because (a) they can't bee seen anyway and (b) they would likely interfere with the already tight fit of the seat into the cockpit tub.
Image

The lap belts are glued into place onto the seat using CA glue. The shoulder belts are temporarily affixed to a Post-It.
Image

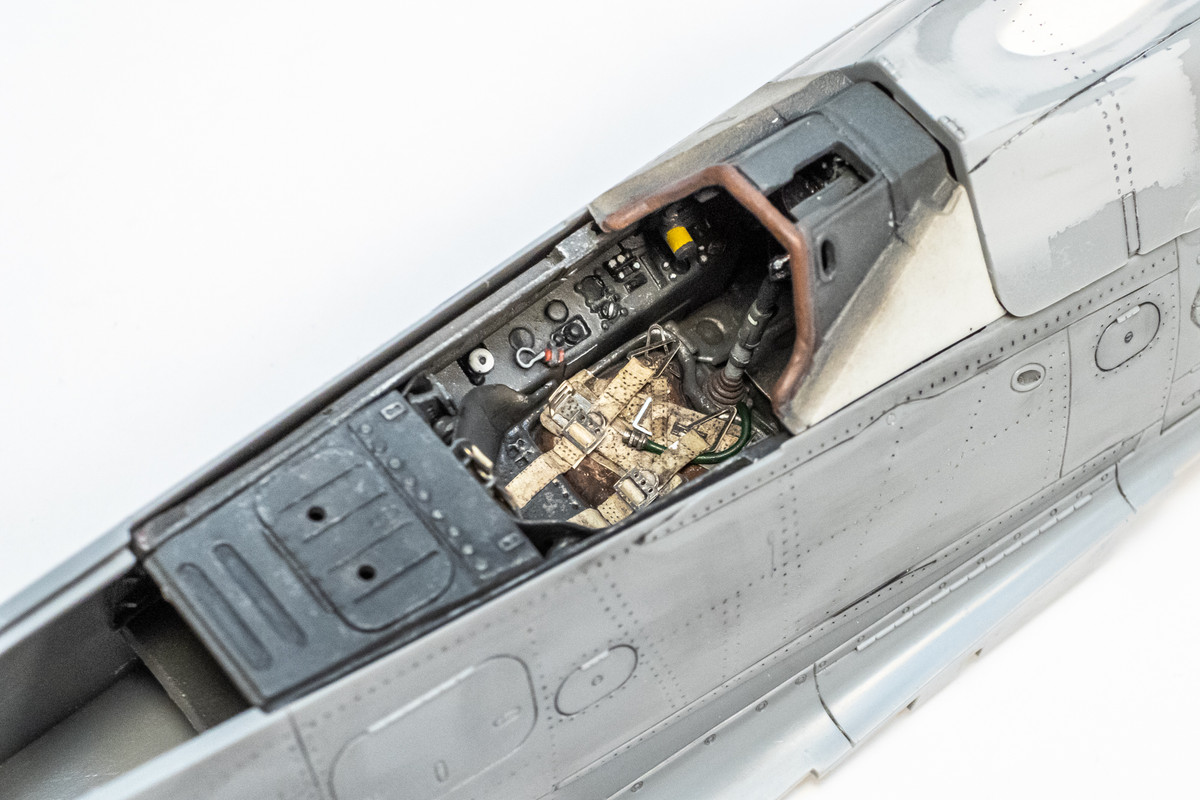
One interesting aspect about the HGW fabric material is that there is some subtle stitching details that have been depressed into the fabric. They are not as consistent as rivets on plastic but additional detail can be highlighted with a wash. So I am giving the belts a gloss coat (Alclad Aqua Gloss) and then a pastel wash of dark brown. Be advised that the crumpling step CAN mar the surface of the fabric so that the pastel wash can leave permanent stains. I'm ok with this.
Image

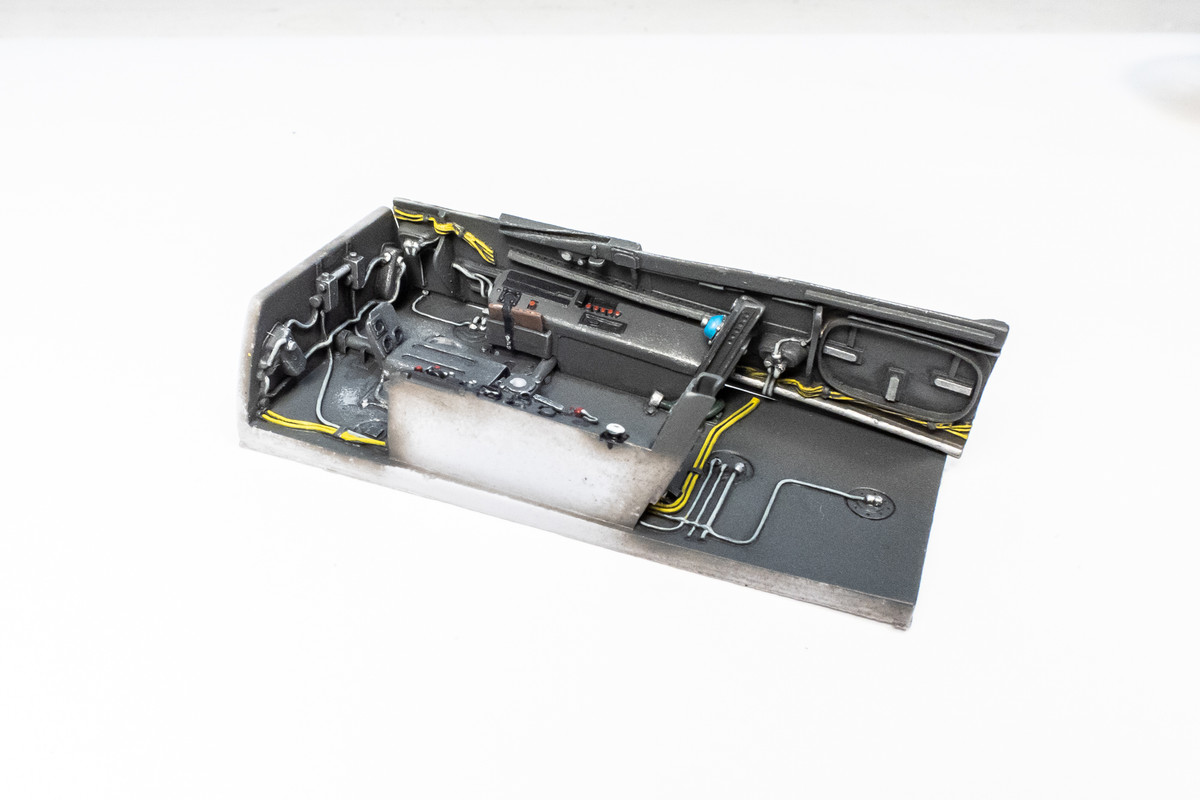
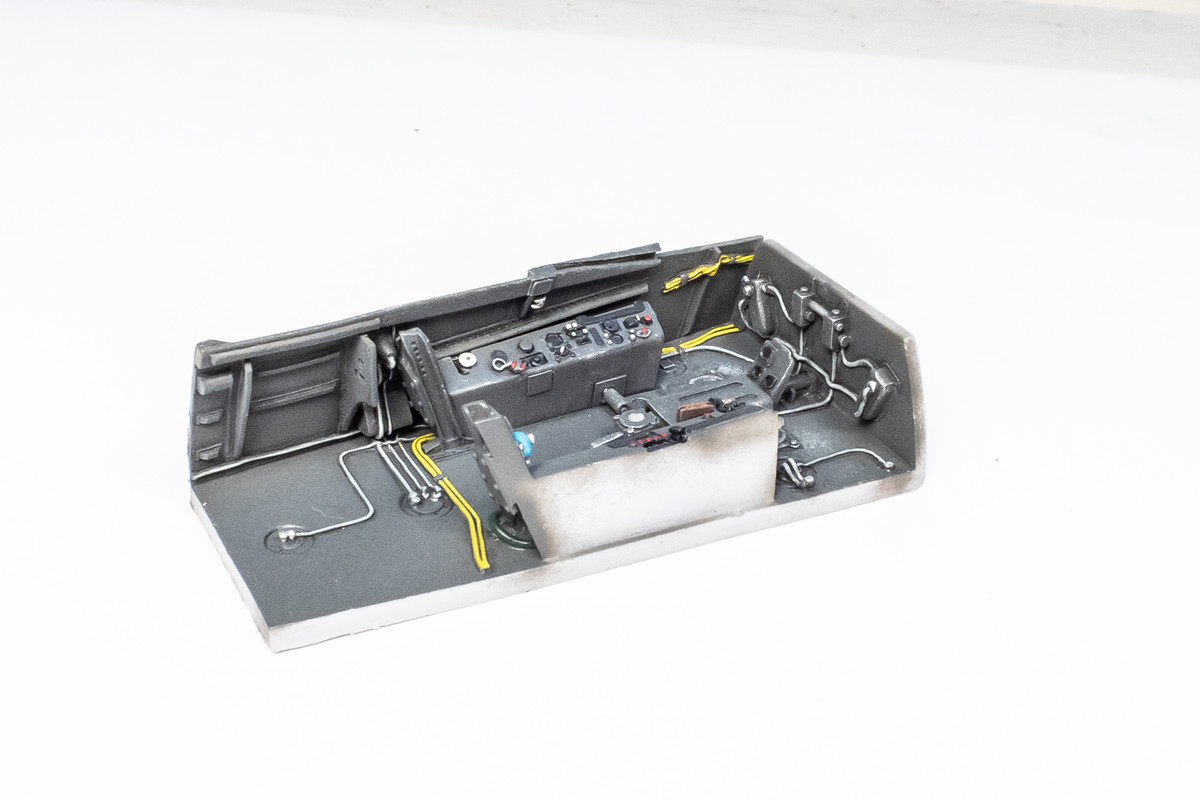
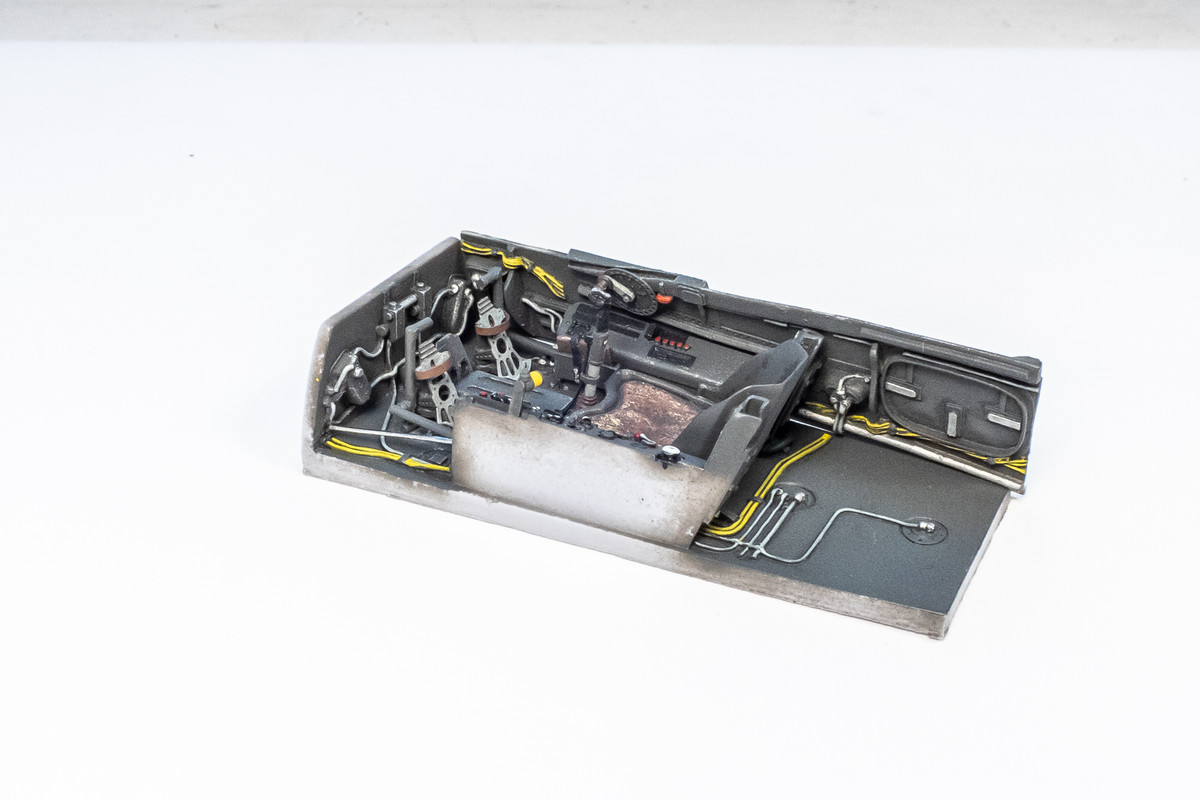
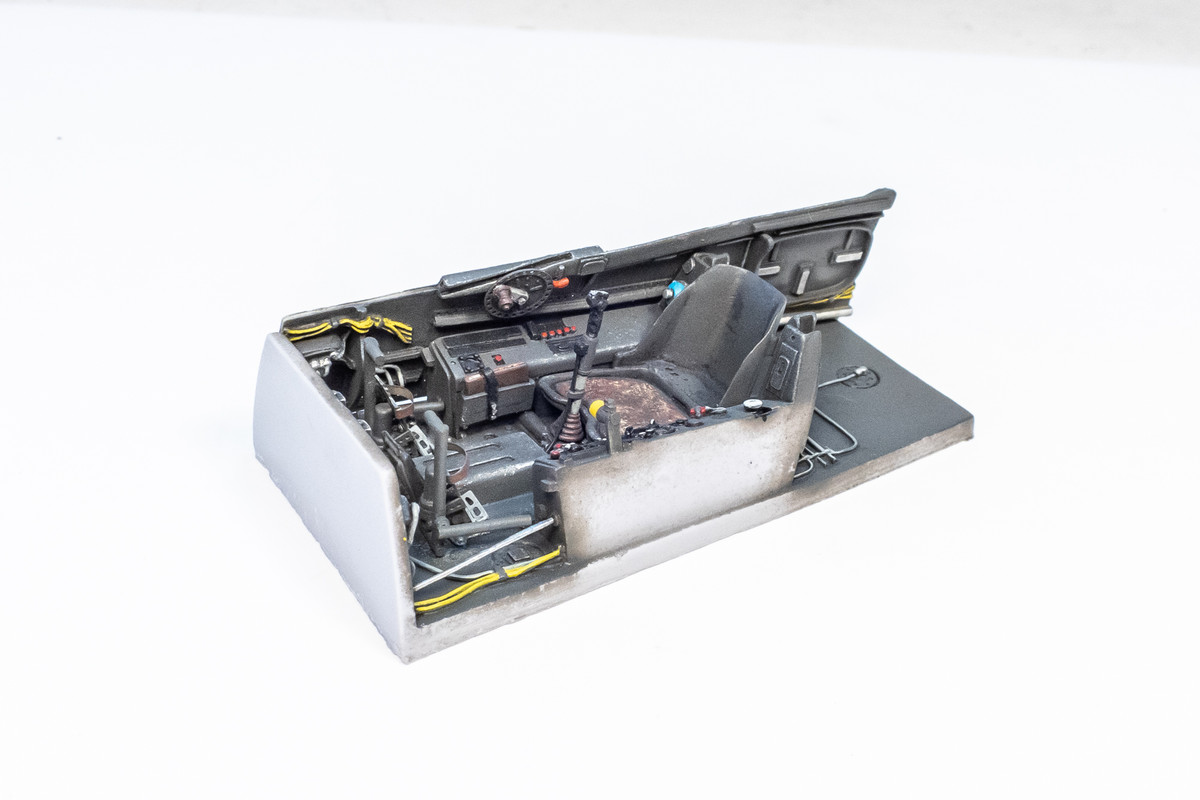
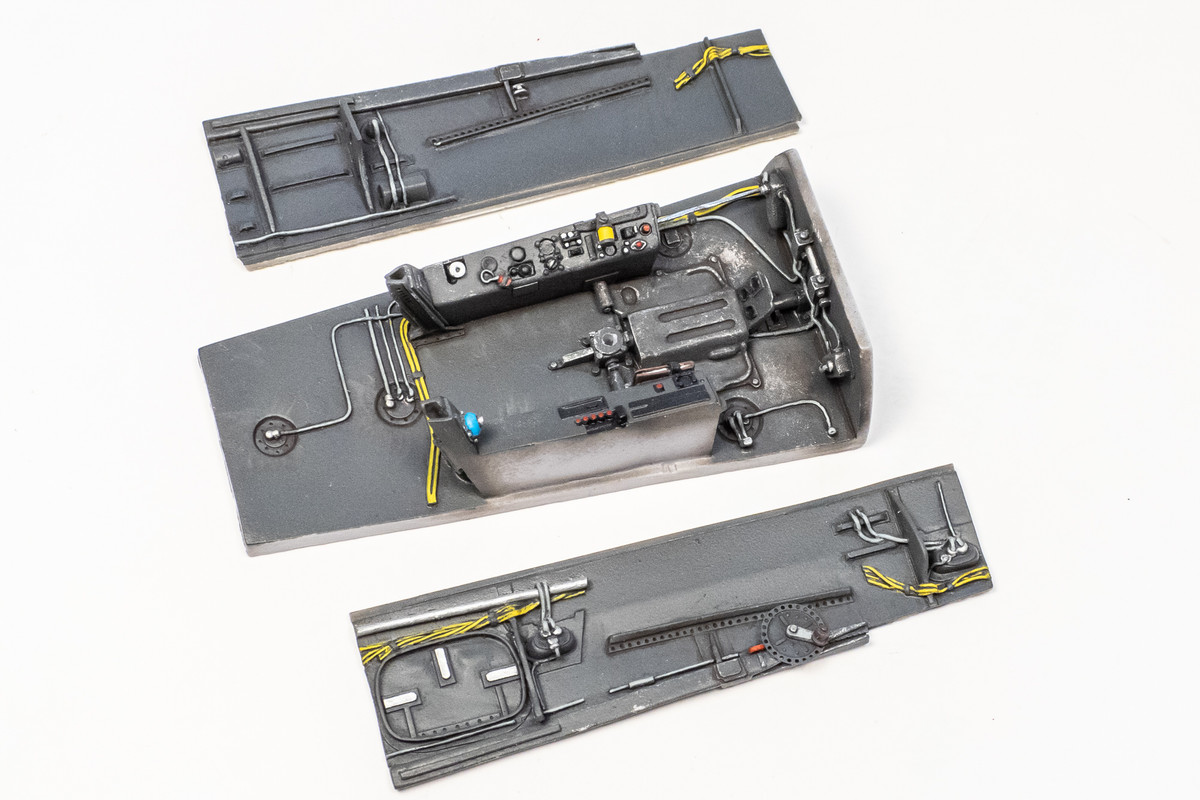
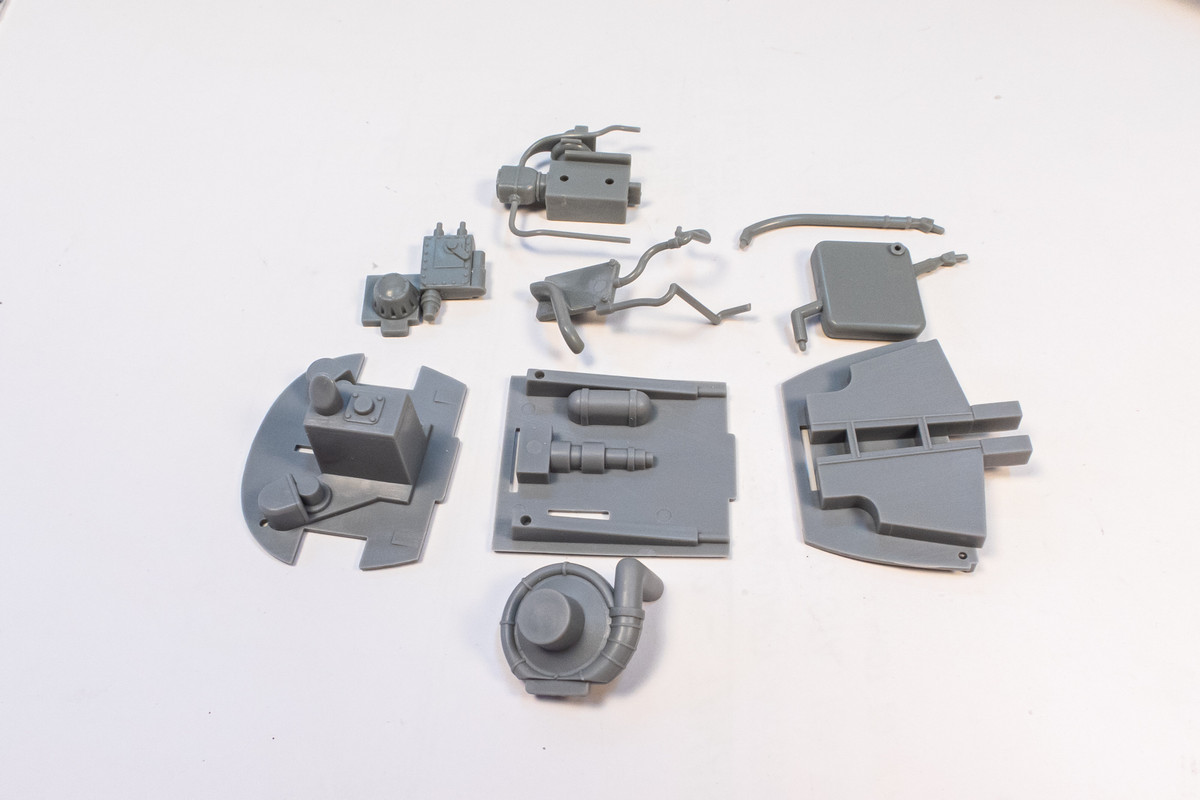
I can now start assembling the cockpit. The seat and control stick are glued into place using CA glue. I've added an oxygen tube per the directions on the Eagle Editions cockpit.
Image

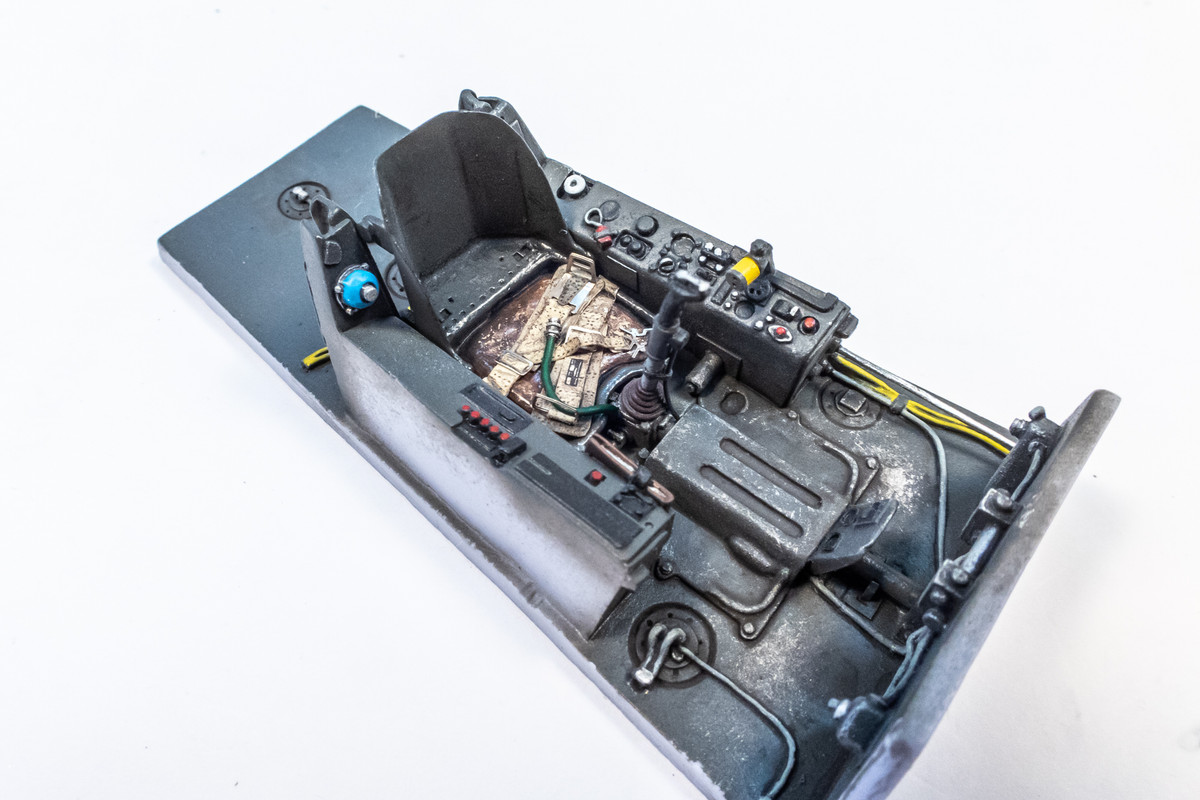
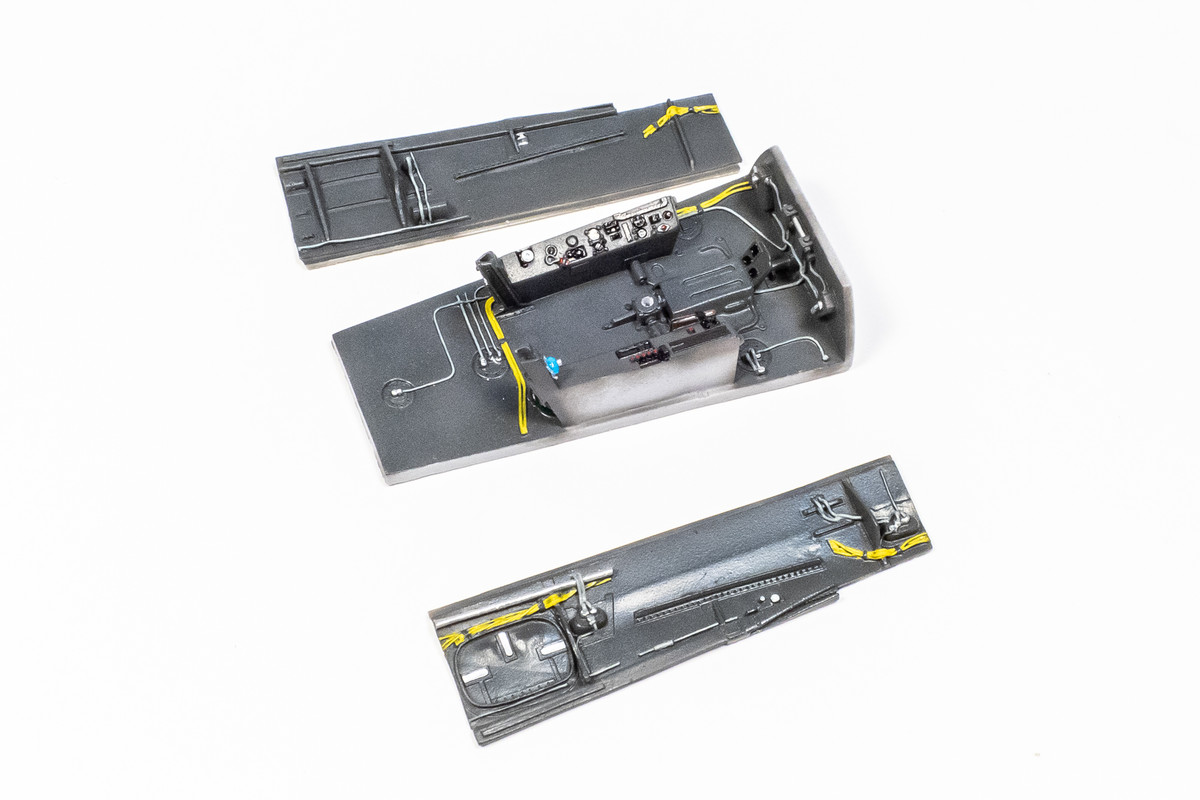
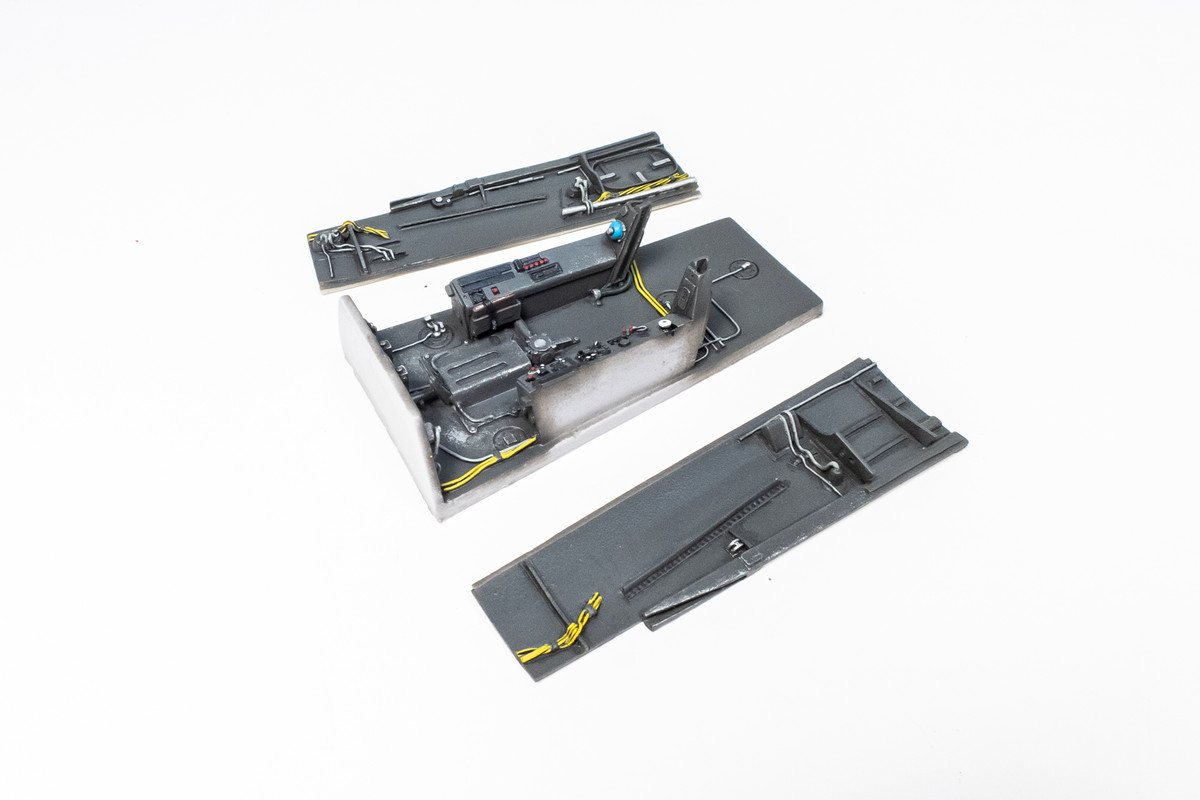
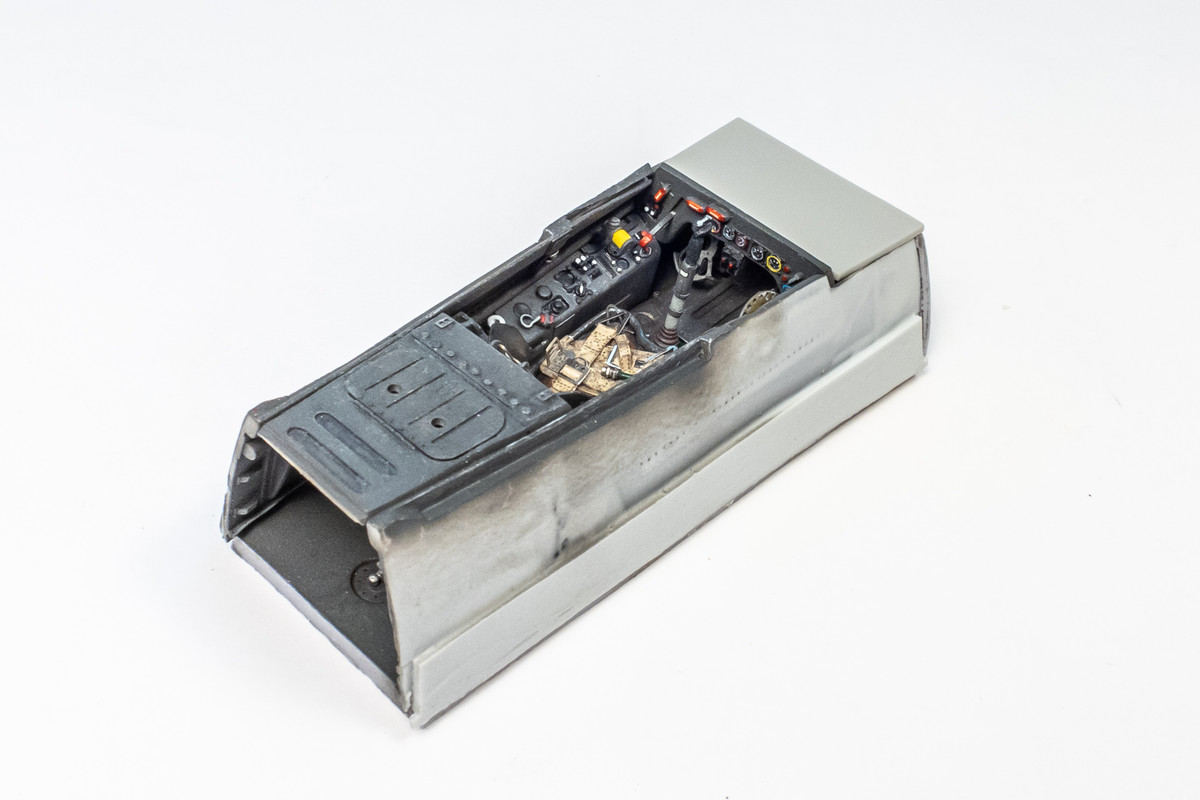
The sidewalls and rear cockpit sill are next to be glued into place, again using CA glue.
Image
Image

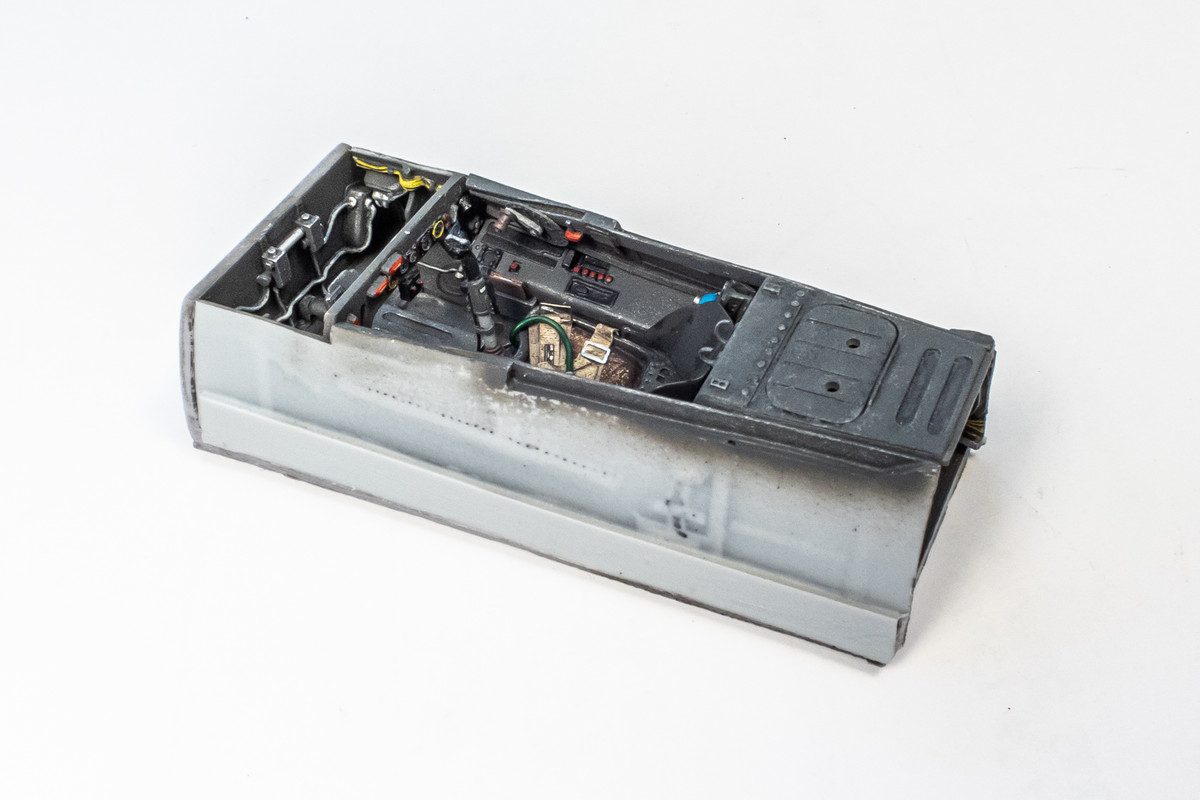
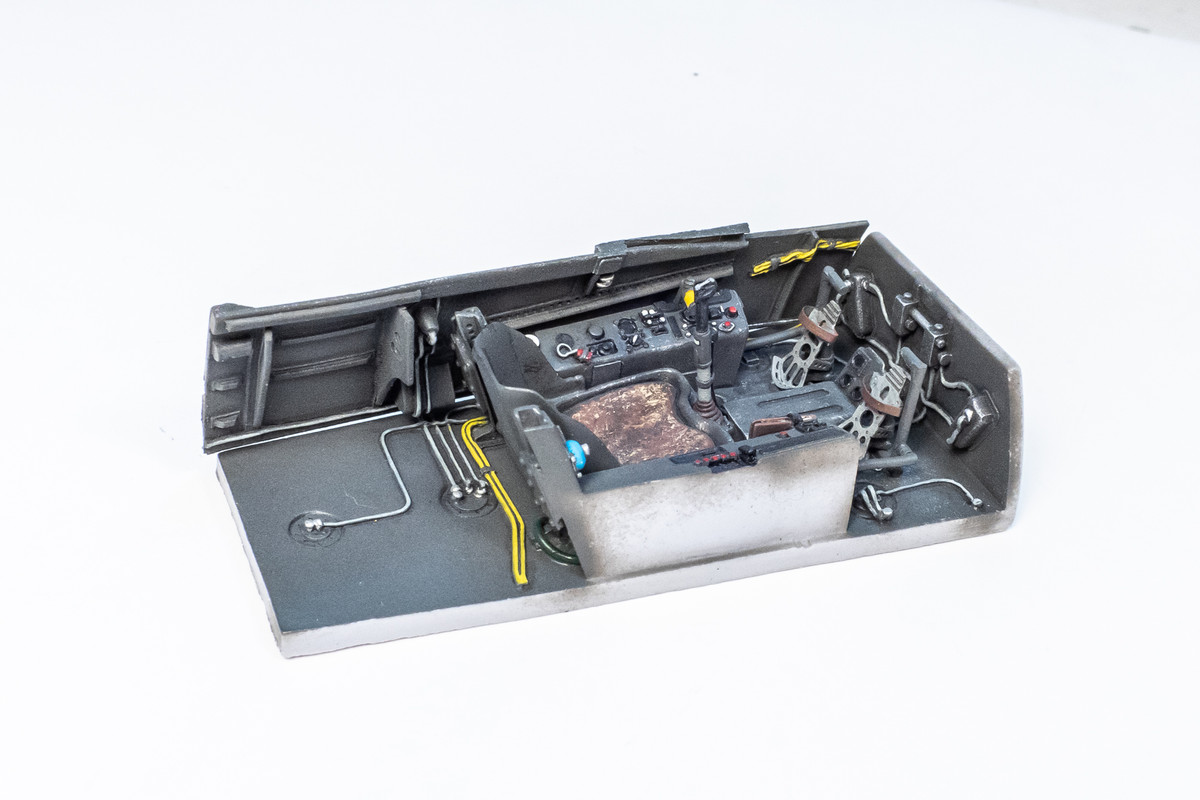
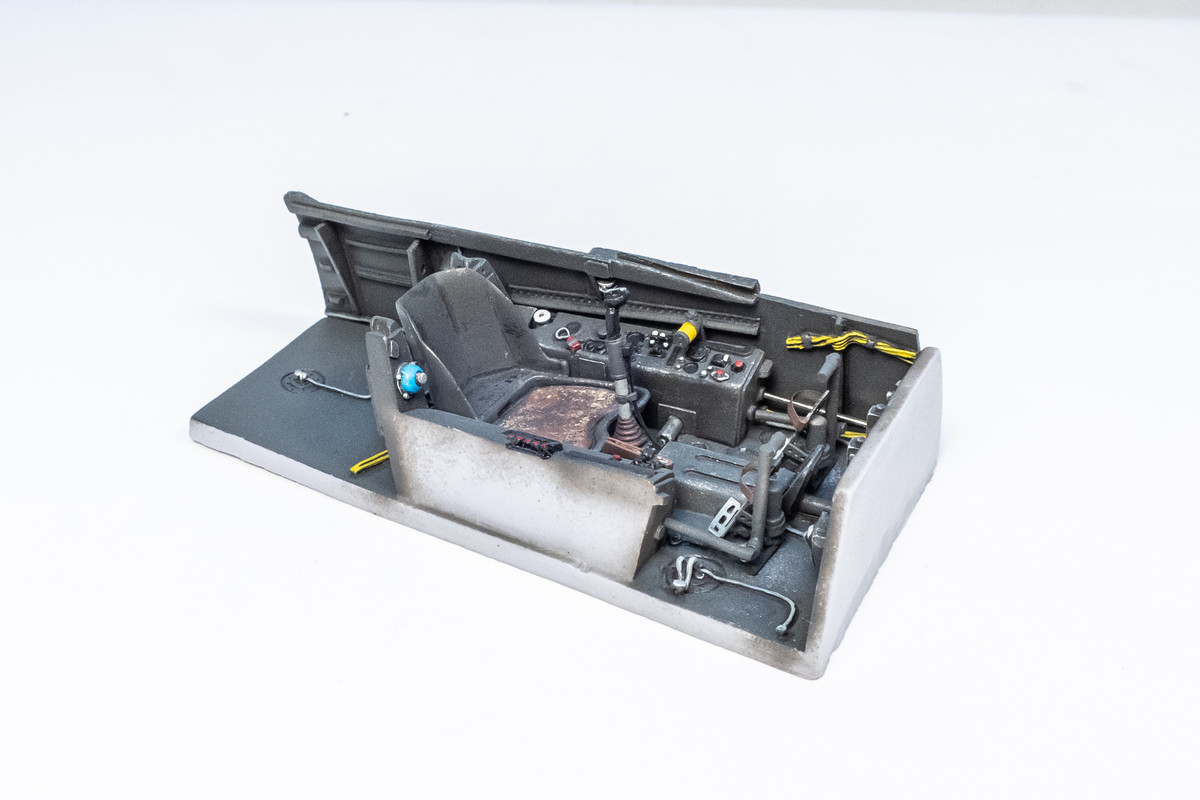
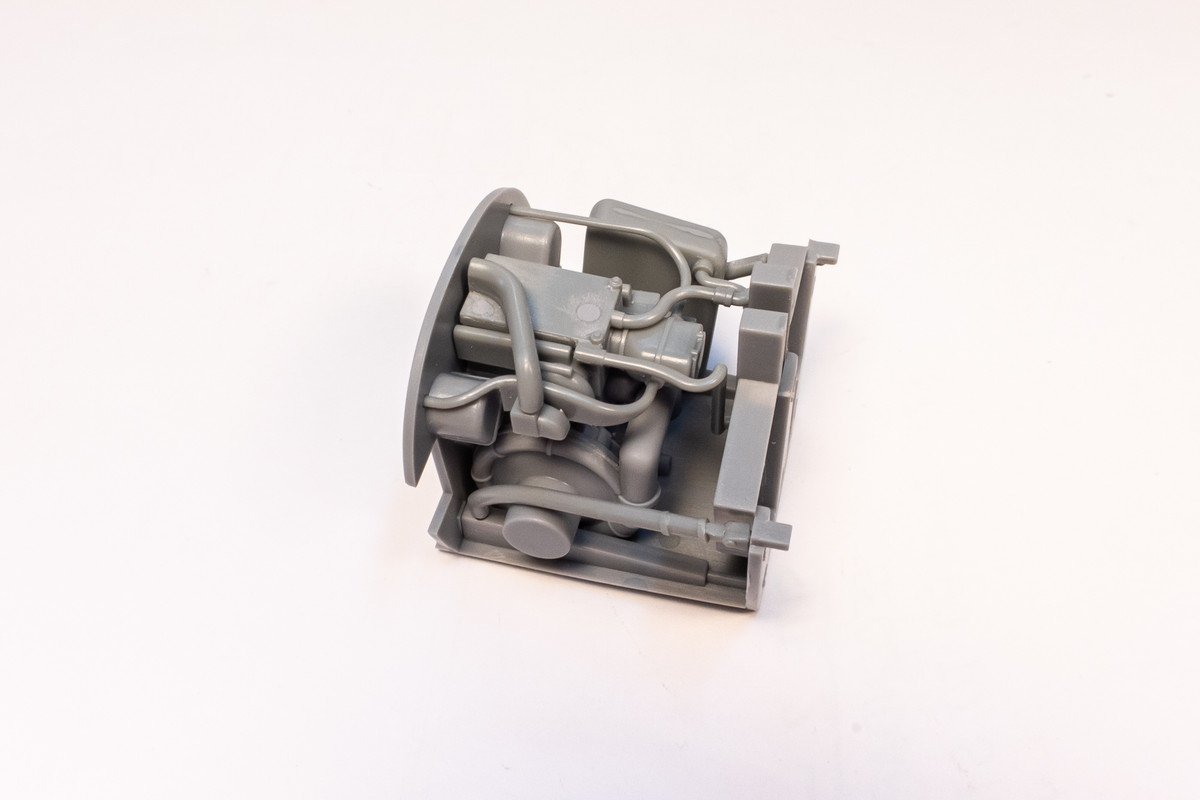
The foot pedals are glued into the roof, which is left completely unpainted because it will not be visible at all.
Image

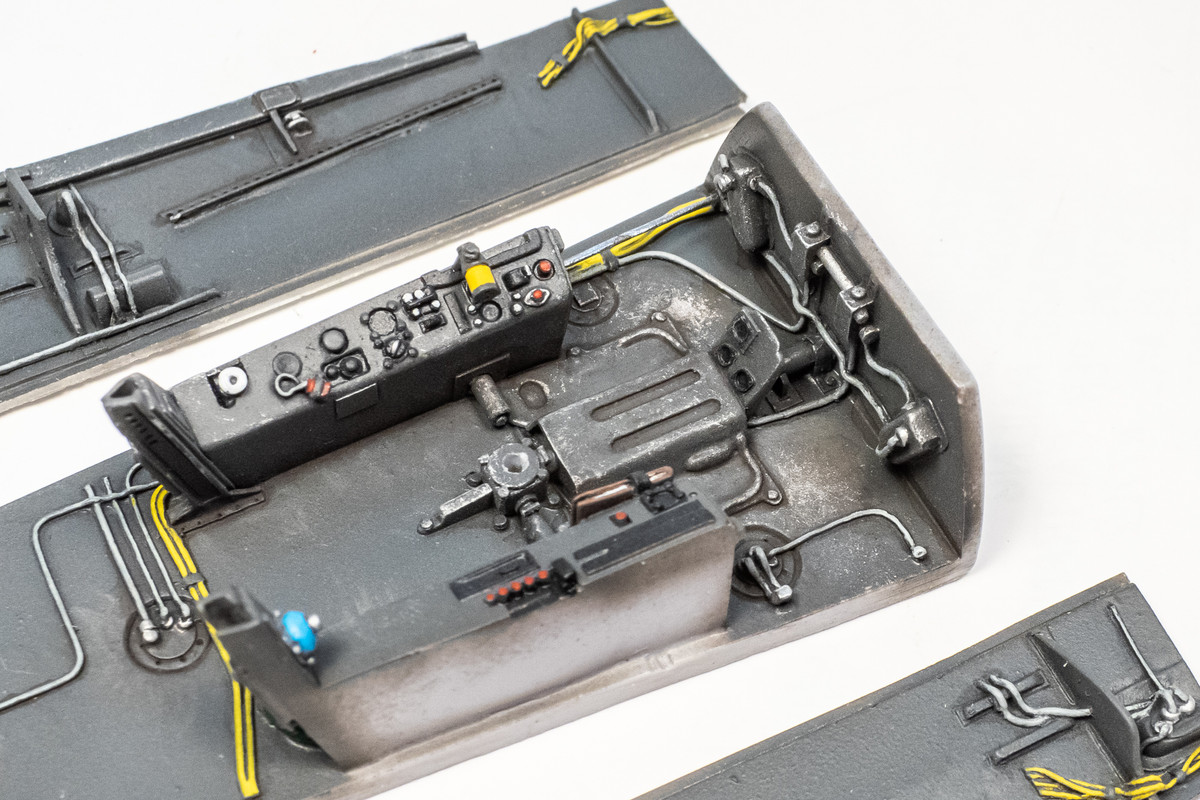
The roof holding the foot pedals cap off the cockpit tub. Remember all of the careful painting including the bright yellow electrical wiring? Most of it disappears after the boxing in of the cockpit.
Image
Image

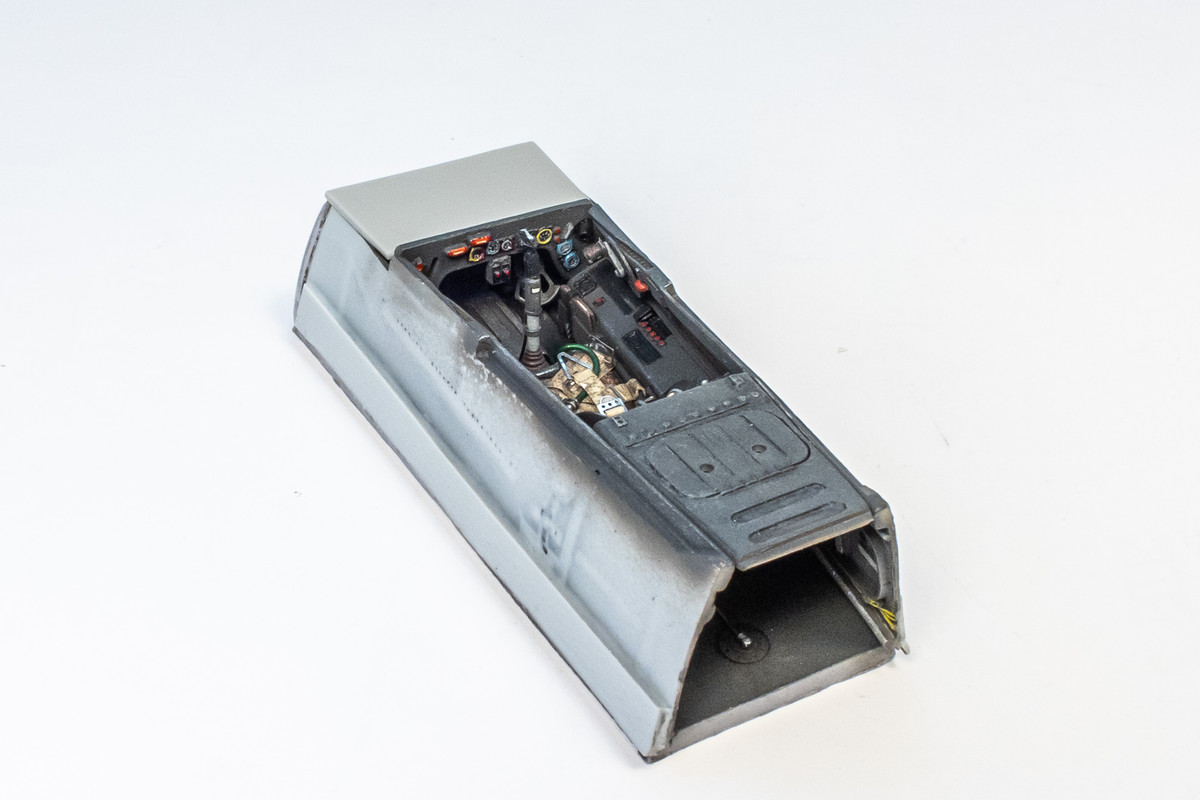
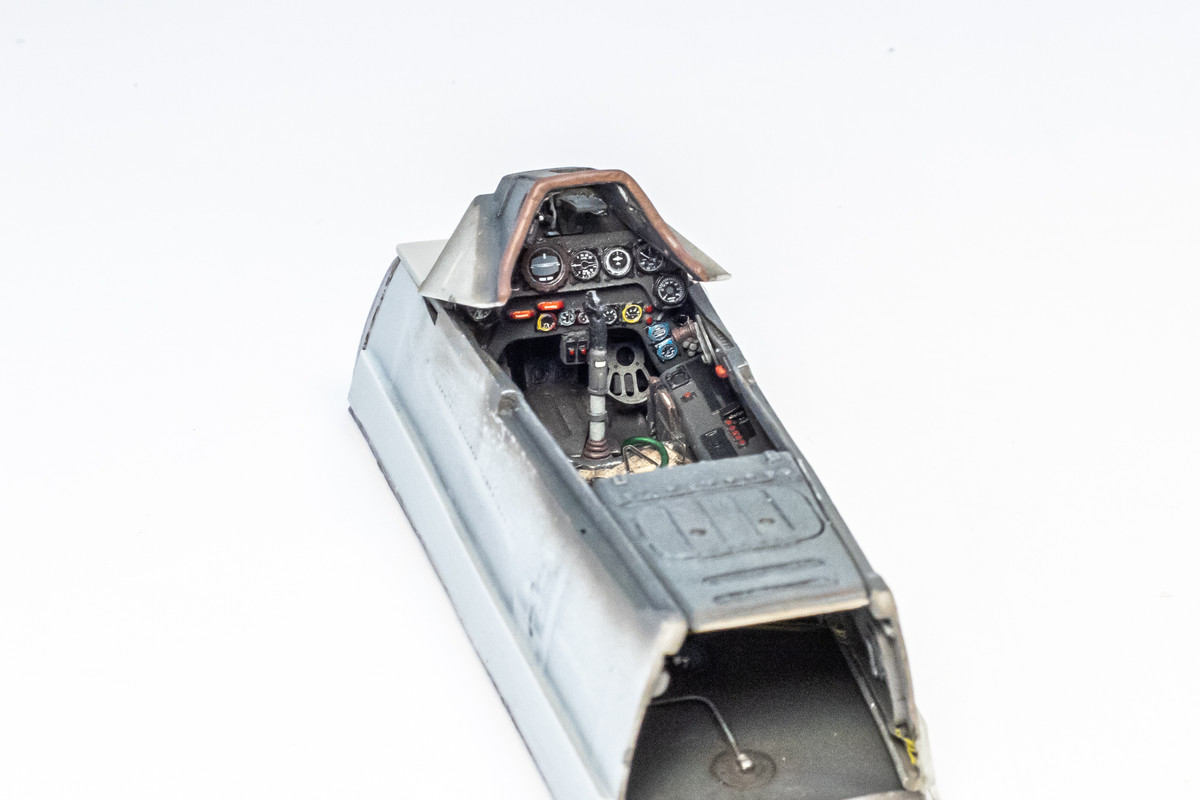
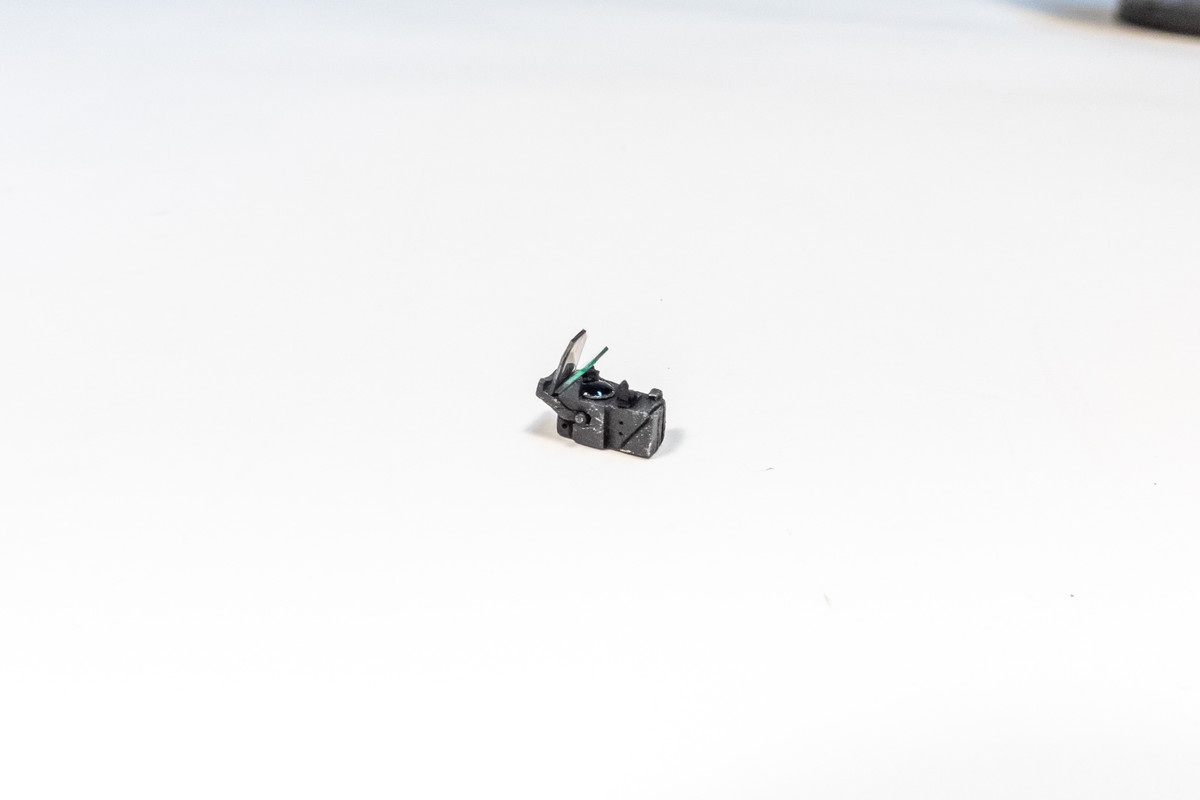
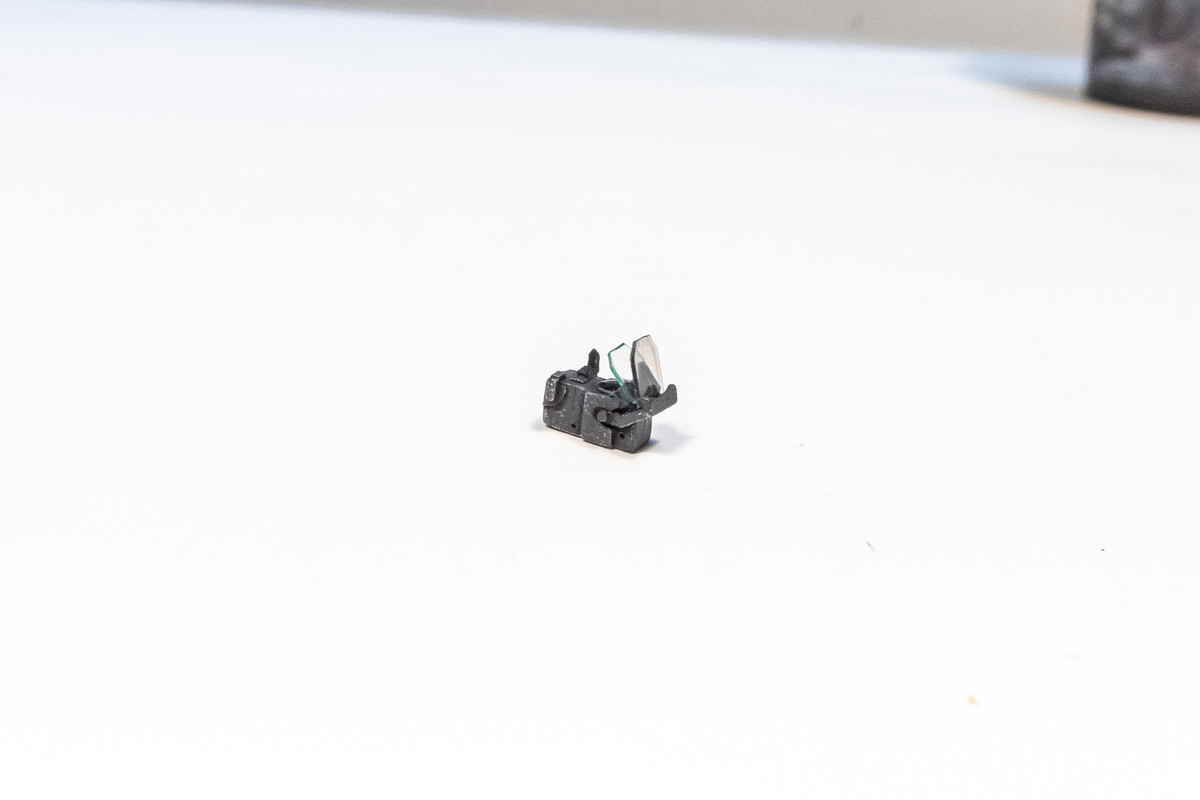
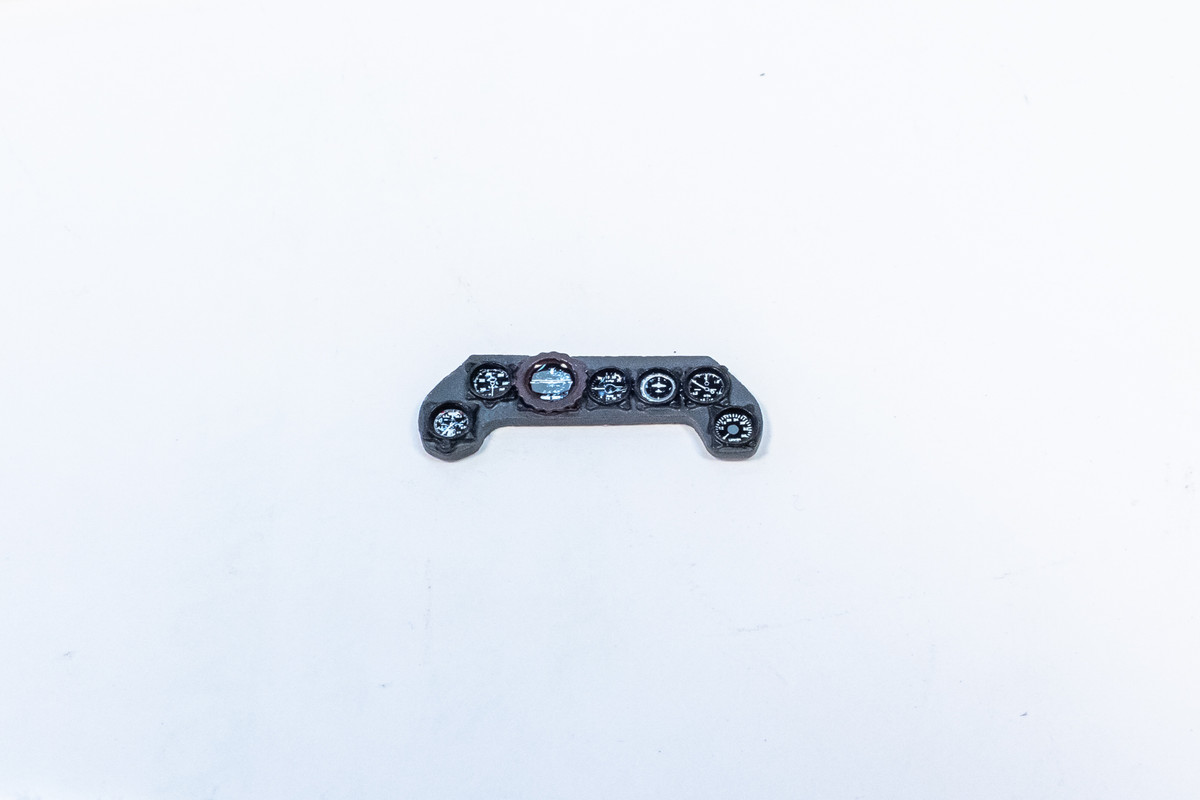
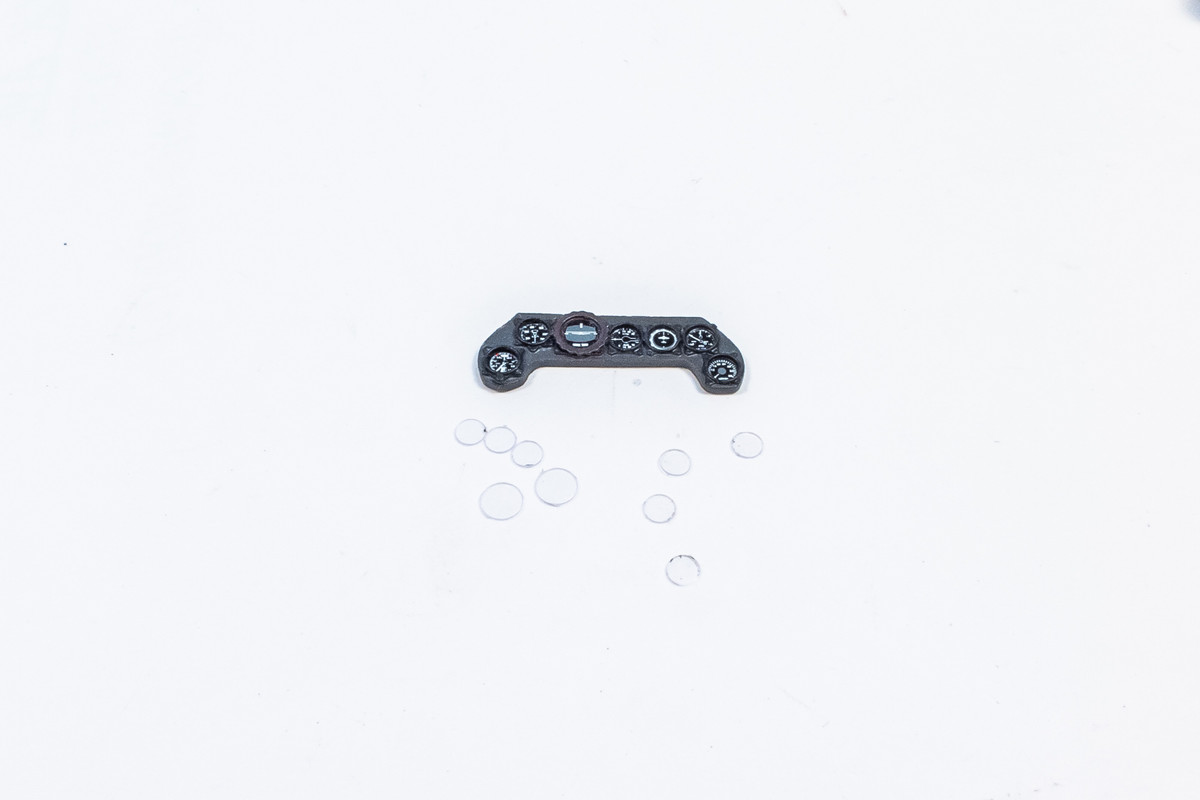
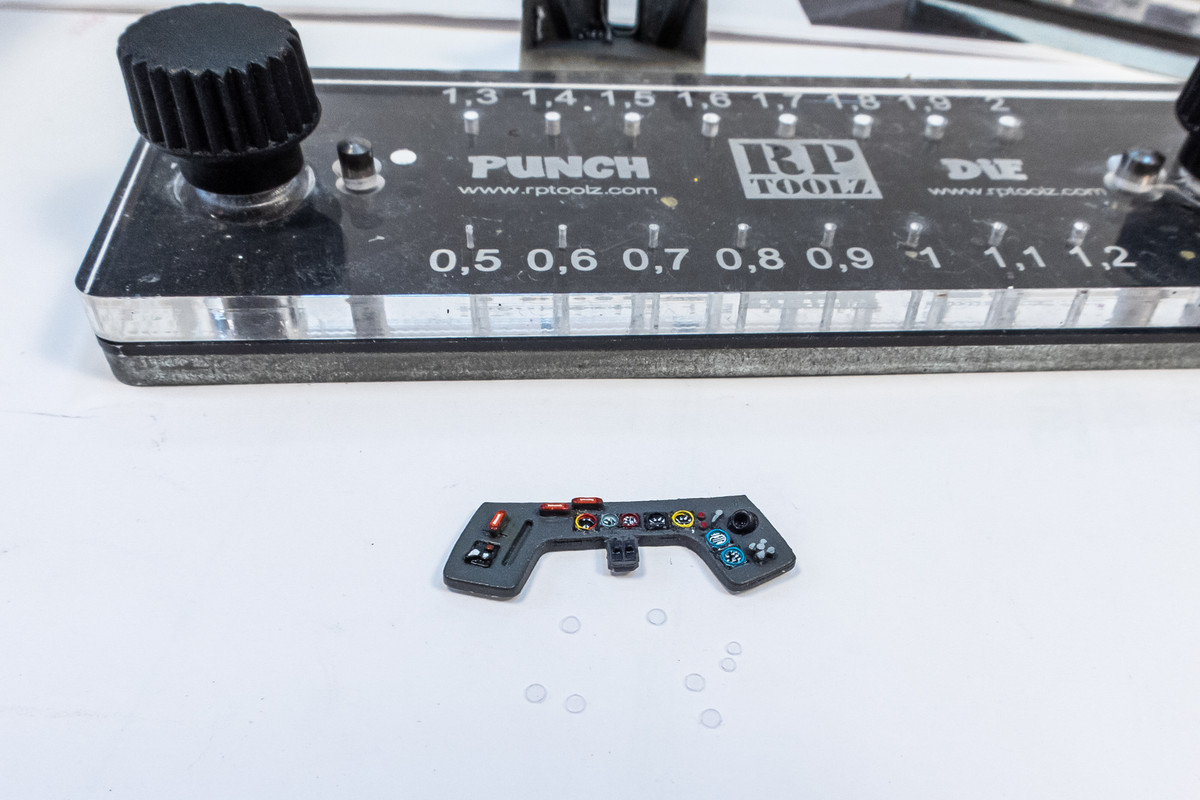
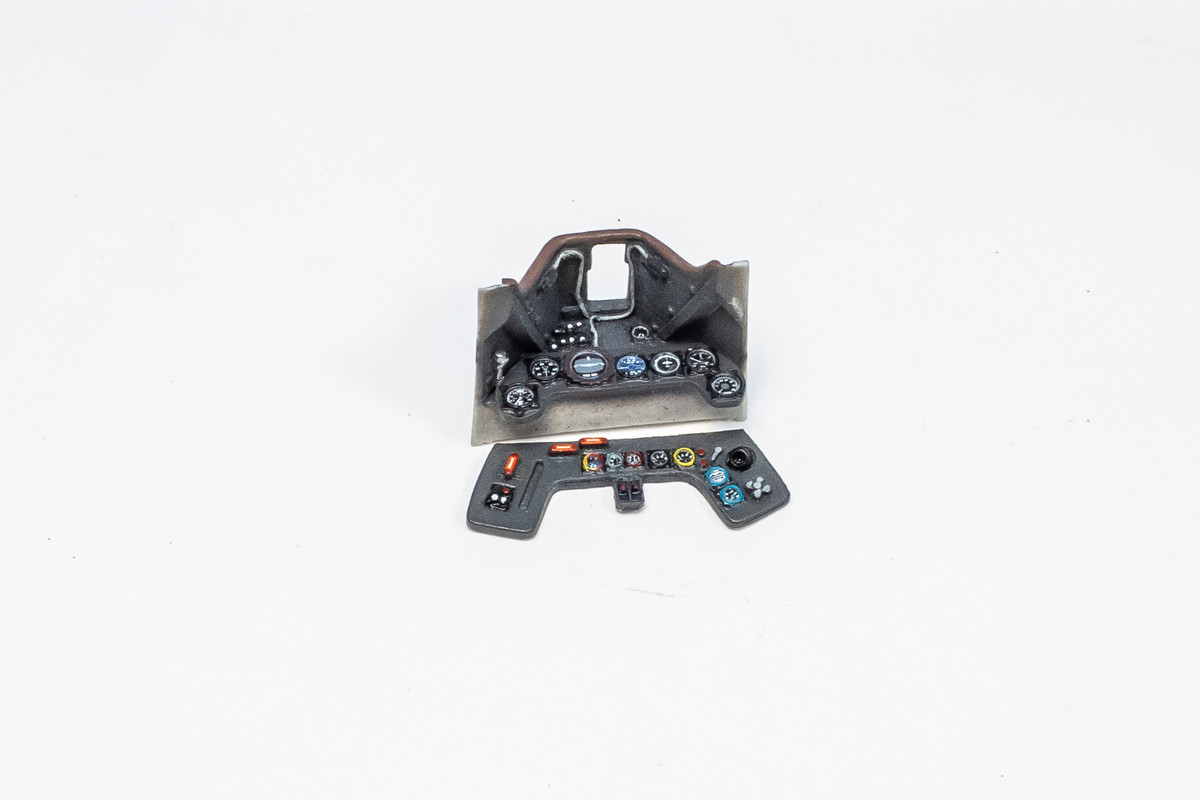
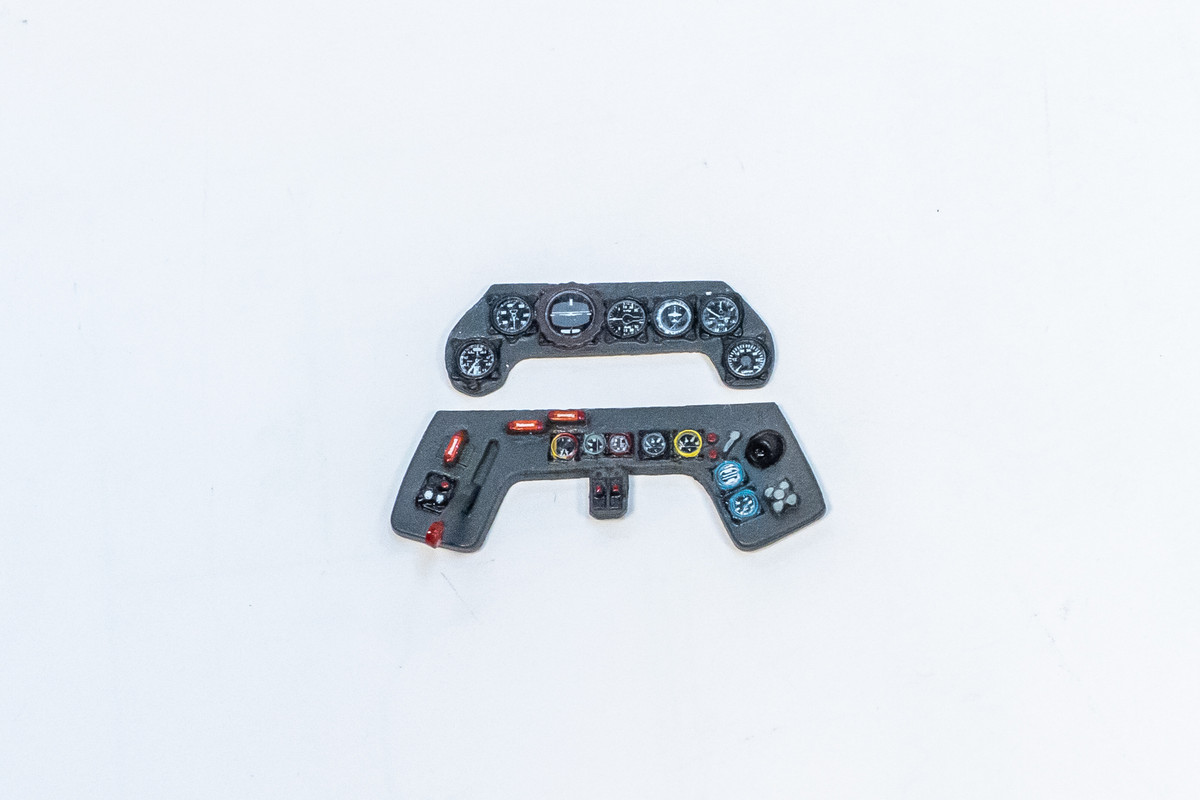
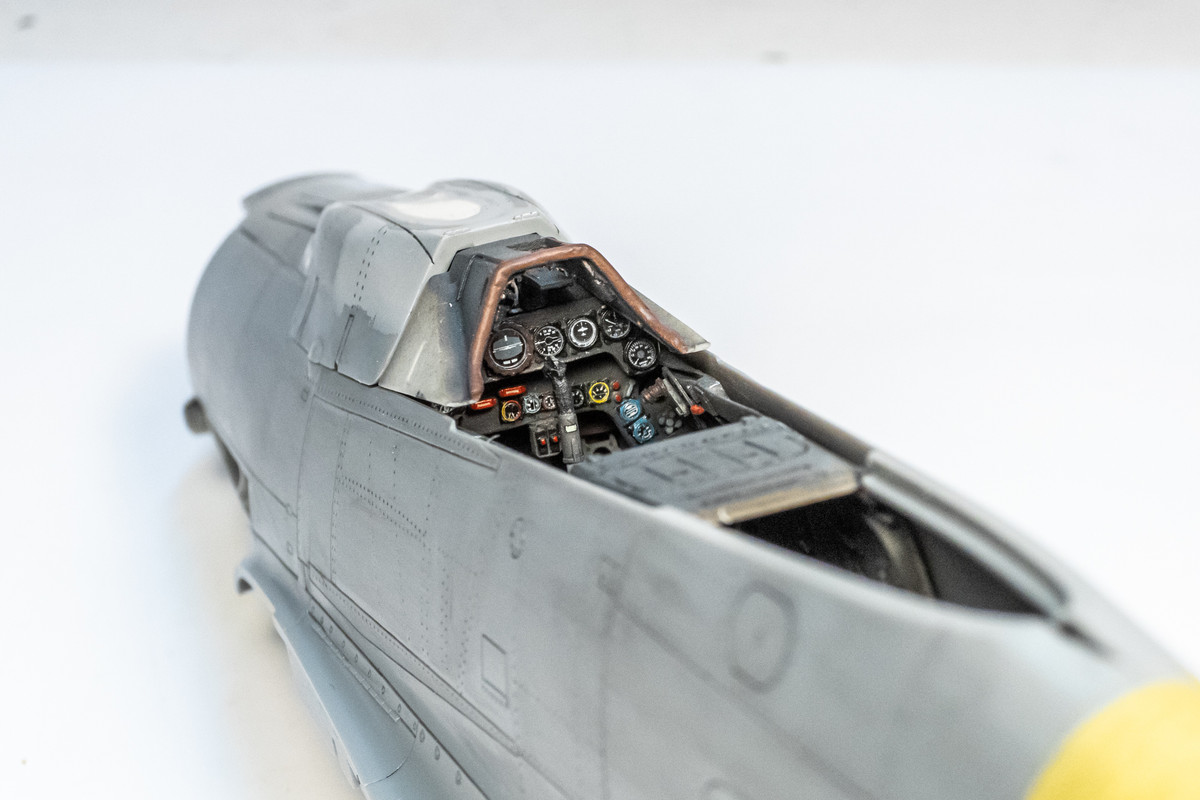
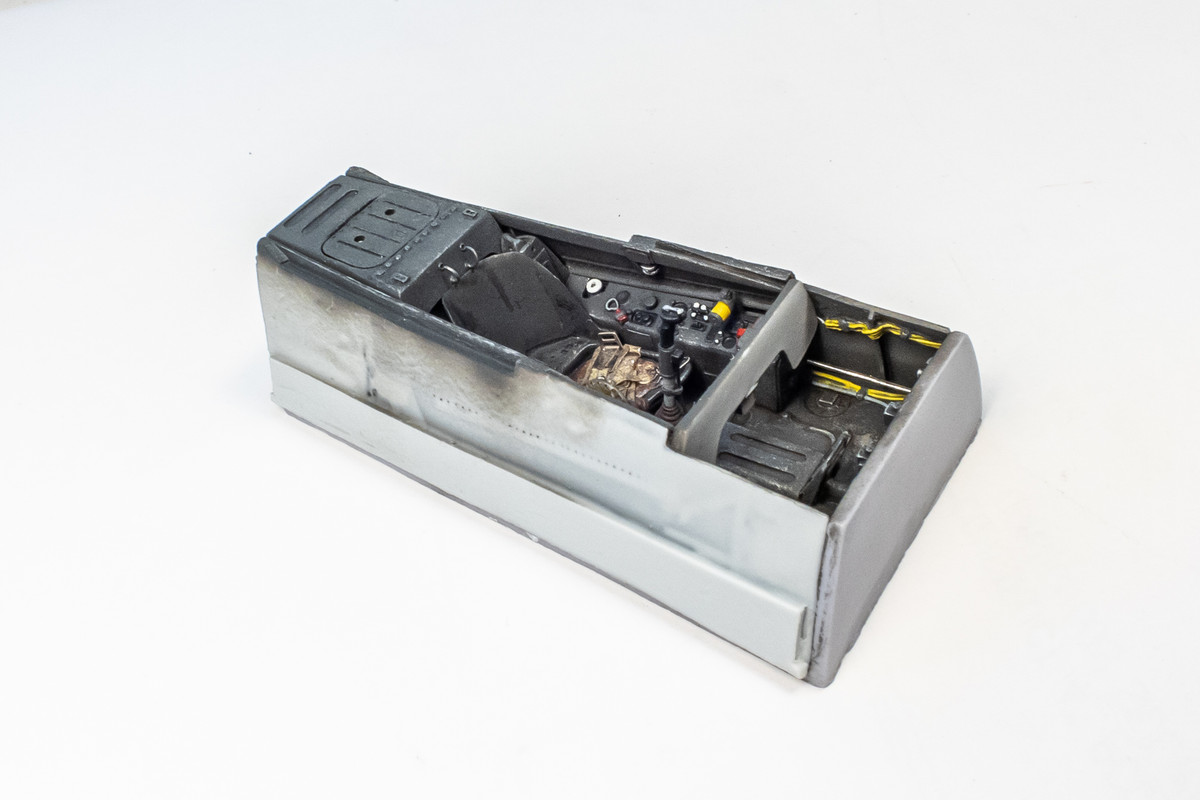
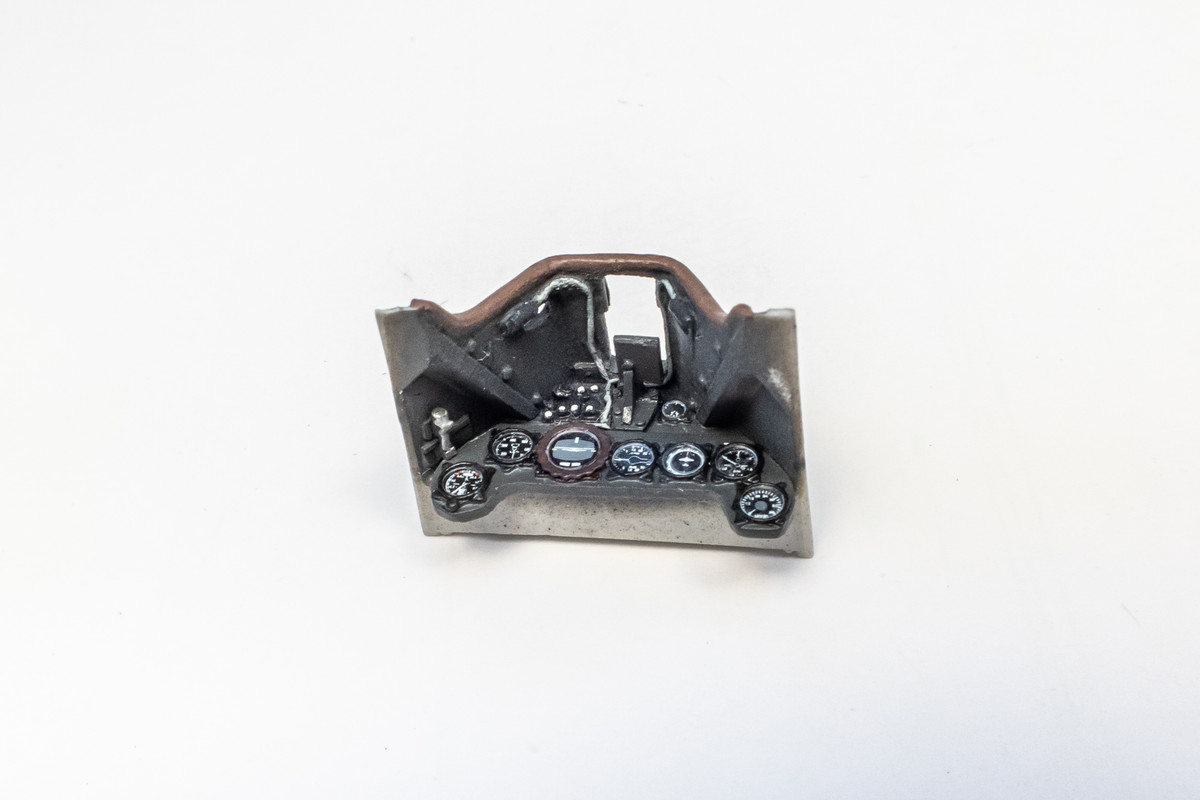
The main instrument panel is glued into the front cockpit hood, along with the shelf for the Revi 16B gun sight.
Image

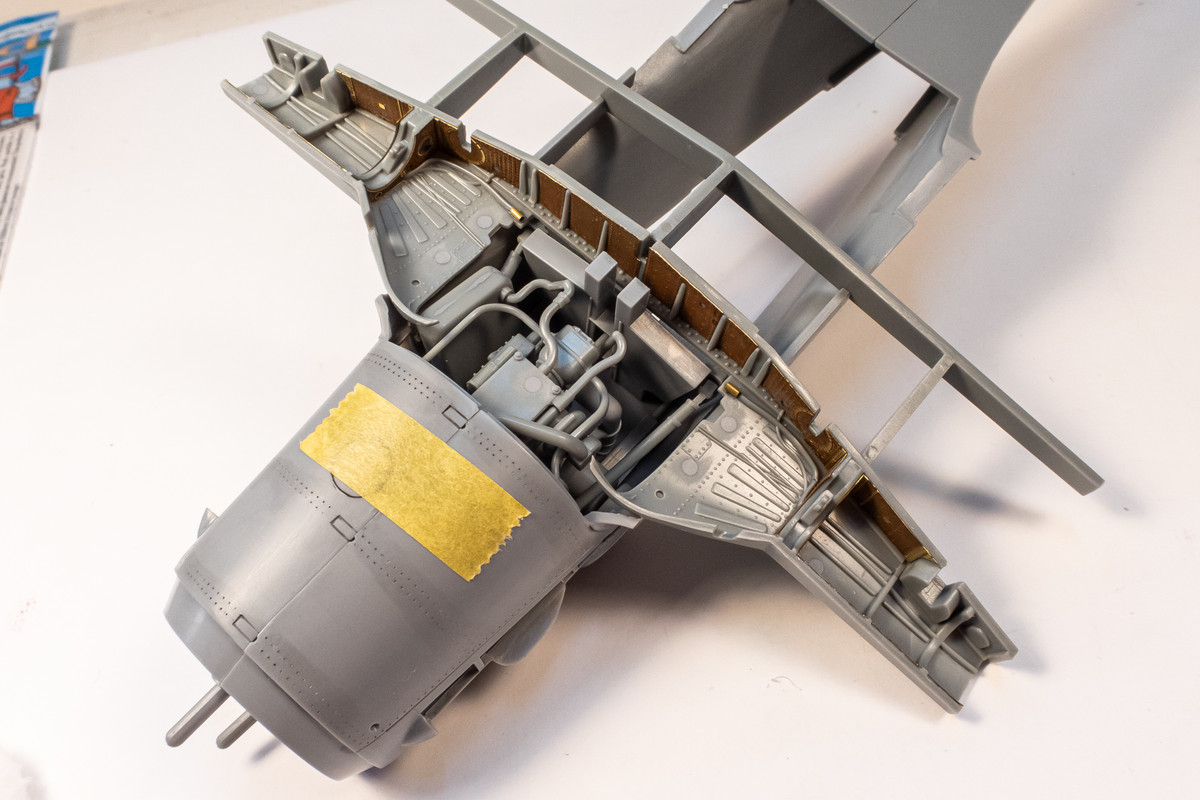
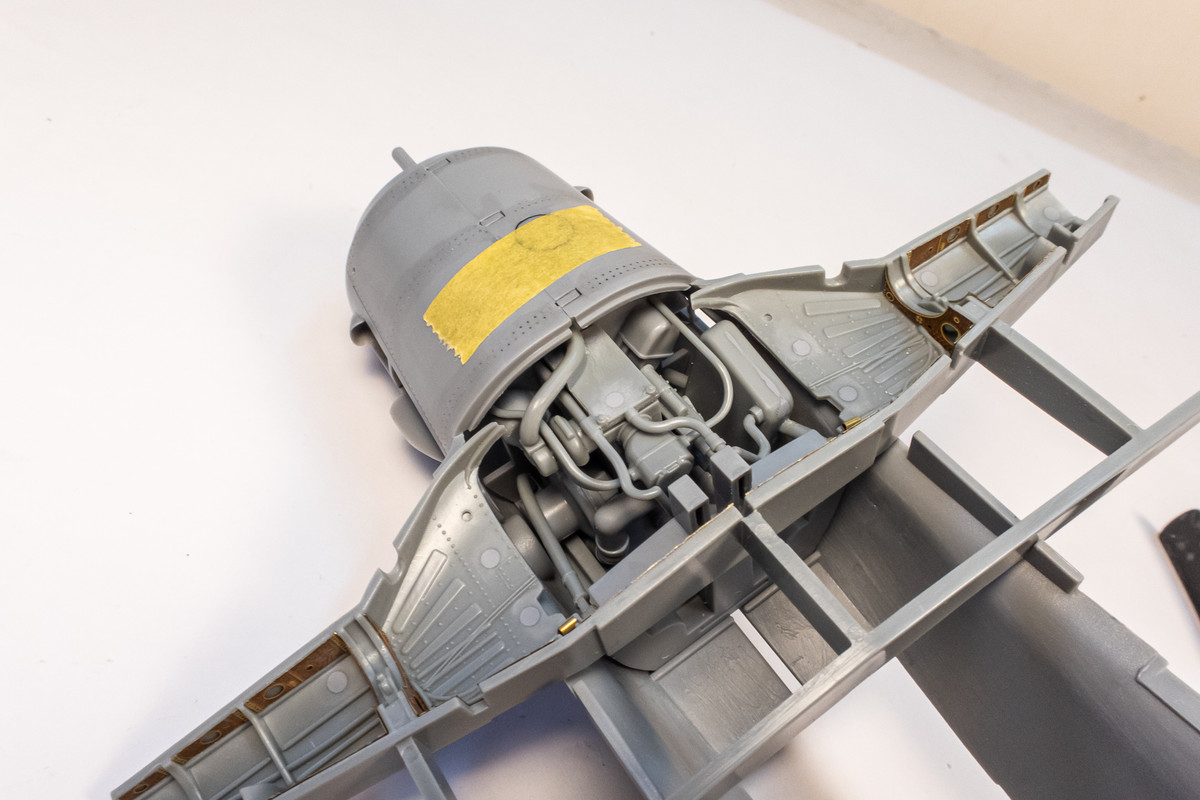
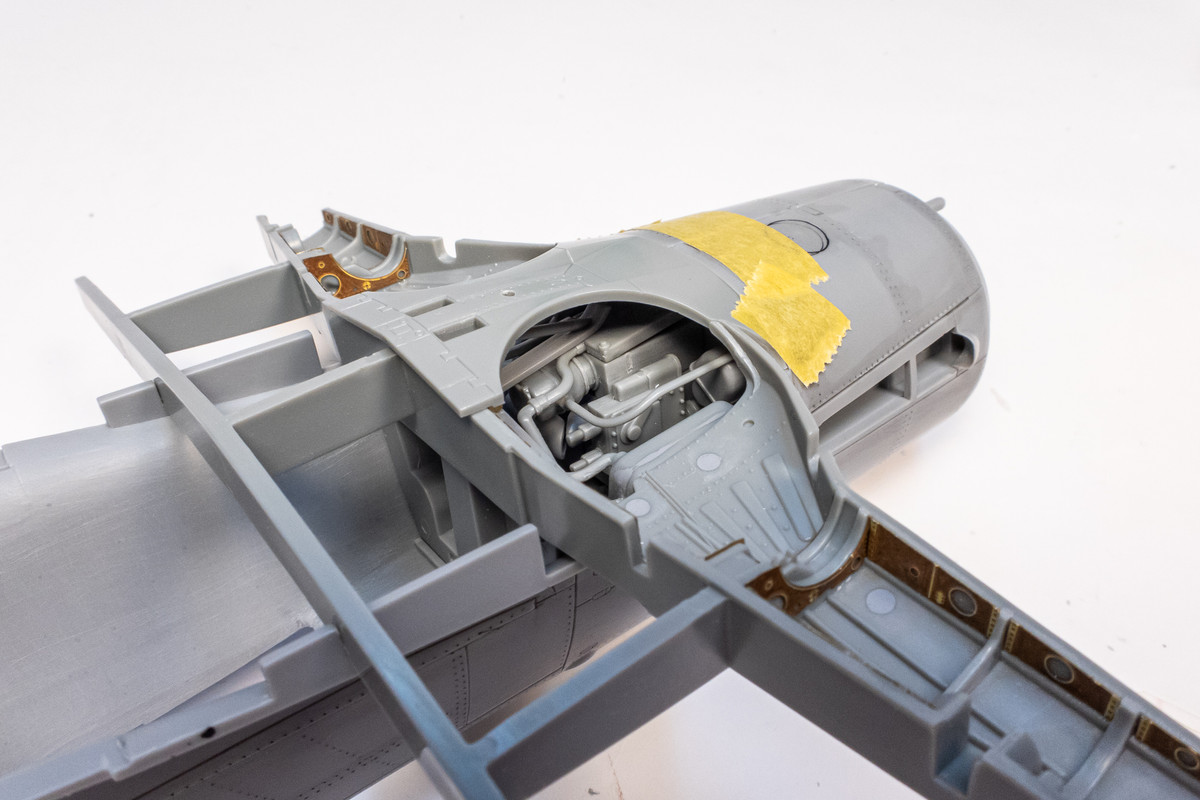
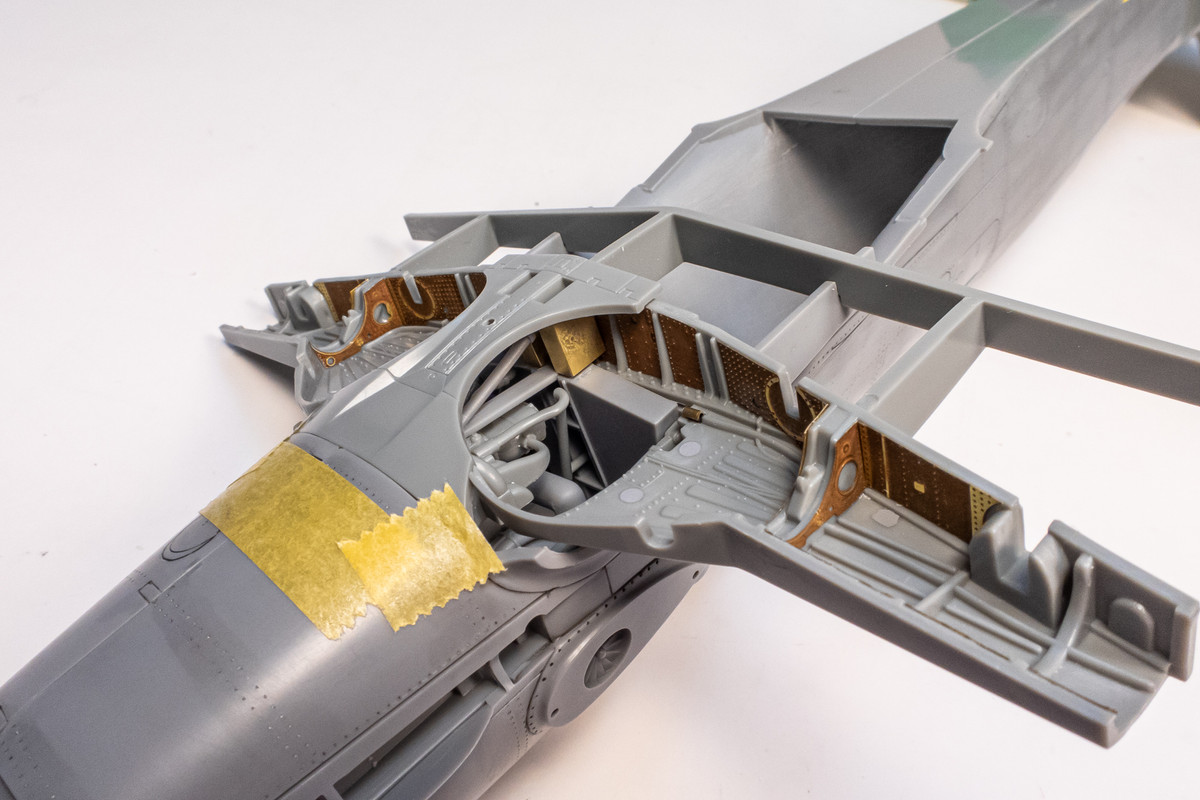
The cockpit stage is complete and we can verify the fit of the resin cockpit into the fuselage sides.
Image
Image
John aka JKim
-----------<><
Image
User avatar
tempestjohnny
Elite Member
Posts: 3335
Joined: Sat Oct 15, 2016 4:51 am
Location: Naples. FL

Re: Hasegawa 1/32 Fw 190D-9 Brown 4

Post by tempestjohnny »

Wow. :wow:
User avatar
Floki
Elite Member
Posts: 3548
Joined: Wed Dec 12, 2018 2:23 am
Location: Muncie, Indiana

Re: Hasegawa 1/32 Fw 190D-9 Brown 4

Post by Floki »

Great looking Belts! I bet they are a lot easier to work with in 1/32
March as one, Don't look back
Odin's sons... Attack!
Unleash hell! Do not repent! Warfare grants us no lament
Let your weapons slash and tear This is no place for fear
Hold the lines! Move as one! In unity our victory's won
Our shields will form a mighty wall
United we shall never fall
User avatar
jkim
Elite Member
Posts: 3923
Joined: Mon Apr 10, 2017 4:03 pm

Re: Hasegawa 1/32 Fw 190D-9 Brown 4

Post by jkim »

Thank you John and Clint! Yes, the HGW belts aren't too bad to deal with at 1/32 scale. I couldn't imagine trying to do them at 1/48!

Verifying that the completed resin cockpit fits into the fuselage without issues.
Image
Image
Image
John aka JKim
-----------<><
Image
User avatar
LyleW
Admin
Posts: 13635
Joined: Fri Dec 13, 2013 7:25 am
Location: Mt. Washington KY

Re: Hasegawa 1/32 Fw 190D-9 Brown 4

Post by LyleW »

Lovely work!
To make each build less crappy than the last one. Or, put another way, "Better than the last one, not as good as the next one!"..
User avatar
jkim
Elite Member
Posts: 3923
Joined: Mon Apr 10, 2017 4:03 pm

Re: Hasegawa 1/32 Fw 190D-9 Brown 4

Post by jkim »

Thank you Lyle!

There are three things that get installed within the fuselage: the cockpit, the rear of the engine and the tail wheel. The cockpit is done so I'll be moving to the engine.

Unlike the Fw190A, the Dora had an open wheel well that allowed part of the Jumo 213 engine to be visible. Hasegawa provides a partial representation of the engine.
Image

Assembled, it provides a reasonable representation of the bottom rear of the engine including some ducts and also the ammo cannisters for the MG131 cannon mounted above the engine.
Image

I am going to add some more wiring in this area. Not going for accuracy here but I want to make it more believably busy, if that makes sense.
Image
Image

Notice that the chutes coming out of the ammo cannisters have solid ends. The Eduard exterior set that I have includes brass replacements for the chutes.
Image
Image

In order to make use of these hollow chutes, the openings on the bottom of the wings need to be opened up first.
Image
Image

The plastic chutes are cut off and the replacement brass chutes are glued into the interior side of the wing bottom piece.
Image

Before the next round of dry-fitting, I glued the backings for the exhausts into place.
Image

Here is what the engine area looks like with the brass ammo chutes added.
Image
Image
Image
John aka JKim
-----------<><
Image
Post Reply

Return to “Aircraft Work in Progress”