Ok wise guy, I have all the rear fuselage seam clean up done now and everything is prepped for some serious progress on my days off after Thanksgiving.Fermis wrote:
Revell 1/32 F-4G Review & Build- update 12/13 (pg.19)
-
Stikpusher

- Moderator
- Posts: 18869
- Joined: Sat Apr 05, 2014 8:37 pm
- Location: Ceti Alpha 5
Re: Revell 1/32 F-4G Review & Build- update 11/21 (pg.16)
"Surely I have made my meaning plain? I intend to avenge myself upon you, Admiral. I have deprived your ship of power, and when I swing 'round, I intend to deprive you of your life."
FLSM
FLSM
-
Stikpusher
- Moderator
- Posts: 18869
- Joined: Sat Apr 05, 2014 8:37 pm
- Location: Ceti Alpha 5
Re: Revell 1/32 F-4G Review & Build- update 11/21 (pg.16)
Lots of little progress photos from this weekend so far
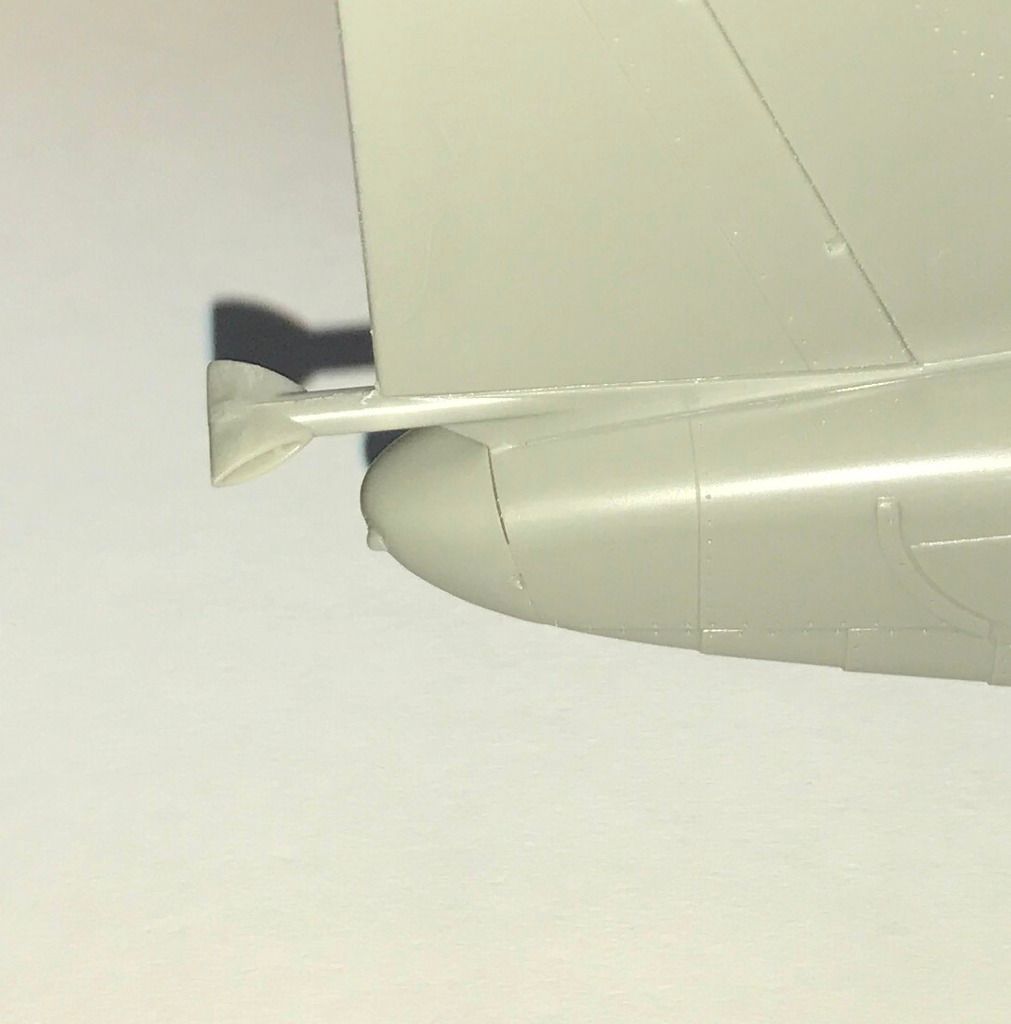
I added a new thinner splitter plate to the intake at the base of the tail using simple strip styrene
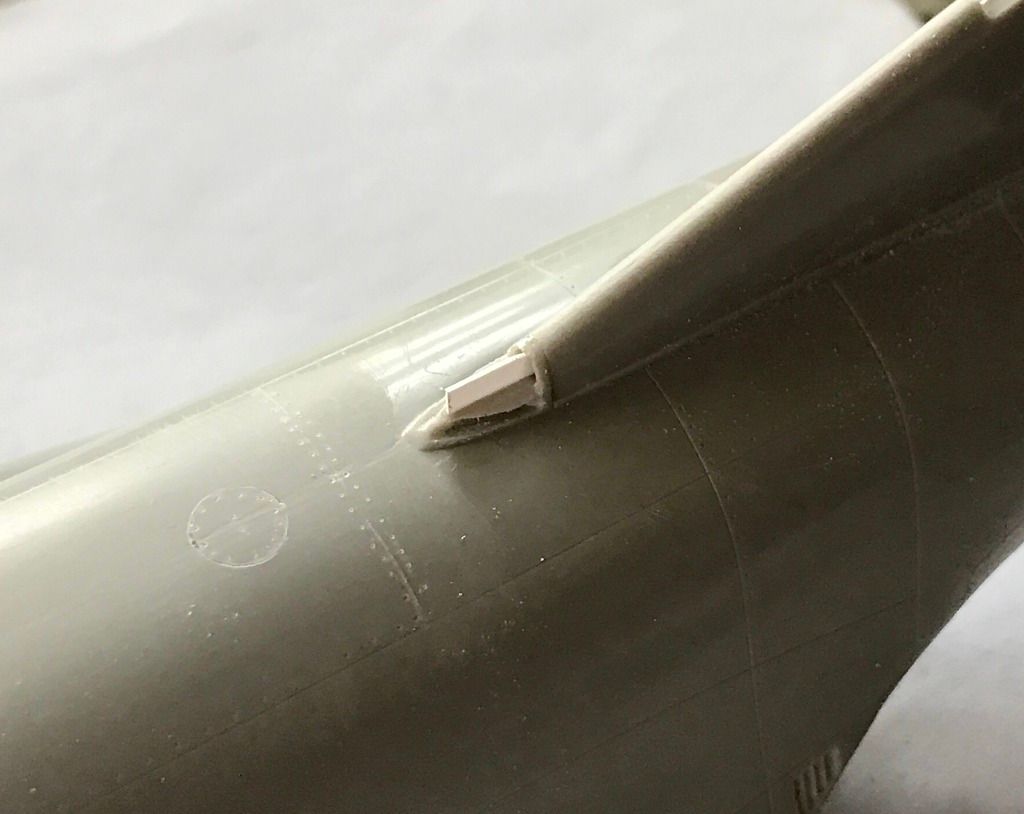

then after it had dried overnite I cut and sanded it to shape
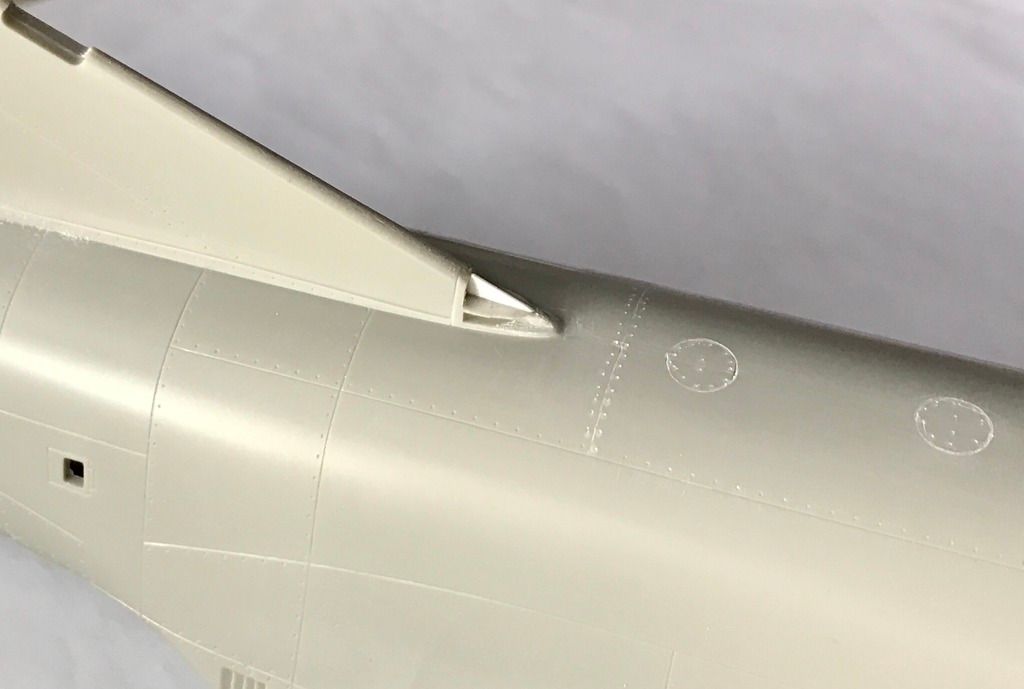
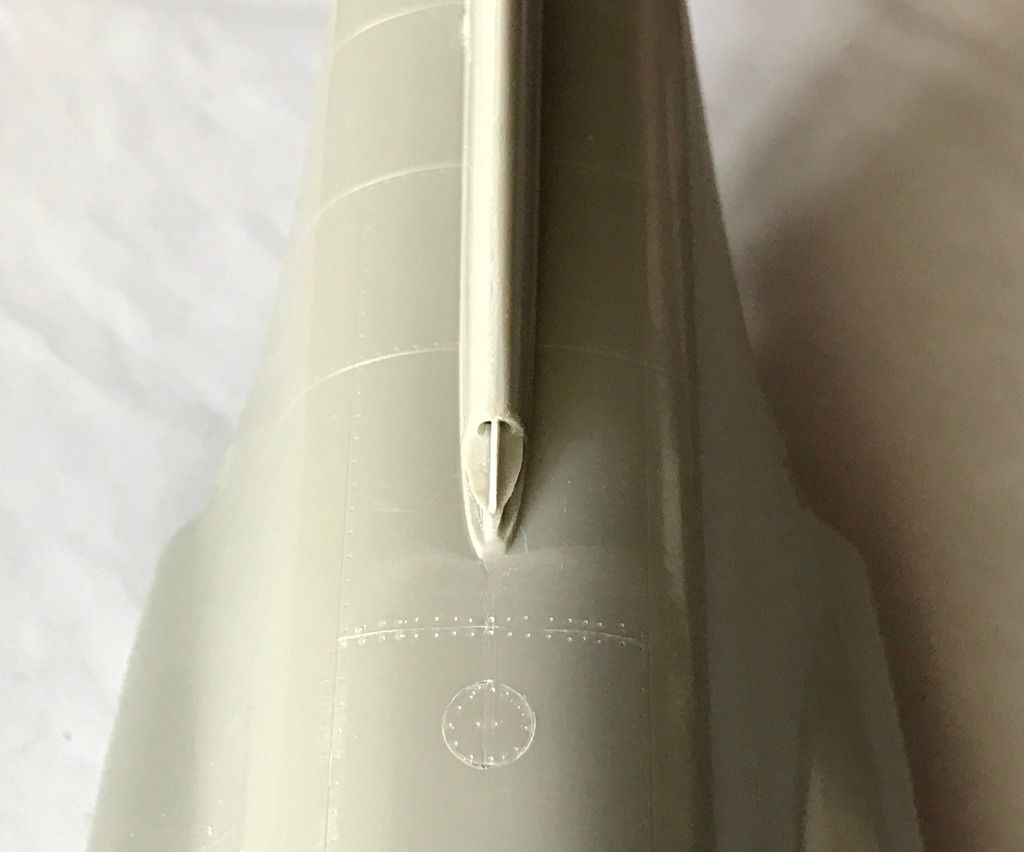
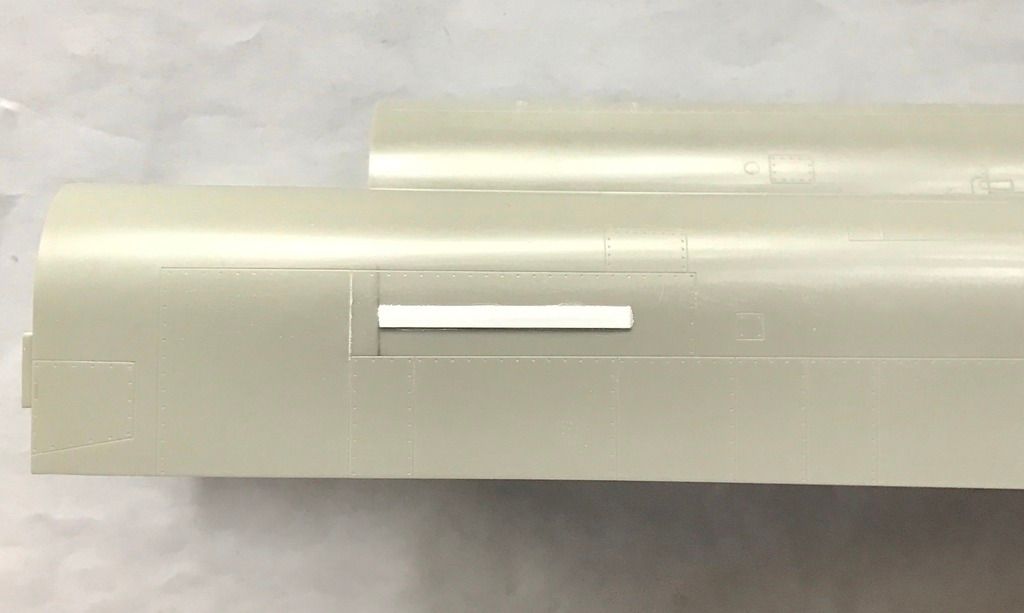
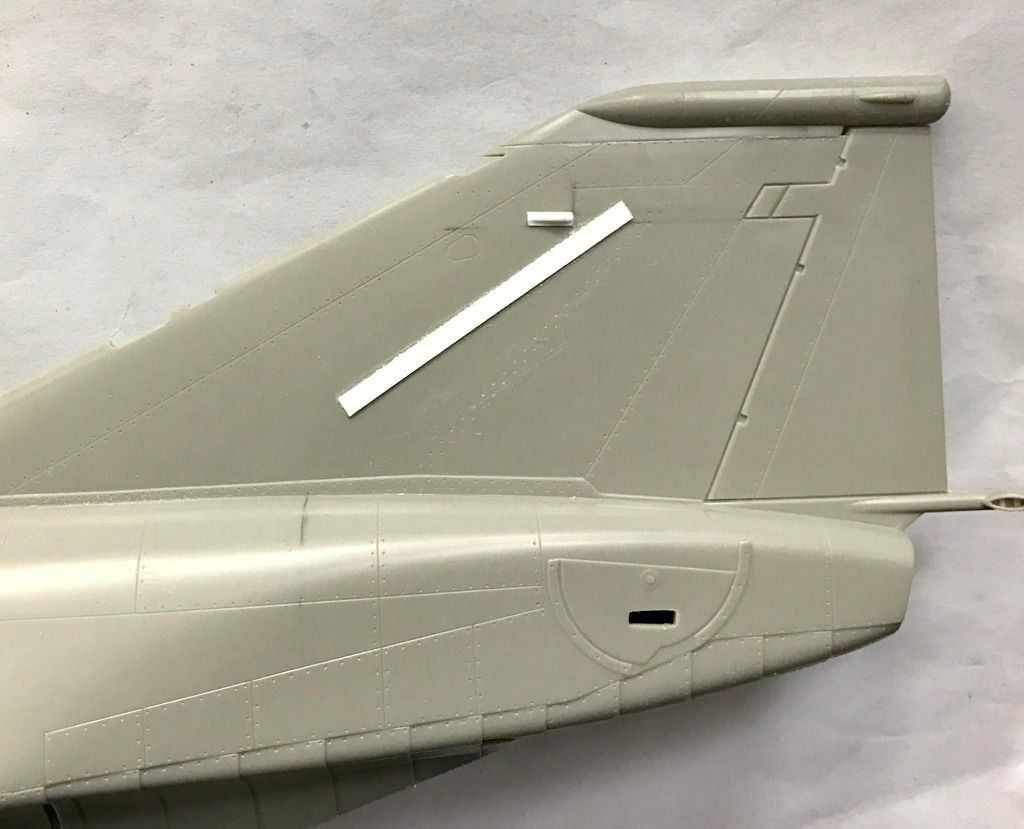
then a little more simple strip styrene work- adding the "slime lights". On the real aircraft they stand up raised from the aircraft skin, so this was super easy to put on. I just had to cut them to length to match the decals for the lights
nose
fuselage
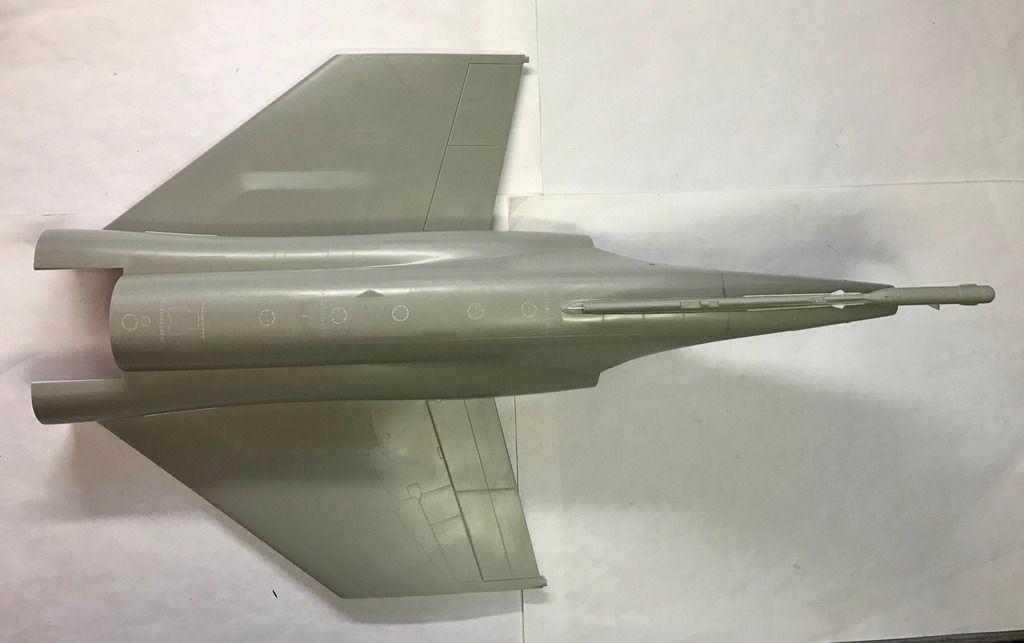
and tail
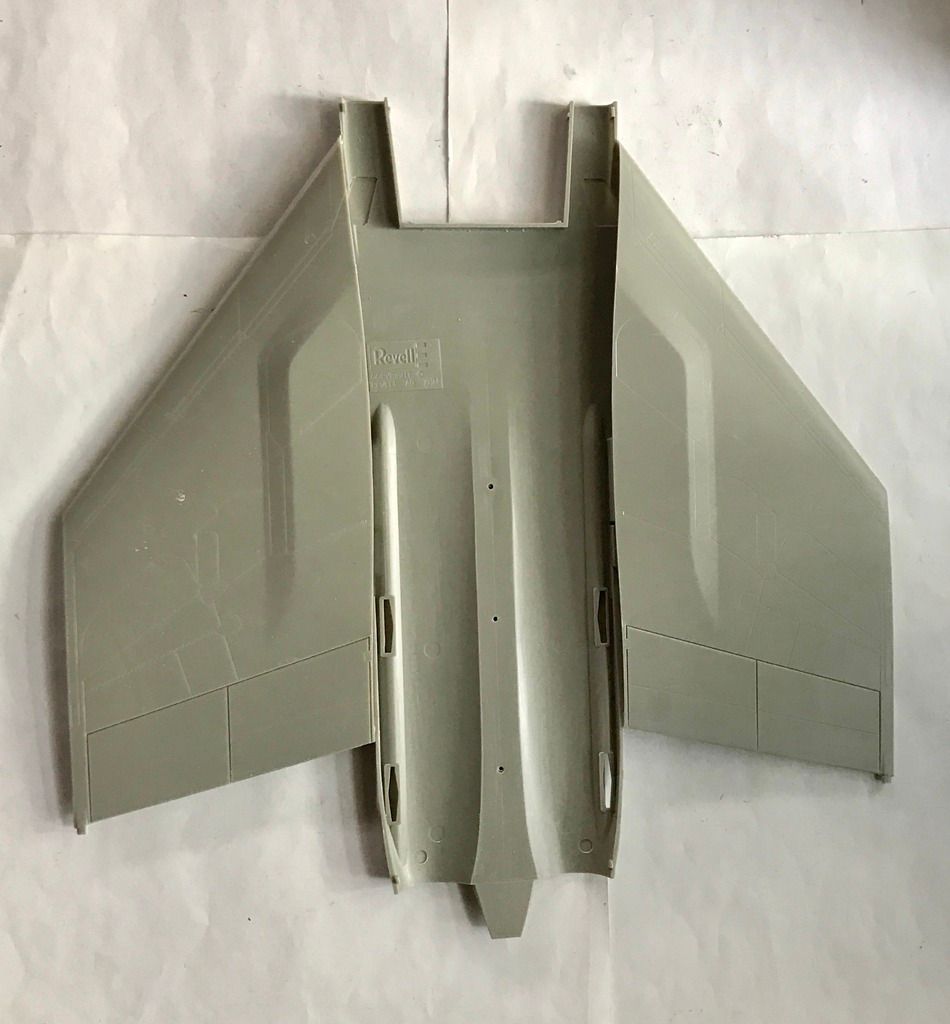
and I built the wing center section
more to come soon...
I added a new thinner splitter plate to the intake at the base of the tail using simple strip styrene
then after it had dried overnite I cut and sanded it to shape
then a little more simple strip styrene work- adding the "slime lights". On the real aircraft they stand up raised from the aircraft skin, so this was super easy to put on. I just had to cut them to length to match the decals for the lights
nose
fuselage
and tail
and I built the wing center section
more to come soon...
"Surely I have made my meaning plain? I intend to avenge myself upon you, Admiral. I have deprived your ship of power, and when I swing 'round, I intend to deprive you of your life."
FLSM
FLSM
-
Stikpusher
- Moderator
- Posts: 18869
- Joined: Sat Apr 05, 2014 8:37 pm
- Location: Ceti Alpha 5
Re: Revell 1/32 F-4G Review & Build- update 11/26 (pg.17)
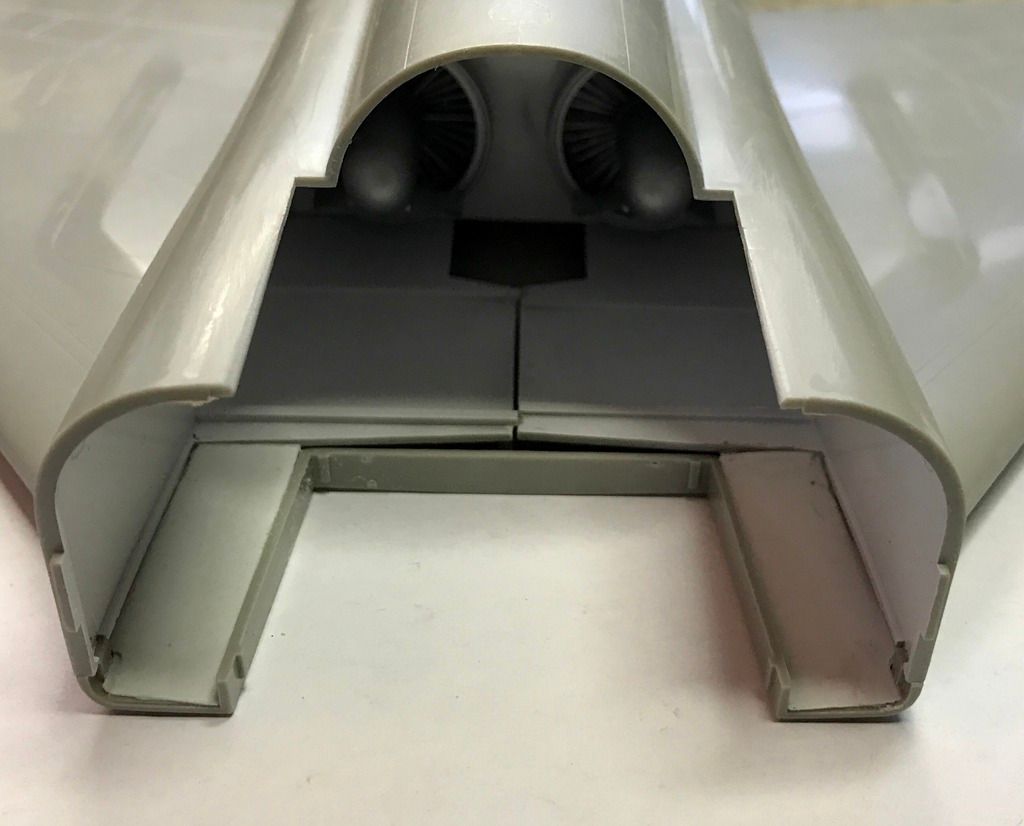
Wing center section glued to the rear fuselage section

since there is a quite visible "step" inside the intakes where the upper and lower areas connect, I added a ramp from sheet plastic to reduce it
and at this point I need to call a halt because I have to do some painting before I can add the nose area and intakes. I have bounced ahead to some sub assemblies as well such as the tail hook and other wings, but will leave them until later as per the instructions. Also many of the sub assemblies ahead, such as speed brakes and landing gear, will interfere with painting, so I will build them up, but not attach them until I normally would in any of my other builds at the end so they do not get broken off. And with a rain storm here right now, I am going to hold off until tomorrow when the weather is supposed to clear, to do any painting....
"Surely I have made my meaning plain? I intend to avenge myself upon you, Admiral. I have deprived your ship of power, and when I swing 'round, I intend to deprive you of your life."
FLSM
FLSM
-
BlackSheep214

- Elite Member
- Posts: 10409
- Joined: Sun Apr 06, 2014 8:47 pm
Re: Revell 1/32 F-4G Review & Build- update 11/26 (pg.17)
“Who controls the skies, controls the fate of this Earth”
Author unknown- 352nd Fighter Group, Blue-Nosed Bastards of Bodney
“Send one plane it’s a sortie; send two planes it’s a flight; send four planes it’s a test of airpower. - Richard Kohn
Author unknown- 352nd Fighter Group, Blue-Nosed Bastards of Bodney
“Send one plane it’s a sortie; send two planes it’s a flight; send four planes it’s a test of airpower. - Richard Kohn
-
Stikpusher
- Moderator
- Posts: 18869
- Joined: Sat Apr 05, 2014 8:37 pm
- Location: Ceti Alpha 5
Re: Revell 1/32 F-4G Review & Build- update 11/26 (pg.17)
I'll go with borderline OCD. Every image search for one thing turns up two more things I can add or modify for better detail....
Thanks for the feedback! I'll have more to show in a few days...
Thanks for the feedback! I'll have more to show in a few days...
"Surely I have made my meaning plain? I intend to avenge myself upon you, Admiral. I have deprived your ship of power, and when I swing 'round, I intend to deprive you of your life."
FLSM
FLSM
-
Stikpusher
- Moderator
- Posts: 18869
- Joined: Sat Apr 05, 2014 8:37 pm
- Location: Ceti Alpha 5
Re: Revell 1/32 F-4G Review & Build- update 11/26 (pg.17)
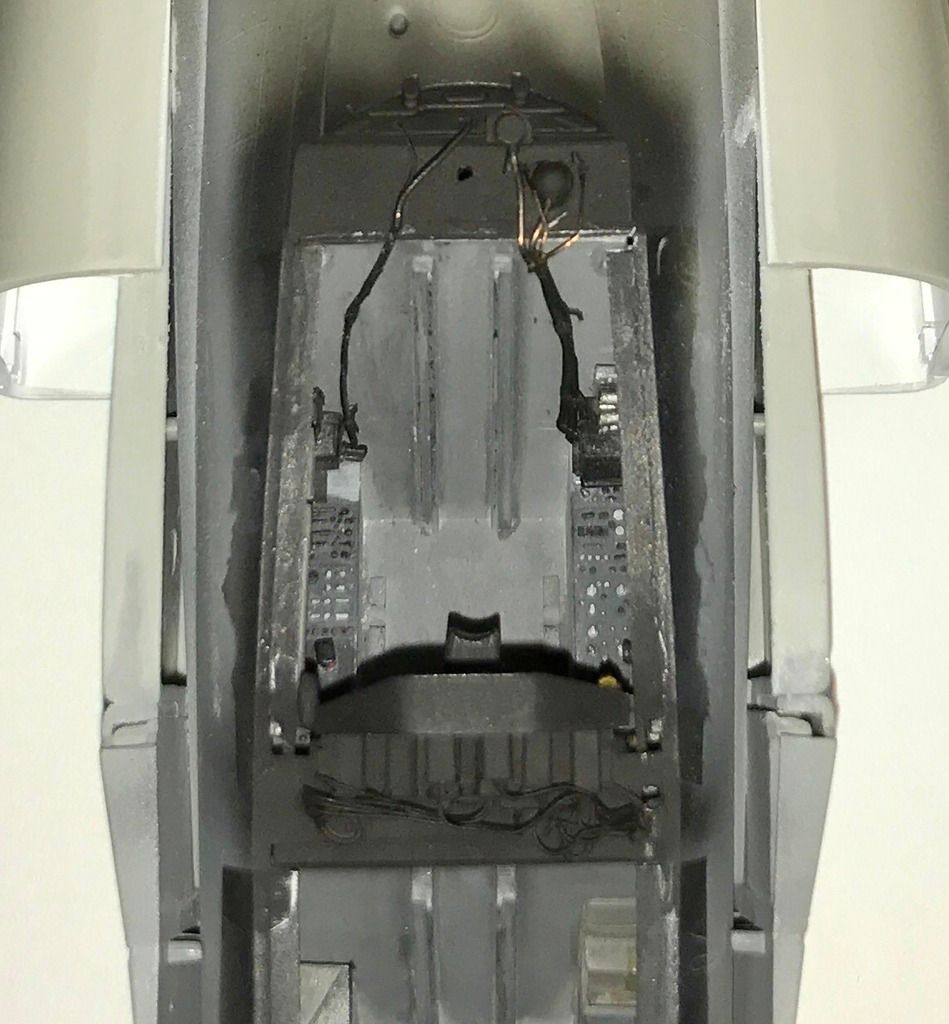
Case in point, while doing some image searches for upcoming areas to be built & painted, I stumble across a photo that clearly shows the area behind the rear seat and canopy hinge area. Well on the kit that is another rather barren area. Today I got it all prepped to add some wiring tomorrow... stay tuned....Stikpusher wrote: Every image search for one thing turns up two more things I can add or modify for better detail....
"Surely I have made my meaning plain? I intend to avenge myself upon you, Admiral. I have deprived your ship of power, and when I swing 'round, I intend to deprive you of your life."
FLSM
FLSM

Re: Revell 1/32 F-4G Review & Build- update 11/26 (pg.17)
Coming along superbly Stik! 
Stuart Templeton 'I may not be good but I'm slow...'
My blog: https://stuartsscalemodels.blogspot.com/
My blog: https://stuartsscalemodels.blogspot.com/
-
Stikpusher
- Moderator
- Posts: 18869
- Joined: Sat Apr 05, 2014 8:37 pm
- Location: Ceti Alpha 5
Re: Revell 1/32 F-4G Review & Build- update 11/26 (pg.17)
Thank you sir.
"Surely I have made my meaning plain? I intend to avenge myself upon you, Admiral. I have deprived your ship of power, and when I swing 'round, I intend to deprive you of your life."
FLSM
FLSM
-
Stikpusher
- Moderator
- Posts: 18869
- Joined: Sat Apr 05, 2014 8:37 pm
- Location: Ceti Alpha 5
Re: Revell 1/32 F-4G Review & Build- update 11/26 (pg.17)
I've been doing detail work over the past few days.
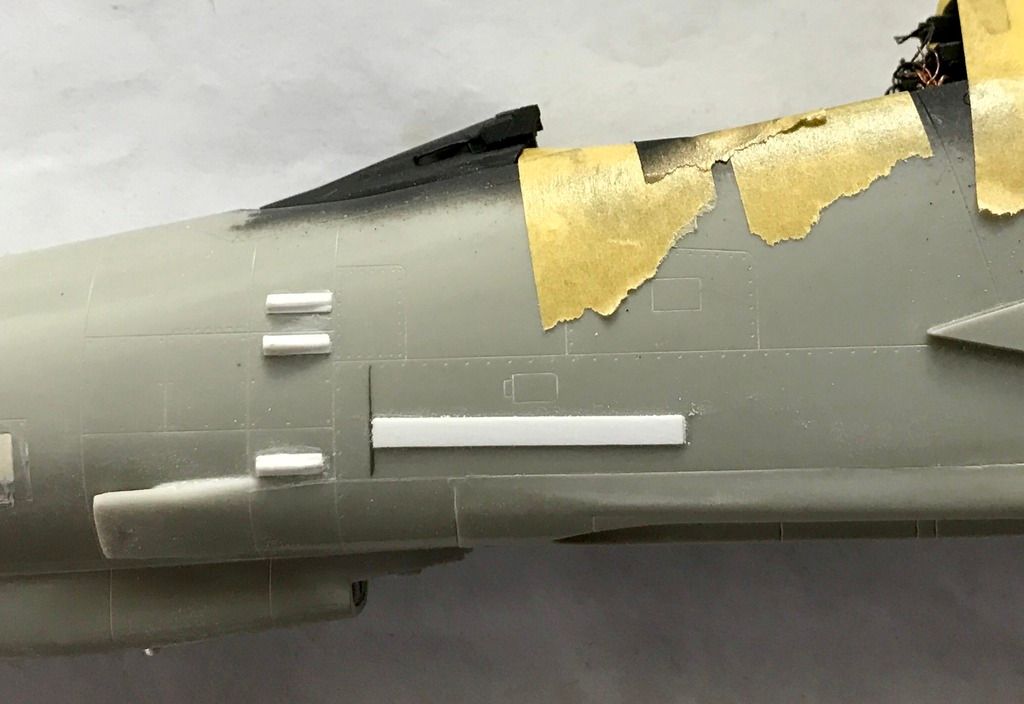
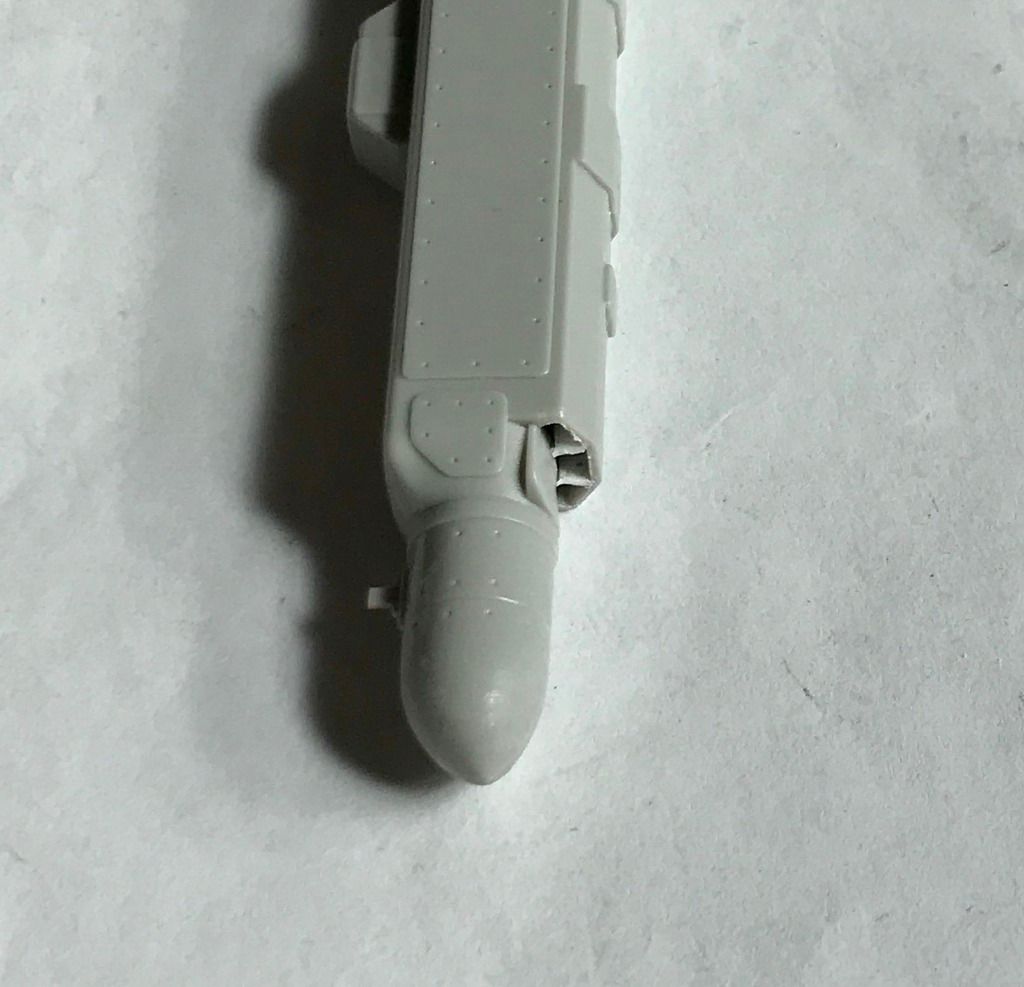
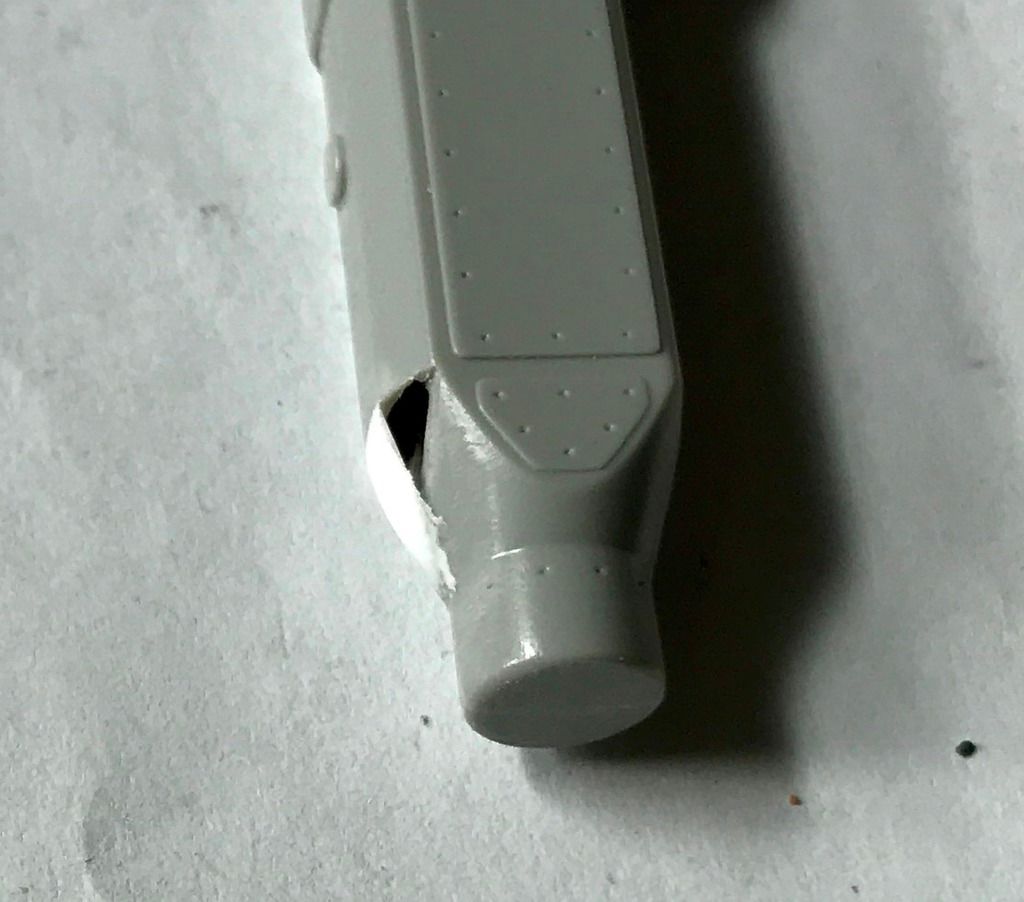
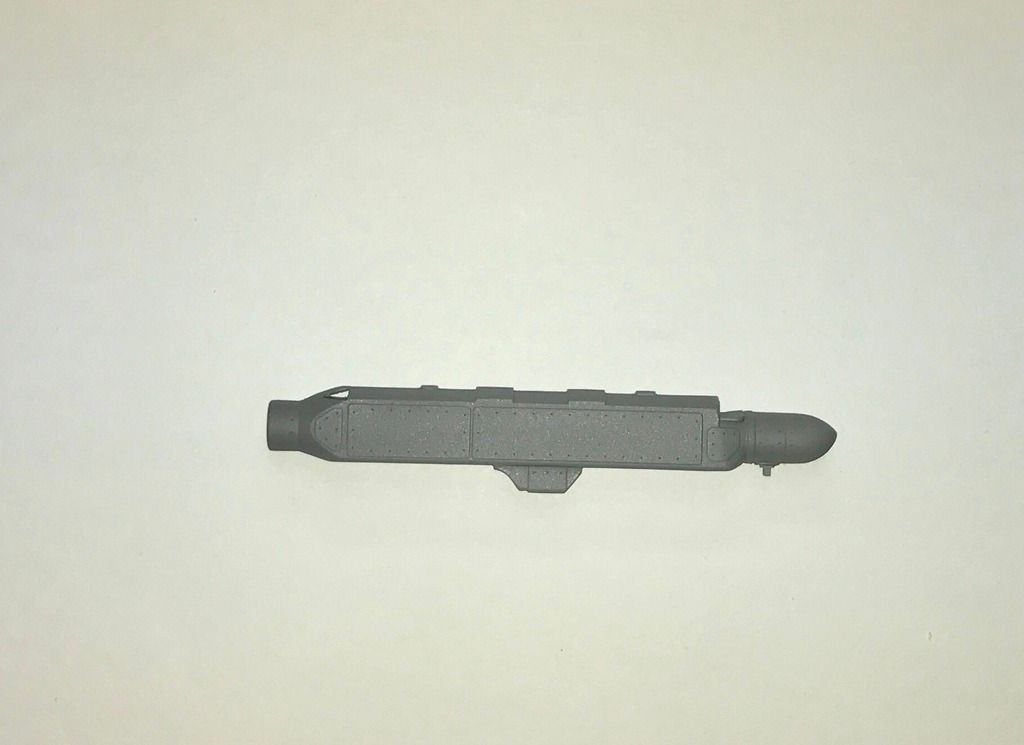
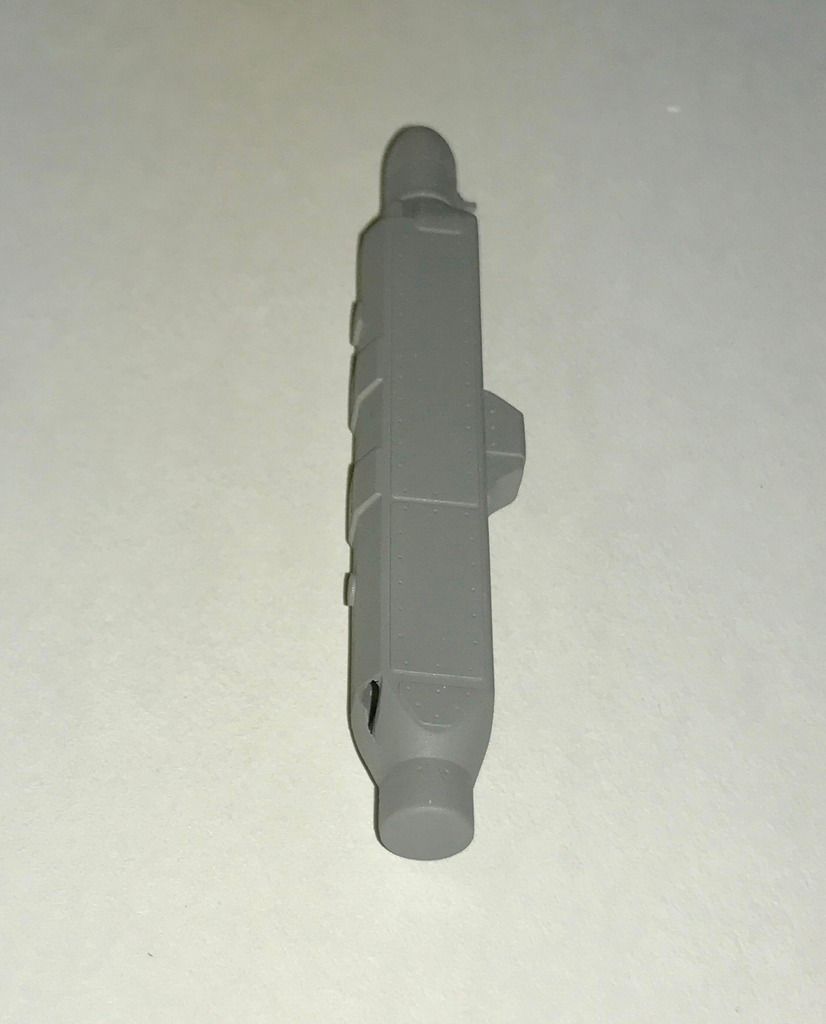
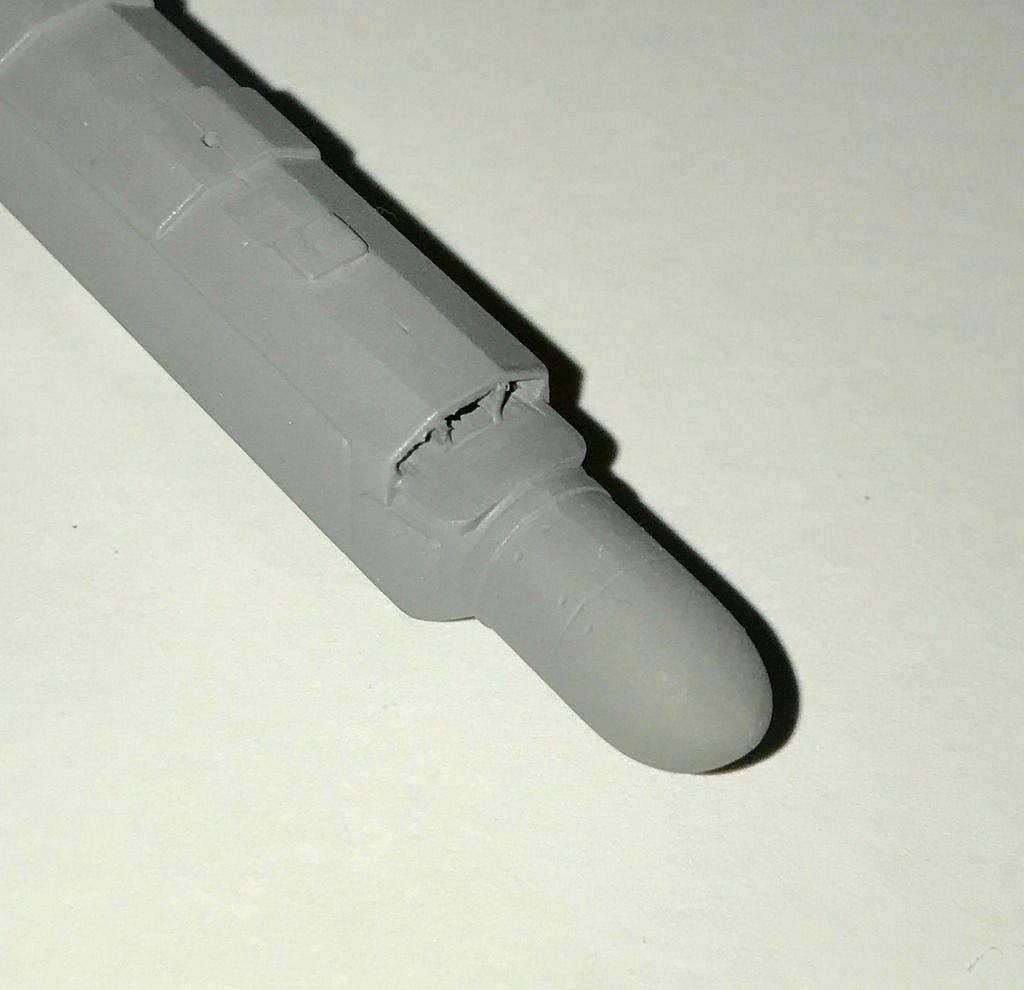
First up is the Trumpeter ALQ-131 pod that I will use in place of the kit supplied ALQ-119. The Trumpeter pod had solid top front and reas, but the real pod has openings there to cool the electronics inside. So a bit of work with a drill bit & pin vise, followed by needle file clean up and a bit of strip styrene work and now much better....
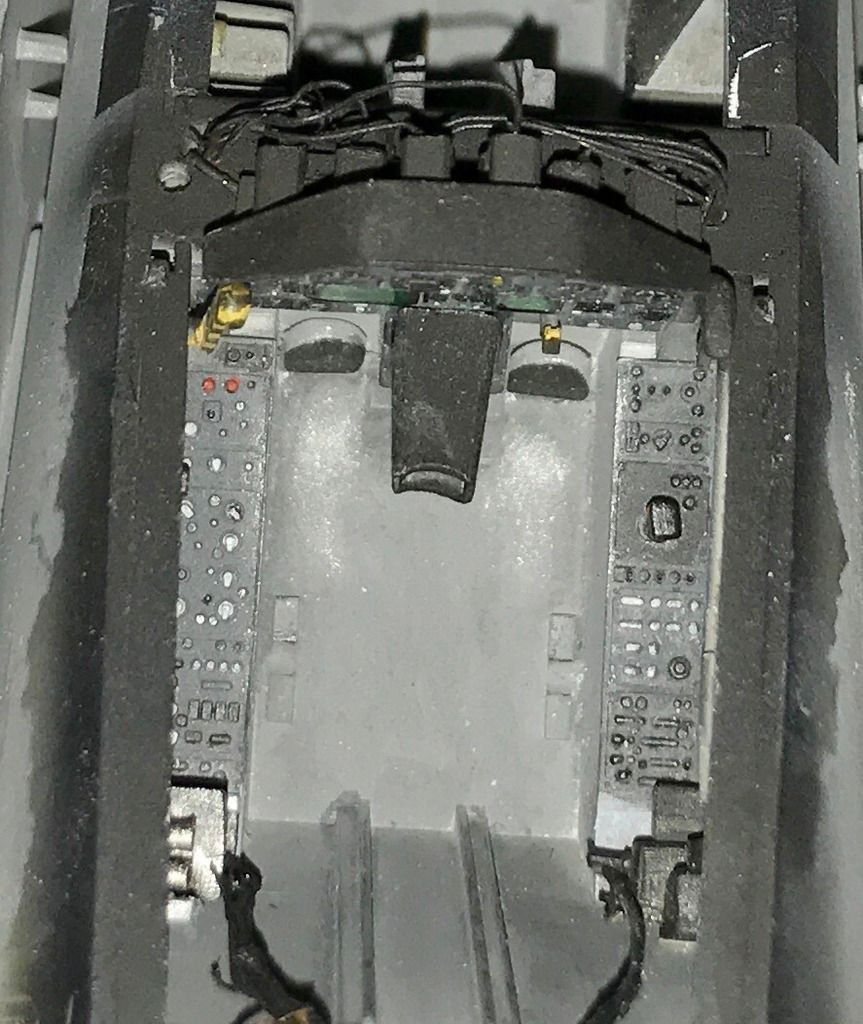
then I finished up the wiring for the rear bulkhead of the rear cockpit... all ready to be painted then formed into place...
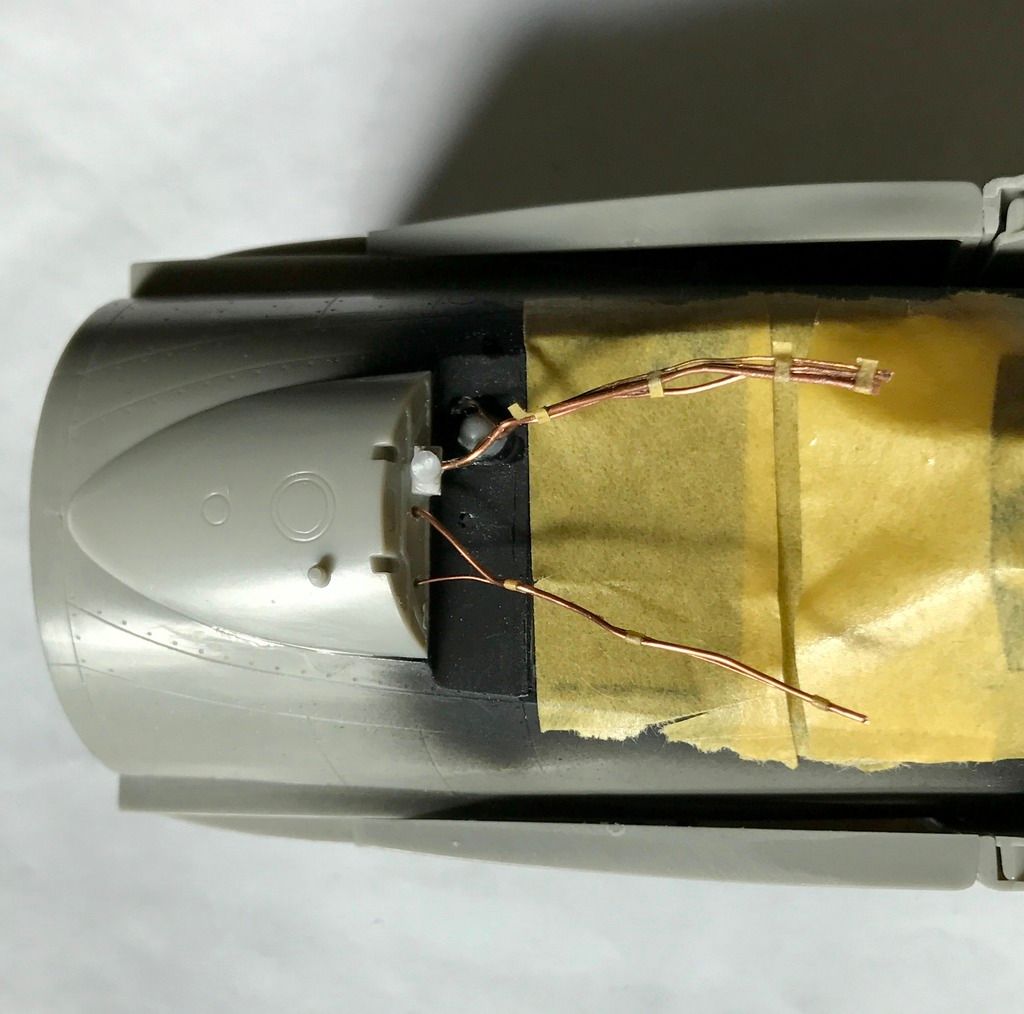
and a bit of gluing of plastic- to ease upcoming painting, I added the side intake inner plates. This also helps in aligning the front and rear fuselage portions for gluing later. The instructions have you adding them after the front and rear portions are glued together, but there is no reason to wait for that point, and I think it helps the assembly out. And also since I was wiring up the rear portion of the rear cockpit, I glued the upper piece the sits behind the rear canopy in place. That is another item that according to the instructions won't be attached until late. BUT, if your going to add detail to that area, it needs to be added sooner.
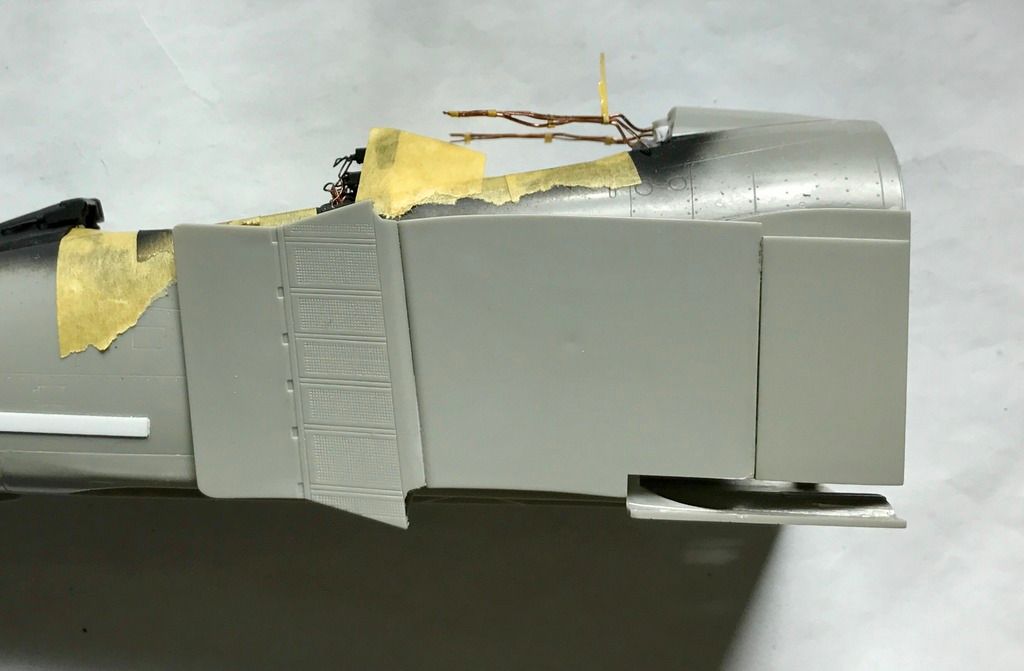
More in a few days...
First up is the Trumpeter ALQ-131 pod that I will use in place of the kit supplied ALQ-119. The Trumpeter pod had solid top front and reas, but the real pod has openings there to cool the electronics inside. So a bit of work with a drill bit & pin vise, followed by needle file clean up and a bit of strip styrene work and now much better....
then I finished up the wiring for the rear bulkhead of the rear cockpit... all ready to be painted then formed into place...
and a bit of gluing of plastic- to ease upcoming painting, I added the side intake inner plates. This also helps in aligning the front and rear fuselage portions for gluing later. The instructions have you adding them after the front and rear portions are glued together, but there is no reason to wait for that point, and I think it helps the assembly out. And also since I was wiring up the rear portion of the rear cockpit, I glued the upper piece the sits behind the rear canopy in place. That is another item that according to the instructions won't be attached until late. BUT, if your going to add detail to that area, it needs to be added sooner.
More in a few days...
"Surely I have made my meaning plain? I intend to avenge myself upon you, Admiral. I have deprived your ship of power, and when I swing 'round, I intend to deprive you of your life."
FLSM
FLSM
-
Stikpusher
- Moderator
- Posts: 18869
- Joined: Sat Apr 05, 2014 8:37 pm
- Location: Ceti Alpha 5
Re: Revell 1/32 F-4G Review & Build- update 11/30 (pg.17)
Today was mostly painting... and some assembling. Airbrushing took far longer than intended. Mostly because my airbrush was long overdue for a major cleaning. After the first color, I noticed poor performance and apparently there was a butt load of metallic colors left in there from when I painted the engine fronts. I guess Windex does not clean up Tamiya metallics as well as it is reputed to do.. So after a good cleaning I resumed work, completed my airbrush session, and then set it all aside to dry.
I applied a base coat of Humbrol Satin Neutral Gray to the ALQ-131 pod. This made the mods look like they were part of the original item again.
and I glued the "Bear's" (scratch buit) scope hood in place
I touched up the black, but of course the black flaked on the back seat wiring when I bent it into place, so another touch up is in order...
the drag chute cover glued in place
and lastly I glued the front and rear fuselage halves together
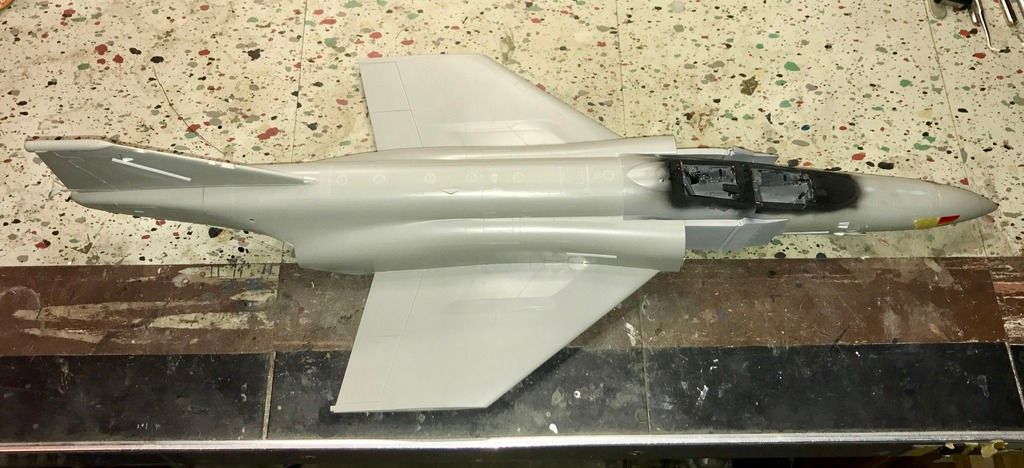
no turning back now... this sucker is officially BIG.
I applied a base coat of Humbrol Satin Neutral Gray to the ALQ-131 pod. This made the mods look like they were part of the original item again.
and I glued the "Bear's" (scratch buit) scope hood in place
I touched up the black, but of course the black flaked on the back seat wiring when I bent it into place, so another touch up is in order...
the drag chute cover glued in place
and lastly I glued the front and rear fuselage halves together
no turning back now... this sucker is officially BIG.
"Surely I have made my meaning plain? I intend to avenge myself upon you, Admiral. I have deprived your ship of power, and when I swing 'round, I intend to deprive you of your life."
FLSM
FLSM