1/32 Special Hobby Hawker Tempest Mk V

Re: 1/32 Special Hobby Hawker Tempest Mk V
Can't wait to see that finished engine. You pulled off some delicate wiring.
Cheers,
Torben
Torben

Re: 1/32 Special Hobby Hawker Tempest Mk V
Thanks guys! Still nervous about the nose/fuselage connection and haven't quite figured that out but I am adjusting as I go and hopefully it will turn out acceptably.
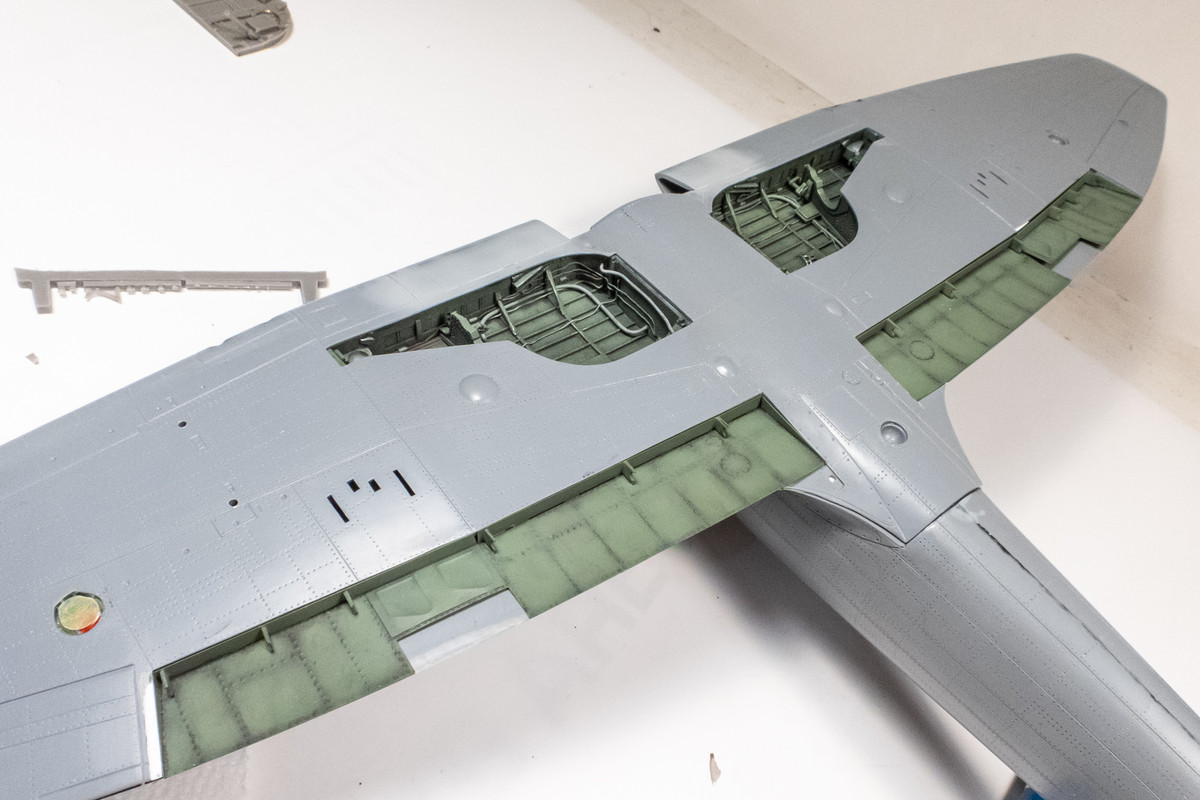
As mentioned in my previous update, the rear bottom corner of the cockpit cage was interfering with the sit of the upper wing flap assembly. After wasting hours of slowly grinding and scraping away, I realized it would much quicker just to SNIP the material off with my sprue cutters.
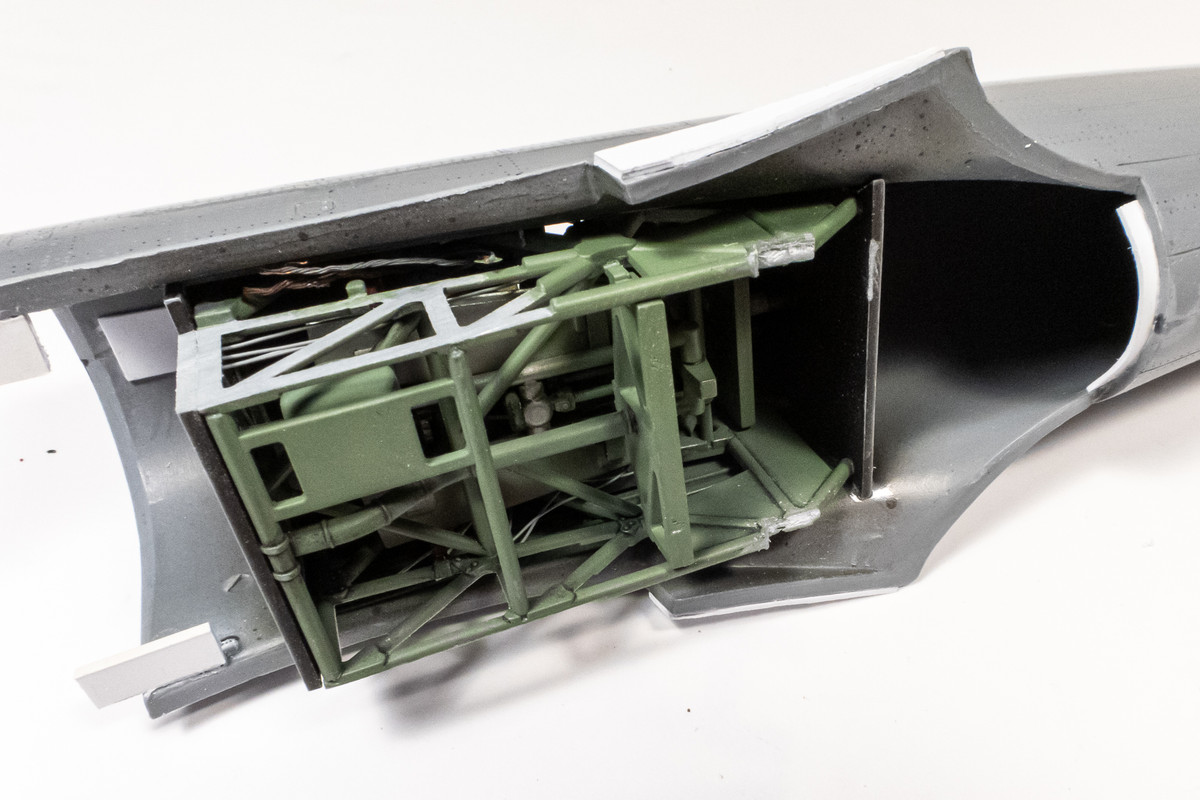
The upper wing flap assembly can now sit without interference.
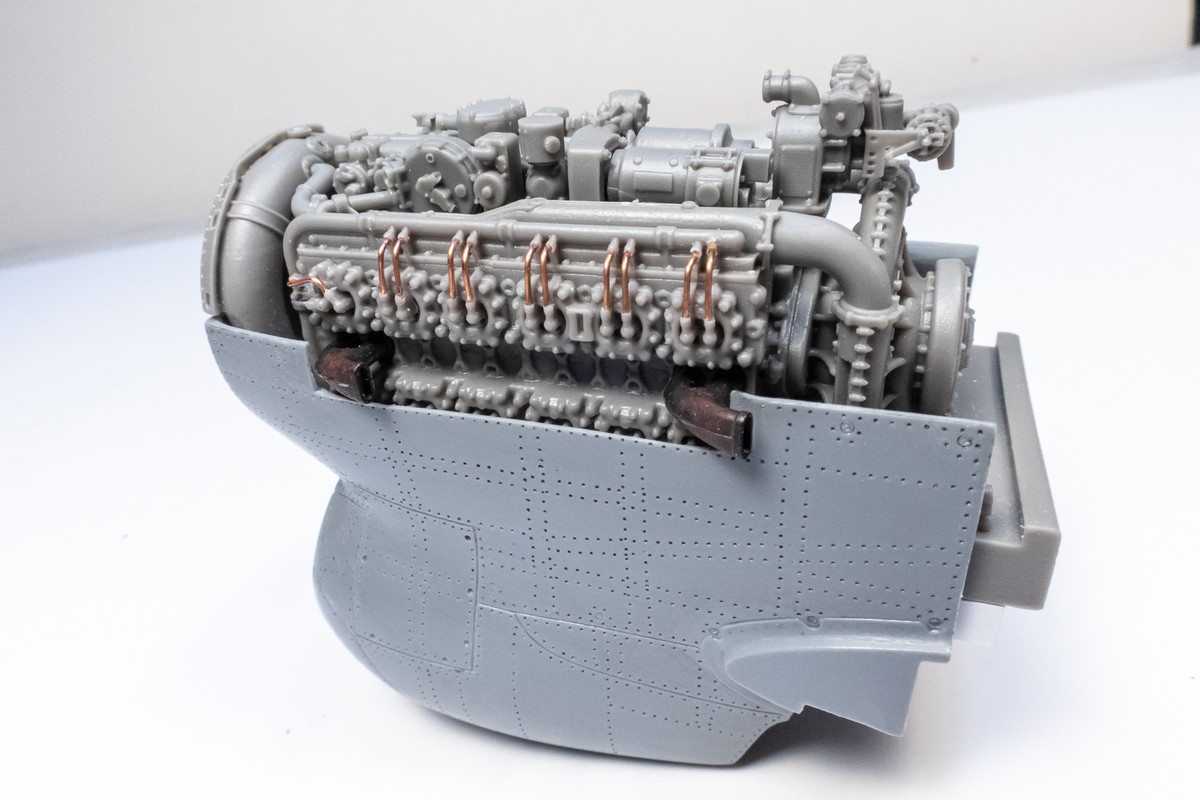
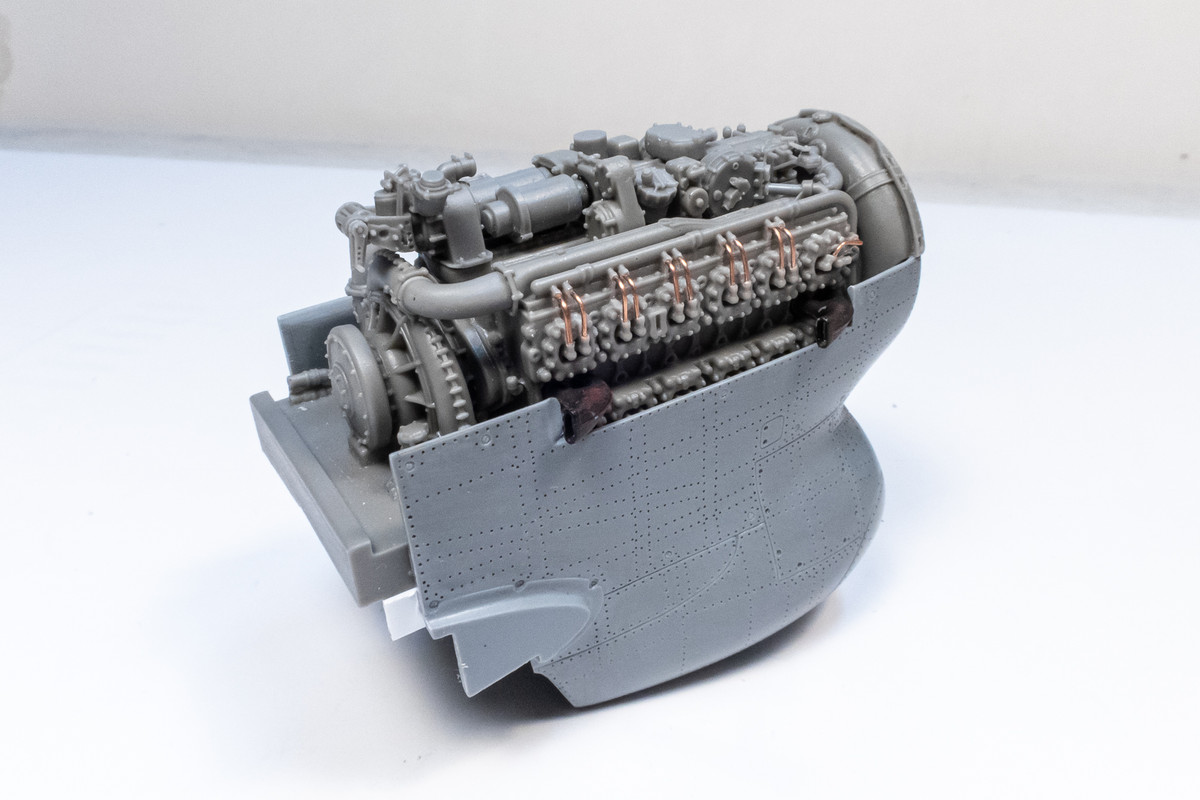
To test the fit of the exhaust tips, I glued them into the engine block with white glue. But they immediately busted off when coming into contact with the nose piece.
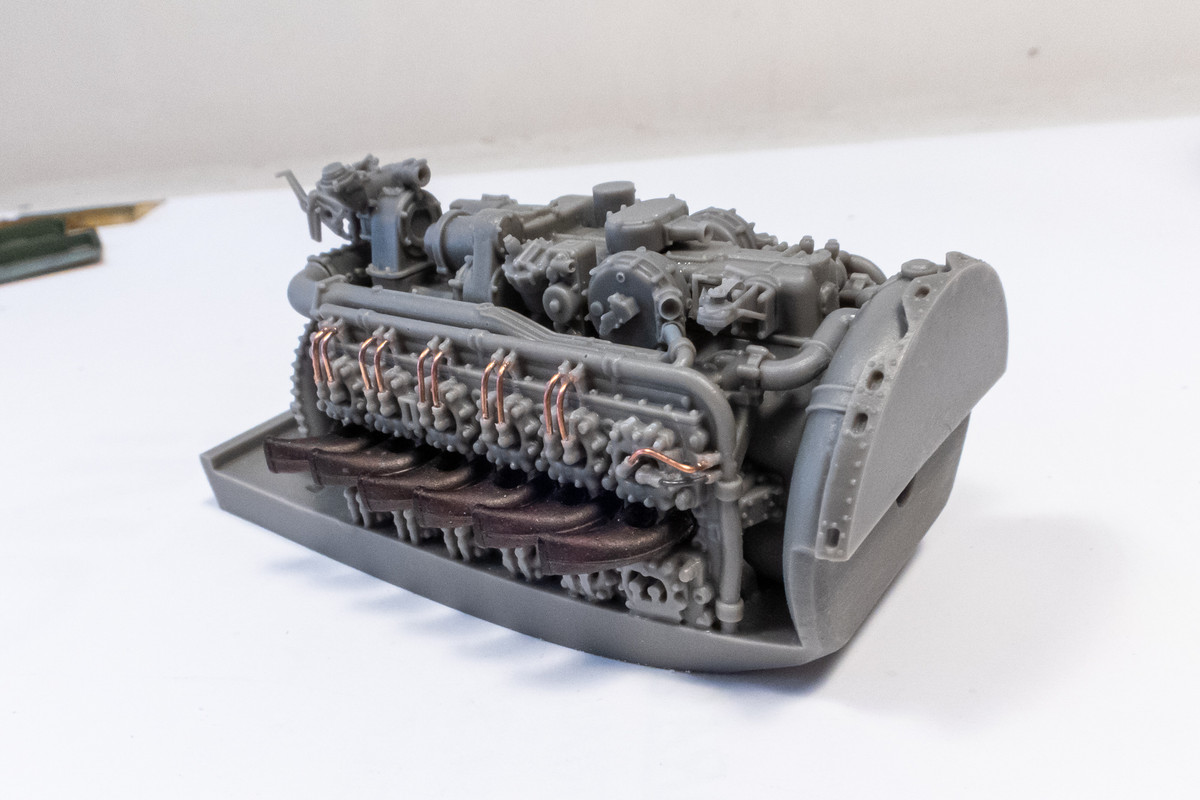
Didn't need the whole row to check fit so I glued the first and last exhaust tip in each row with CA glue. Seems just squeeze into the provided openings. I think I'll need to provide a bit more space in front of that leading exhaust pipe. And yeah, they are getting scratched up with the pre-fitting so I'll probably have to repaint them at some point.
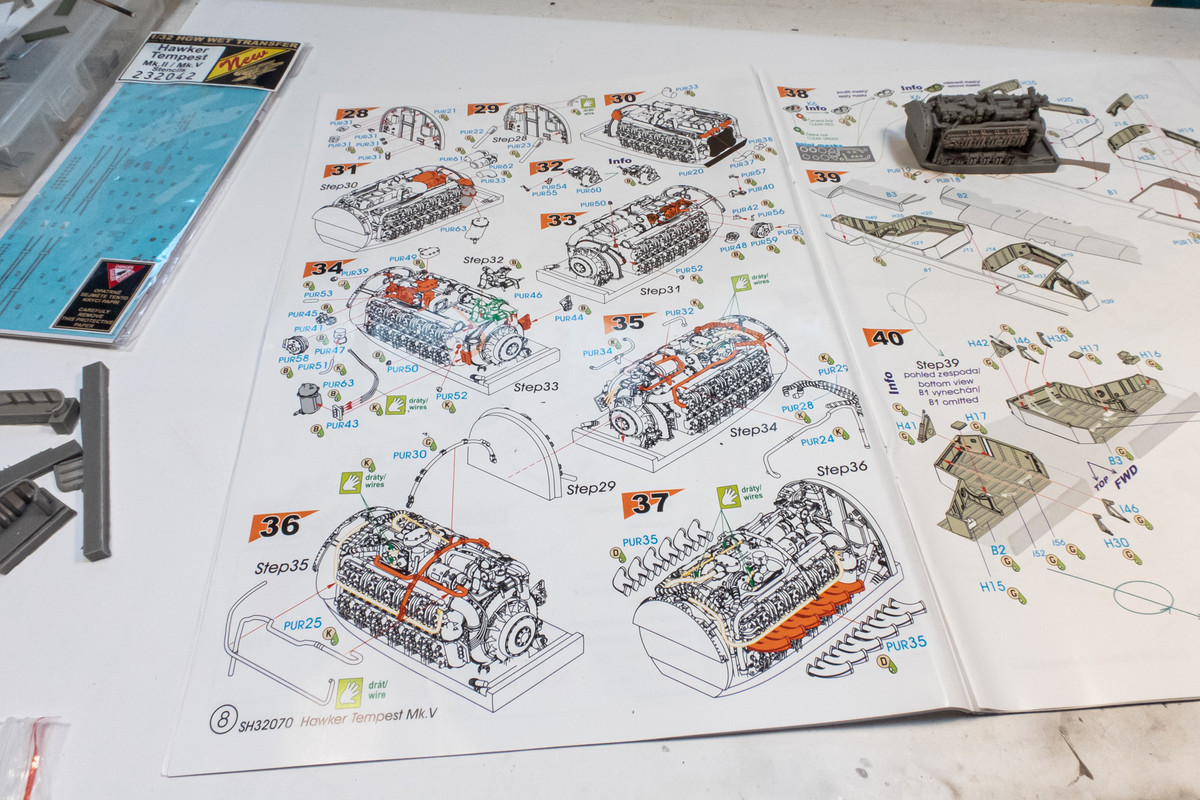
I just wanted to point out the complexity of the engine assembly by showing these instructions. To Special Hobby's credit, the fit of the engine parts has been very good and they have a provided many of the pipes and fluid lines as separately cast resin parts. Instructions aren't crystal clear but usually, if you check closely, most parts have some sort of positive connection in the form of a tab or pin.
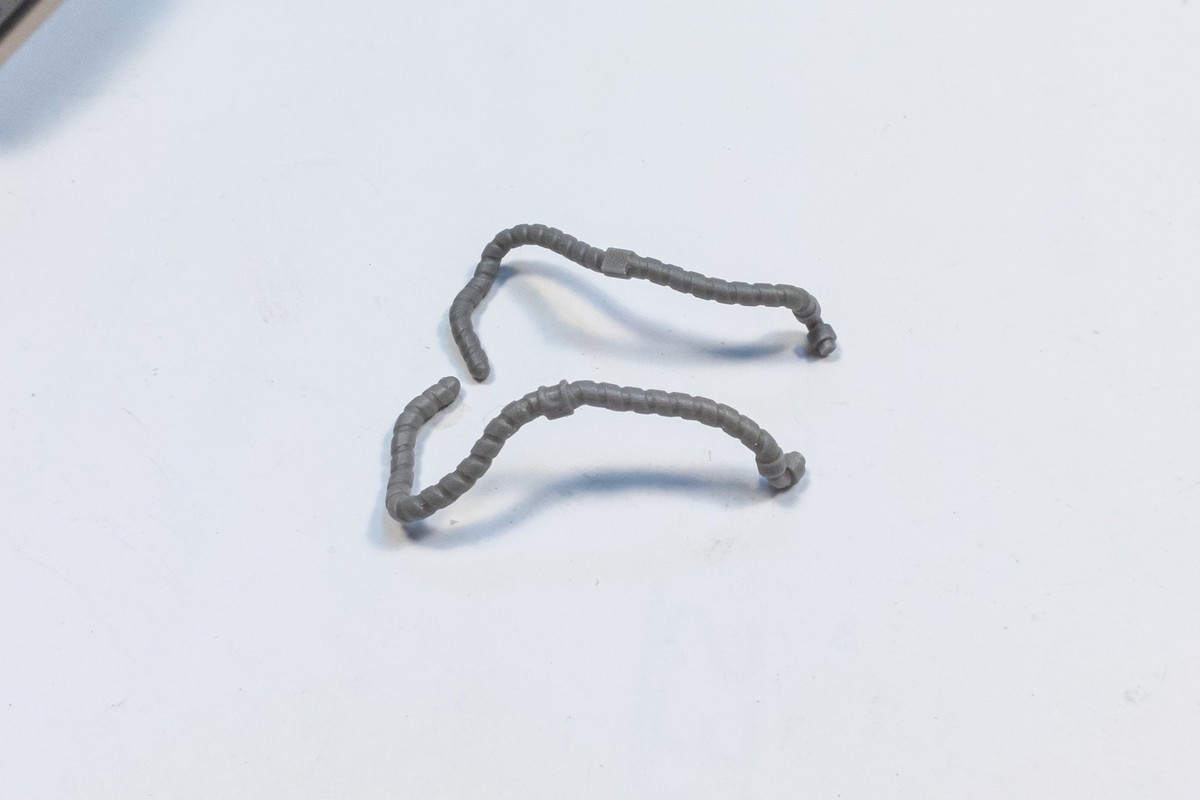
One of the thicker lines is a pair of segmented pipes that I wanted to try and fit. Avoid the temptation of trying to snip these types of parts off with a sprue cutter. A razor saw is recommended.
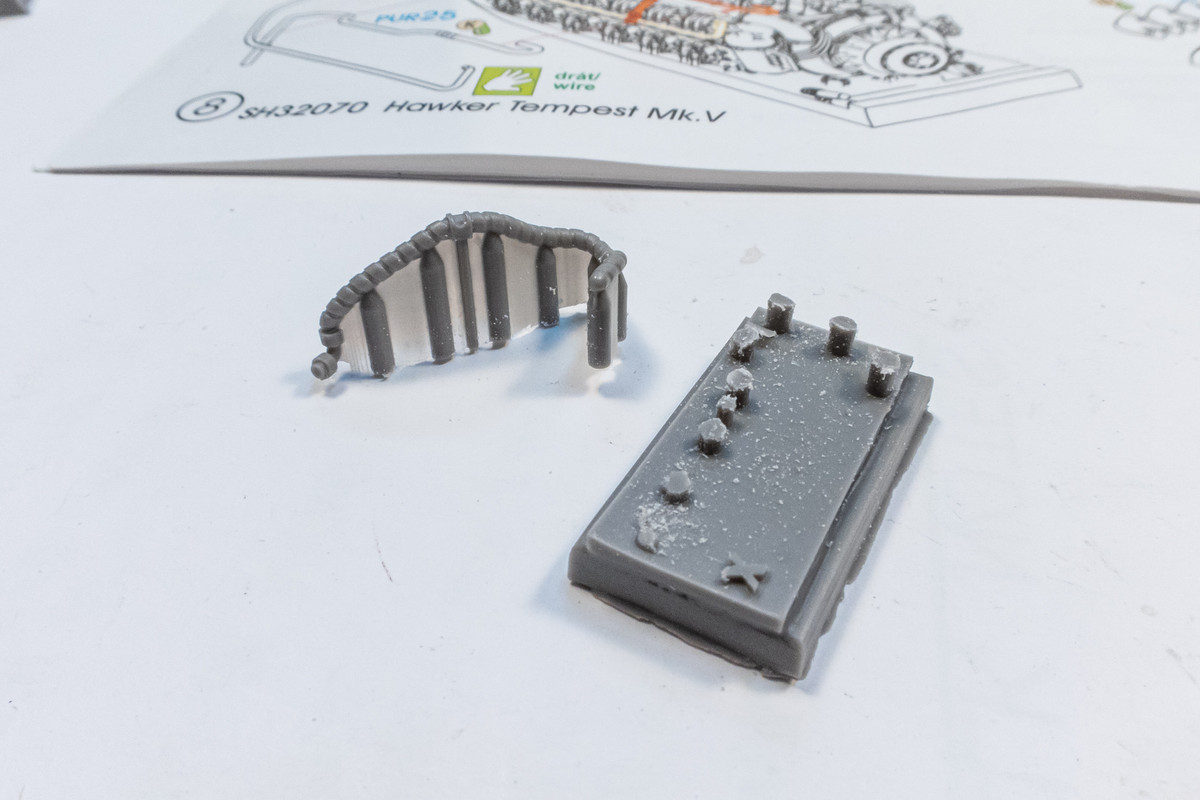
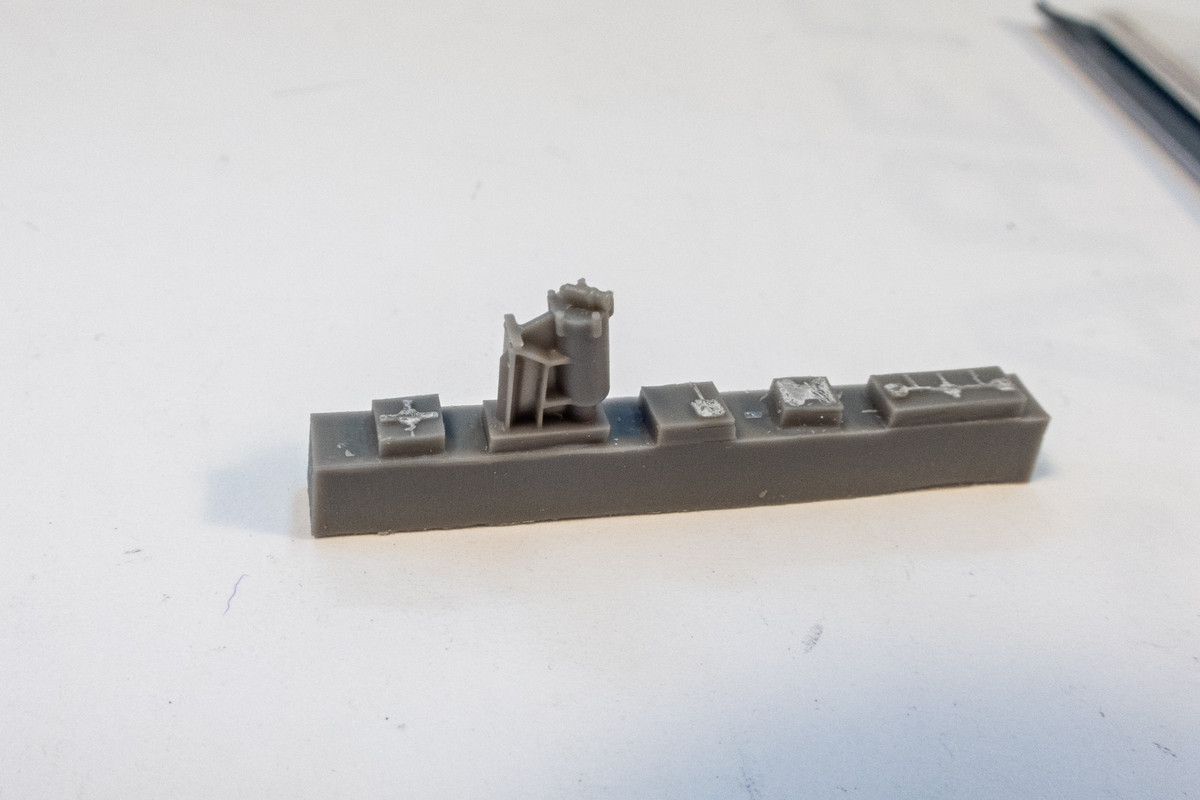
One of the casting runners looked different than the others so I didn't cut it off until I verified that it was indeed not a necessary component.
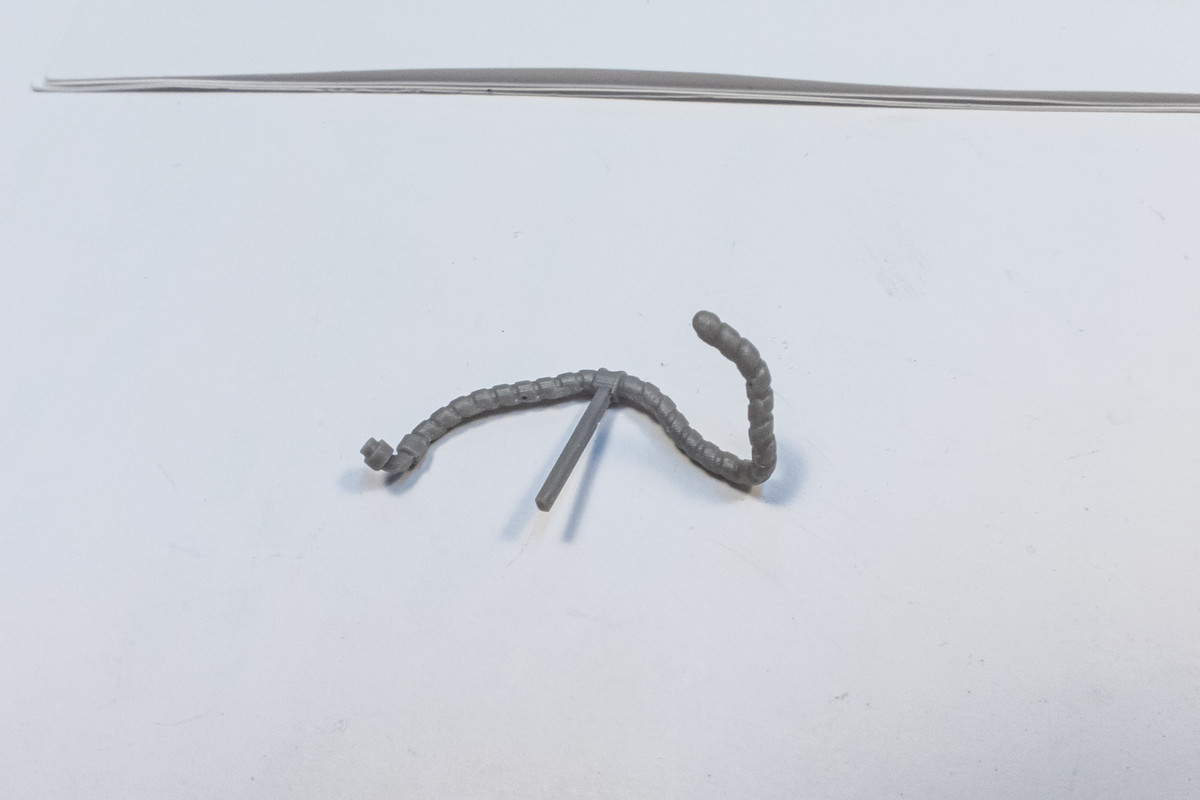
Here are the two pipes that have been carefully cleaned up.
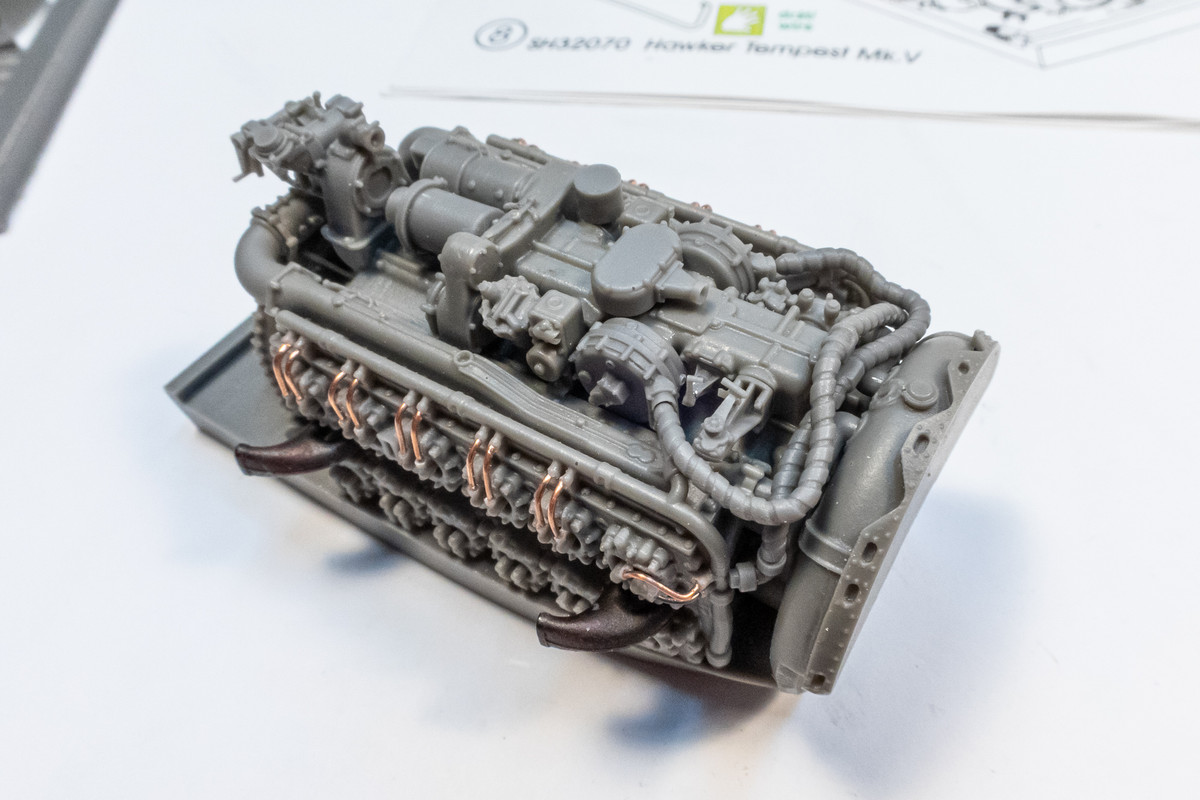
Here is how they fit onto the engine block. In this case, both ends of the pipe fit into openings provided on the engine block even though these openings are not shown in the instructions... you just have to look carefully and find them.
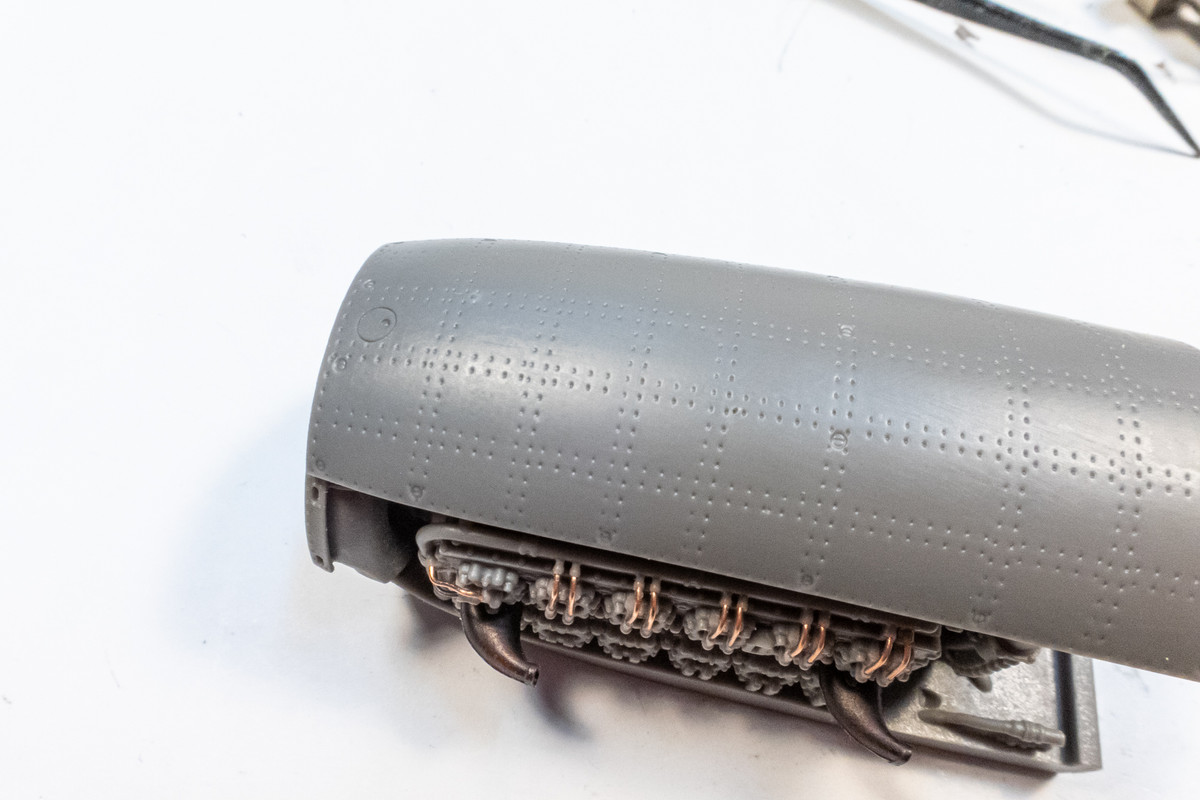
There is a fuel fill port on the front of the engine cover that is not molded onto the kit plastic and I was curious to see if it was present on the resin part... nope. So I scribed one.
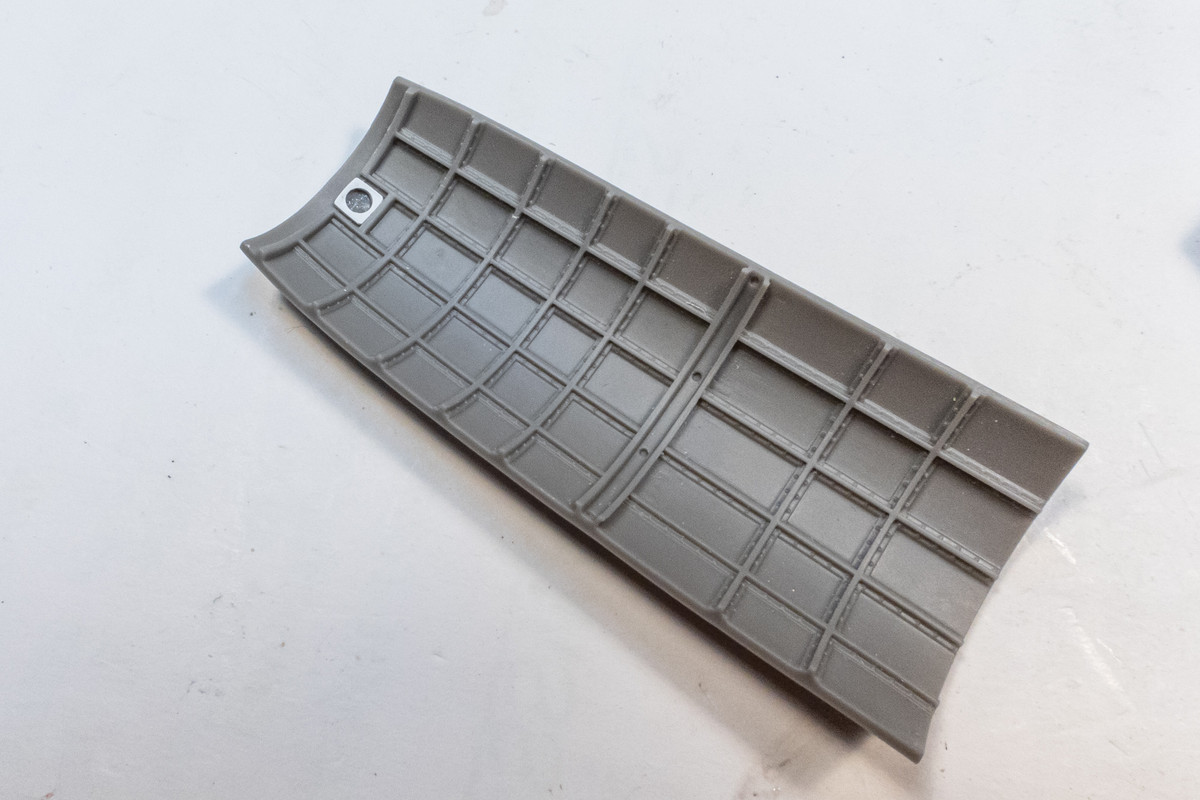
I also added a piece of sheet styrene with a hole punched out on the interior side to match.
As mentioned in my previous update, the rear bottom corner of the cockpit cage was interfering with the sit of the upper wing flap assembly. After wasting hours of slowly grinding and scraping away, I realized it would much quicker just to SNIP the material off with my sprue cutters.
The upper wing flap assembly can now sit without interference.
To test the fit of the exhaust tips, I glued them into the engine block with white glue. But they immediately busted off when coming into contact with the nose piece.
Didn't need the whole row to check fit so I glued the first and last exhaust tip in each row with CA glue. Seems just squeeze into the provided openings. I think I'll need to provide a bit more space in front of that leading exhaust pipe. And yeah, they are getting scratched up with the pre-fitting so I'll probably have to repaint them at some point.
I just wanted to point out the complexity of the engine assembly by showing these instructions. To Special Hobby's credit, the fit of the engine parts has been very good and they have a provided many of the pipes and fluid lines as separately cast resin parts. Instructions aren't crystal clear but usually, if you check closely, most parts have some sort of positive connection in the form of a tab or pin.
One of the thicker lines is a pair of segmented pipes that I wanted to try and fit. Avoid the temptation of trying to snip these types of parts off with a sprue cutter. A razor saw is recommended.
One of the casting runners looked different than the others so I didn't cut it off until I verified that it was indeed not a necessary component.
Here are the two pipes that have been carefully cleaned up.
Here is how they fit onto the engine block. In this case, both ends of the pipe fit into openings provided on the engine block even though these openings are not shown in the instructions... you just have to look carefully and find them.
There is a fuel fill port on the front of the engine cover that is not molded onto the kit plastic and I was curious to see if it was present on the resin part... nope. So I scribed one.
I also added a piece of sheet styrene with a hole punched out on the interior side to match.
John aka JKim
-----------<><

-----------<><

Re: 1/32 Special Hobby Hawker Tempest Mk V
That is a very complex and beautiful engine. I'm happy to see that the wings now have a good fit
March as one, Don't look back
Odin's sons... Attack!
Unleash hell! Do not repent! Warfare grants us no lament
Let your weapons slash and tear This is no place for fear
Hold the lines! Move as one! In unity our victory's won
Our shields will form a mighty wall
United we shall never fall
Odin's sons... Attack!
Unleash hell! Do not repent! Warfare grants us no lament
Let your weapons slash and tear This is no place for fear
Hold the lines! Move as one! In unity our victory's won
Our shields will form a mighty wall
United we shall never fall
-
Medicman71

- Elite Member
- Posts: 11396
- Joined: Mon Apr 07, 2014 9:32 am
- Location: Houston, Tx
Re: 1/32 Special Hobby Hawker Tempest Mk V
Floki wrote:That is a very complex and beautiful engine. I'm happy to see that the wings now have a good fit
 Man I'd mess that up for sure.
Mike
Sponsored by Boeing, Lockheed Martin, Northrop Grumman, Saab, BAE, and Dassault
Sponsored by Boeing, Lockheed Martin, Northrop Grumman, Saab, BAE, and Dassault
Re: 1/32 Special Hobby Hawker Tempest Mk V
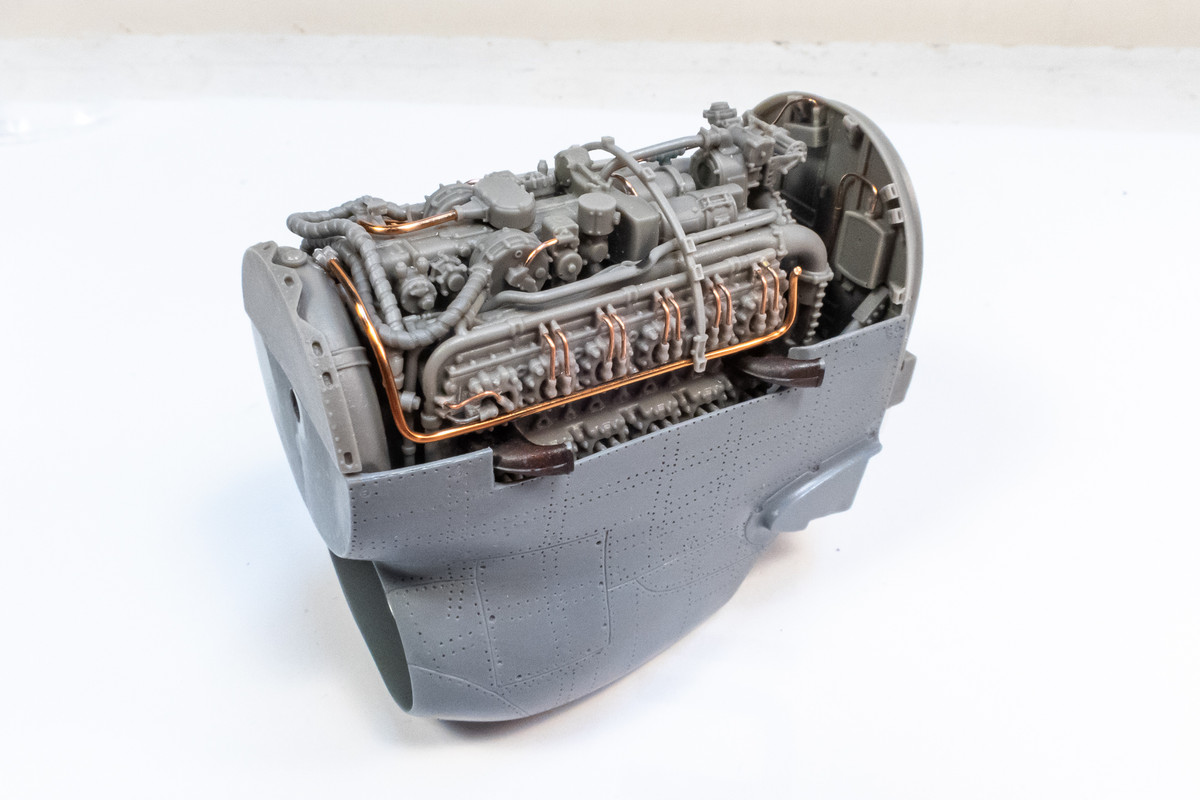
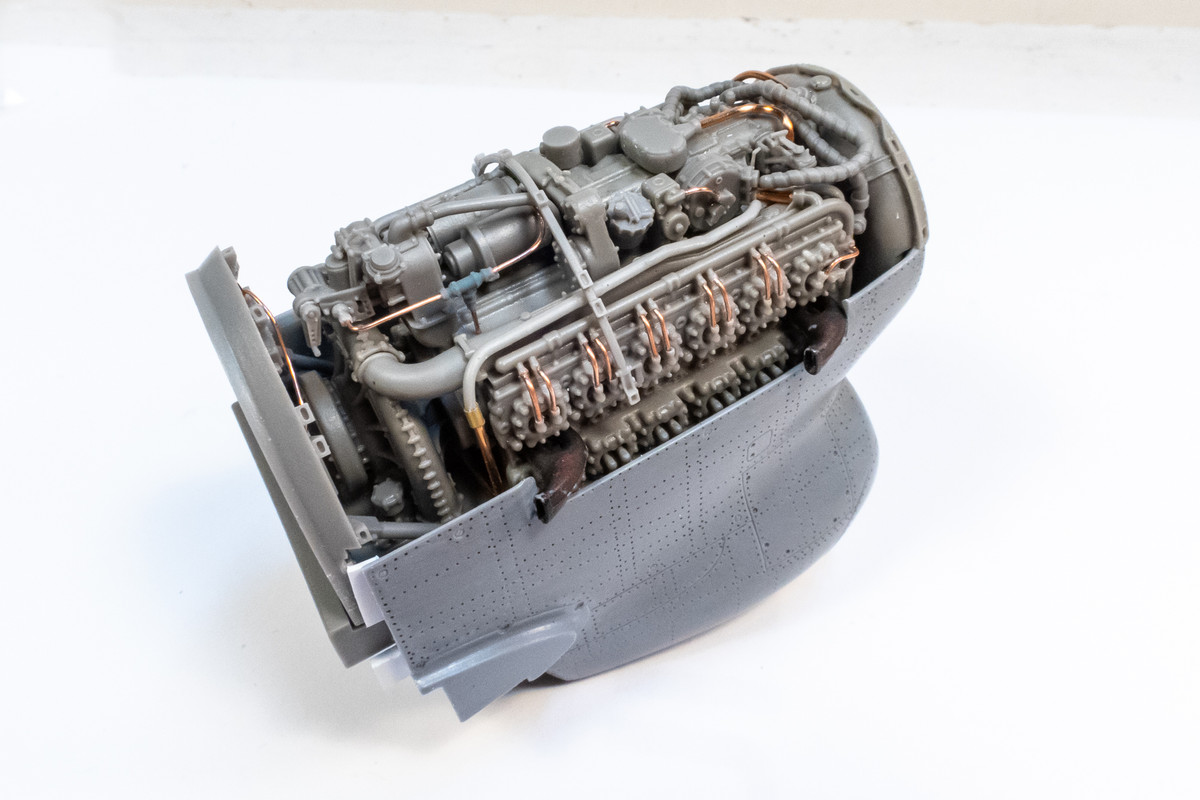
Thanks guys! Moving forward slowly on the engine. The additions have been a mixture of resin piping and copper wiring as indicated on the plans. Alot of these intertwine or overlap and I'm finding it difficult to NOT glue them into place in order to keep the build moving forward. This has dictated when painting is going to occur... after assembly. There will only be a few things left unattached before I start painting the engine, which will be rear bulkhead, the pair of segmented pipes and the semi-circular frame in the middle of the engine block.
John aka JKim
-----------<><
-----------<><
-
BlackSheep214

- Elite Member
- Posts: 13598
- Joined: Sun Apr 06, 2014 8:47 pm
Re: 1/32 Special Hobby Hawker Tempest Mk V
I have no words except...


“Who controls the skies, controls the fate of this Earth”
Author unknown- 352nd Fighter Group, Blue-Nosed Bastards of Bodney
“Send one plane it’s a sortie; send two planes it’s a flight; send four planes it’s a test of airpower. - Richard Kohn
Author unknown- 352nd Fighter Group, Blue-Nosed Bastards of Bodney
“Send one plane it’s a sortie; send two planes it’s a flight; send four planes it’s a test of airpower. - Richard Kohn
Re: 1/32 Special Hobby Hawker Tempest Mk V
Thank you sir!
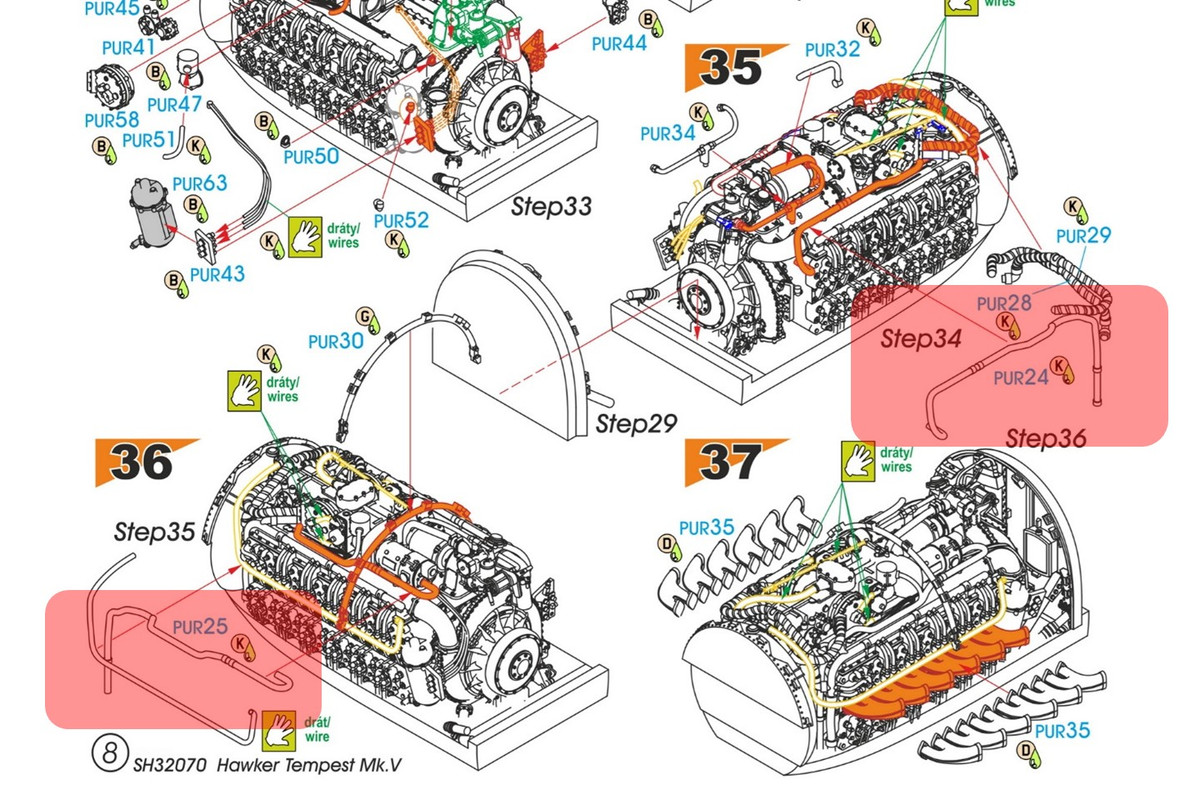
Work on the engine continues. I've accounted for all of the resin parts shown on plans except one. Part PUR46, which is some sort of small cannister.
I scanned the instructions multiple times to find it but all I could find was the text "PUR46" (which I've highlighted in blue below) with no corresponding figure or instruction.
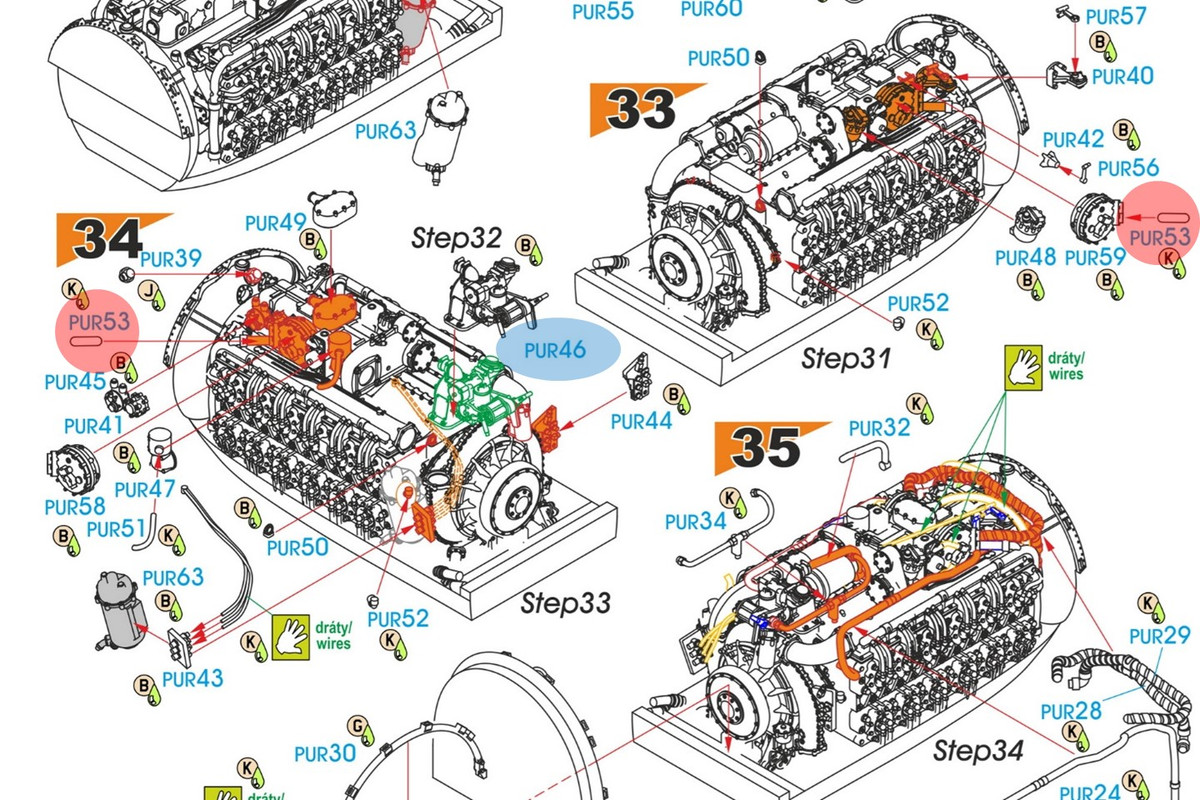
One deviation from the instructions you need to make is to hold off on installing the pair of PUR53 parts in Step 33 and 34 (highlighted in red above). These are short stubs of piping which will block the installation of the longer resin pipes PUR24 and PUR25 (highlighted in red below) described in Step 35 and 36. Make sure you glue PUR53 after Installing PUR24 and PUR25.
There are a couple of wiring harnesses that need to be added. I've tried to approach these logically with the goal of making sure everything is securely glued into place.

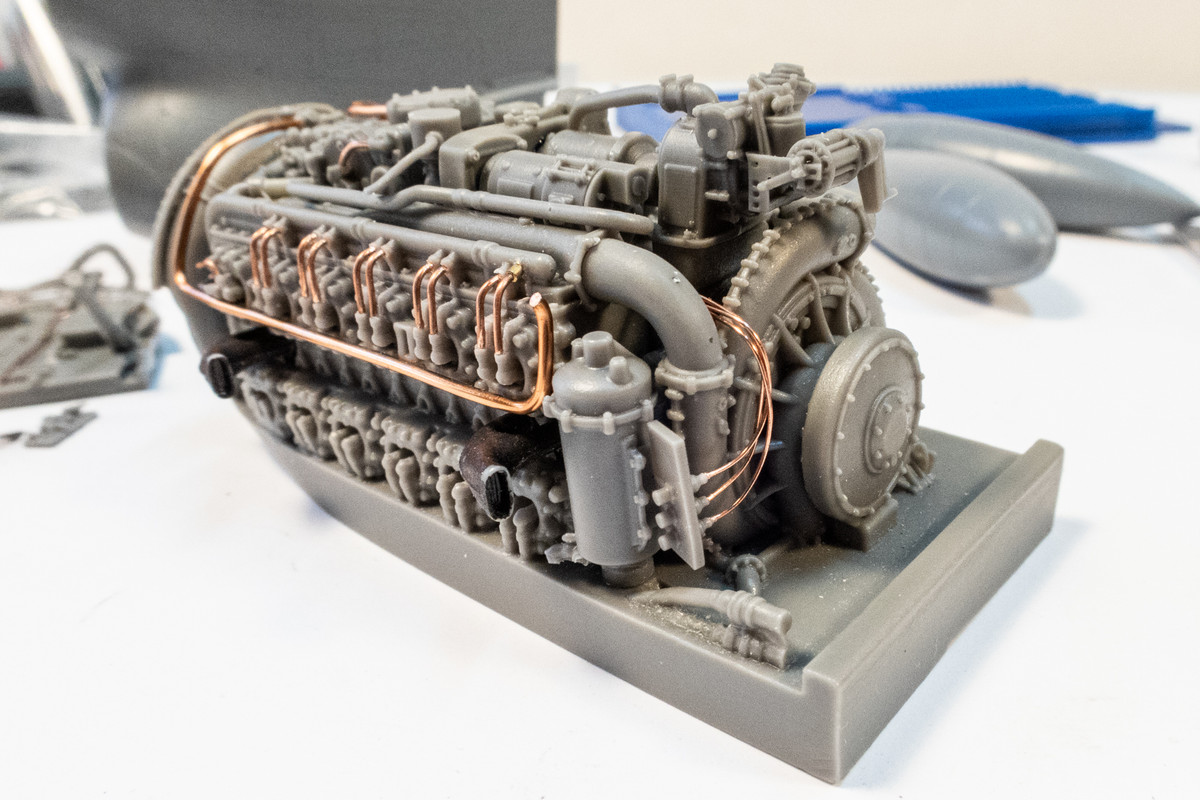
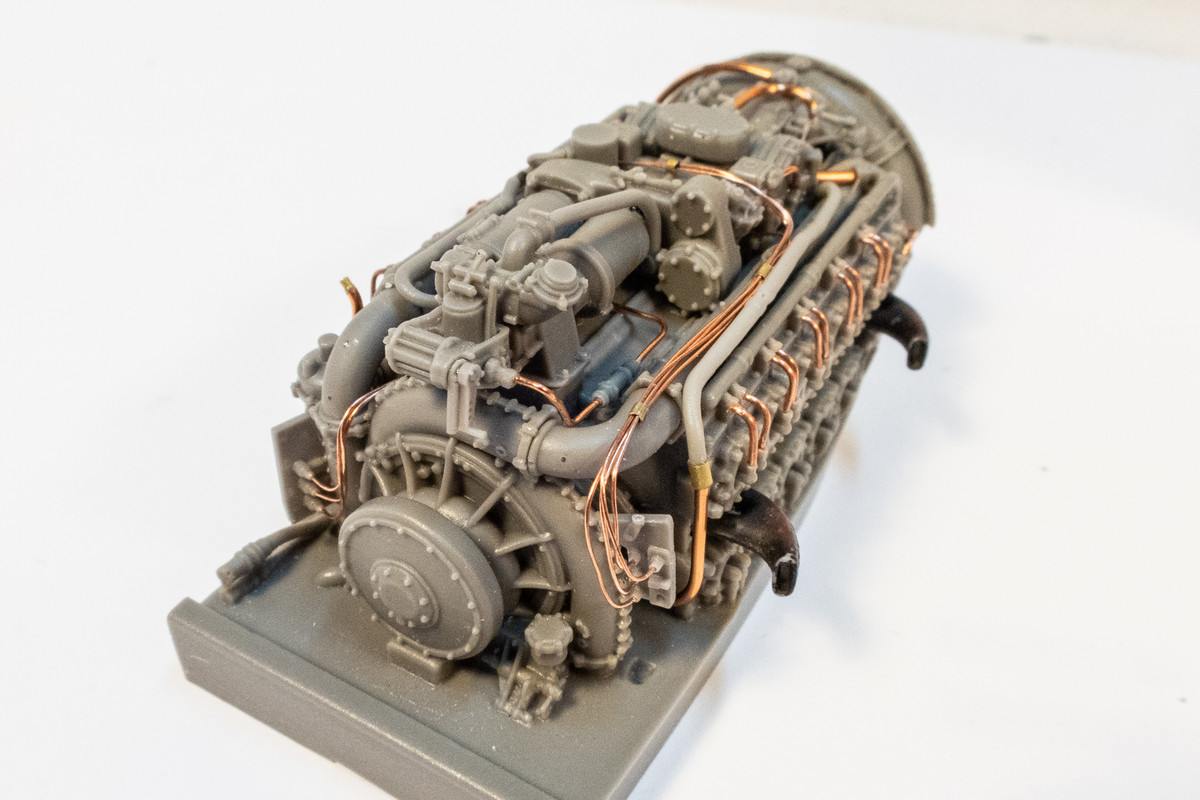
The assembly of the engine is just about complete. The segmented piping, semi-circular brace and the bulkhead are the only detachable items. The pipe on the bulkhead to was changed to connect with the engine.
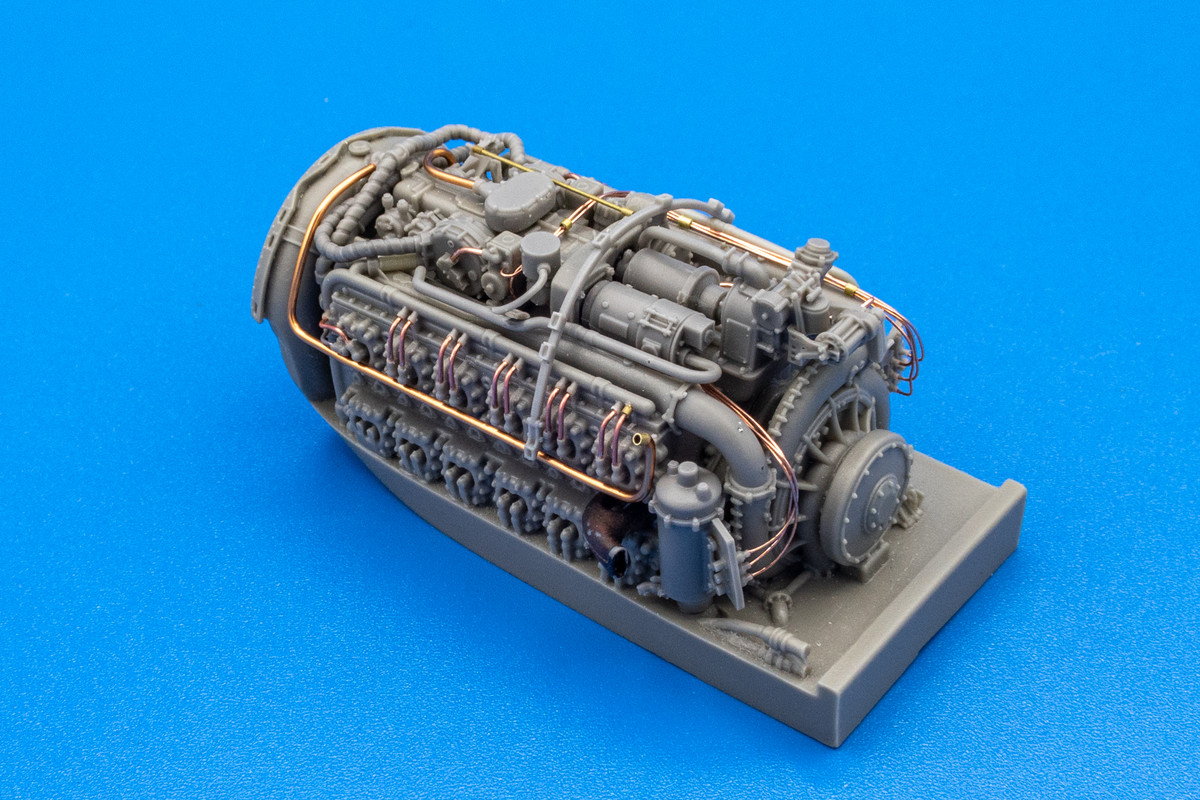
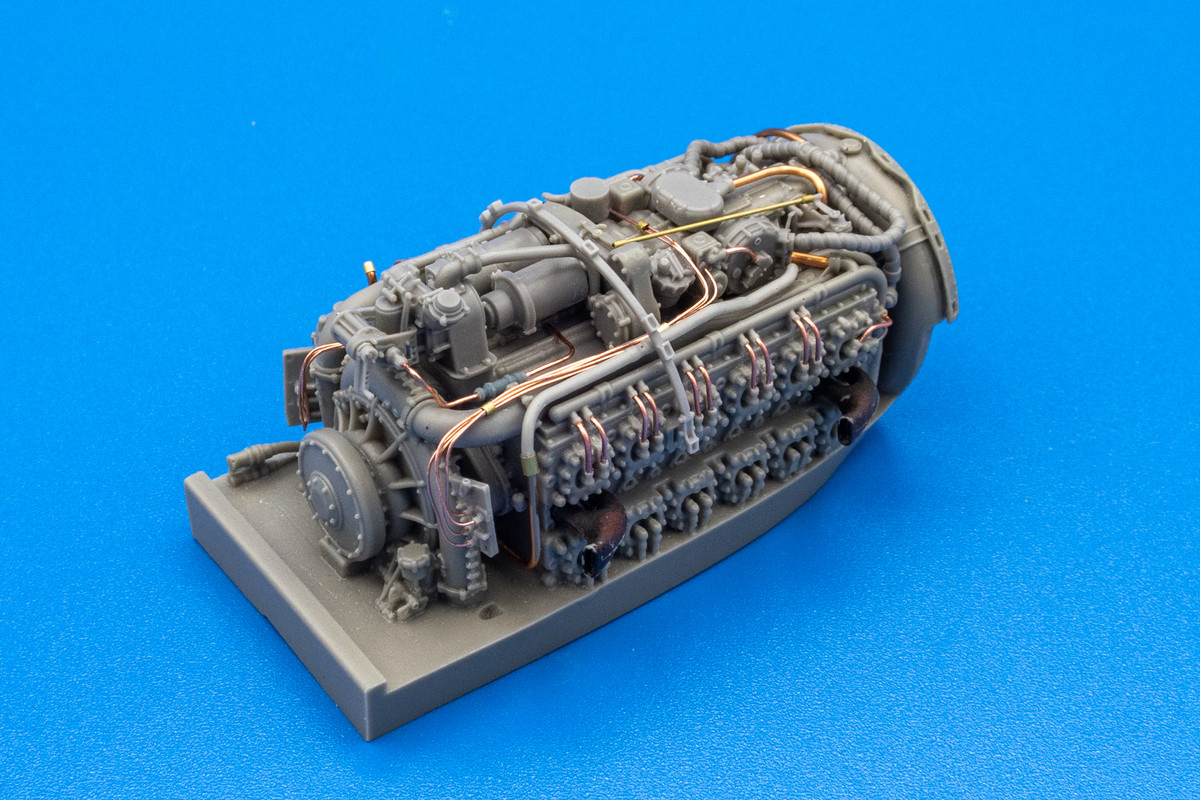
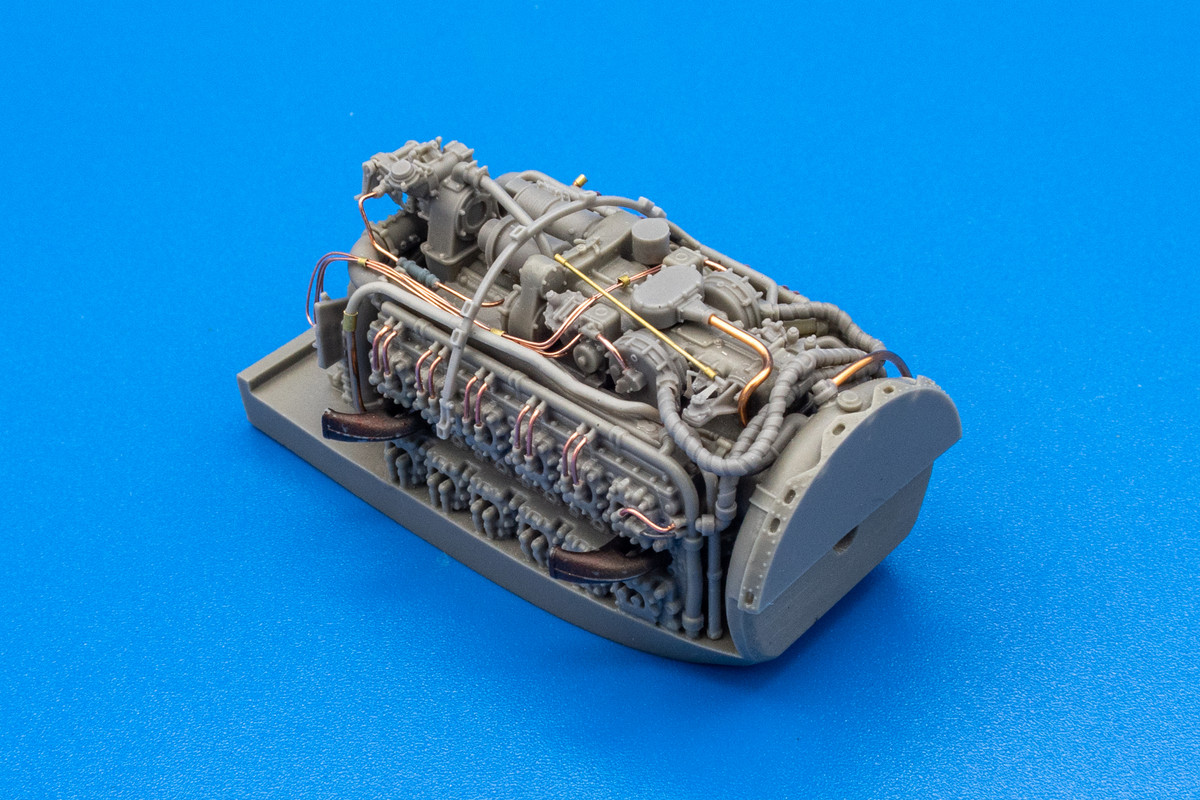
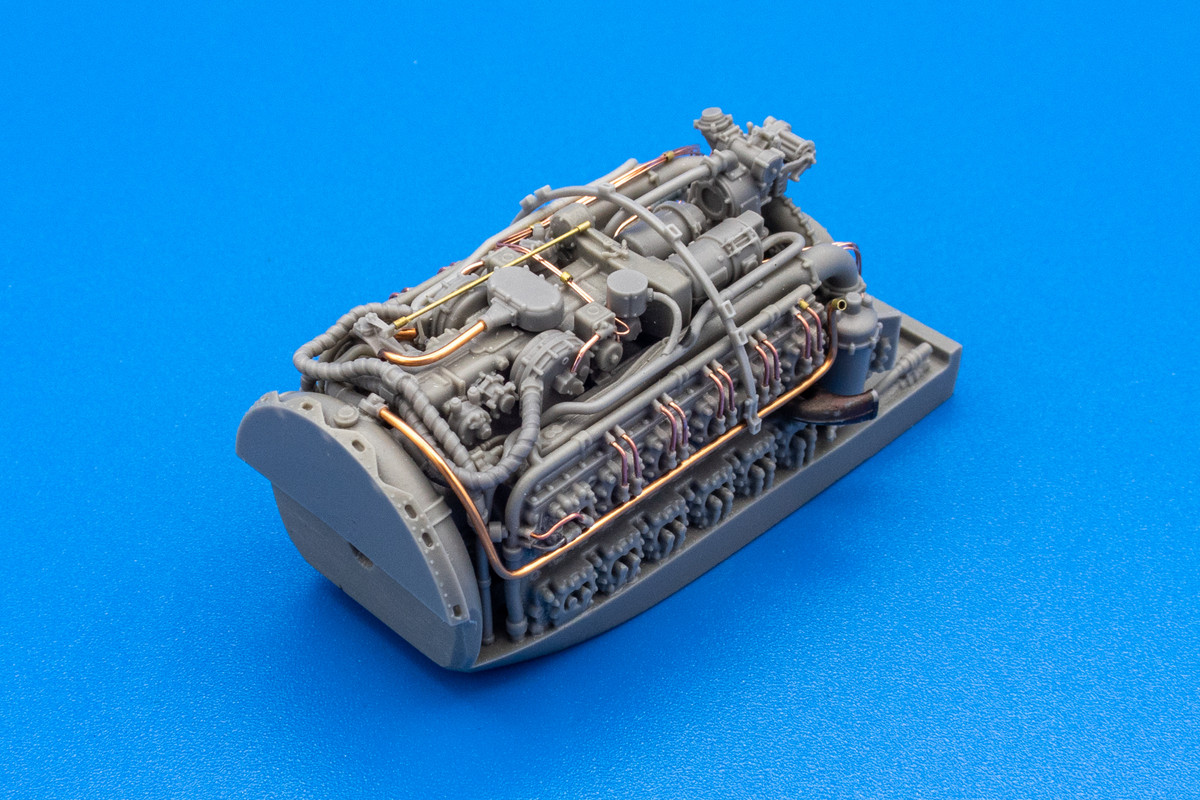
With the bulkhead in place...
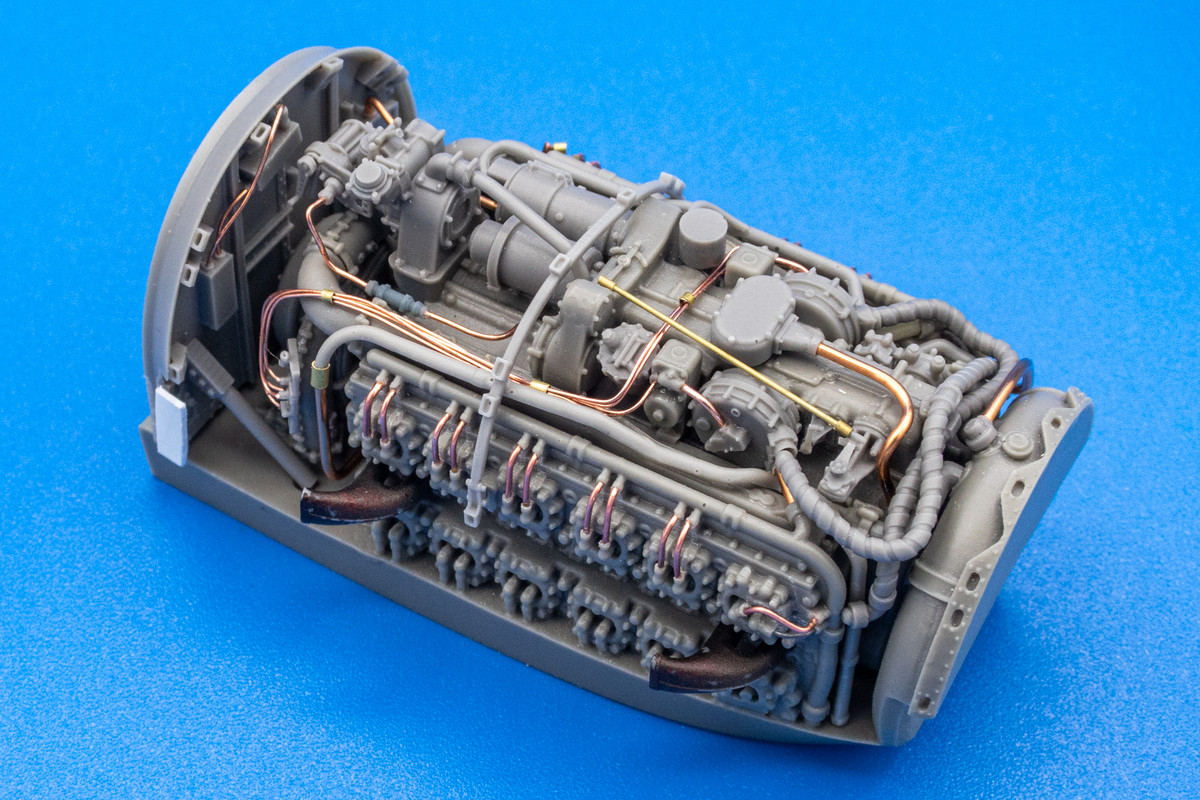
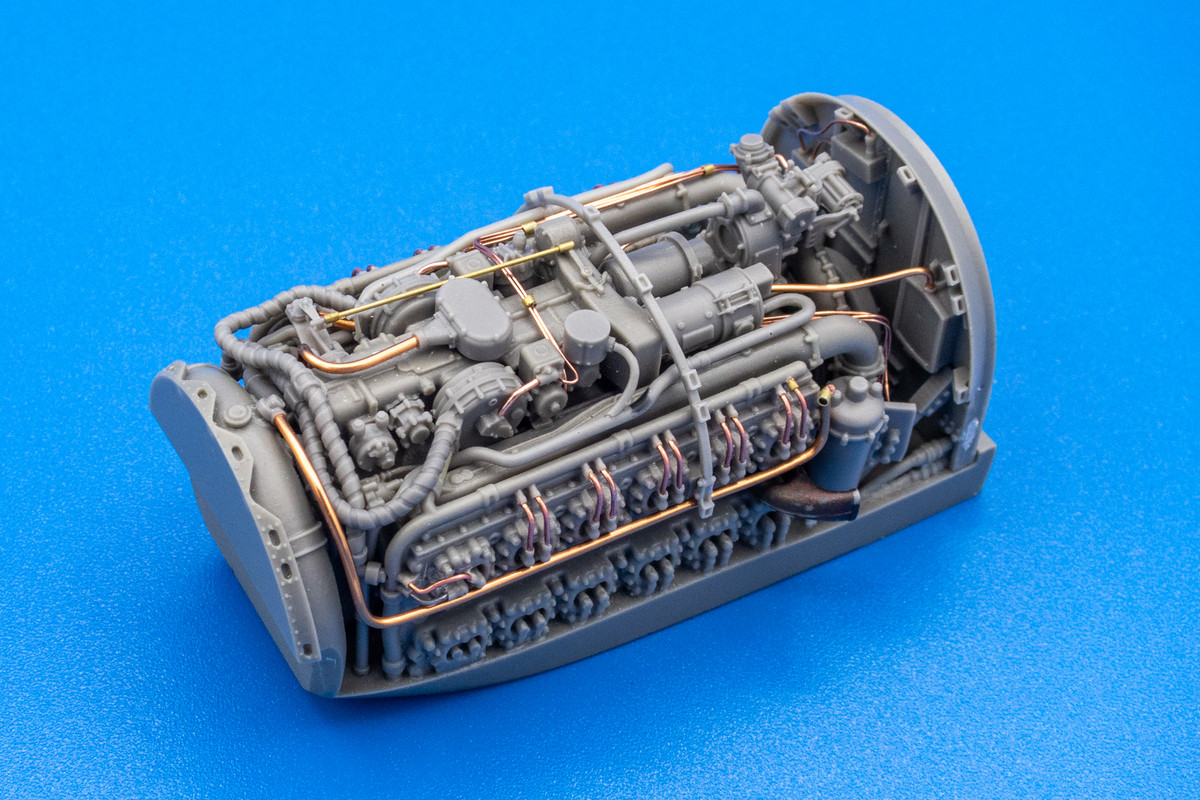
The exhaust pipes have taken a beating and will be removed before painting begins.
Work on the engine continues. I've accounted for all of the resin parts shown on plans except one. Part PUR46, which is some sort of small cannister.
I scanned the instructions multiple times to find it but all I could find was the text "PUR46" (which I've highlighted in blue below) with no corresponding figure or instruction.
One deviation from the instructions you need to make is to hold off on installing the pair of PUR53 parts in Step 33 and 34 (highlighted in red above). These are short stubs of piping which will block the installation of the longer resin pipes PUR24 and PUR25 (highlighted in red below) described in Step 35 and 36. Make sure you glue PUR53 after Installing PUR24 and PUR25.
There are a couple of wiring harnesses that need to be added. I've tried to approach these logically with the goal of making sure everything is securely glued into place.
The assembly of the engine is just about complete. The segmented piping, semi-circular brace and the bulkhead are the only detachable items. The pipe on the bulkhead to was changed to connect with the engine.
With the bulkhead in place...
The exhaust pipes have taken a beating and will be removed before painting begins.
John aka JKim
-----------<><
-----------<><
-
jeaton01

- Elite Member
- Posts: 2374
- Joined: Thu Apr 23, 2020 9:20 am
- Location: Northern California
- Contact:
Re: 1/32 Special Hobby Hawker Tempest Mk V
Is it possible that Step 32 will contain PUR46, or maybe it should be attached to what was assembled in step 32? Very nice work!
I redid the photos in my Yak 3 post and would be interested in what you think.
I redid the photos in my Yak 3 post and would be interested in what you think.
-
tempestjohnny

- Elite Member
- Posts: 3826
- Joined: Sat Oct 15, 2016 4:51 am
- Location: Naples. FL

Re: 1/32 Special Hobby Hawker Tempest Mk V
I don't know what to say at all. Just that this is so beautiful.
March as one, Don't look back
Odin's sons... Attack!
Unleash hell! Do not repent! Warfare grants us no lament
Let your weapons slash and tear This is no place for fear
Hold the lines! Move as one! In unity our victory's won
Our shields will form a mighty wall
United we shall never fall
Odin's sons... Attack!
Unleash hell! Do not repent! Warfare grants us no lament
Let your weapons slash and tear This is no place for fear
Hold the lines! Move as one! In unity our victory's won
Our shields will form a mighty wall
United we shall never fall