Trumpeter P-47D Razorback "Eileen"

Re: Trumpeter P-47D Razorback "Eileen"
Stunning detail work as ever John!
Stuart Templeton 'I may not be good but I'm slow...'

Re: Trumpeter P-47D Razorback "Eileen"
Excellent looking cockpit! You can see the dark chipping in the photos along with the bright dry brush
March as one, Don't look back
Odin's sons... Attack!
Unleash hell! Do not repent! Warfare grants us no lament
Let your weapons slash and tear This is no place for fear
Hold the lines! Move as one! In unity our victory's won
Our shields will form a mighty wall
United we shall never fall
Odin's sons... Attack!
Unleash hell! Do not repent! Warfare grants us no lament
Let your weapons slash and tear This is no place for fear
Hold the lines! Move as one! In unity our victory's won
Our shields will form a mighty wall
United we shall never fall
-
TheMongoose
- Advanced Member
- Posts: 173
- Joined: Fri Oct 21, 2022 11:51 am
Re: Trumpeter P-47D Razorback "Eileen"
You better get a green screen program to set up your pics when done because if you put a background with these we won’t know what’s real or not!
-
Medicman71

- Elite Member
- Posts: 11396
- Joined: Mon Apr 07, 2014 9:32 am
- Location: Houston, Tx
Re: Trumpeter P-47D Razorback "Eileen"
Incredible work as always! 
Mike
Sponsored by Boeing, Lockheed Martin, Northrop Grumman, Saab, BAE, and Dassault
Sponsored by Boeing, Lockheed Martin, Northrop Grumman, Saab, BAE, and Dassault

Re: Trumpeter P-47D Razorback "Eileen"
Thanks guys! Creeping along on the cockpit... it's nice because of the large size of the P-47 office. There's lots of room to play with.
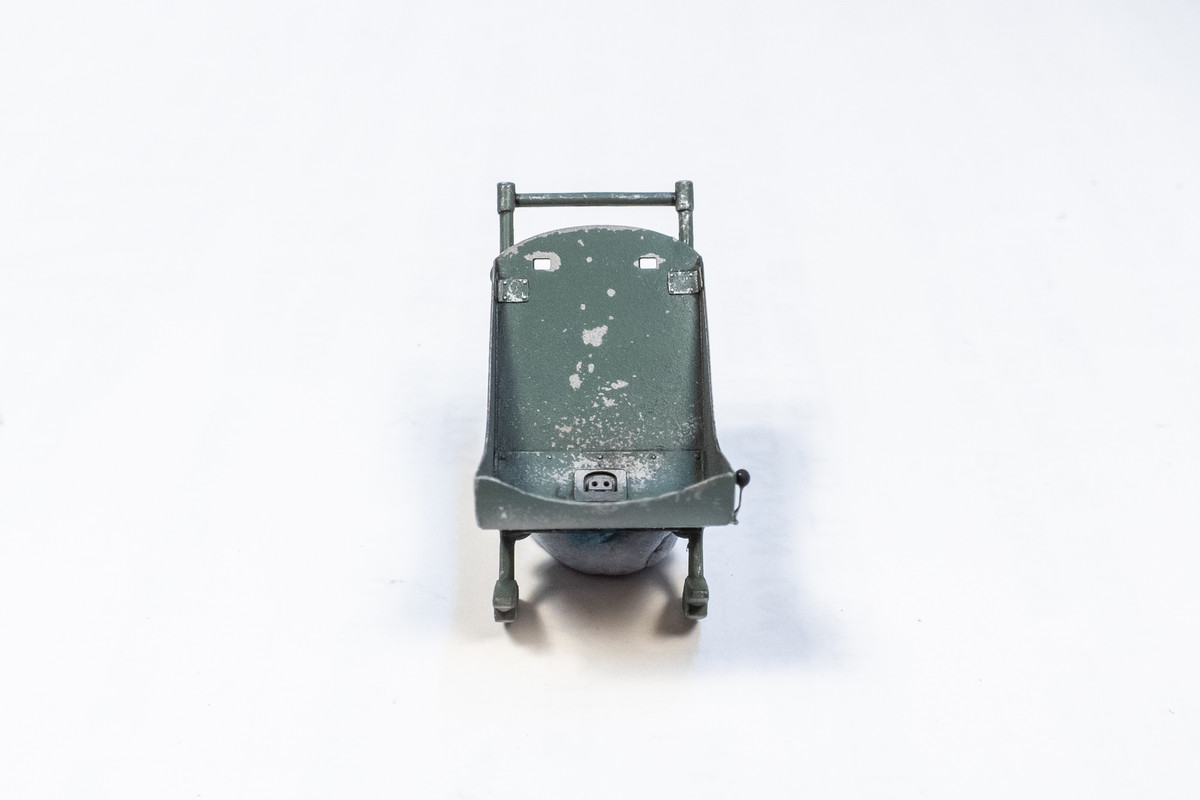
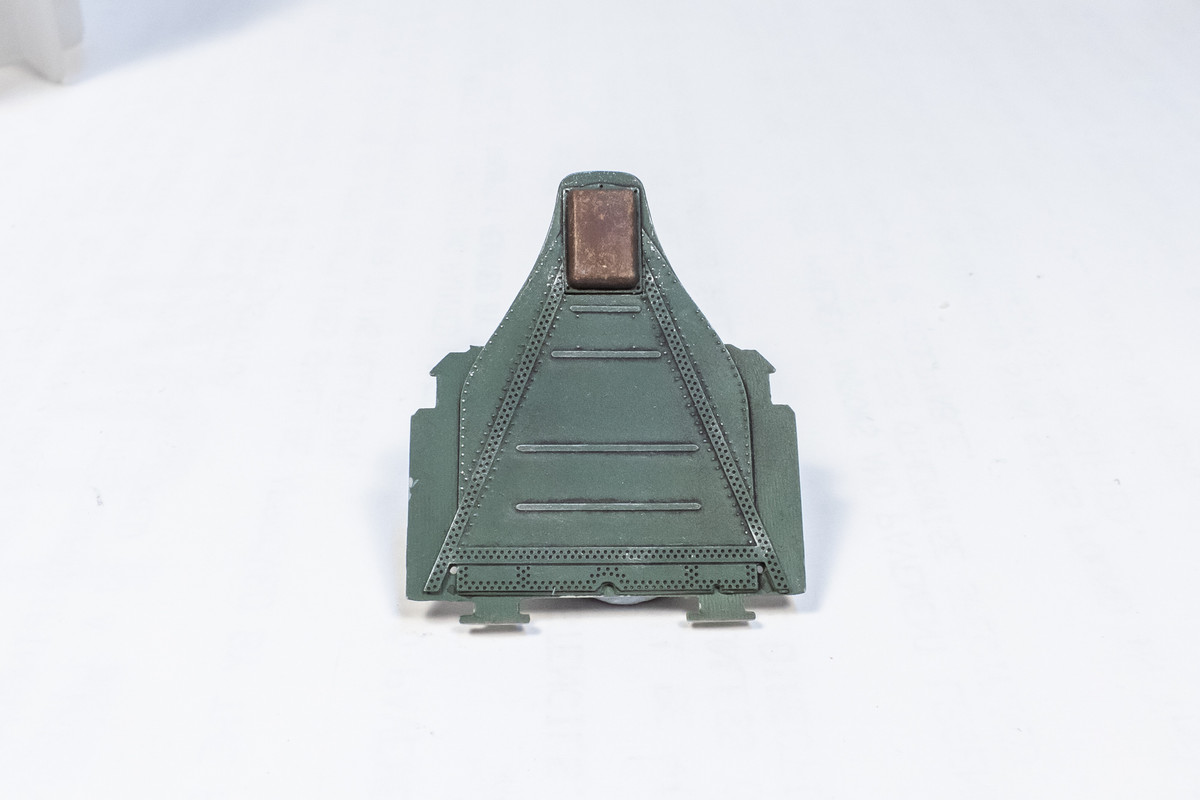
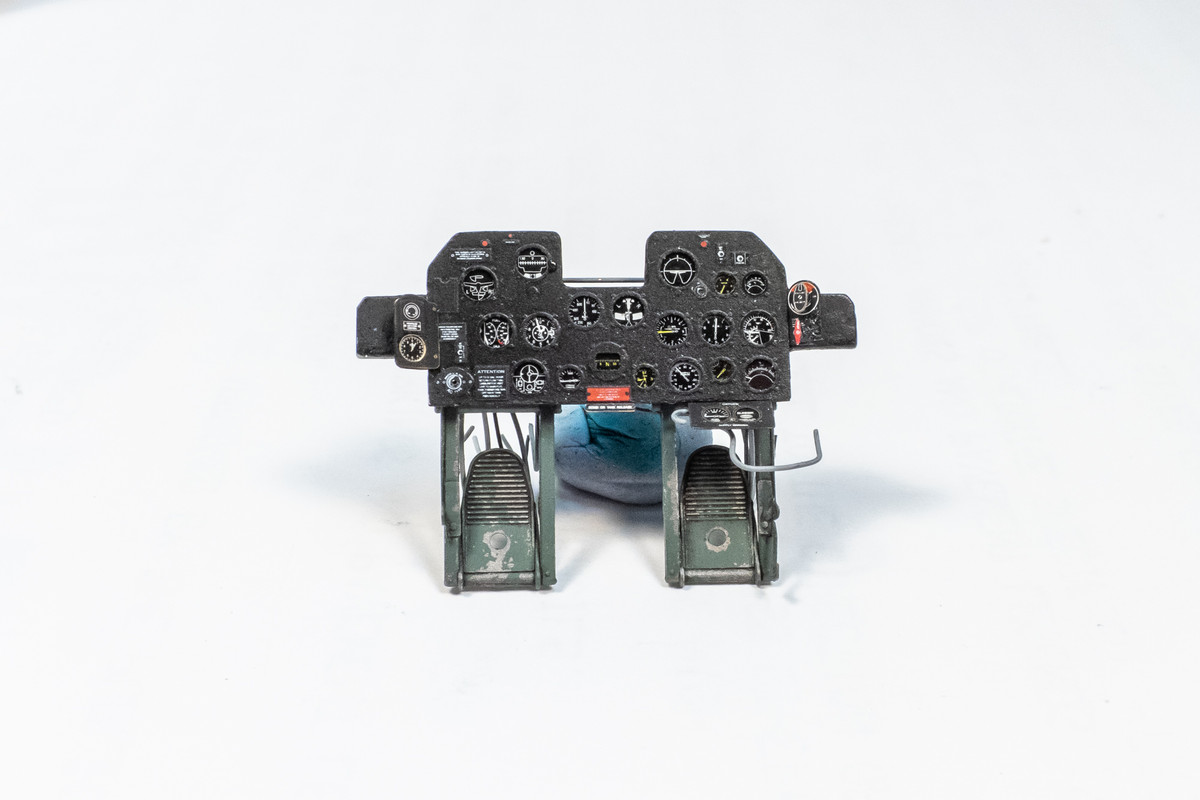
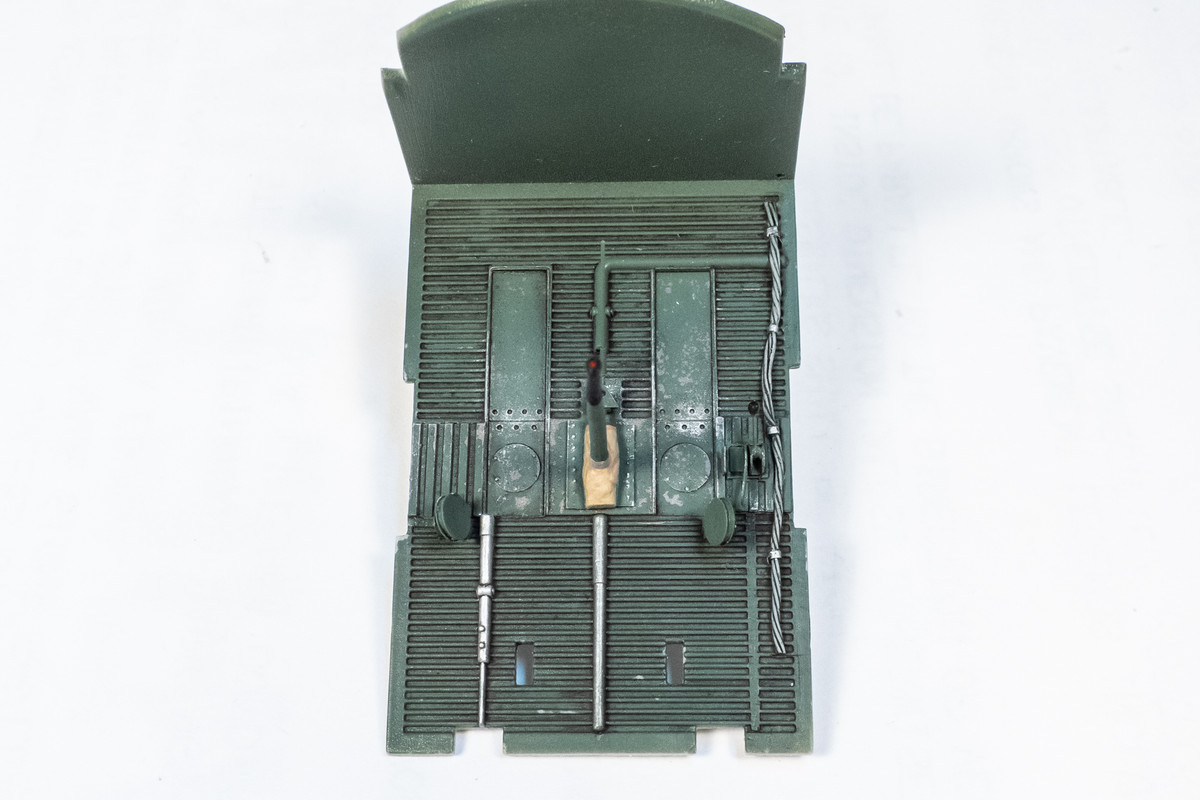
Here are some views of the components that have been painted so far. I've tried to position the parts so that the chipping is more visible.
The seat.
The rear cockpit bulkhead and headrest.
The instrument panel with the foot rests added.
The cockpit floor with the control stick.
Adding adding levers to the main circuit panel was fiddly and I've decided not to go any further and add the even smaller knobs that could possibly populate other areas of the panel.
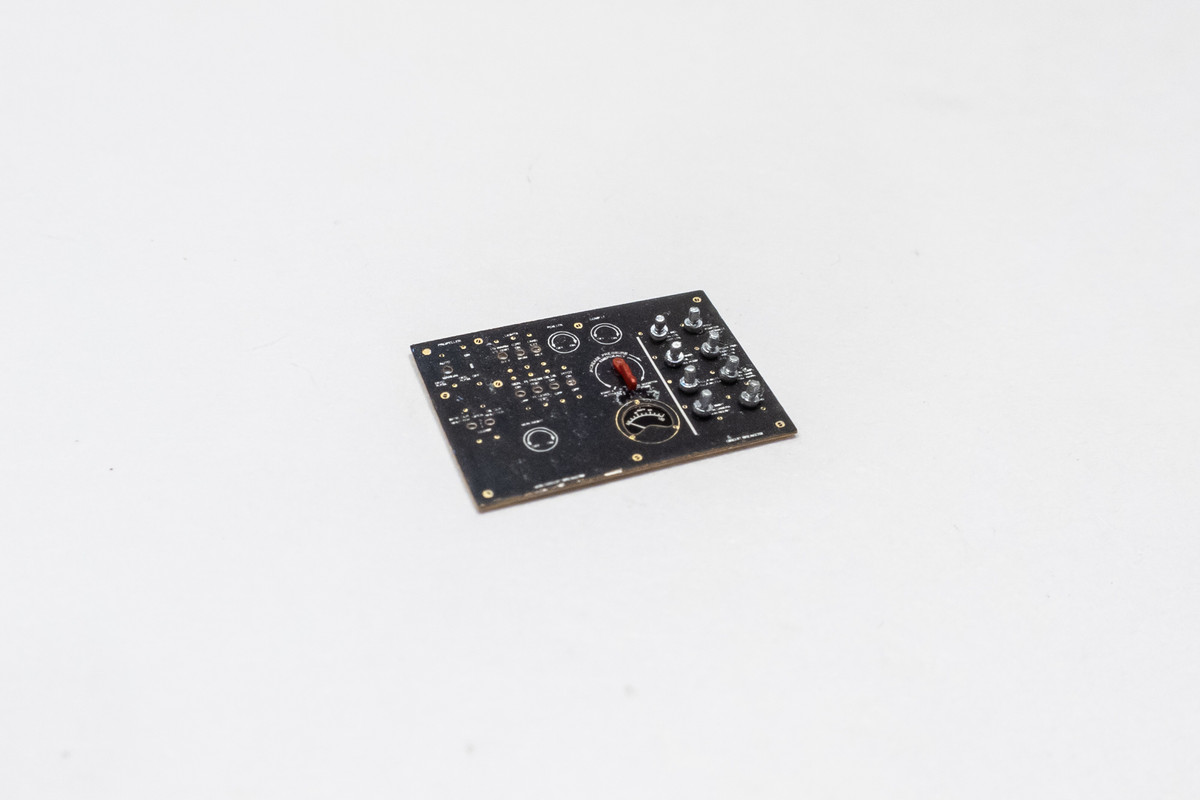
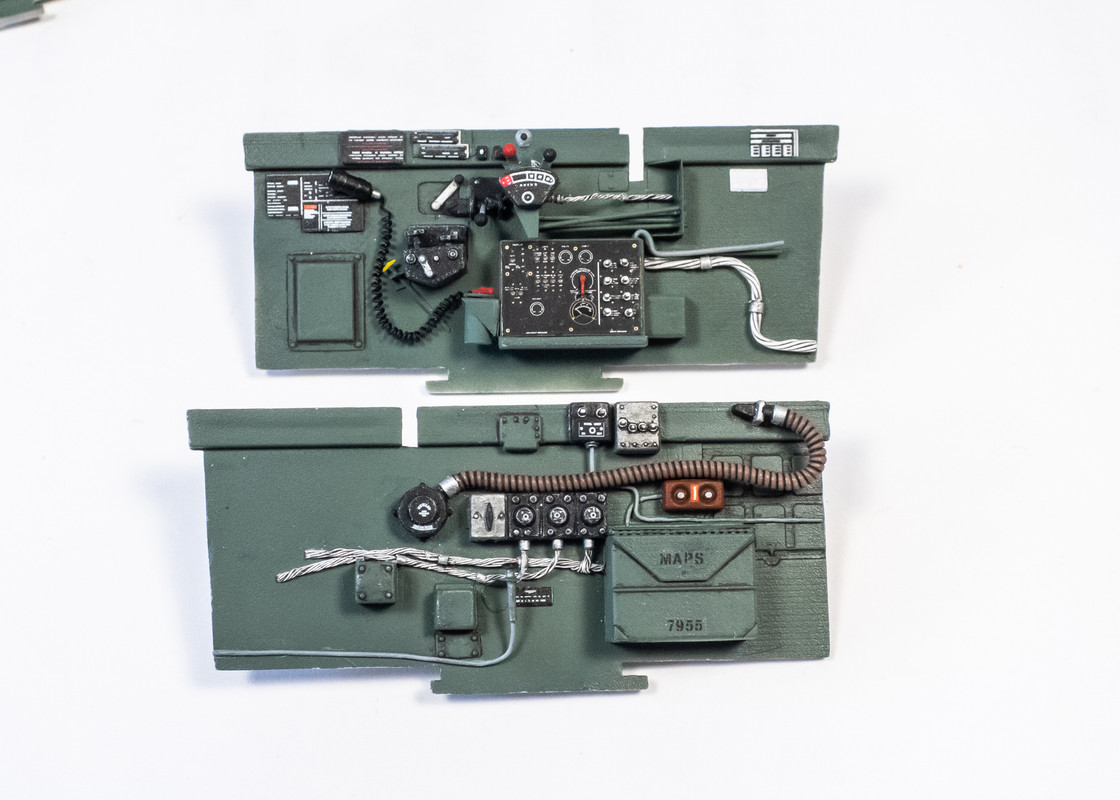
Completion of the main circuit panel signals the last step in the cockpit sidewall work. The sidewalls are now complete.
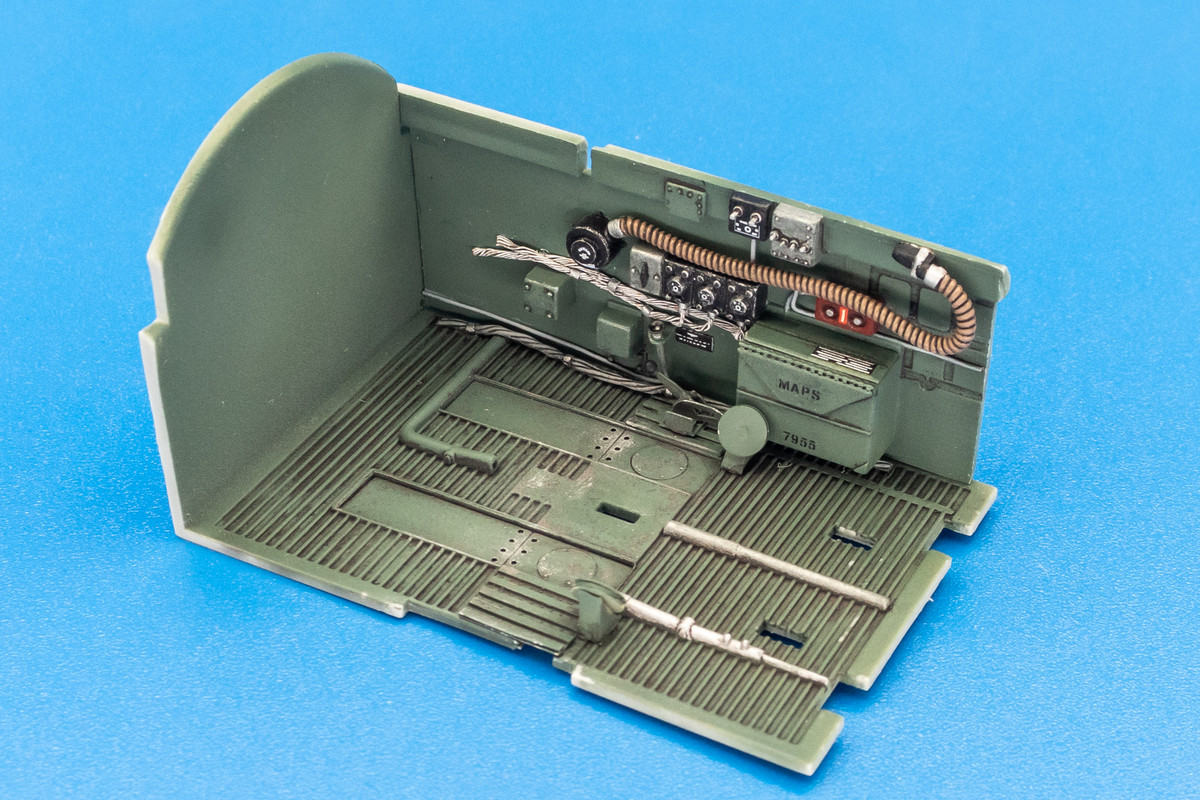
The starboard wall mounted on the cockpit floor.
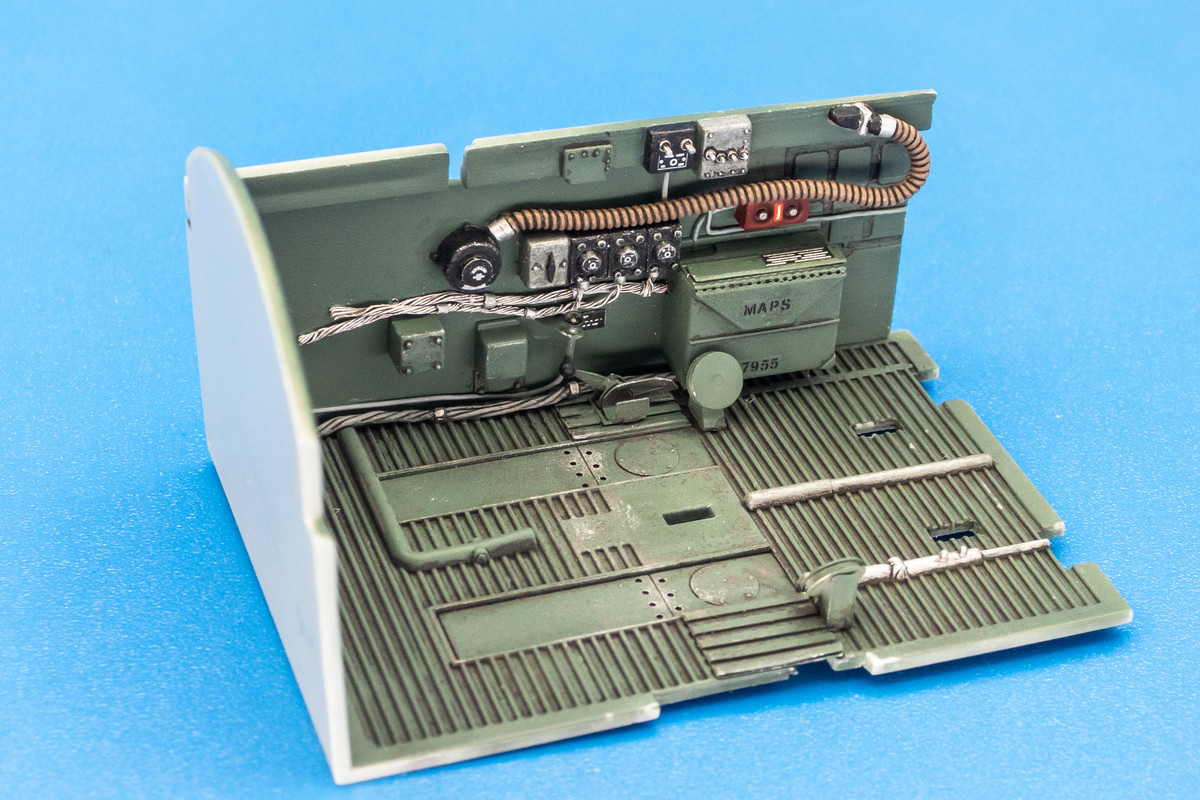
The port side.
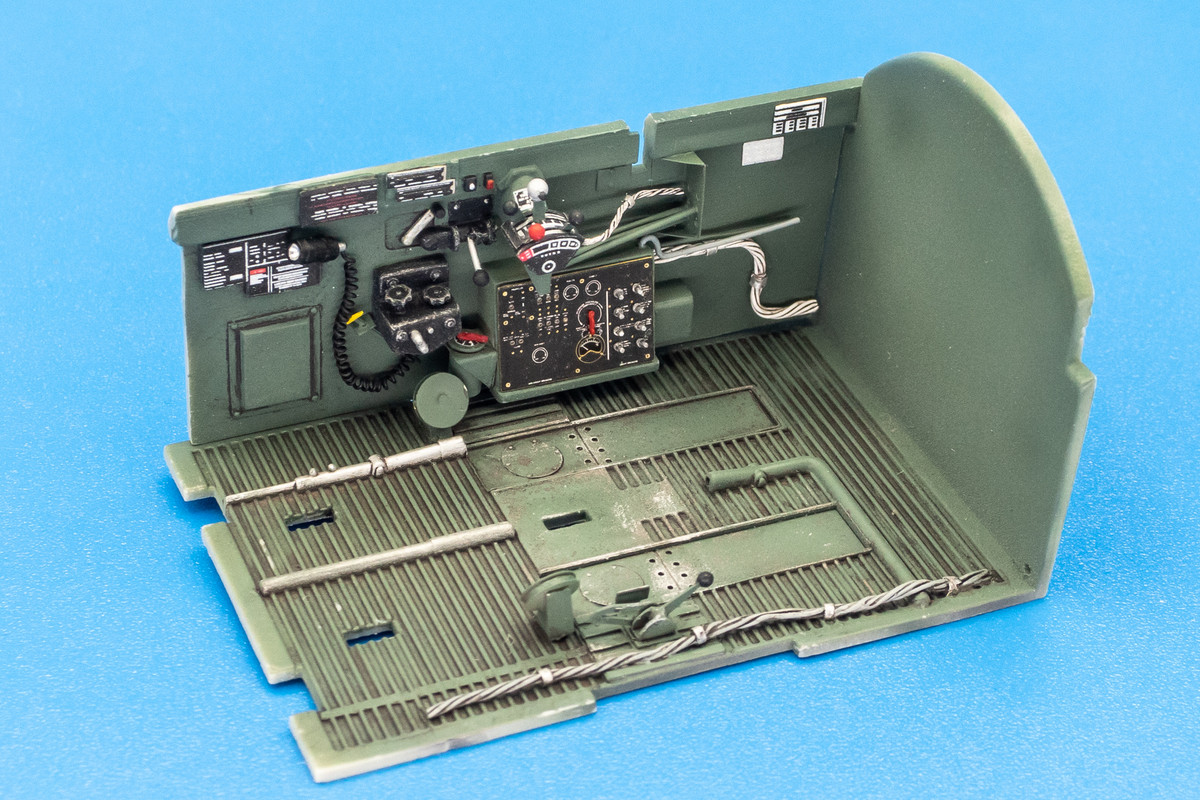
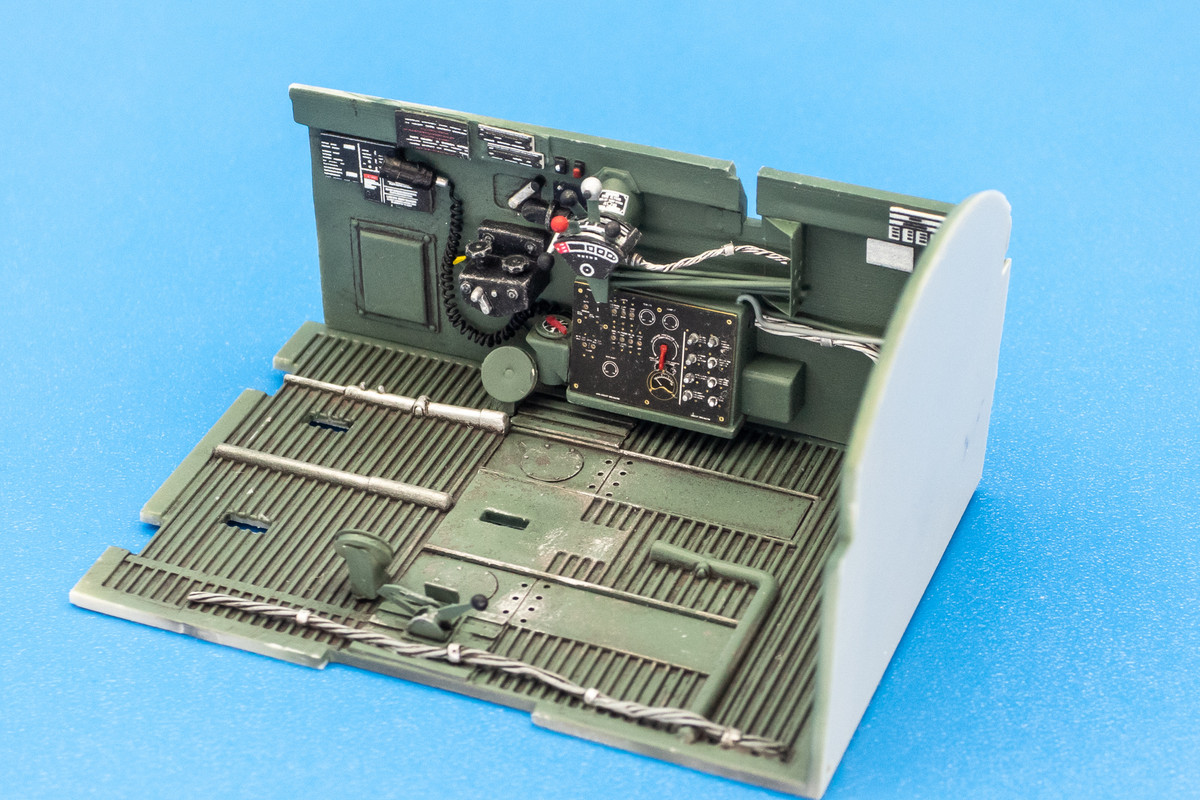
Here are some views of the components that have been painted so far. I've tried to position the parts so that the chipping is more visible.
The seat.
The rear cockpit bulkhead and headrest.
The instrument panel with the foot rests added.
The cockpit floor with the control stick.
Adding adding levers to the main circuit panel was fiddly and I've decided not to go any further and add the even smaller knobs that could possibly populate other areas of the panel.
Completion of the main circuit panel signals the last step in the cockpit sidewall work. The sidewalls are now complete.
The starboard wall mounted on the cockpit floor.
The port side.
John aka JKim
-----------<><

-----------<><
-
tempestjohnny

- Elite Member
- Posts: 3825
- Joined: Sat Oct 15, 2016 4:51 am
- Location: Naples. FL


-
BlackSheep214

- Elite Member
- Posts: 13596
- Joined: Sun Apr 06, 2014 8:47 pm
Re: Trumpeter P-47D Razorback "Eileen"
Damn..... can I sit in it when you’re done? Pure entertainment watching this come together.
“Who controls the skies, controls the fate of this Earth”
Author unknown- 352nd Fighter Group, Blue-Nosed Bastards of Bodney
“Send one plane it’s a sortie; send two planes it’s a flight; send four planes it’s a test of airpower. - Richard Kohn
Author unknown- 352nd Fighter Group, Blue-Nosed Bastards of Bodney
“Send one plane it’s a sortie; send two planes it’s a flight; send four planes it’s a test of airpower. - Richard Kohn
Re: Trumpeter P-47D Razorback "Eileen"
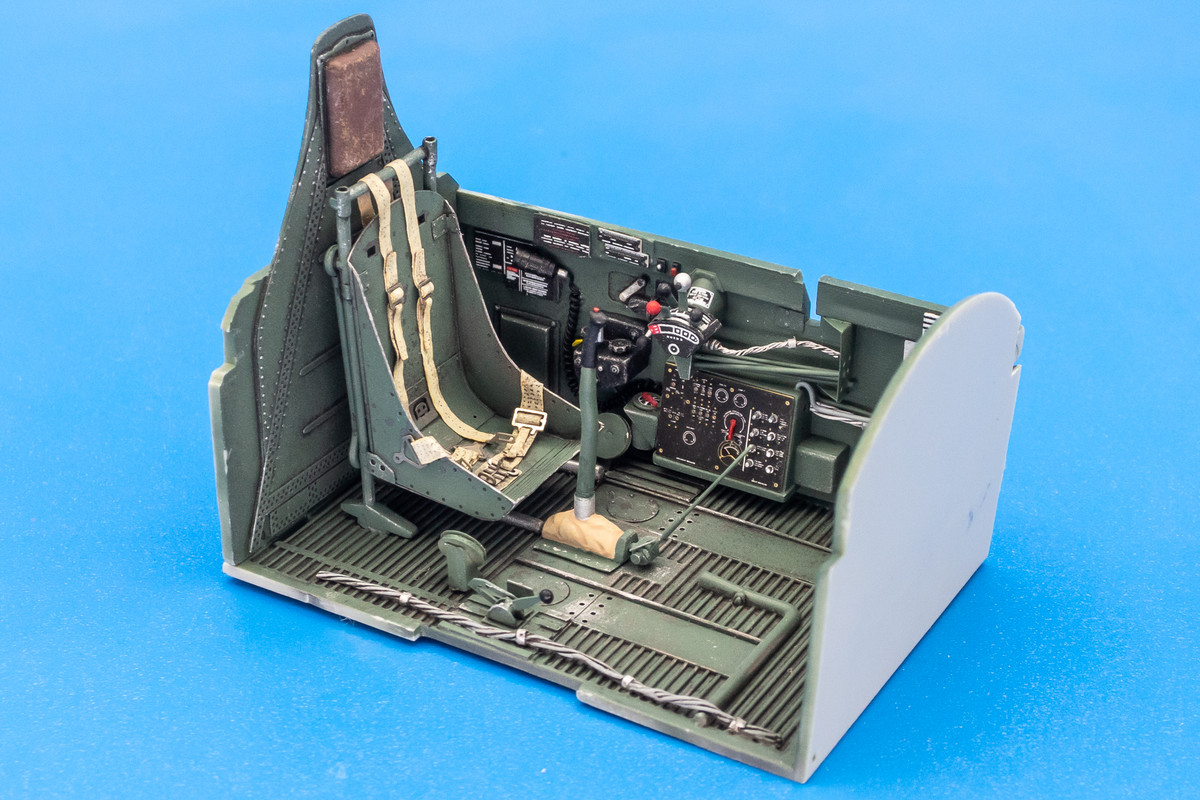
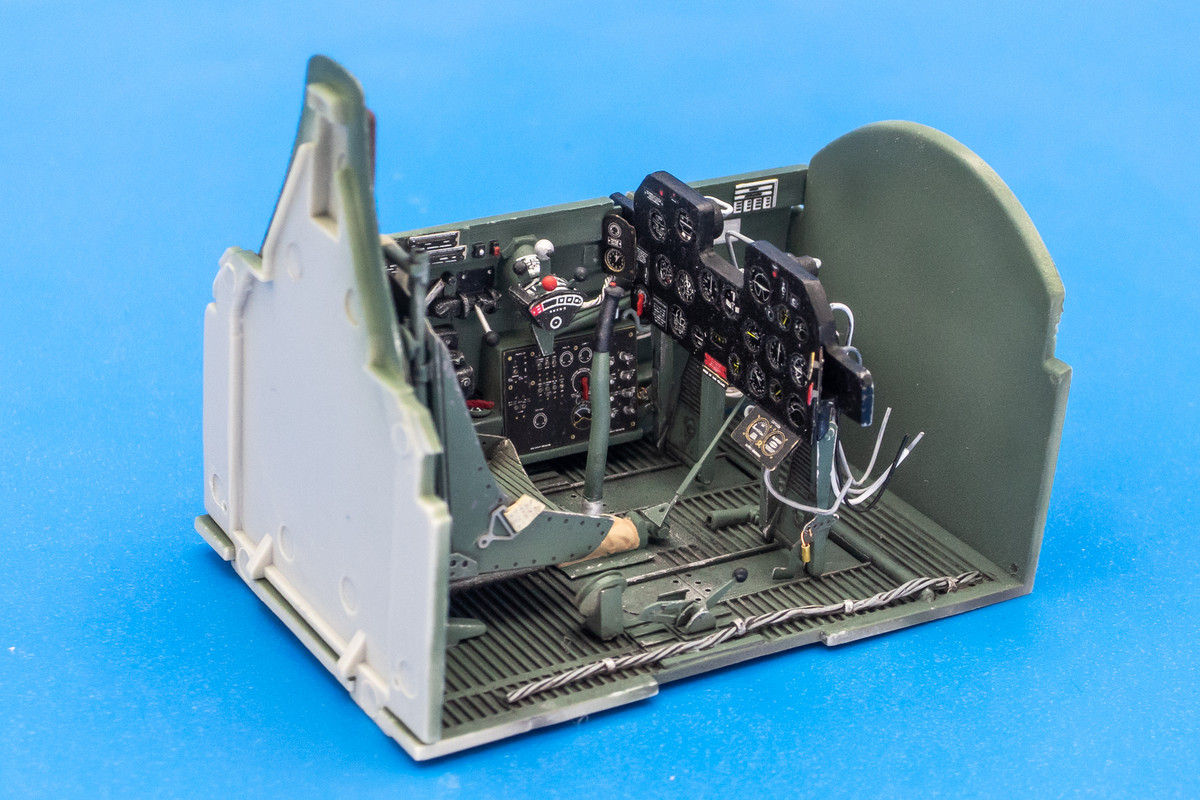
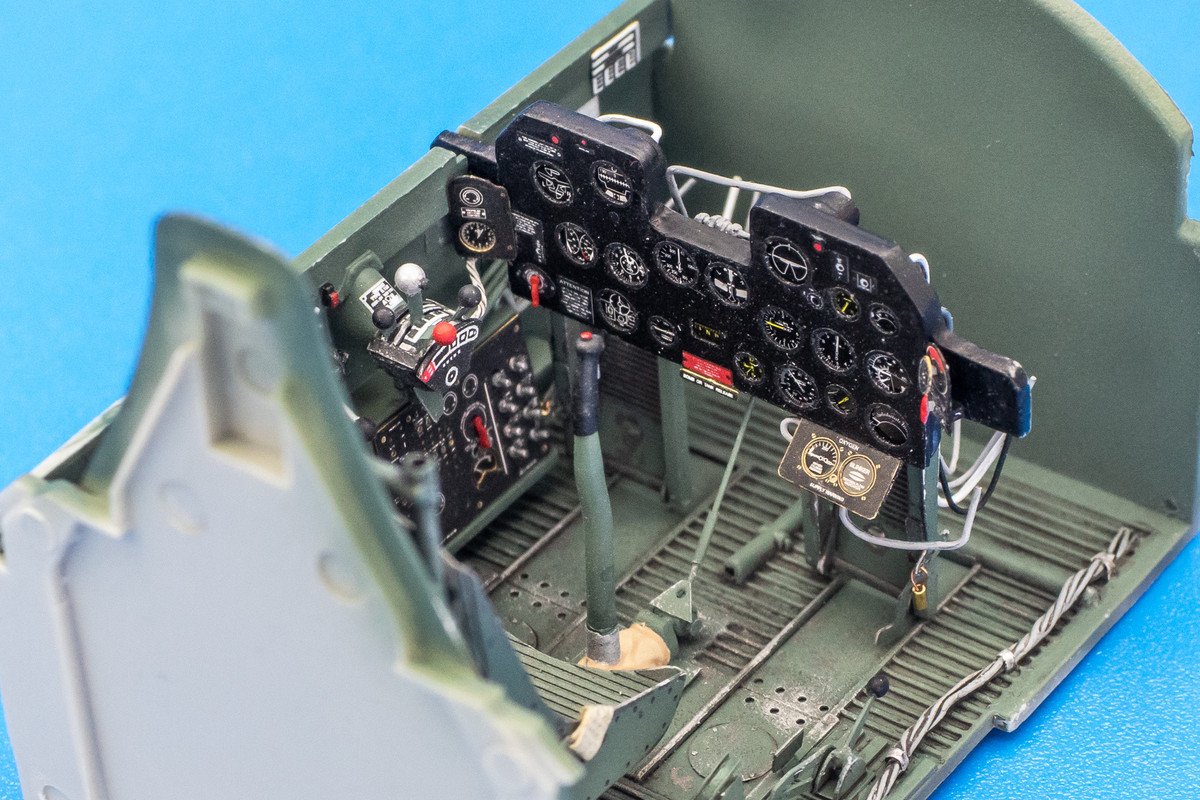
Time to cobble the HGW seat harnesses together.
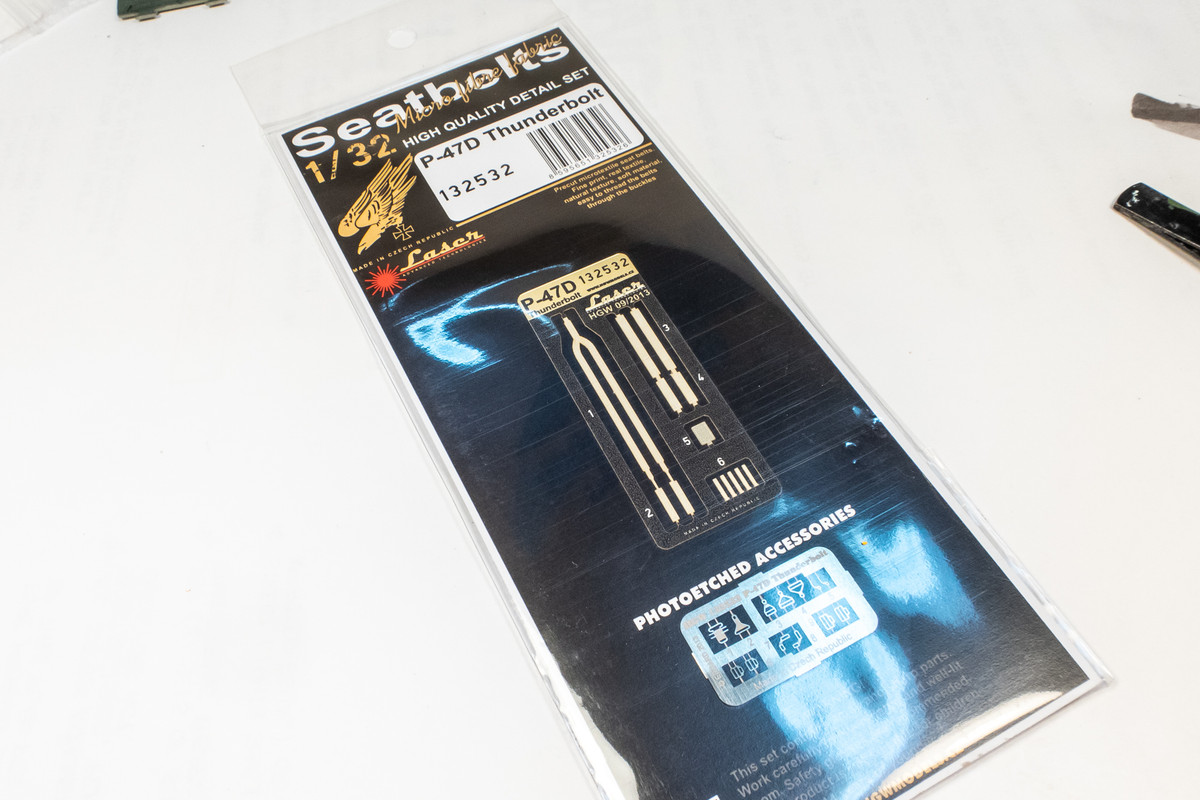
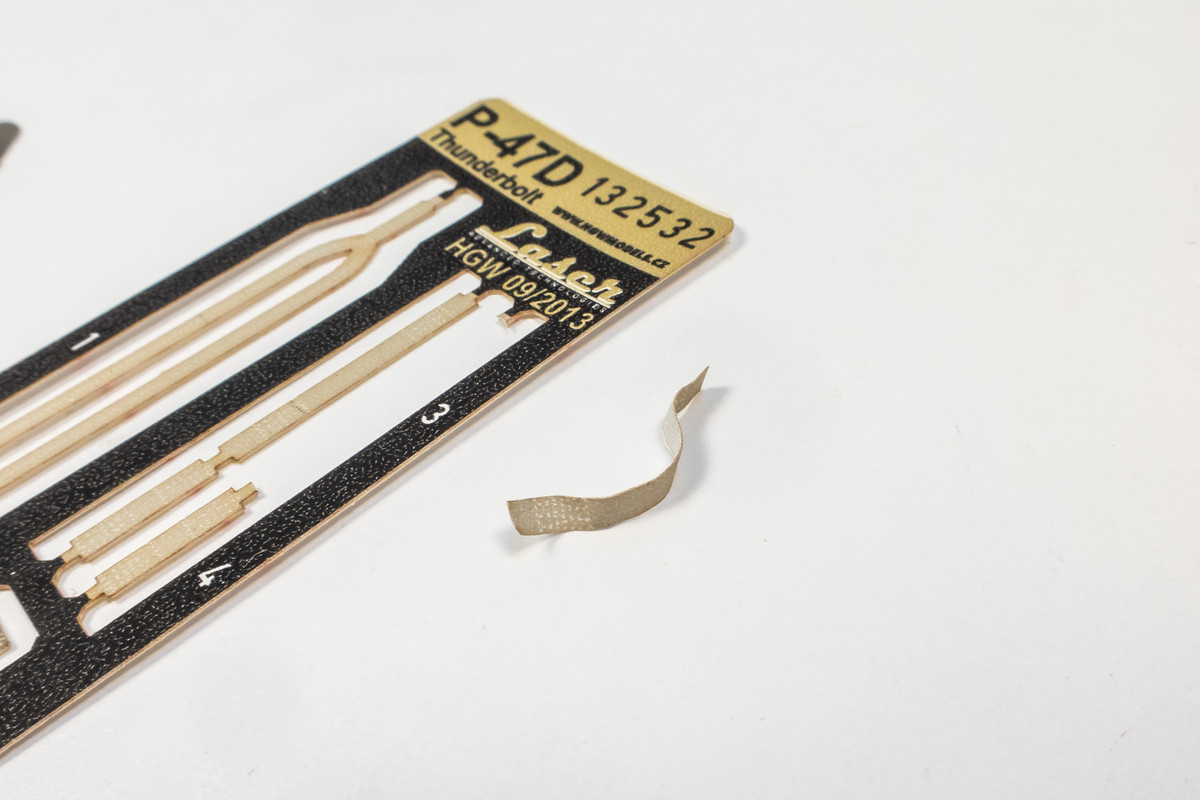
The HGW harnesses feature a textile-based material for the belts and photoetch for the buckles.
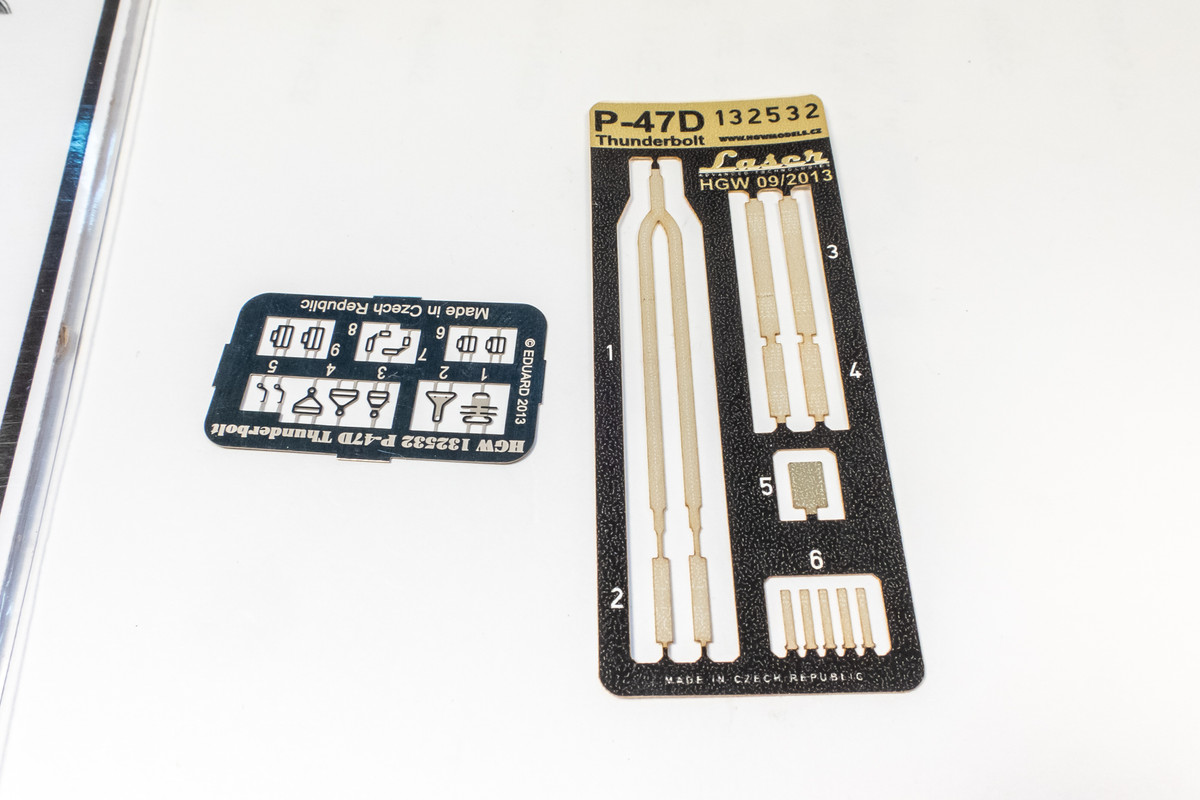
Remember to remove the paper backing from the belt pieces!
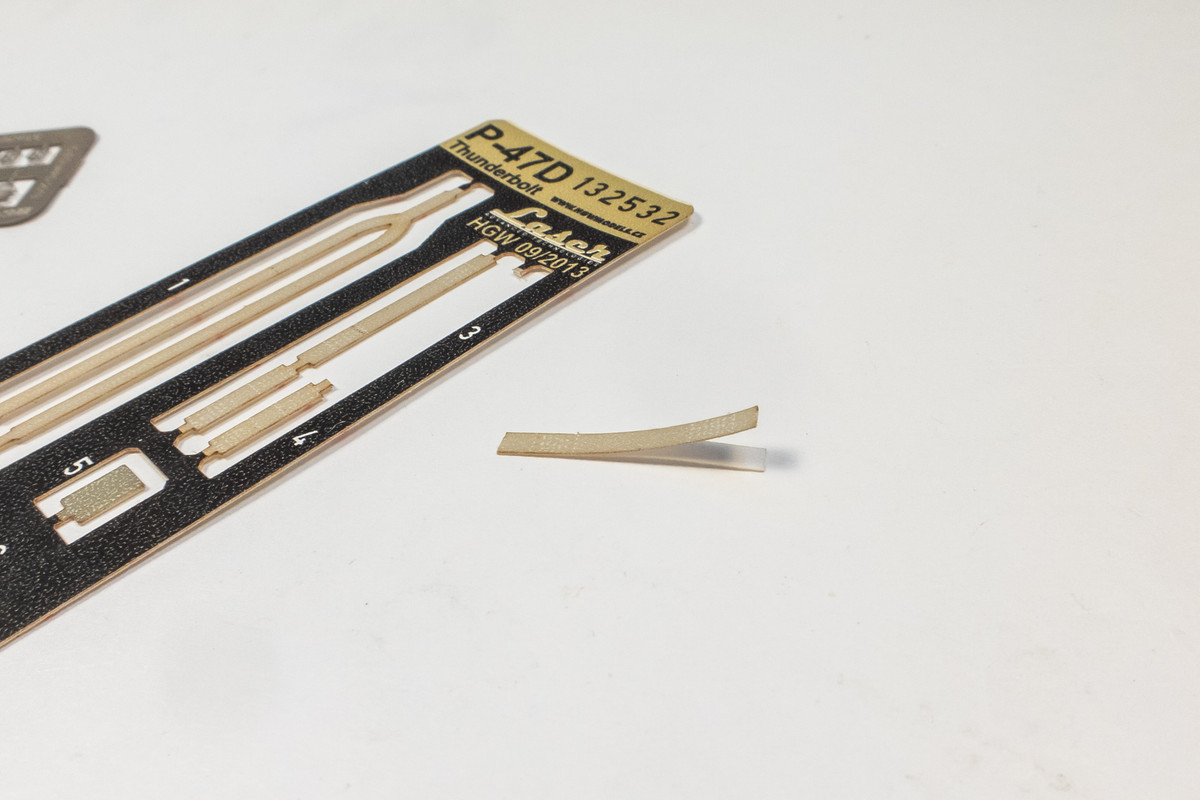
Per instructions, I like to crumple the fabric pieces to wrinkle and soften the pieces a little bit. I want to take full advantage of the fabric material.
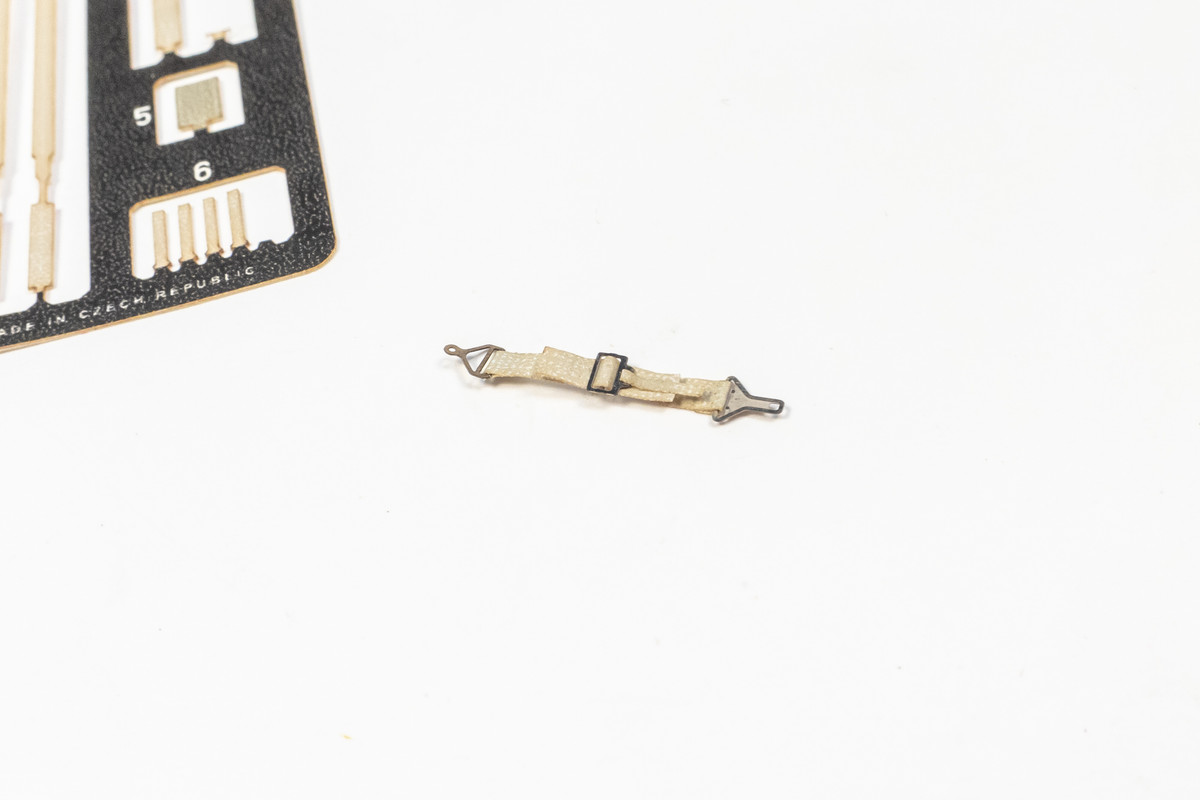
The buckles are threaded on and secured by folding/gluing the belt ends. I like to use PVA glue for this but CA glue works too.
After the lap belts are put together, they are glued into place onto the seat. The separate shoulder harness and the lap belts on the seat are given a coat of clear gloss (Alclad Aqua Gloss).
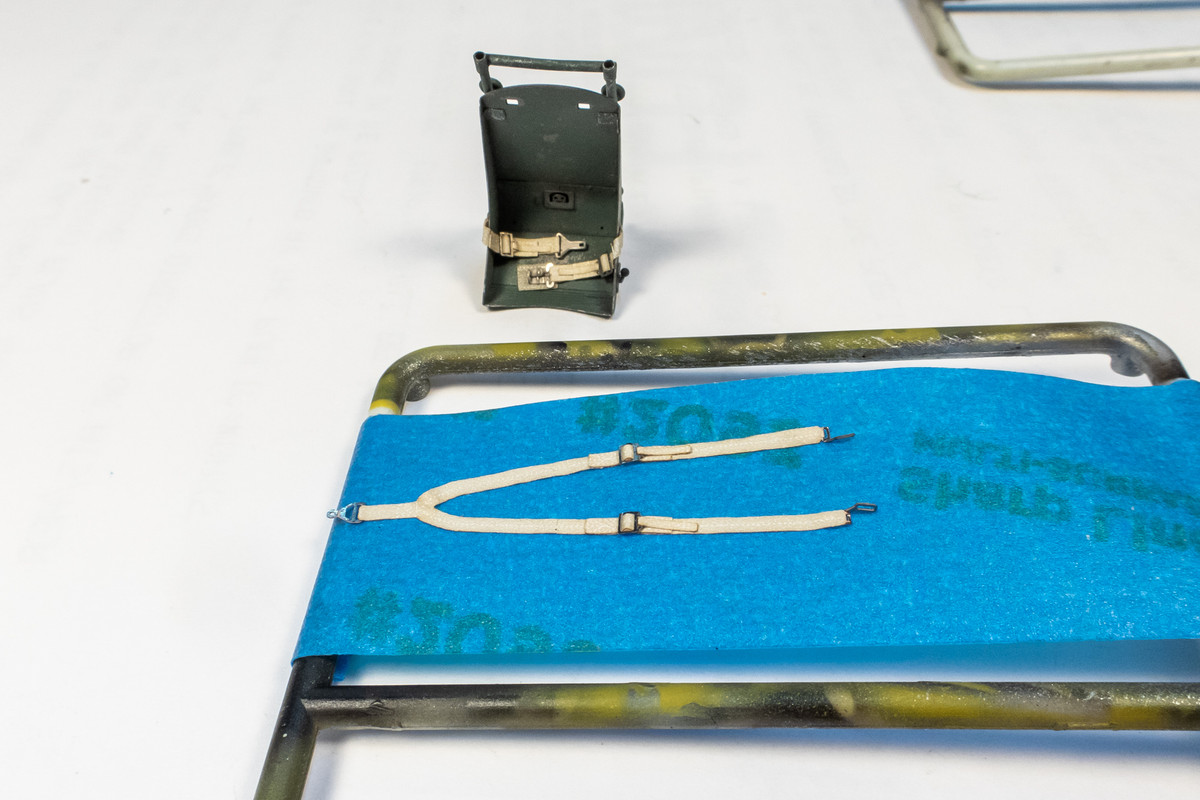
The HGW fabric material features little holes that represent stitching detail and that can be highlighted with a dark wash. Because the fabric material is porous, it can absorb the wash which is why a clear coat is used. But the stitching holes are quite small and could be eradicated if the clear coat is too thick. The trade-off is a little bit of staining on the harnesses, which is not a bad thing.
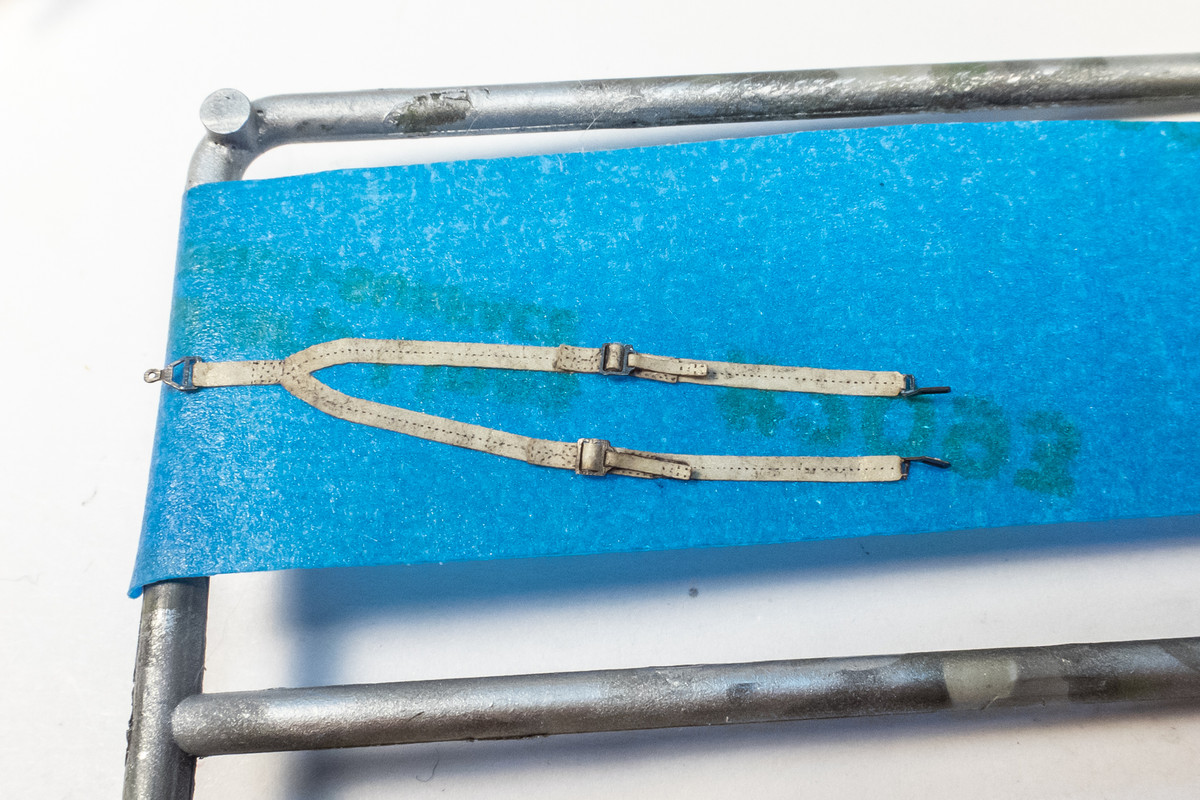
The shoulder harness is then glued into place with small dots of CA glue and the
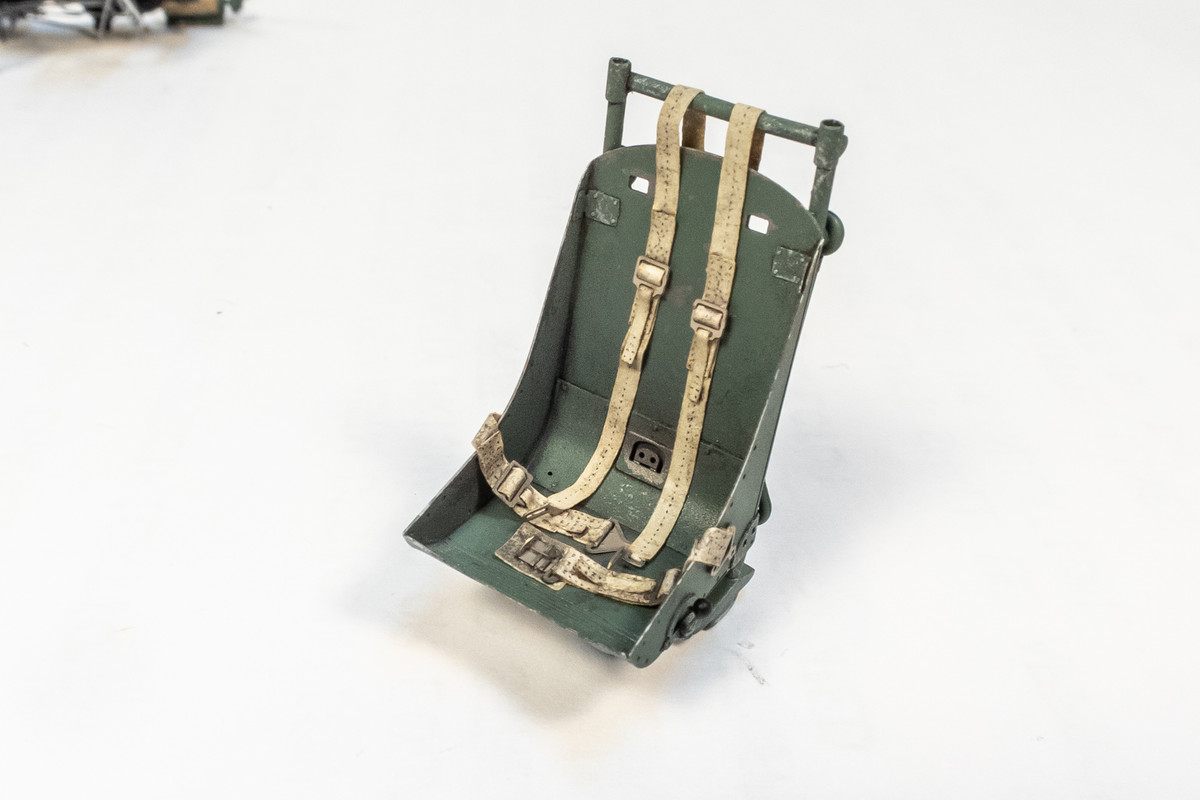
Here are some looks at the nearly finished cockpit with the painted sub-assemblies temporarily fit into place.
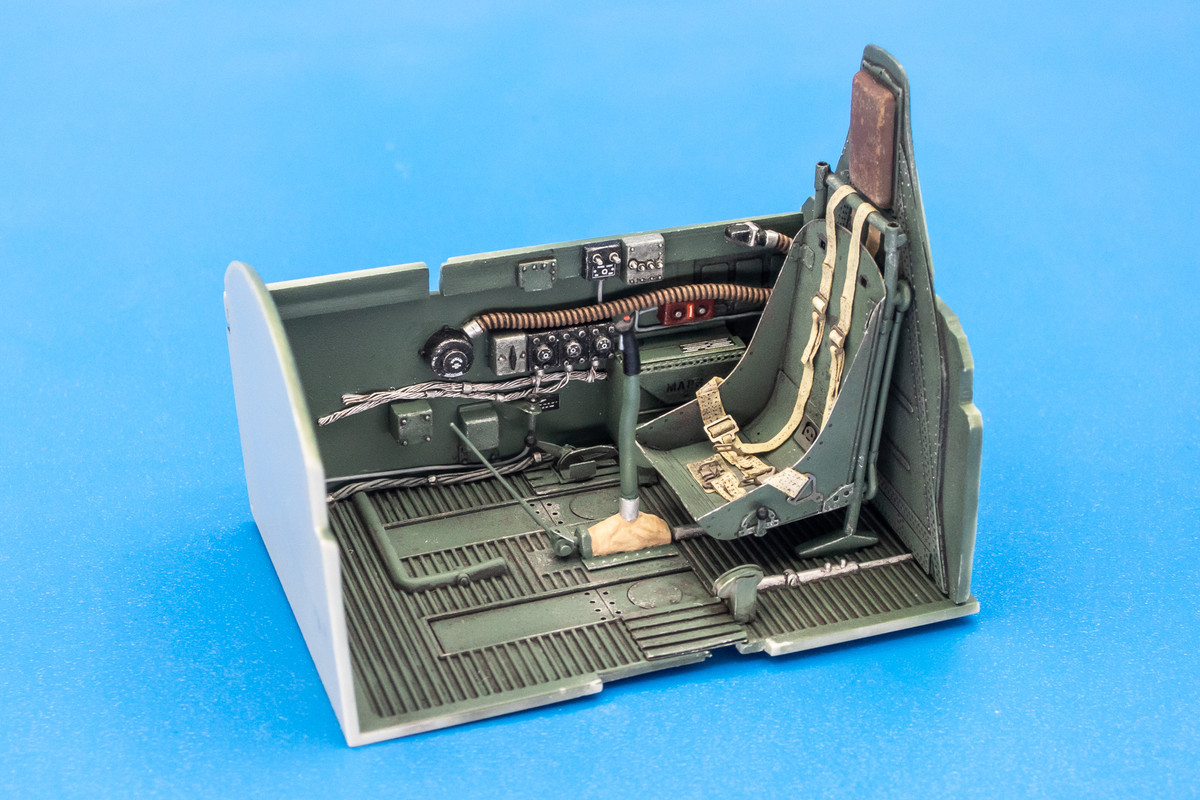
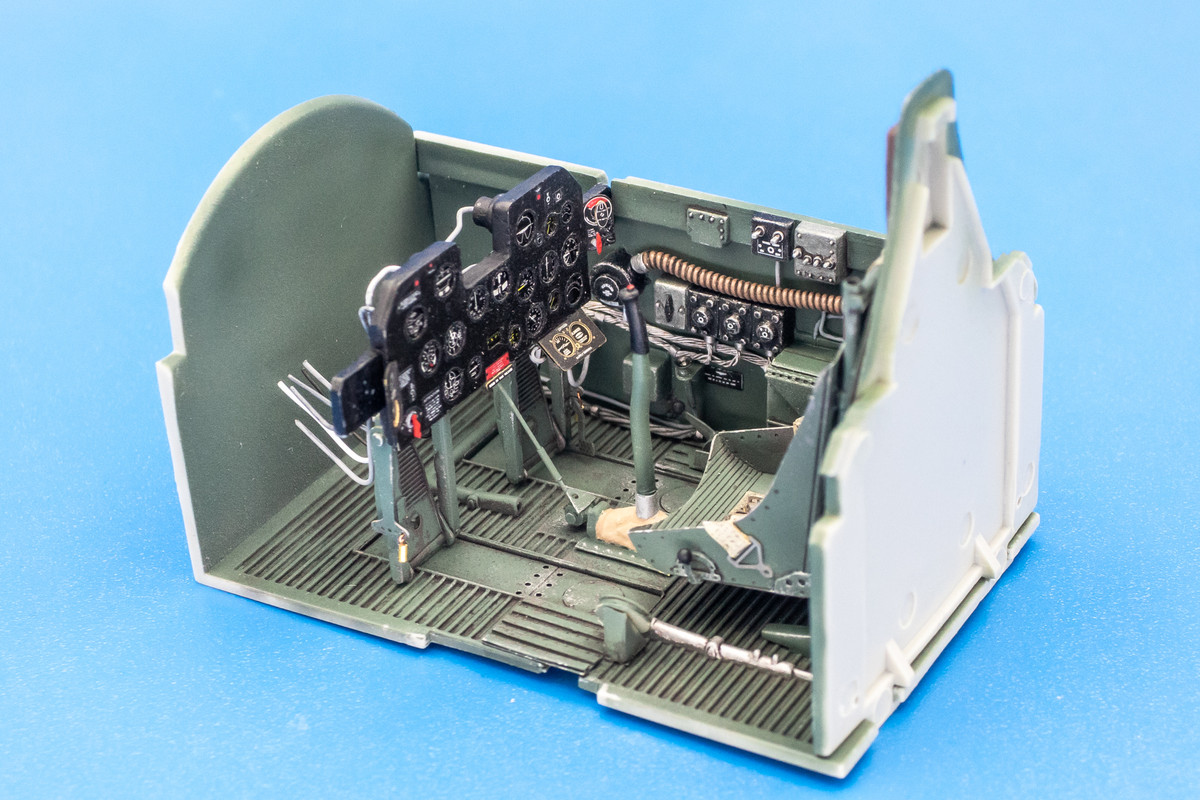
The HGW harnesses feature a textile-based material for the belts and photoetch for the buckles.
Remember to remove the paper backing from the belt pieces!
Per instructions, I like to crumple the fabric pieces to wrinkle and soften the pieces a little bit. I want to take full advantage of the fabric material.
The buckles are threaded on and secured by folding/gluing the belt ends. I like to use PVA glue for this but CA glue works too.
After the lap belts are put together, they are glued into place onto the seat. The separate shoulder harness and the lap belts on the seat are given a coat of clear gloss (Alclad Aqua Gloss).
The HGW fabric material features little holes that represent stitching detail and that can be highlighted with a dark wash. Because the fabric material is porous, it can absorb the wash which is why a clear coat is used. But the stitching holes are quite small and could be eradicated if the clear coat is too thick. The trade-off is a little bit of staining on the harnesses, which is not a bad thing.
The shoulder harness is then glued into place with small dots of CA glue and the
Here are some looks at the nearly finished cockpit with the painted sub-assemblies temporarily fit into place.
John aka JKim
-----------<><
-----------<><
-
jeaton01

- Elite Member
- Posts: 2374
- Joined: Thu Apr 23, 2020 9:20 am
- Location: Northern California
- Contact:
Re: Trumpeter P-47D Razorback "Eileen"
Lifelike!
Re: Trumpeter P-47D Razorback "Eileen"
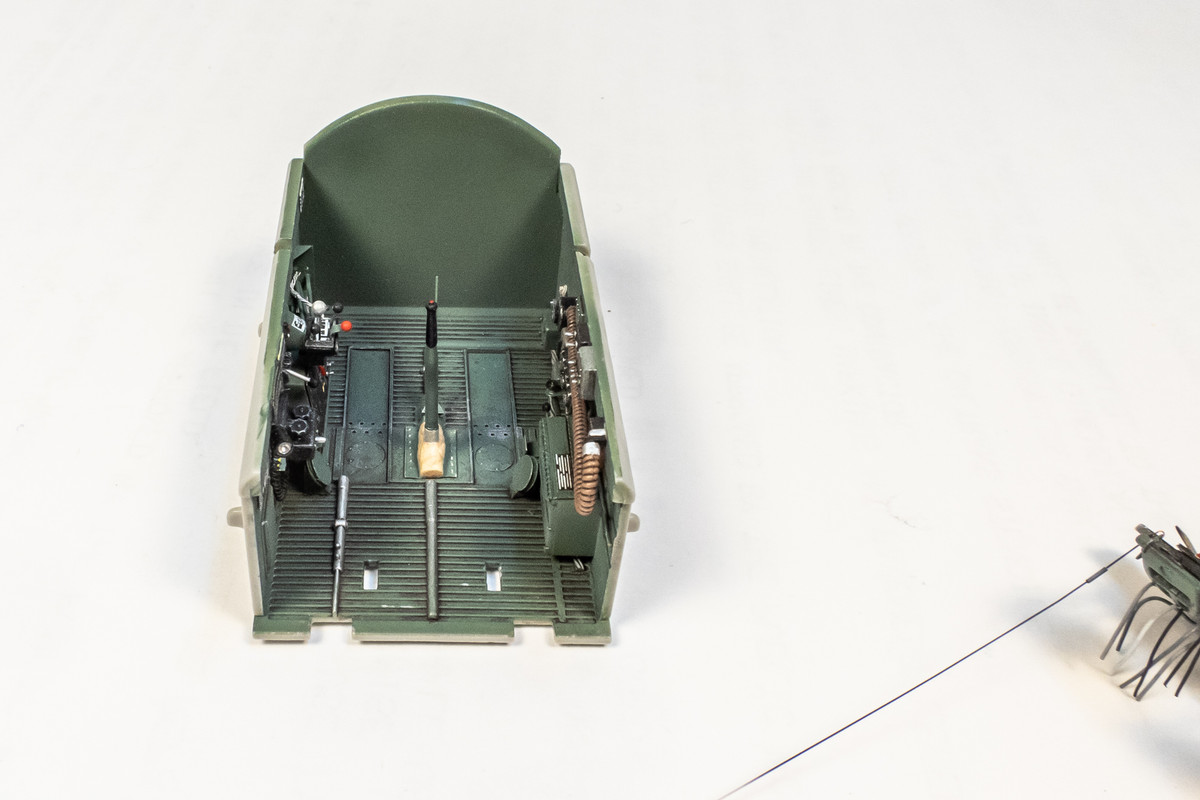
Trying to take the detail thing as far as I can but maybe this next thing isn't worth it. Here are the rudder cables attached to the foot pedal assembly. The cables are stretched sprue threaded through sections of brass tube.
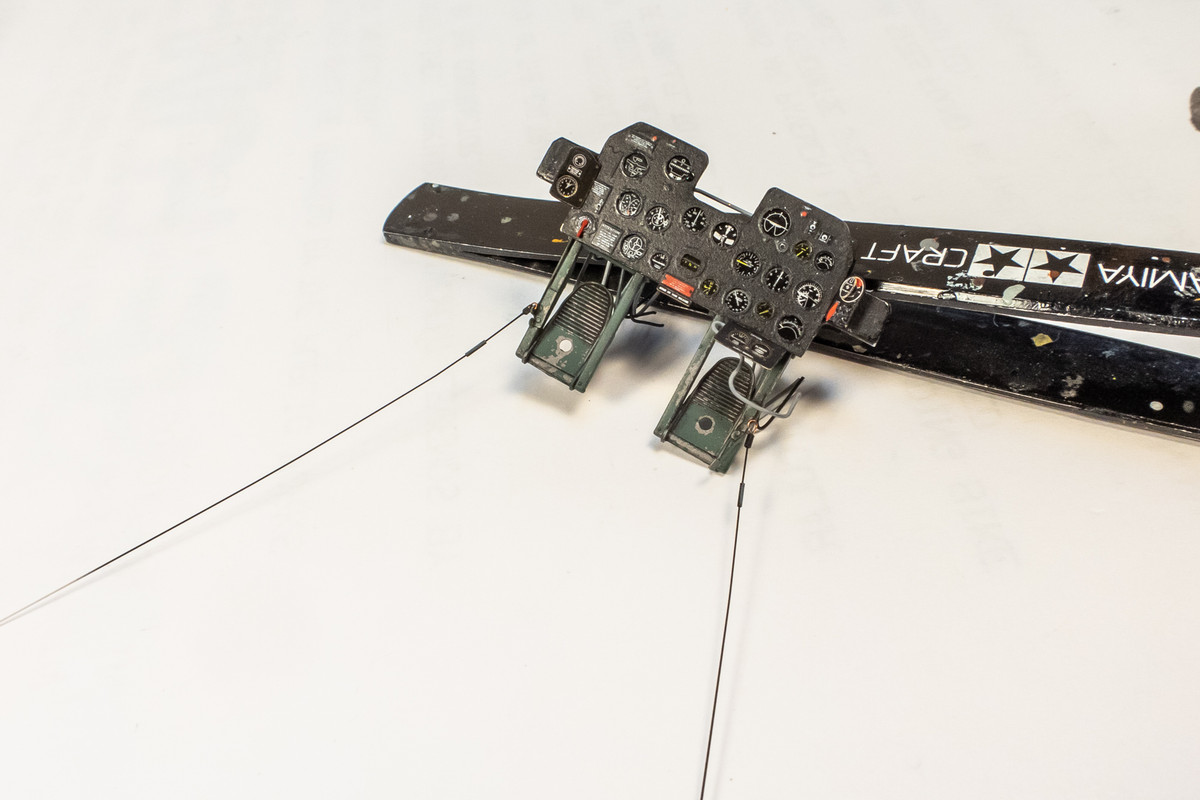
Since the instrument panel rests in notches in the side panels, I had to install the side panels first. The control stick is glued in too because the instrument panel needs to fit over the control lock rod. The seat and rear bulkhead are left off so I have room to route the rudder cables under the pulley wheels.
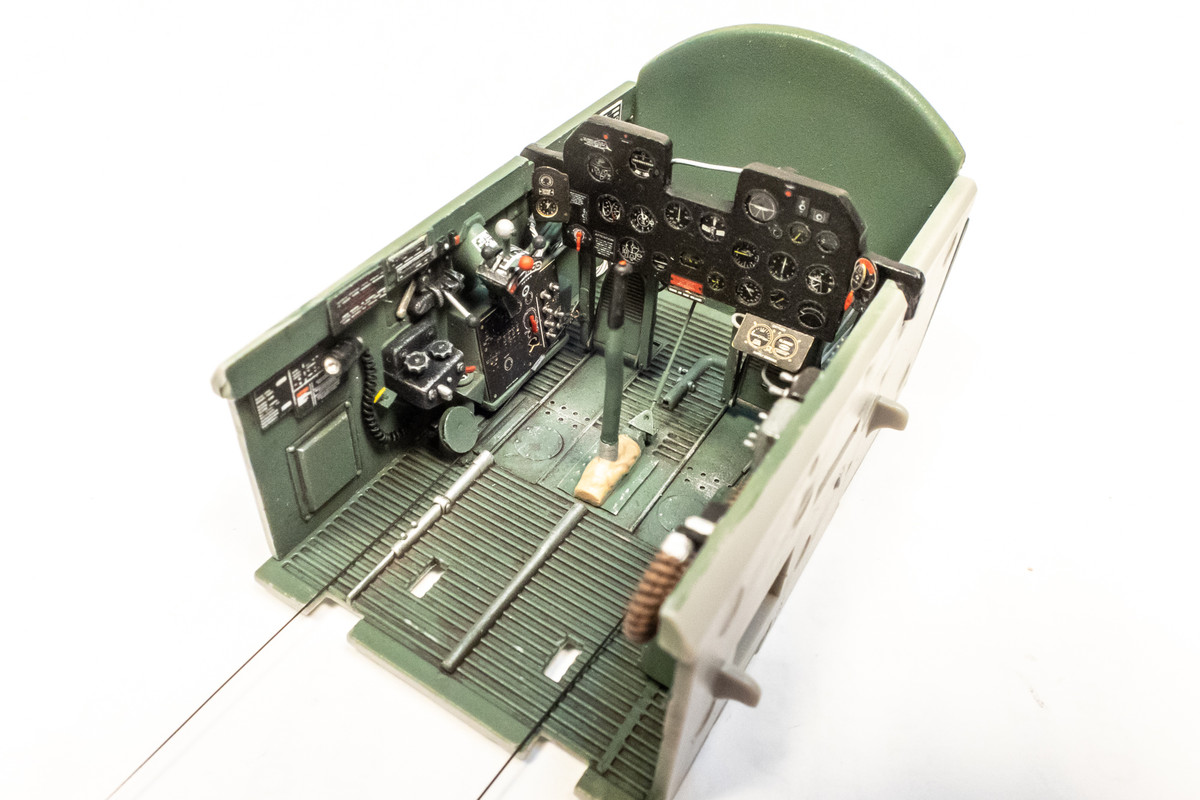
Physical conflict and overall busy-ness in this area makes the cable unnoticeable on the port side compounded by my choice to paint the cables black. I even knocked off one of the switches on the circuit panel... GRRRR.
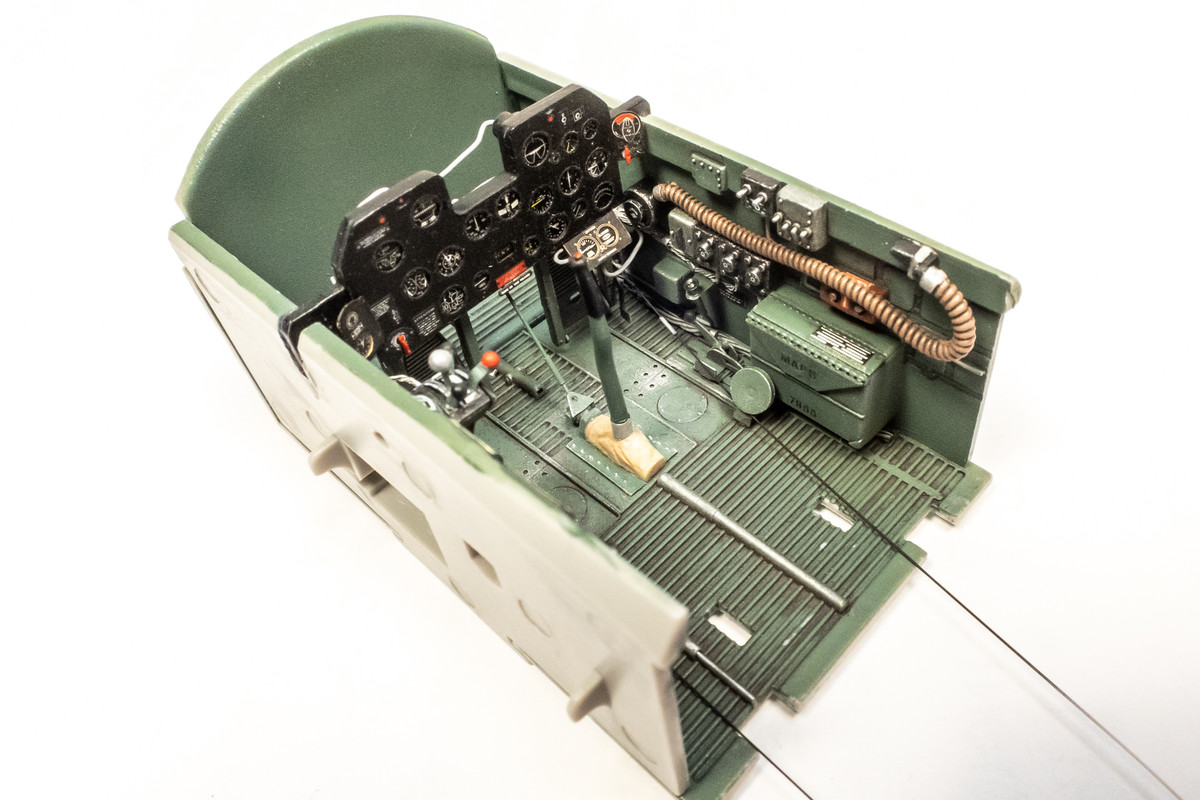
It's a little more visible on the starboard side.
Since the instrument panel rests in notches in the side panels, I had to install the side panels first. The control stick is glued in too because the instrument panel needs to fit over the control lock rod. The seat and rear bulkhead are left off so I have room to route the rudder cables under the pulley wheels.
Physical conflict and overall busy-ness in this area makes the cable unnoticeable on the port side compounded by my choice to paint the cables black. I even knocked off one of the switches on the circuit panel... GRRRR.
It's a little more visible on the starboard side.
John aka JKim
-----------<><
-----------<><