Trumpeter 1/32 Me262A-1 Yellow 3

Post your work in progress of your aircraft builds in here.
Post Reply
User avatar
speedgraflex
Moderator
Posts: 11358
Joined: Fri Feb 10, 2017 11:08 pm
Contact:

Re: Trumpeter 1/32 Me262A-1 Yellow 3

Post by speedgraflex »

Image
Smithsonian Archive
Does it look like the paneling around the nose comes from a different manufacturer?

Make more models!
User avatar
jkim
Elite Member
Posts: 4073
Joined: Mon Apr 10, 2017 4:03 pm

Re: Trumpeter 1/32 Me262A-1 Yellow 3

Post by jkim »

Maybe... I was told that it was made of steel, not aluminum. Nice photo... is that 111711?
John aka JKim
-----------<><
Image
User avatar
Medicman71
Elite Member
Posts: 11299
Joined: Mon Apr 07, 2014 9:32 am
Location: Houston, Tx

Re: Trumpeter 1/32 Me262A-1 Yellow 3

Post by Medicman71 »

Just caught up with this build. Looks like it's going to be another EPIC build.
Mike

Sponsored by Boeing, Lockheed Martin, Northrop Grumman, Saab, BAE, and Dassault
User avatar
Medicman71
Elite Member
Posts: 11299
Joined: Mon Apr 07, 2014 9:32 am
Location: Houston, Tx

Re: Trumpeter 1/32 Me262A-1 Yellow 3

Post by Medicman71 »

Oh and I did send you a friend request on Facebook.
Mike

Sponsored by Boeing, Lockheed Martin, Northrop Grumman, Saab, BAE, and Dassault
User avatar
jkim
Elite Member
Posts: 4073
Joined: Mon Apr 10, 2017 4:03 pm

Re: Trumpeter 1/32 Me262A-1 Yellow 3

Post by jkim »

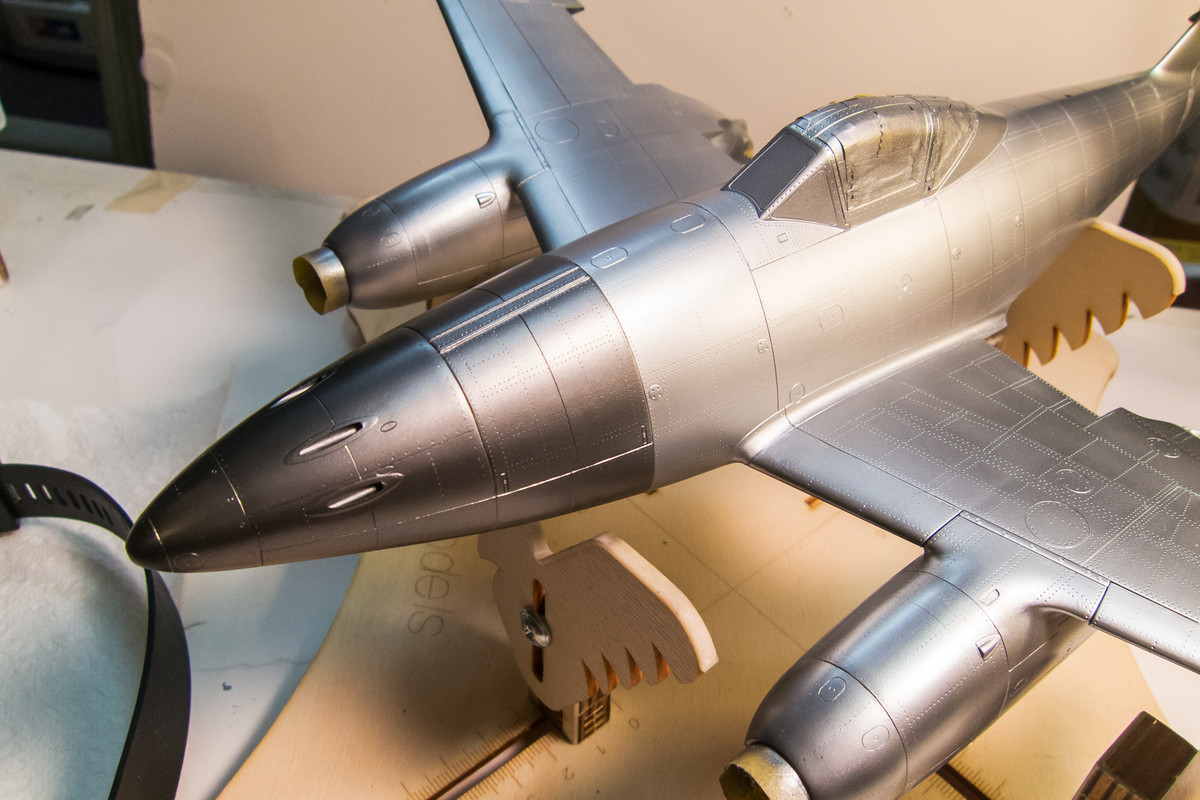
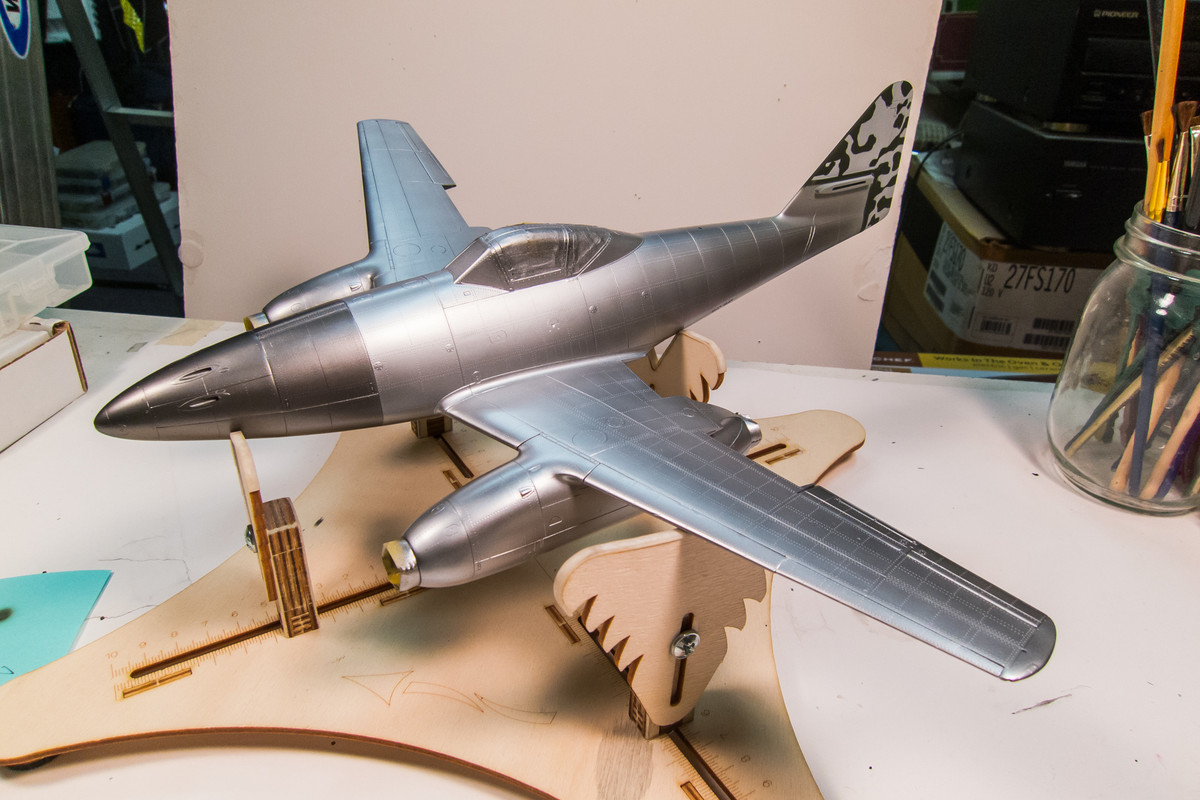
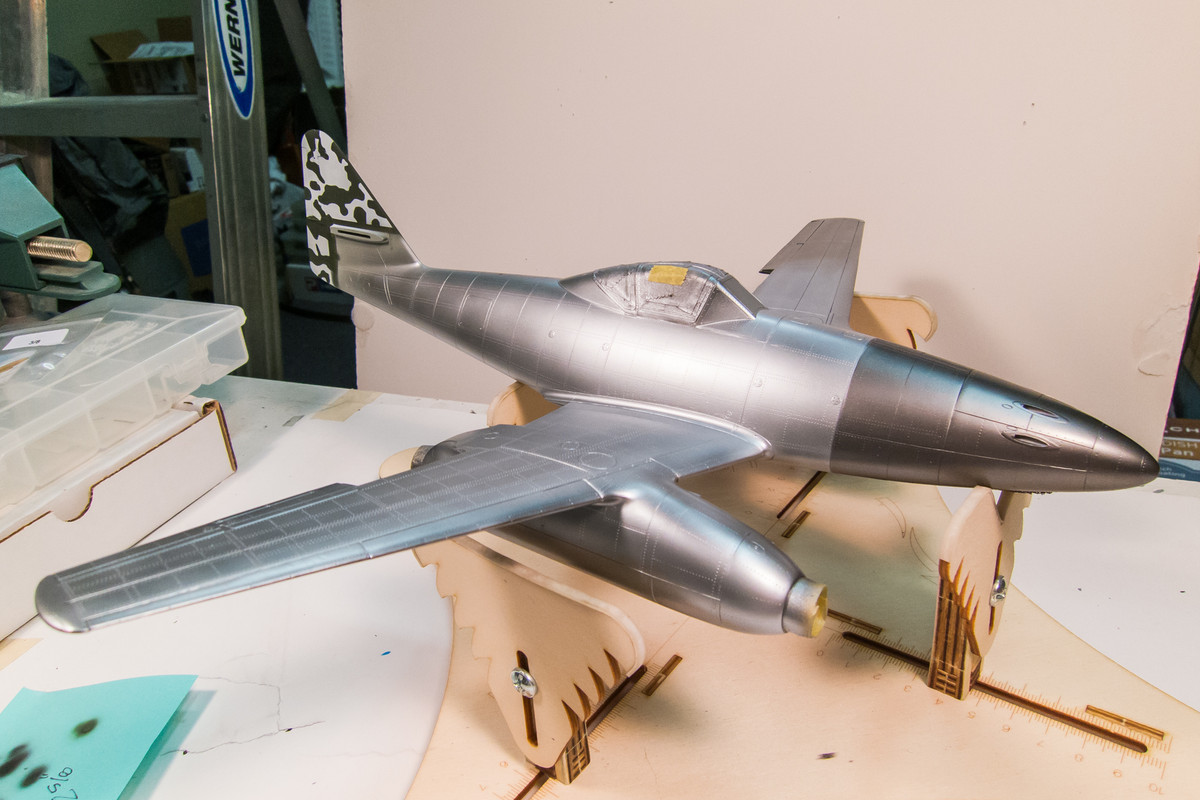
Ok... back to work on the 262! Based on the information that the nose, from the cannon doors forward, was made of steel and not airframe aluminum, I painted the nose a darker metallic shade. It was a mixture of two Aclad shades: Steel and Airframe Aluminum.
Image

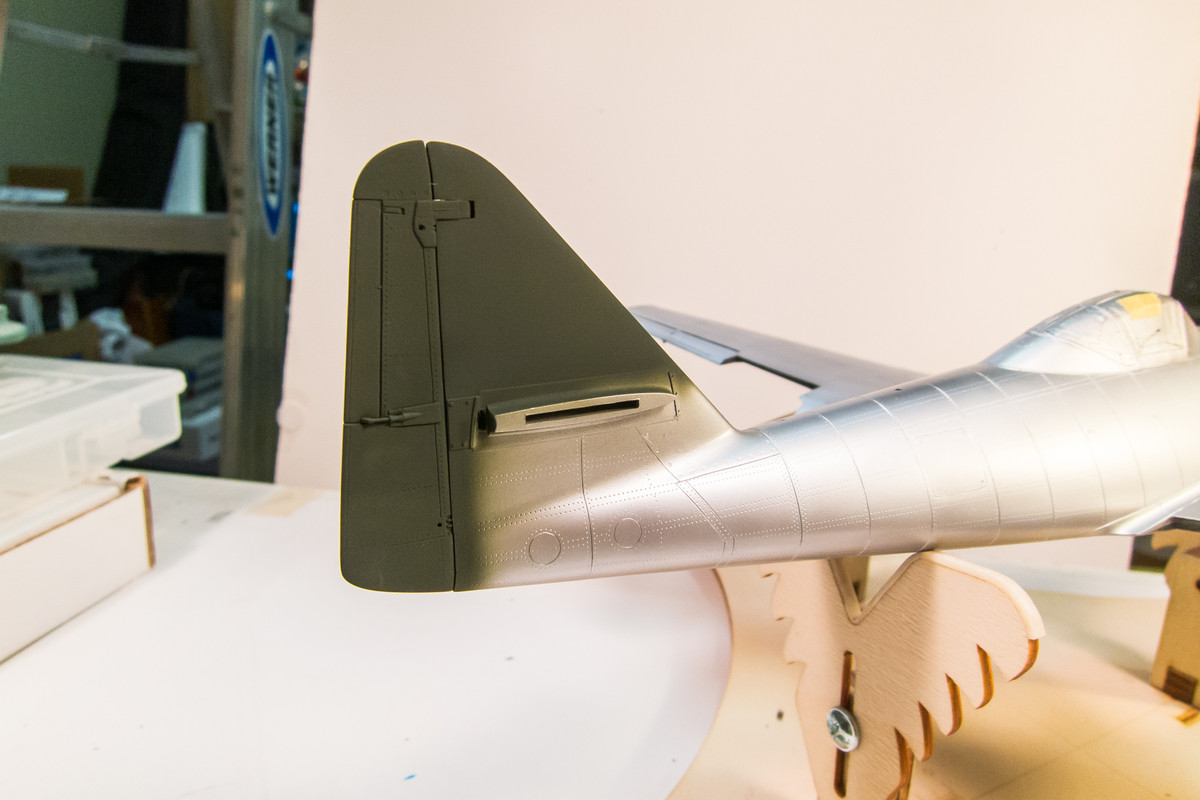
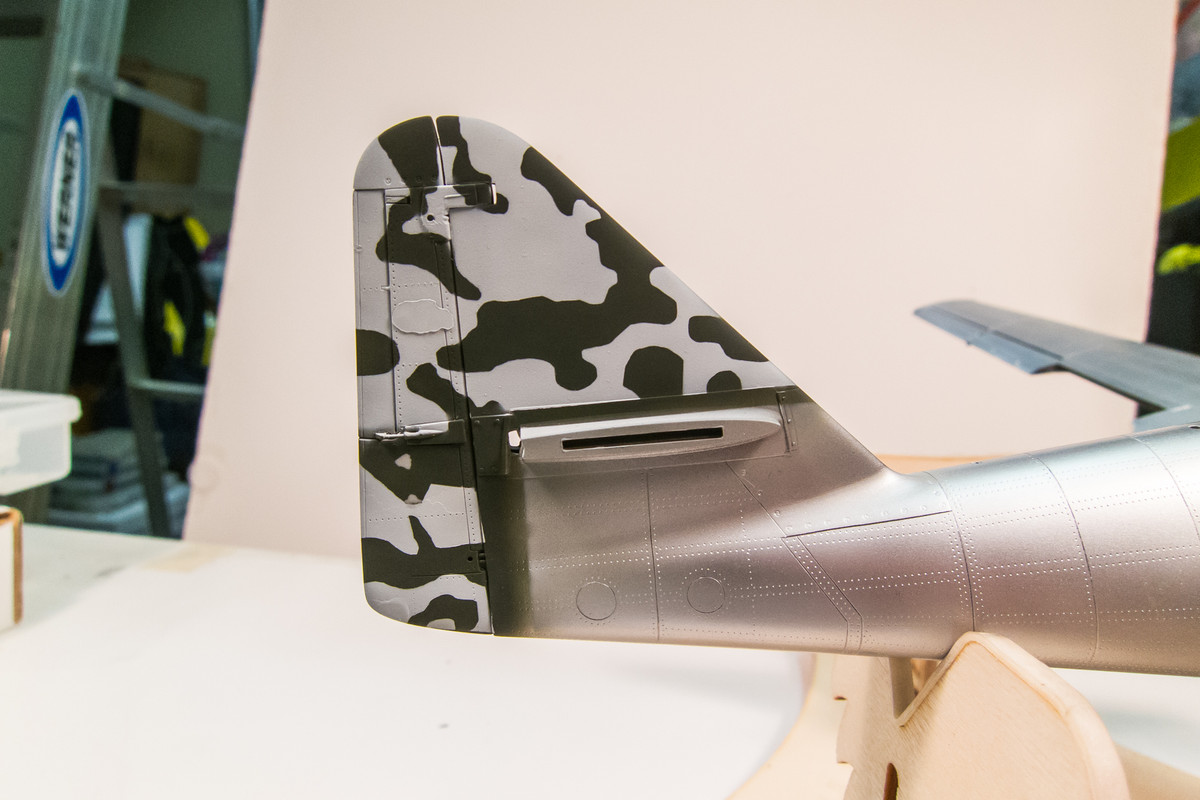
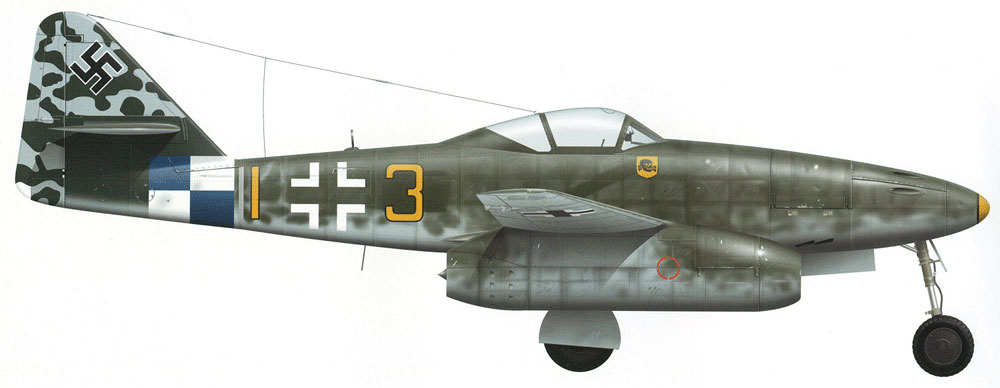
I decided to tackle the tail mottling next. Probably a highlight for me since it is one of the defining features of this aircraft. The plan was to paint the darker color first and then use bits of Blue-Tack to represent the mottles. The green was Tamiya Black Green.
Image

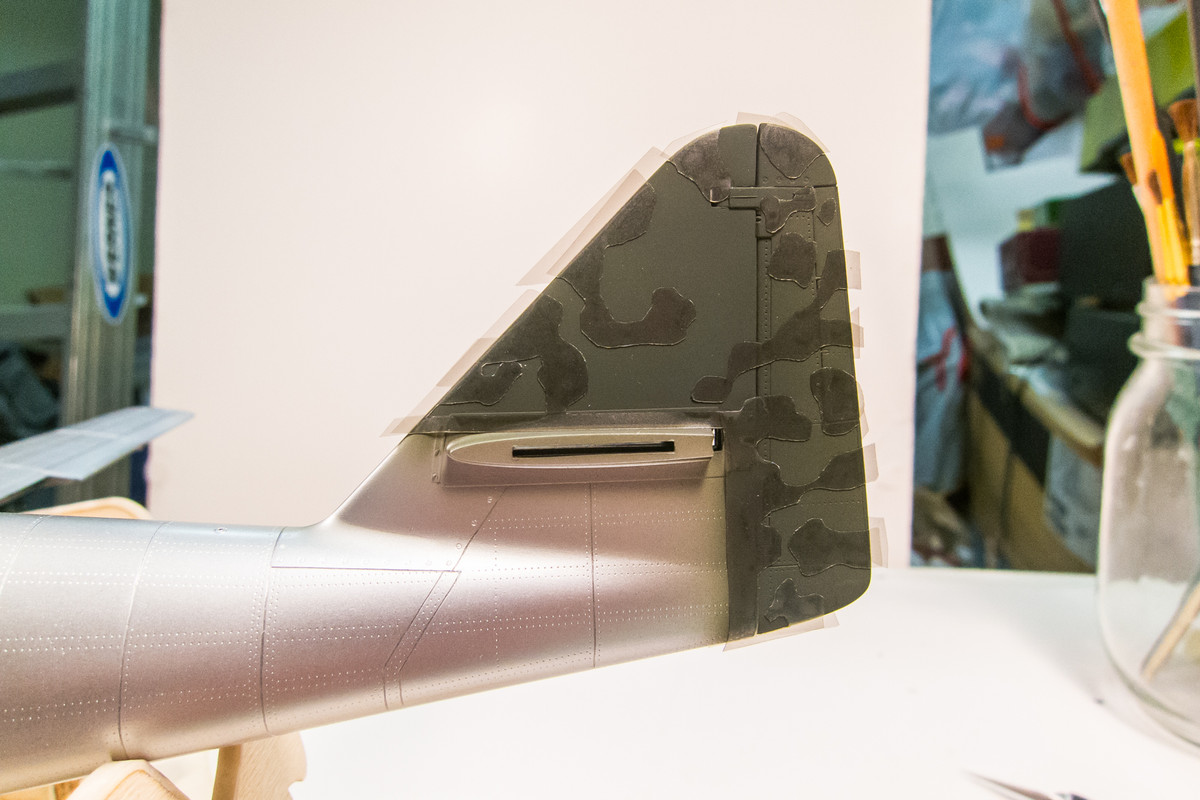
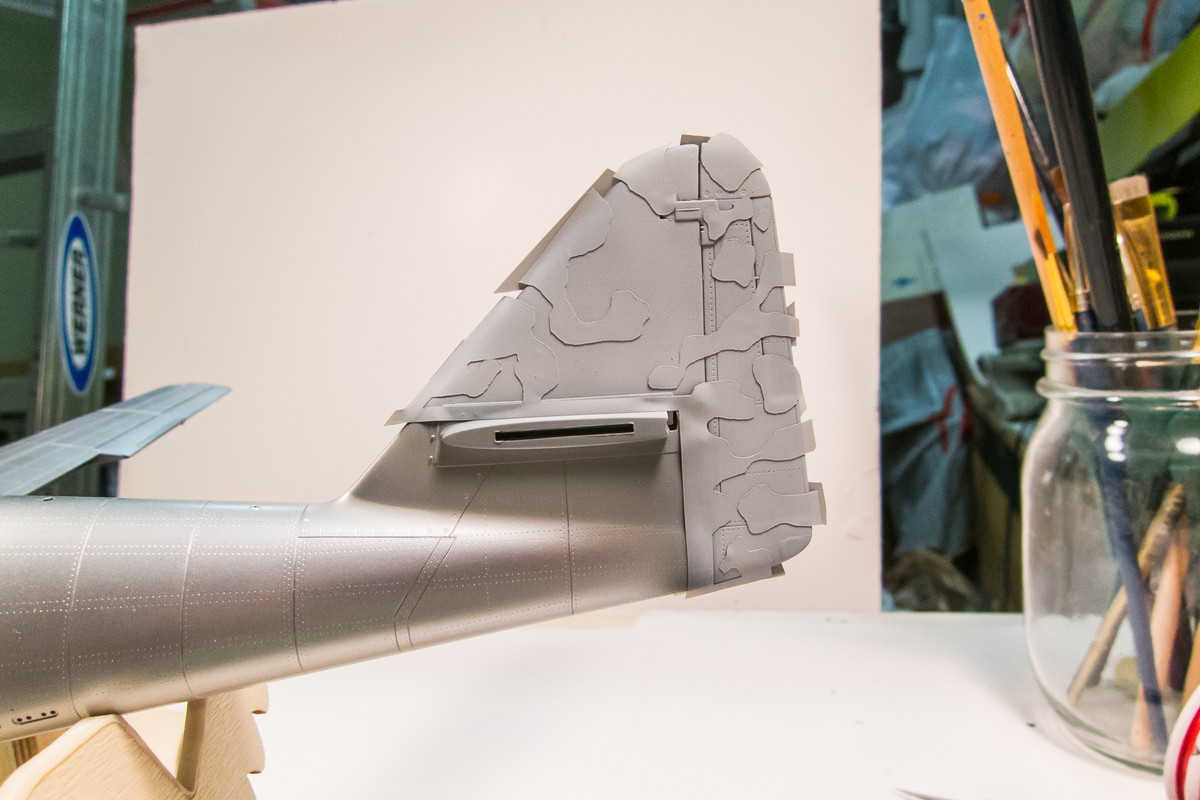
The Blue-Tack idea wasn't working out. Although I've used it successfully on smaller 1/48 builds such as the Bf109K-4 rudder, it was hard to get the pieces of Blue-Tack to stuck onto the model. I gave that up and decided to try and create custom masks using my Silhouette Portrait cutter. The Experten Decals sheet has beautiful profiles of both sides by Tom Tullis. Those were scanned and imported into AutoCAD. I then traced the mottles and exported them to DXF format for cutting. The masks were placed onto the tail using the profiles as a guide.
Image

The tail was then sprayed a lighter than normal shade of RLM76, based on the notes in the Experten instructions.
Image

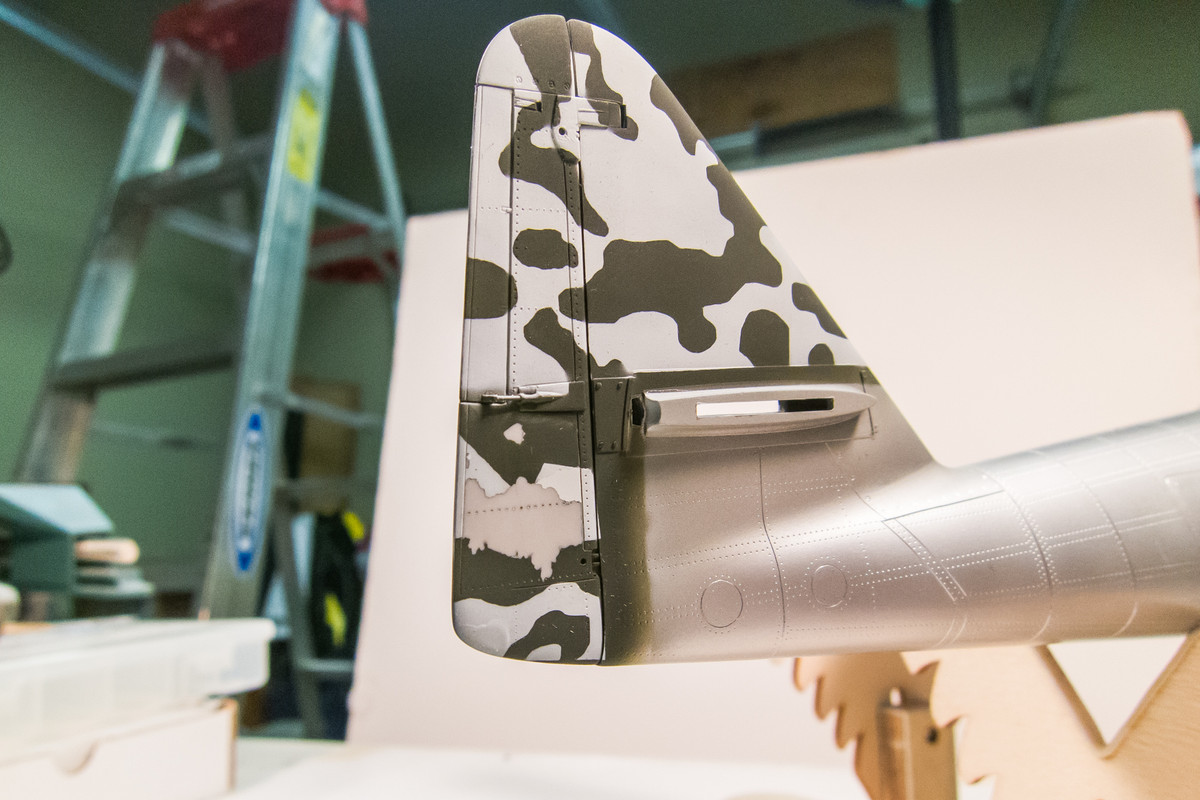
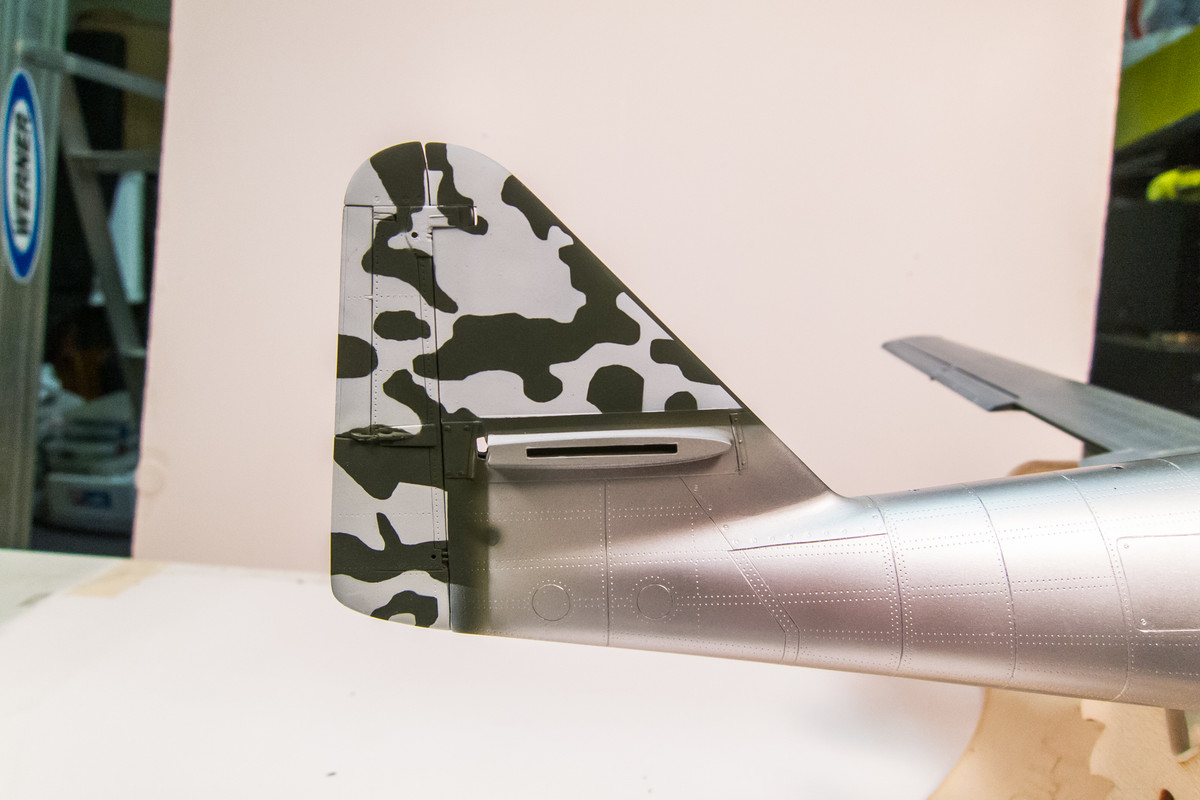
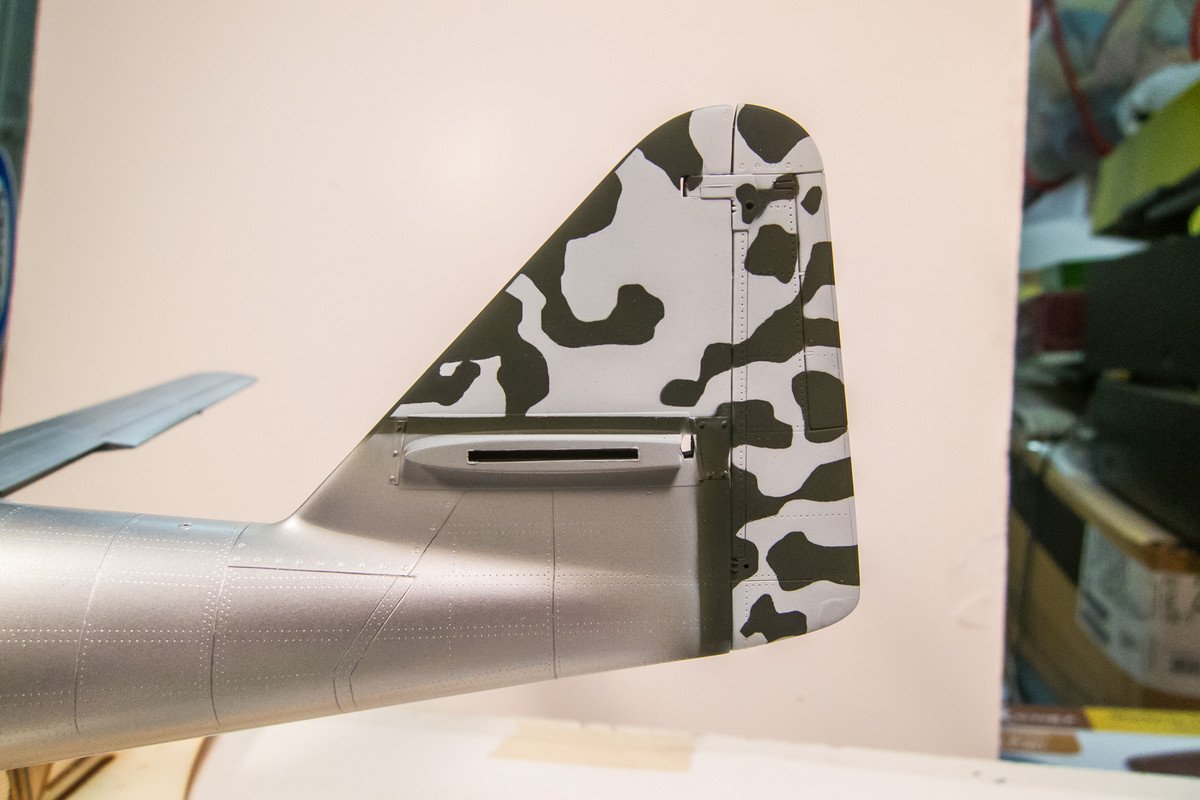
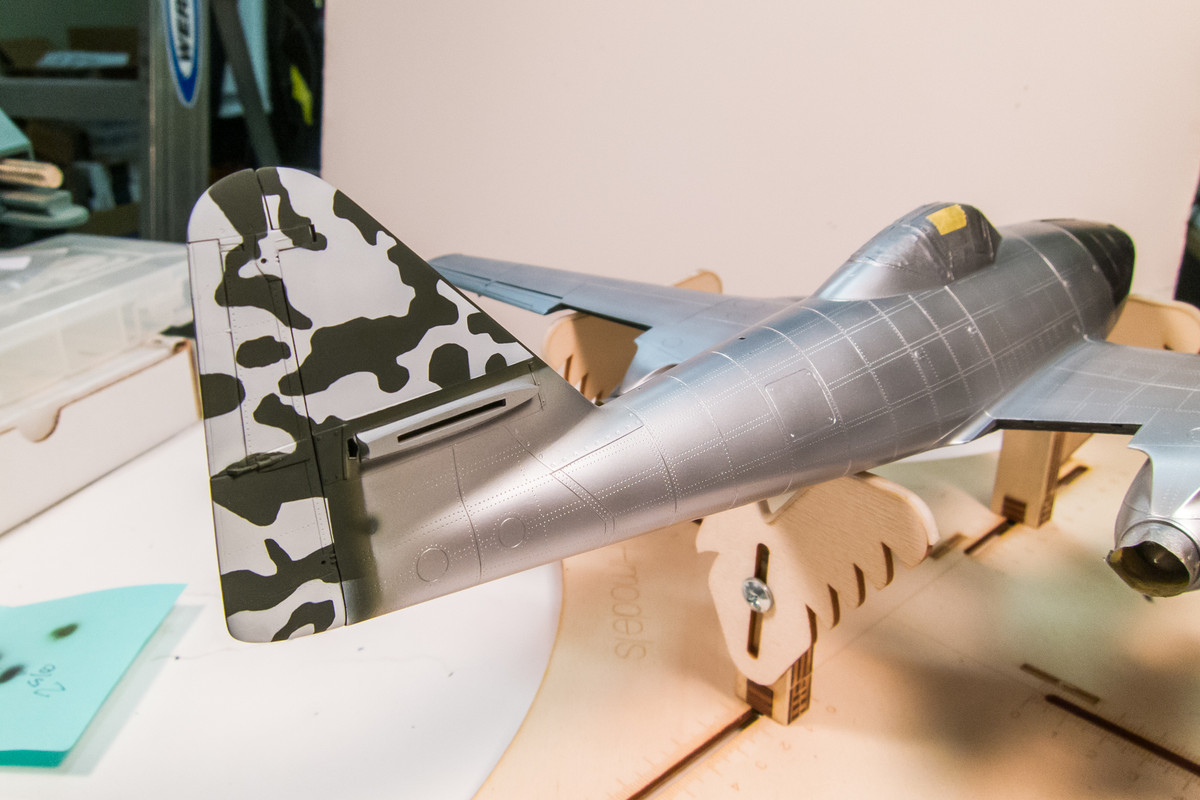
The masks were carefully removed and the hard edged "tadpole" mottling is revealed. There are some soft edges and overspray that need to be corrected but overall, the result is pretty good.
Image

I got some dreaded paint lift on the starboard side.
Image

Using a piece of Tamiya tape, I removed as much of the compromised paint as I could and then buffed out the edges of the removal with Micromesh.
Image

The masks were re-used to repair the lifted paint areas. Any soft edges or overspray was touched up with an airbrush or by hand.
Image

Here is the other side after touch-ups.
Image

Compare the mottles on the model with the profile... fairly spot-on.
Image
Image

I need a kick in the pants to start the next stage, which is to establish the puttied/painted seams. I still have not decided HOW I'm going to do this... brush paint? Airbrush?
Image
Image
John aka JKim
-----------<><
Image
User avatar
speedgraflex
Moderator
Posts: 11358
Joined: Fri Feb 10, 2017 11:08 pm
Contact:

Re: Trumpeter 1/32 Me262A-1 Yellow 3

Post by speedgraflex »

John! Incredible! A beautiful and elegant solution!

Image

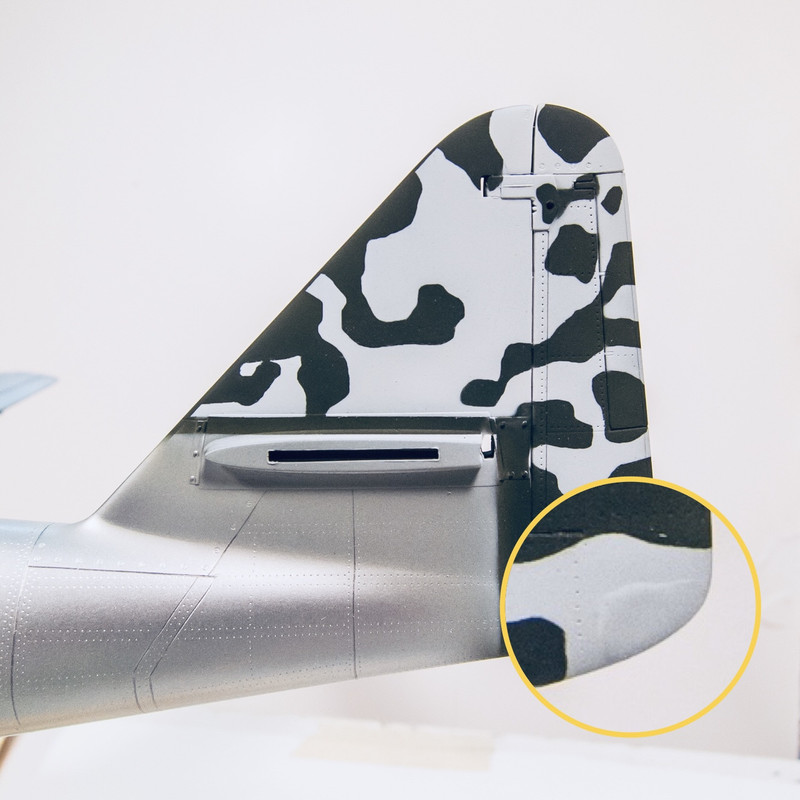
Now, a question... I noticed that the tip of the tail only on this side has what appears to be seams visible. Is this a shadow, perhaps? I tried adjusting the contrast and adding a magnifier to see if this was a trick of lighting or not. Let me know! Thanks so much.

I want to wax rhapsodic on your hard-edges camouflage, but I also want to be mindful of a detail... All the best!
Make more models!
User avatar
jkim
Elite Member
Posts: 4073
Joined: Mon Apr 10, 2017 4:03 pm

Re: Trumpeter 1/32 Me262A-1 Yellow 3

Post by jkim »

What a sharp eye you have, Bruce! That blob is actually a bit of Micro Mask on the tail light. The Experten sheet describes the tail as being partially painted over so the mask job on it was purposefully vague. It's actually visible on both sides and they are not symmetric... again, done on purpose. Believe it or not!

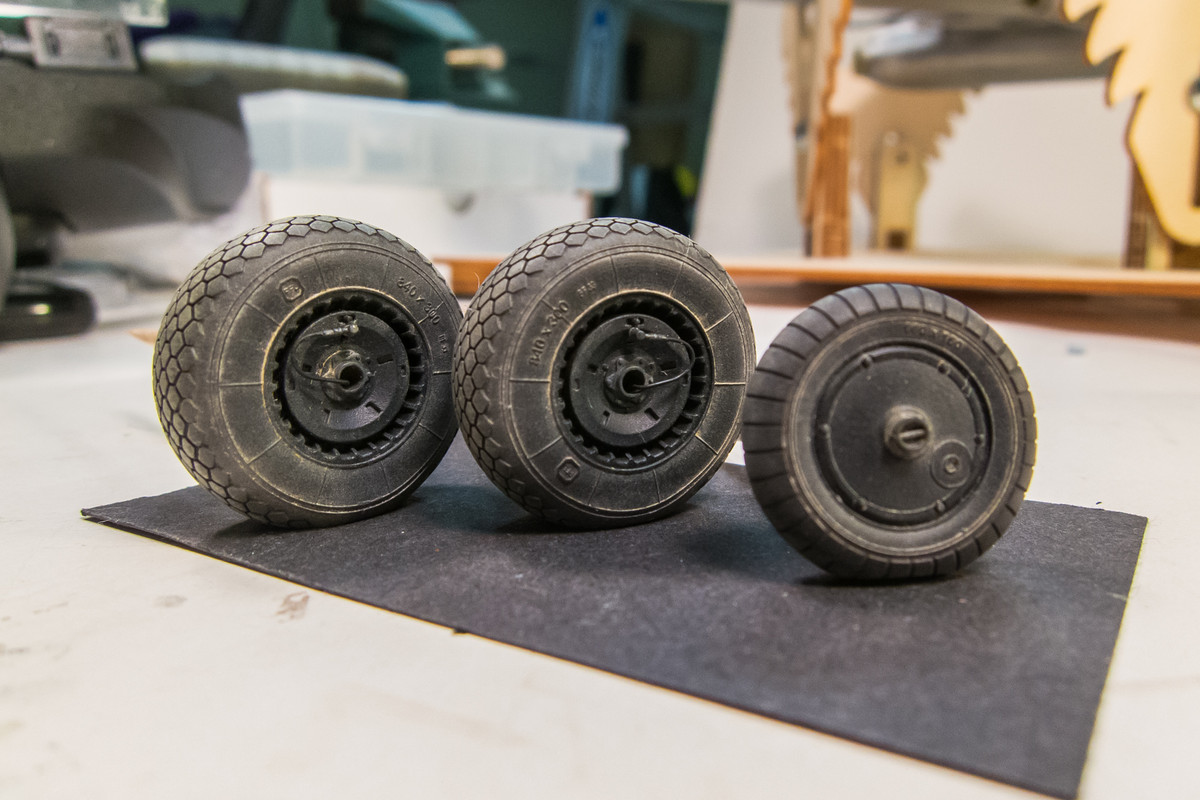
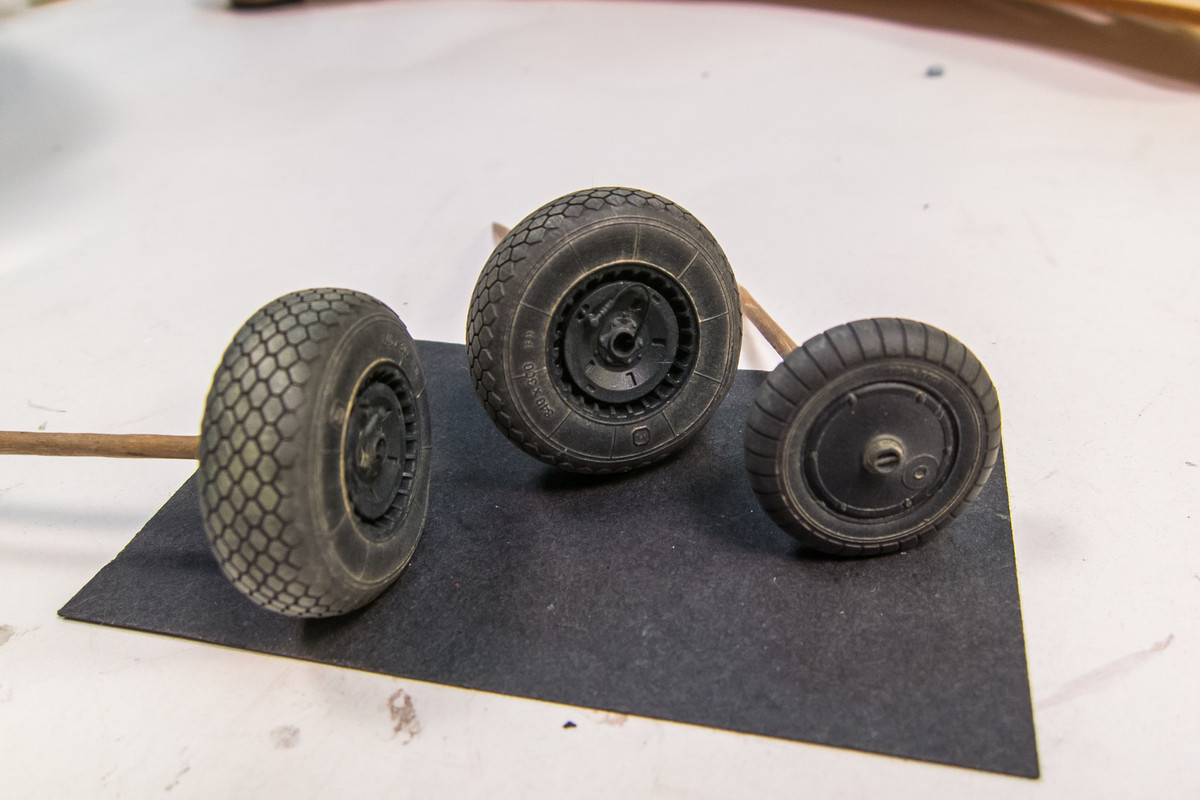
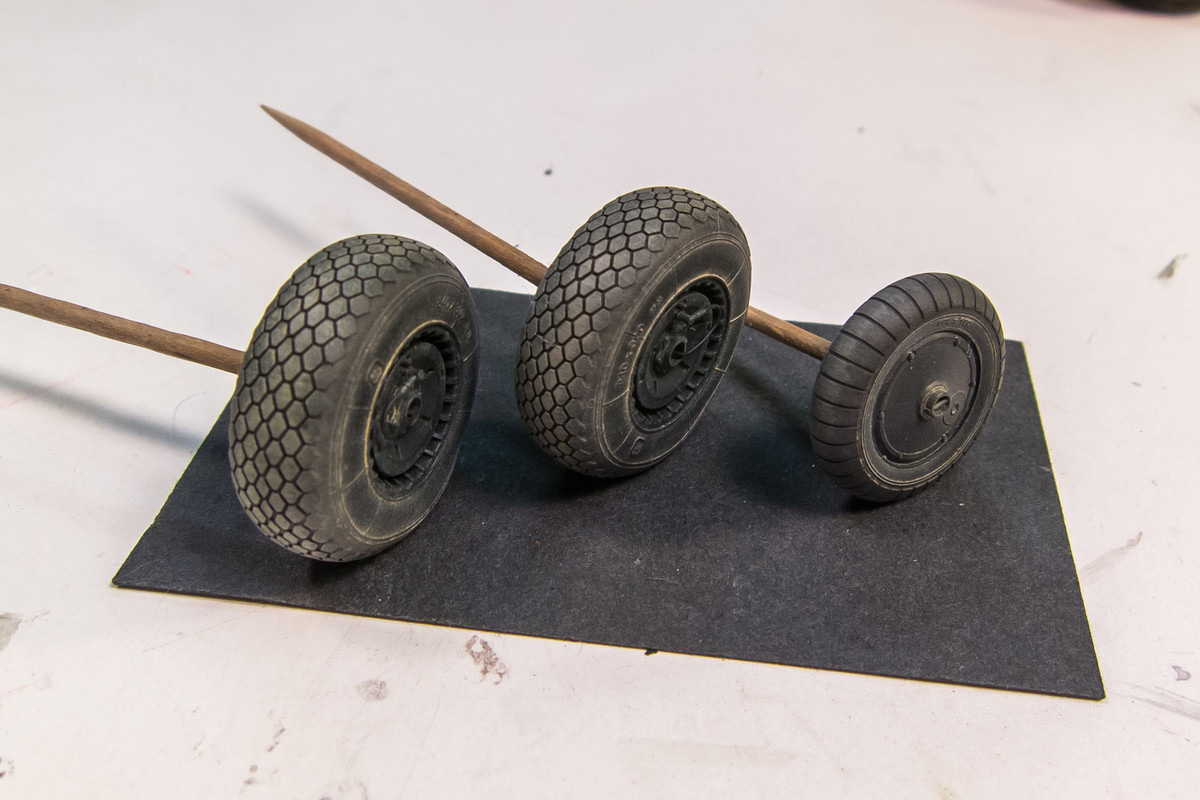
I've added some additional weathering on the tires. Mostly to dirty up the sidewalls. I also had to re-treat the tread grooves with a dark wash. Every time I tried to lighten the tread surfaces with dry pastels, the grooves got that much lighter. In the end, I dry-brushed a lighter dusty grey color and put wash in the grooves one final time.

Image
Image
Image
John aka JKim
-----------<><
Image
User avatar
mostrich
Admin
Posts: 3105
Joined: Sun Apr 06, 2014 2:13 pm
Location: Hamburg, Germany
Contact:

Re: Trumpeter 1/32 Me262A-1 Yellow 3

Post by mostrich »

jkim wrote:I need a kick in the pants to start the next stage, which is to establish the puttied/painted seams. I still have not decided HOW I'm going to do this... brush paint? Airbrush?
I'd go with the before mentioned oilpaint approach. Nice opacity and easy to control. Drying time can be an issue, but there are ways to manipulate that.
And I'm never getting tired seeing your tires. Fantastic work, like also on the stabilizer!
Cheers,
Torben
User avatar
speedgraflex
Moderator
Posts: 11358
Joined: Fri Feb 10, 2017 11:08 pm
Contact:

Re: Trumpeter 1/32 Me262A-1 Yellow 3

Post by speedgraflex »

John, Thank you for your explanation. I am truly glad that is not what it looked like. Whew—great. Onward. I was going to ask why not take your spare Jumo engines and try out the putty techniques. Use 'em as mules. You already have used 'em as mules, so why not keep using 'em? Also, I agree with Torben, and I do like the Holbein Duo because it dries fast (minutes) and cleans up with water. However, I just don't know what you are going to use for your camouflage—acrylics? Also I agree with Torben—fantastic work especially on the tires. I believe you just leveled up with your tire techniques, sir! Congratulations.
Make more models!
User avatar
KSaarni
Elite Member
Posts: 5621
Joined: Sun Apr 06, 2014 7:13 am
Location: Gent, Belgium
Contact:

Re: Trumpeter 1/32 Me262A-1 Yellow 3

Post by KSaarni »

jkim wrote:What a sharp eye you have, Bruce! That blob is actually a bit of Micro Mask on the tail light. The Experten sheet describes the tail as being partially painted over so the mask job on it was purposefully vague. It's actually visible on both sides and they are not symmetric... again, done on purpose. Believe it or not!

I've added some additional weathering on the tires. Mostly to dirty up the sidewalls. I also had to re-treat the tread grooves with a dark wash. Every time I tried to lighten the tread surfaces with dry pastels, the grooves got that much lighter. In the end, I dry-brushed a lighter dusty grey color and put wash in the grooves one final time.

Image
Image
Image
Even more fantastic John,

and many thanks for your explanation how you did the painting/weathering of the tires!

- Kari
---
On the bench:

MiniArt 1:48 - Junkers F13 Float Plane


https://www.facebook.com/GrundAsk-Scale ... 721218708/
Post Reply

Return to “Aircraft Work in Progress”