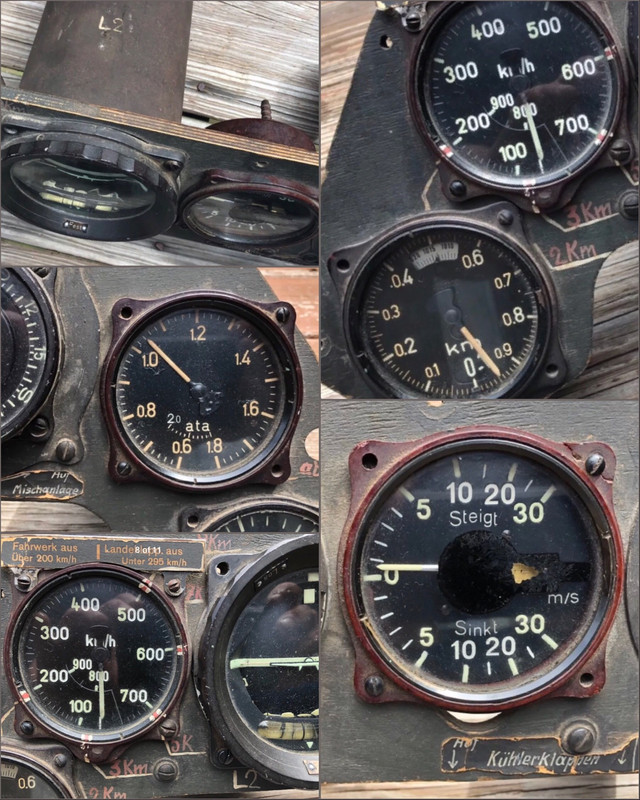
Pacific Coast Models 1/32 Fw 190A-1. Black 13. Belgium, 1941

Post your work in progress of your aircraft builds in here.
User avatar
speedgraflex
Moderator
Posts: 11358
Joined: Fri Feb 10, 2017 11:08 pm
Contact:

Re: Pacific Coast Models 1/32 Fw 190A-0. Black 13. Belgium,

Post by speedgraflex »

Thanks so much, John. Yeah! A lot more work without the Zona, too. I need to replace the blade! I was thinking about you fitting all the interior parts of the Me 262, and marveling at your patience. I do think you found an elegant solution to a very challenging project. I do wish I had more guts to chime in with the others on that forum, but here I feel we are all in a safe place.

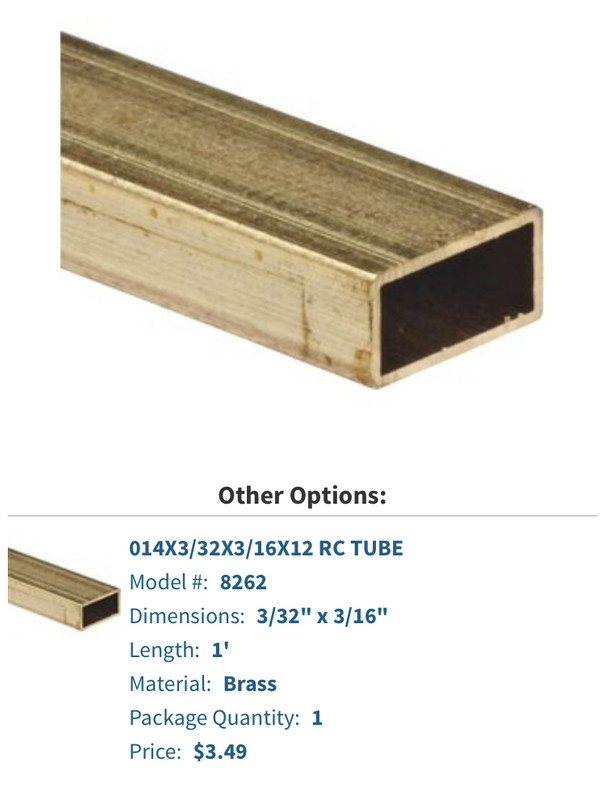
Plan B, maybe? Did you try this?

Image
Make more models!
User avatar
jkim
Elite Member
Posts: 4073
Joined: Mon Apr 10, 2017 4:03 pm

Re: Pacific Coast Models 1/32 Fw 190A-0. Black 13. Belgium,

Post by jkim »

If you can find the right dimensions, I'd say go for it! Much easier than bending your own chutes like I've done in the past. Getting the right size would be the challenge though. Hmmm... maybe it doesn't have to be the exact size. If you get it close, you could easily adjust the openings in the wing bottom to fit.
John aka JKim
-----------<><
Image
User avatar
speedgraflex
Moderator
Posts: 11358
Joined: Fri Feb 10, 2017 11:08 pm
Contact:

Re: Pacific Coast Models 1/32 Fw 190A-0. Black 13. Belgium,

Post by speedgraflex »

I will definitely keep you posted!
Make more models!
User avatar
Floki
Elite Member
Posts: 3548
Joined: Wed Dec 12, 2018 2:23 am
Location: Muncie, Indiana

Re: Pacific Coast Models 1/32 Fw 190A-0. Black 13. Belgium,

Post by Floki »

Cutting resin from the plug is always a choir but in the end you get a nicely detailed part to use. I would also suggest thinning down the sides first before replacing them so you don't lose the alignment any but if that doesn't look good to you then replace.
March as one, Don't look back
Odin's sons... Attack!
Unleash hell! Do not repent! Warfare grants us no lament
Let your weapons slash and tear This is no place for fear
Hold the lines! Move as one! In unity our victory's won
Our shields will form a mighty wall
United we shall never fall
User avatar
speedgraflex
Moderator
Posts: 11358
Joined: Fri Feb 10, 2017 11:08 pm
Contact:

Re: Pacific Coast Models 1/32 Fw 190A-0. Black 13. Belgium,

Post by speedgraflex »

Thanks, Clint. I sincerely appreciate your advice!

:bow:
Make more models!
User avatar
speedgraflex
Moderator
Posts: 11358
Joined: Fri Feb 10, 2017 11:08 pm
Contact:

Re: Pacific Coast Models 1/32 Fw 190A-0. Black 13. Belgium,

Post by speedgraflex »

Amidst all the drama of life, on a dark and stormy night here in Los Angeles, I thinned the edges of the pilot’s seat and cleaned up the resin casting...

Image
Make more models!
User avatar
mostrich
Admin
Posts: 3105
Joined: Sun Apr 06, 2014 2:13 pm
Location: Hamburg, Germany
Contact:

Re: Pacific Coast Models 1/32 Fw 190A-0. Black 13. Belgium,

Post by mostrich »

Much bettererer! Edgy work, bro.
Cheers,
Torben
User avatar
Floki
Elite Member
Posts: 3548
Joined: Wed Dec 12, 2018 2:23 am
Location: Muncie, Indiana

Re: Pacific Coast Models 1/32 Fw 190A-0. Black 13. Belgium,

Post by Floki »

That's looking more inscale now, great job.
March as one, Don't look back
Odin's sons... Attack!
Unleash hell! Do not repent! Warfare grants us no lament
Let your weapons slash and tear This is no place for fear
Hold the lines! Move as one! In unity our victory's won
Our shields will form a mighty wall
United we shall never fall
User avatar
jkim
Elite Member
Posts: 4073
Joined: Mon Apr 10, 2017 4:03 pm

Re: Pacific Coast Models 1/32 Fw 190A-0. Black 13. Belgium,

Post by jkim »

The seat looks much better! Now let's see some paint on that cockpit!
John aka JKim
-----------<><
Image
User avatar
speedgraflex
Moderator
Posts: 11358
Joined: Fri Feb 10, 2017 11:08 pm
Contact:

Re: Pacific Coast Models 1/32 Fw 190A-0. Black 13. Belgium,

Post by speedgraflex »

Lunch. Finally.

Thanks so much, Clint, Torben (“Edgy,” indeed, lol) and John for your comments. Okaayy. There is a lot to unpack, but let’s say of the three dedicated RLM66ers I own (Gunze, Humbrol and Model Master) I am going Gunze, lacquer vs enamel.

What would be a recommended PSI...

Also, backing up, should I use Mr Surfacer 1500 or Tamiya Extra or Superfine primer? I have the Tamiya fine primer in white, which I am actually stoked about using on this project. Barring the excess spray dust, Tamiya White is the bee’s knees, sexysmooth and very revealing. However I must be mindful of the resin and perhaps Mr S has more “bite” to it?

My RLM66 match comes from these daylight shots taken a year ago of a U.S. eBay auction for the D-9 IP ($5K received from someone, somewhere). These daylight shots, there are I believe ten angles, really showcase a lot of details and tones:

Overview:
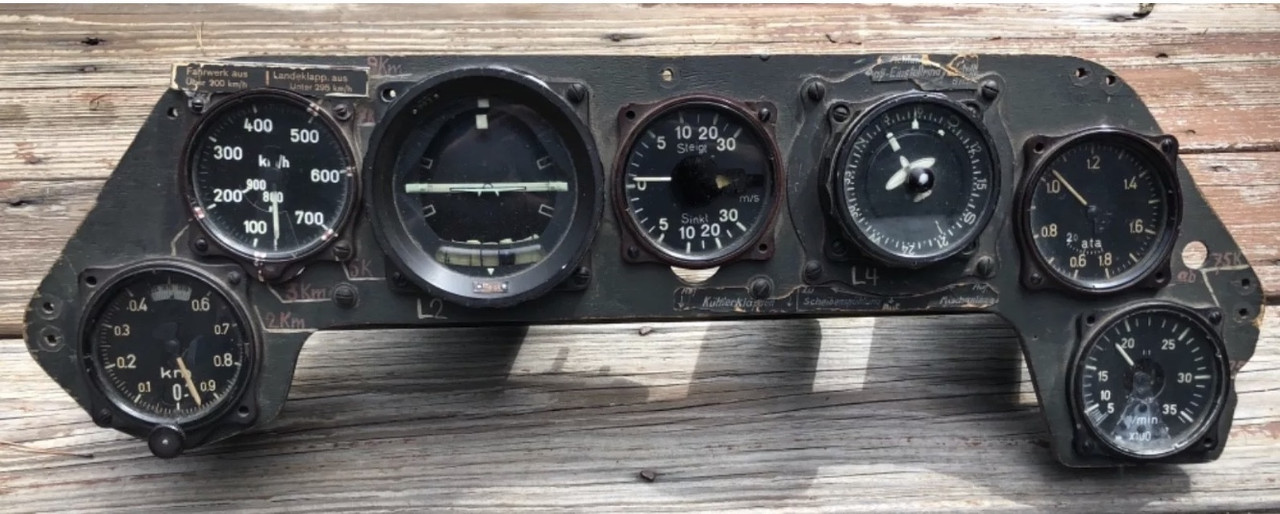
Image

Samples:

Image

I am happy to share my screen caps here full-size, if anyone wants to see these. The eBay post is probably still online. The sale was last year.

Wait... there’s more! So, the Smithsonian’s F-8 is a primary resource. Was the cockpit touched up and restored? Probably. Still, it’s the best HD resource I know of—unless one of you fellas has a few shots? What’s interesting is panel 3 (if we label the top as 1, and work down) is sheet metal... and my final quandary concerns panel 4, center console... is this attached to the cockpit floor???
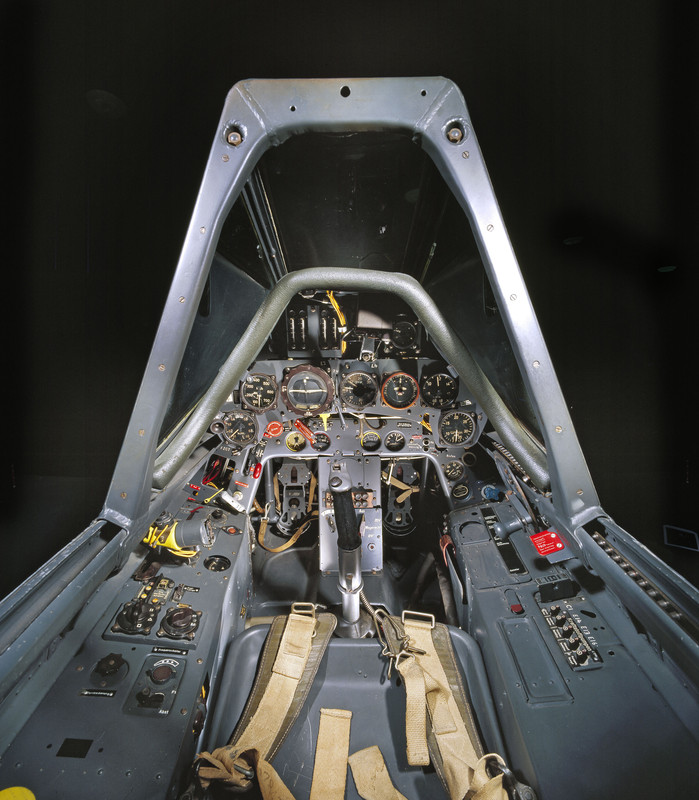
Image

Any advice?
Make more models!
Post Reply

Return to “Aircraft Work in Progress”