Page 2 of 42
Re: KENNY X HAS A TANK
Posted: Fri Nov 23, 2018 4:43 pm
by KennyX
Thank you Carlos and Mr. Black Sheep!
And one fast word, I’m not going to be weathering the crap out of this tank. Don’t get me wrong, it’ll be weathered, I’m just not going to beat it up too much. I want to use this build as a means of:
1. Tightening up my paint work, and getting the hang of working on smaller more localized areas with my new airbrush.
2. Introducing things like oils for fading and stuff.
3. Improving with pigments.
It’s going to be faded, dusty, with some minimal chipping and minor rust, but still in good working order is what I’m going for.
If all goes well with the oils, I’ll be using that effect on my Corsair. And I figure I’d rather start that here on this build, and try it here first, than my airplane.
Re: KENNY X HAS A TANK
Posted: Fri Nov 23, 2018 8:01 pm
by KennyX
And wrapping-up the evening:
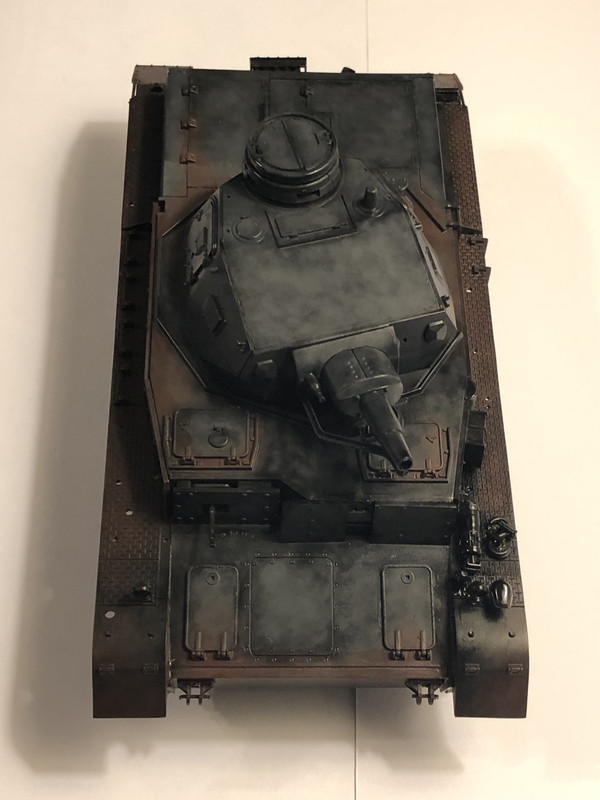
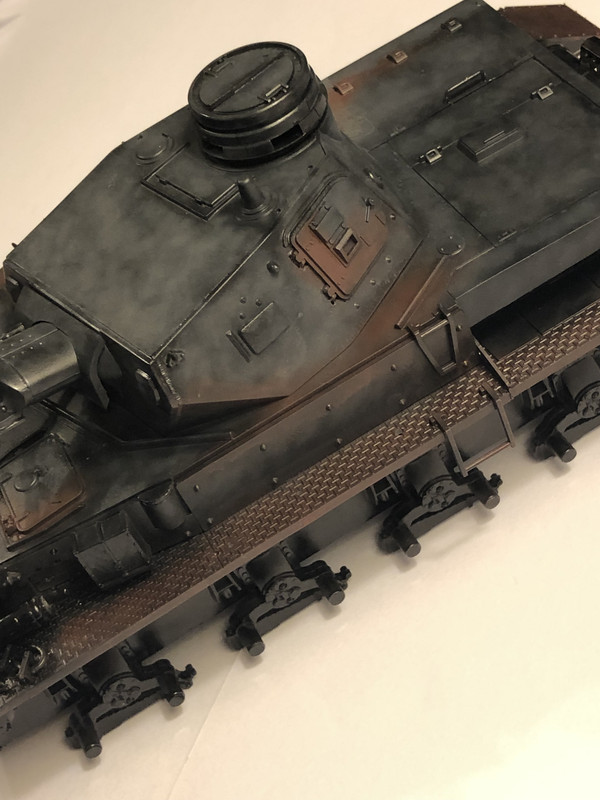
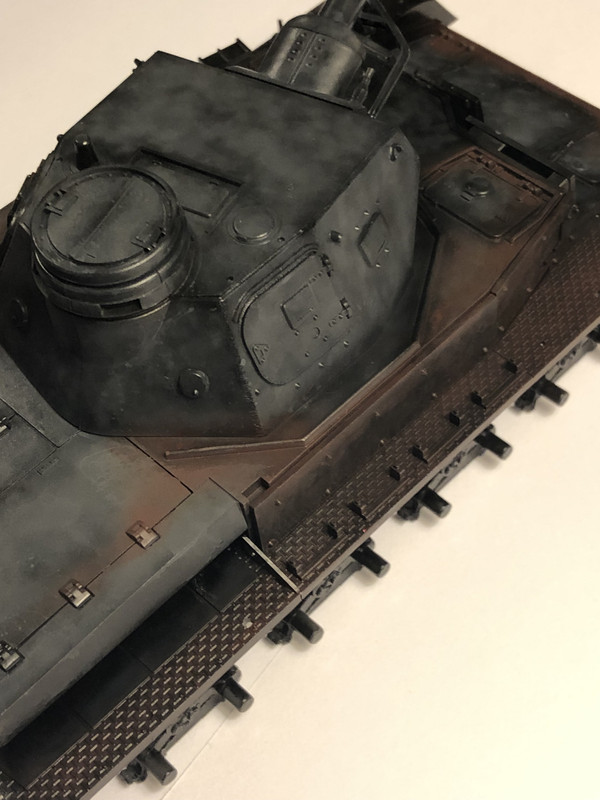
I got some primer color (or my best guess at it, I like it fine) sprayed on there. I’m not beating this thing to Hell, but some chipping will look nice so I got some areas defined for that. Should be good!
Re: KENNY X HAS A TANK
Posted: Fri Nov 23, 2018 8:33 pm
by speedgraflex
Looks good. You are making great progress, and your personal goals are detailed so clearly, it is a snap to see where you are heading and what your take away will be. The variegated pattern below the surface looks great. I like how you unabashedly pursue developing these techniques. How long are you letting your coats cure??
Re: KENNY X HAS A TANK
Posted: Fri Nov 23, 2018 9:45 pm
by KennyX
My man! Thank you for stopping in.
Let me see here, concerning the paint coats. The first coat, the Flat Black, that didn’t cure long because I was so unhappy with the way my tank looked sitting on my shelf. Maybe three hours tops. Probably less. It was pretty dumb of me to expect it to spray like Mr. Surfacer and look that nice. Anyhow, it got a marble coat of NATO Black straight away, and I was happy with that, mostly because I was doing something about it, it tamped down the uneven glossiness and actually kind of gave the impression of oily steel, which was kind of cool actually.
Anyhow all that dried overnight, and then I sprayed the first marbling of the German Grey, and let that rest. Then, oh, maybe 6 hours later I put the red primer color on there. I used Hull Red mixed with regular red for that.
I’m going to leave it alone now until either tomorrow afternoon while the babies nap, or Sunday. I want to seal the primer color, and I use a lacquer Clear for that. And that’ll dry at least 24 hours.
And after that, more German Grey, marbling and then blending. Then some chipping.
And after after that, I’ll get cracking on the lower hull.
Re: KENNY X HAS A TANK
Posted: Sat Nov 24, 2018 1:41 am
by KSaarni
Very nice, yup!
- Kari
Re: KENNY X HAS A TANK
Posted: Sat Nov 24, 2018 2:56 am
by speedgraflex
I will read tomorrow once again with fresher eyes, but thank you for these details...

Re: KENNY X HAS A TANK
Posted: Sat Nov 24, 2018 10:42 am
by Stikpusher
Some thoughts on chipping:
1) overall, the Germans had Very Good quality control on paint and vehicle application.
2) military vehicle paint is very tough stuff, it has to be.
3) any chipping is likely to occur in two areas: flexible sheet metal areas such as fenders & stowage bins, areas that get metal to metal contact and wear such as hatch latches, tow hook/pintle areas, etc. Any armored areas aside from these that have chipping is going to be battle damage, along with accompanying damage to the armor itself, be it bullets, shell splinters, or shot.
4) crew entry and exit in and out of hatches takes extended periods of time (read years) for wearing off of paint to happen. Most WWII combat vehicles had service lives of weeks or months at most. Especially in more extended campaigns such as Russia or North Africa. Of course there are exceptions to this guideline...
Re: KENNY X HAS A TANK
Posted: Sat Nov 24, 2018 12:26 pm
by KennyX
Stikpusher wrote:Some thoughts on chipping:
1) overall, the Germans had Very Good quality control on paint and vehicle application.
2) military vehicle paint is very tough stuff, it has to be.
3) any chipping is likely to occur in two areas: flexible sheet metal areas such as fenders & stowage bins, areas that get metal to metal contact and wear such as hatch latches, tow hook/pintle areas, etc. Any armored areas aside from these that have chipping is going to be battle damage, along with accompanying damage to the armor itself, be it bullets, shell splinters, or shot.
4) crew entry and exit in and out of hatches takes extended periods of time (read years) for wearing off of paint to happen. Most WWII combat vehicles had service lives of weeks or months at most. Especially in more extended campaigns such as Russia or North Africa. Of course there are exceptions to this guideline...
Carlos, boy oh boy am I glad I took the time to read that comment. Holy cow.
Okay so good deal, this helps me narrow my vision to a more accurate and clear focus and I appreciate it. Truly. I’m going to restrict the chipping to small areas on the fenders, and just a little around some hinges up front, and *maybe* a small battle damaged area.
I’ll report back once it’s underway, using this here as a guide.
Again, BIG THANKS!
Re: KENNY X HAS A TANK
Posted: Sat Nov 24, 2018 1:00 pm
by speedgraflex
Yes, echoing your thoughts here—thank you, Carlos. I am grateful you chimed in as usual. There seems to be a lot of heavy handed approaches to modeling the exteriors of active subjects especially when our information comes from the past. I spend a lot of time overthinking this topic (My brain just chimed in: “No shit.”) but I find Carlos cuts to the chase, which is pure gold.
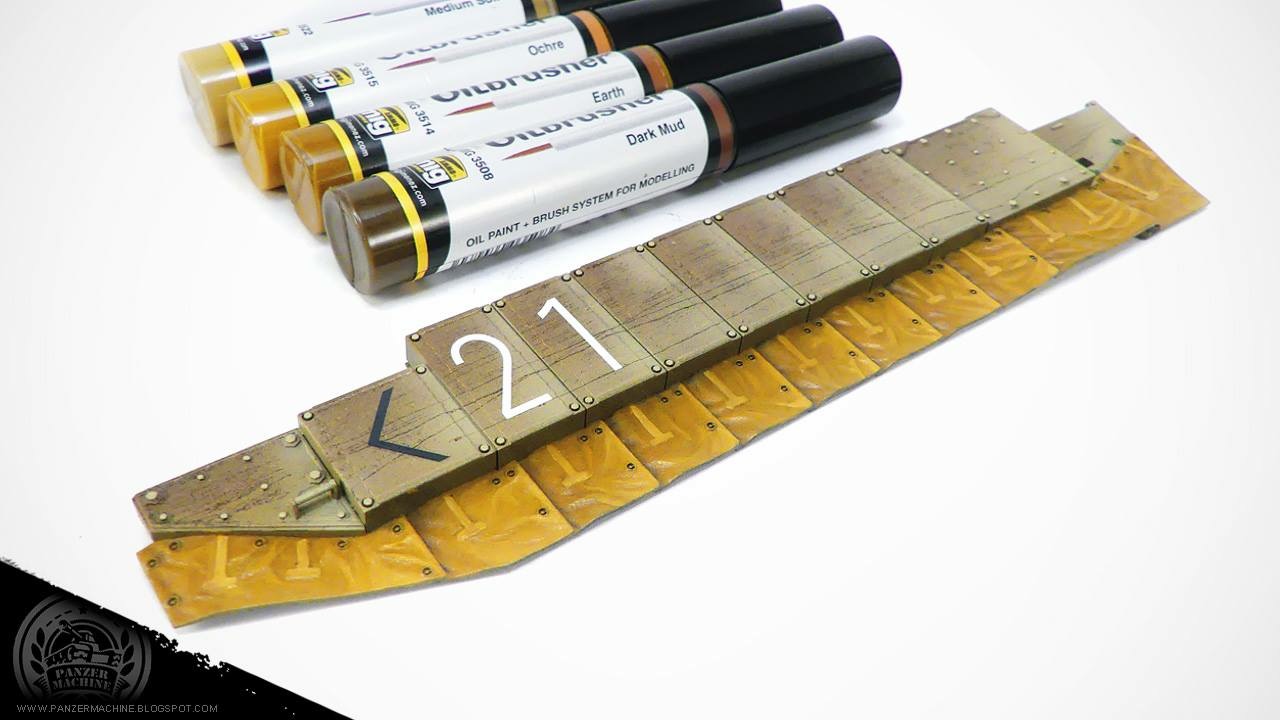
Mig Ammo Oilbrushers
Oilbrushers? Have you considered using these? I am loathe to buy any more products, but I was thinking that the applicator brush within the bottle is super effective, so I may have to shoot the lock off my wallet...
Re: KENNY X HAS A TANK
Posted: Sat Nov 24, 2018 1:40 pm
by KennyX
I’m with you 100%, Bruce. Man, I am so glad I came back to this group. Bruce, thank you for encouraging me to come back. This discussion here has caused a lot of good things to bubble up in my mind. Check this out—
I’m a “Boy oh boy is this new whizbang product/technique/methodology is cool, I’m gonna implement it right away at every opportunity possible” type of guy. That’s just my nature. But I’ve come to realize that my nature is really just a set of built-in “options” and I have even more options at my disposal provided I keep an open mind.
Now, let’s say I go with that. As you know, i love real paint chipping. I’m chipping the hell out of the paint on my Corsair. And that option works for that project in-particular provided I don’t make the sumbitch look like a blue Zero.
But going the other way, I noticed already an inclination of mine to use this tank as a canvas for chipping (however “minor” that may be). And knowing me, I can be very heavy handed with the new whizbang stuff I like. But I’m in it for the realism (most of the time, hehe I got a project cooking right now that I’ll be doing after this one which is the pure stuff of the Pataphysics in my own imagination) my own way of relating to that and my subjects notwithstanding.
All that to say-
I want to use a different option here. I don’t want to jam this build into a project that shows how heavily I can chip stuff because of how cool it might look, or whatever.
I’d rather pick other options.
Now, I’m considering very light chipping on the fenders and a little on the front of the tank. I’m talking minuscule, here, but I am also planning on adding some mud, and that stuff might could end up covered up anyway... but yeah, I’m really glad we had this talk because I got some introspection out of it, and I feel like this will make my first tank project a better success.
So thanks again!