Page 2 of 5

Re: Point Du Hoc

Posted: Sun Nov 19, 2023 11:47 am
by SteveSki
Feathering in the Details

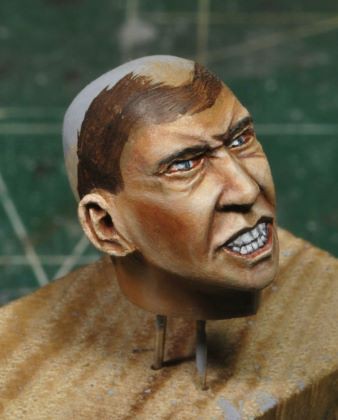
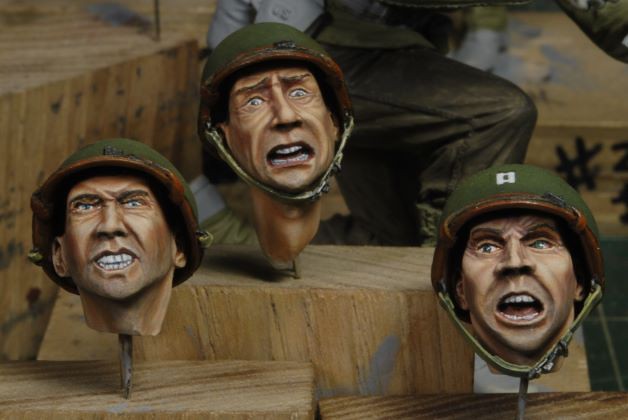
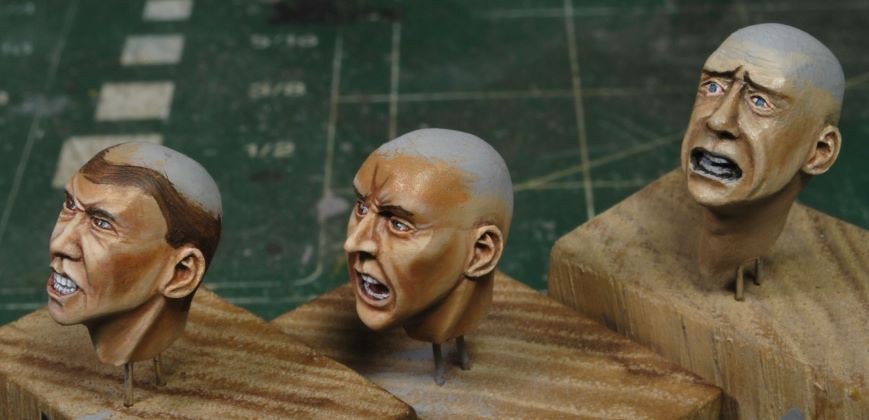
Once the basic facial work has been done and the oils set up for a day or two, I go back over each face and add in more defined highlights and shadows. As you can see from the three faces, they are each in a different phase of this process. Number three just might get another oven cleaner bath, he’s looking pretty shabby, again, what a bummer.
Image

Using a very minute amount of paint I apply in the desired areas and then feather it in using a damp brush. The feathering brush is barely damp at all. We just need the oils to feather into the surrounding areas for a smooth transition. If too much paint is added the work area may become out of cinque with the rest of the face and then it’s a fight to bring it back in without total distortion of the desired tones.
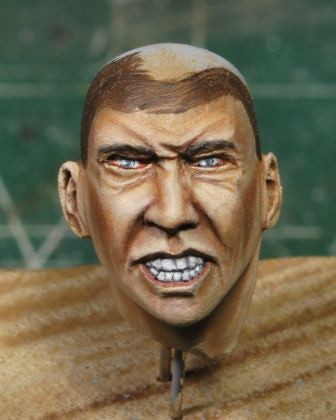
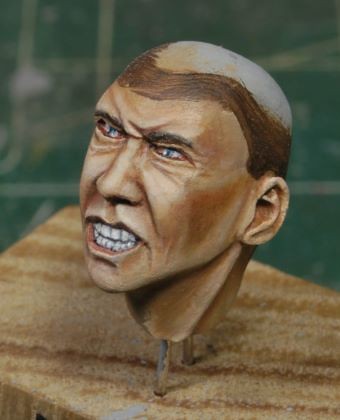
Image Image

Image

No names for these guys yet, but I’m working on it. This face above has a bit more red on the cheeks than is necessary and will be toned down slightly. There’s still quite a bit to do to just this face alone, but much of the fine tuning will be done in a few days.

More to follow soon and thanks for watchin. Cheers, Ski.
Re: Point Du Hoc

Posted: Wed Nov 22, 2023 2:48 pm
by SteveSki
A Little More Detail

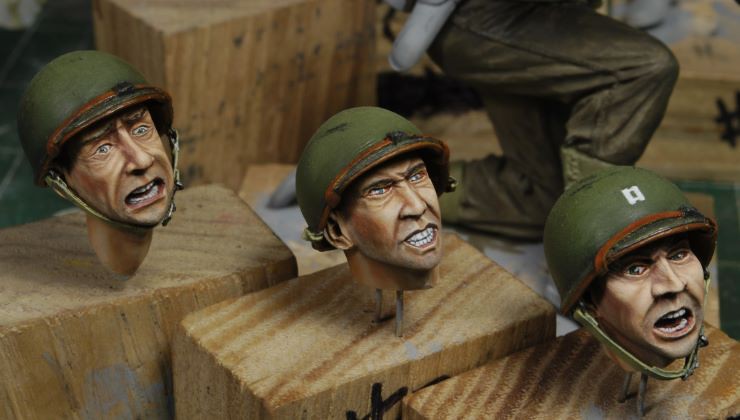
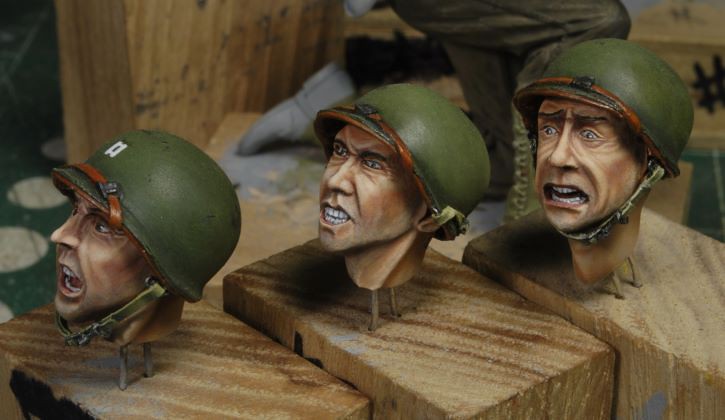
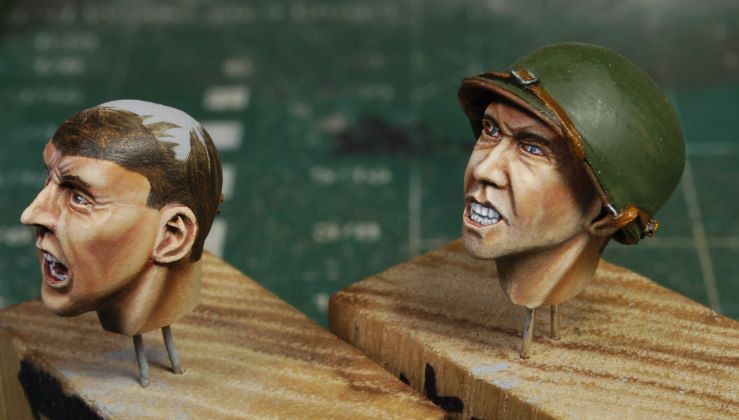
Adding a few more minute details it appears the number two figure is pretty close. I added the helmet and took care of the leather work and buckles/clips. I also added in the 5 o’clock shadows. Number one will be touched up a little more before his helmet is attached, then off to work Number three.

Image

Image

More to follow soon and thanks for watchin. Cheers, Ski.
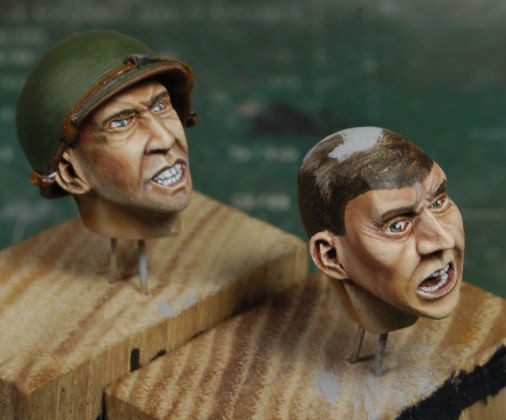
P.S. We now have names for these guys; #1 is Walt, #2 is Bruce, and #3 is Luke.

Re: Point Du Hoc

Posted: Wed Nov 22, 2023 10:18 pm
by jeaton01
They don't look happy!

Re: Point Du Hoc

Posted: Thu Nov 23, 2023 3:57 am
by SteveSki
Lol, I recon they don't.

Re: Point Du Hoc

Posted: Fri Dec 08, 2023 3:30 pm
by SteveSki
Finishing Faces, Working upper Torsos

The faces for this crew are now complete minus a few touch-ups here and there. Luke, the terrified fellow, was not wanting to cooperate with my brush. After I convinced him, that Bruce wasn’t going to let him go, he began to be more manageable.

Sometimes faces just don’t want to work, so I’m finding that working them over several days, feathering, and filtering necessary tones works best. Poor Luke, he’s the cleanest kid on the block with four oven cleaner baths to his credit, HA! I have also added the 2nd Ranger Battalion emblem on the back of the helmets, not seen in these photos. The helmet tones will be adjusted more towards the drab range, btw.

Image

Image

Image

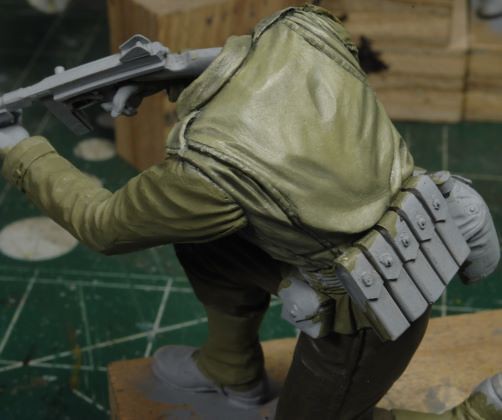
Reference photos show a myriad of tan and olive drab shades for WWII US GI uniforms, so I won’t be too worried about the shade I’ve chosen. The button and rivet counters can now relax, it has been decided. I have matched the oils to an almost exact tone by taking a dab of oil and swiping it onto the photo posted on my easel. It may not appear so close now, but it will later when the oils dry.

Image

https://www.dday-overlord.com/en/norman ... nte-du-hoc More photos can be found on the net referencing the D-Day Pont Du Hoc 75th Anniversary.

I decided to start with Capt. Walt and get some oils on the canvas, so to speak, while Sgt. Luke was drying for a bit. I really do like how Steve works these wrinkles and folds, very crisp and clean, much easier to paint. I will be working my way down the figure as I usually do.

Image

Image

Image

I will address all three upper torsos before I move onto the next phase while the palette still has a good oil mix. Remixing another batch days from now may not come out within the same tonal range, and that is what I am trying to avoid here, offset tones.

Progress is a bit slow, but steady, so more to follow very soon. Thanks for watchin. Cheers, Ski.
Re: Point Du Hoc

Posted: Sat Dec 09, 2023 2:49 am
by KSaarni
Wouh, impressing!

What is really amazing with these "removable" heads, you can really change the content of the entire scenario!
Imagine Lukes head being the one with the Captains helmet, I would surely not want to be in that group. :-D

I visited Normandie in 2004 and of course Point du Hoc.
It's even a worser place than one could imagine, seeing from pictures and movie clips!

Once more, impressing work Steve! Looking forward to next stages

- Kari

Re: Point Du Hoc

Posted: Sat Dec 09, 2023 11:05 am
by SteveSki
Thank you Karti. Now you got something there, changing out the heads, lol. I recon the time to think of that was before the primer, oops, good idea though. Yes, I can just imagine the emotion you felt just looking at what these guys had to endure. We could use a bit more of that since Dec 7th was just the other day.

Re: Point Du Hoc

Posted: Sat Dec 09, 2023 12:12 pm
by jeaton01
Enjoying the posts Steve. Hoping a little will stick in my brain!

Re: Point Du Hoc

Posted: Mon Dec 11, 2023 9:35 am
by SteveSki
Thanks, John. Don't worry about the "stick" part, I have to relearn stuff quite often, lol.

Re: Point Du Hoc

Posted: Sat Dec 23, 2023 10:19 am
by SteveSki
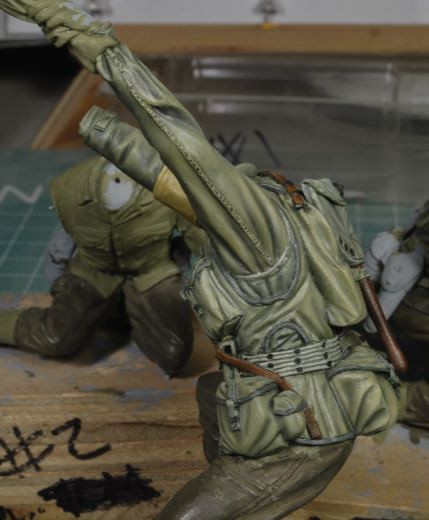
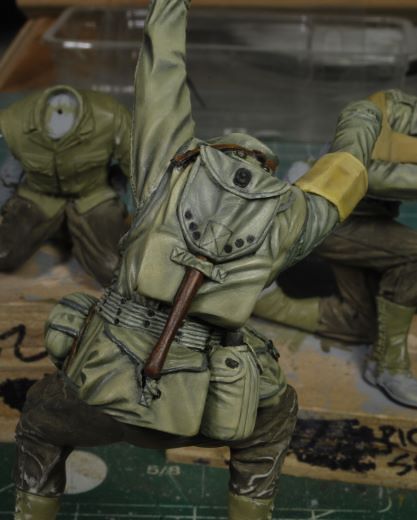
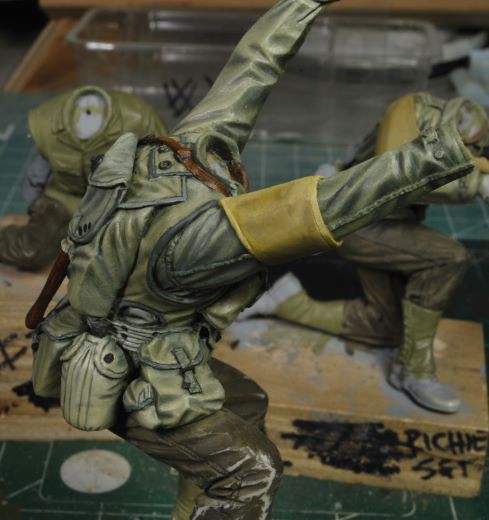
Getting Luke Up to Speed

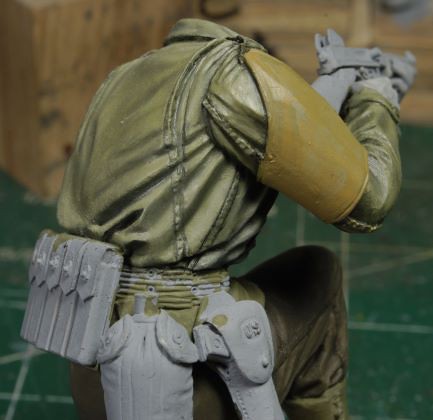
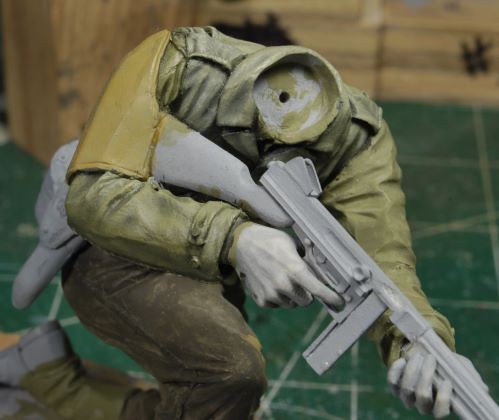
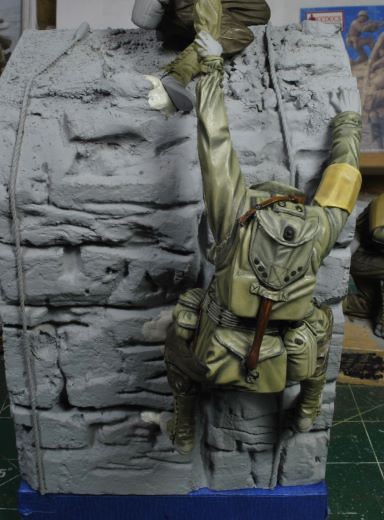
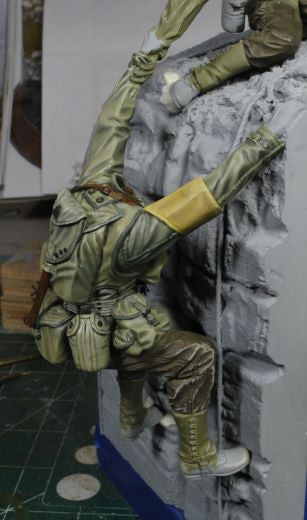
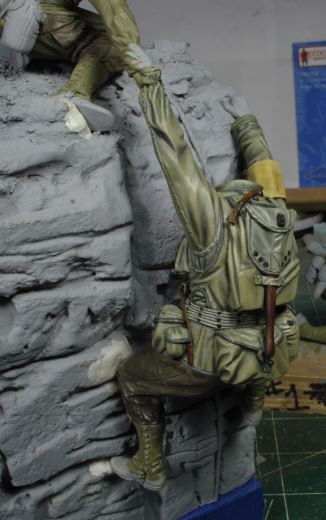
I started to work on Luke’s jacket and decided that since the area was so small, I would continue on and work his vest before moving on to Bruce. What I did not take into consideration was the coupling of two figures together. I had never worked adjoining figures in the past, so this was a learning experience for me. I can clearly see that sculpting adjoining figures is not an easy task but rather a complicated one.

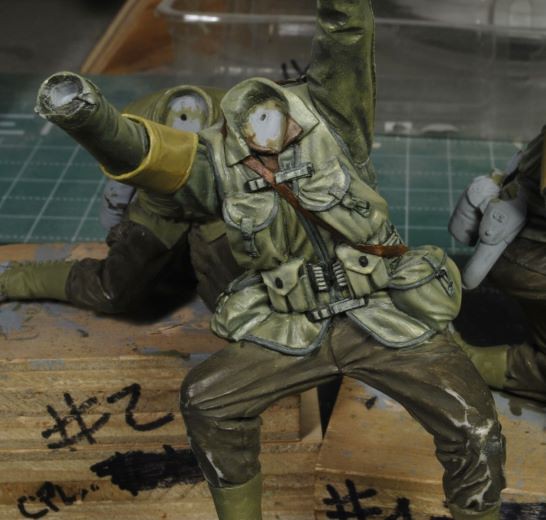
I did perform a test fit to the base with both figures before I started painting and thought everything was good to go. Right about the time I was finishing up Luke’s gear something told me to recheck before I kept going. Sure enough, I boofed! What I finally realized was that I had not aligned Bruce’s arm correctly to accept Luke’s shoulder section. That slight off-line attachment of Bruce’s arm caused a good 3/16th of an inch alignment problem for Luke on the cliff.

You might think, ok, do some work on the cliff to remedy the issue, but that didn’t’ work so well. That caused even more problems. So, I worked in some Epoxy Sculpt to clean up my mess on the cliff and began to rework Bruce’s arm for a much better fit. Long story short, a lot of time was wasted because I neglected to retest the fit when the arms were glued in place.

Well, like this was the first time I’ve messed up, right? Na, it happens all the time, lol. This was a simple oversight that required a lot of unnecessary tweaking. Lesson learned once again. Ruck Onward.

Image

Image Image

Image

I need to point out now that the details on Luke’s vest are incredible and it’s obvious to me that Steve has taken a lot of time and expended a lot of effort to make this vest accurate with crisp clean details. Kudos, Stevo!

You may also notice that I have a tonal variation issue with Luke’s left arm. That arm section was not attached when I started to paint Luke and once again I boofed, this time on the tones of the jacket arm. Like I said, having never done adjoining figures before, I missed details that otherwise should have been addressed much earlier. The tonal variation has been addressed since taking these pics, and still a bit more needs to be done, but that is a minor issue which is easy to address compared to an arm realignment.

Image Image

Image

I would also like to add that the precision of the fit for Luke on the cliff is incredible. Steve has sculpted the arm to hand fit, and boot placement, so well that Luke can hang on by himself without any anchor or glue, impressive. Luke is pulling a big fake with that scared look on his face, isn’t he? HA!

I will be working Bruce’s arm and his jacket together to get the same color tones before I go any further. I really don’t fancy having to go back and address another boof, two is enough for now, wouldn’t ya say?

More to follow soon and thanks for watchin. Cheers, Ski.