1/32 Hasegawa Fw 190D-13 Yellow 10

Re: 1/32 Hasegawa Fw 190D-13 Yellow 10
I wish I could take more credit for the wood flaps but it was just a matter of placing decals! Gotta thank HGW for their wood grain decals!
John aka JKim
-----------<><

-----------<><
-
BlackSheep214

- Elite Member
- Posts: 13596
- Joined: Sun Apr 06, 2014 8:47 pm
Re: 1/32 Hasegawa Fw 190D-13 Yellow 10
Incredible.... 
“Who controls the skies, controls the fate of this Earth”
Author unknown- 352nd Fighter Group, Blue-Nosed Bastards of Bodney
“Send one plane it’s a sortie; send two planes it’s a flight; send four planes it’s a test of airpower. - Richard Kohn
Author unknown- 352nd Fighter Group, Blue-Nosed Bastards of Bodney
“Send one plane it’s a sortie; send two planes it’s a flight; send four planes it’s a test of airpower. - Richard Kohn


Re: 1/32 Hasegawa Fw 190D-13 Yellow 10
I just picked up the Aires gun bay set for the 190D, which is essentially a cream-colored version of this...
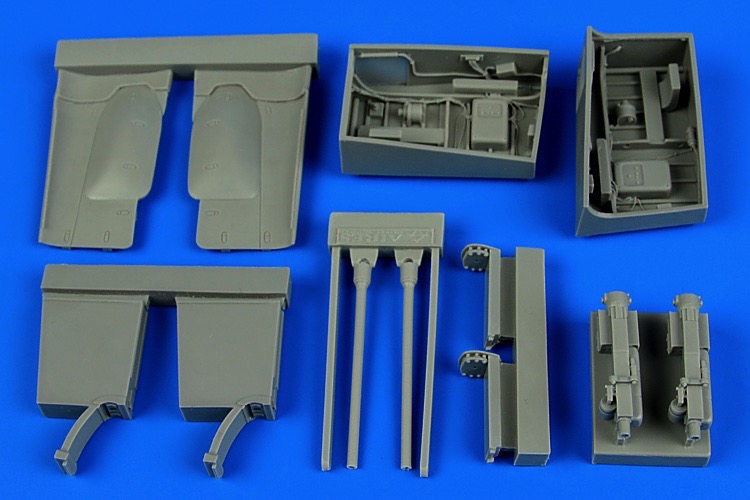
This gives me some raw material to help customize the engine compartment for a D-13.
This gives me some raw material to help customize the engine compartment for a D-13.
John aka JKim
-----------<><
-----------<><
Re: 1/32 Hasegawa Fw 190D-13 Yellow 10
After taking a short break following the finish of the Me262B Nightfighter build, I've been trying to work up enough mojo to start this build back up. It's slow going but I've managed to make a little progress.
First off, I've received the Aires 190D gun bay resin set. I think it must be one of Aires older products based on the color of the resin and visible yellowing of the packaging.
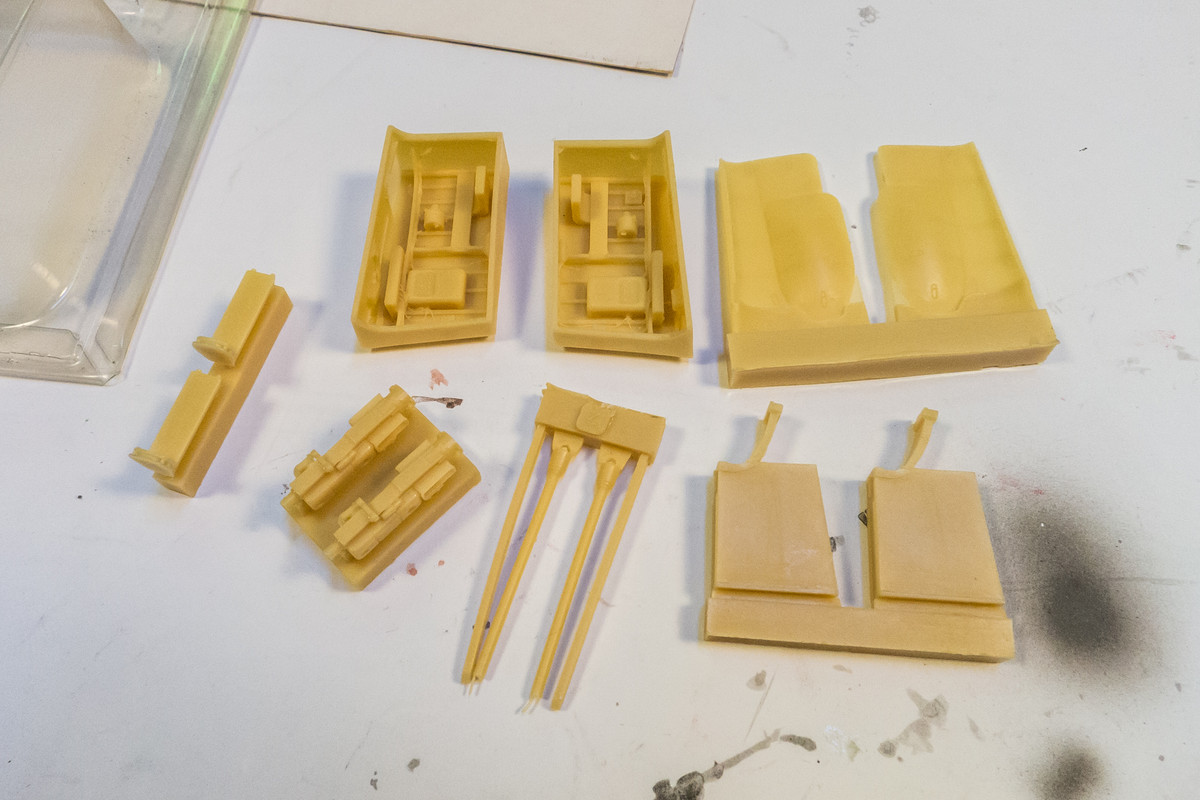
I have no intention of using these in the wing root gun bays as designed but I thought it would be helpful to at least assemble one of the wing root stations to get a better understanding of how the MG151 is mounted. Surprisingly, the front end of gun body butts up against a solid wall. Although the gun barrels are provided, the set makes no provisions for their use. I guess they expect the modeler to drill the necessary holes.
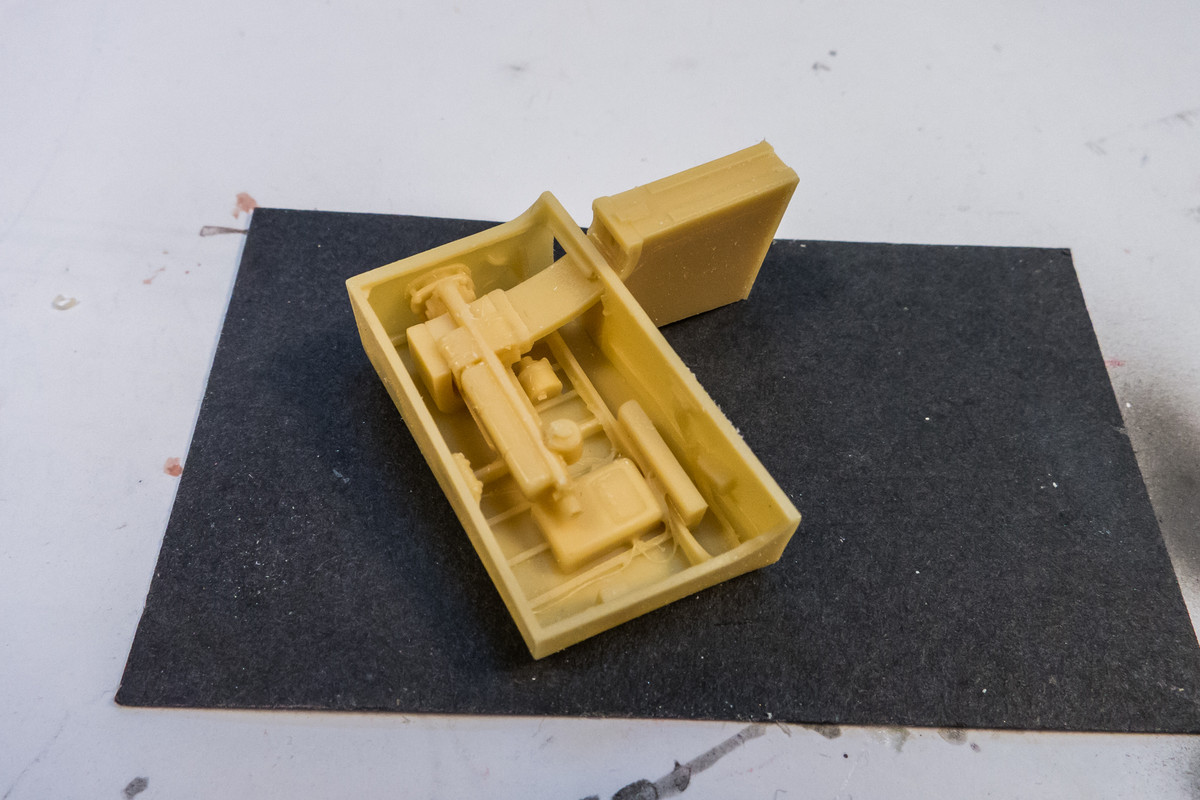
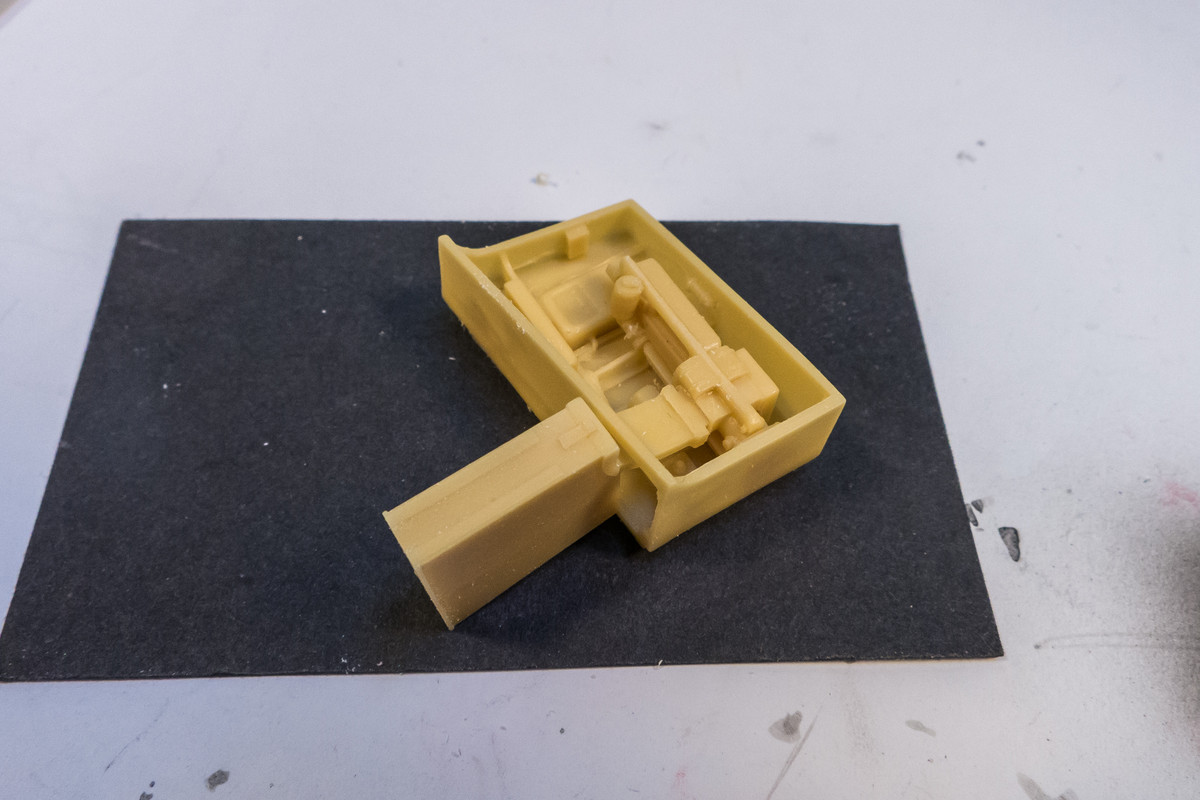
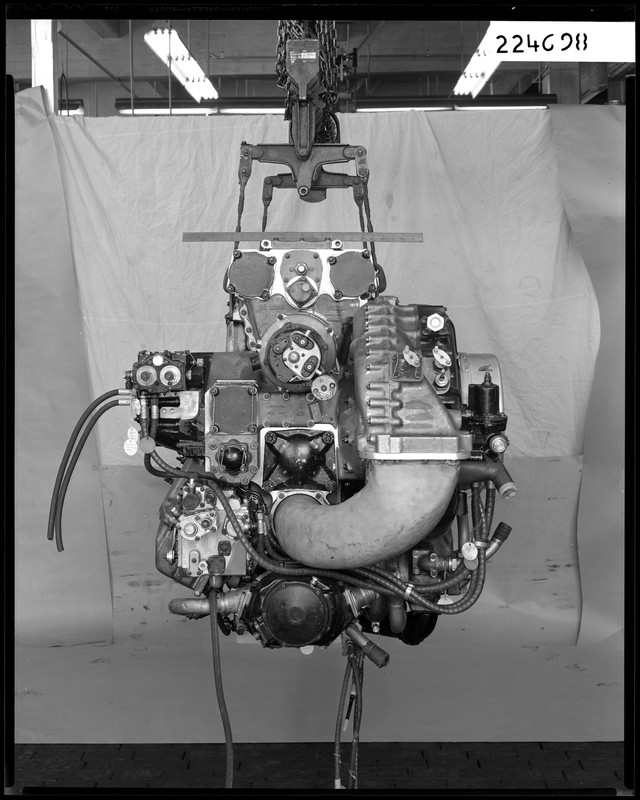
The back of the Jumo 213 has a cover, which I THINK is the location of the hollow space where a gun barrel would fit. D-9's had no gun in this location hence the cover, which is the black object above the large trunk of the supercharger. The Hasegawa kit depicts this cover and therefore gives me a point of reference as to where the MG151 can be mounted.
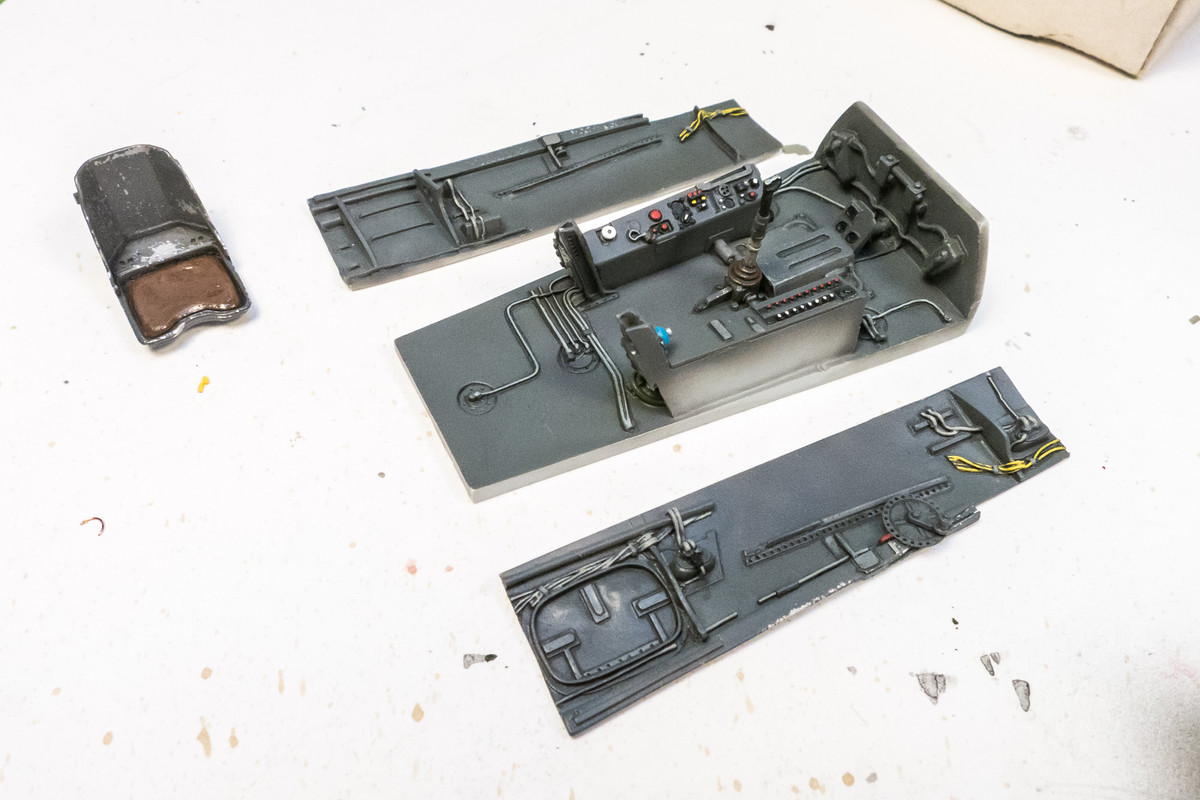
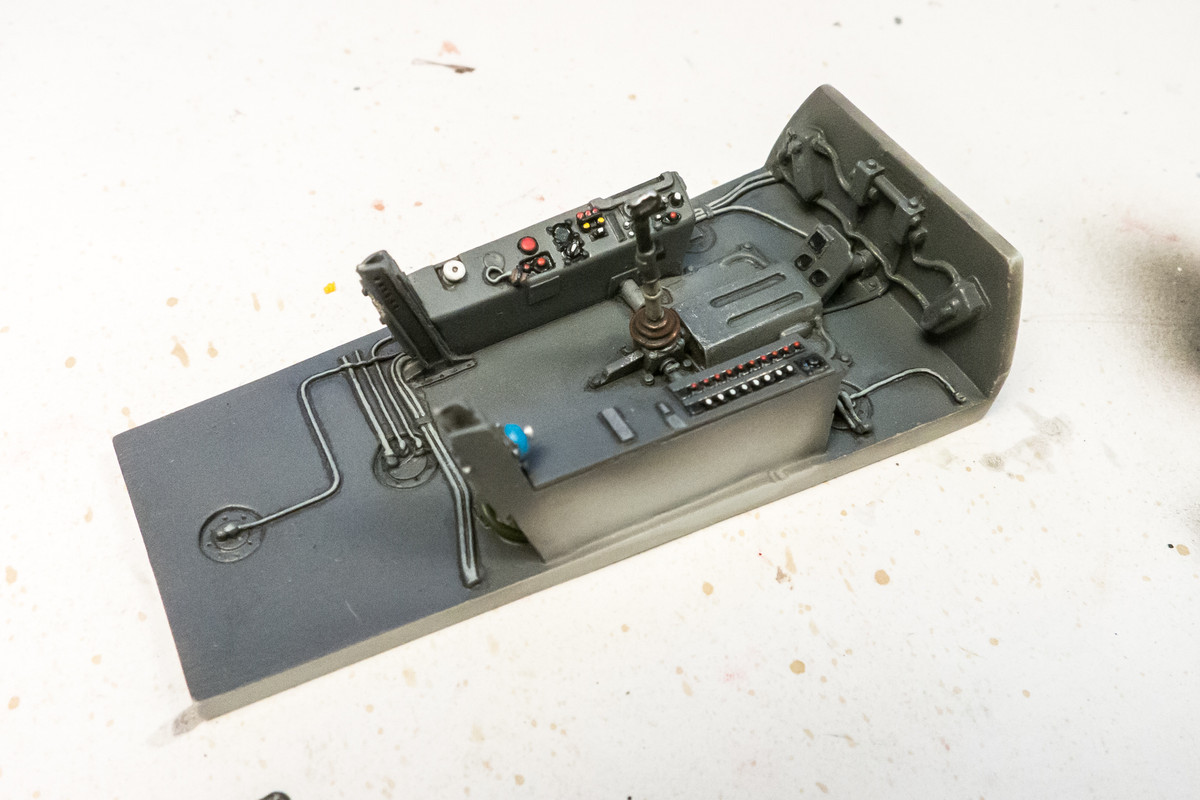
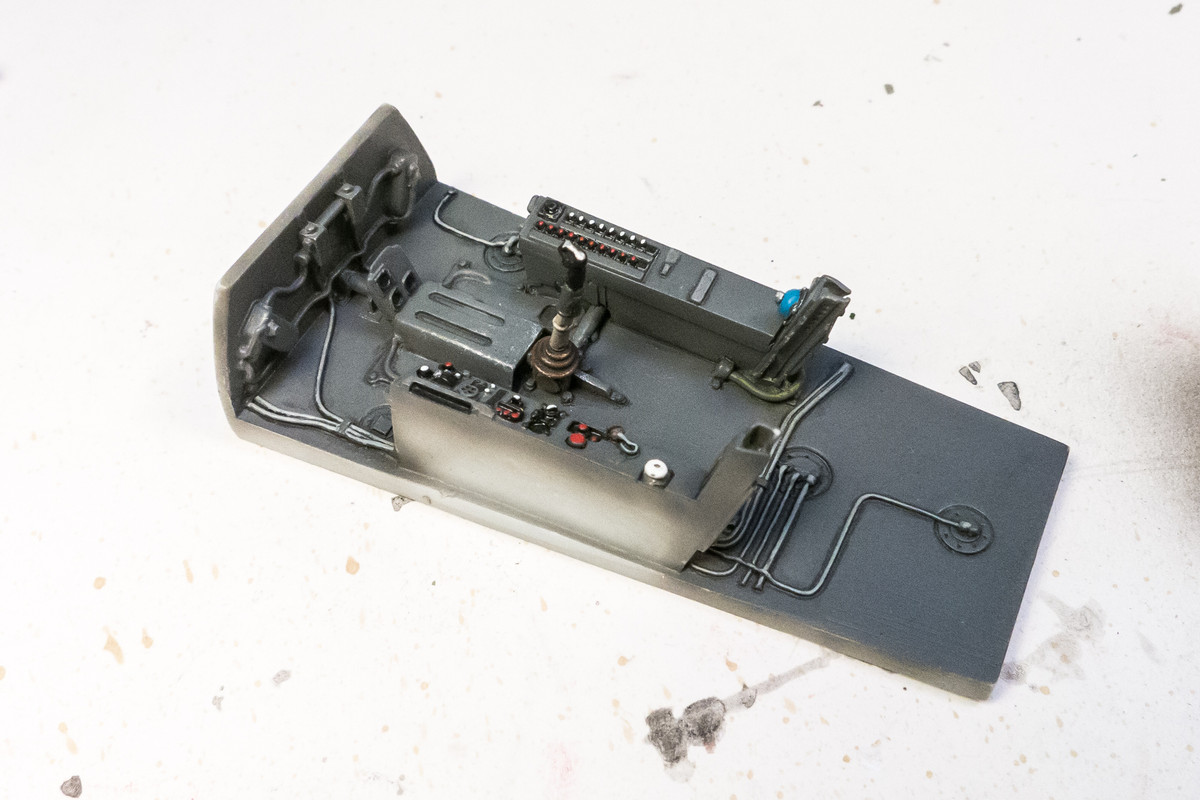
As previously shown, the instrument panels have been painted and it was time to paint the rest of the cockpit. Pretty understated and, dare I say, boring? The Eagle Editions cockpit represents much more than will be visible from the cockpit opening. Everything behind and in front of the raised side panels will be obscured from sight.
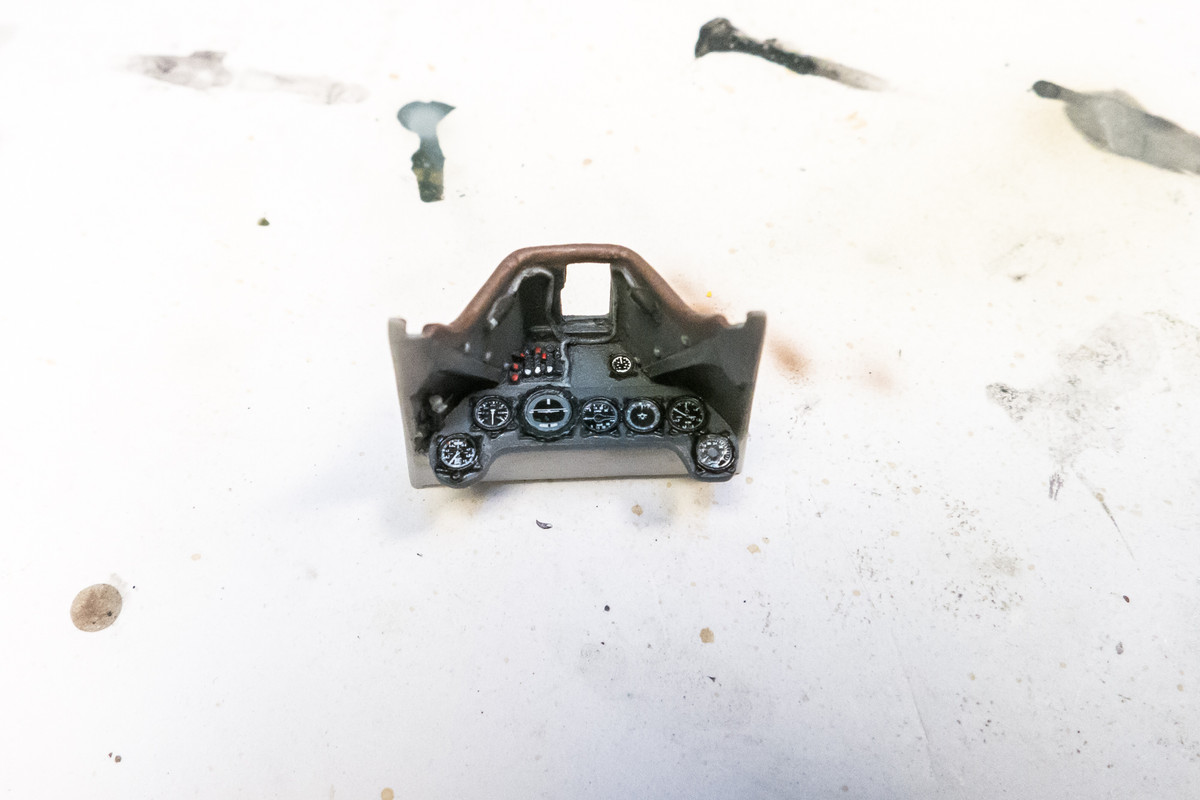
Here is the frontal hood with the upper instrument panel in place. The Revi 16B gun sight still needs to be painted and added.
The upper areas of the sidewalls have been chipped. Really not much else will be see due to the raised side panels. None of the painted wiring runs will be visible as they will be blocked by the instrument panel and the seat.
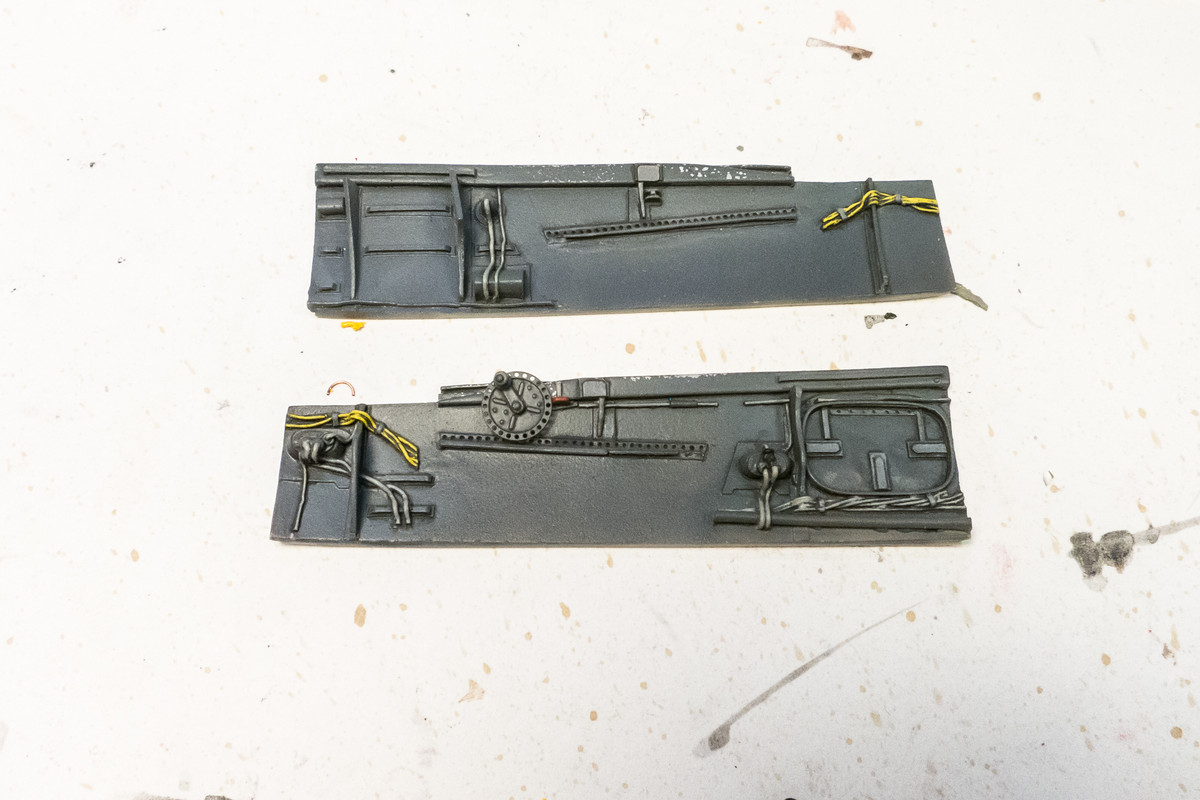
The starboard side panel is grafted from the Zoukei Mura Ta152H-1 kit to reflect the difference between the D-13 and D-9. One of the things I've been doing after the cockpit has been painted and given a flat coat is to go back with a fine brush and touch up the black areas with Future. The glossy Future will darken the black and provide more contrast and also give some surfaces a variance in sheen. Just something to break up the monotony of a sparse cockpit.
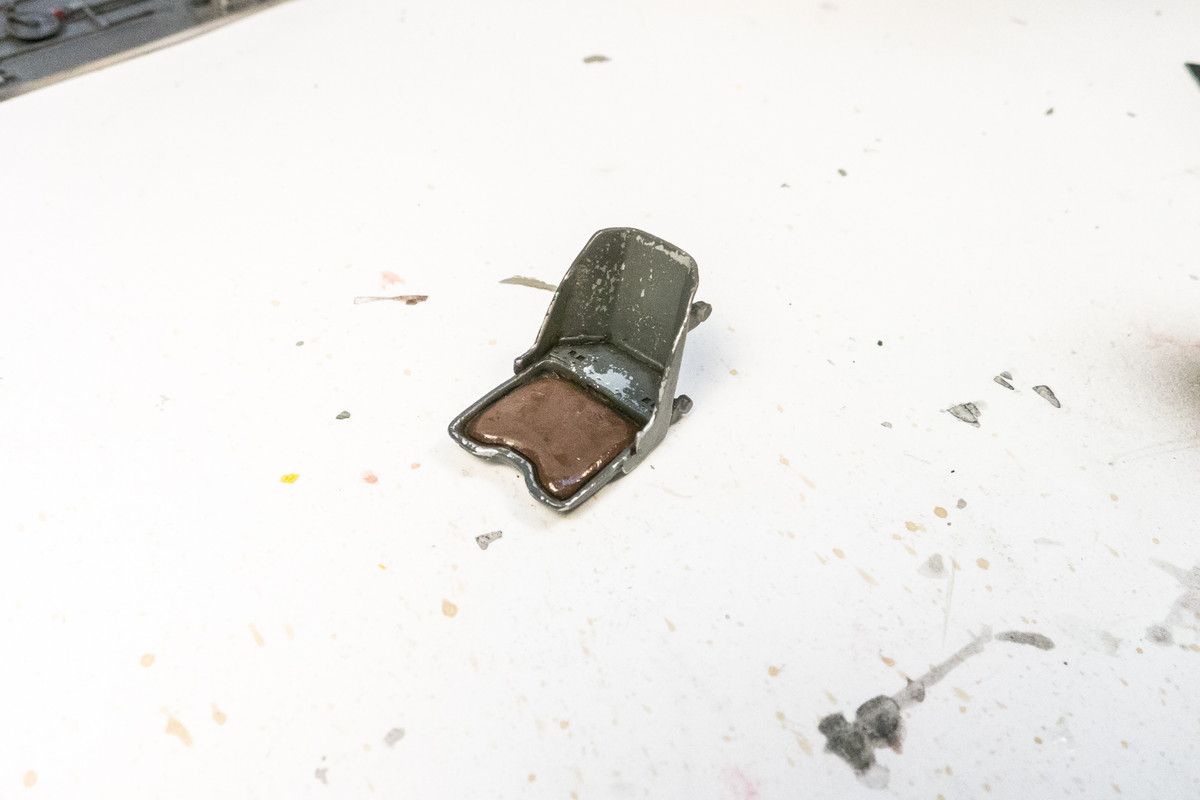
The seat hasn't been given a flat coat yet. I'll do that after the HGW harnesses have been added.
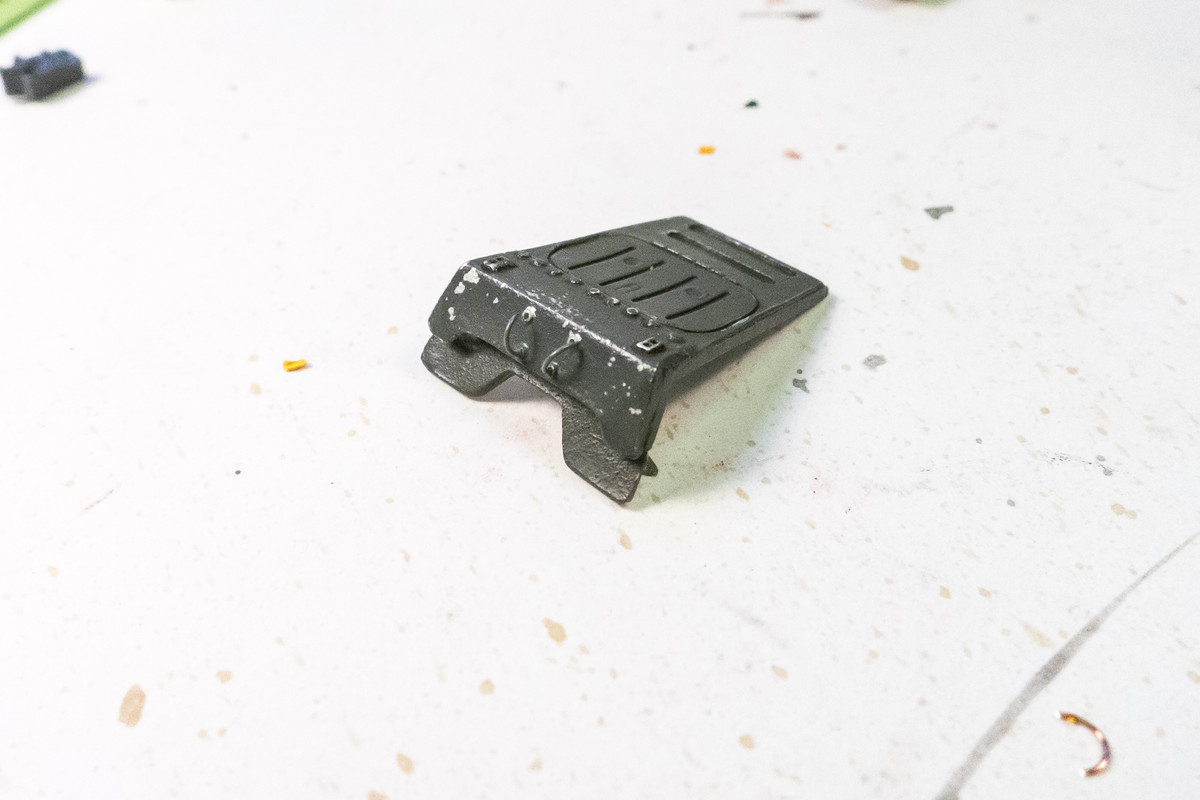
On the rear deck, I've pre-installed loops for the attachment of the shoulder harnesses. The top of loops have been left open so, in theory, I can just slip the shoulder straps onto the loops and close them with CA glue.
First off, I've received the Aires 190D gun bay resin set. I think it must be one of Aires older products based on the color of the resin and visible yellowing of the packaging.
I have no intention of using these in the wing root gun bays as designed but I thought it would be helpful to at least assemble one of the wing root stations to get a better understanding of how the MG151 is mounted. Surprisingly, the front end of gun body butts up against a solid wall. Although the gun barrels are provided, the set makes no provisions for their use. I guess they expect the modeler to drill the necessary holes.
The back of the Jumo 213 has a cover, which I THINK is the location of the hollow space where a gun barrel would fit. D-9's had no gun in this location hence the cover, which is the black object above the large trunk of the supercharger. The Hasegawa kit depicts this cover and therefore gives me a point of reference as to where the MG151 can be mounted.
As previously shown, the instrument panels have been painted and it was time to paint the rest of the cockpit. Pretty understated and, dare I say, boring? The Eagle Editions cockpit represents much more than will be visible from the cockpit opening. Everything behind and in front of the raised side panels will be obscured from sight.
Here is the frontal hood with the upper instrument panel in place. The Revi 16B gun sight still needs to be painted and added.
The upper areas of the sidewalls have been chipped. Really not much else will be see due to the raised side panels. None of the painted wiring runs will be visible as they will be blocked by the instrument panel and the seat.
The starboard side panel is grafted from the Zoukei Mura Ta152H-1 kit to reflect the difference between the D-13 and D-9. One of the things I've been doing after the cockpit has been painted and given a flat coat is to go back with a fine brush and touch up the black areas with Future. The glossy Future will darken the black and provide more contrast and also give some surfaces a variance in sheen. Just something to break up the monotony of a sparse cockpit.
The seat hasn't been given a flat coat yet. I'll do that after the HGW harnesses have been added.
On the rear deck, I've pre-installed loops for the attachment of the shoulder harnesses. The top of loops have been left open so, in theory, I can just slip the shoulder straps onto the loops and close them with CA glue.
John aka JKim
-----------<><
-----------<><

Re: 1/32 Hasegawa Fw 190D-13 Yellow 10
Glad to see you back on this. The cockpit is looking really good.
March as one, Don't look back
Odin's sons... Attack!
Unleash hell! Do not repent! Warfare grants us no lament
Let your weapons slash and tear This is no place for fear
Hold the lines! Move as one! In unity our victory's won
Our shields will form a mighty wall
United we shall never fall
Odin's sons... Attack!
Unleash hell! Do not repent! Warfare grants us no lament
Let your weapons slash and tear This is no place for fear
Hold the lines! Move as one! In unity our victory's won
Our shields will form a mighty wall
United we shall never fall
-
tempestjohnny

- Elite Member
- Posts: 3825
- Joined: Sat Oct 15, 2016 4:51 am
- Location: Naples. FL
Re: 1/32 Hasegawa Fw 190D-13 Yellow 10
Oh my........

Re: 1/32 Hasegawa Fw 190D-13 Yellow 10
Superb cockpit work John.
Stuart Templeton 'I may not be good but I'm slow...'

Re: 1/32 Hasegawa Fw 190D-13 Yellow 10
If this is what you do with waning mojo, .....wow
To make each build less crappy than the last one. Or, put another way, "Better than the last one, not as good as the next one!"..
-
Stikpusher

- Moderator
- Posts: 21383
- Joined: Sat Apr 05, 2014 8:37 pm
- Location: Ceti Alpha 5
Re: 1/32 Hasegawa Fw 190D-13 Yellow 10
And now we return to our regularly scheduled programming...

"Surely I have made my meaning plain? I intend to avenge myself upon you, Admiral. I have deprived your ship of power, and when I swing 'round, I intend to deprive you of your life."
FLSM
FLSM