Page 12 of 19
Re: Revell 1/32 F-4G Review & Build- update 10/11
Posted: Tue Oct 18, 2016 12:16 pm
by Duke Maddog
Excellent work Carlos! Great job adding those in. It may be a small update, but at least you are getting bench time! I haven't seen that in several weeks! Looking forward to seeing more.
Re: Revell 1/32 F-4G Review & Build- update 10/11
Posted: Tue Oct 18, 2016 3:41 pm
by Stikpusher
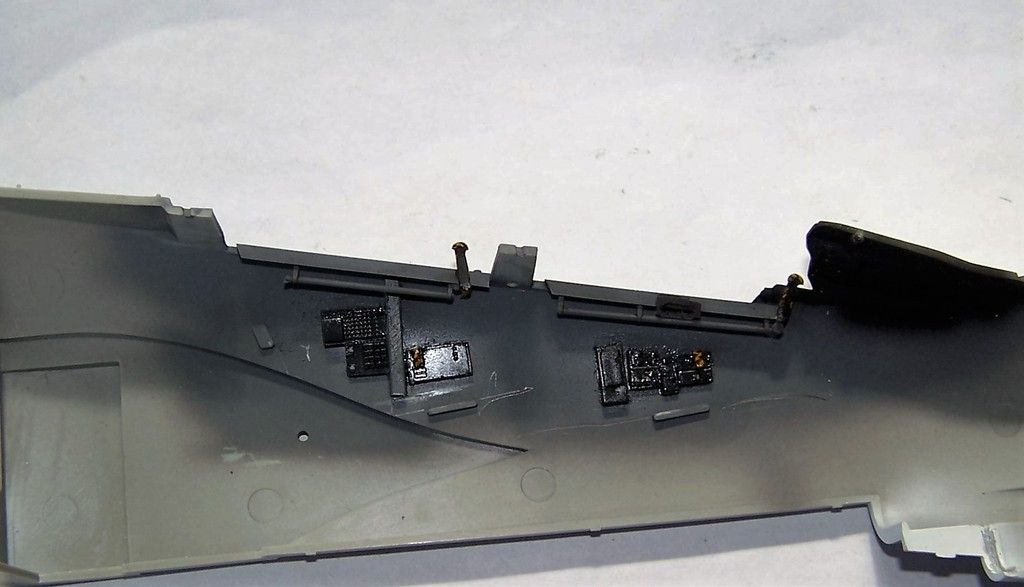
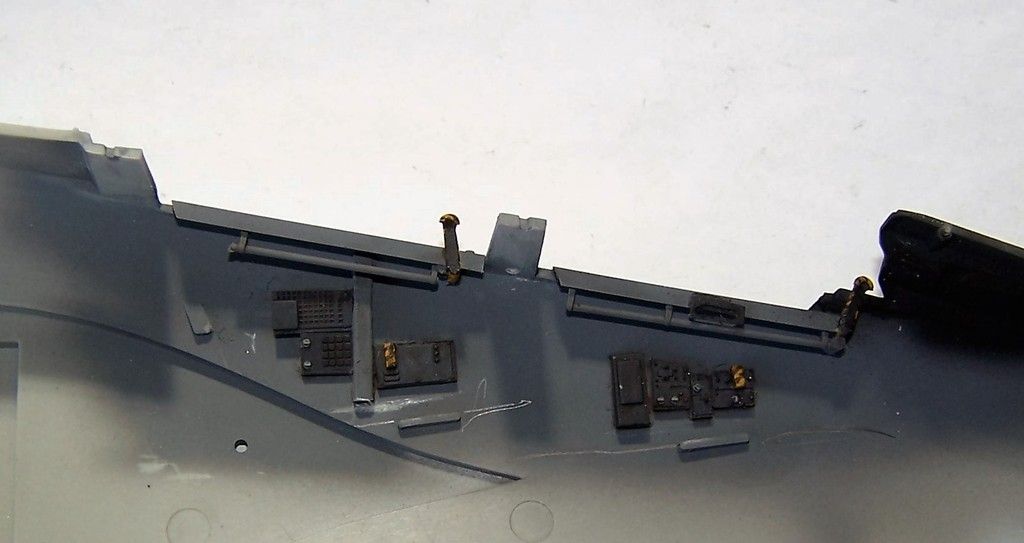
Thanks Mark. I am almost done with the interior detail painting. I still need to stripe up a couple of the emergency handles, and do the bare metal switches on the sidewalls, then I can get a wash on and get it all sealed up... one small step at a time.

Re: Revell 1/32 F-4G Review & Build- update 10/11
Posted: Mon Oct 24, 2016 2:50 pm
by Stikpusher
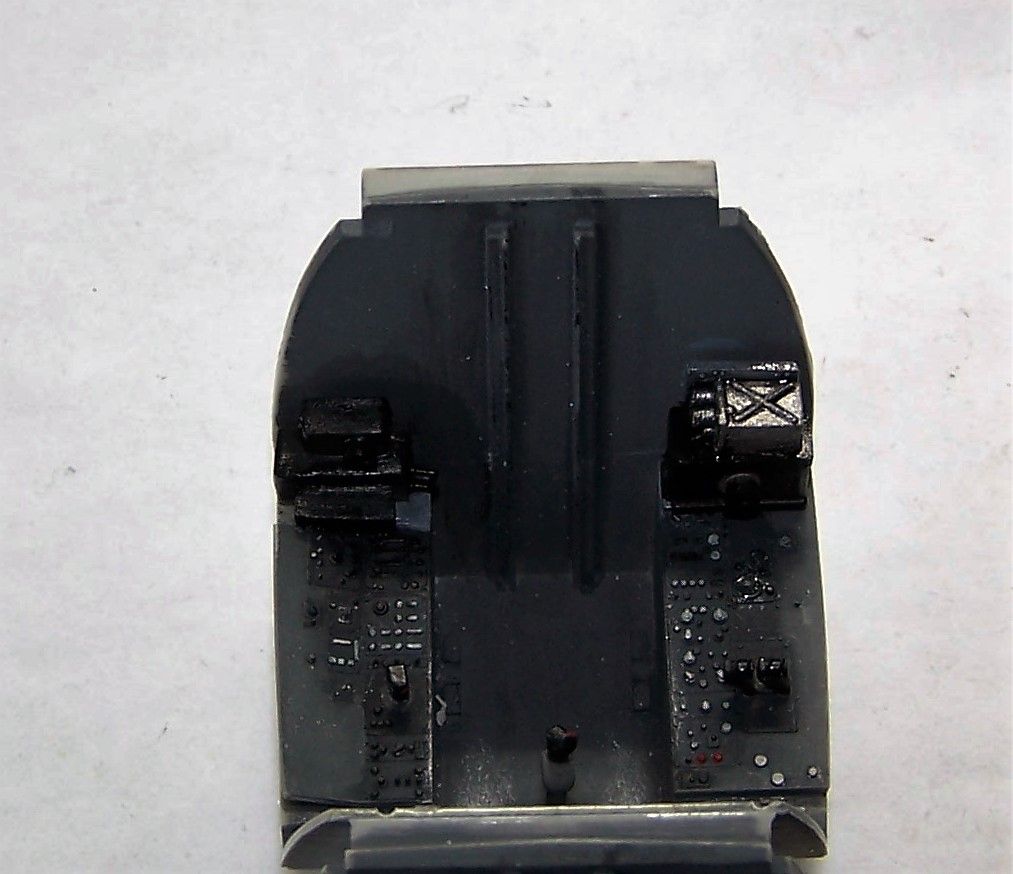
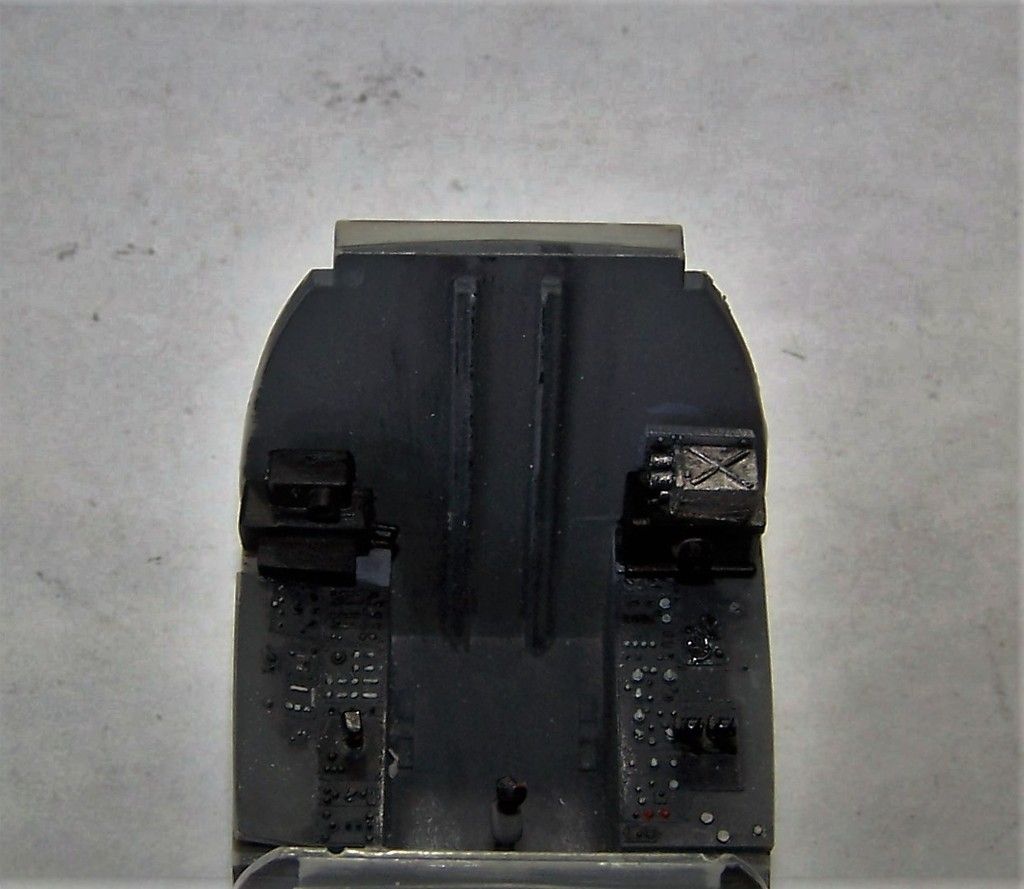
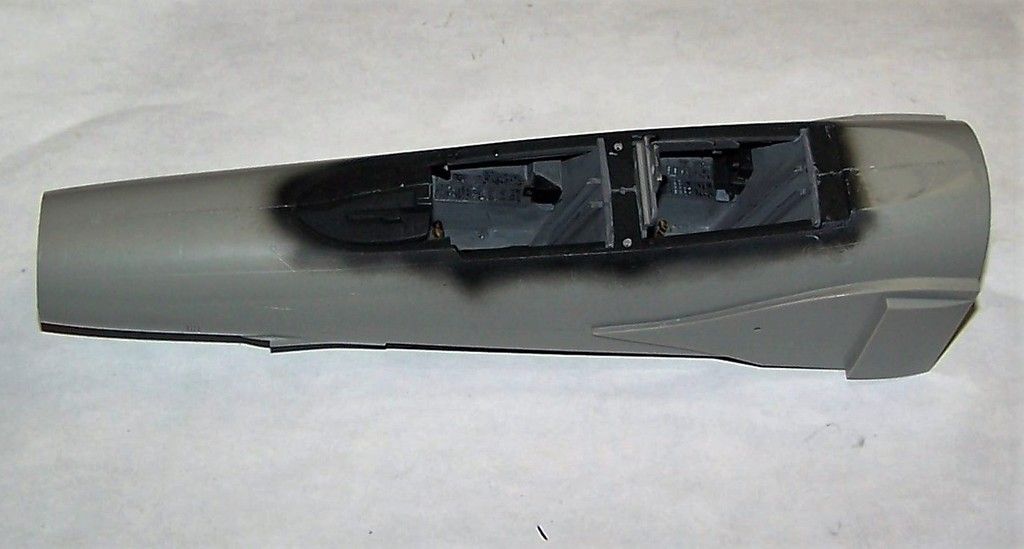
Well the cockpit interior is all finished, painted, and installed. Along with the forward end of the nose gear well and the radar bulkhead. And the forward fuselage halves glued together. But Photobucket is currently FUBAR and not operating, so I will get photos posted when it returns to merely SNAFU...

Re: Revell 1/32 F-4G Review & Build- update 10/11
Posted: Mon Oct 24, 2016 10:32 pm
by Stikpusher
Re: Revell 1/32 F-4G Review & Build- update 10/24
Posted: Tue Oct 25, 2016 10:12 am
by Duke Maddog
Looking excellent Carlos! It does feel good to see some progress doesn't it?
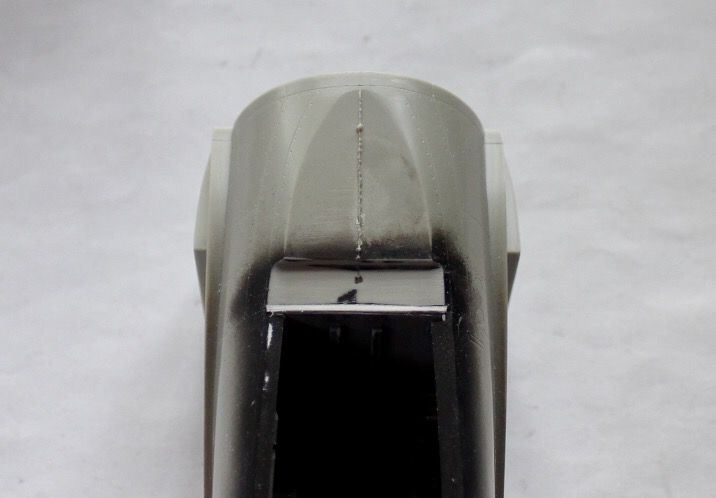
Check your seams; I see a few peeking out. And it looks like there's a slot for a radar assembly in the radar panel in the nose so you can pose the nose open to show the radar. That is cool!
Also, check the instructions/sprues. Isn't there a shroud or something that covers that rear of the GIB's IP? I always thought there was.
Re: Revell 1/32 F-4G Review & Build- update 10/24
Posted: Tue Oct 25, 2016 4:30 pm
by Stikpusher
Duke Maddog wrote:Looking excellent Carlos! It does feel good to see some progress doesn't it?
Check your seams; I see a few peeking out. And it looks like there's a slot for a radar assembly in the radar panel in the nose so you can pose the nose open to show the radar. That is cool!
Also, check the instructions/sprues. Isn't there a shroud or something that covers that rear of the GIB's IP? I always thought there was.
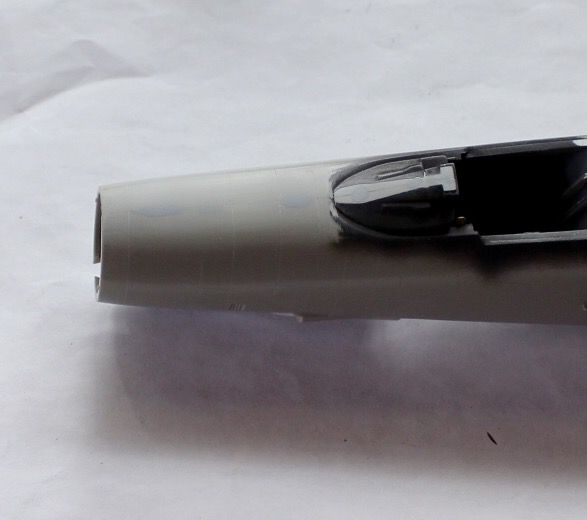
Mark, it feels great to have something this substantial at least basicly put together now. Although I seriously do have a lot more to do on this portion alone, aside from seam clean. Which I have not yet even started. I have to fill up some vents on the bottom of the chin fairing which are left over from the F-4E/F-4F base kit and were not present on the F-4G. Plus I need to create and add at least 7 more antennas to this assembly alone.
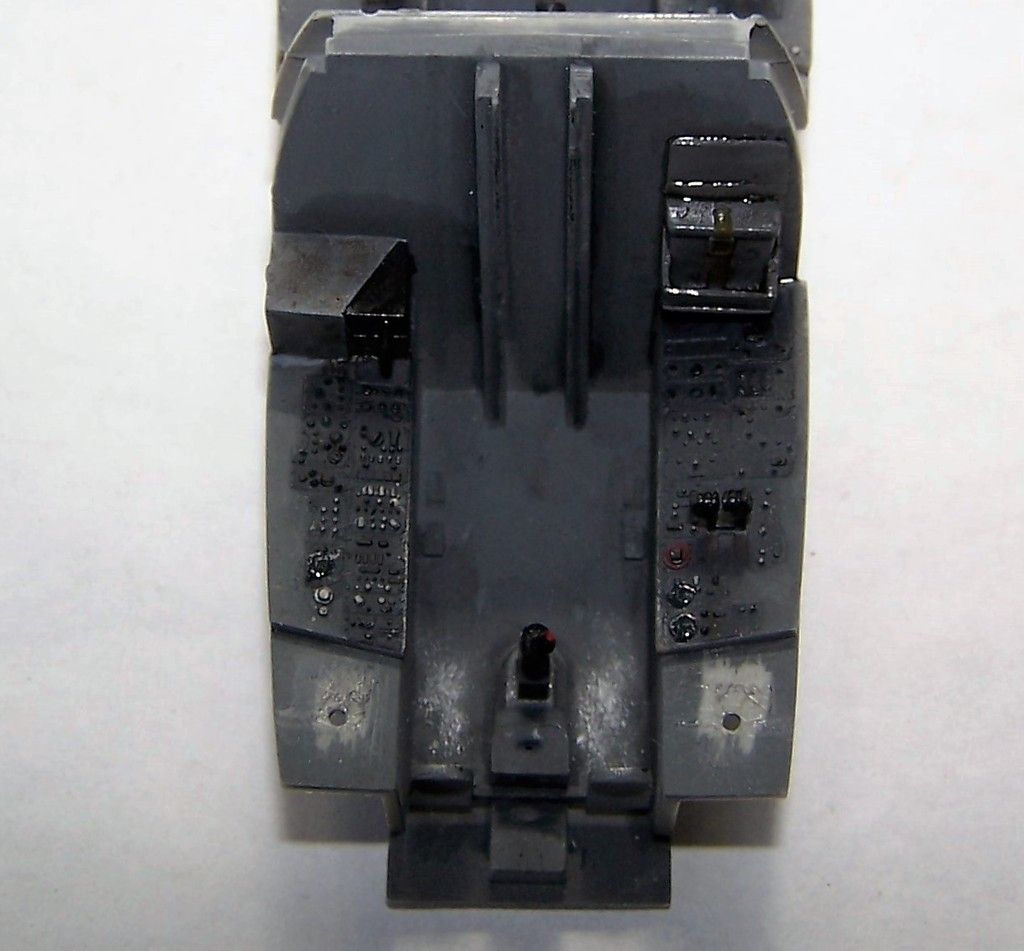
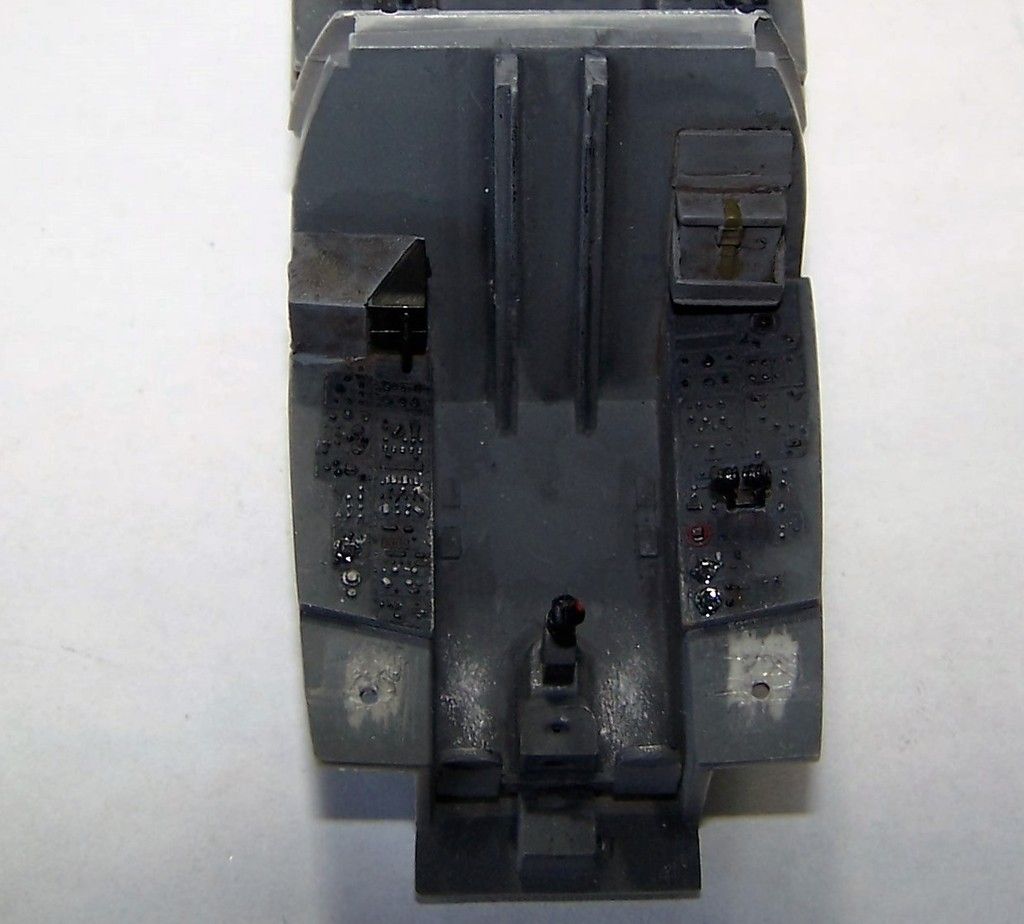
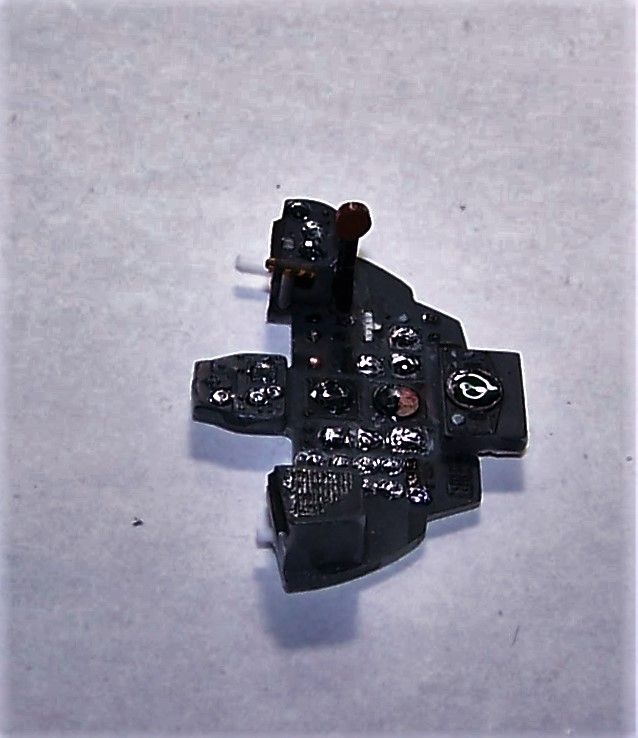
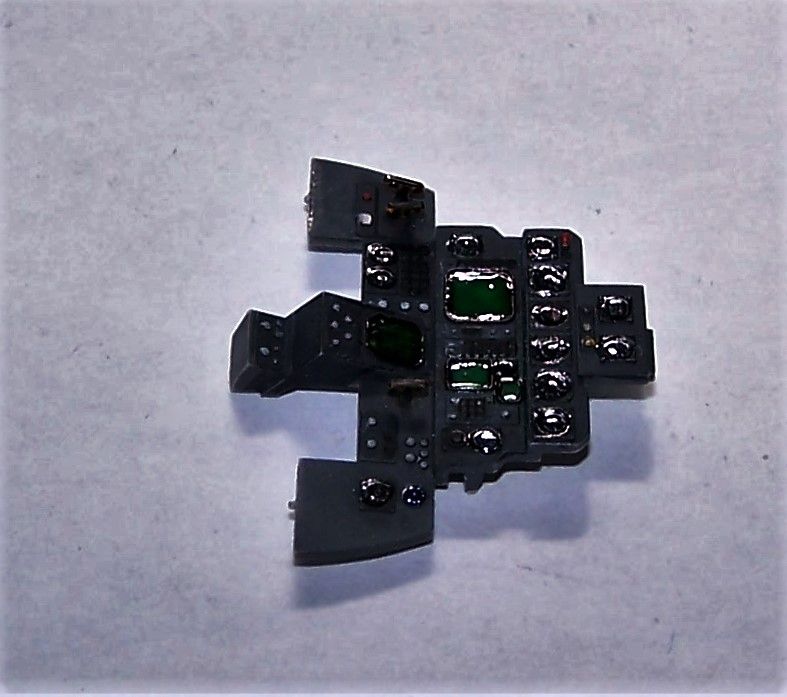
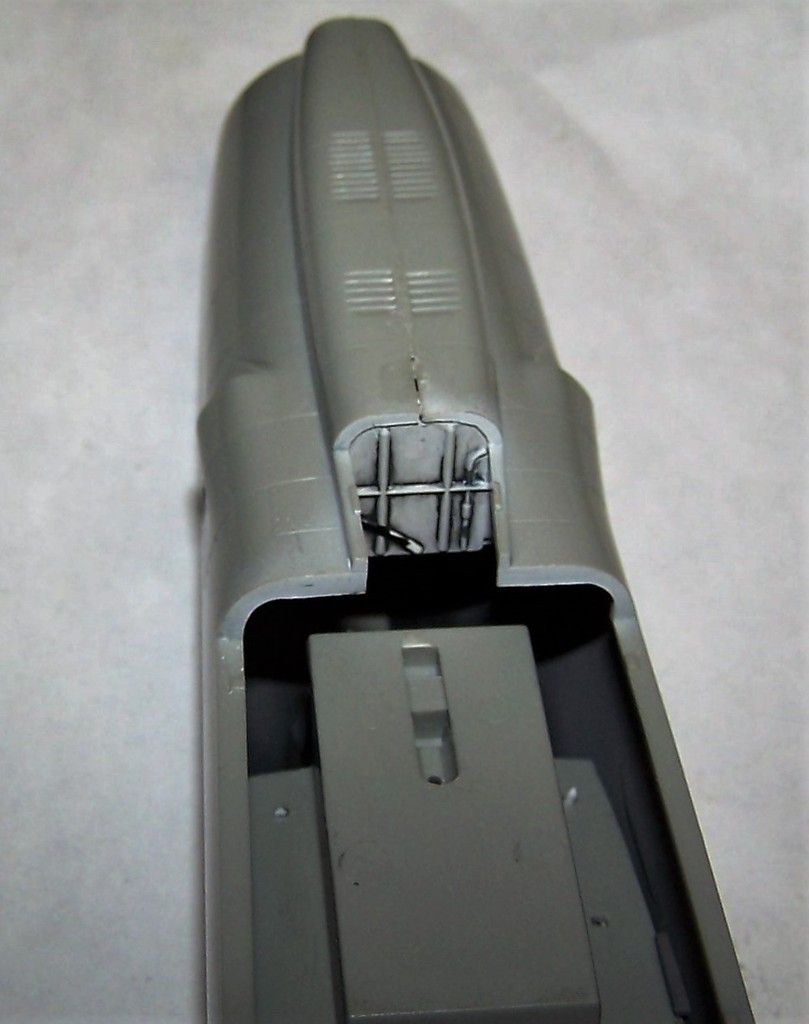
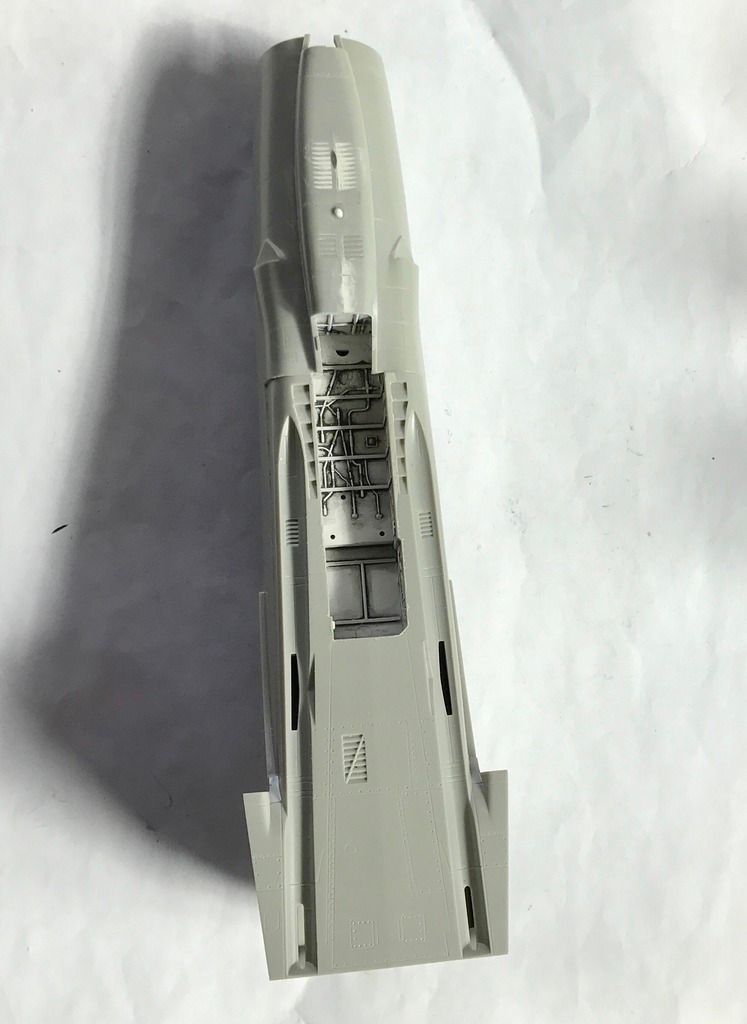
Yes there is a slot for a radar. There are even the parts for one to display open. Unfortunately it is the type of radar used of the Luftwaffe F-4F ICE (the base molds for this kit), and not the radar used on the F-4E & F-4G. At the very least a new dish and mount is needed to do that on this kit.
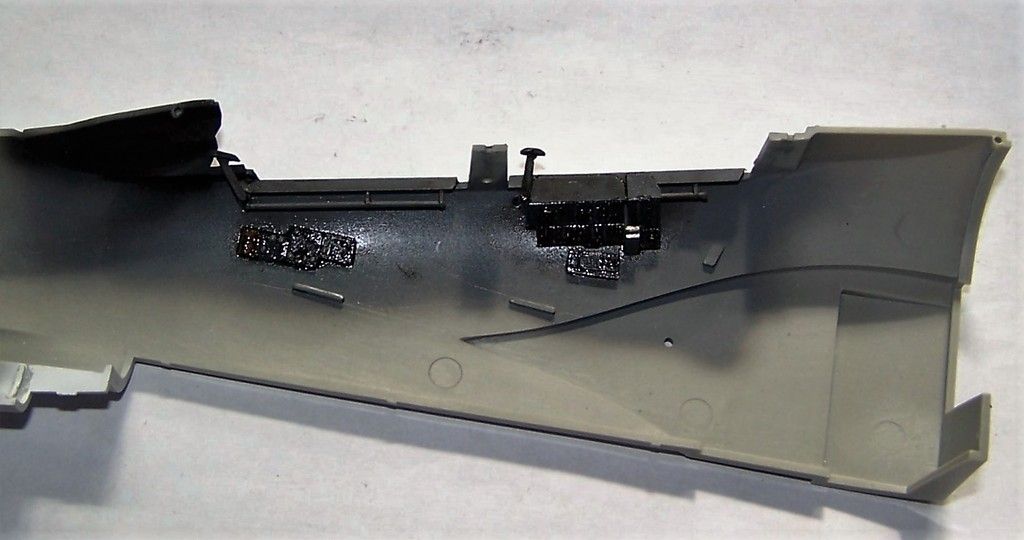
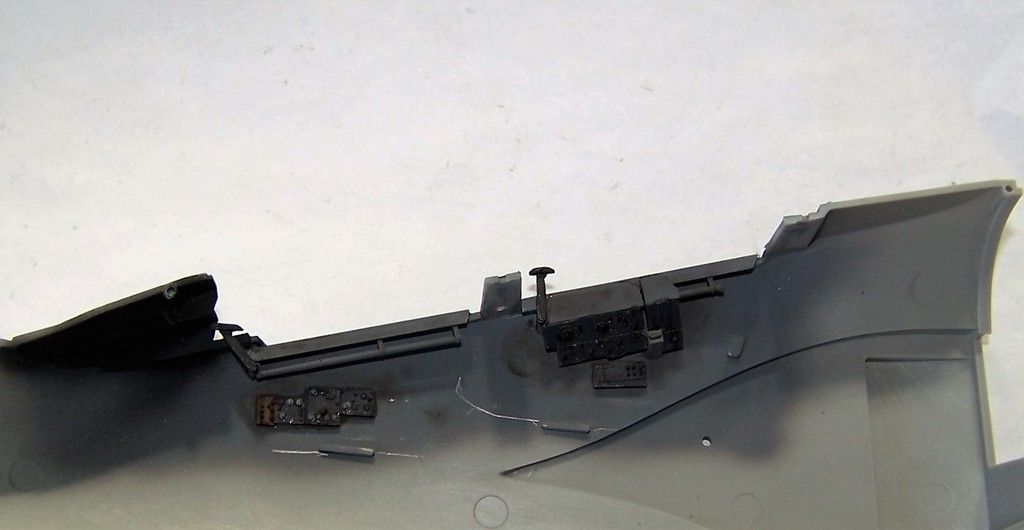
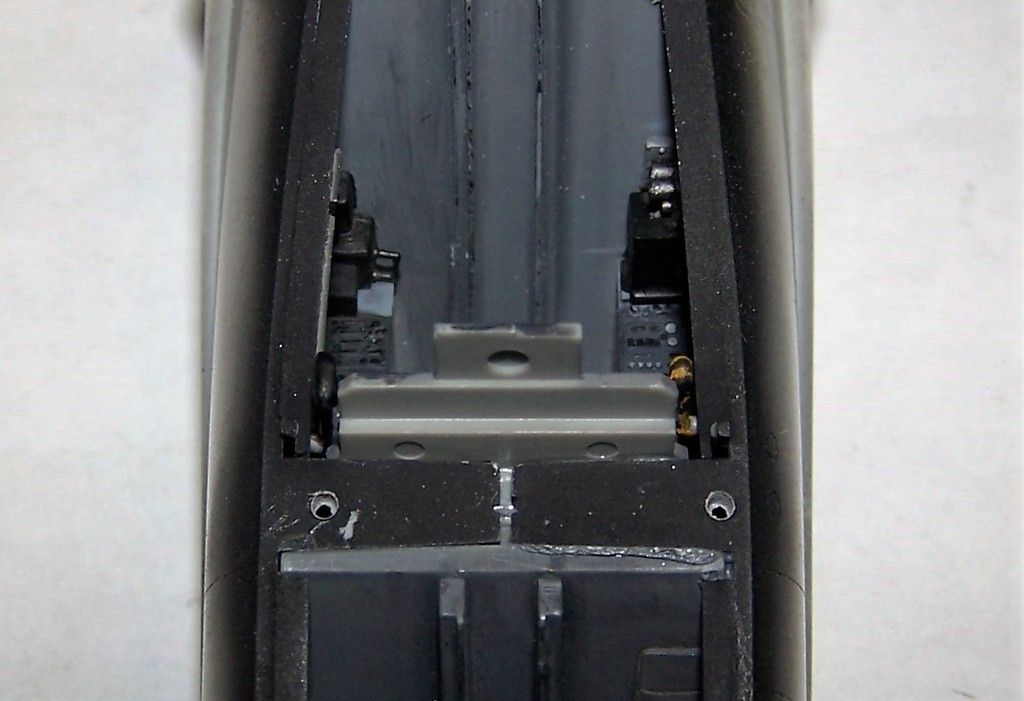
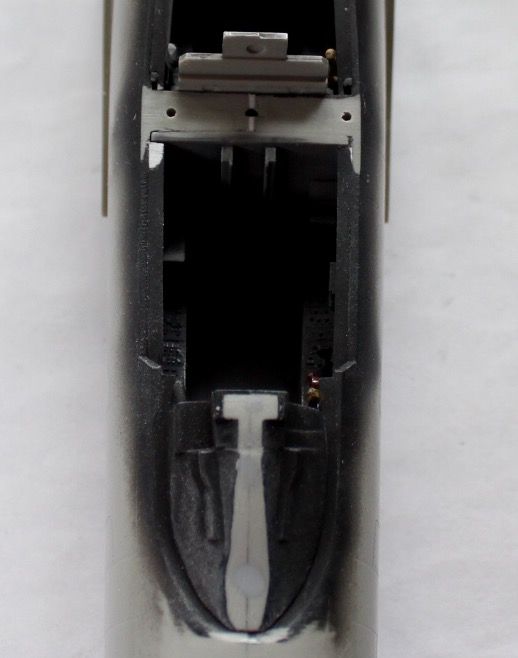
Yes there is a glare shroud over the top of the rear IP, but the instrument housings themselves are exposed to the front between the panel and the pilot's ejection seat.
you can get an idea of that area from these two photos


Re: Revell 1/32 F-4G Review & Build- update 10/24
Posted: Thu Oct 27, 2016 1:33 pm
by Stikpusher
Re: Revell 1/32 F-4G Review & Build- update 10/27
Posted: Thu Oct 27, 2016 1:42 pm
by LyleW
I like this so much, I'm giddy.
Re: Revell 1/32 F-4G Review & Build- update 10/27
Posted: Thu Oct 27, 2016 3:09 pm
by Stikpusher
I'm happy to hear that. I am really enjoying this quite a bit myself. It's not "shake n bake", but it sure is nice. And I am really enjoying the project. It's turned into one of those that keeps the creativity juices flowing...
Re: Revell 1/32 F-4G Review & Build- update 10/27
Posted: Fri Oct 28, 2016 3:36 pm
by Stikpusher
So yesterday and today I have been working on adding the front lower portion. The fit was fine before the nose gear well was glued in place, but once that is attached, it adds a lot of rigidity to that piece. So for anybody taking notes glue the well walls together, but do not add the well to the bottom part to allow for some flexibility when you glue the bottom to the sides. Or you will get a step like I did...
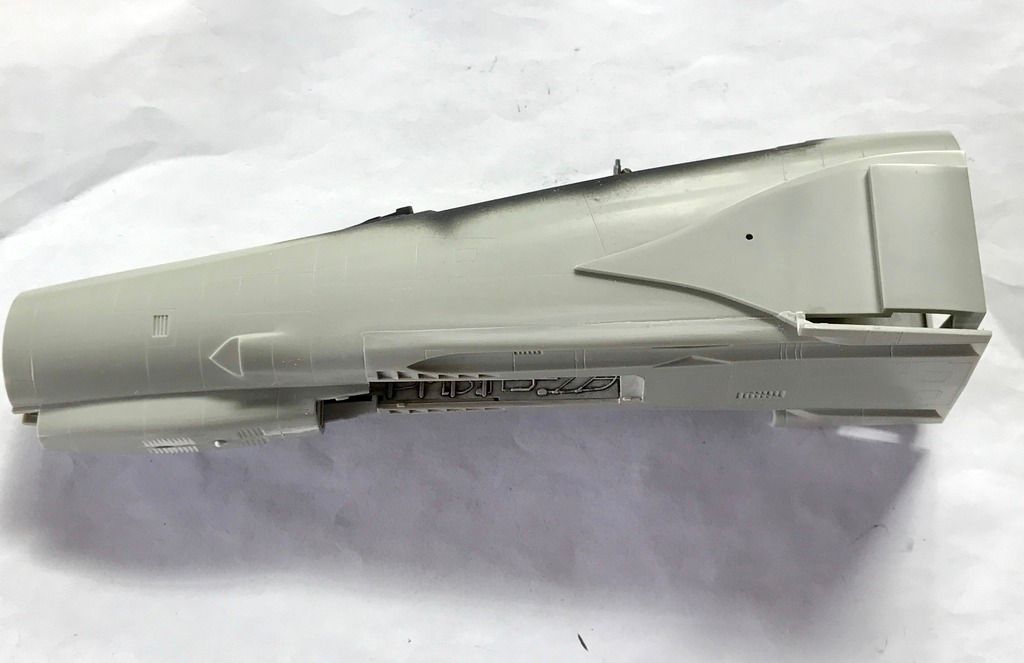
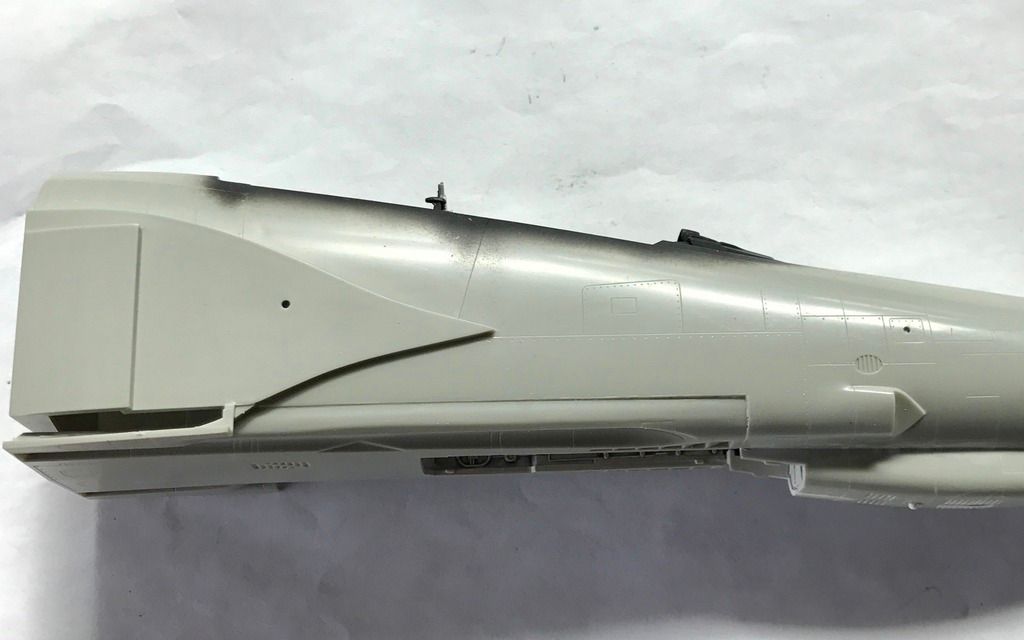
At least on one side... more to come in a moment