Hasegawa 1/32 Fw 190D-9 Brown 4
-
jeaton01

- Elite Member
- Posts: 2374
- Joined: Thu Apr 23, 2020 9:20 am
- Location: Northern California
- Contact:
Re: Hasegawa 1/32 Fw 190D-9 Brown 4
Nice neat work, as per usual on this channel.
-
tempestjohnny

- Elite Member
- Posts: 3826
- Joined: Sat Oct 15, 2016 4:51 am
- Location: Naples. FL
Re: Hasegawa 1/32 Fw 190D-9 Brown 4
Yes they doFloki wrote:Quick and easy but increase detail a ton
-
Medicman71

- Elite Member
- Posts: 11396
- Joined: Mon Apr 07, 2014 9:32 am
- Location: Houston, Tx
Re: Hasegawa 1/32 Fw 190D-9 Brown 4

Mike
Sponsored by Boeing, Lockheed Martin, Northrop Grumman, Saab, BAE, and Dassault
Sponsored by Boeing, Lockheed Martin, Northrop Grumman, Saab, BAE, and Dassault

Re: Hasegawa 1/32 Fw 190D-9 Brown 4
Thanks guys! Yes, it gets a little tougher to do these types of enhancements as drop down in scale to 1/48 and 1/72. Tougher but not impossible!
John aka JKim
-----------<><

-----------<><
Re: Hasegawa 1/32 Fw 190D-9 Brown 4
After the base coat of RLM02 on the landing gear, some details were brush painted and then a dark brown pastel wash was applied.
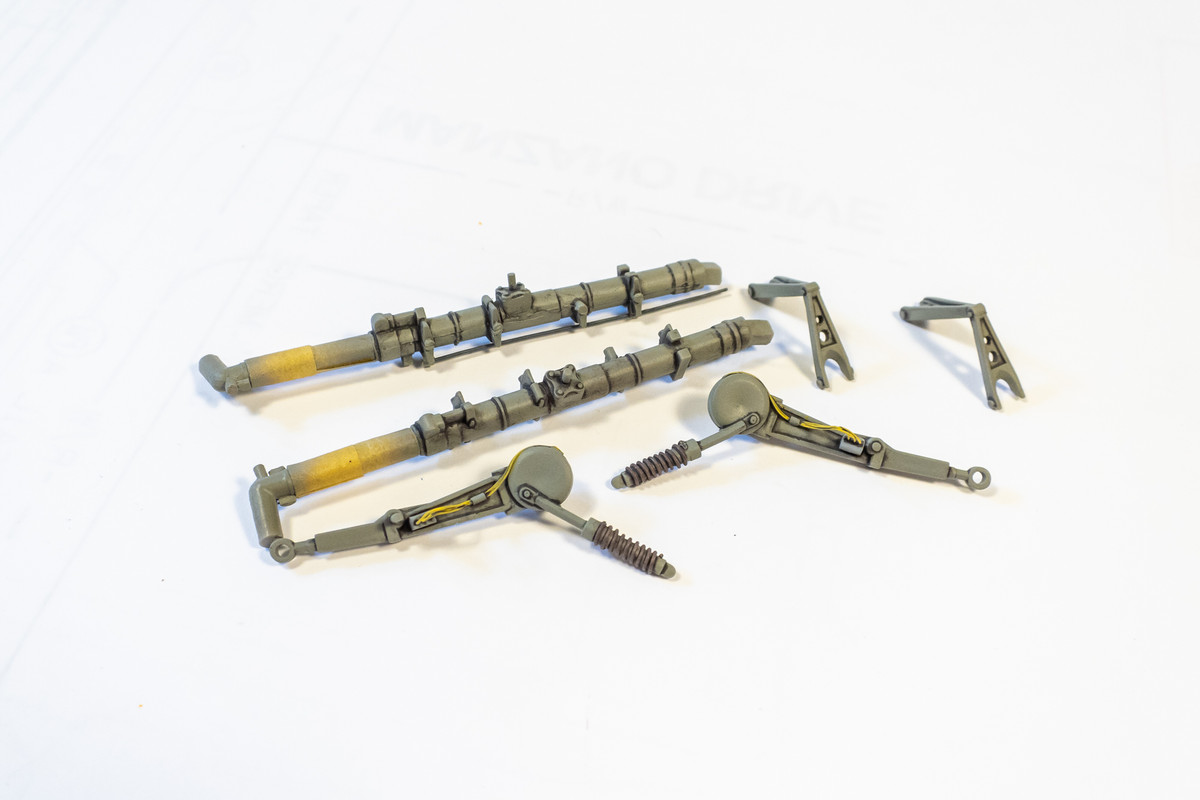
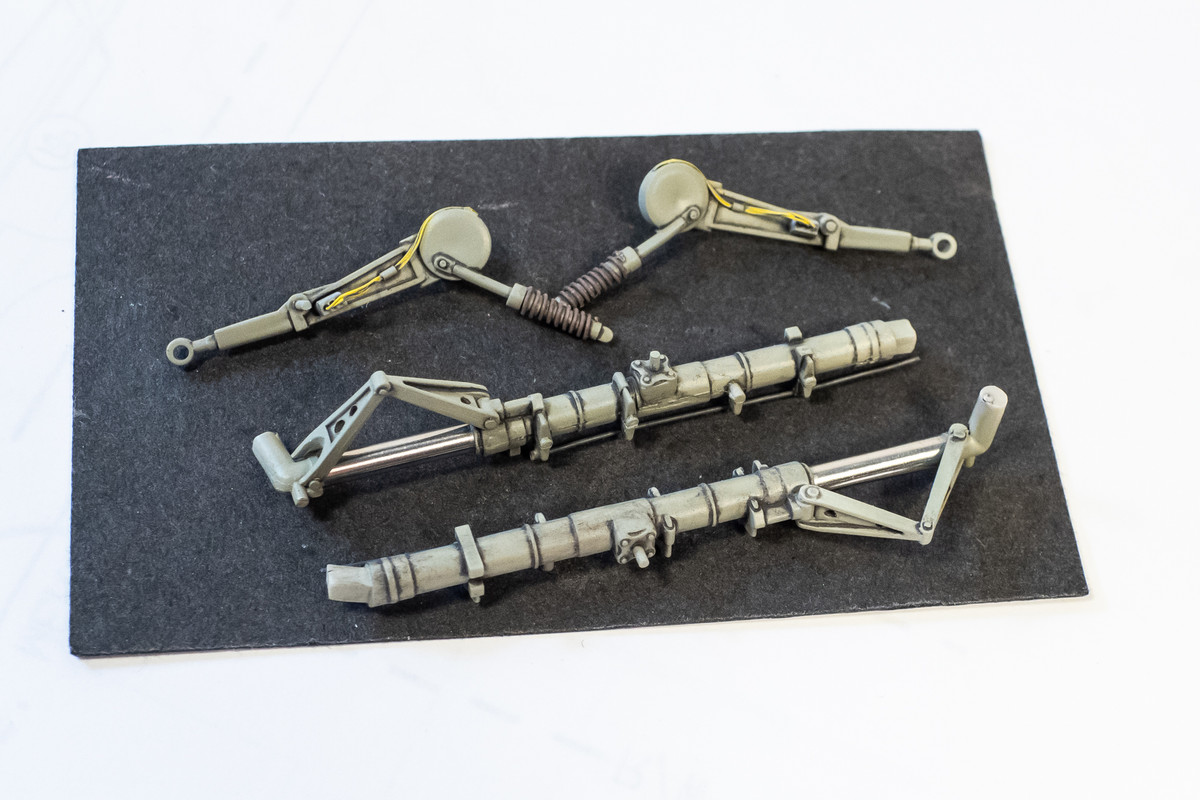
John aka JKim
-----------<><
-----------<><
Re: Hasegawa 1/32 Fw 190D-9 Brown 4
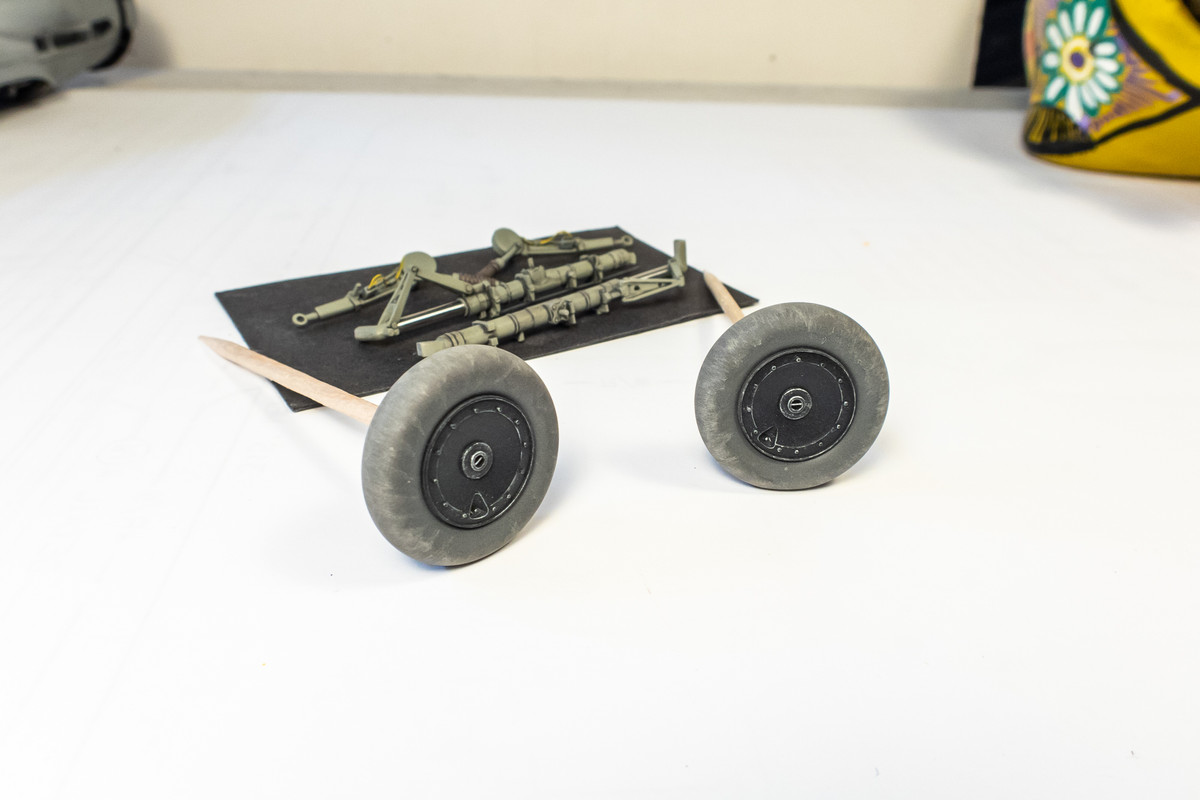
The wheels have been painted. The hubs were painted black and very lightly dry-brushed with silver. The tires were painted a dark brown/grey with lighter gradations towards the middle of the tires. The weathering was topped by applying drops of tan pastel wash onto a flat finish. This causes the drops to spread out and create tide marks. These are then lightly wiped off leaving faint stains.

Time to fold up some brass flaps! First, I need to remove some material from the wings to accommodate the Eduard brass flaps.
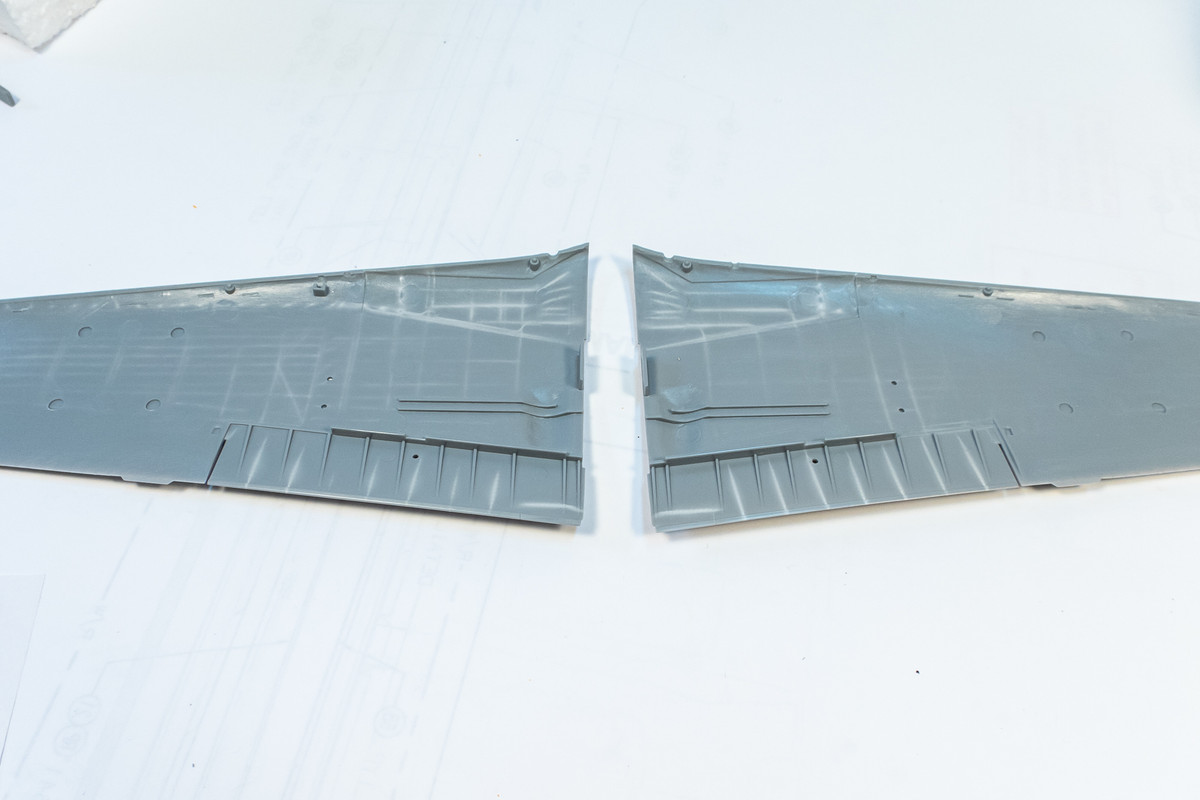
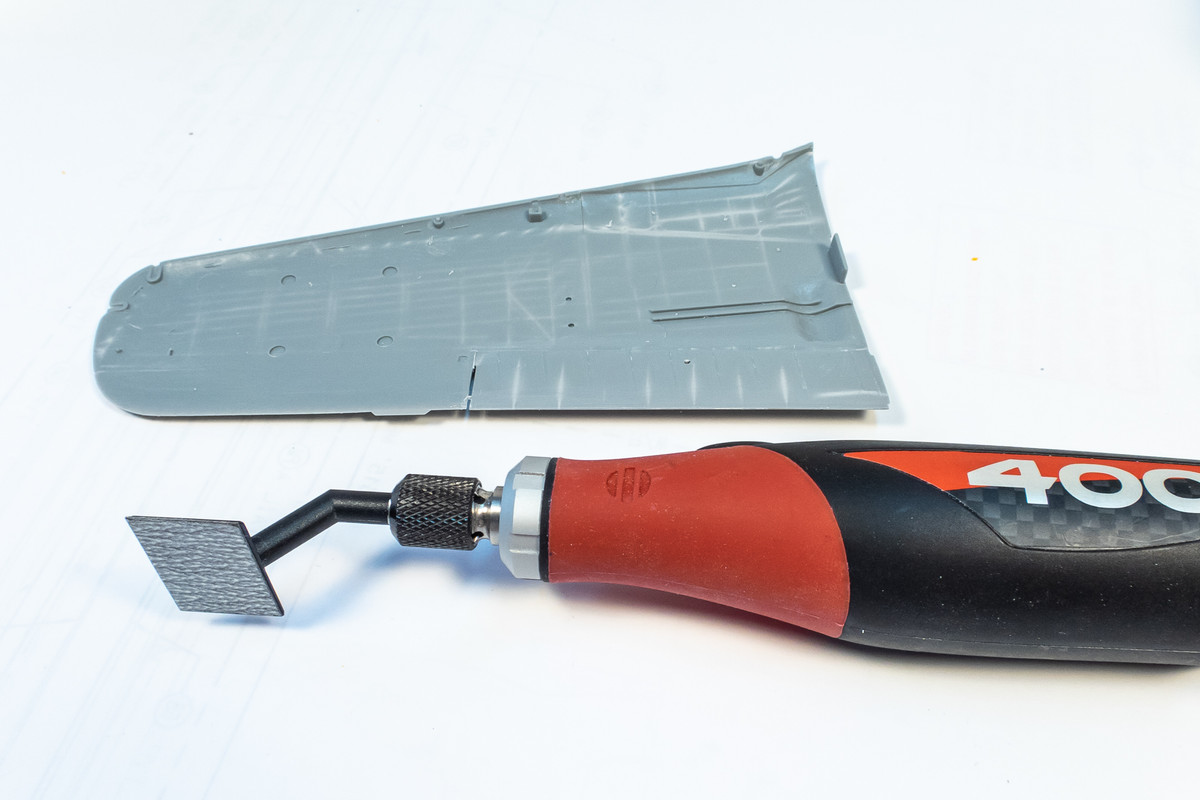
After the ribs have been snipped and scraped away from the wing tops, an oscillating sander like this David-Union D400 is very helpful in sanding down to a uniform flat surface.
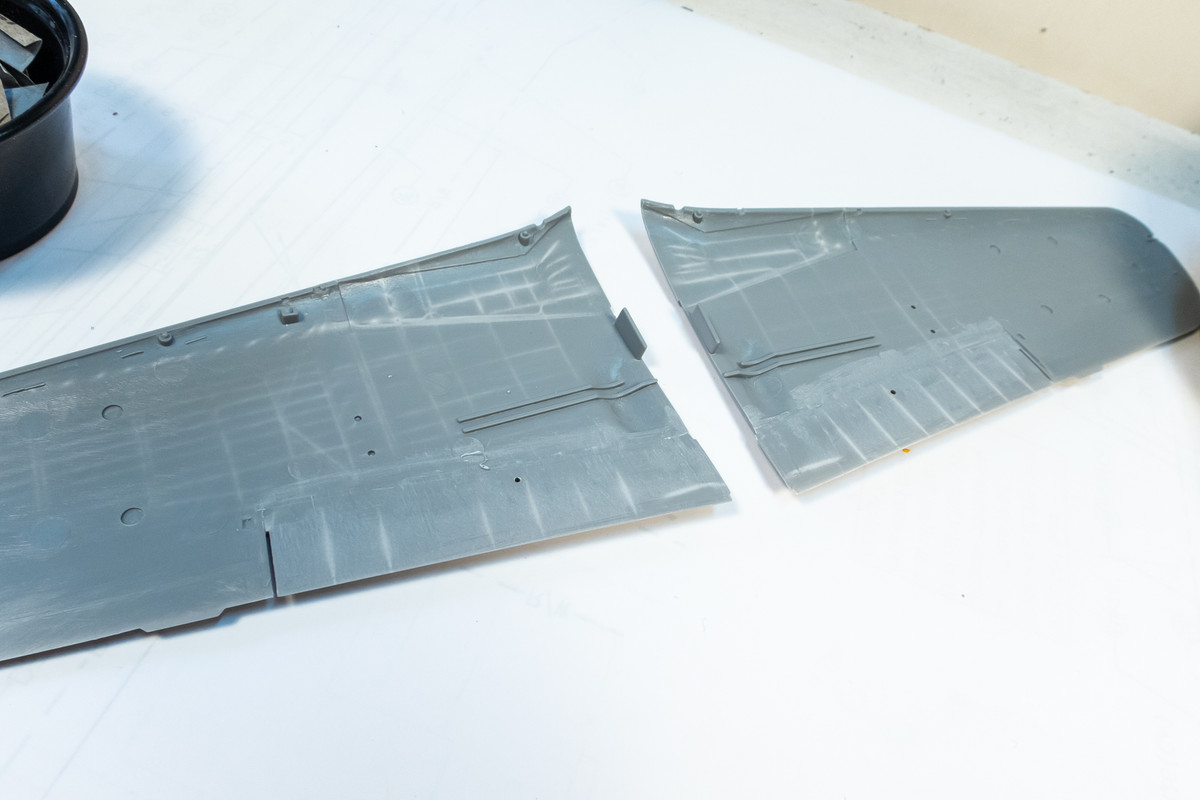
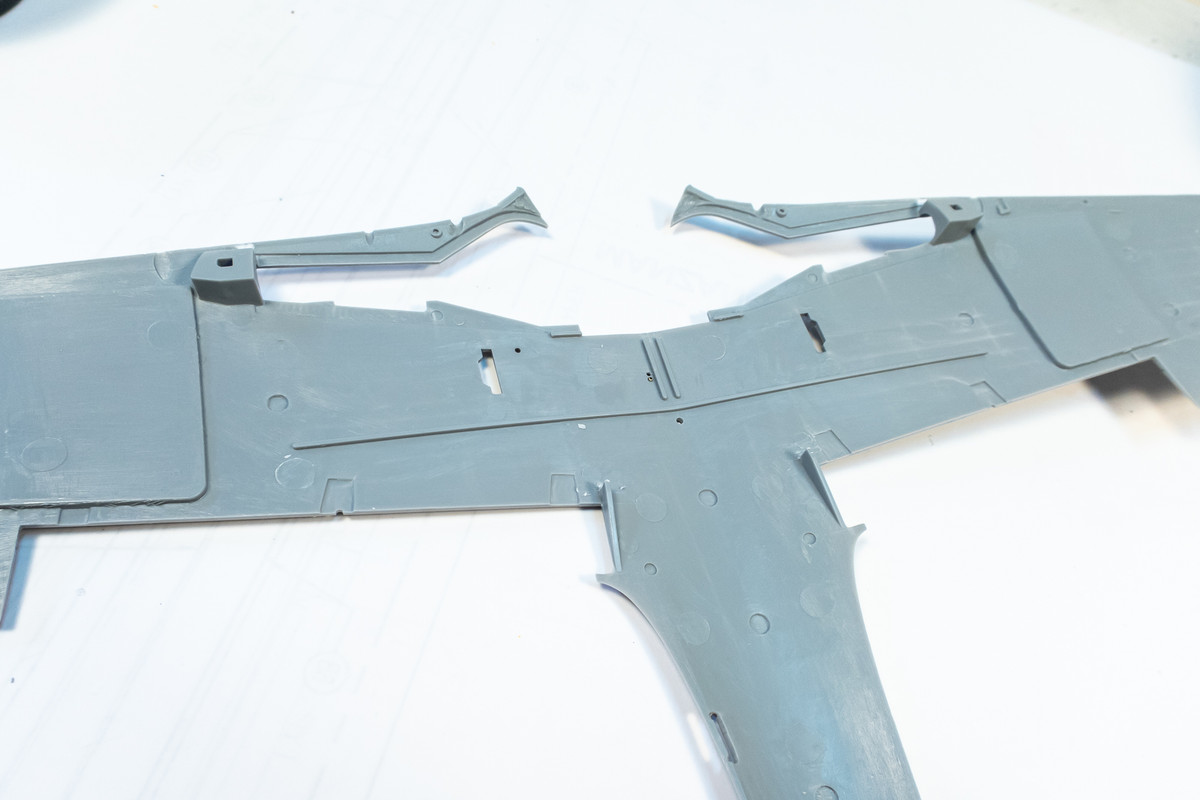
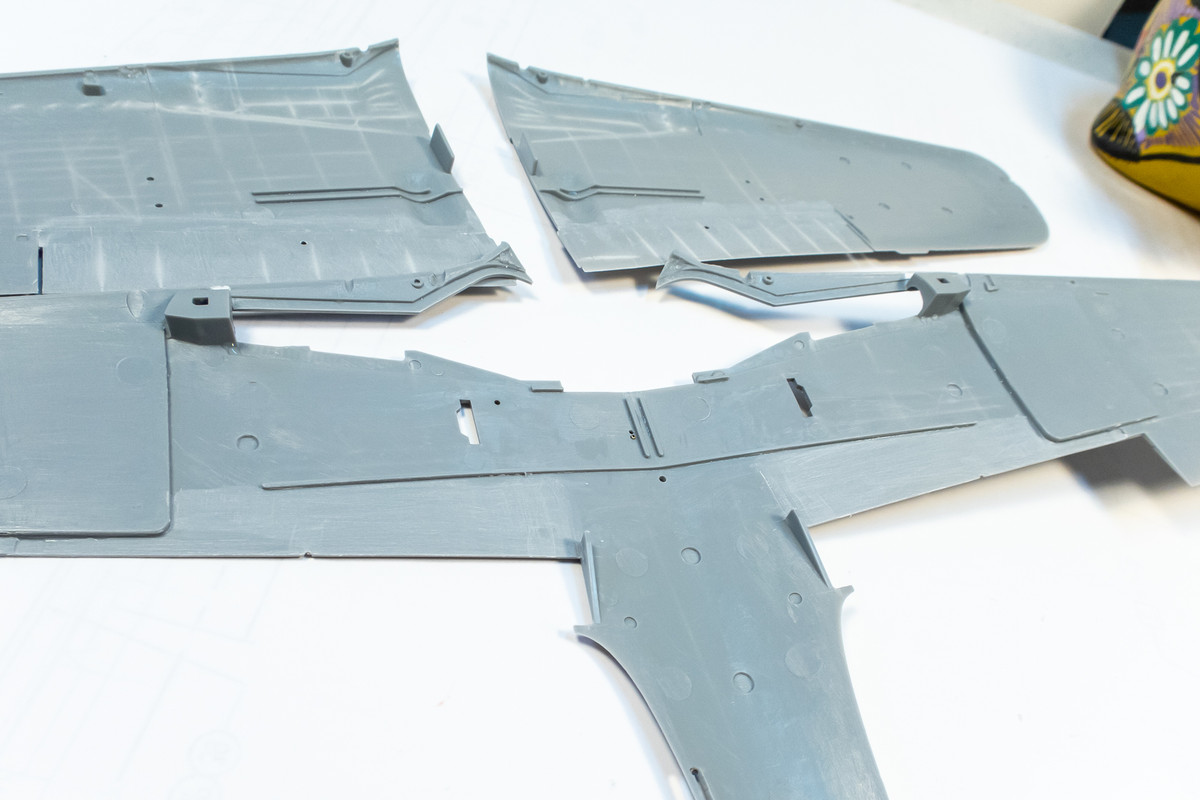
The wing bottoms require a little more work as a whole area needs to "lowered" to a thinner level. The Eduard instructions are very detailed and let you know exactly what needs to be removed.
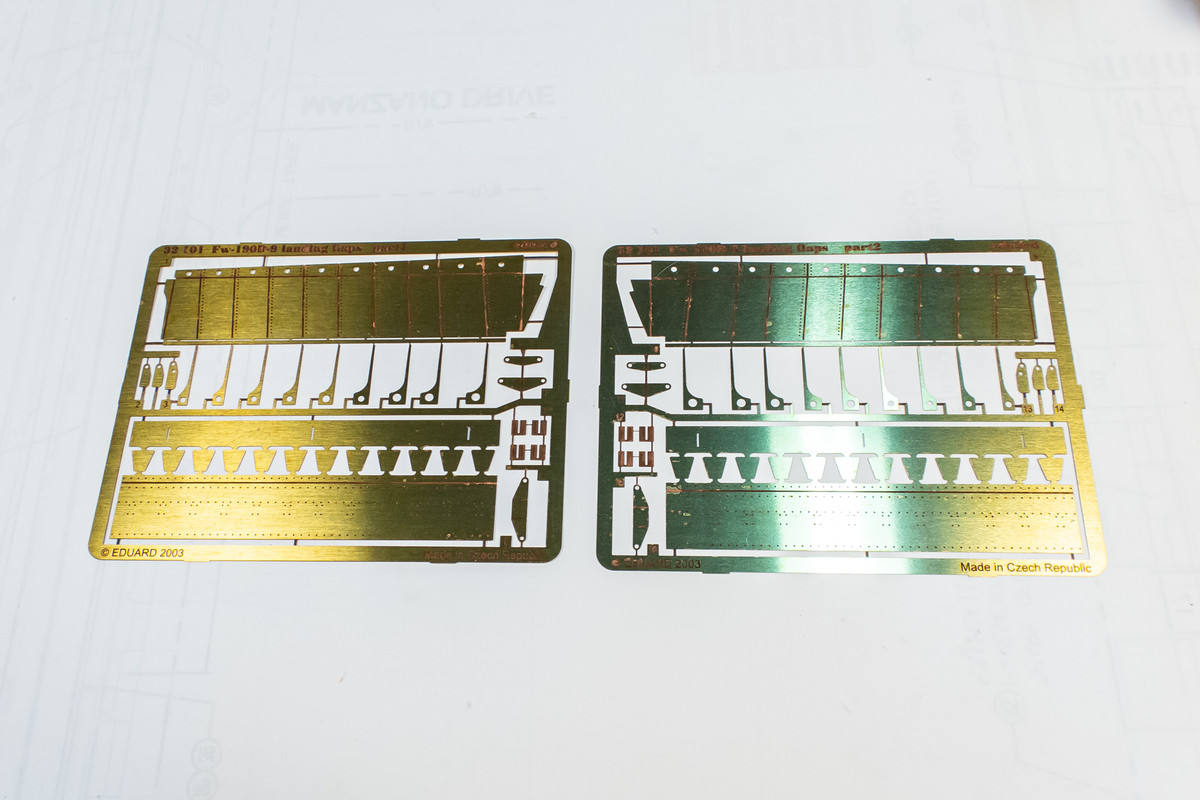
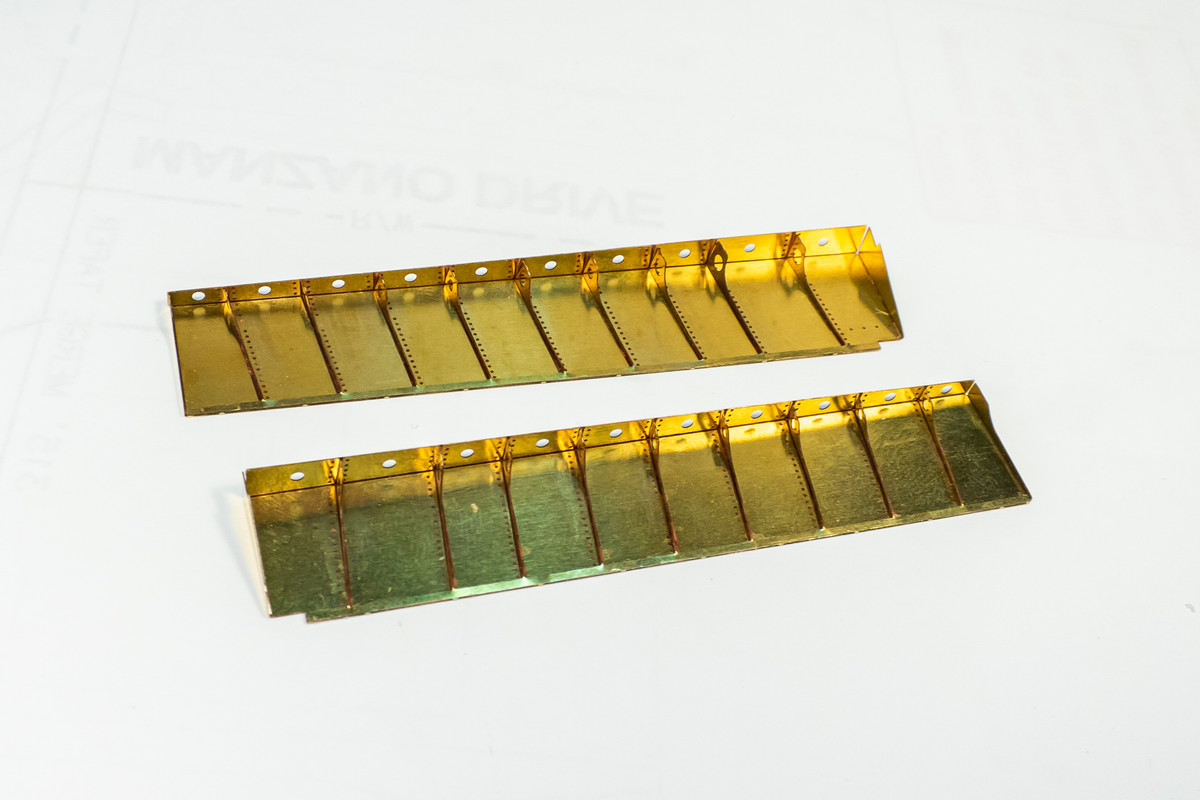
Here are the flaps. I'm going to do the parts that sit in the wing tops first.
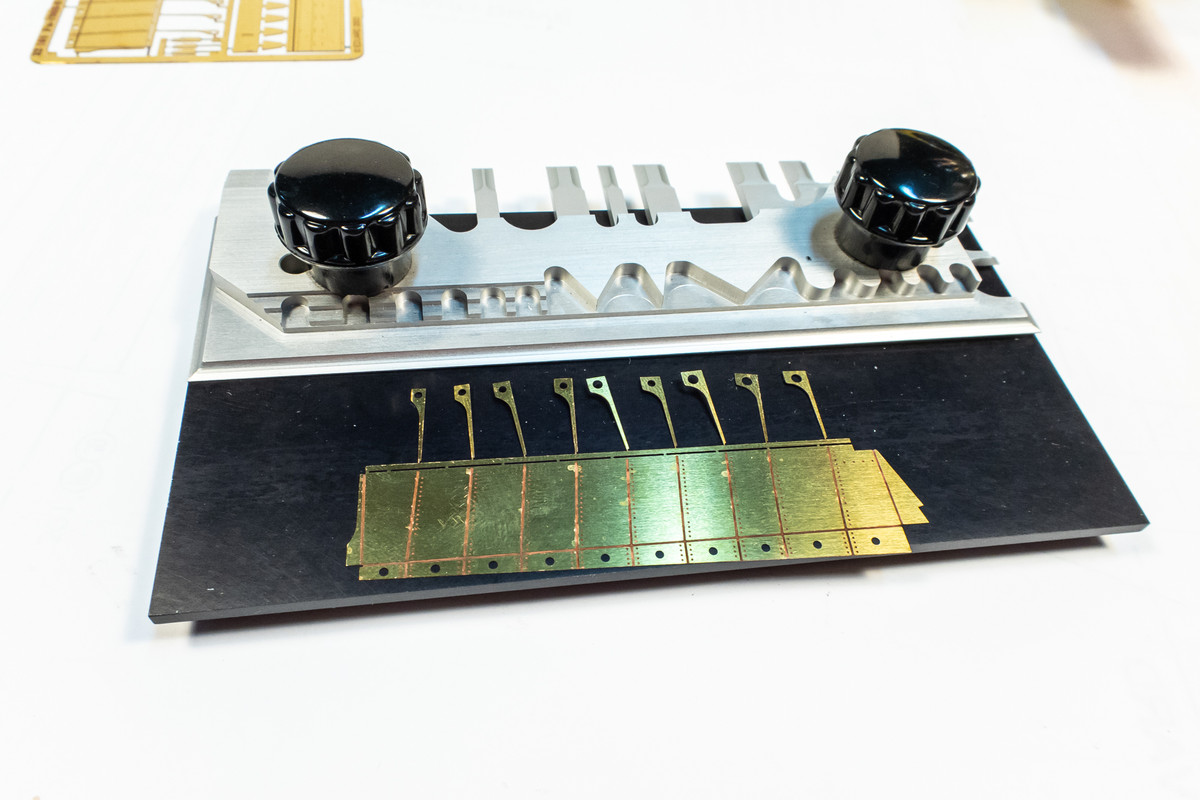
A PE bending tool is very helpful in getting uniform bends. This one is from 5.5 inch Hold and Fold from The Small Shops, which is big enough to fold long pieces like this flap.
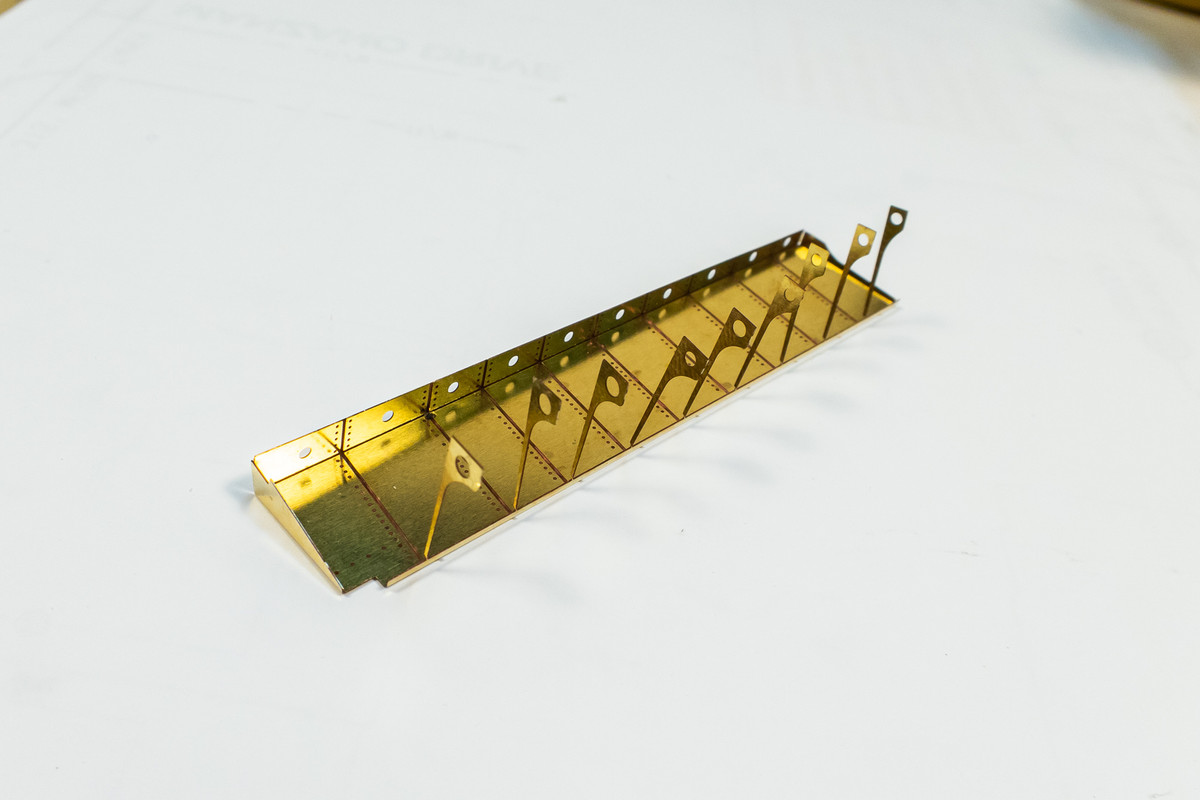
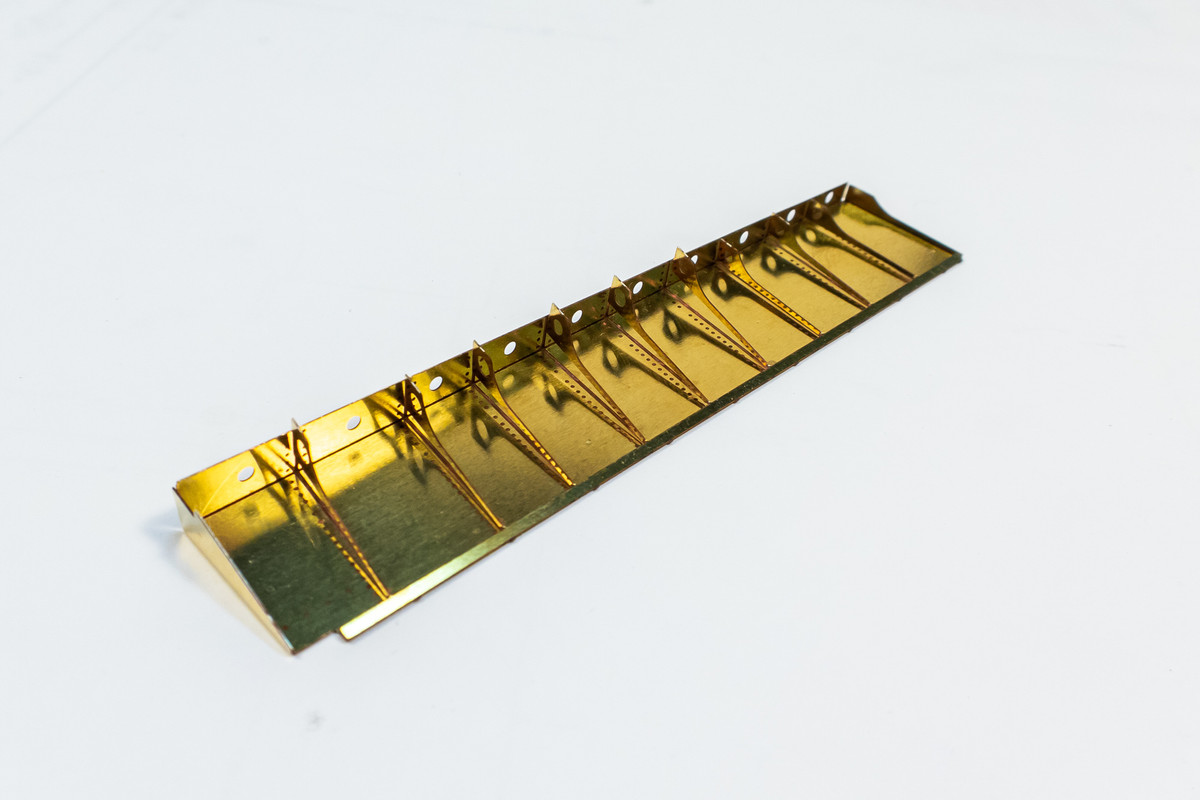
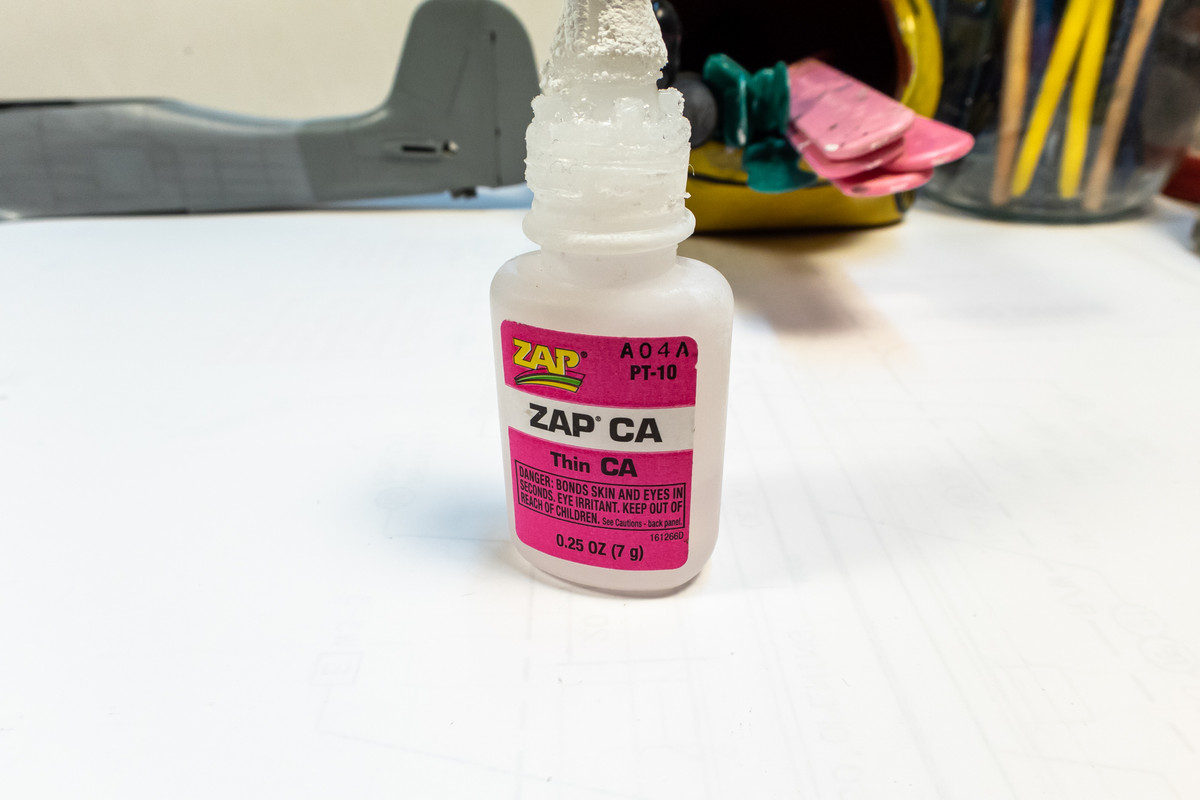
Once the flap spars are generally oriented, I used the capillary action of thin CA glue to secure each spar individually as it was held in place with my fingers.
Any obvious blobs of CA glue are wiped off using CA debonder.
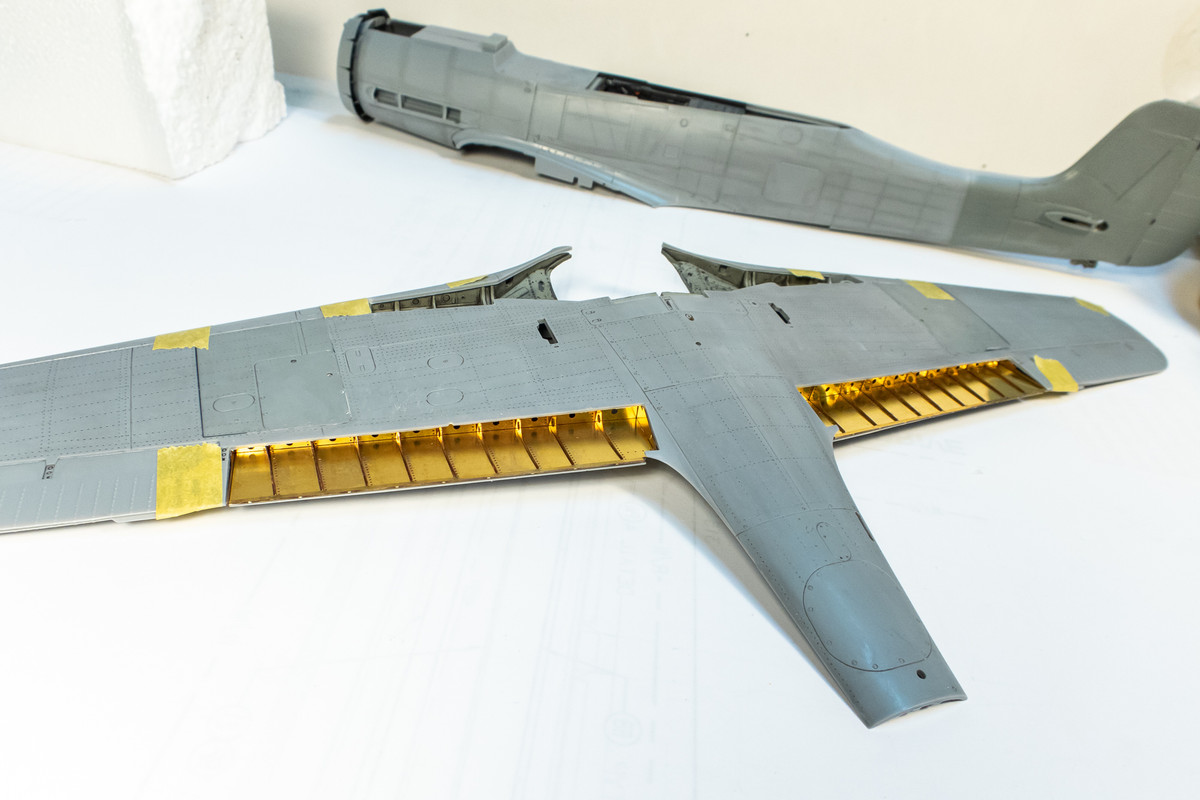
A quick check to see how the brass fits into the wings.
Time to fold up some brass flaps! First, I need to remove some material from the wings to accommodate the Eduard brass flaps.
After the ribs have been snipped and scraped away from the wing tops, an oscillating sander like this David-Union D400 is very helpful in sanding down to a uniform flat surface.
The wing bottoms require a little more work as a whole area needs to "lowered" to a thinner level. The Eduard instructions are very detailed and let you know exactly what needs to be removed.
Here are the flaps. I'm going to do the parts that sit in the wing tops first.
A PE bending tool is very helpful in getting uniform bends. This one is from 5.5 inch Hold and Fold from The Small Shops, which is big enough to fold long pieces like this flap.
Once the flap spars are generally oriented, I used the capillary action of thin CA glue to secure each spar individually as it was held in place with my fingers.
Any obvious blobs of CA glue are wiped off using CA debonder.
A quick check to see how the brass fits into the wings.
John aka JKim
-----------<><
-----------<><
-
tempestjohnny
- Elite Member
- Posts: 3826
- Joined: Sat Oct 15, 2016 4:51 am
- Location: Naples. FL
Re: Hasegawa 1/32 Fw 190D-9 Brown 4
That looks great
-
Medicman71
- Elite Member
- Posts: 11396
- Joined: Mon Apr 07, 2014 9:32 am
- Location: Houston, Tx
Re: Hasegawa 1/32 Fw 190D-9 Brown 4
Wow! Those flaps look awesome!
Mike
Sponsored by Boeing, Lockheed Martin, Northrop Grumman, Saab, BAE, and Dassault
Sponsored by Boeing, Lockheed Martin, Northrop Grumman, Saab, BAE, and Dassault
Re: Hasegawa 1/32 Fw 190D-9 Brown 4
Thanks guys!
Now that the flap bays are folded, I can do the same for the moving lower flap parts. I had to tackle the lower flap in stages as there are multiple folds and bends that need to be done. And fold carefully as the brass naturally wants to bend where there is the least material and those do not correspond to a fold edge.
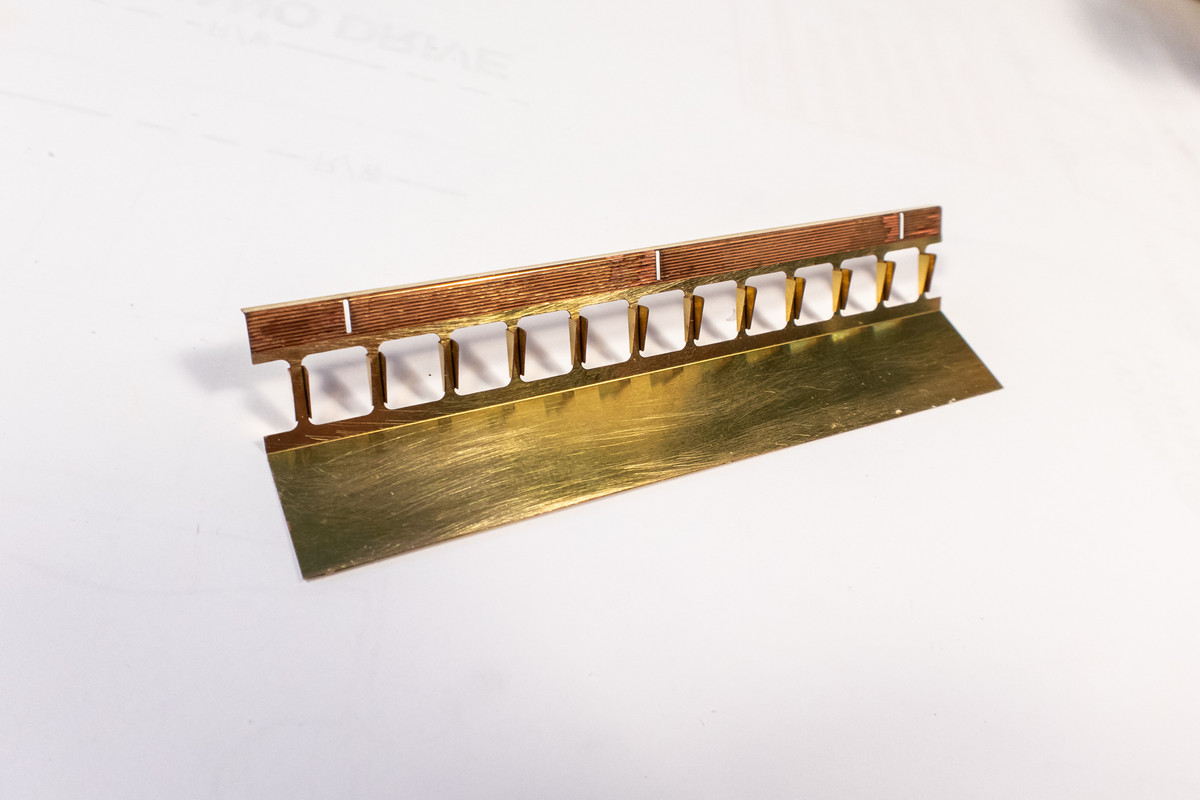
The back edge of the flaps needs to curve so a piece of circular plastic rod is used as a template. The back edge is secured with thin CA glue.
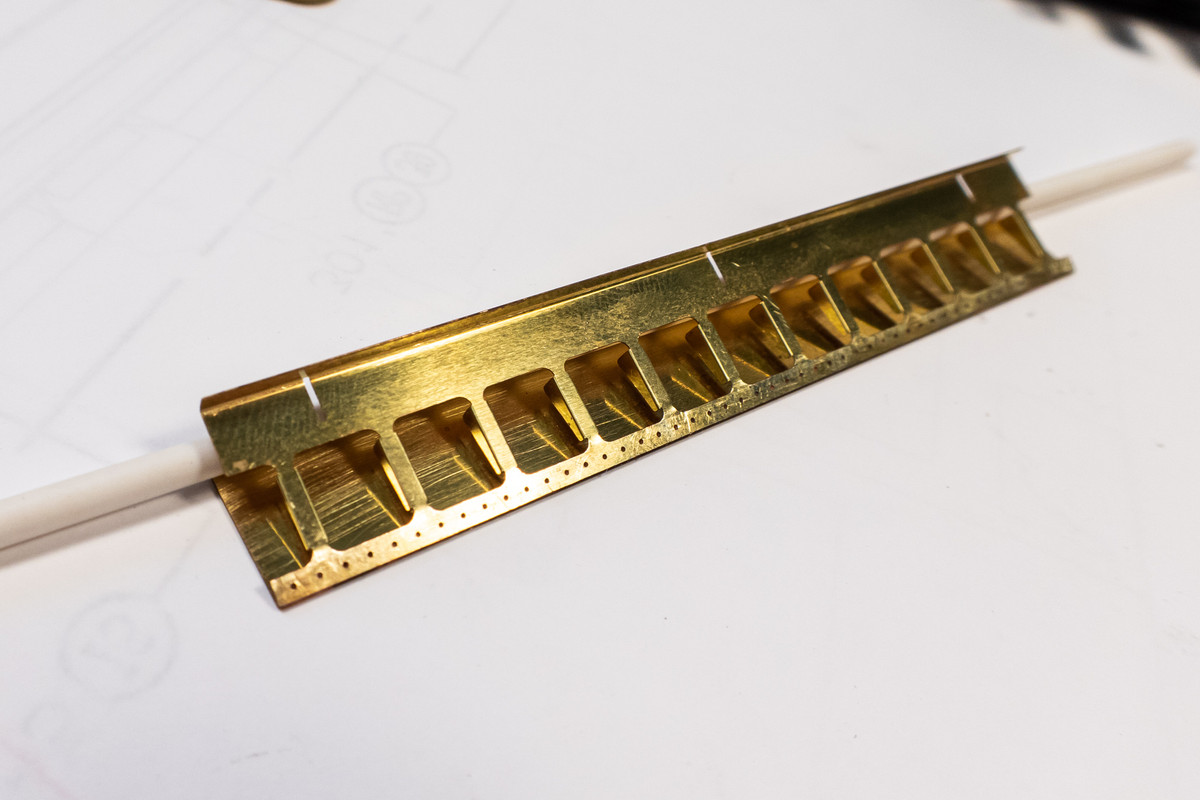
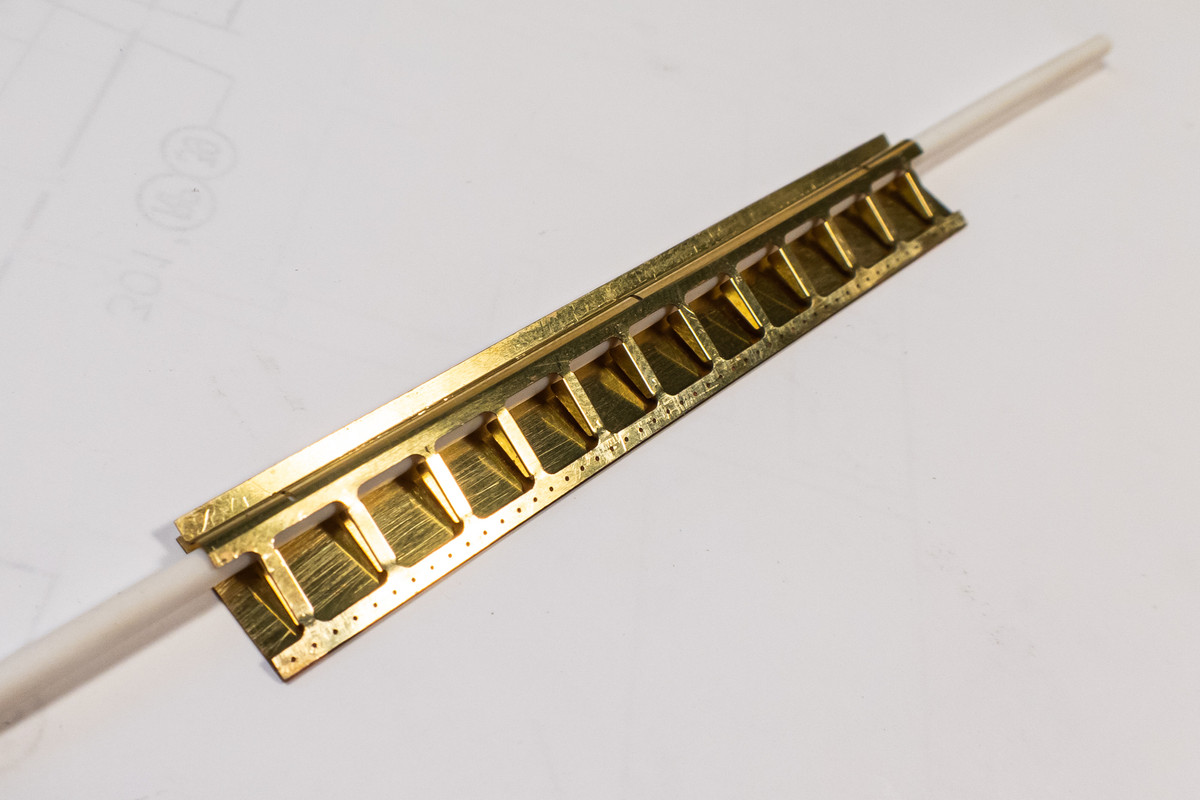
Here are the flap parts before the mounting hardware is attached.

The mounting tabs on the movable flaps fit into slots so the position is established. Small reinforcement plates are curved using the same plastic rod.
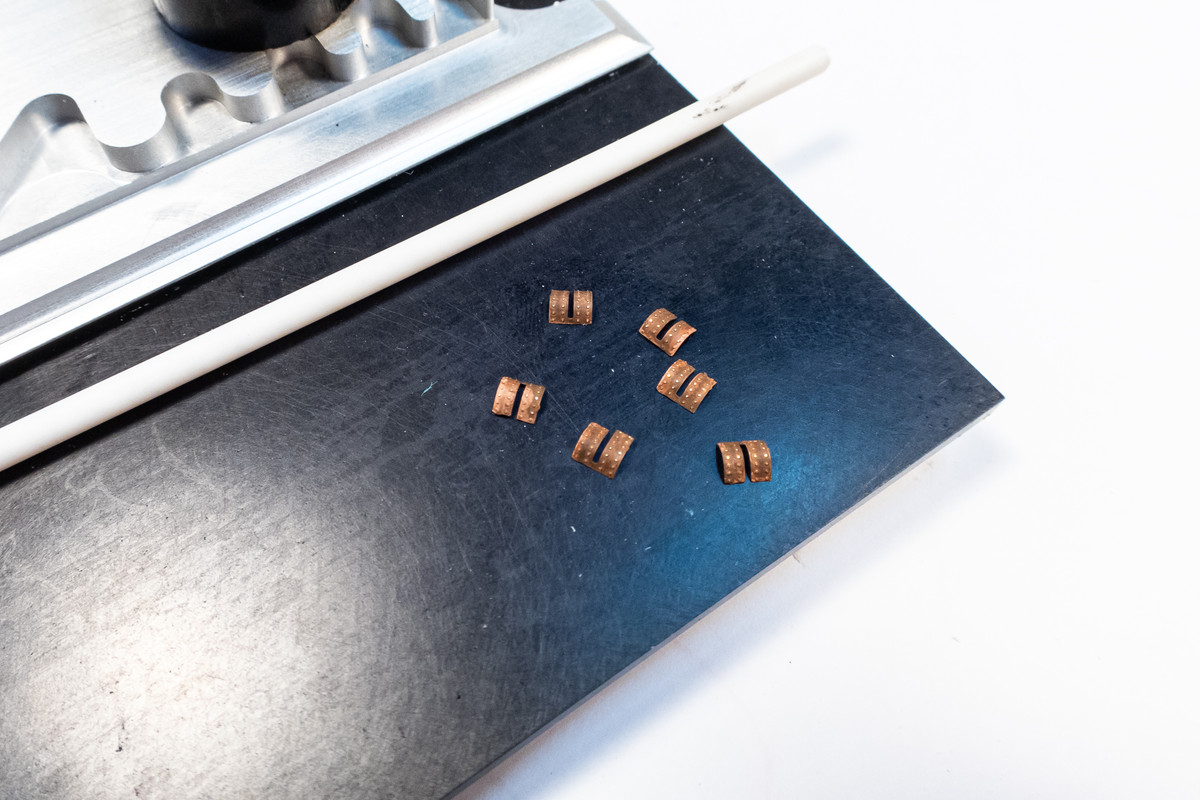
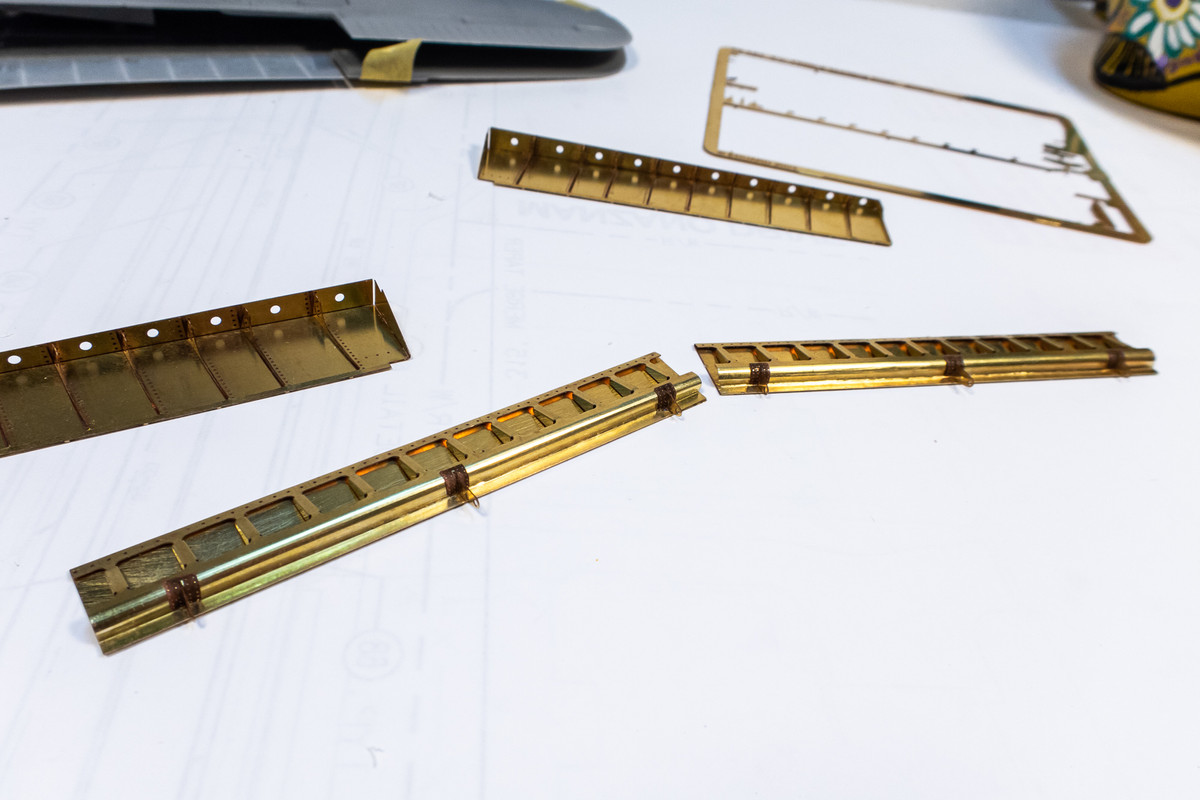
The attachment hangers in the flap bays must be positioned carefully to match the tabs.
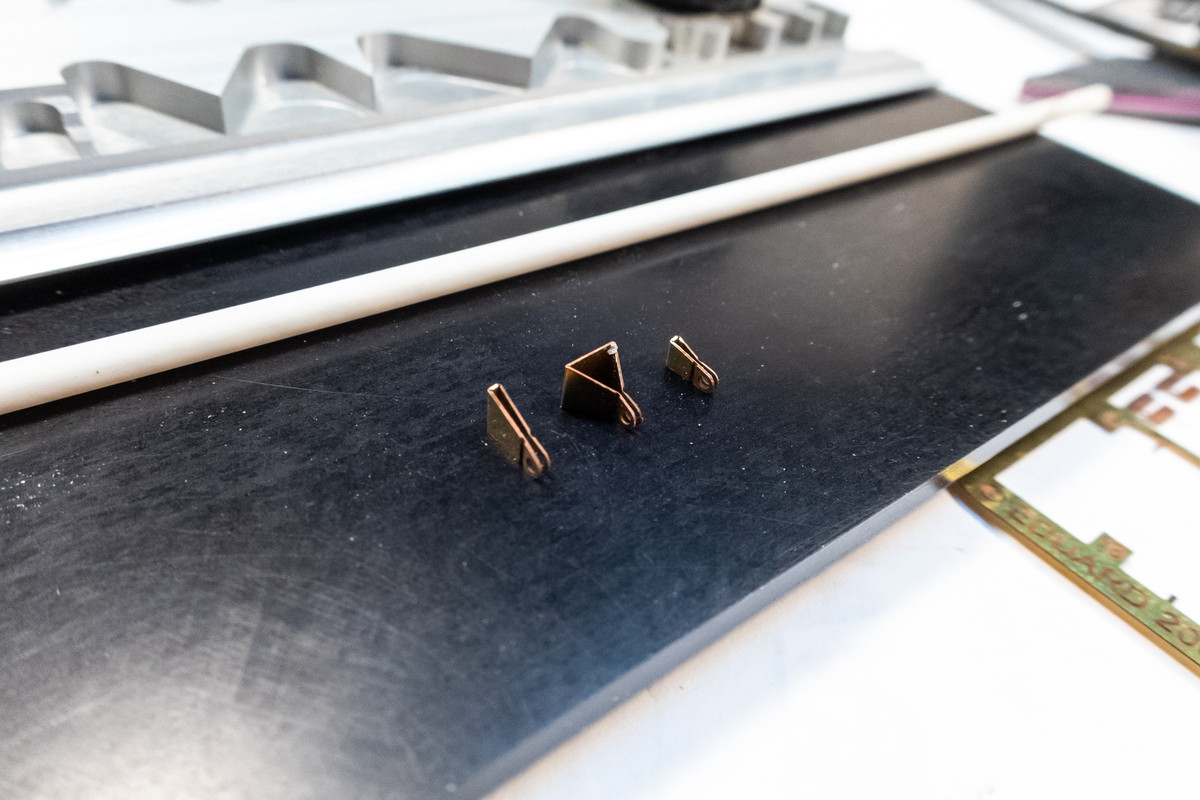
The movable flaps look identical but they are not as the mounting tab positions are slightly asymmetrical. You can match the movable flaps to the correct flap bay by positioning them together... the mounting tabs on the moving flaps will line up with empty space on the flap bay, which will accommodate the attachment hangers. If any of the mounting tabs line up directly with a spar, the two parts are mismatched. So use the mounting tabs as a location guide when gluing in the attachment hangers.
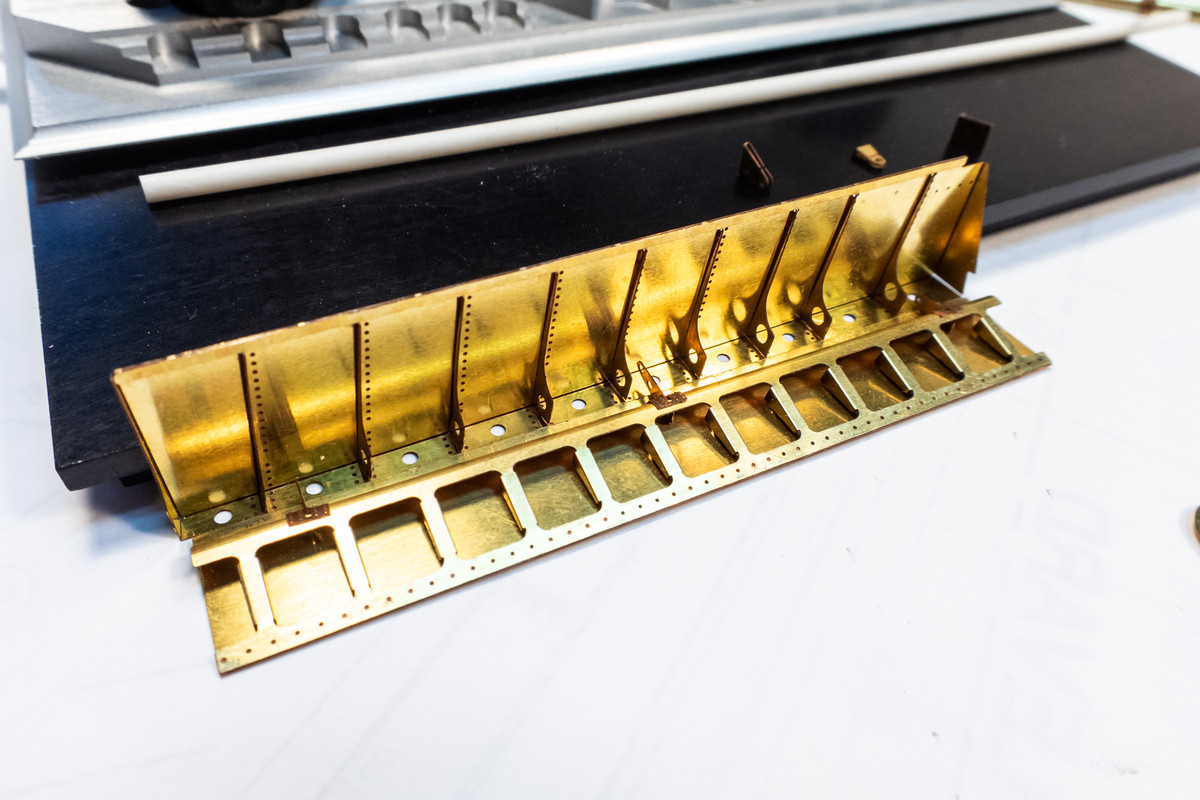
The movable lower flaps are now done.
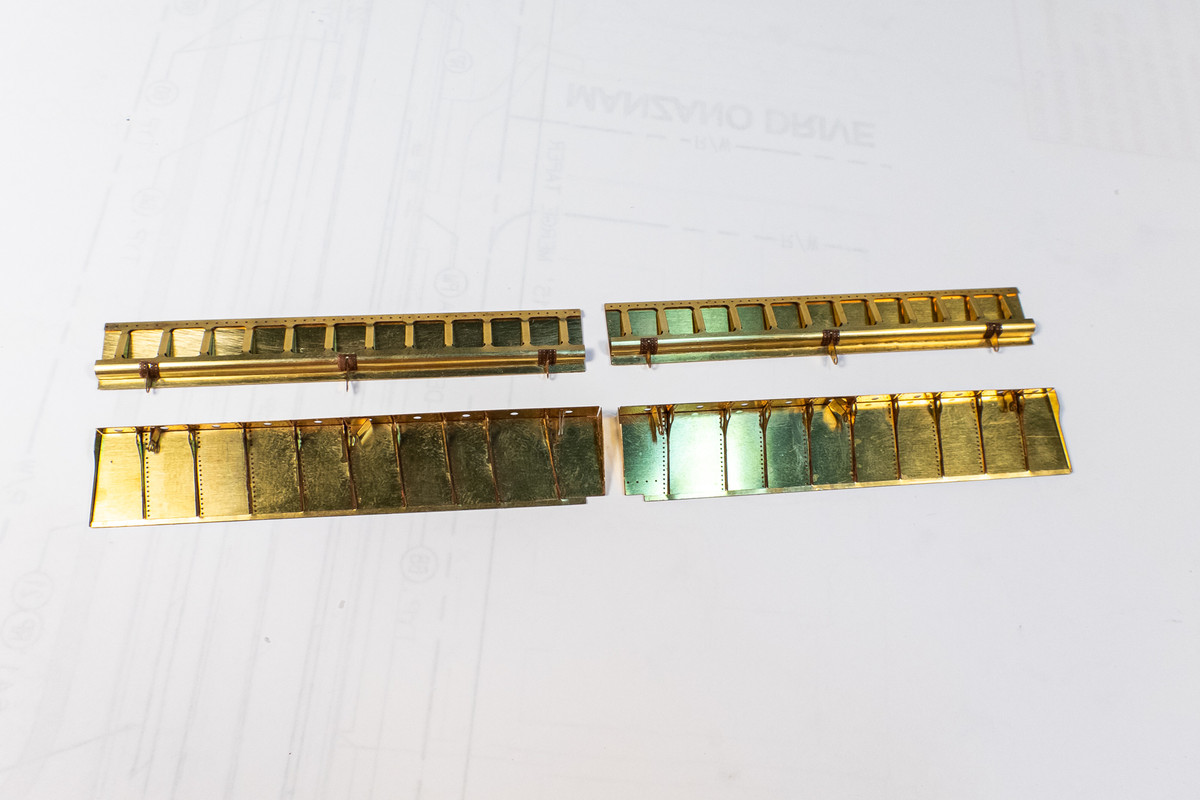
Attachment of the lower flaps into the flap bays is not 100% secure due to the flimsiness of the attachment hangers.
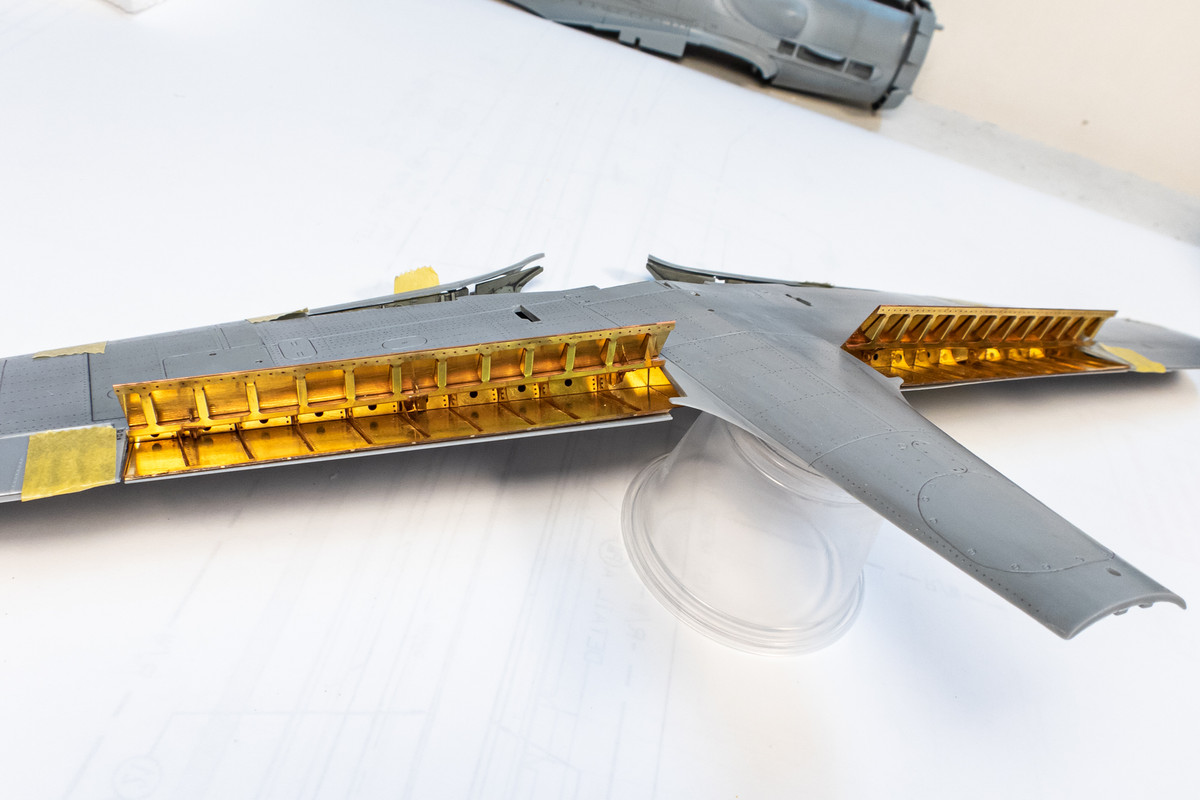
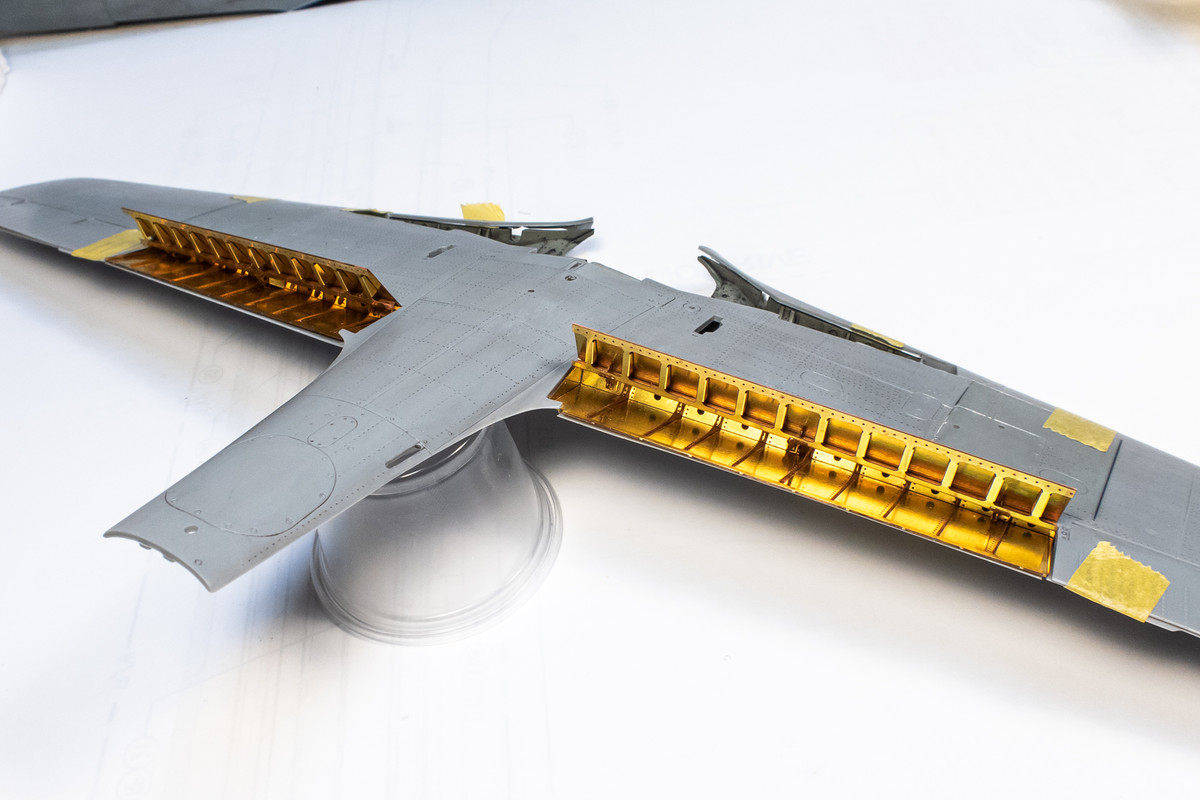
The brass flaps always look much more impressive unpainted than painted, don't you think?
Now that the flap bays are folded, I can do the same for the moving lower flap parts. I had to tackle the lower flap in stages as there are multiple folds and bends that need to be done. And fold carefully as the brass naturally wants to bend where there is the least material and those do not correspond to a fold edge.
The back edge of the flaps needs to curve so a piece of circular plastic rod is used as a template. The back edge is secured with thin CA glue.
Here are the flap parts before the mounting hardware is attached.
The mounting tabs on the movable flaps fit into slots so the position is established. Small reinforcement plates are curved using the same plastic rod.
The attachment hangers in the flap bays must be positioned carefully to match the tabs.
The movable flaps look identical but they are not as the mounting tab positions are slightly asymmetrical. You can match the movable flaps to the correct flap bay by positioning them together... the mounting tabs on the moving flaps will line up with empty space on the flap bay, which will accommodate the attachment hangers. If any of the mounting tabs line up directly with a spar, the two parts are mismatched. So use the mounting tabs as a location guide when gluing in the attachment hangers.
The movable lower flaps are now done.
Attachment of the lower flaps into the flap bays is not 100% secure due to the flimsiness of the attachment hangers.
The brass flaps always look much more impressive unpainted than painted, don't you think?
John aka JKim
-----------<><
-----------<><
-
Medicman71
- Elite Member
- Posts: 11396
- Joined: Mon Apr 07, 2014 9:32 am
- Location: Houston, Tx
Re: Hasegawa 1/32 Fw 190D-9 Brown 4
Yeah they do! Those are some really complicated flaps. Crazy.
Mike
Sponsored by Boeing, Lockheed Martin, Northrop Grumman, Saab, BAE, and Dassault
Sponsored by Boeing, Lockheed Martin, Northrop Grumman, Saab, BAE, and Dassault