Page 15 of 44
Re: 1/32 Hasegawa Fw190D-9 Red One
Posted: Sat Nov 17, 2018 3:00 pm
by Duke Maddog
I can only echo how thrilled I am to see you here again. That cockpit is stunning; I feel I can just climb in and start flippin' switches! Nice work on the rivets; if you hadn't pointed them out I would not have noticed the wayward lines.
Bruce it's too bad you can't get Kenny X to join us here. I guess I'll never understand the appeal of posting pics of my models on Facebook where they get pushed down the page so fast that most people miss them. At least here on the Forums I can access them all the time without having to search or scroll forever.
John, I hope you plan on staying around for a while. I am really looking forward to seeing more.
Re: 1/32 Hasegawa Fw190D-9 Red One
Posted: Sat Nov 17, 2018 3:27 pm
by KSaarni
Duke Maddog wrote:
I guess I'll never understand the appeal of posting pics of my models on Facebook where they get pushed down the page so fast that most people miss them.
I agree 110% with you Duke! I cannot either get the point.. and on top of that, facebook uses special algorithms... every ”refresh” of the page one does, changes the content, meaning one does not even see everything anyhow...
- Kari
Re: 1/32 Hasegawa Fw190D-9 Red One
Posted: Sat Nov 17, 2018 5:55 pm
by speedgraflex
Hi everyone! A note on Mister X or a couple of notes—he will be back here. He is reducing the amount of online time currently with his twins, work, life, the universe... and everything. Believe me however 2019 will be the Year of the Mustang on SPAM—he’s waiting for a P-51B to arrive from Tamiya....
Also, John, sincerely—welcome back!
Re: 1/32 Hasegawa Fw190D-9 Red One
Posted: Sat Nov 17, 2018 6:53 pm
by jkim
Thanks for the warm welcome friends! Truly. I'm guessing that progress on Red One will be intermittent with the holidays upon us but, I'm just happy that I'm excited and motivated to do some modeling again.
I stopped posting in June because I stopped modeling altogether. I can't explain why I stopped modeling because I really don't know. Nothing drastic has changed in my life. My health is good. My job is steady. My relationship with the wifey and the daughters is normal (which means I love them to death!). I think I needed a break and I had lots of other things in the summer and fall to occupy my time (mostly fishing).
I really hope to see Kenny X back here. Before I stopped modeling, I was really enjoying the passion he was bringing to SPAM. Please relay my greetings to him for me, Bruce. I like Facebook for many things but posting my modeling builds is not among them. I much prefer message boards for this type of sharing just because it is much easier to track the progress of builds and I do refer to online builds often (my own and the work of others). I lurk on several modeling groups on FB but have no desire to participate. There are some great builds there but also a lot of stupid interweb drama, which I like to avoid.
I decided to do some grunt work to keep the momentum going. Something not requiring too much thought... just time and effort. I'll be using the Eduard brass flaps for this build like I did for Black 1. That means some removals from the kit wings to accommodate the brass flaps.
The Eduard instructions show the necessary removals. On the upper wings, the interior flap ribbings need to be gone. The removal areas are all raised, which is relatively simple to do.
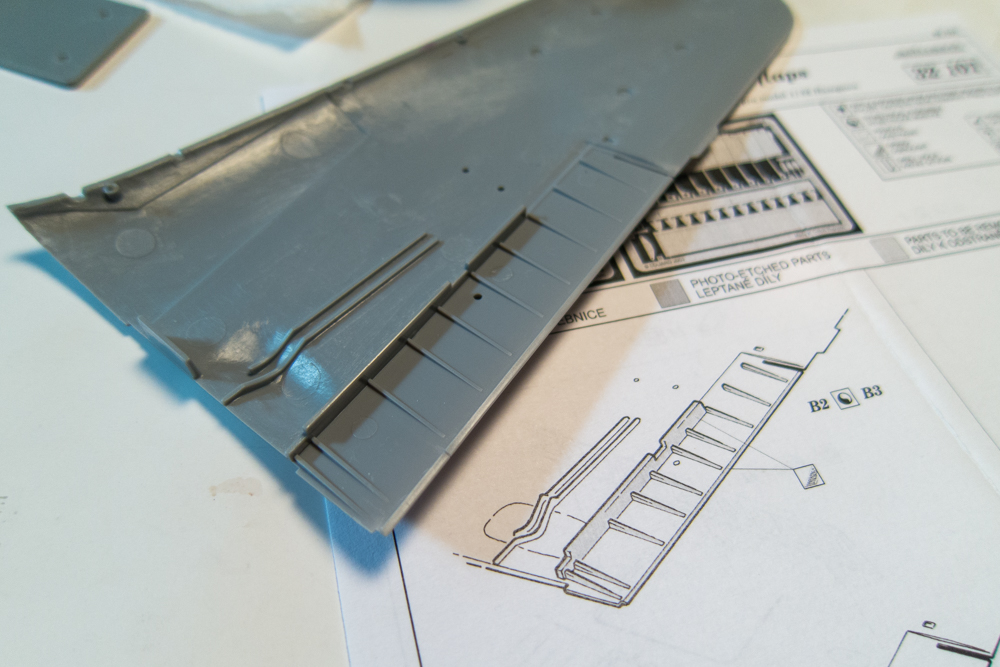
I use my pair of Tamiya cutters to snip away the raised ribs. A curved x-acto blade is used to slice away the remnants.

The curved blade is scraped across the trailing edge repeatedly to get rid of the raised edge. I used the same scraping technique to further remove the ribbing. Now the area is ready for sanding.

For sanding, it is important to use a coarse enough grit to cut through the raised remnants and flatten the area.
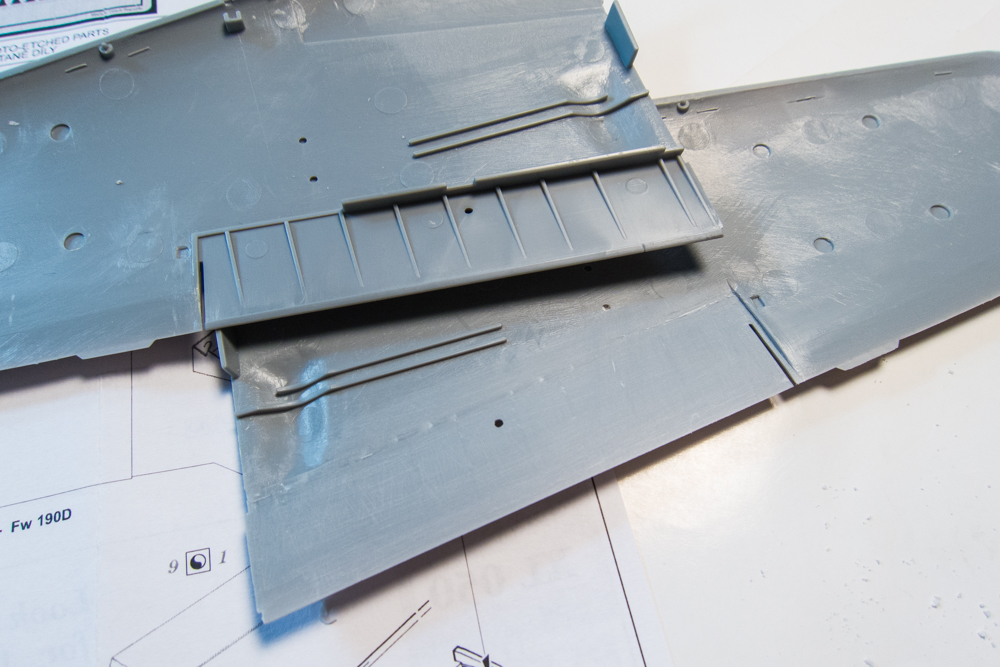
The top wings are finished.

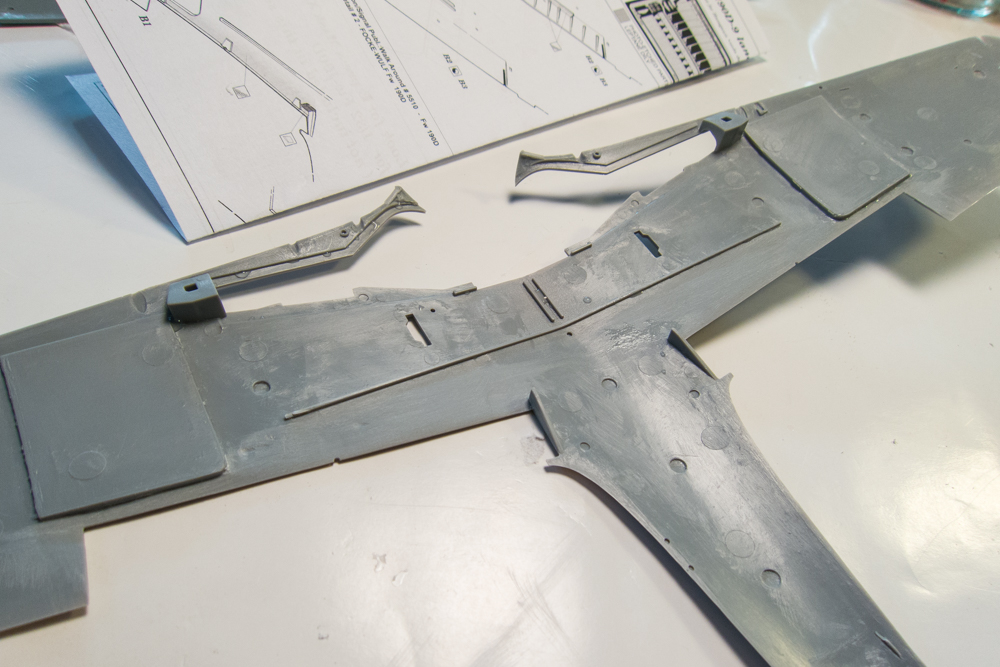
The removals on the bottom wing are a smaller area (see shaded area on the Eduard instructions) but take much longer to do since I have to drop a narrow area down "one level", which will essentially remove the three square recessed areas on the trailing edge of the flap openings.
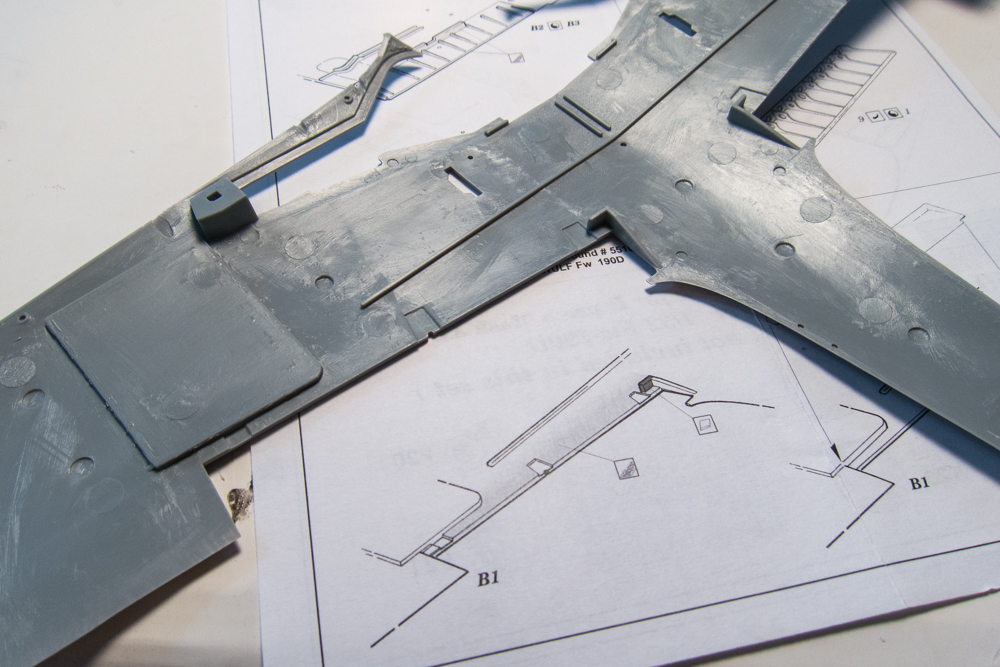
This took me two sessions of scraping, slicing, grinding and sanding to finish the bottom wings. By "finish" I mean prepping for the flaps. The wing surfaces still need to be riveted.
Re: 1/32 Hasegawa Fw190D-9 Red One
Posted: Sat Nov 17, 2018 8:37 pm
by speedgraflex
Seeing your work once again is a most sincere pleasure, John!!! I am following along and paying close attention to the way you make your choices. I plan to do a 1/32 Anton with as much finesse as you bring to your work, so I am grateful for your photographic documentation as well. There is a great deal to learn here.
I was pondering your reasons on and off with model building; and I think your explanation makes a lot of sense. When you reach for a certain standard of excellence, there is also a very necessary point where one’s thoughts and actions must by necessity turn towards other pursuits; and this is by no means a push too far (this is my experience anyway all of these rambling remarks). For me the explanation is what Stanley Kubrick remarked on with the plight of Icarus: “Build better wings.”
Re: 1/32 Hasegawa Fw190D-9 Red One
Posted: Sun Nov 18, 2018 11:02 am
by BlackSheep214
Re: 1/32 Hasegawa Fw190D-9 Red One
Posted: Sun Nov 18, 2018 11:50 pm
by jkim
Tinkered around with the engine plug... mostly thinking about it. I was pretty happy with the result from Black 1 so I'll probably follow the same general game plan but just add to it incrementally.
In the meantime, I decided to cobble together the upper brass flaps to see how they fit into the previously modified wings.

A PE bending tool is help to get uniform bends. This one is from The Small Shop.


Careful handling is necessary with these PE parts due to the delicate connections.
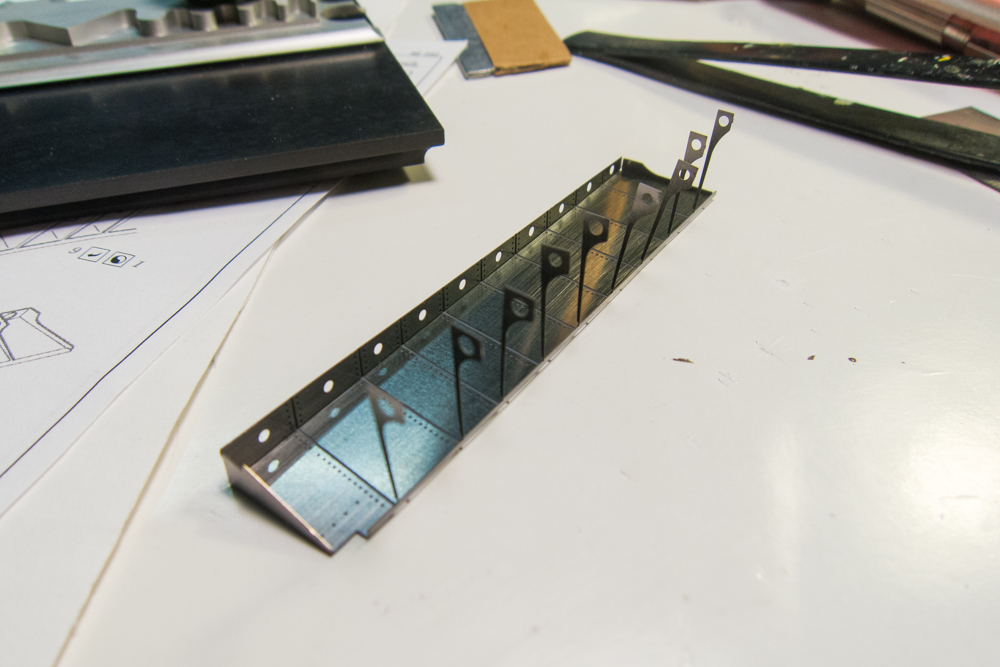
CA glue is used to secure the ribs into place. After the CA glue dries, I'll clean up the excess with CA glue debonder.
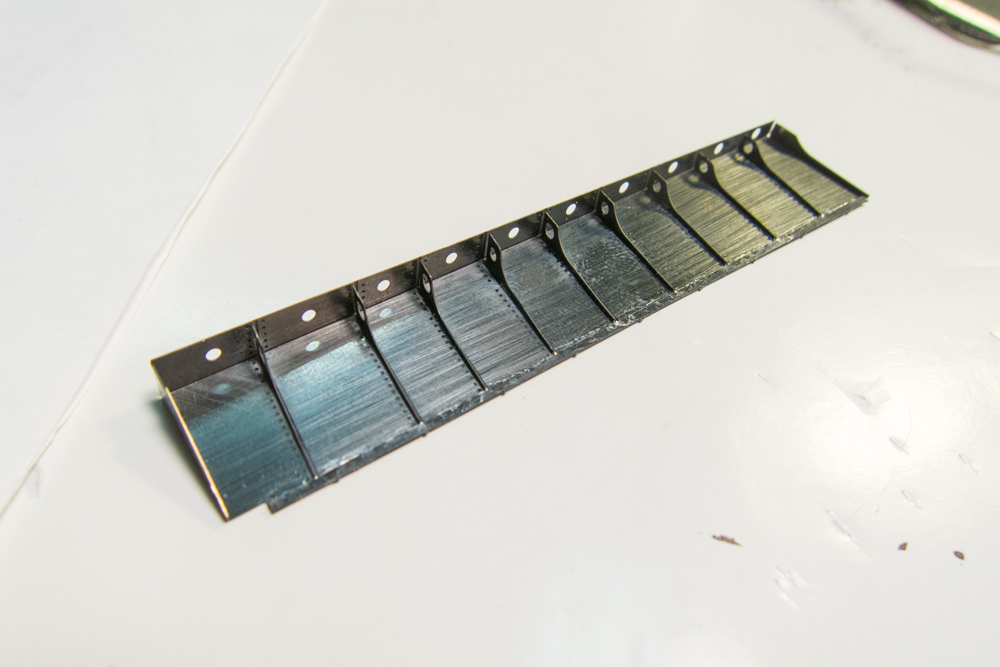
The port flap seems to fit ok!
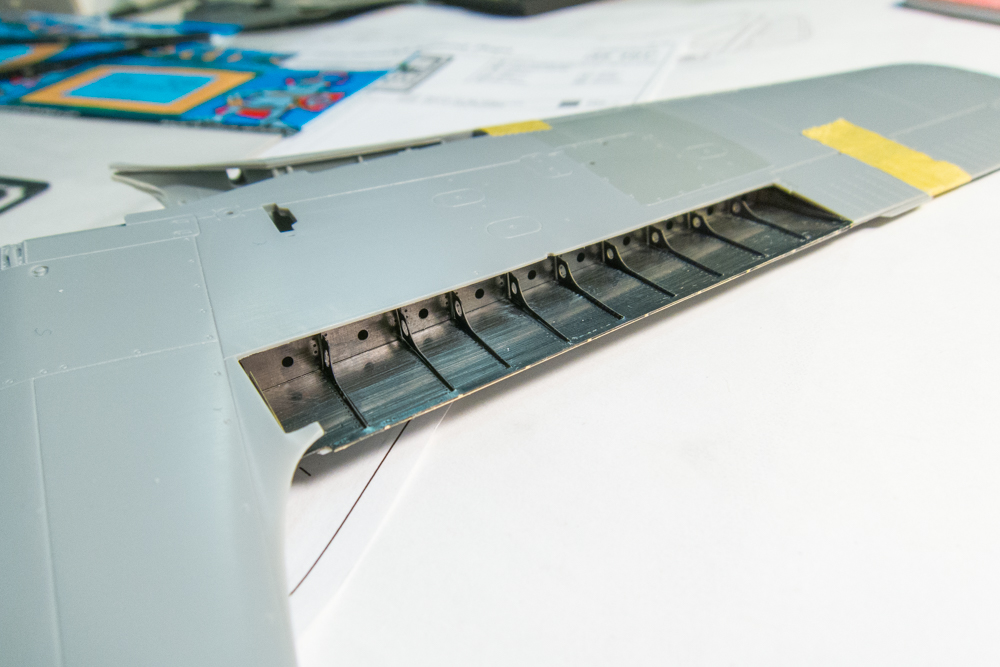
The other flap was assembled and dry fit onto the wings. Everything looks a-ok!
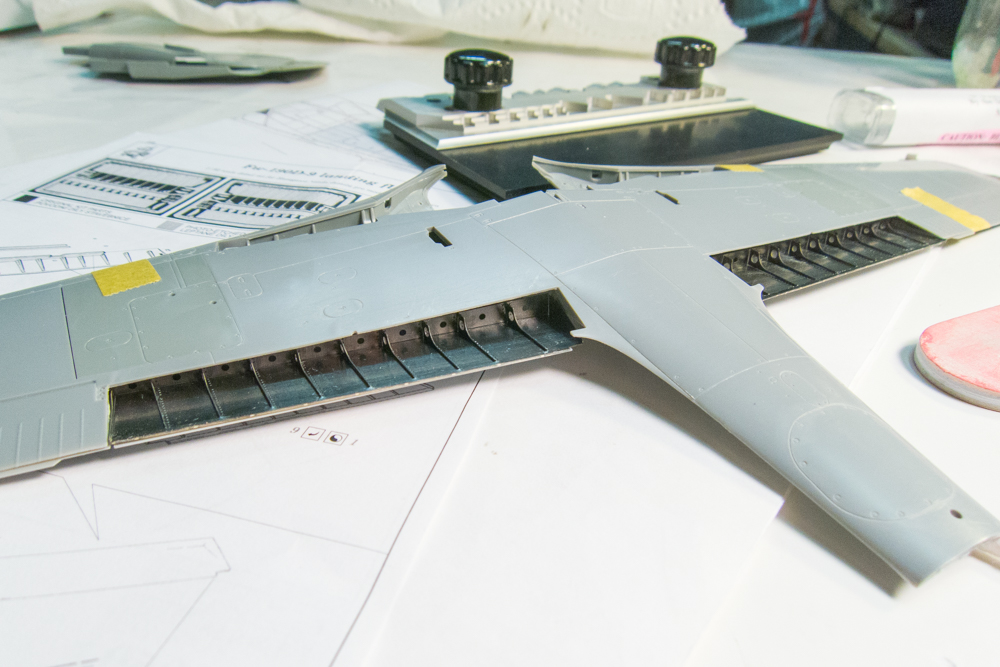
At the end of this session, the clamp from my desk lamp broke. I ordered a pair of replacements due to arrive on Tuesday.
Re: 1/32 Hasegawa Fw190D-9 Red One
Posted: Mon Nov 19, 2018 2:51 pm
by speedgraflex
John! I read your posts last night about the same time as you posted them—this was also about the time I was heading off to Slumberland, so apologies for my delay.
First, Happy Holiday to you and your family! I hope you all have a lovely Thanksgiving together.
Next, my sincere thank you for posting here! Your wonderful images illuminate the technical corners of model building so well.
Finally—I’m trying to understand most clearly how you removed the excess styrene from the kit in order to fit the AM. This was so deftly done! What intrigues me is the way you eliminated the existing forms on the interior edge. What is most interesting to me is how your results eliminated the raised interior without stressing the plastic; that combination of finesse mixed with results like these is potent!
Re: 1/32 Hasegawa Fw190D-9 Red One
Posted: Mon Nov 19, 2018 3:33 pm
by jkim
Hi Bruce! My parents have flown in from Hawaii. My sis and her family will be arriving on Tuesday, along with my daughter returning from Berkeley. We're all going to a cousin's house in Irvine for Thanksgiving dinner. My mom is the oldest of 12 children and so I have lots of relatives on that side of the family. I hope your Thanksgiving is blessing filled and that goes out to all of the posters here at SPAM.
Plastic removals are not my fave thing to do. Especially the thinning of a flat surface. It's a drawn-out process and I've only shown the beginning and the end so it looks neat and tidy. It's not. In the middle, there are a bunch of rough cuts and grinds with plastic shavings and dust all over the model, my fingers and my lap. For thinning, I usually use a combination of (a) scraping with a curved x-acto blade, (b) sanding with coarse grit sandpaper and (c) grinding with a stone bit on the Dremel. The Dremel is a last resort and not ideal since even the lowest speed on my tool results in melted bits of plastic.
Re: 1/32 Hasegawa Fw190D-9 Red One
Posted: Mon Nov 19, 2018 4:46 pm
by Duke Maddog
I finally had a chance to post here. Stunning work on those wings John. Everything does look amazing. I also hope you have a great Thanksgiving. I'll be spending it with in-laws in Alhambra, but if you pass by Rowland Heights/Diamond Bar area on your way to Irvine, then you would be passing close to my house.
Have fun with family, I'm looking forward to seeing more when you get to it.

