Thank you fellas so much. I appreciate it very much.
I apologize that it’s been quiet here for the past few days. I have been knee-deep in construction of the Zero’s movable control surfaces and retractable landing gear, and I’ve been wanting to do a writeup about it because John expresses some interest in seeing how this all works.
This proved difficult to write about (and even more challenging to execute) than I thought it would be.
Let me state at the outset that when envisioning how this would turn out, I decided that I wanted all the control surfaces, save for the flaps on the innermost areas of the wings set to neutral, and this aircraft would not be displayed in-flight. Also, the movable control surfaces and retractable great weren’t really a big selling point for me when I bought this kit. You know me, I like interesting cockpits and cool, well-detailed engines, and of course- nice looking airframes.
Still though, these features made me curious. And I ended up attempting to build the control surfaces movable as per the instructions just because I was curious if I could do it or not.
Firstly, the vertical stab and rudder: 50% FAIL, it’ll only go one way

BUT- it sits neutral so it doesn’t ruin the project.
Secondly, the flaps on the horizontal stab: 100% FAIL
as much as I tried to be careful with the glue when assembling that all together, I screwed the pooch somewhere along the line because they ain’t moving! The bright side: they sit at perfect neutral as-is so again, the project isn’t ruined.
I’m really glad I took mishaps into account when assembling the thing, and did it in such a way where if glue got where it didn’t belong, it’d dry with the control surfaces neutral. *WHEW*
Okay, next up, the gear bay doors and the retractable landing gear mechanism!
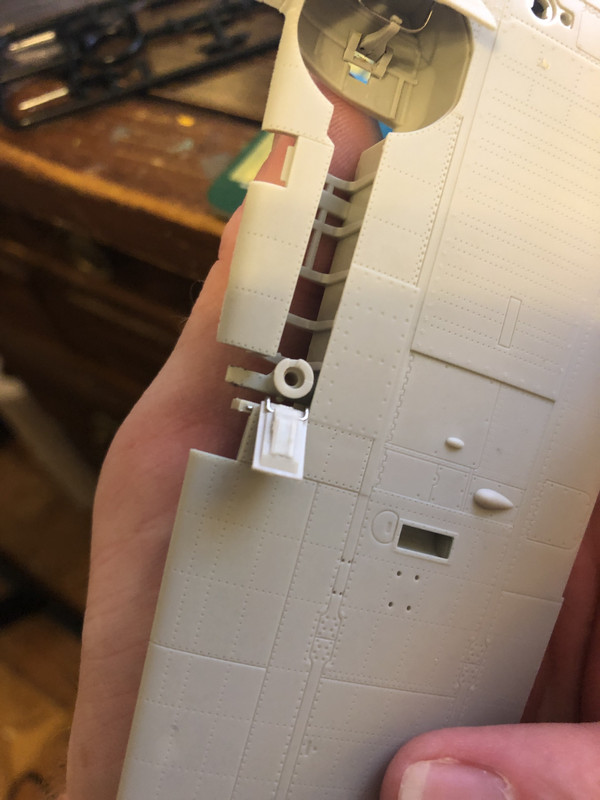
Here’s the gear bay doors open and closed:
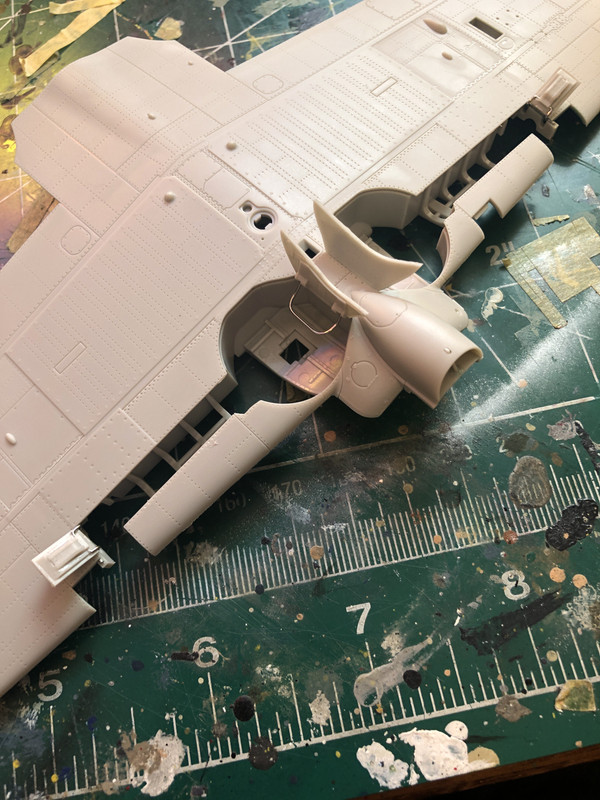
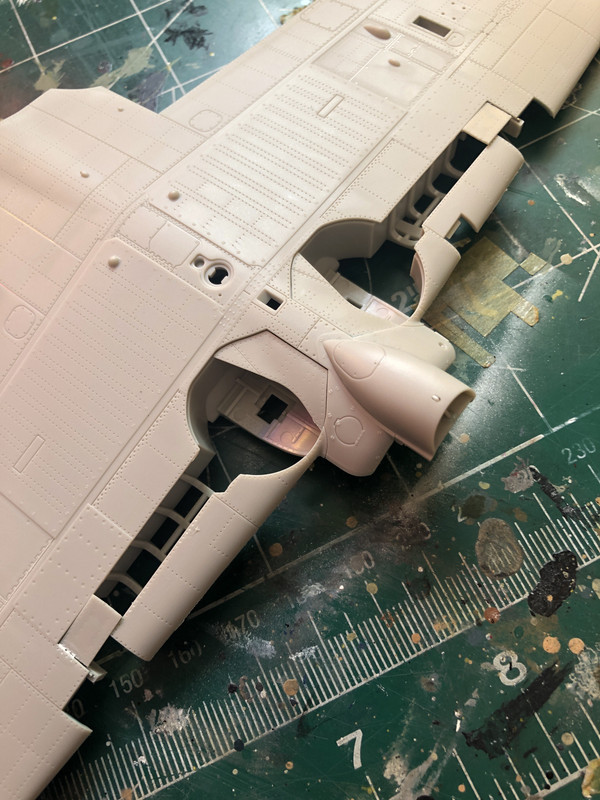
These little guys are held in place by fiddly little metal hinges. Installing them is not easy.
Next comes the little thingunmabobbers inside the gear bays that hold the innermost hinges:
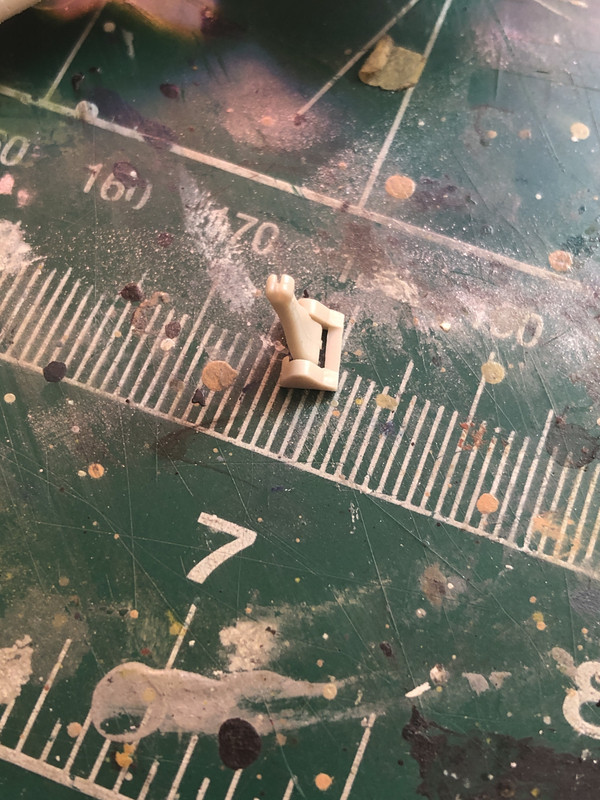
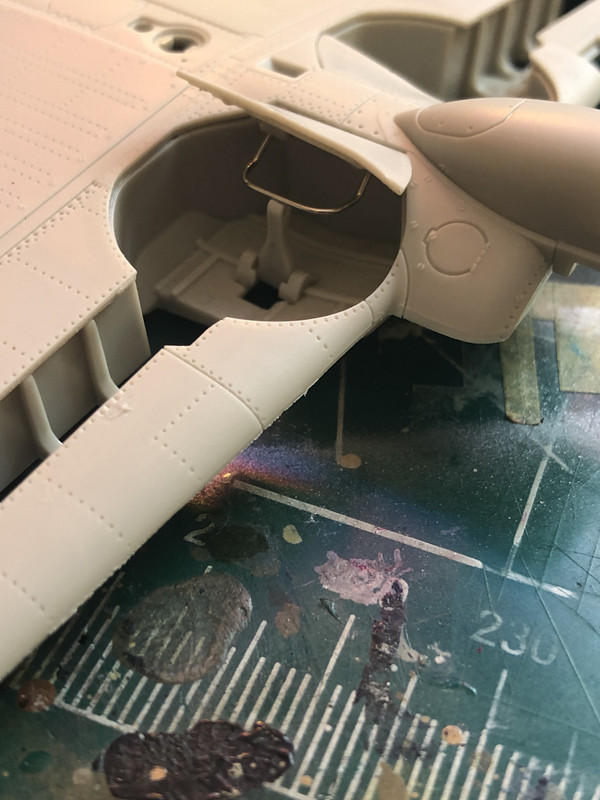
Great care must be taken when installing these as that piece needs to be able to move freely so you can close those covers up. Very fiddly.
And again, I screwed up someplace because post installation, they doors will not close all the way:
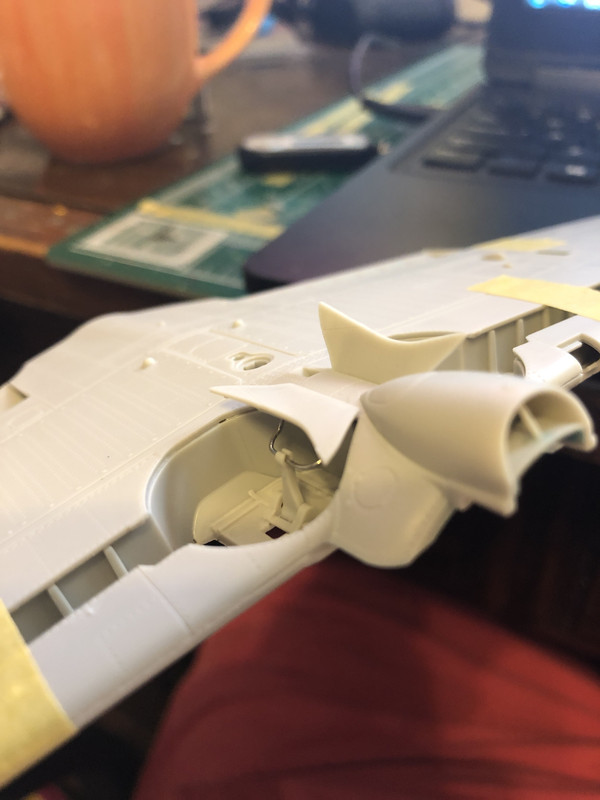
Fellas that’s three strikes and I’m out, looks like! Interestingly enough, they still do move! So the good news is, I can leave them open, as was the plan all along. So there’s a bright-side here too! Looks like I’m still in the game!
Next, here’s the mechanism that makes the gear retract:
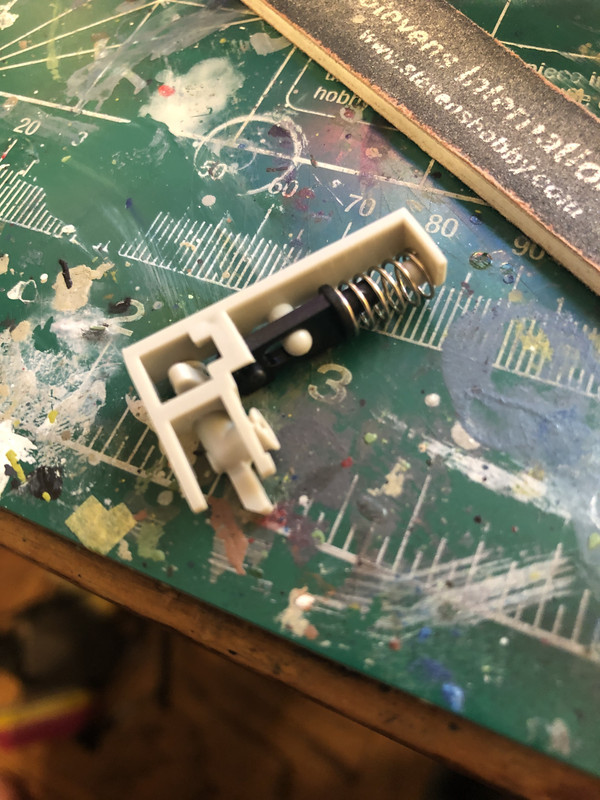
The cylindrical piece on the left there holds the strut. Inserting a special tool over it and turning it allows a nub on the rear of it to push against the black piece and it slides back against the spring, giving a nice smooth action. Here it is, installed and doing its thing:
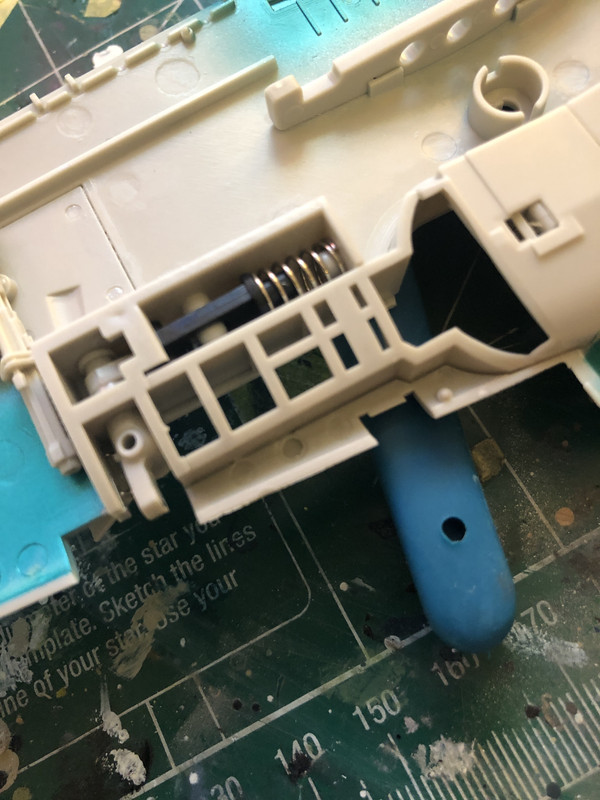
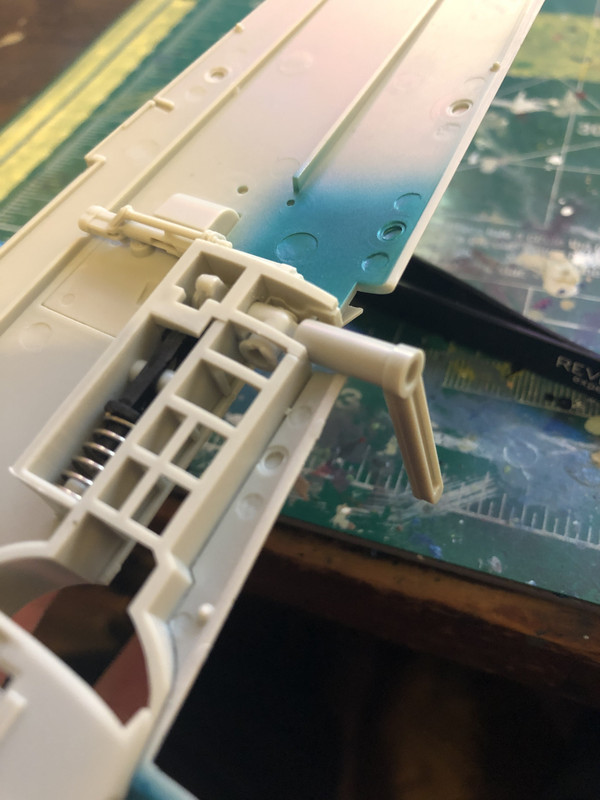
These WORK! Or at least they did during assembly. I left them in the gear-down position and haven’t checked them again. But I’m happy at least that I was able to assemble those correctly.
As to the bay doors, I’m disinclined to fix them as I never intended to display this bird in-flight anyway. So yesterday morning I pulled the trigger on gluing them in place in the open position because I didn’t want them wiggling around.
After that, I spent the rest of my time filling in and sanding down these ejector pin marks on the flaps:
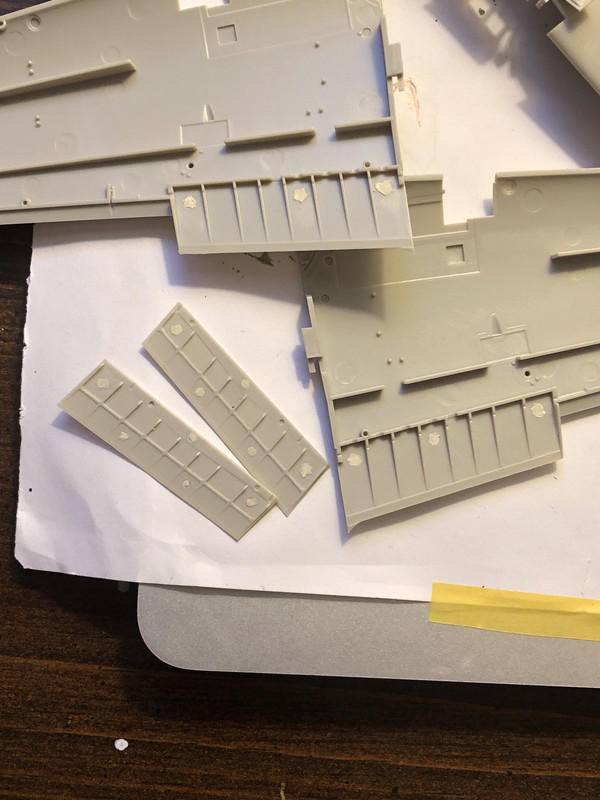
I used Mr. White Putty for that job. I spackled a little at a time into each one with a toothpick, let it dry, and I’ve been sanding each one, one by one, ever since
Okay! So, the verdict on this is- I still think it’s a great kit because it has all the features I like in a model airplane -only LARGER, BOOYAH BABY!- and somehow with all that mechanical crap packed into those wings the pieces fit together beautifully and trouble-free and the wing roots are lovely:
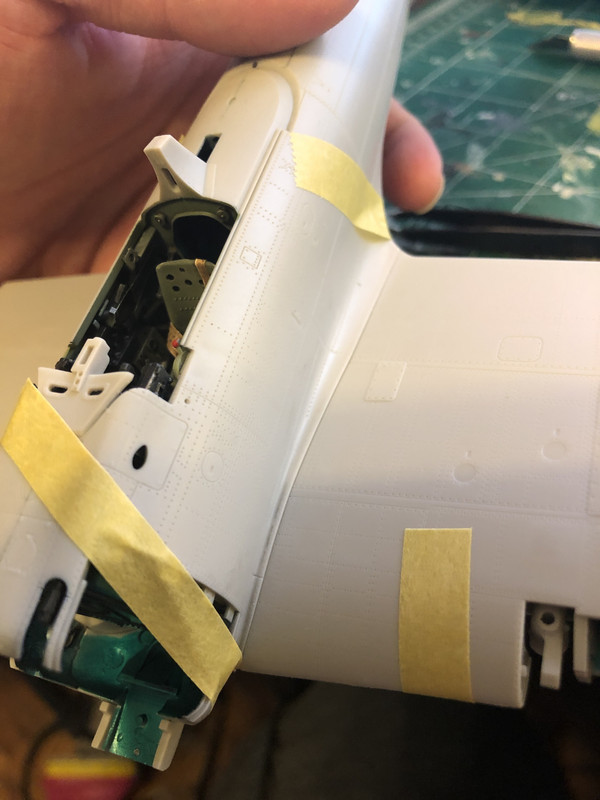
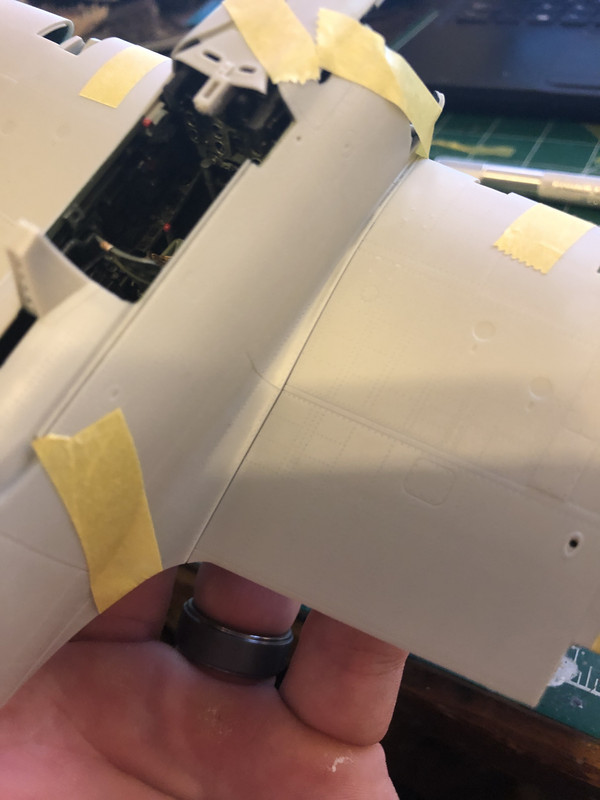
...and the fit everyplace else so far has been lovely, too.
So all that said, for me, personally, all those other little features are just gravy. And I’m glad I got to try building them and making them work, even though most of them were fails, I bet better modelers than me could build this kit and make all those extras work
no problem.
Anyhow, that’s where we’re at! And thank you guys as always for looking and for your kind words. I appreciate it!
 toys
toys