
I can clearly see two different tones of grey on the front cowl, right above the guys right shoulder you can see a clear line between the two colors
Edit: In the photo Bruce has cleaned up you can really see it.
1/32 Hasegawa Bf109K-4 Weisse 8
Re: 1/32 Hasegawa Bf109K-4 Weisse 8
March as one, Don't look back
Odin's sons... Attack!
Unleash hell! Do not repent! Warfare grants us no lament
Let your weapons slash and tear This is no place for fear
Hold the lines! Move as one! In unity our victory's won
Our shields will form a mighty wall
United we shall never fall
Odin's sons... Attack!
Unleash hell! Do not repent! Warfare grants us no lament
Let your weapons slash and tear This is no place for fear
Hold the lines! Move as one! In unity our victory's won
Our shields will form a mighty wall
United we shall never fall
-
speedgraflex

- Moderator
- Posts: 11527
- Joined: Fri Feb 10, 2017 11:08 pm
- Contact:
Re: 1/32 Hasegawa Bf109K-4 Weisse 8
John, I believe you are on track with everything. I actually copied and pasted your research as a great source. So, sincerely—thank you. I definitely agree about increasing the saturation and moving away from the overall brown wash present in the profile. I believe that your subtle approaches with edges will be all that is necessary. I have a photo of a K-4 waiting in a field for service - and that is how I too would prefer to see the aircraft, more prototype accuracy than a diorama recreation.
Also I would like to know your thoughts about two areas with the profile. The first as you and Clint pointed out would be the cowling. It feels as though it comes from elsewhere than was somewhat blended in with the green/gray camouflage in situ, as a field replacement, perhaps, or simply as a different mfg plant’s contribution. I wonder if there is less hard vertical line and perhaps a darker blending on an angle towards the weapons? I am literally in two minds about this. So help! Is it simply a completely different grey with a vertical blend of grey green or the same gray with a light upward angling smudge of darker green/grey? I tried to indicate this on the profile with a green line. Also my feeling is that the numbers painted on the rear fuselage do not angle upwards (orange line). The 4 is not higher in my opinion. I think an easy way to verify is simply by copying and taping a copy of the numbers on the fuselage itself and orienting the fuse as it is in the photo. It just seems to me that if someone is painting on numbers they would orient from the top down in order to do so. Maybe I think too much about these things??
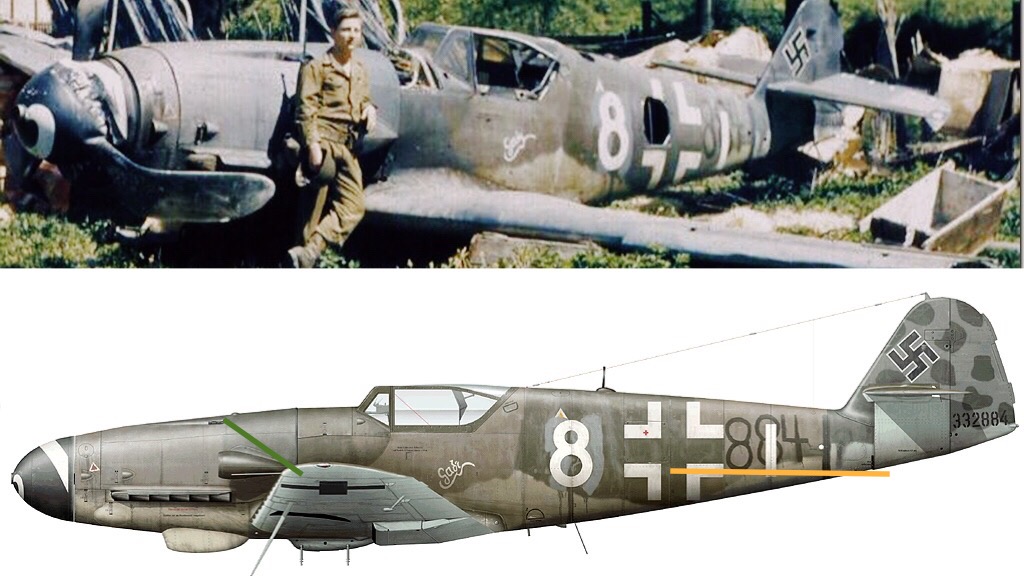
Also I would like to know your thoughts about two areas with the profile. The first as you and Clint pointed out would be the cowling. It feels as though it comes from elsewhere than was somewhat blended in with the green/gray camouflage in situ, as a field replacement, perhaps, or simply as a different mfg plant’s contribution. I wonder if there is less hard vertical line and perhaps a darker blending on an angle towards the weapons? I am literally in two minds about this. So help! Is it simply a completely different grey with a vertical blend of grey green or the same gray with a light upward angling smudge of darker green/grey? I tried to indicate this on the profile with a green line. Also my feeling is that the numbers painted on the rear fuselage do not angle upwards (orange line). The 4 is not higher in my opinion. I think an easy way to verify is simply by copying and taping a copy of the numbers on the fuselage itself and orienting the fuse as it is in the photo. It just seems to me that if someone is painting on numbers they would orient from the top down in order to do so. Maybe I think too much about these things??
Make more models!

Re: 1/32 Hasegawa Bf109K-4 Weisse 8
Man, you have to love those late war patchwork schemes. Fantastic discussion, nothing is left behind.
Cheers,
Torben
Torben

Re: 1/32 Hasegawa Bf109K-4 Weisse 8
I've seen the mismatch between the engine cowling and the rest of the fuselage in many K-4 photos. So much so that I am beginning to think that is was a semi-regular occurrence. There are a couple of photos in the JaPo book of K-4's fresh from the factory that exhibit this characteristic but I don't have my book in hand at the moment.
The only applicable photo that I could find on the net right now is this one, assumed to be 334148. Based on the lack of spiral and a tactical number, I'm not sure this was an operational aircraft but you can sort of see the tonal differences between the front of the cowling and the colors of the fuselage and tail... it looks like a third, lighter color. And the demarcation between the light/dark color on the cowling matches where the demarcation might be on White 8. I've seen some publications label these lighter K-4 cowlings as a combination of RLM 77 and 75.
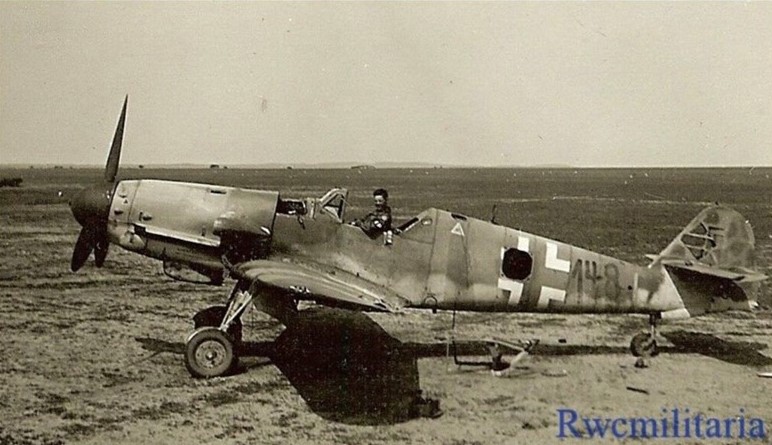
The photo also shows the handwritten number on the rear of the fuselage. From the photos I've seen, these numbers, if handwritten or hand-sprayed, have that upward tilt. 884 seems to be upward tilted as, at least to my eye. Hard to tell based on the angle but I'm extending the straight line of the white fuselage cross as a reference.
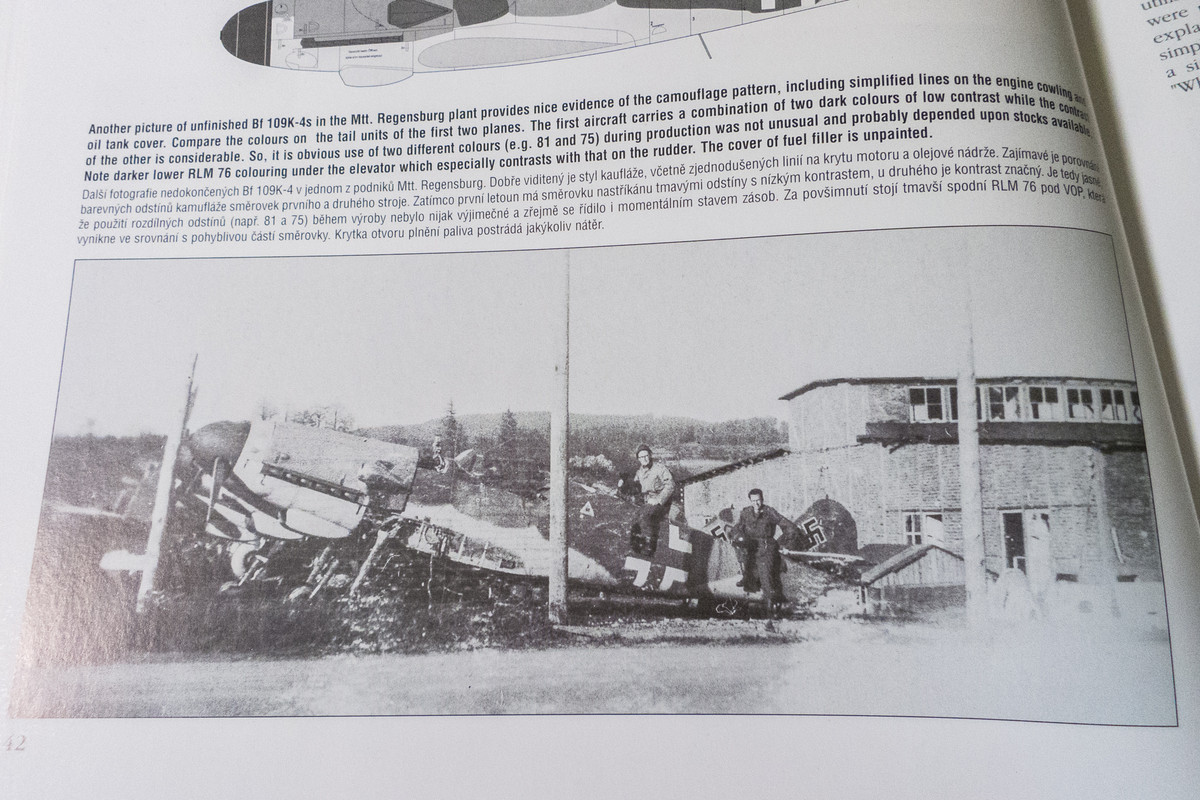
Last note... take a look at the photo above. Do you see the light colored stripe between the tail unit and the fuselage? Very similar to the dark stripe on 884. And I also see a tonal difference between the bottom colors of the fuselage and tail, perhaps indicating two different forms of RLM 76 as evidenced in 884. The more I see of these photos, the more I start to believe that the color mismatches are not due to repair/replacement but were due to decentralized manufacturing.
The only applicable photo that I could find on the net right now is this one, assumed to be 334148. Based on the lack of spiral and a tactical number, I'm not sure this was an operational aircraft but you can sort of see the tonal differences between the front of the cowling and the colors of the fuselage and tail... it looks like a third, lighter color. And the demarcation between the light/dark color on the cowling matches where the demarcation might be on White 8. I've seen some publications label these lighter K-4 cowlings as a combination of RLM 77 and 75.
The photo also shows the handwritten number on the rear of the fuselage. From the photos I've seen, these numbers, if handwritten or hand-sprayed, have that upward tilt. 884 seems to be upward tilted as, at least to my eye. Hard to tell based on the angle but I'm extending the straight line of the white fuselage cross as a reference.
Last note... take a look at the photo above. Do you see the light colored stripe between the tail unit and the fuselage? Very similar to the dark stripe on 884. And I also see a tonal difference between the bottom colors of the fuselage and tail, perhaps indicating two different forms of RLM 76 as evidenced in 884. The more I see of these photos, the more I start to believe that the color mismatches are not due to repair/replacement but were due to decentralized manufacturing.
John aka JKim
-----------<><

-----------<><
Re: 1/32 Hasegawa Bf109K-4 Weisse 8
Here's a photo from the JaPo book showing a factory fresh K-4 without wings and featuring the mismatching engine cowling.
I haven't been able to do much work on the K-4 during the work week. Just cleaning up the fuselage. Here's the tail wheel area after a coat of primer.
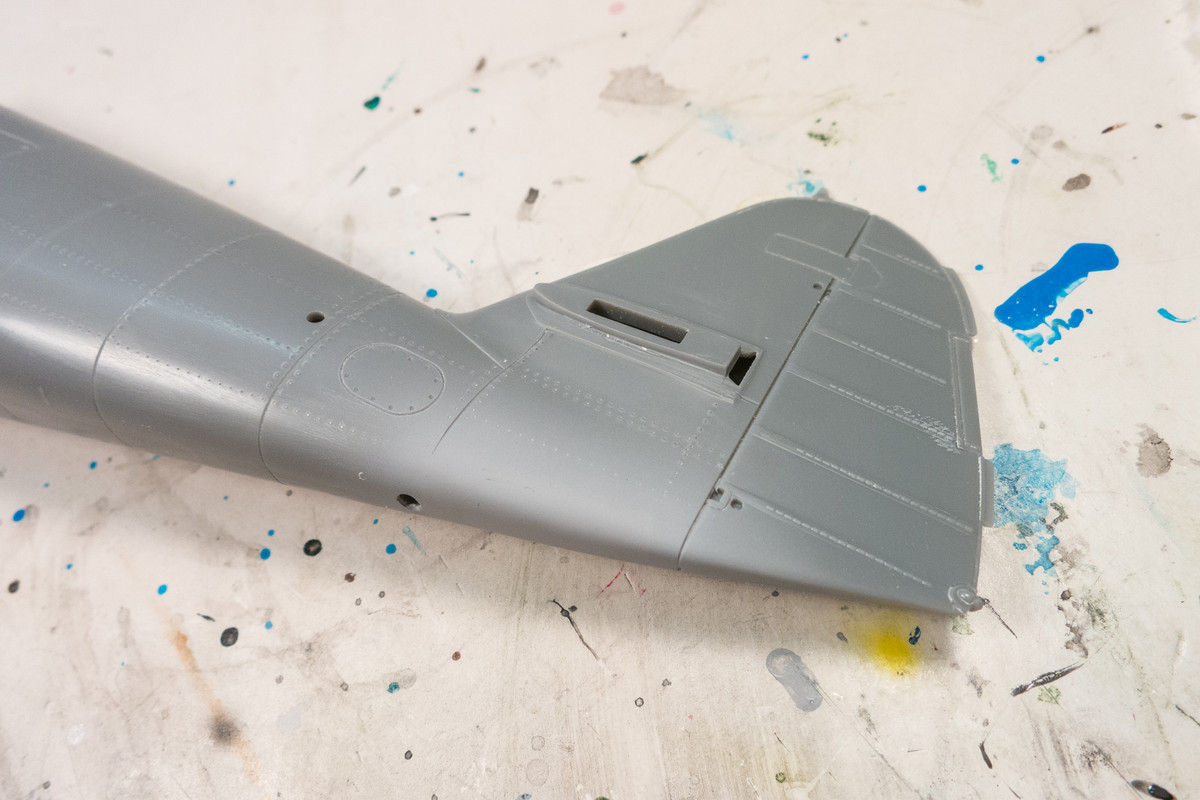
The joint between the fuselage halves was re-scribed and the rest of the riveting has been filled in.
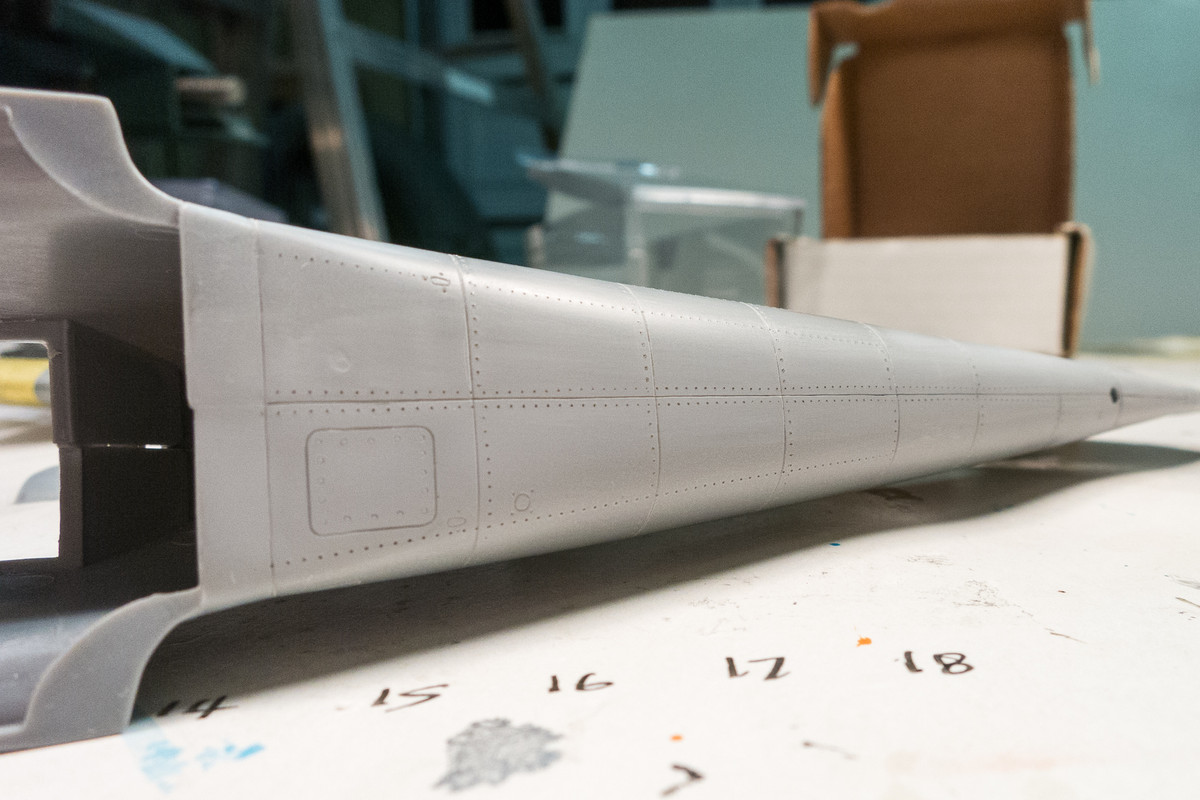
I haven't been able to do much work on the K-4 during the work week. Just cleaning up the fuselage. Here's the tail wheel area after a coat of primer.
The joint between the fuselage halves was re-scribed and the rest of the riveting has been filled in.
John aka JKim
-----------<><
-----------<><
Re: 1/32 Hasegawa Bf109K-4 Weisse 8
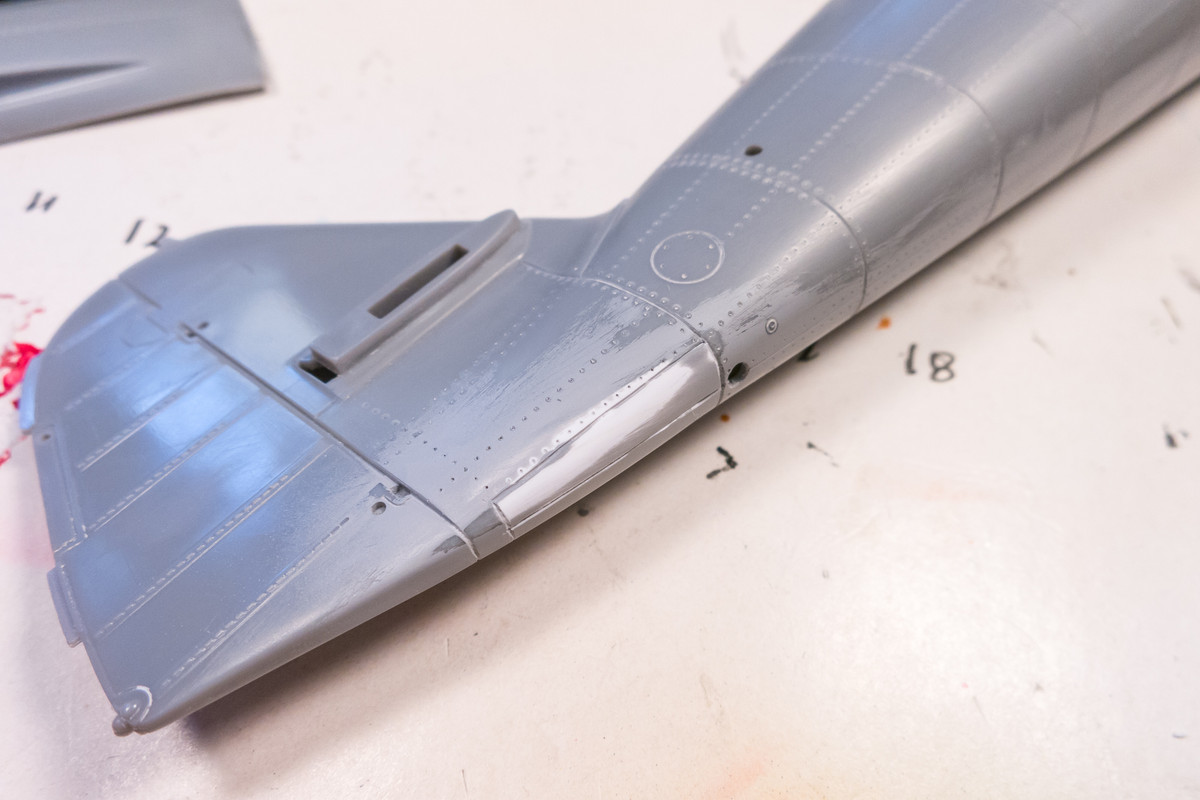
The closed tail wheel doors after a couple rounds of filling/sanding/riveting/scribing.
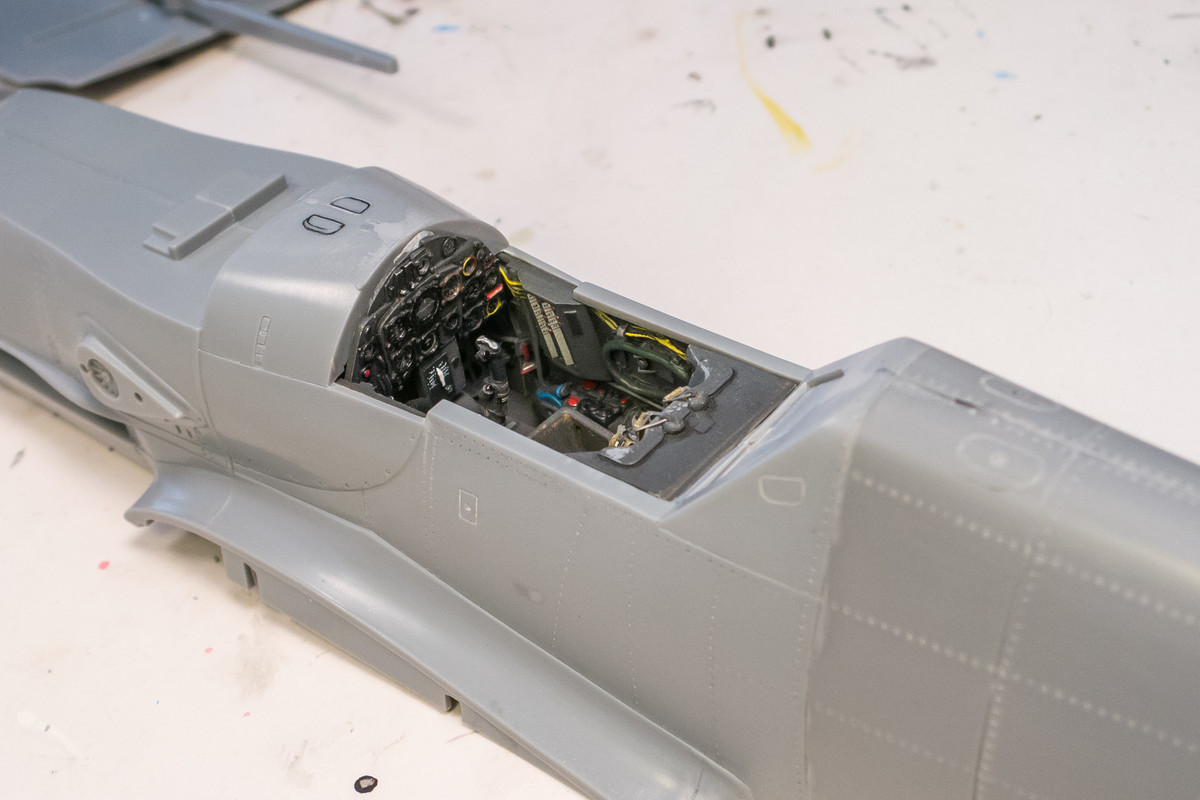
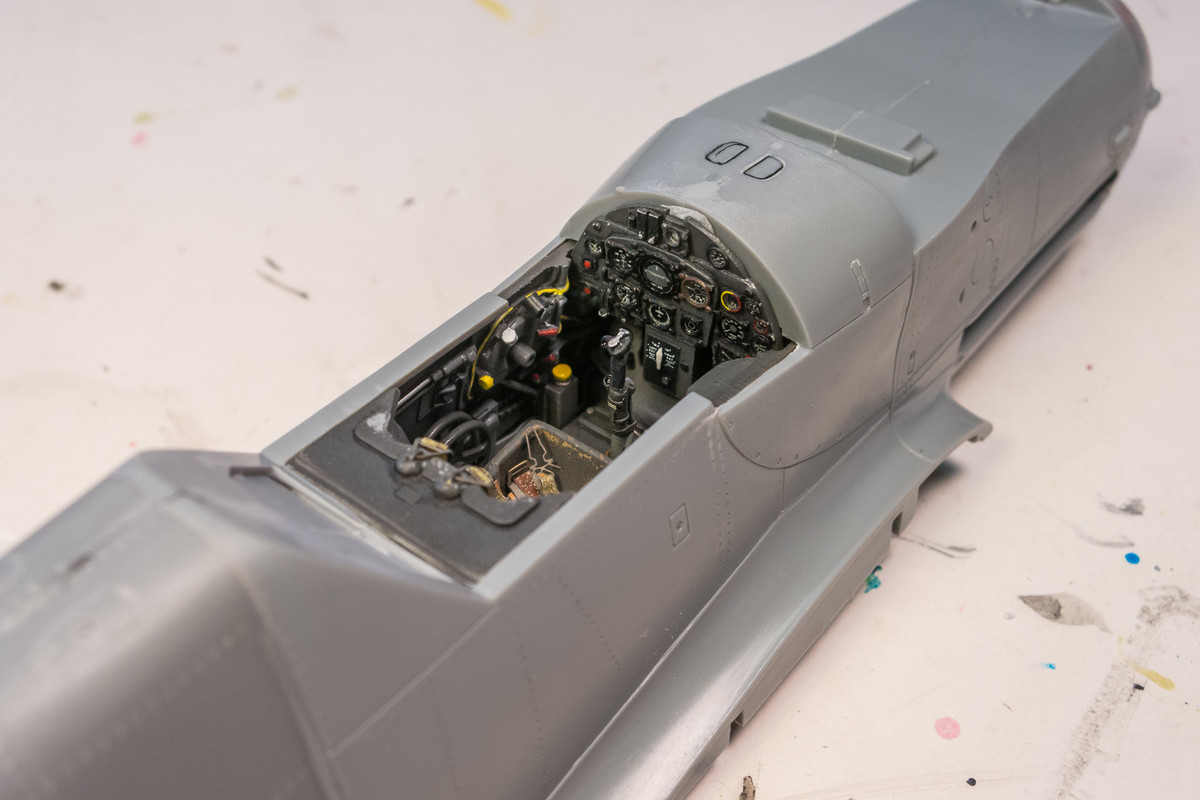
The cockpit has been glued into the fuselage using two-part epoxy. The instrument panel will be glued into place later but I wanted to see how it fit so I stuck it on with a piece of Blue-Tack.
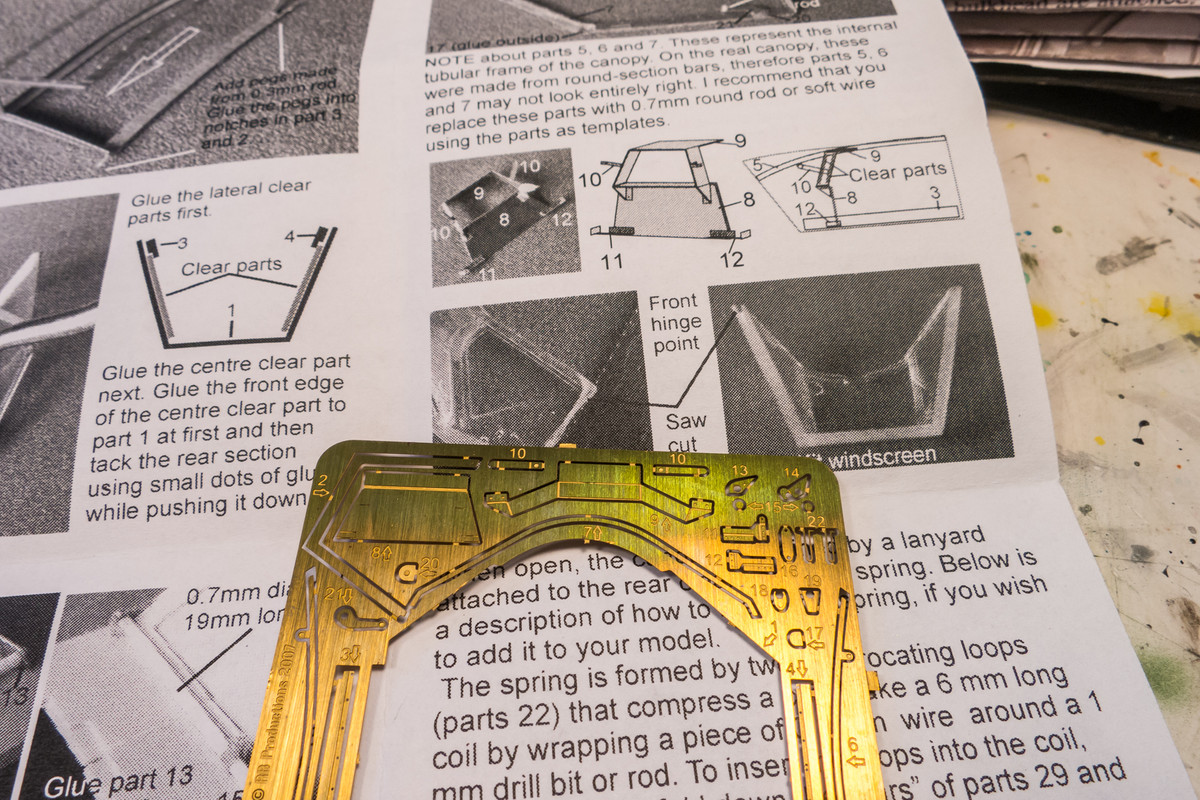
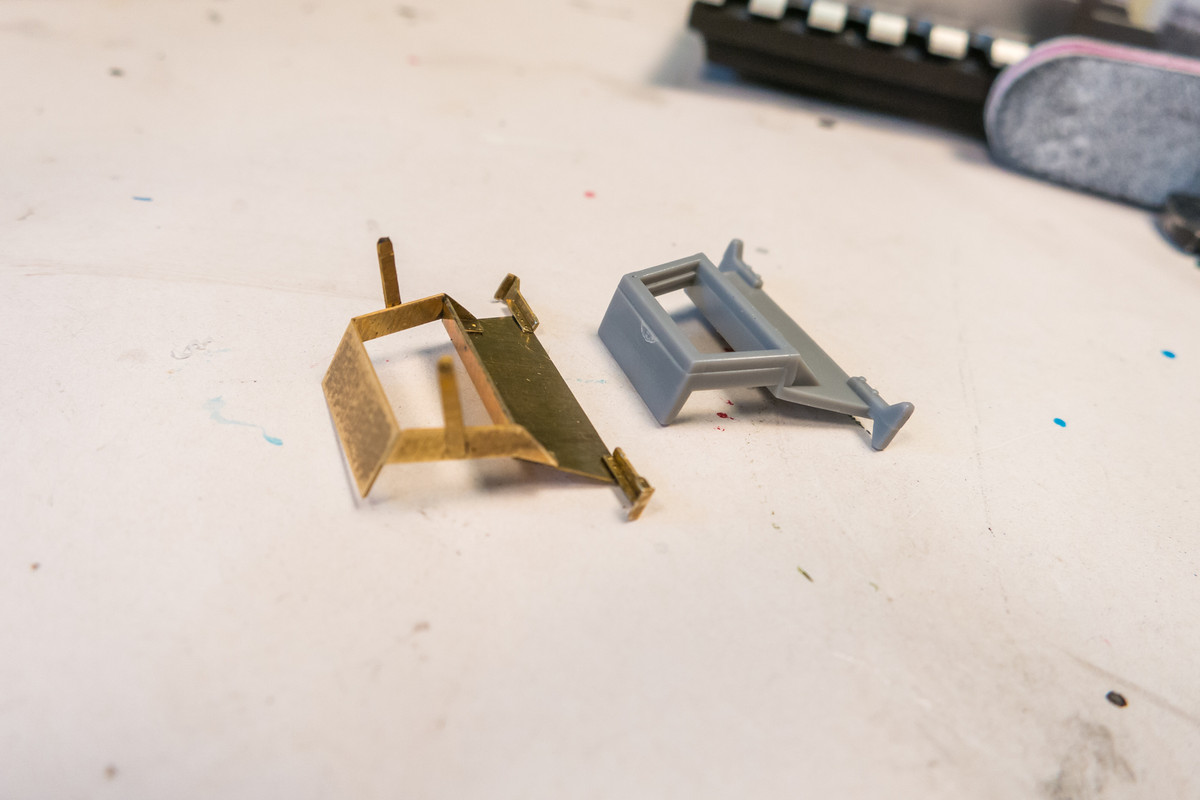
The RB Productions photoetch canopy frame does not fit well on the Hasegawa K-4 kit, unfortunately. But I thought maybe I could make use of the head armor to replace the kit plastic. I just had to make sure the width on the bottom matched the kit part so that it would span the inside of the canopy for attachment.
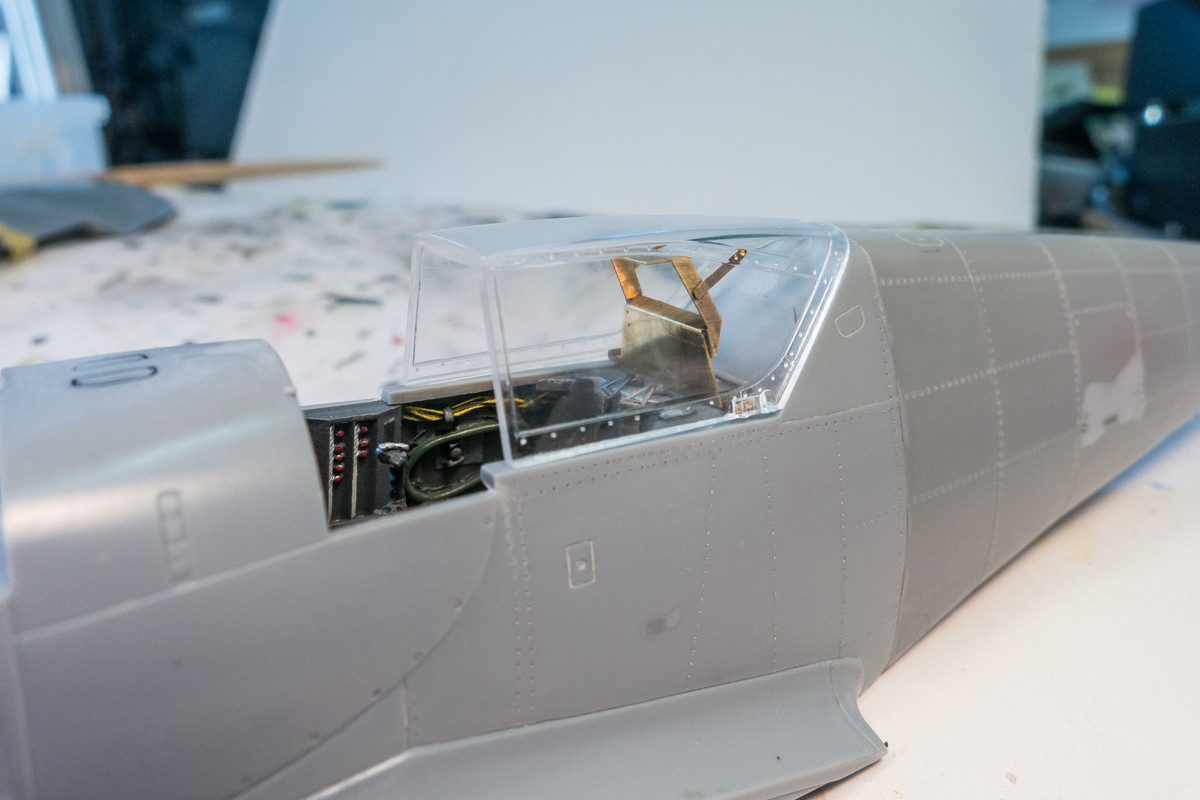
The cockpit has been glued into the fuselage using two-part epoxy. The instrument panel will be glued into place later but I wanted to see how it fit so I stuck it on with a piece of Blue-Tack.
The RB Productions photoetch canopy frame does not fit well on the Hasegawa K-4 kit, unfortunately. But I thought maybe I could make use of the head armor to replace the kit plastic. I just had to make sure the width on the bottom matched the kit part so that it would span the inside of the canopy for attachment.
John aka JKim
-----------<><
-----------<><
Re: 1/32 Hasegawa Bf109K-4 Weisse 8
Chugging along before the Thanksgiving holiday!
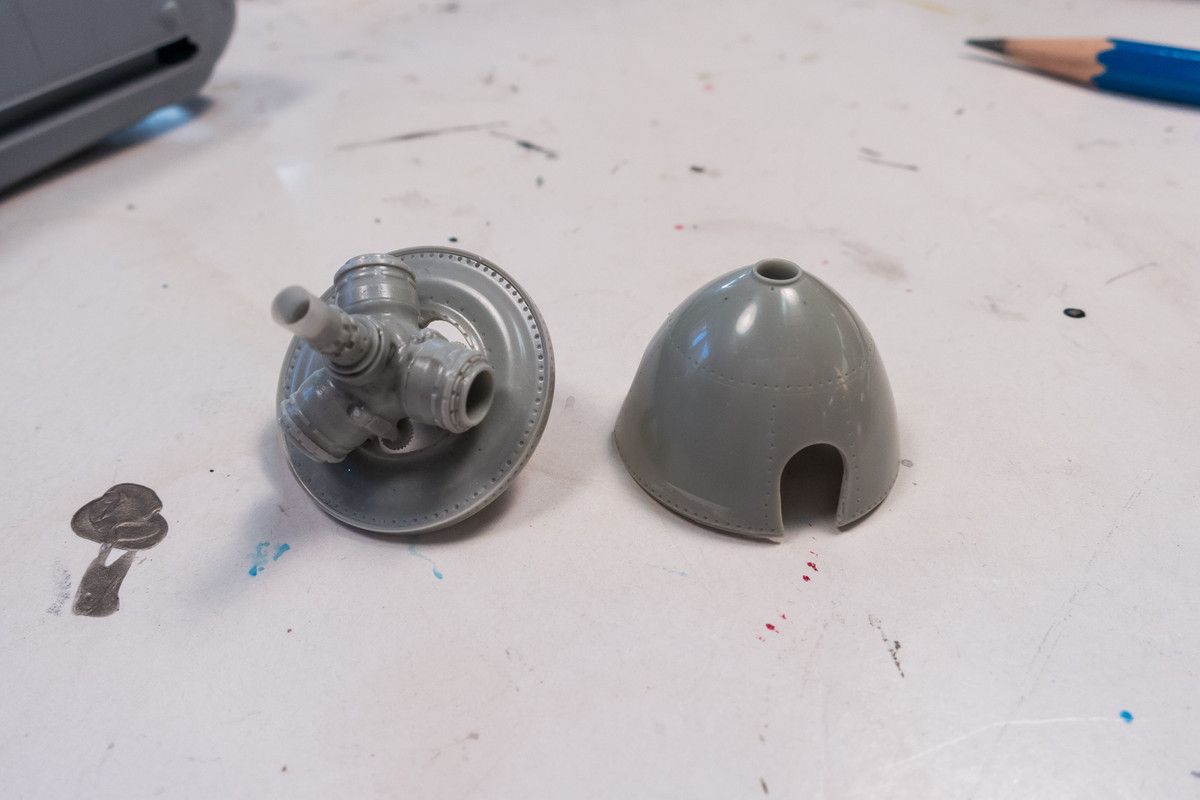
I have the Henri Daehne prop assembled and ready for painting.
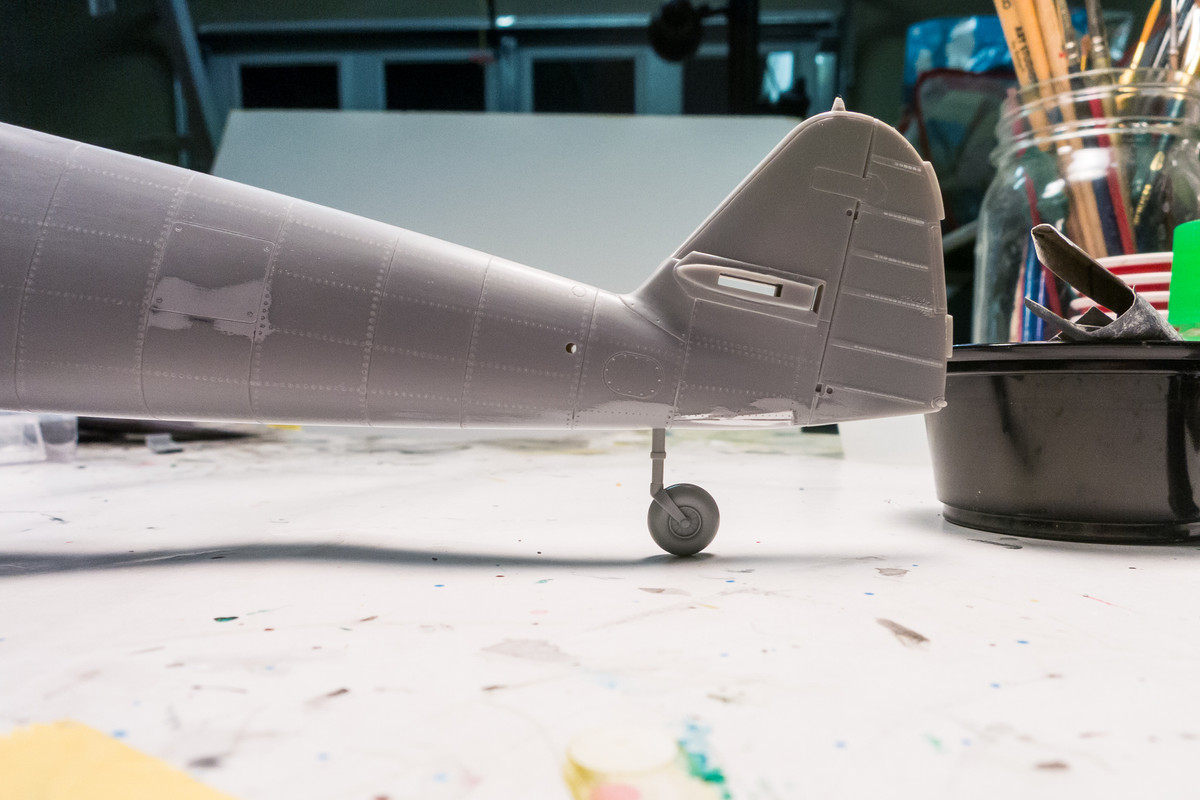
The fuselage seams have been addressed for the most part, so now I can glue the fuselage bottom into place.
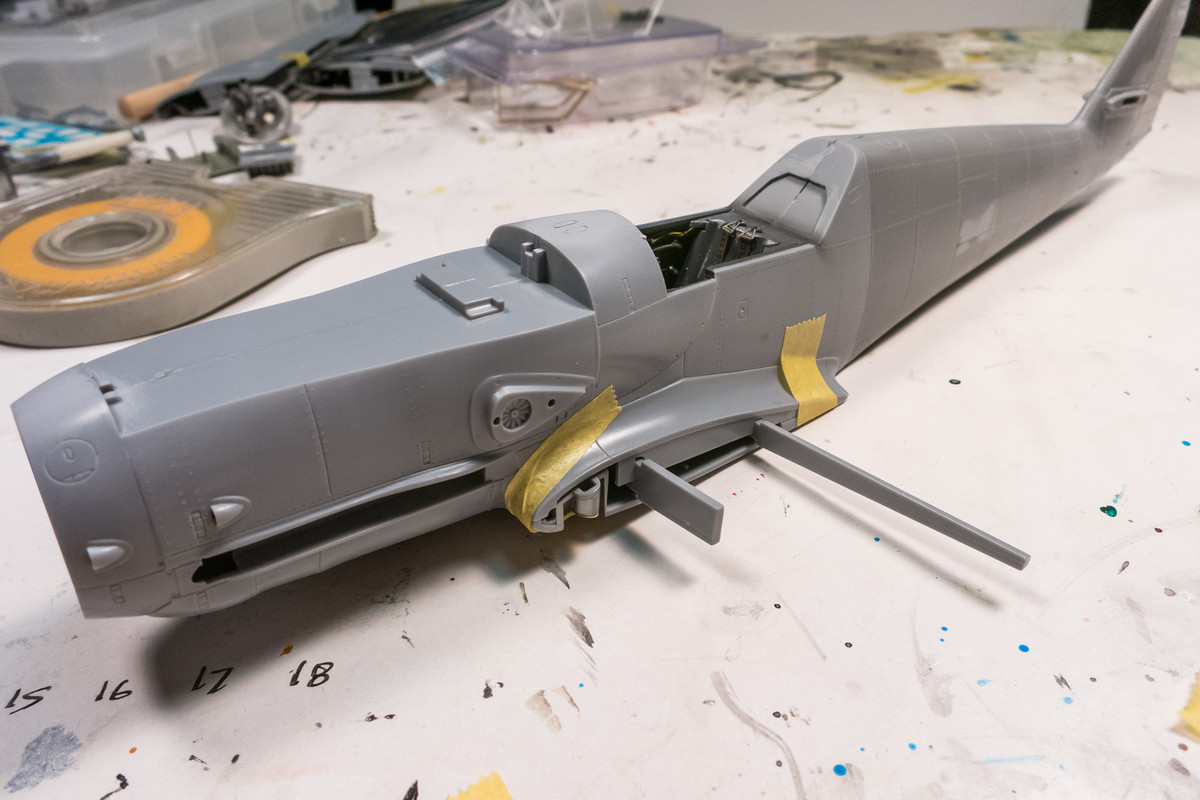
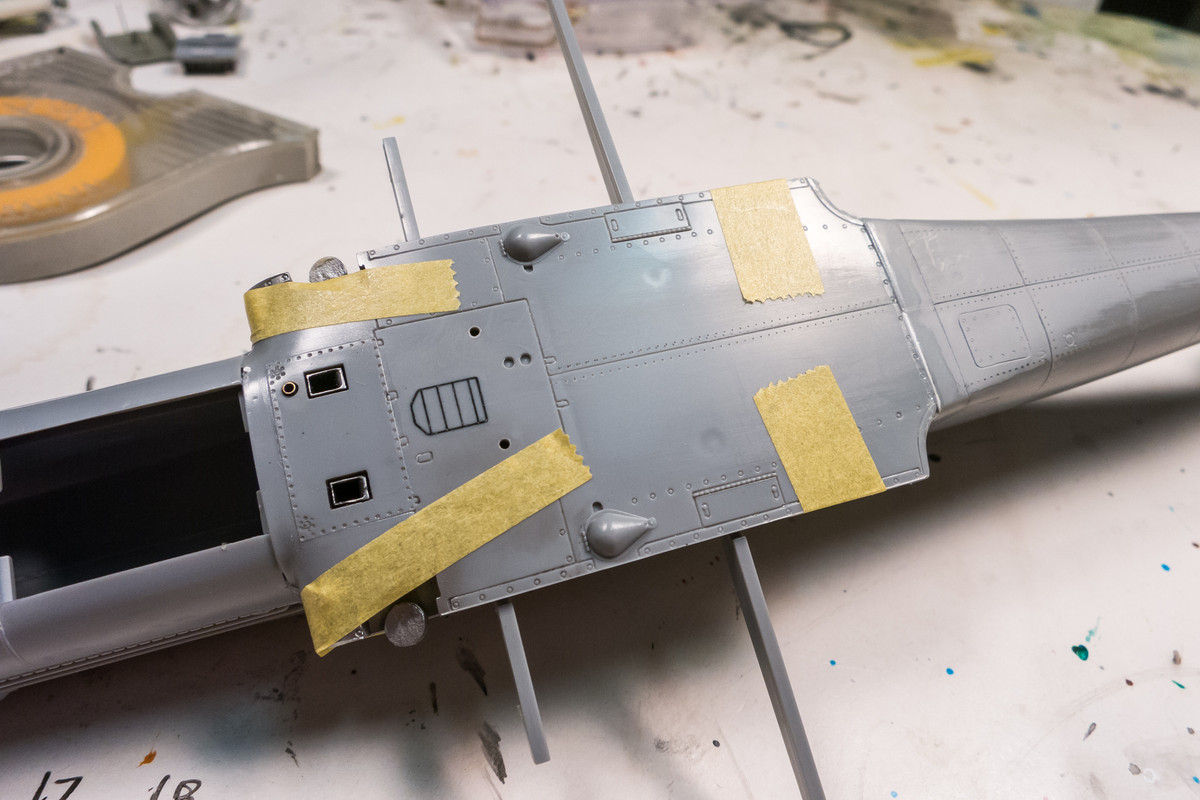
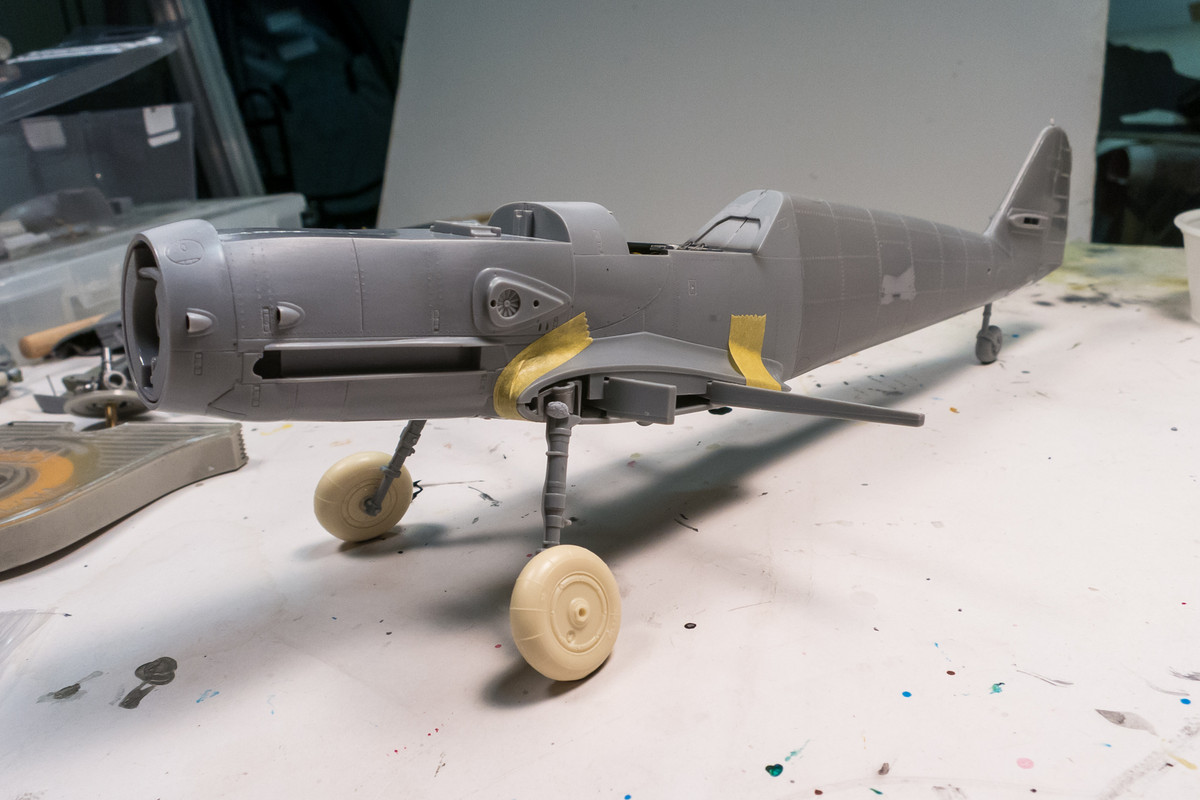
An atypical kit in that the wings are separate. Dry-fitting the landing gear struts and Barracuda resin wheels, I can start thinking about weighting the wheels by sanding a flat spot on the contact areas. I've used a spot of wet paint on a post-it and rested each of the three tires into the paint to help orient where the flat spot should go.
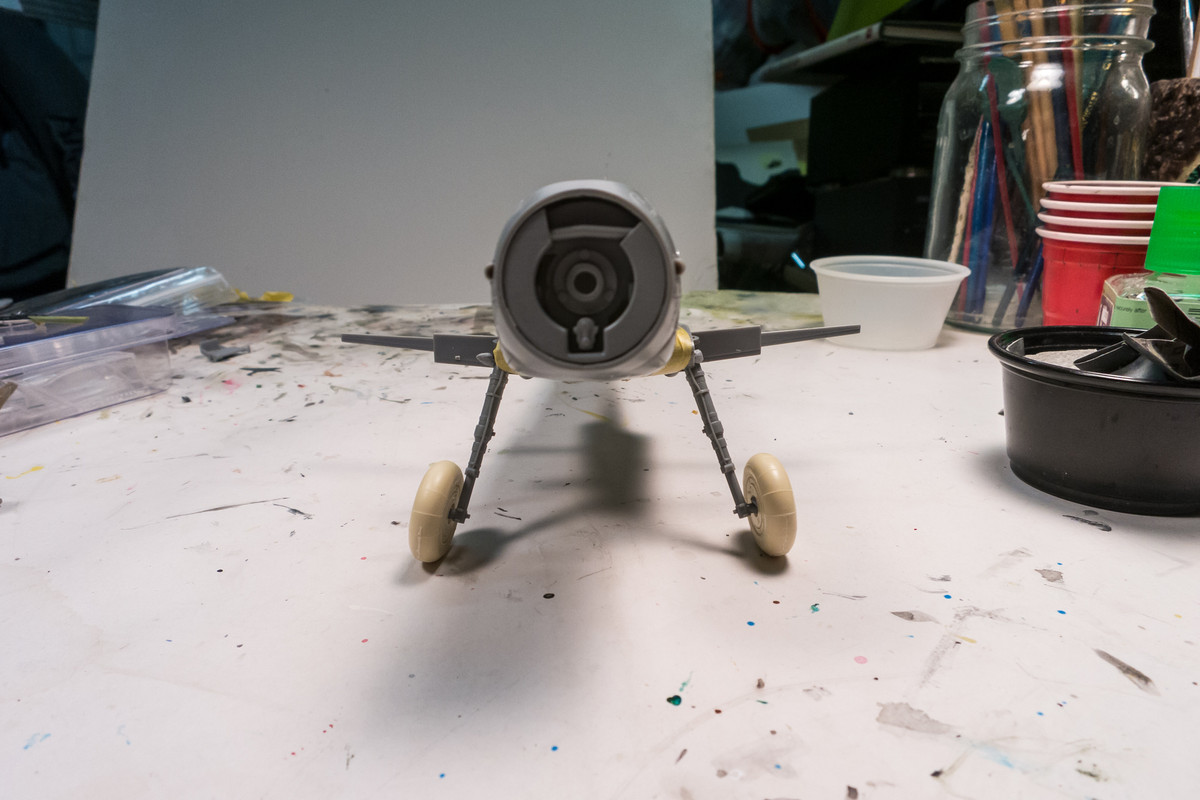
I have the Henri Daehne prop assembled and ready for painting.
The fuselage seams have been addressed for the most part, so now I can glue the fuselage bottom into place.
An atypical kit in that the wings are separate. Dry-fitting the landing gear struts and Barracuda resin wheels, I can start thinking about weighting the wheels by sanding a flat spot on the contact areas. I've used a spot of wet paint on a post-it and rested each of the three tires into the paint to help orient where the flat spot should go.
John aka JKim
-----------<><
-----------<><
Re: 1/32 Hasegawa Bf109K-4 Weisse 8
That pit is beautiful the weathering on the seat is perfect. That's also a nice looking prop going to leave the cone off to show it off?
March as one, Don't look back
Odin's sons... Attack!
Unleash hell! Do not repent! Warfare grants us no lament
Let your weapons slash and tear This is no place for fear
Hold the lines! Move as one! In unity our victory's won
Our shields will form a mighty wall
United we shall never fall
Odin's sons... Attack!
Unleash hell! Do not repent! Warfare grants us no lament
Let your weapons slash and tear This is no place for fear
Hold the lines! Move as one! In unity our victory's won
Our shields will form a mighty wall
United we shall never fall
Re: 1/32 Hasegawa Bf109K-4 Weisse 8
Thanks Clint! Unfortunately, the spinner needs to be firmly attached to the backplate with glue so the prop hub is going to be covered up.
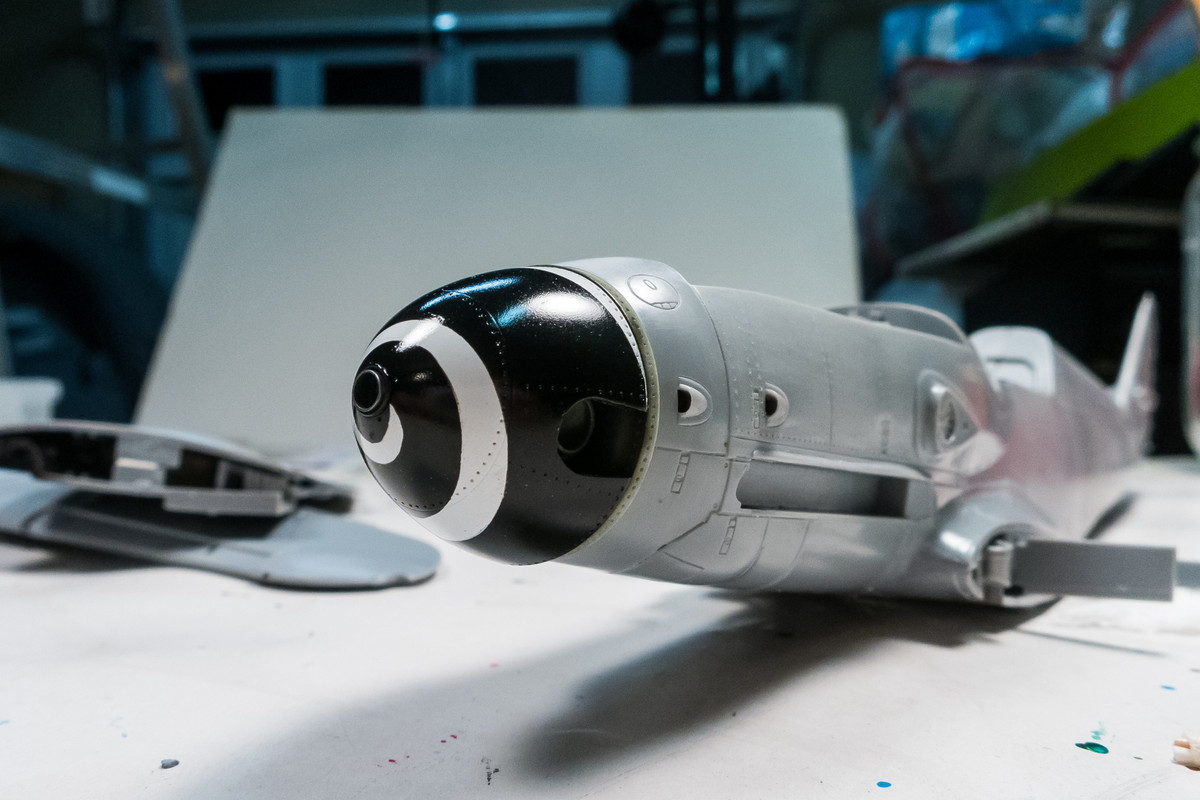
Speaking of the spinner, I've gone ahead and painted it. First comes a coat of white.
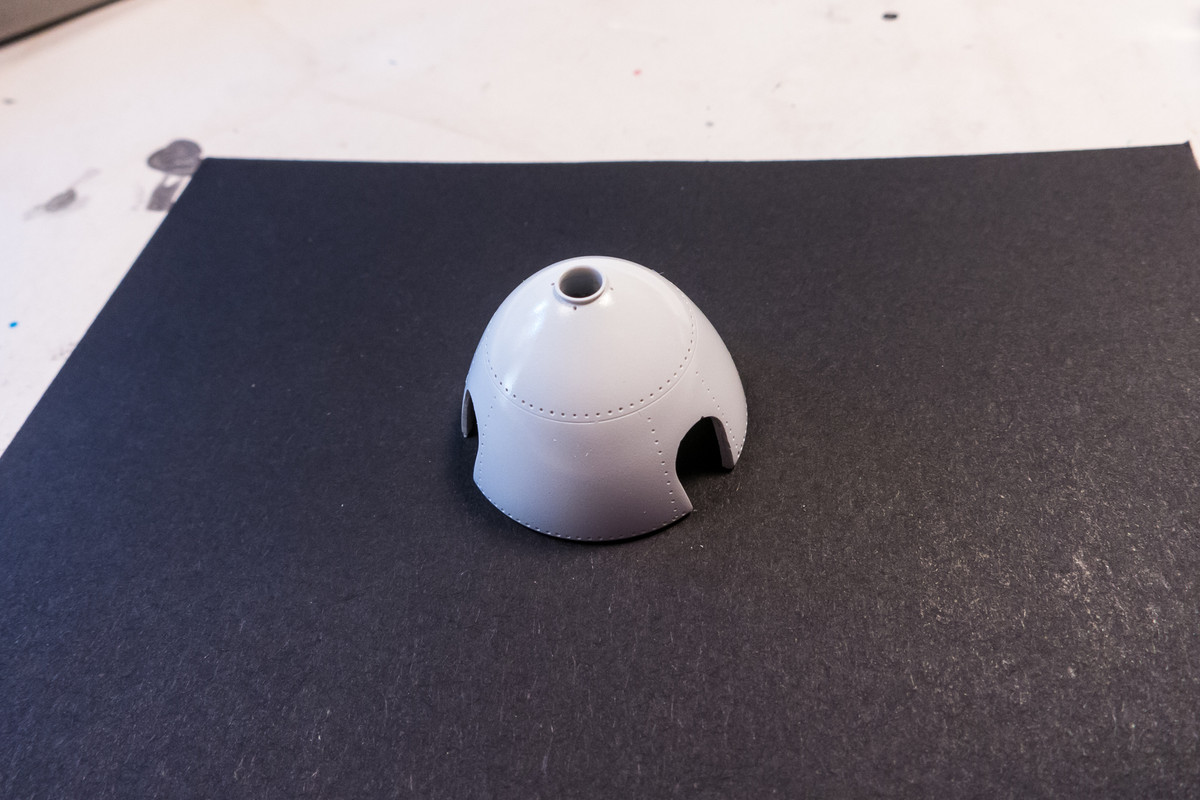
I digitized some spirals off decal sheets and made masks using the Silhouette cutter. For some reason, the DXF files that I export from AutoCAD resolve my spirals (which are comprised of compound curves) into a bunch of straight lines. So the spiral came out a bit choppy in some areas.
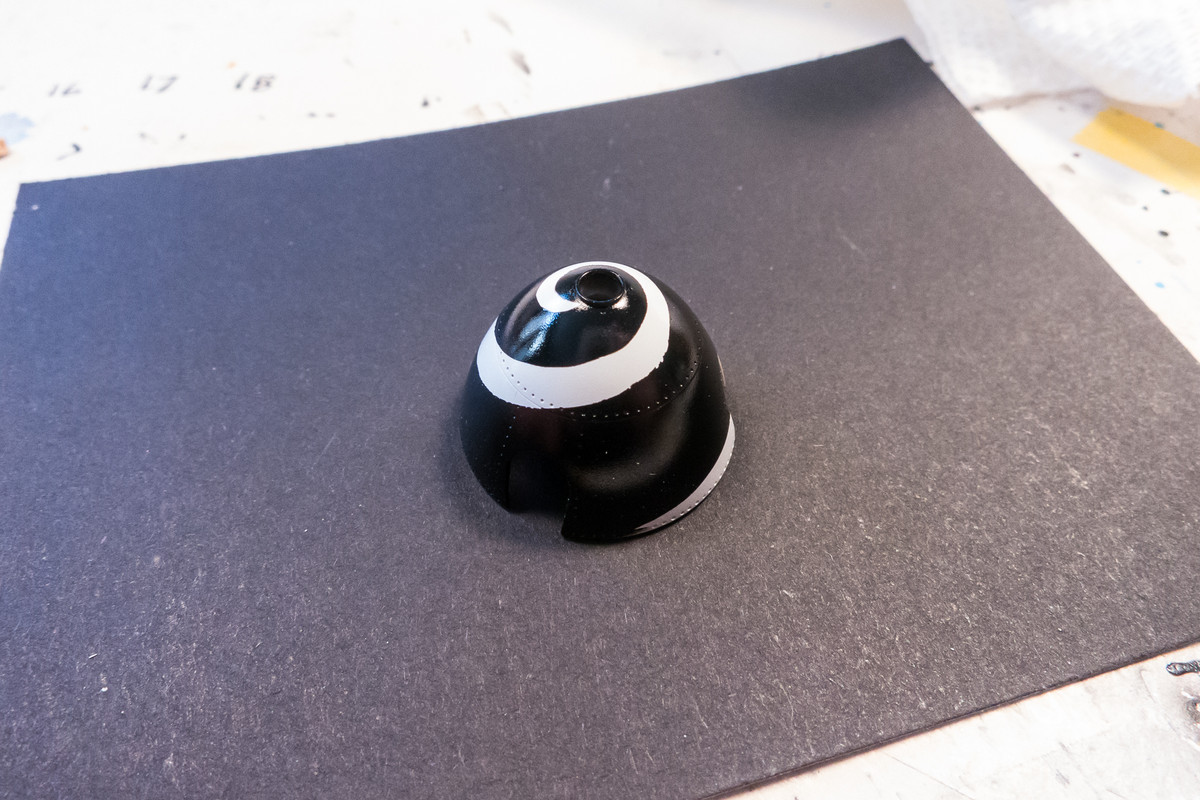
Using bits of Tamiya plastic tape, I cleaned up the spiral as best as I could. The prop hub was painted too.
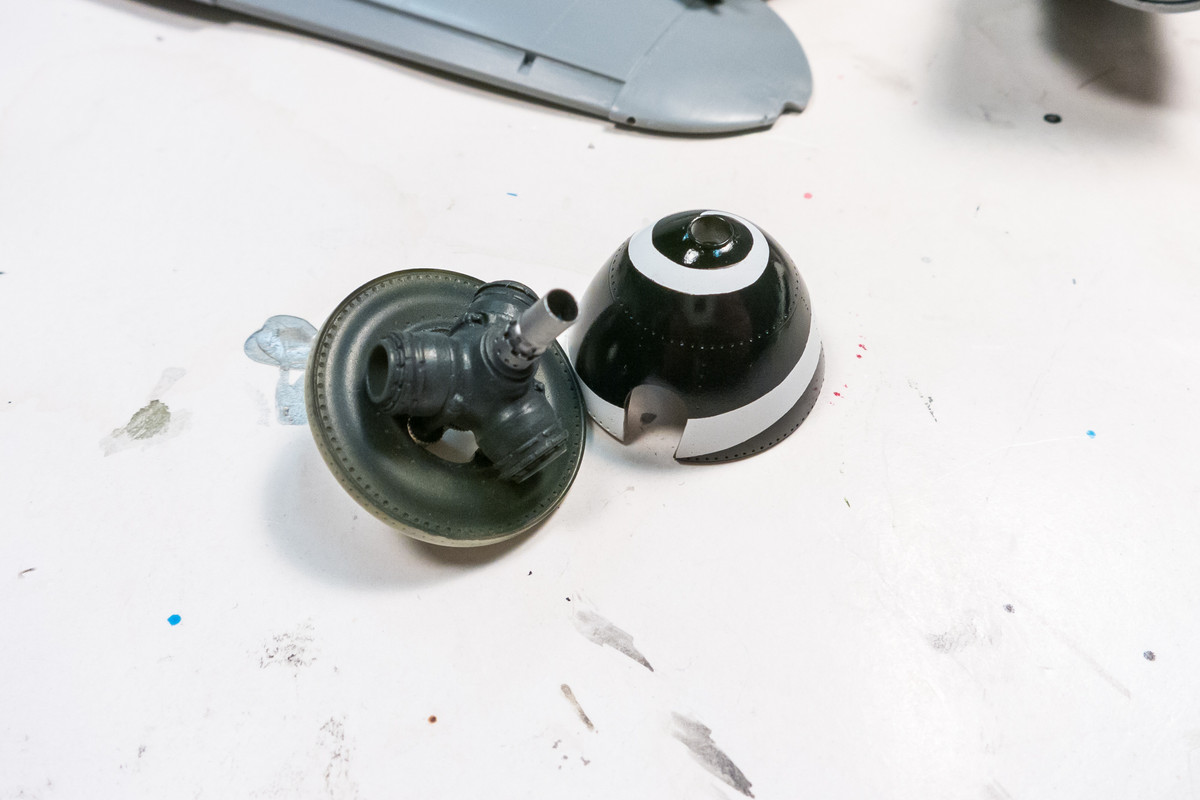
A preview of the spinner mounted on the fuselage!
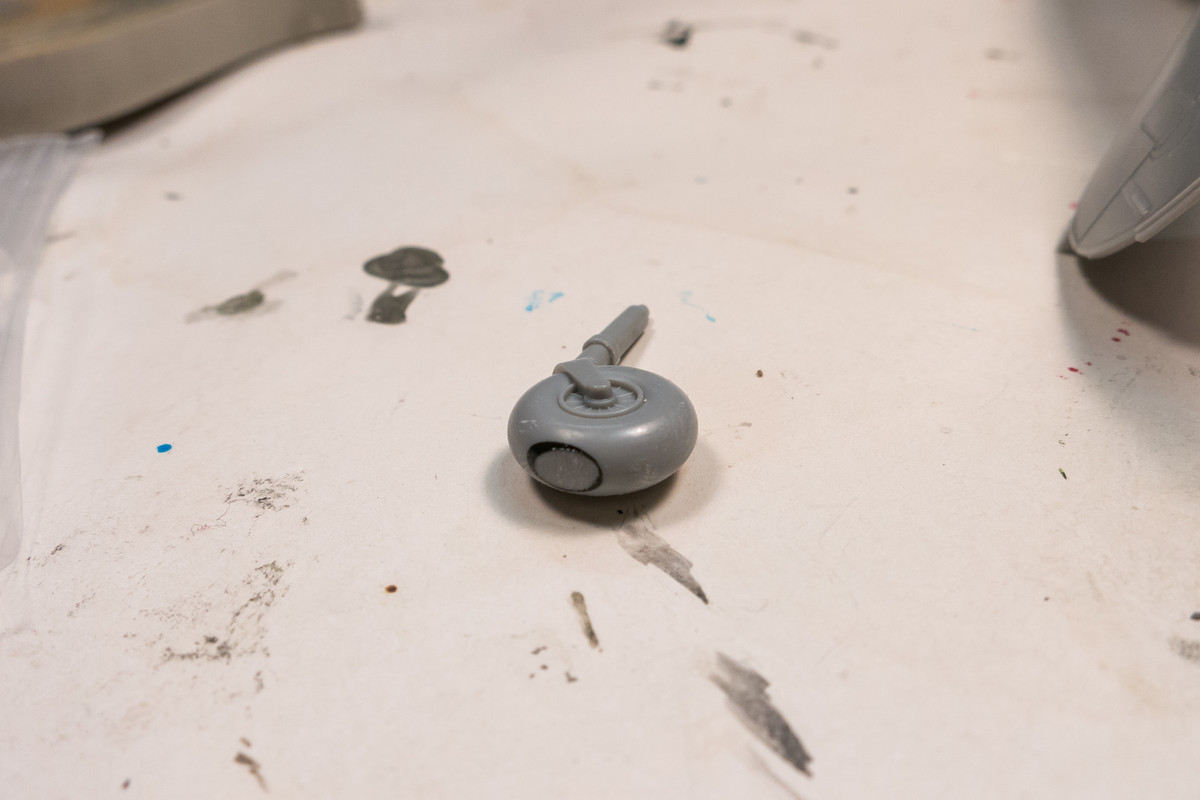
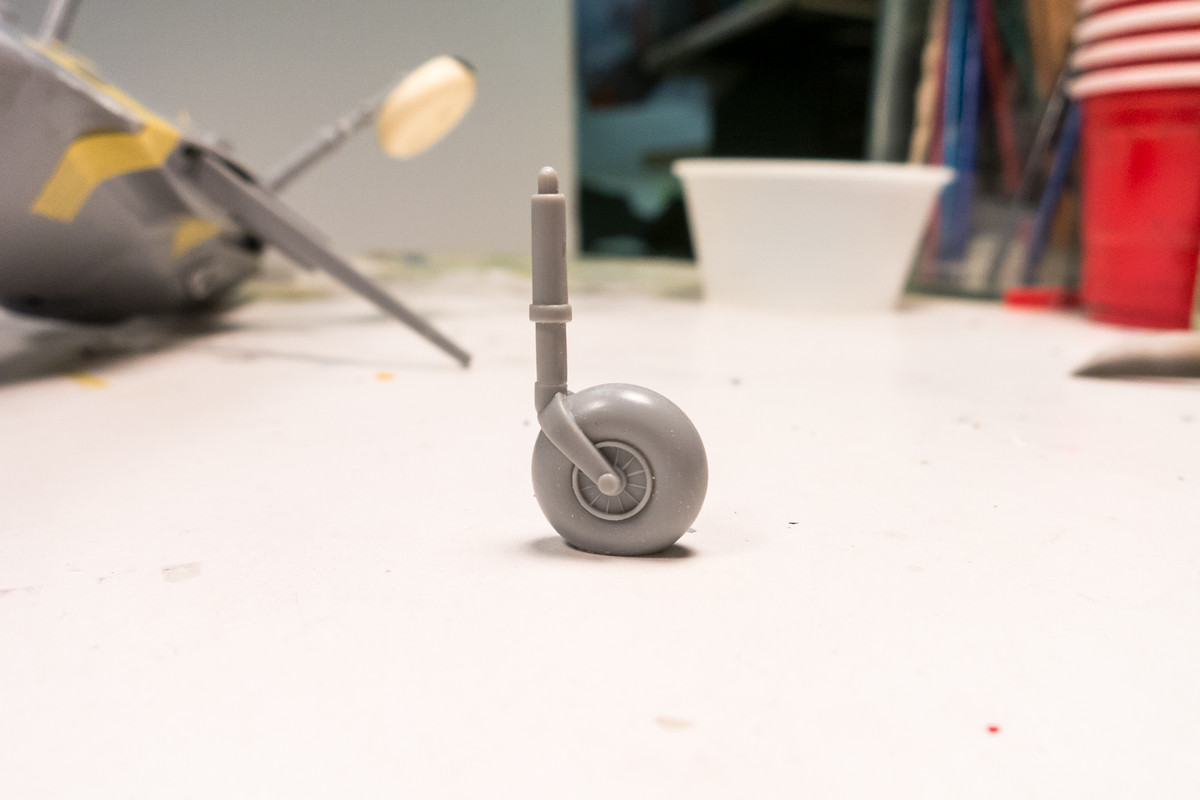
Here is the tailwheel after I've sanded a flat spot on it to represent weight on the wheel.
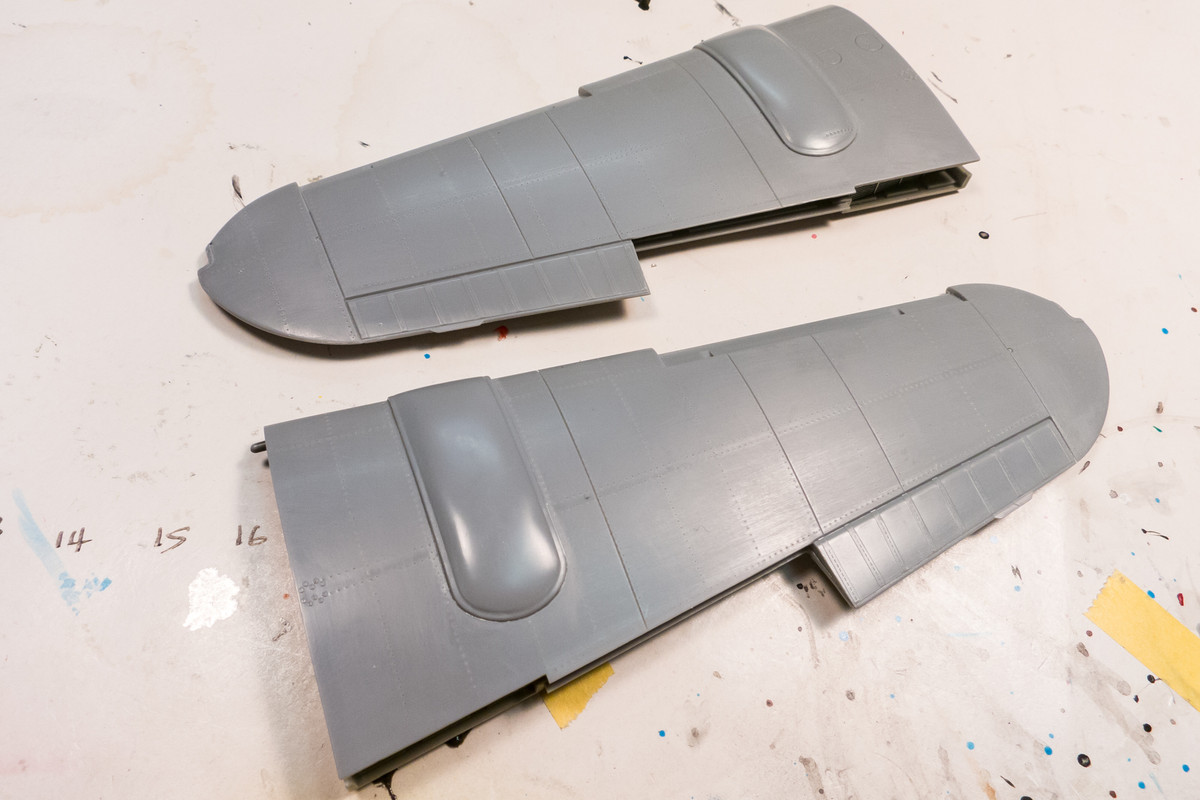
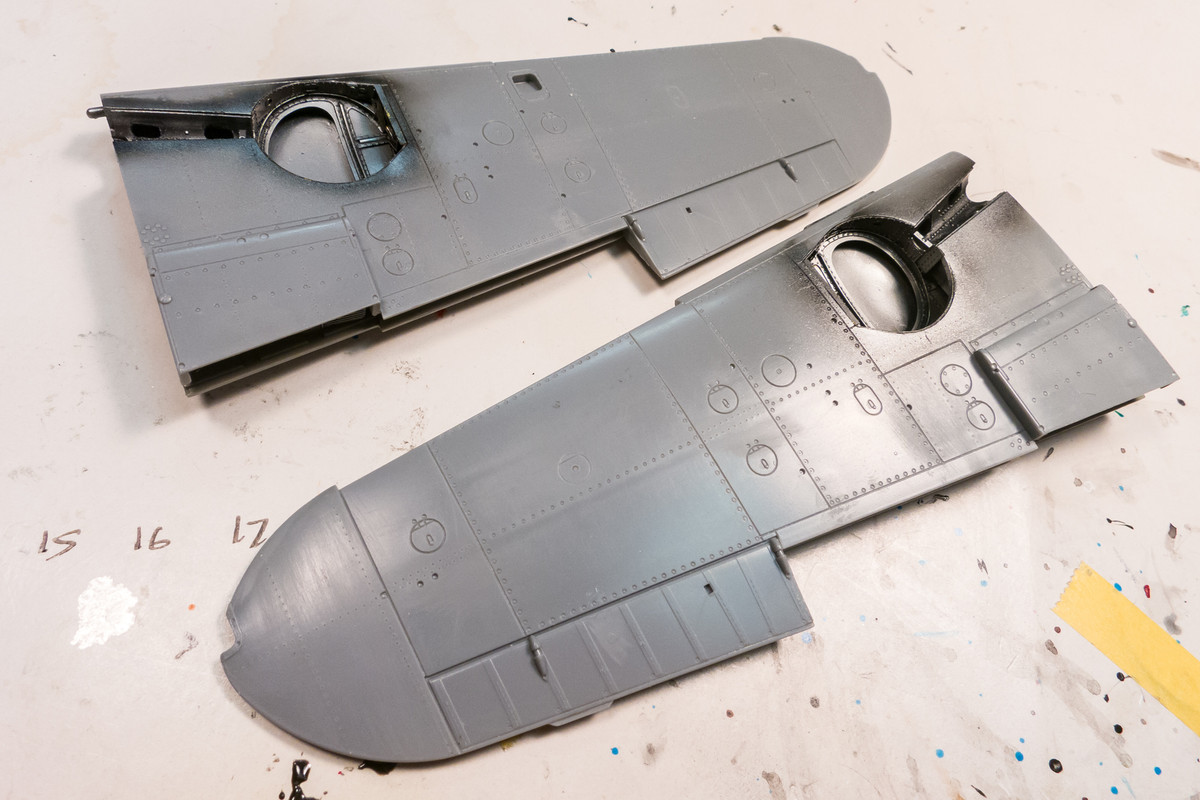
The wings have been glued together.
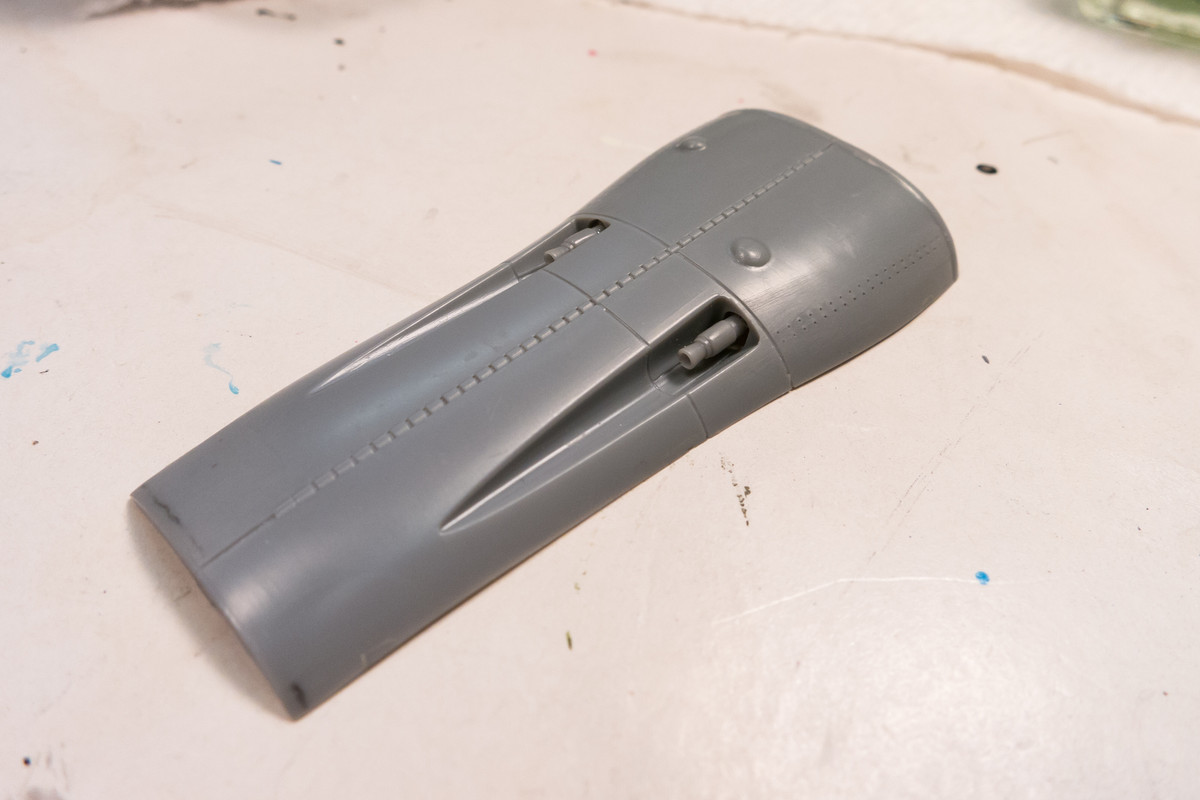
Finally, we have the gun cowling with the gun barrels glued into place. I'll have to paint these at the end but it should be easy since I made sure they don't touch the gun troughs.
Speaking of the spinner, I've gone ahead and painted it. First comes a coat of white.
I digitized some spirals off decal sheets and made masks using the Silhouette cutter. For some reason, the DXF files that I export from AutoCAD resolve my spirals (which are comprised of compound curves) into a bunch of straight lines. So the spiral came out a bit choppy in some areas.
Using bits of Tamiya plastic tape, I cleaned up the spiral as best as I could. The prop hub was painted too.
A preview of the spinner mounted on the fuselage!
Here is the tailwheel after I've sanded a flat spot on it to represent weight on the wheel.
The wings have been glued together.
Finally, we have the gun cowling with the gun barrels glued into place. I'll have to paint these at the end but it should be easy since I made sure they don't touch the gun troughs.
John aka JKim
-----------<><
-----------<><
Re: 1/32 Hasegawa Bf109K-4 Weisse 8
Again that is a beautiful looking prop. The spiral looks spot on to me.
March as one, Don't look back
Odin's sons... Attack!
Unleash hell! Do not repent! Warfare grants us no lament
Let your weapons slash and tear This is no place for fear
Hold the lines! Move as one! In unity our victory's won
Our shields will form a mighty wall
United we shall never fall
Odin's sons... Attack!
Unleash hell! Do not repent! Warfare grants us no lament
Let your weapons slash and tear This is no place for fear
Hold the lines! Move as one! In unity our victory's won
Our shields will form a mighty wall
United we shall never fall