Re: Revell 1/32 F-4G Review & Build- update 12/03 (pg.18)
Posted: Tue Dec 13, 2016 2:42 pm
Well, with the holidays fast bearing down upon us, my time at the bench has been cut back quite a bit. And most of my work has been sanding and seam clean up, as well as scribing to replace lost detail due to those activities. I have almost finished up that task. The intakes require quite a bit of work, especially on the bottom surface. I will take photos of that once I have it doe, but there was quite a few tiny "steps" there that I could not quite avoid, no matter how much test fitting I did in assembly.
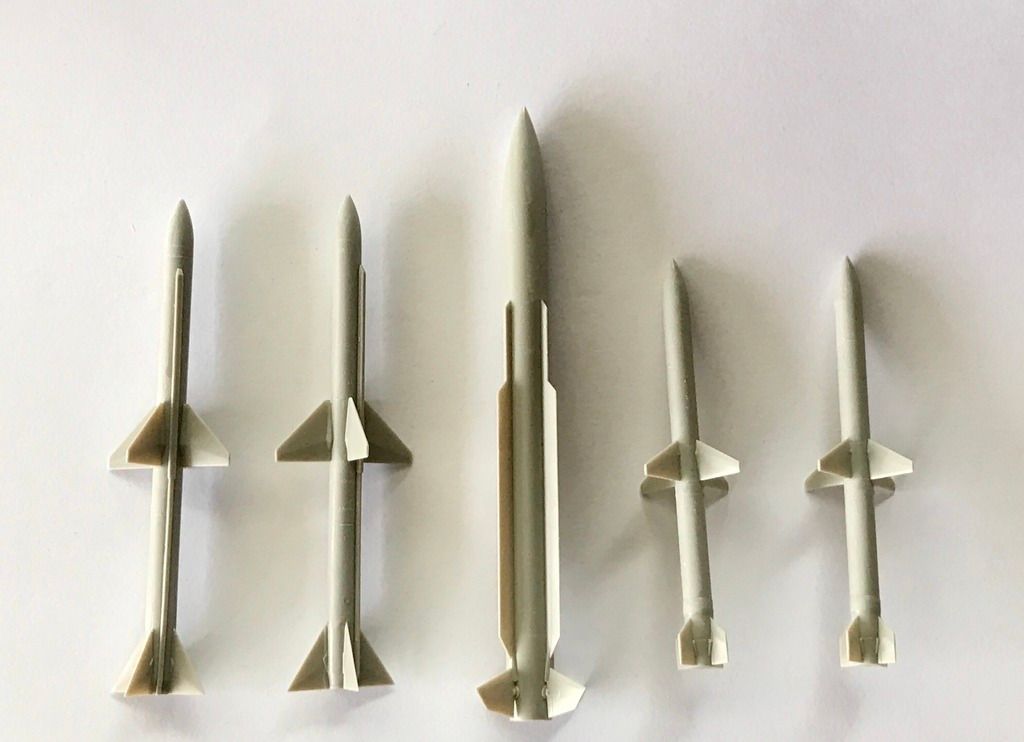
But... I did get all the missiles cleaned up, and boy are those beautiful. It seems a shame that I will not use them on the completed build. But I will paint them up, at least for a display shot...
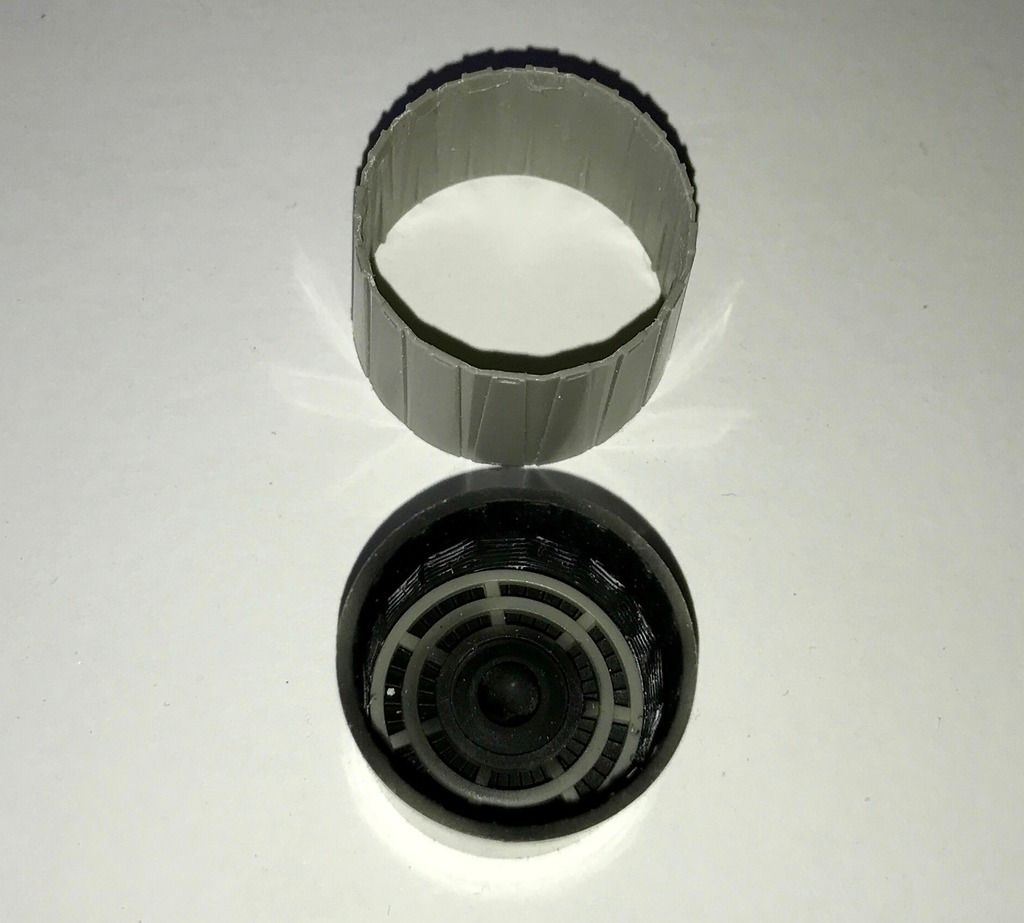
and I did do a bit of work on the inner face area of the afterburner cans. On the real J-79, there are grooves running circumferentially around each of the corrugations that are not present on the kit part. So I dragged a razor saw across each arch to give a representation of that. And I cleaned up some mold seam lines on the inner face of the afterburner petals with mu needle files. Tedious and time consuming, but they really improve the look of these parts and now they are ready for painting.
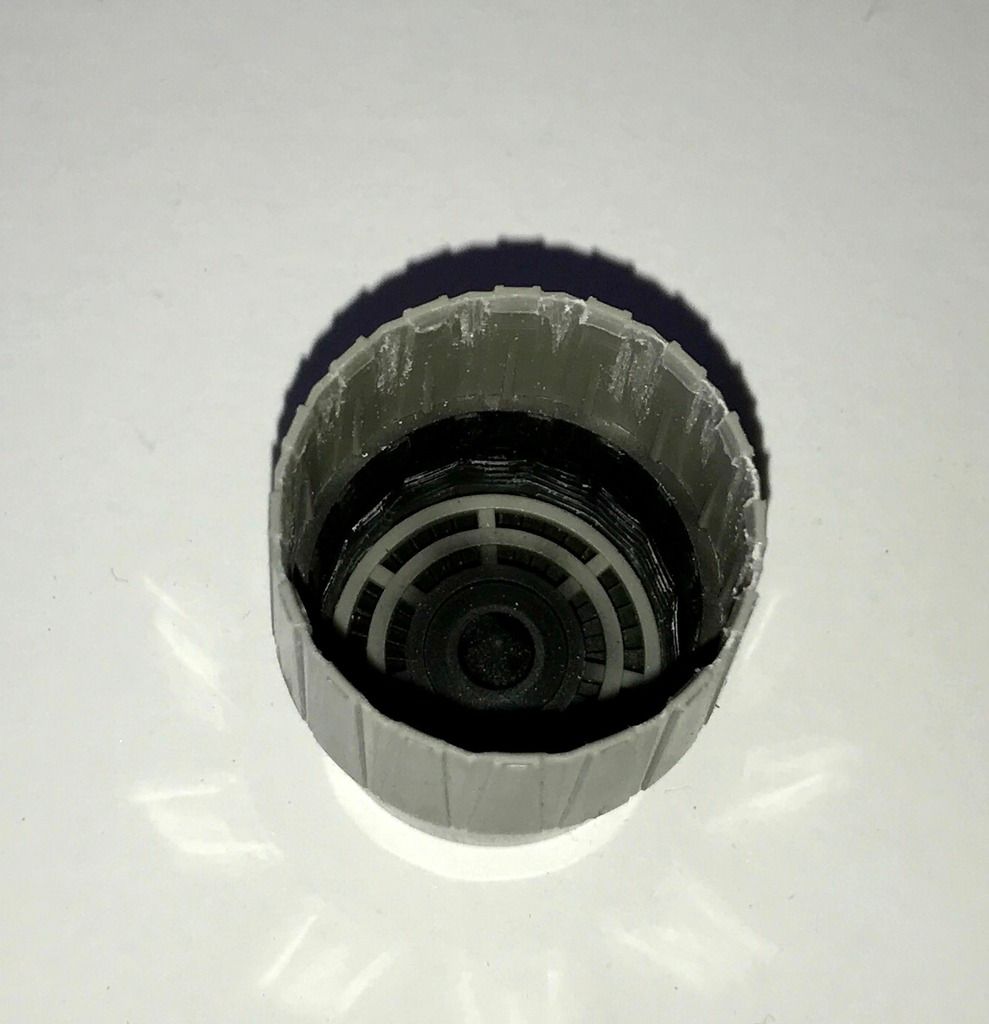
here's the real deal in there...
https://www.cybermodeler.com/aircraft/f ... -4g_29.jpg
But... I did get all the missiles cleaned up, and boy are those beautiful. It seems a shame that I will not use them on the completed build. But I will paint them up, at least for a display shot...
and I did do a bit of work on the inner face area of the afterburner cans. On the real J-79, there are grooves running circumferentially around each of the corrugations that are not present on the kit part. So I dragged a razor saw across each arch to give a representation of that. And I cleaned up some mold seam lines on the inner face of the afterburner petals with mu needle files. Tedious and time consuming, but they really improve the look of these parts and now they are ready for painting.
here's the real deal in there...
https://www.cybermodeler.com/aircraft/f ... -4g_29.jpg