Page 20 of 44
Re: 1/32 Hasegawa Fw190D-9 Red One
Posted: Sat Dec 08, 2018 8:53 am
by Stikpusher
I like the replaced wire for the engine plug. It certainly looks more “in scale” than the replaced piece. And those were wise choices to alter the assembly sequence for the tail attachment sequence, and come back to the wing riveting after rest with a fresh eye and mind.
Re: 1/32 Hasegawa Fw190D-9 Red One
Posted: Sat Dec 08, 2018 10:23 am
by BlackSheep214
A smart move to deviate from the instruction guide. Sometimes it makes sense to do what you did to ensure a better fit. I often do this on my builds in the past (present and my youth years) and it does work.
Re: 1/32 Hasegawa Fw190D-9 Red One
Posted: Sat Dec 08, 2018 12:55 pm
by Stikpusher

Oh yes... on my Dragon Challenger, they would have one install the tracks last... with all the stuff in the way that would be a serious challenge...
Re: 1/32 Hasegawa Fw190D-9 Red One
Posted: Sat Dec 08, 2018 5:15 pm
by KennyX
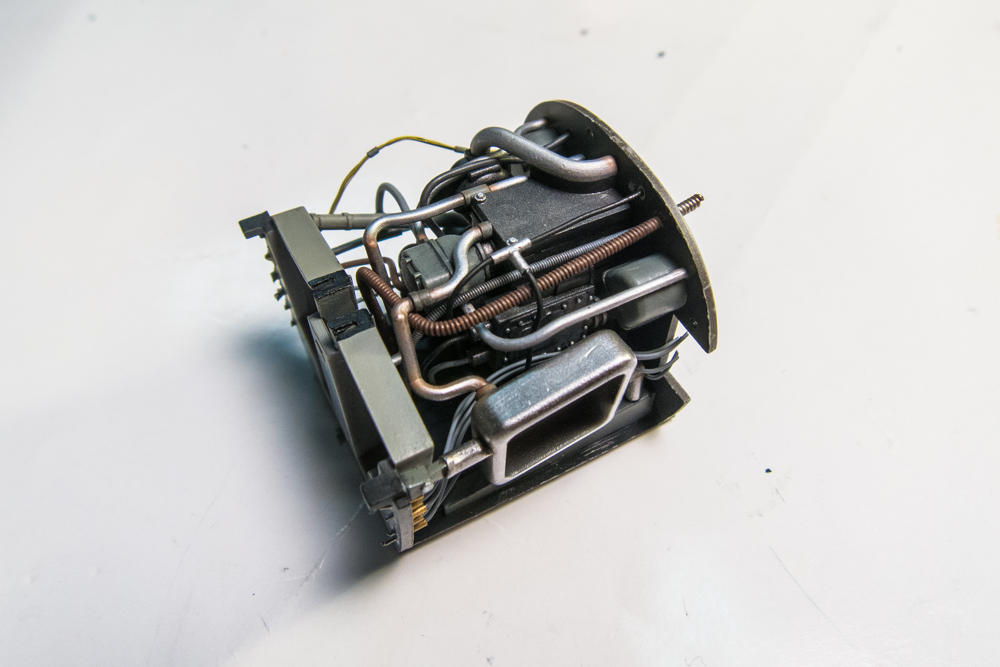
Gee freakin’ wiz that could not have been easy. The engine looks great. I really like the extra work you put into that wiring and plumbing.
Re: 1/32 Hasegawa Fw190D-9 Red One
Posted: Sat Dec 08, 2018 6:15 pm
by jkim
Thanks guys! Yes, Carlos, a little more "in-scale" was the effect I was after when I changed out the wiring.
Man, a free Saturday and I'm really rolling on this build! Not in the mo
![Image]()
od to rivet so I busied myself with other things that needed to be done. The gooey joint between the starboard fuselage and tail was the first thing I tackled this morning.
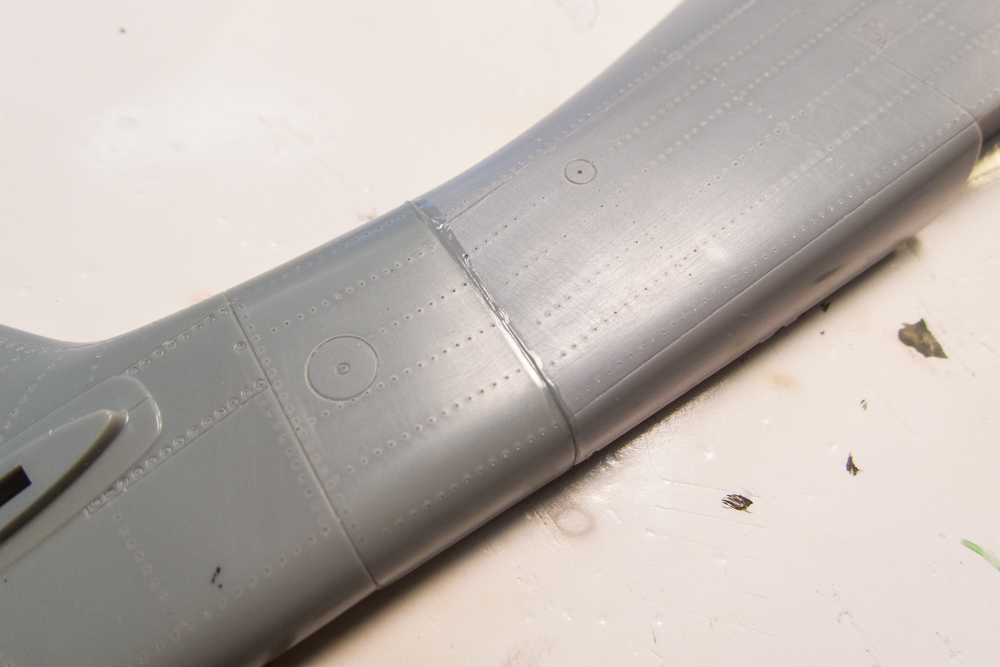
Pretty easy job of sanding the joint down and then refreshing the panel line and adding rivets along either side of the panel line.
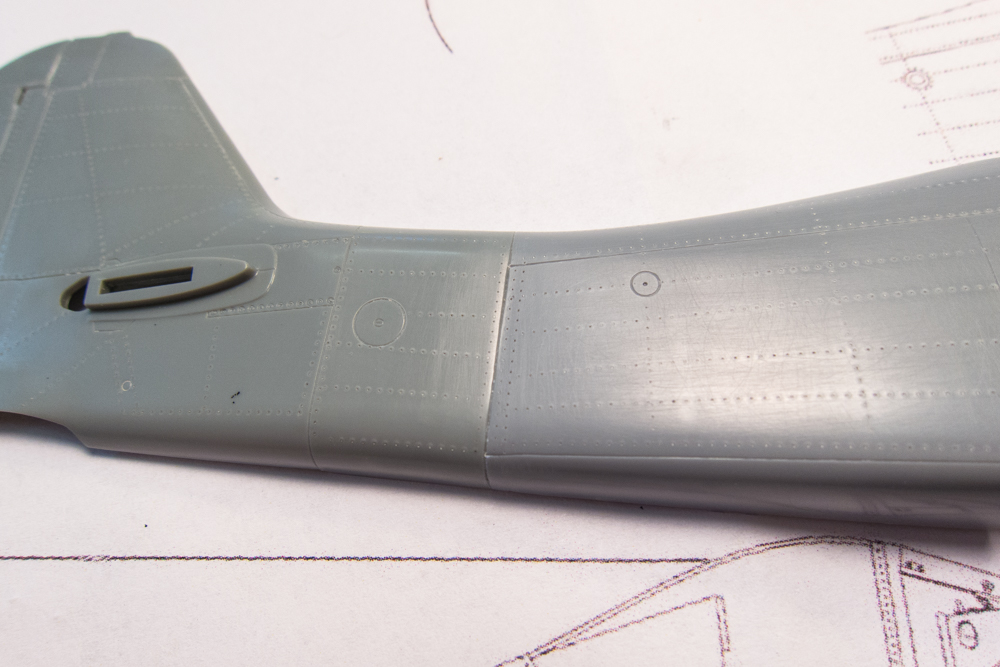
The port side was neater so clean-up was a piece of cake.
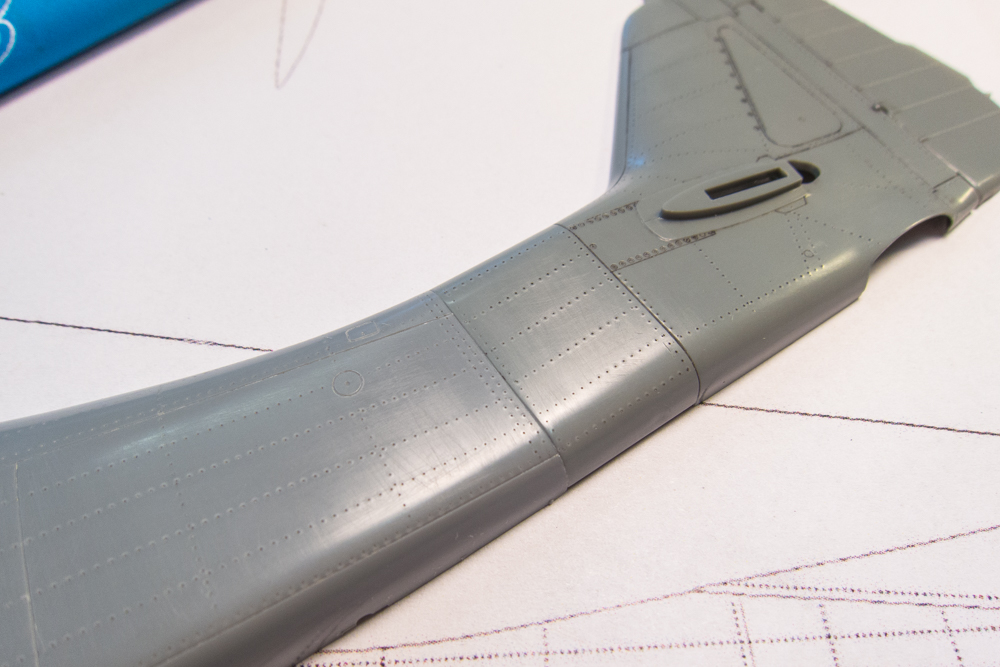
The supercharger intake was glued on. I did it now so that it would be easier to access the joint, which needs to be filled in completely. I didn't document it but the interior of the supercharger scoop and base were painted. While I was doing to black base coat, I went ahead and filled in the exhaust openings with black too.
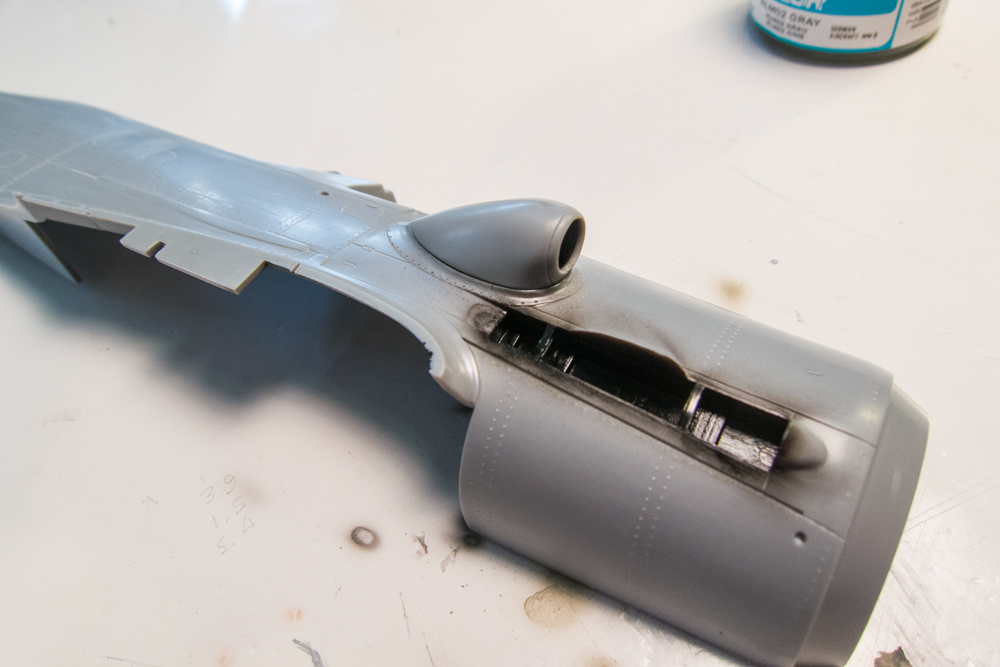
Making sure that the fuselage halves fit ok. Can't see it but I've drilled a tiny hole in the tip of the pointy aerial mast at the top of the tail. I'm just waiting for it to get snapped at some during construction.
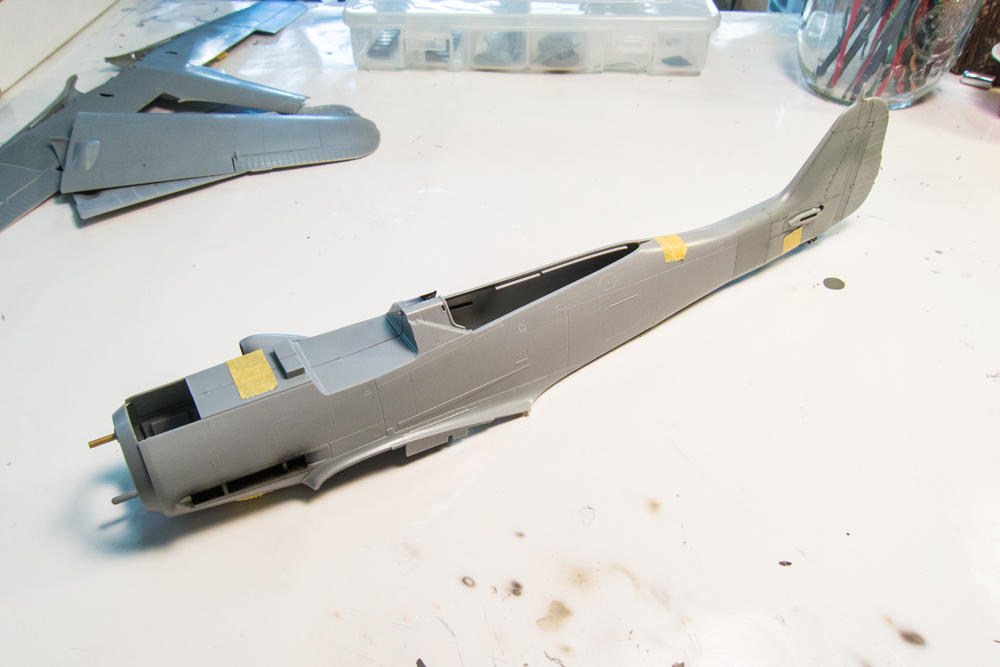
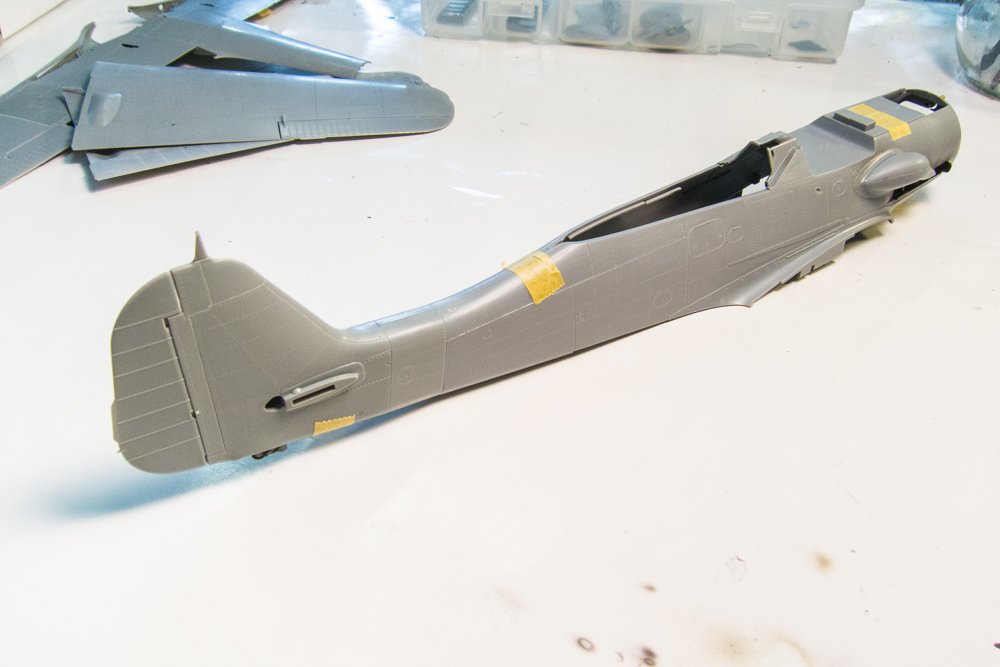
More checking... I want to see how the completed engine plug looks in place.
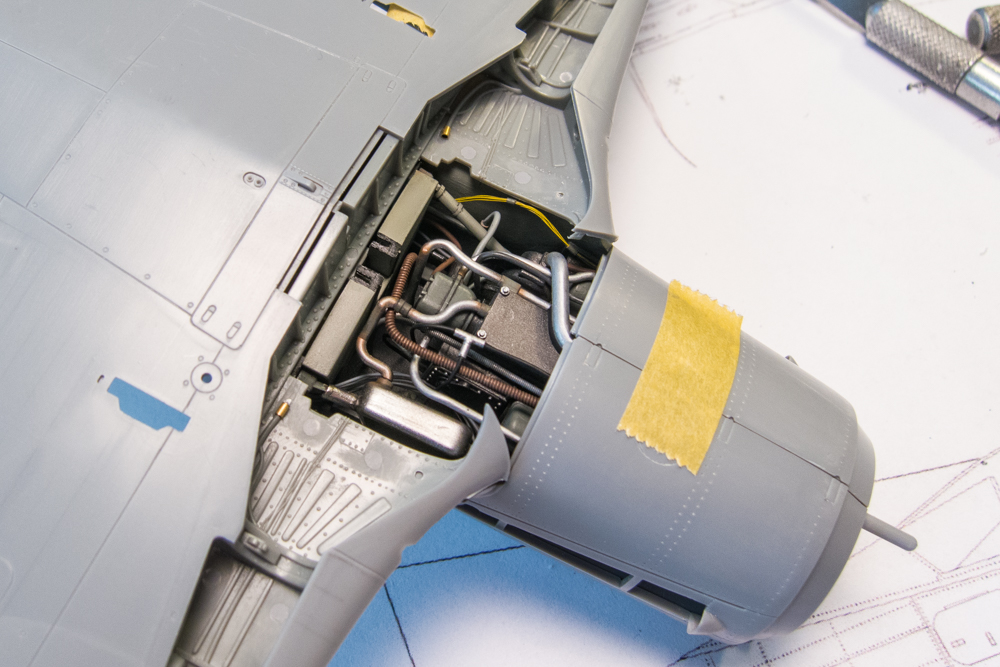
The small center wing panel covers a lot but you can still see a good amount of the plumbing.
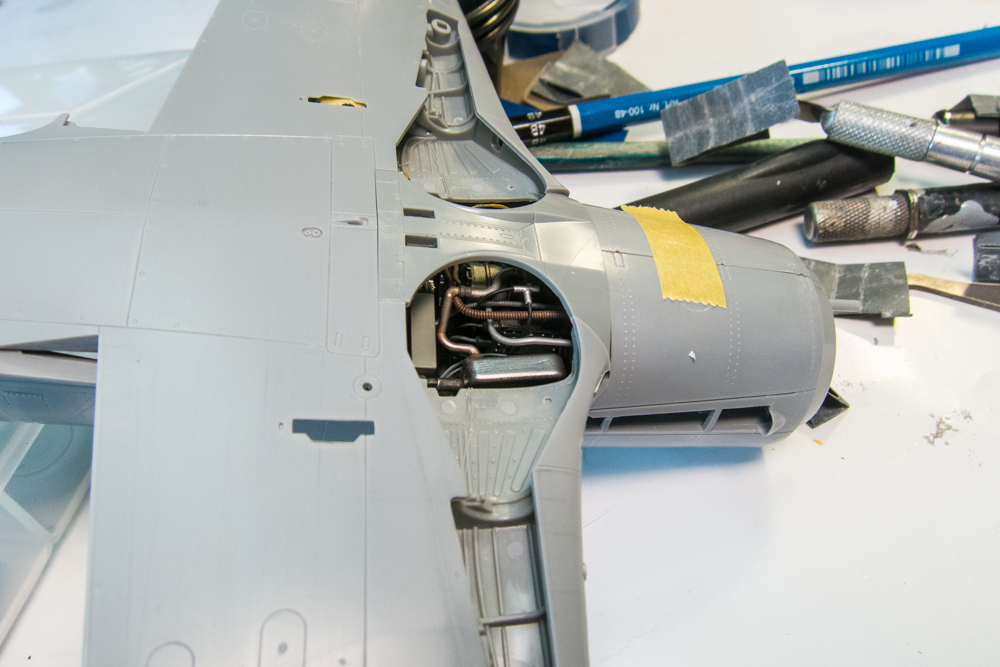
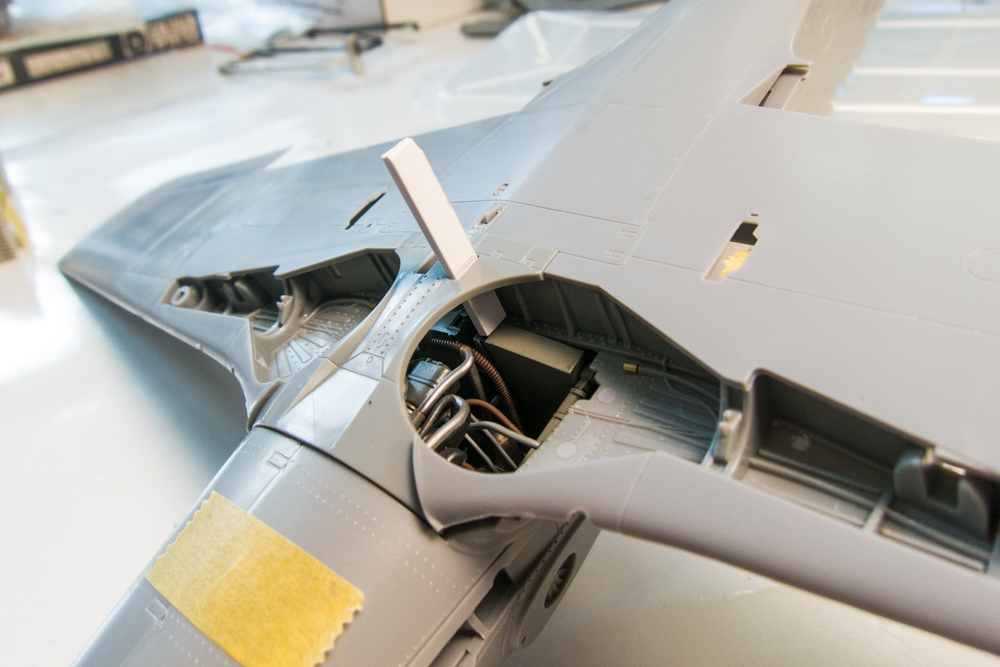
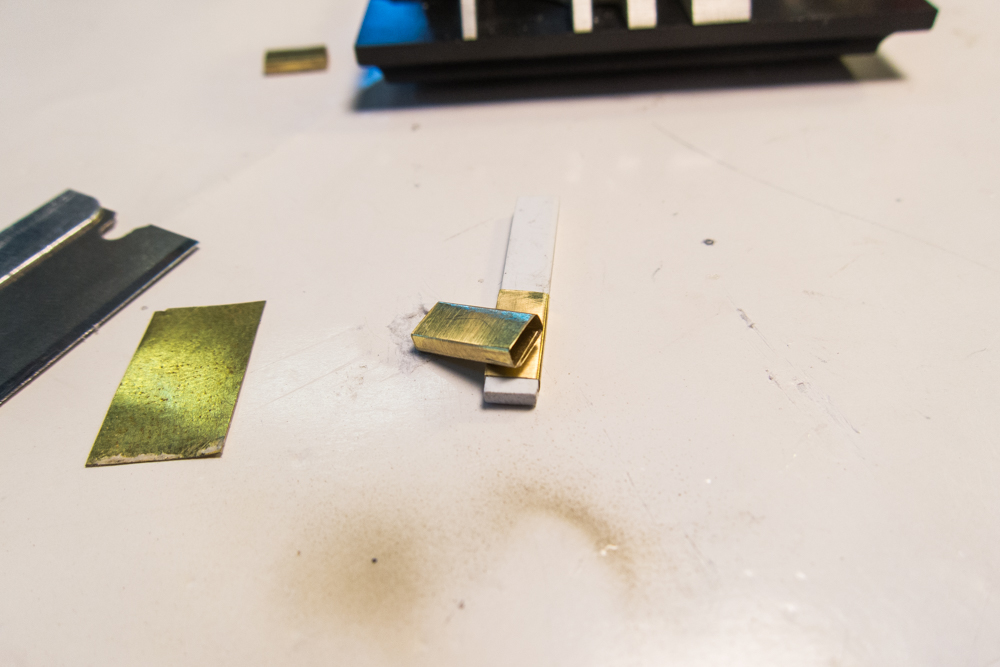
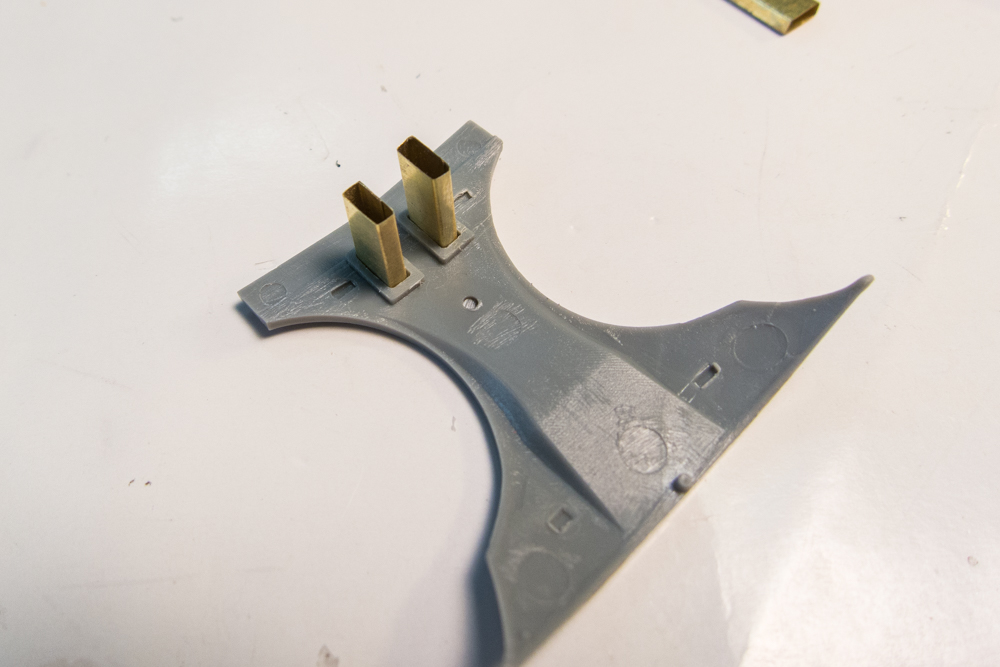
Dry-fitting the engine plug gives me the opportunity to fashion a set of hollow ammo chutes. I use a section of plastic sheet that has the same cross-section (but slightly smaller) as the ammo chute opening in the center wing panel. This will be used as a jig to form the ammo chutes and can also be marked to estimate how long they need to be.
The little scoop is glued onto the gun cowling. The end has been hollowed out with an x-acto blade, similar to how I did the exhaust pipes. I've also glued the gun barrels into place. Keeping the barrels completely clear of the cowl openings will make painting them at the end a lot easier.

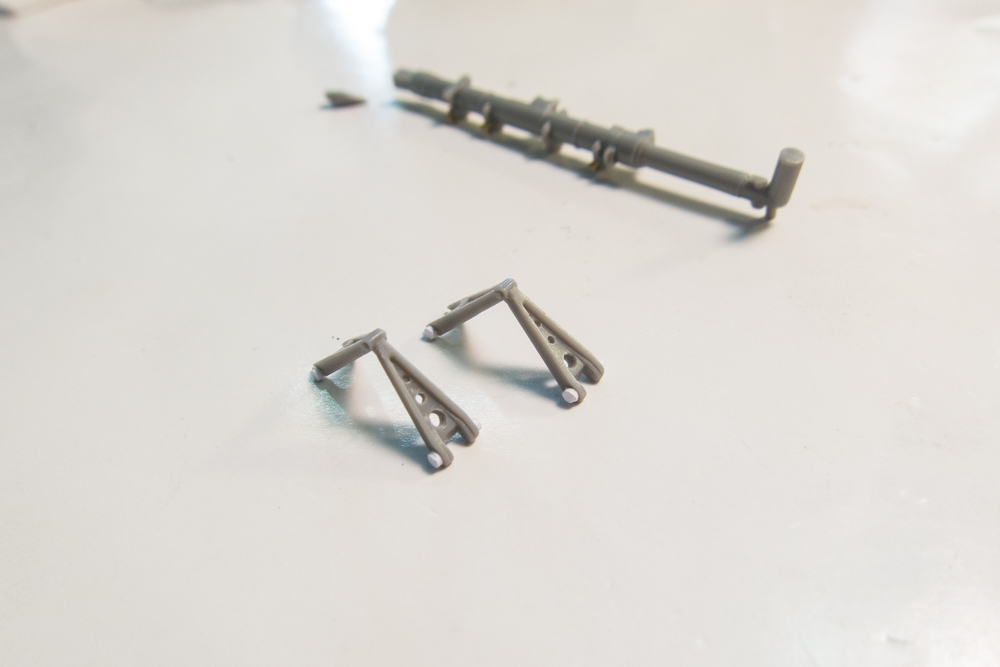
The landing gear oleo scissors have been enhanced by drilling out holes and adding pieces of punched out sheet styrene as bolts. The scissors and brake line will be added after painting. This will make the painting process easier, especially the masking of the shiny metal strut. I'm taking advantage of the familiarity of this kit, having built it three times now.
Re: 1/32 Hasegawa Fw190D-9 Red One
Posted: Sat Dec 08, 2018 8:36 pm
by BlackSheep214
I know the feeling of something breaking off during assembly. I’m surprised you didn’t opt to go with using metal gun barrels. Either way, it still looks pretty spectacular.
Re: 1/32 Hasegawa Fw190D-9 Red One
Posted: Sat Dec 08, 2018 10:46 pm
by speedgraflex
That actually is a fabuloso idea to punch bolt heads from styrene card, John! Wow! I am still studying one post back when you glued the tail sections on the fuselage... but wow! Double wow! Triple wow! Infinite wow factor! Add in ammo chutes formed by brass... is that a NWSL Chopper you are using? I’m trying to locate that and the rest of my Dad’s small tools. Those chutes are gorgeous and align perfectly. What a great day for you, and incredible fun and educational benefits for those following you! Cheers!
Re: 1/32 Hasegawa Fw190D-9 Red One
Posted: Sun Dec 09, 2018 9:36 am
by Handiabled
I have often thought about building kits that I had visited before for the sake of the " if I knew then what I know now " factor... This looks stunning so far!!
Re: 1/32 Hasegawa Fw190D-9 Red One
Posted: Sun Dec 09, 2018 11:56 pm
by jkim
BlackSheep214 wrote:I know the feeling of something breaking off during assembly. I’m surprised you didn’t opt to go with using metal gun barrels. Either way, it still looks pretty spectacular.
If the cooling holes on the barrel jacket were exposed, I may have either (a) considered metal barrels or (b) tried drilling out the holes on the kit barrels. Since only the tips of the barrels poke out, I didn't think it was worth going aftermarket. With the ends hollowed out and painted, the kit guns should look the part. The wing guns are being replaced with hollow brass tubing.
speedgraflex wrote:That actually is a fabuloso idea to punch bolt heads from styrene card, John! Wow! I am still studying one post back when you glued the tail sections on the fuselage... but wow! Double wow! Triple wow! Infinite wow factor! Add in ammo chutes formed by brass... is that a NWSL Chopper you are using? I’m trying to locate that and the rest of my Dad’s small tools. Those chutes are gorgeous and align perfectly. What a great day for you, and incredible fun and educational benefits for those following you! Cheers!
Not a NWSL Chopper... had to google that one. The thin brass sheet is easily cut with a metal straight edge and sharp x-acto blade. A Small Shops PE bending tool (The Bug) was used to initiate the first fold and then the plastic form was used to make the rest of the bends.
Handiabled wrote:I have often thought about building kits that I had visited before for the sake of the " if I knew then what I know now " factor... This looks stunning so far!!
Familiarity with the Hasegawa Dora kit gives me more confidence to deviate from the instructions where necessary. I also hope to improve with each build and I'm adding little things here and there to break from autopilot mode.
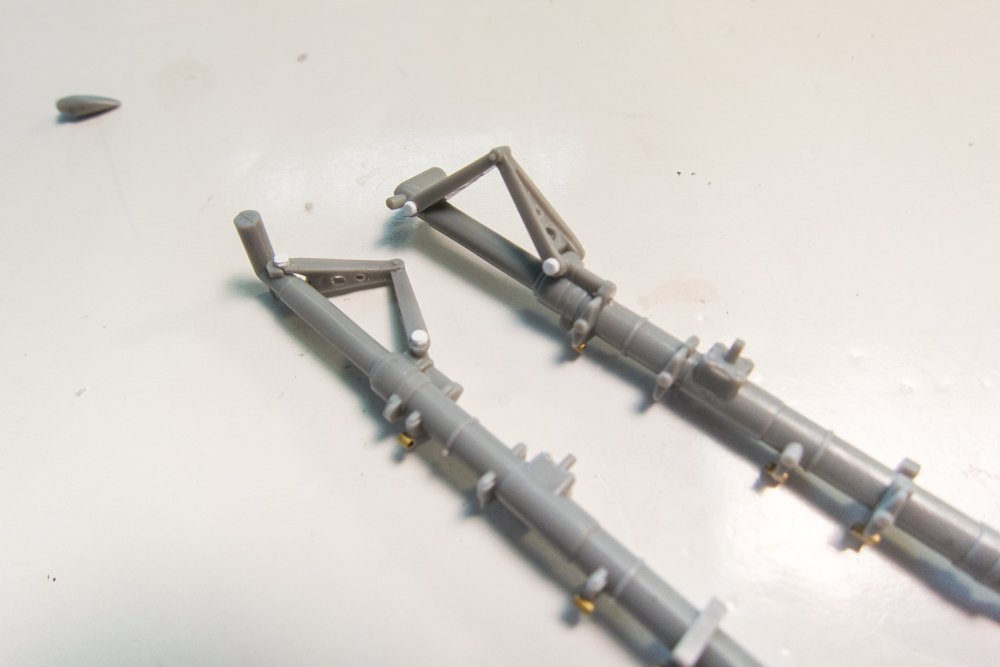
The landing gear retraction arms have been spruced up with wire to represent the spring and electrical connections.

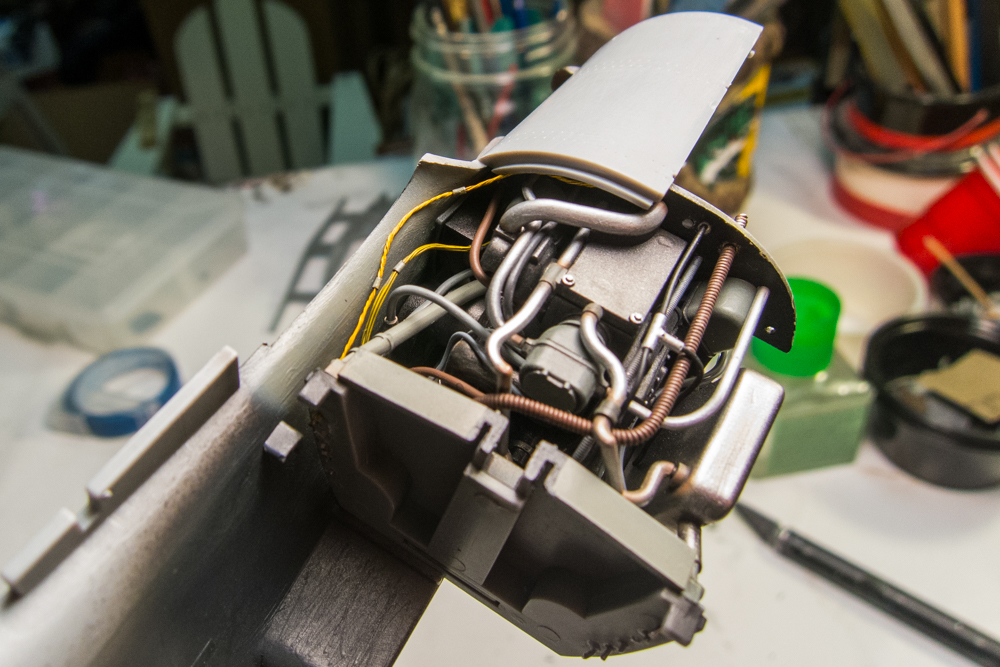
I had some left over wire strands so I decided to add one more electrical wiring line to the engine plug.
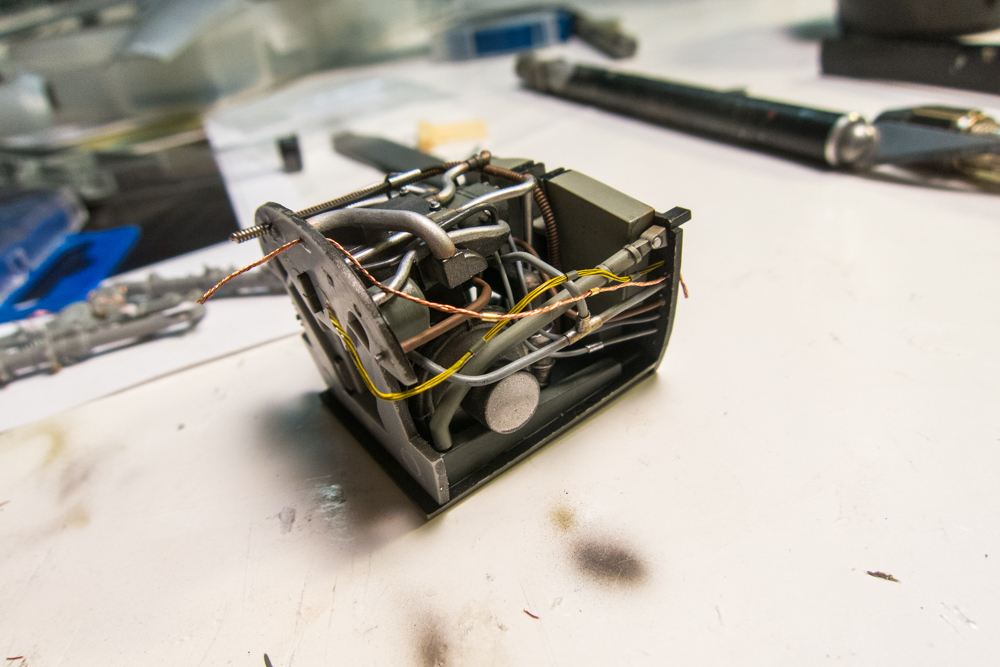
I purposefully flared the wire out from the plug because I remembered that this side of the fuselage wall was relatively bare on the last build and could use some clutter.
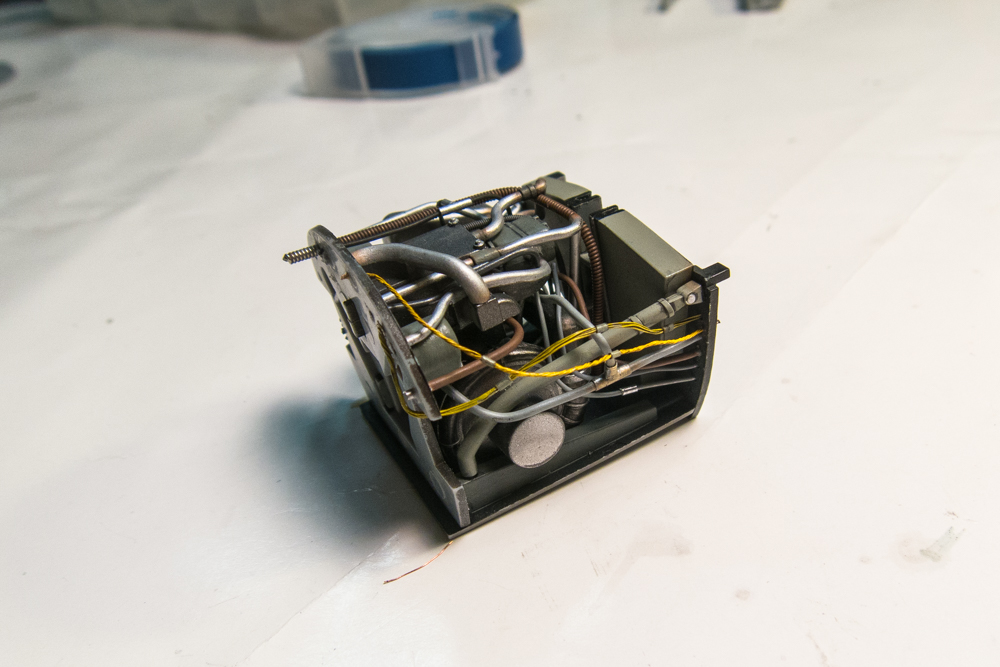
You can see what I mean on this next photo...
The supercharger cowling joint was filled in three stages. First was the White Milliput, which I forced into the gap and then removed the excess with a wet piece of paper towel. With the gap reduced to a shallow groove, I used Mr Dissolved Putty as a second filler and finally Mr Surfacer 1000 to finish it off. After sanding the joint, I shot it with Mr Surfacer 1200 to check the joint. The gap has been filled but there remains a subtle sanding edge on both side, photographically evident in the view from the bottom.
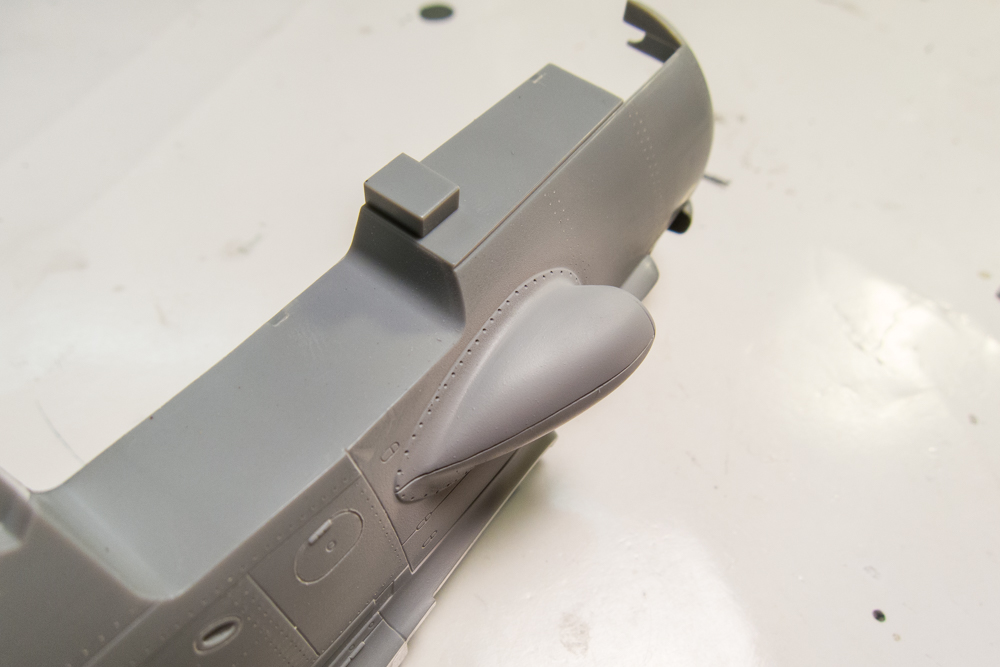
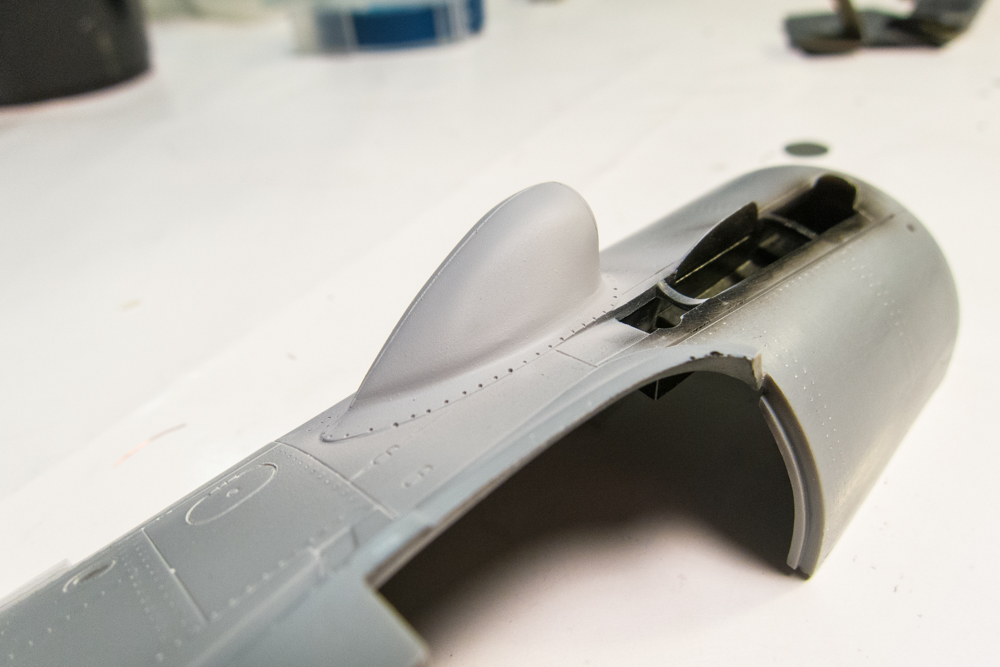
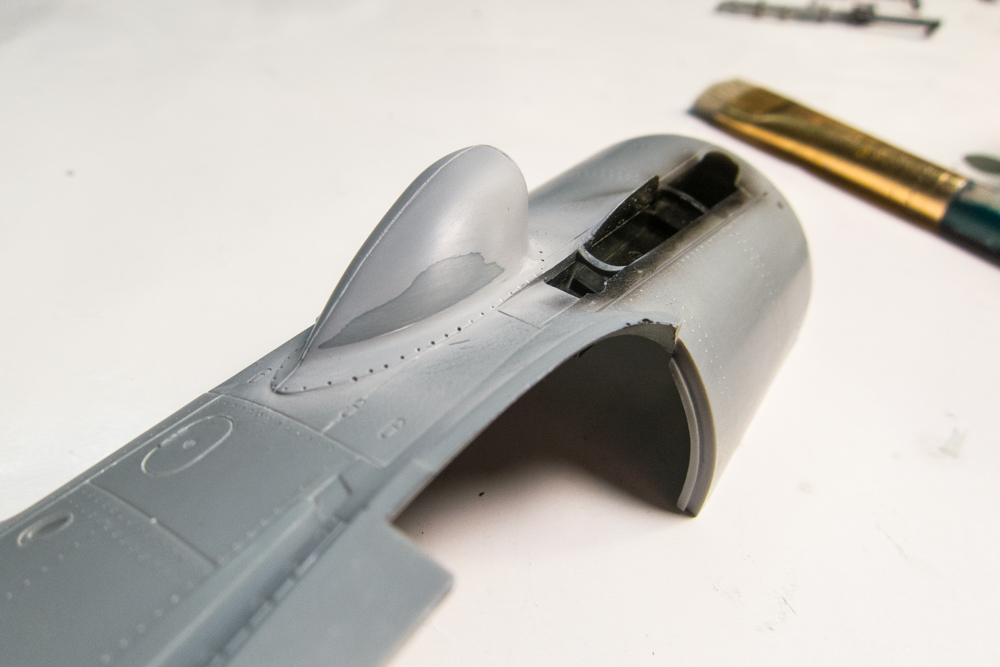
I did some additional sanding to remove the subtle edge. I'll shoot another thin layer of primer to check my work.

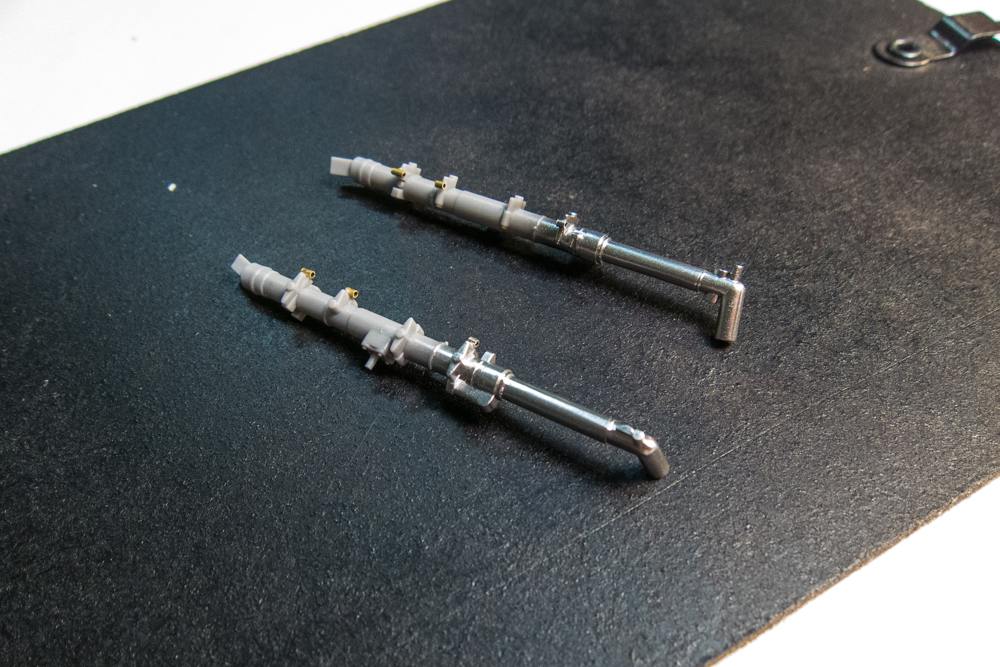
Final work for the night was painting the shiny metal on the landing gear legs. I like to use Alclad Chrome for this on top of a shiny gloss black base (Mr. Color lacquer). The Chrome is not the strongest finish so I want to make sure to let it cure completely before I mask it off to paint the landing gear legs.
Re: 1/32 Hasegawa Fw190D-9 Red One
Posted: Mon Dec 10, 2018 11:55 pm
by kahunaminor
Just fantastic John,
The intake looks excellent and benefits the extra work. I really enjoy your tutorial style, many thanks.
Regards,