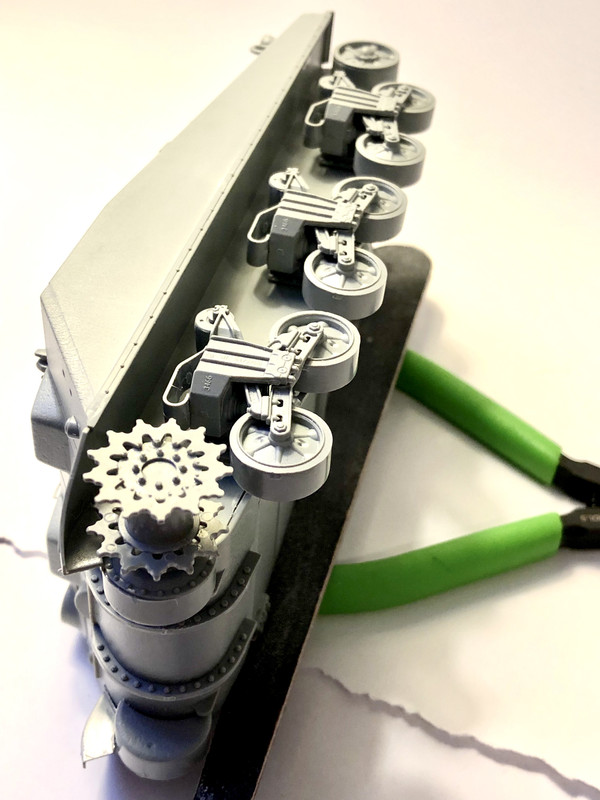
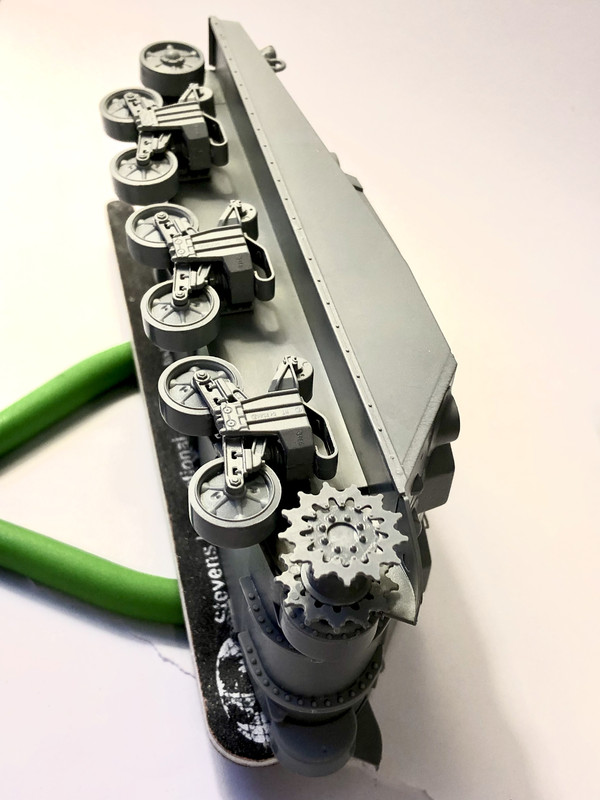
Page 20 of 42

Re: KENNY X HAS A TANK

Posted: Wed Jan 23, 2019 8:15 pm
by KennyX
Image

Image

Re: KENNY X HAS A TANK

Posted: Wed Jan 23, 2019 11:57 pm
by Stikpusher
Looking great so far Kenny. The Firefly is a good looking tank.

Re: KENNY X HAS A TANK

Posted: Thu Jan 24, 2019 6:44 am
by KennyX
Stikpusher wrote:Looking great so far Kenny. The Firefly is a good looking tank.

Thanks Carlos! I ran into a couple of gotchas in Step 2 and Step 3 that I’ll post about later on today.

Re: KENNY X HAS A TANK

Posted: Thu Jan 24, 2019 9:41 am
by KennyX
Okay! Let’s get into some of the gotchas I found. And let me state at the outset that my motivation for publishing these is not to bash Dragon but rather, to make other folks who might be interested in building this kit aware of the few, very minor issues I’ve found. So far this has been a great kit, a real pleasure to build.

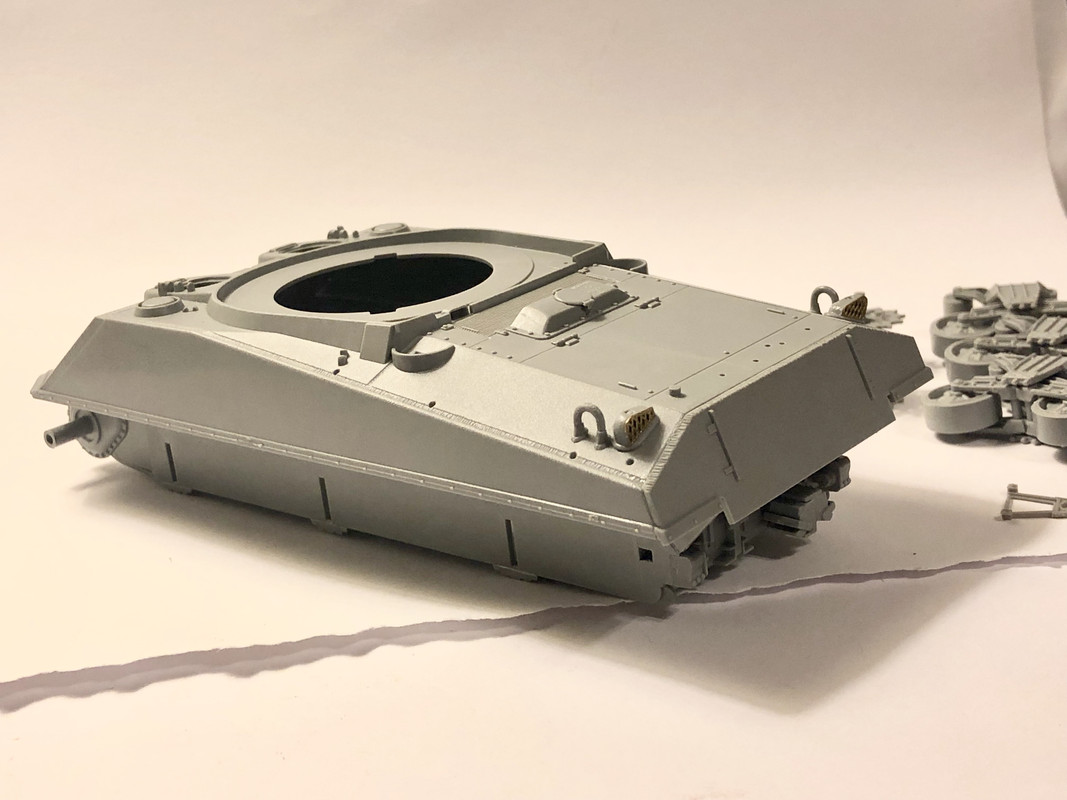
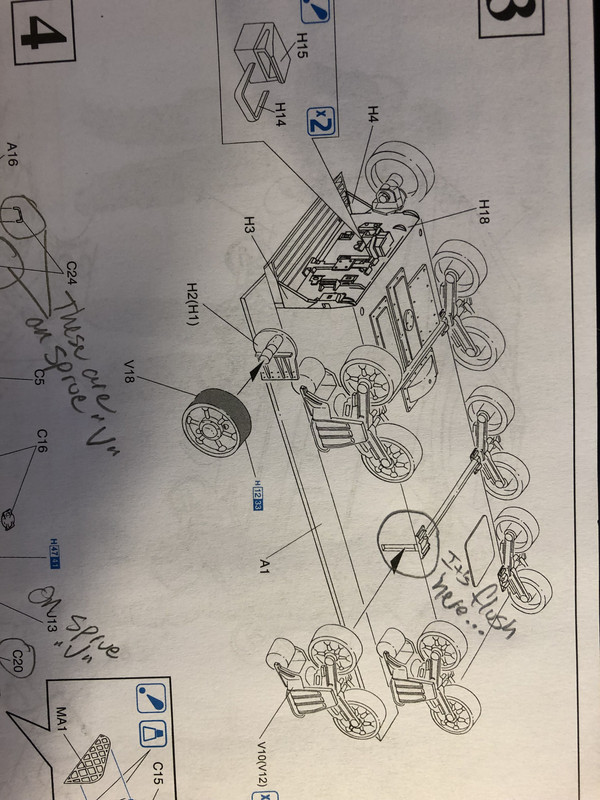
Here we go. First, under the hull, take note of “V3” and the lines I’ve made in pencil on the outward edges:
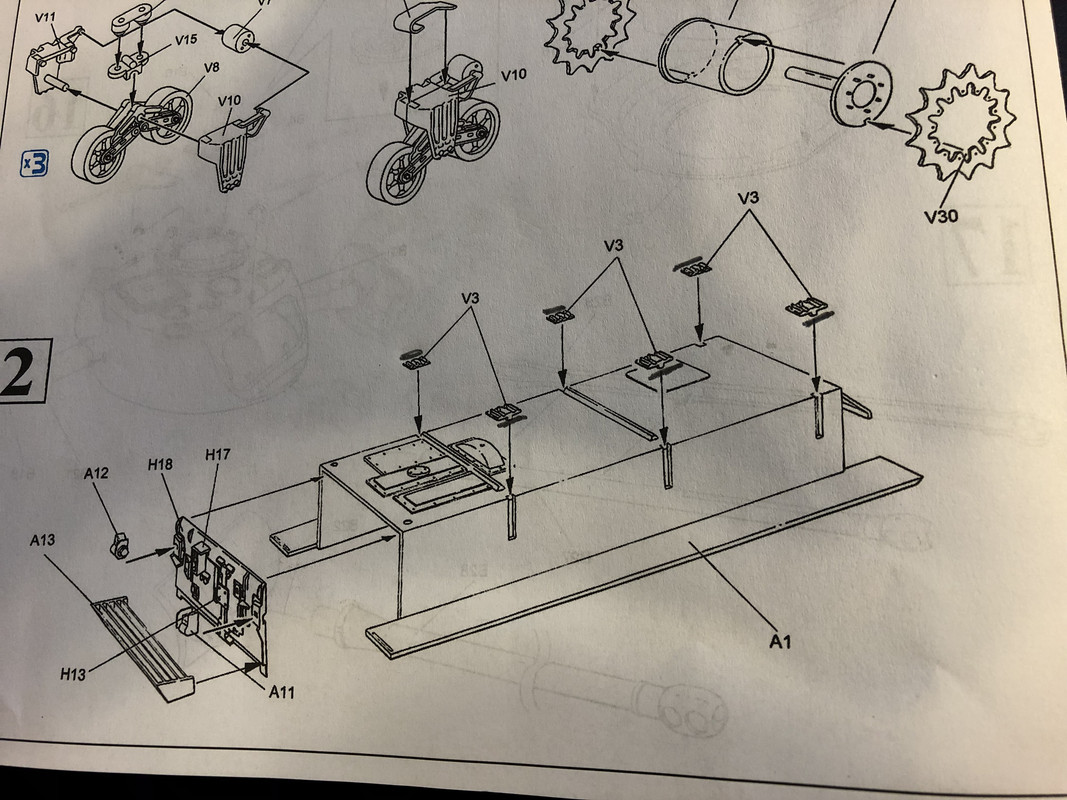
Image

I made those lines to denote the fact that when installed these parts to not fit flush with the outer edge below them. They stick out a bit. And there is no way they’ll naturally fit flush.

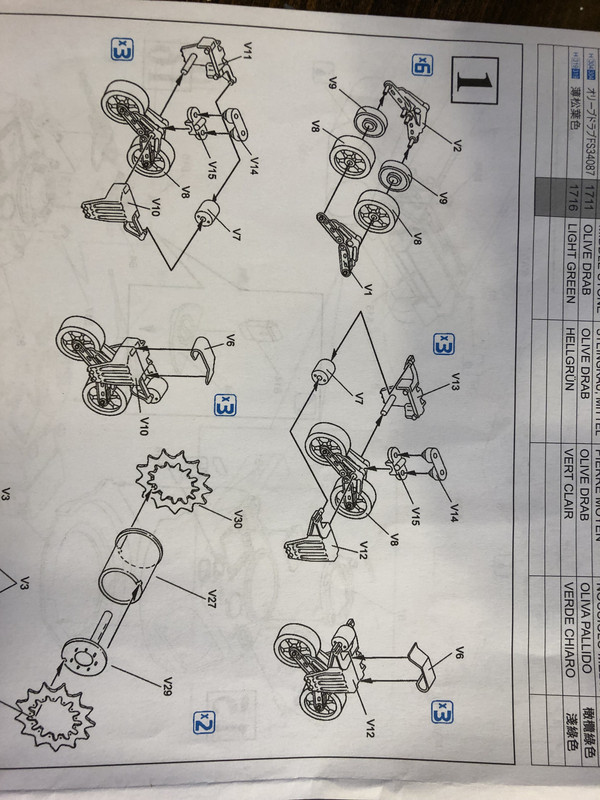
Now, look at the next diagram. It shows them fitting flush, and it describes how the wheels attach, ostensibly by way of slots:
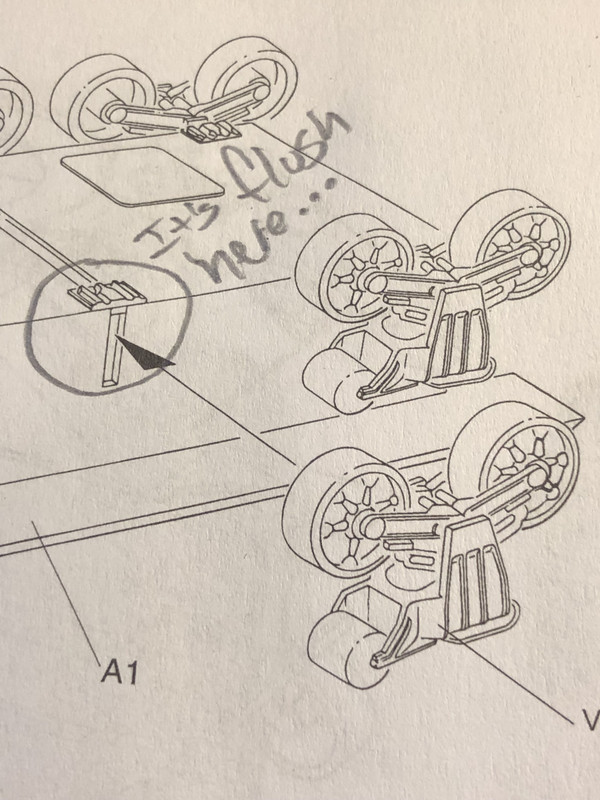
Image

Okay, groovy! But take a gander at this part here, the back of the thingunmabobber that holds the wheels:
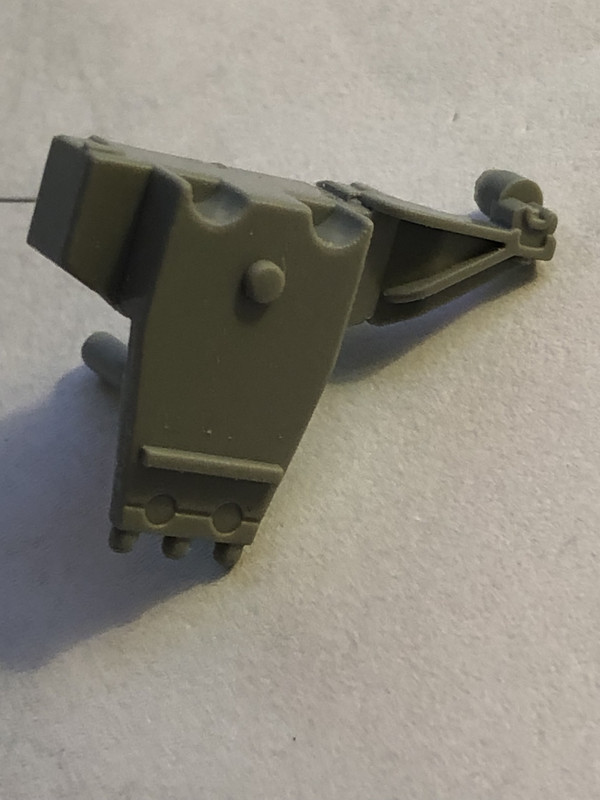
Image

It does indeed have a circular nub which fits into the slot, but it doesn’t protrude far enough to mate with the slot with that “V3” part sticking out. And to compound the problem, that bar below the nub prevents it from mating too.

Now I must’ve looked at this and meditated on it for a solid half hour last night, and I’ll be damned if I could suss how to make that work. So here’s what I opted to do.

1. I sanded the outward edge of the “V3” parts so they’d be flush with the lower hull (the instructions show them flush after all):
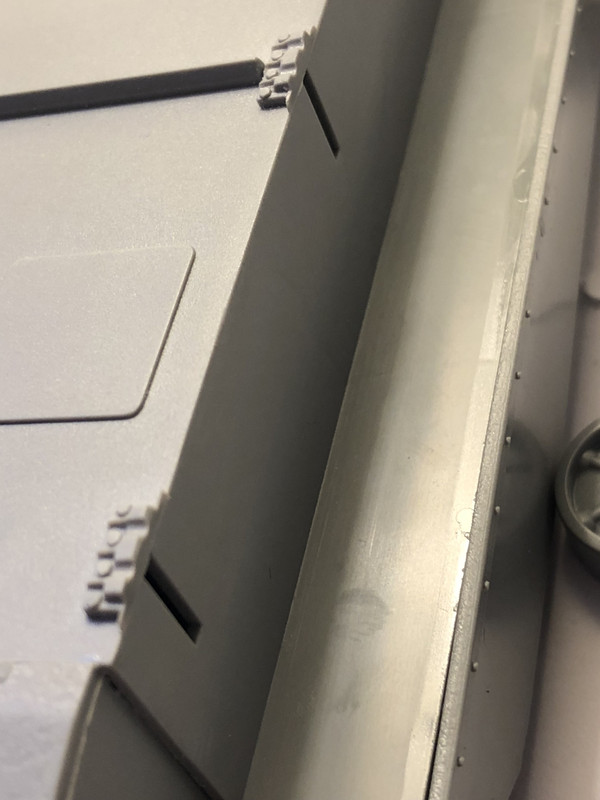
Image

2. I sanded the bar off the wheelie thingunmabobber:
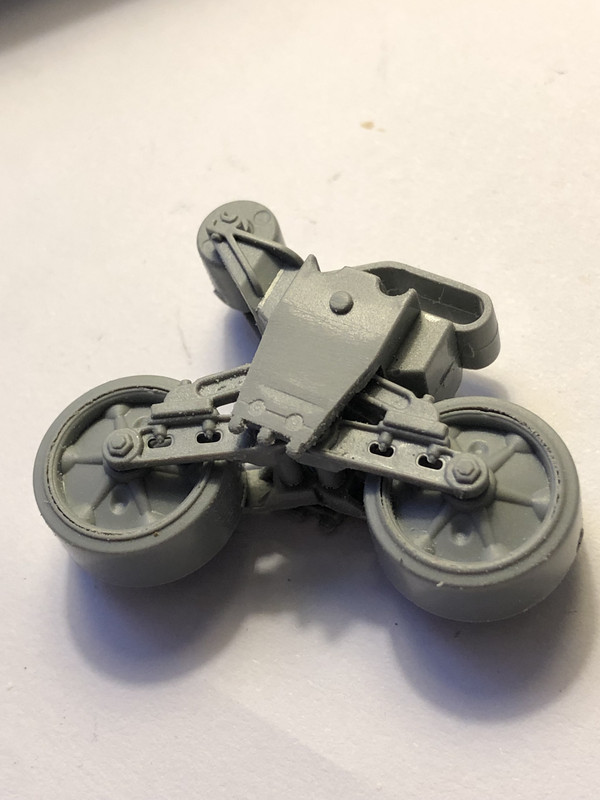
Image

This at least allows the nub to mate with the slot -barely but that’s better than before because it didn’t mate at all before. Also, appropriate care must be taken at glue time to make sure they all go on there true. I’m preparing for that, now.

Furthermore, this was a “scorched earth” fix. I tend to brute force things and when brute force doesn’t work, I don’t sweat it, I just use *more*. Could this fix possibly have screwed things up which I won’t find out about until later on down the line?

The answer to that is a definite maybe. But I’ve got plenty of spare plastic and cutting bars out is not a big deal, at least to me.

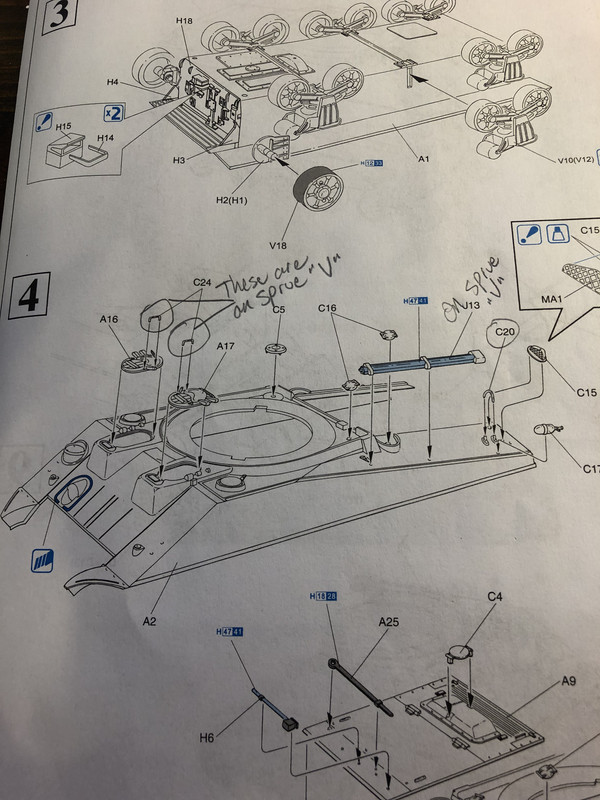
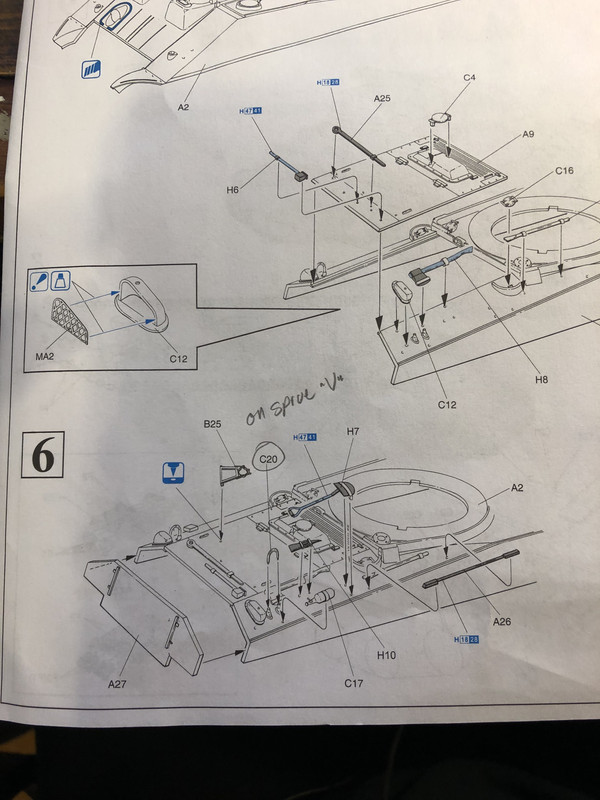
So there’s that. Let’s get into the handles. This is just a simple misprint in the instructions. See here:
Image

Image

So those are the land mines you could step on so far. That takes you through steps 1-8 I believe.

Now, let me say this. These little SNAFU’s have not in any way diminished my enjoyment of building this hobby kit. Not a bit. My pals here (you guys) cautioned me about issues like these and I’ve been on the lookout. That helped. Knowing what I might be in for when I opened it up and started chipping parts off the sprues helped a lot. When these issues cropped up, I just laughed them off. No sweat. And heck, one is just a simple misprint. That happens. It’s okay, and I’m not sweating it.

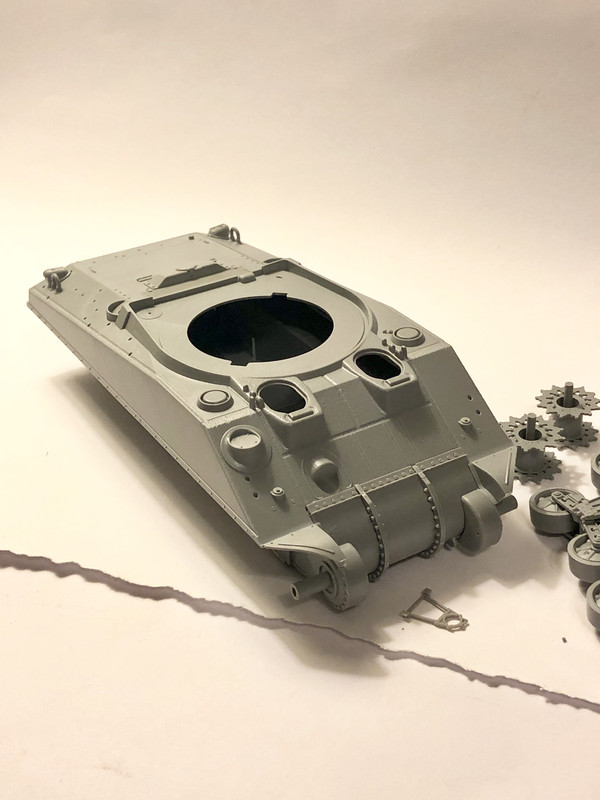
So there we go. So far, I’m enjoying myself with this kit,
Re: KENNY X HAS A TANK

Posted: Thu Jan 24, 2019 11:07 am
by speedgraflex
Image

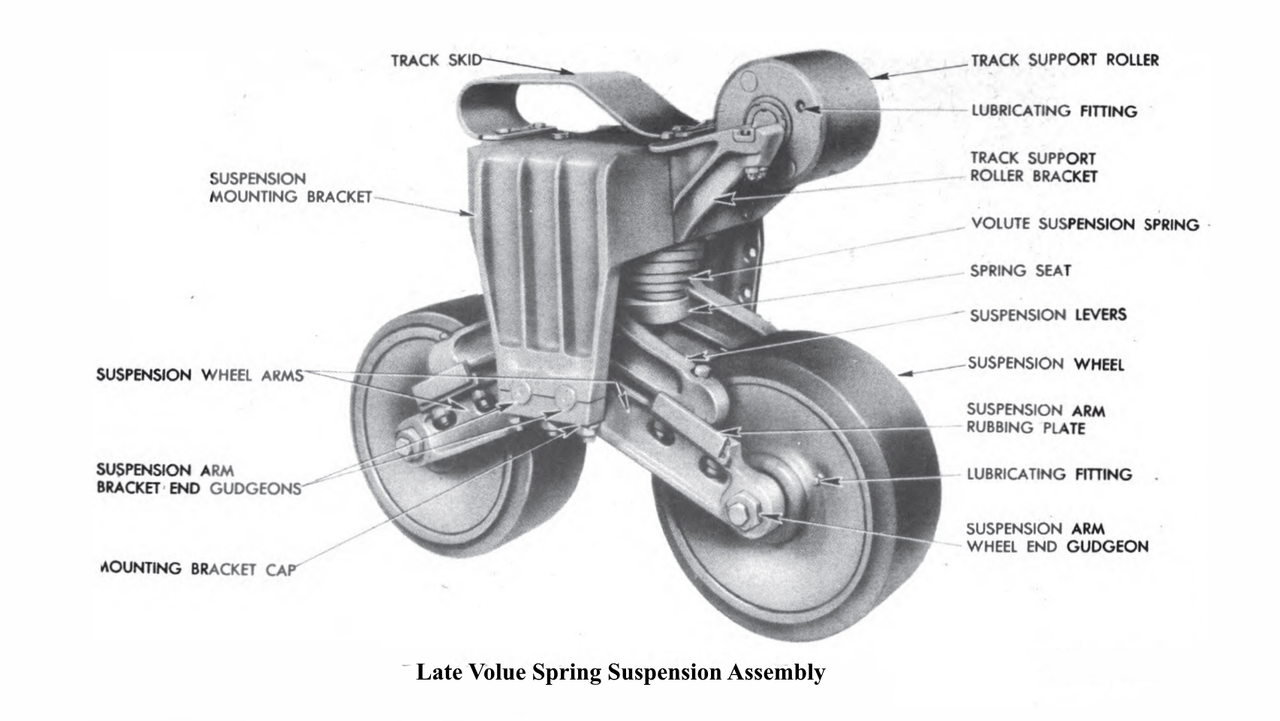
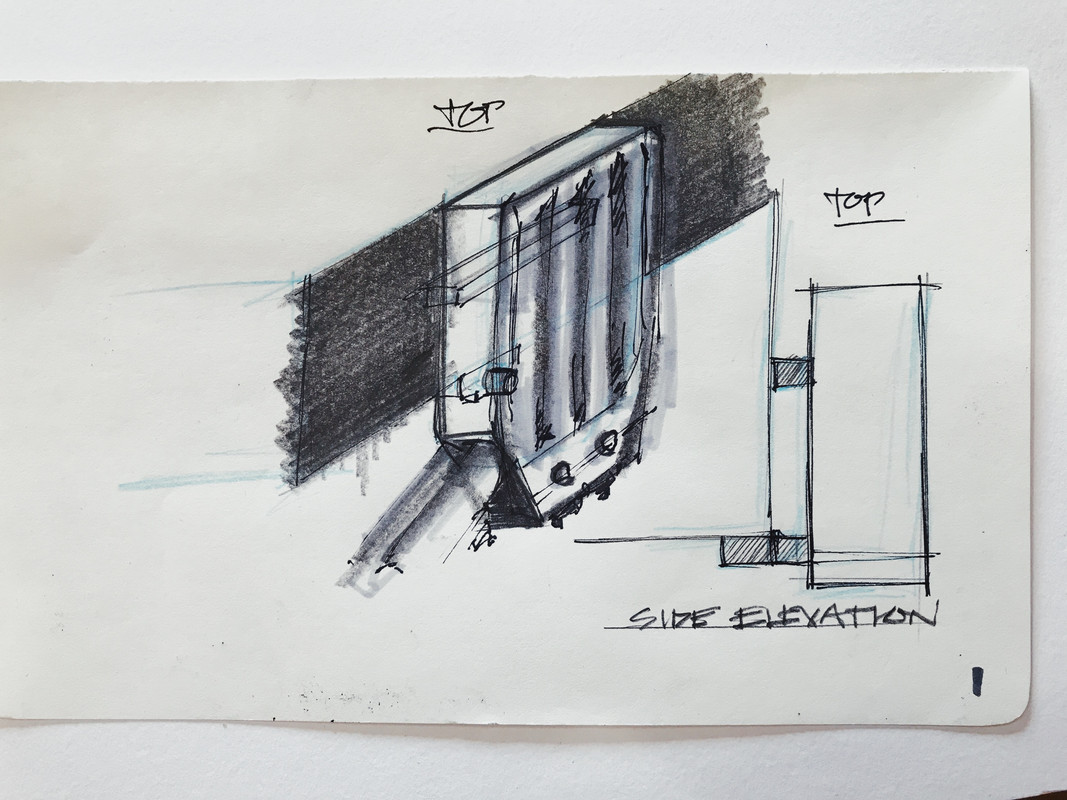
Hey, I think Dragon’s illustrations are very tricky here. Dragon redesigned these kits several times, improving them along the way. Perhaps the “nipple and bar” are supposed to be there and the bogie sits away from the hull. That is how I think. However, I agree with every move you made so far to correct this. I believe the issue rests on whether or not the bogies are flush to the hull—in reality. In the land of the Dragon, that arrow is very misleading, and if indeed the nipple and bar are meant to be glued without any helper tabs or slots, the instructions ought to spell that out. Hey, it’s the land of the Dragon. The details look great and your construction is fantastic.

Re: KENNY X HAS A TANK

Posted: Thu Jan 24, 2019 12:36 pm
by KennyX
Ah! Thanks for weighing-in on this.

If the bogey does indeed not fit flush, I wonder why there’d be a slot there at all? That’s so bloody weird. And I haven’t found any parts which fit that nipple and bar and plug-in to those slots. So what I’m planning for here is finding out later on that these don’t fit flush. If that happens, I’ll cut plastic, and what I’ll to is make “T’s”. The top of the T will fit against the side of the hull and I’ll affix the bogeybto it. and the leg will plug into the slot. That’s Option 1 anyway. But hopefully it doesn’t come to that LOL

Re: KENNY X HAS A TANK

Posted: Thu Jan 24, 2019 12:57 pm
by KennyX
AH-HA! I figured it out!

Piece “V5”!!! There is no mention of this piece in the instructions, see below:

Image

Image

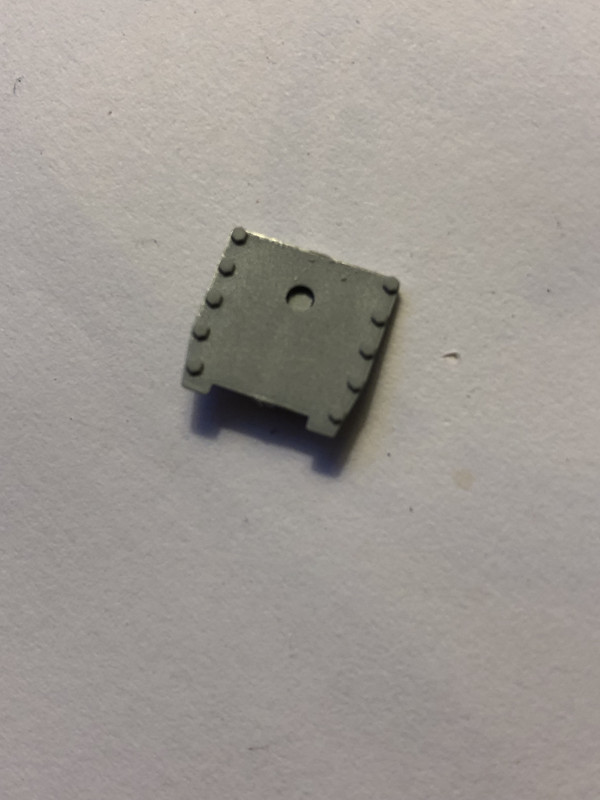
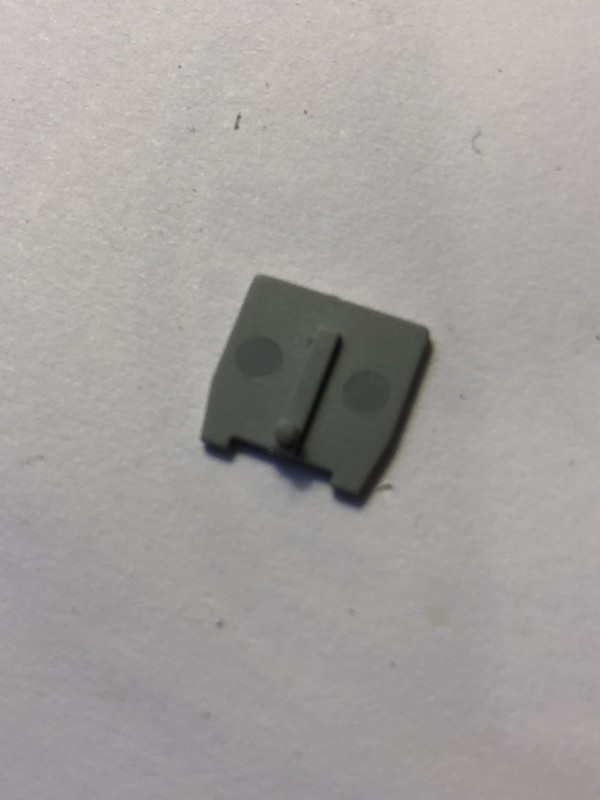
Anyway, it looks like this. Here’s where the nipple goes:

Image

And here’s how it plugs into the slot:

Image

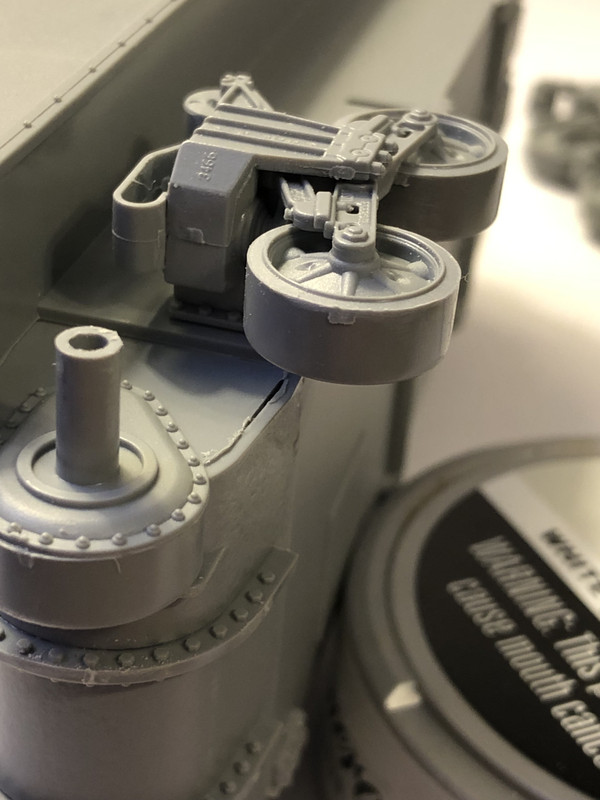
Though I removed the bar on the bottom, getting it mounted to the bogie straight and true wasn’t a problem. Here she is dry-fitted to the hull:

Image

There is a gap now LOL, from my sanding. But Milliput can fix that-

Image

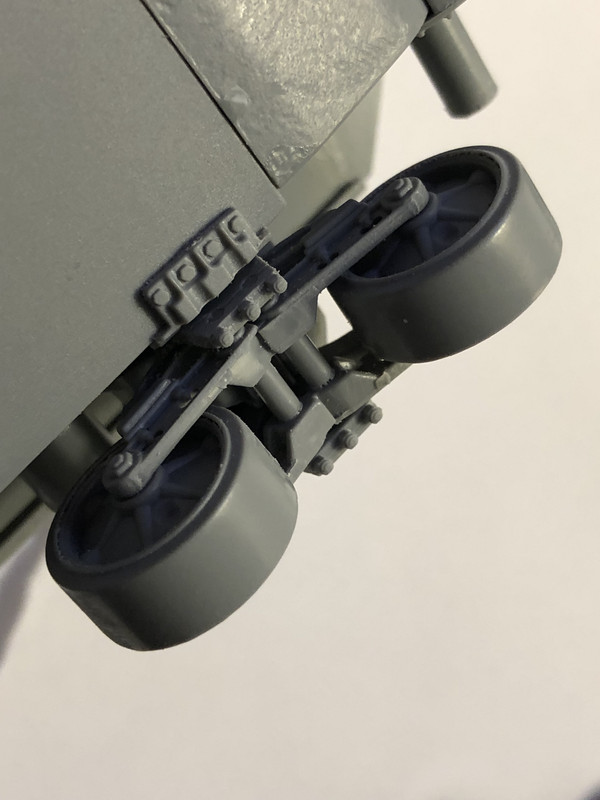
Bogies on both sides outfitted with the “V5” part and dry-fitted into the slots:

Image

Image

I am really glad I looked around the sprues again for anything that might’ve looked like it would do the job. Baffled by why there’s no mention of those parts in the instructions, but it is okay. I’m glad it’s fixed.

Re: KENNY X HAS A TANK

Posted: Thu Jan 24, 2019 2:02 pm
by speedgraflex
There ya go, buddy. Looks killer. Here’s a totally worthless now sketch I made whilst thinking about your situation.

Image

Re: KENNY X HAS A TANK

Posted: Thu Jan 24, 2019 2:19 pm
by KennyX
It’s beautiful, Bruce. Absolutely beautiful and I appreciate it!

Re: KENNY X HAS A TANK

Posted: Thu Jan 24, 2019 2:29 pm
by speedgraflex
Thanks for your kind words—I am glad you figured out what to do. There is definitely something sketchy with Dragon’s instructions. There should upgrade what they present as steps—leaving off a key piece is ridiculous.