Page 3 of 4
Re: 1/48 Yakovlev UT-1b / Mikro-Mir [Cockpit ready for pain
Posted: Sat May 31, 2014 5:53 am
by LyleW
Nice work! More, please....
Re: 1/48 Yakovlev UT-1b / Mikro-Mir [Cockpit ready for pain
Posted: Mon Jun 02, 2014 1:32 am
by BorgR3mc0
That "printing on plastic" is an interesting technique.
I would like to try that so I have some qustions:
Do you just tape the plastic to a piece of paper?
What is the risk of jamming the printer?
Do you use a special paper feed on the printer?
What kind of printer do you use?
Re: 1/48 Yakovlev UT-1b / Mikro-Mir [Cockpit ready for pain
Posted: Mon Jun 02, 2014 6:26 am
by wasabi
BorgR3mc0 wrote:That "printing on plastic" is an interesting technique.
I would like to try that so I have some qustions:
Do you just tape the plastic to a piece of paper?
What is the risk of jamming the printer?
Do you use a special paper feed on the printer?
What kind of printer do you use?
Hi Borg,
This technique is great for me as I am very bad when it comes to drawing symmetrical lines.
First I work with a slim cardboard template to get my measurements. These measures are then used to make a drawing using Illustrator. The drawing is then printed on common A4 paper to know exactly where to position the styrene sheet. Thin 0.25 mm styrene sheet is taped (Tamiya masking tape) on the right location and printed using an HP Photosmart inkjet printer (main feed tray).
So far I was lucky as I never jammed the printer. I would not recommend using a laser printer because the heat might melt the plastic

Re: 1/48 Yakovlev UT-1b / Mikro-Mir [Cockpit ready for pain
Posted: Mon Jun 02, 2014 1:45 pm
by Medicman71
Very nice work! Your scratch building is awesome!
Re: 1/48 Yakovlev UT-1b / Mikro-Mir [Cockpit ready for pain
Posted: Tue Jun 03, 2014 11:41 am
by wasabi
Thank you Medic

Re: 1/48 Yakovlev UT-1b / Mikro-Mir [Cockpit done]
Posted: Sat Jun 28, 2014 5:40 am
by wasabi
Hi,
The cockpit is finally done. Not perfect though, but that will do.
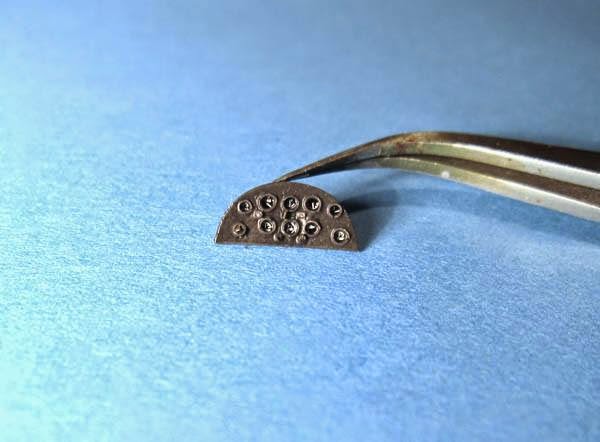
I made a new Instrument Panel as the one in the box was a bit undersized. I used the drawing from the official manual to print my IP on plastic card. The shape of the new IP is not 100% accurate but at least it fits ok now.
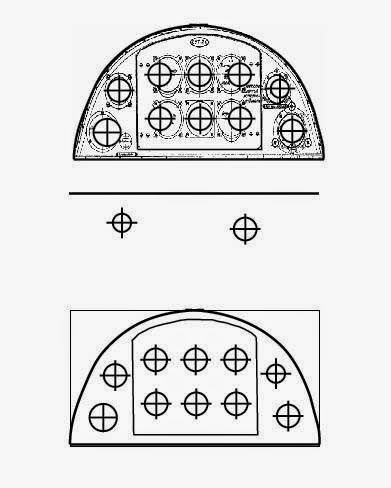
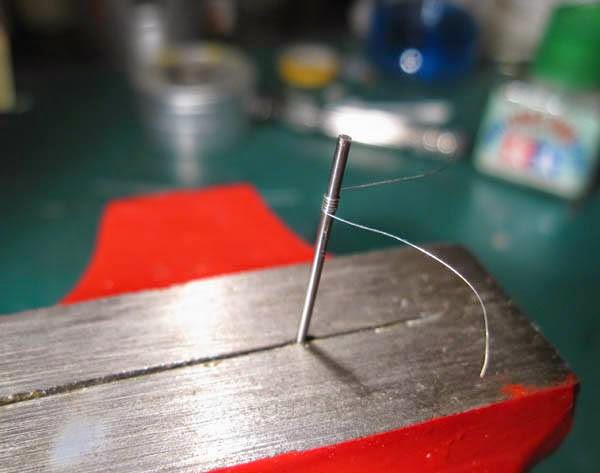
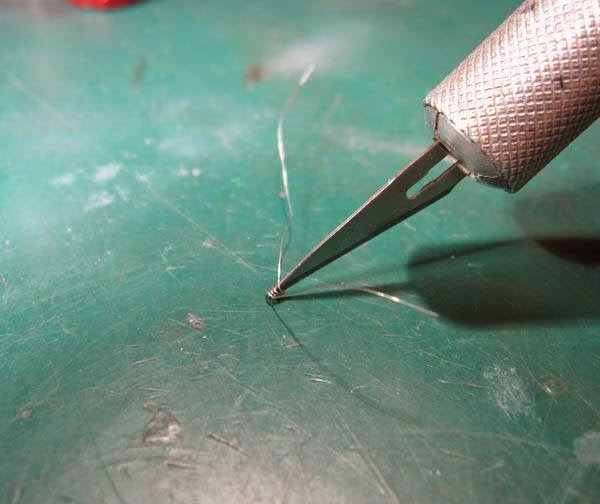
I made the instruments with wire and decals. To make it faster, I made a coil out of wire and cut the
sausage in the middle to make plenty of little circles. Just have to choose the roundest
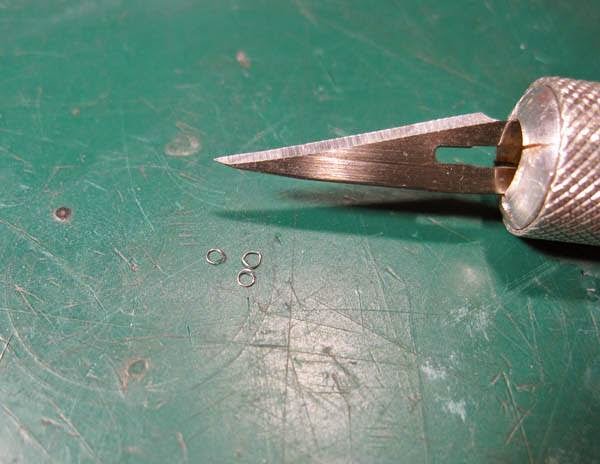
Bezels were first glued with Tamiya extra-fluid cement, and later firmly stuck in place by inserting a toothpick impregnated with CA glue into the holes. Quick and clean.
The instruments were made from spare decals and sealed with Future + transparent acetate sheet.
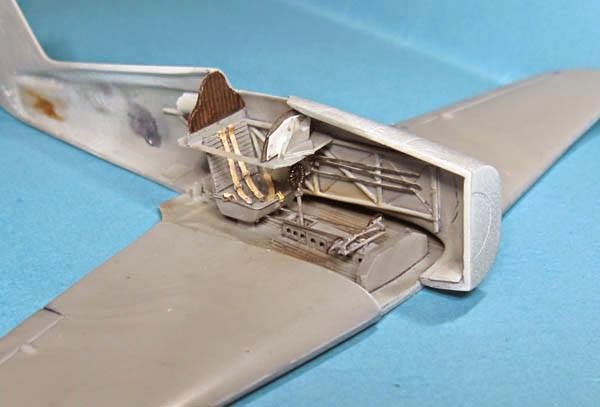
The cockpit now finished:
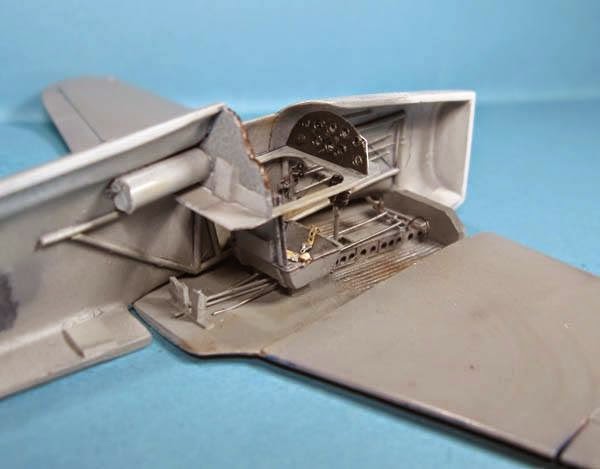
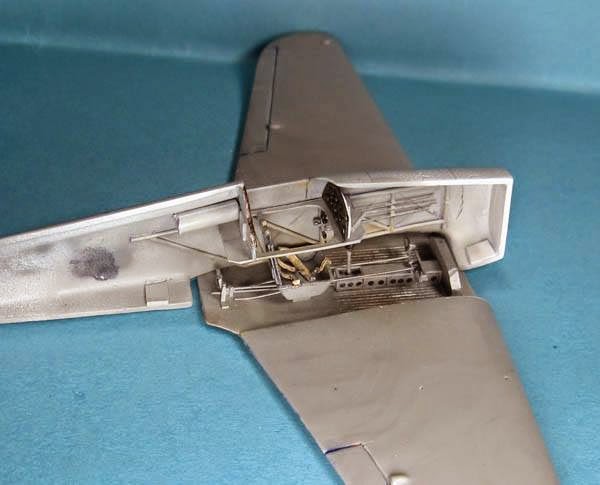
You can notice that the rudder pedals are quite far from the seat. This is explained by Russian pilots having very long legs and wearing stilettos. Saw it too late and couldn't be bothered

The painting of the headrest will be improved after closing the fuselage.
Cheers
Tonio
Re: 1/48 Yakovlev UT-1b / Mikro-Mir [Cockpit done]
Posted: Sat Jun 28, 2014 6:34 am
by LyleW
Tonio, that is some fine scratching - Well illustrated, too. Nice tips. Those girly pilots would need som amazingly long legs. All will be ok when closed up.
Re: 1/48 Yakovlev UT-1b / Mikro-Mir [Cockpit done]
Posted: Sat Jun 28, 2014 1:24 pm
by BsYamato
Excellent way for instruments Tonio

just see an italian modeler using the same tecnique on a 1/72 Claude

Re: 1/48 Yakovlev UT-1b / Mikro-Mir [Cockpit done]
Posted: Sat Jun 28, 2014 2:14 pm
by BorgR3mc0
Great work wasabi and thanks for all your answers.
Re: 1/48 Yakovlev UT-1b / Mikro-Mir [Cockpit done]
Posted: Sat Jun 28, 2014 2:45 pm
by wasabi
Thank you guys for your nice comments
BsYamato wrote:Excellent way for instruments Tonio
just see an italian modeler using the same tecnique on a 1/72 Claude
It's already a pain as it is in 1/48, it must be crazy in 1/72
