Commission Build for Bruce Cooper
-
Duke Maddog

- Elite Member
- Posts: 7700
- Joined: Tue Jun 03, 2014 11:22 am
- Location: Rowland Heights, CA
Re: Commission Build for Bruce Cooper
Just in time; I have another update to post....
The Duke
Virtuoso of Miniatures
"Do you know what the chain of command is? It's the chain I get and beat you with 'till you understand who's in ruttin' command!"
-Jayne Cobb, Firefly Episode 2 "The Train Job"
We are modelers - the same in spirit, in hunger to insanely buy newly released kits, hustlers in hiding our stash from our better halves and experts in using garbage as replacements for after-market parts.
Virtuoso of Miniatures
"Do you know what the chain of command is? It's the chain I get and beat you with 'till you understand who's in ruttin' command!"
-Jayne Cobb, Firefly Episode 2 "The Train Job"
We are modelers - the same in spirit, in hunger to insanely buy newly released kits, hustlers in hiding our stash from our better halves and experts in using garbage as replacements for after-market parts.
-
Duke Maddog
- Elite Member
- Posts: 7700
- Joined: Tue Jun 03, 2014 11:22 am
- Location: Rowland Heights, CA
Re: Commission Build for Bruce Cooper
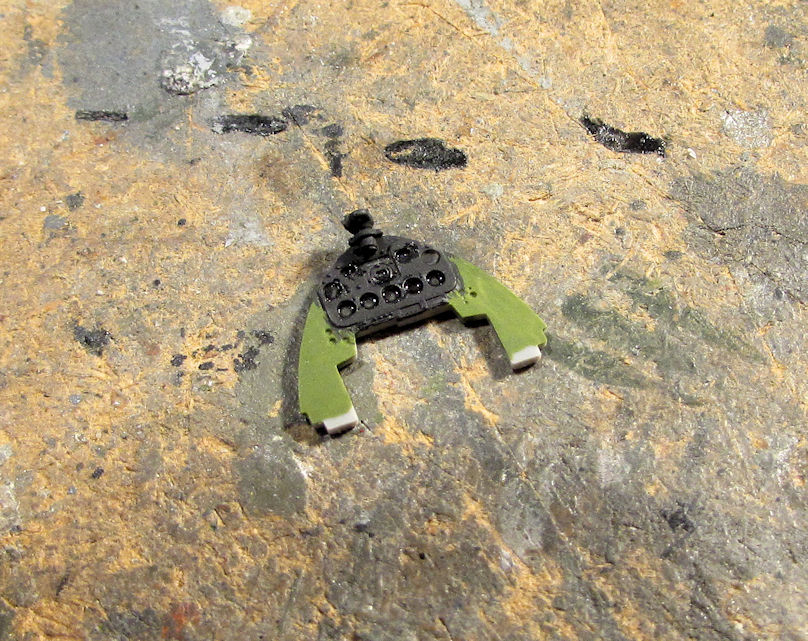
Okay, here's the latest work on Bruce's commission build. I got the instrument panel painted up using a lightened flat black for the panel itself, then I painted the dials with a Metallic black to simulate glass covered dials:
I then painted up the entire cockpit and installed the instrument panel:
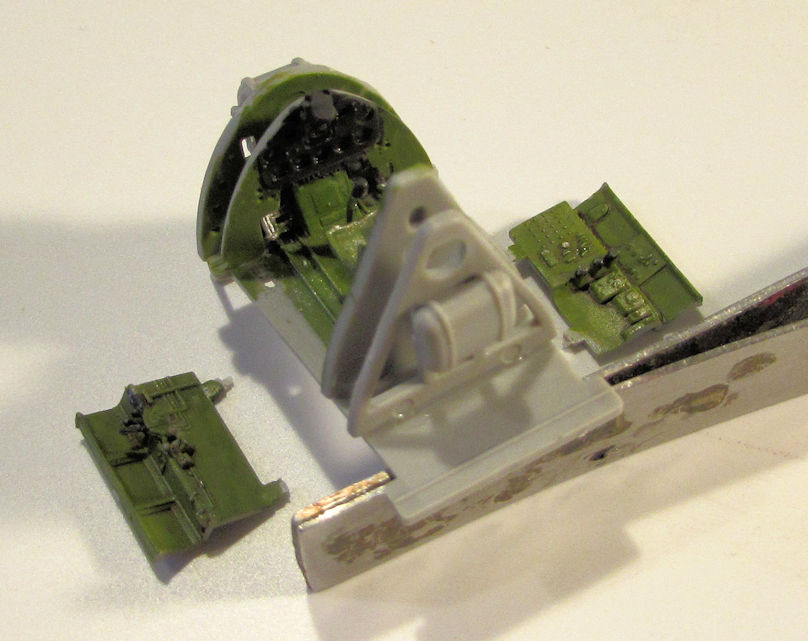
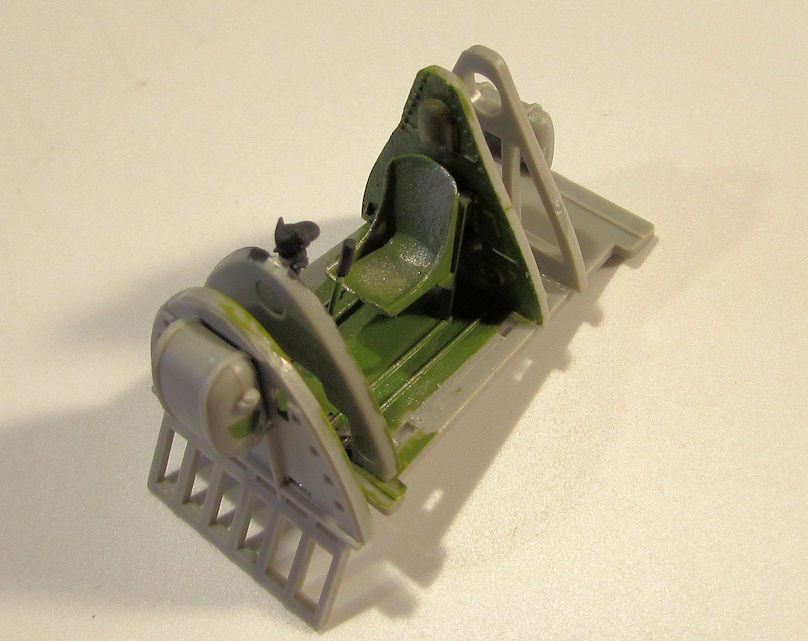
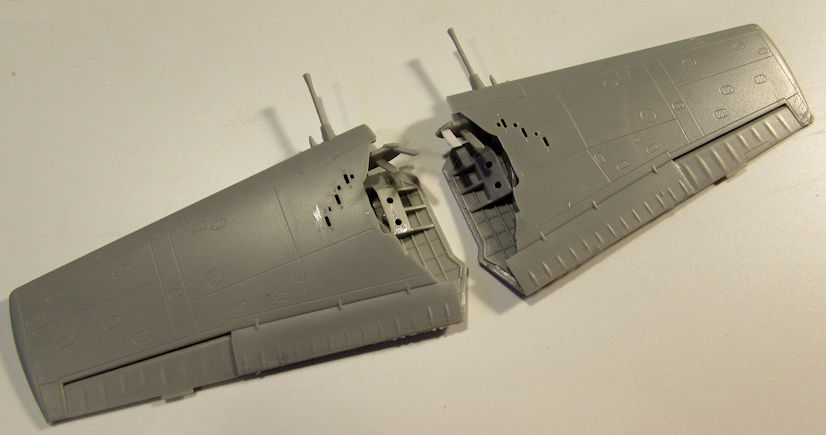
This kit came with photo-etch seatbelts that I'll need to paint and install next. I then assembled the wings; using the linkages for folded ones:
Afterward I assembled the center section that attaches to the fuselage. Here it is with the assembled wings:
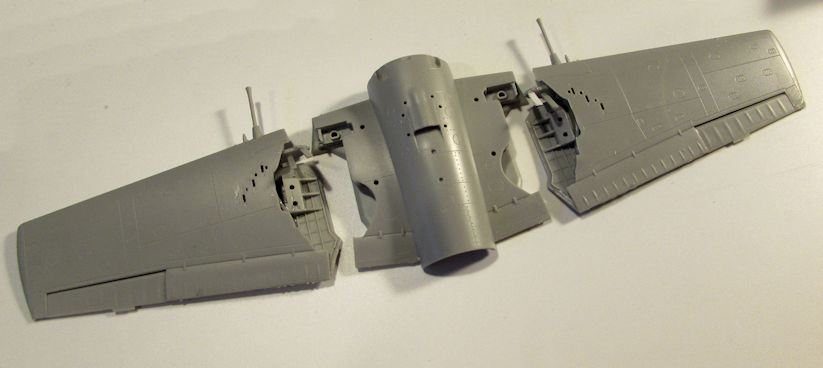
You'll note that one linkage is white; while test fitting the wings to the center section I broke one off which then disappeared. Strip styrene to the rescue!
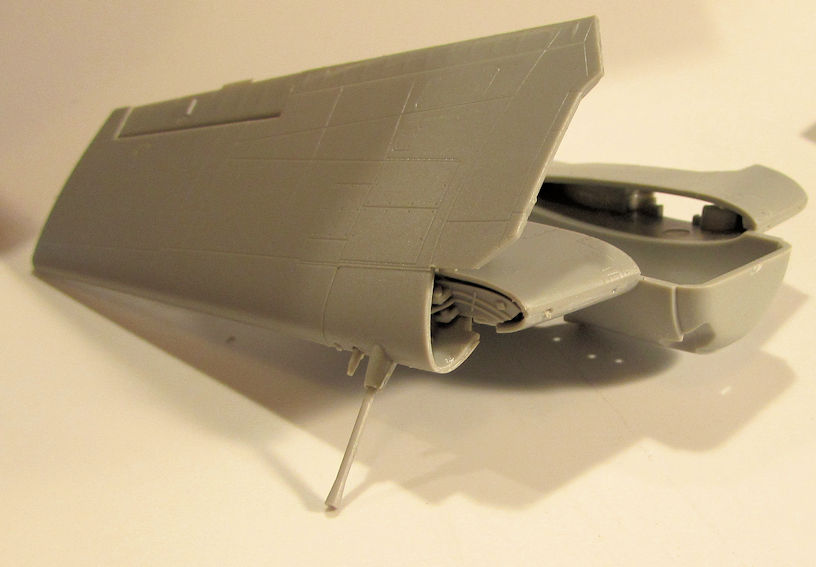
Here is one of the wings test fit in place. It does look good:
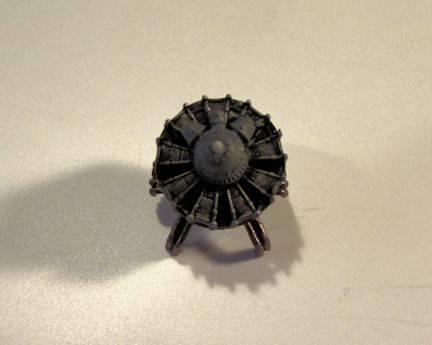
Finally, I can't post an update without showing the engine. I got it all painted up and ready to install. I also ran it for a bit to test it and it purrs like a kitten. LOL! The pics don't do it justice here:
That's all so far. Today is another Hobby Day so I'll probably get more done on this later. Stay tuned, more to come.
I then painted up the entire cockpit and installed the instrument panel:
This kit came with photo-etch seatbelts that I'll need to paint and install next. I then assembled the wings; using the linkages for folded ones:
Afterward I assembled the center section that attaches to the fuselage. Here it is with the assembled wings:
You'll note that one linkage is white; while test fitting the wings to the center section I broke one off which then disappeared. Strip styrene to the rescue!
Here is one of the wings test fit in place. It does look good:
Finally, I can't post an update without showing the engine. I got it all painted up and ready to install. I also ran it for a bit to test it and it purrs like a kitten. LOL! The pics don't do it justice here:
That's all so far. Today is another Hobby Day so I'll probably get more done on this later. Stay tuned, more to come.
The Duke
Virtuoso of Miniatures
"Do you know what the chain of command is? It's the chain I get and beat you with 'till you understand who's in ruttin' command!"
-Jayne Cobb, Firefly Episode 2 "The Train Job"
We are modelers - the same in spirit, in hunger to insanely buy newly released kits, hustlers in hiding our stash from our better halves and experts in using garbage as replacements for after-market parts.
Virtuoso of Miniatures
"Do you know what the chain of command is? It's the chain I get and beat you with 'till you understand who's in ruttin' command!"
-Jayne Cobb, Firefly Episode 2 "The Train Job"
We are modelers - the same in spirit, in hunger to insanely buy newly released kits, hustlers in hiding our stash from our better halves and experts in using garbage as replacements for after-market parts.

Re: Commission Build for Bruce Cooper
Ooh, what have I missed, what I have missed all these weeks...
What a wonderful project Duke (and Bruce) !
- Kari
What a wonderful project Duke (and Bruce) !
- Kari
---
On the bench:
Eduard 1:48 - Fokker D.VII OAW
https://www.facebook.com/GrundAsk-Scale ... 721218708/
On the bench:
Eduard 1:48 - Fokker D.VII OAW
https://www.facebook.com/GrundAsk-Scale ... 721218708/
-
speedgraflex

- Moderator
- Posts: 11535
- Joined: Fri Feb 10, 2017 11:08 pm
- Contact:
Re: Commission Build for Bruce Cooper
Hi Duke and Kari! It is really nice to see how well things are progressing, Duke! I remember debating between this kit and Eduard’s version, but the details here look great, Duke! Good luck with Hobby Day and I hope you are feeling better!!
Make more models!
-
Stikpusher

- Moderator
- Posts: 21386
- Joined: Sat Apr 05, 2014 8:37 pm
- Location: Ceti Alpha 5
Re: Commission Build for Bruce Cooper
Looks great so far Mark! But man I’d be worried about those gun barrels at this point. There is no way to install them later, or did I miss that part?
"Surely I have made my meaning plain? I intend to avenge myself upon you, Admiral. I have deprived your ship of power, and when I swing 'round, I intend to deprive you of your life."
FLSM
FLSM
-
Duke Maddog
- Elite Member
- Posts: 7700
- Joined: Tue Jun 03, 2014 11:22 am
- Location: Rowland Heights, CA
Re: Commission Build for Bruce Cooper
Thanks everyone for the great replies.
Kari, I'm thrilled to see you posting here. Feel free to check out my other work from the past as well.
Bruce, thank you. Aside from the issues with the Dragon instructions, I think this is a better build for me. I've had issues with Eduard kits in the past. I'm not feeling much better except when under the influence; but hopefully things start improving.
Carlos, thanks. Yeah, I am concerned a bit with those gun barrels too, but they are sandwiched inside the wing halves. I didn't get pics of that part of the construction, sorry. If I had wanted to install them later; I would have had to cut them apart before adding them. That would not work well; especially for the smaller ones. I'll just have to be extra careful.
Stay tuned, more to come.
Kari, I'm thrilled to see you posting here. Feel free to check out my other work from the past as well.
Bruce, thank you. Aside from the issues with the Dragon instructions, I think this is a better build for me. I've had issues with Eduard kits in the past. I'm not feeling much better except when under the influence; but hopefully things start improving.
Carlos, thanks. Yeah, I am concerned a bit with those gun barrels too, but they are sandwiched inside the wing halves. I didn't get pics of that part of the construction, sorry. If I had wanted to install them later; I would have had to cut them apart before adding them. That would not work well; especially for the smaller ones. I'll just have to be extra careful.
Stay tuned, more to come.
The Duke
Virtuoso of Miniatures
"Do you know what the chain of command is? It's the chain I get and beat you with 'till you understand who's in ruttin' command!"
-Jayne Cobb, Firefly Episode 2 "The Train Job"
We are modelers - the same in spirit, in hunger to insanely buy newly released kits, hustlers in hiding our stash from our better halves and experts in using garbage as replacements for after-market parts.
Virtuoso of Miniatures
"Do you know what the chain of command is? It's the chain I get and beat you with 'till you understand who's in ruttin' command!"
-Jayne Cobb, Firefly Episode 2 "The Train Job"
We are modelers - the same in spirit, in hunger to insanely buy newly released kits, hustlers in hiding our stash from our better halves and experts in using garbage as replacements for after-market parts.
-
Duke Maddog
- Elite Member
- Posts: 7700
- Joined: Tue Jun 03, 2014 11:22 am
- Location: Rowland Heights, CA
Re: Commission Build for Bruce Cooper
Okay, here is my latest progress on this model. I got this all done yesterday and the day before.
Starting out, I added the photo etch seat belts to the seat, starting with the lap belts first; then the shoulder belts:
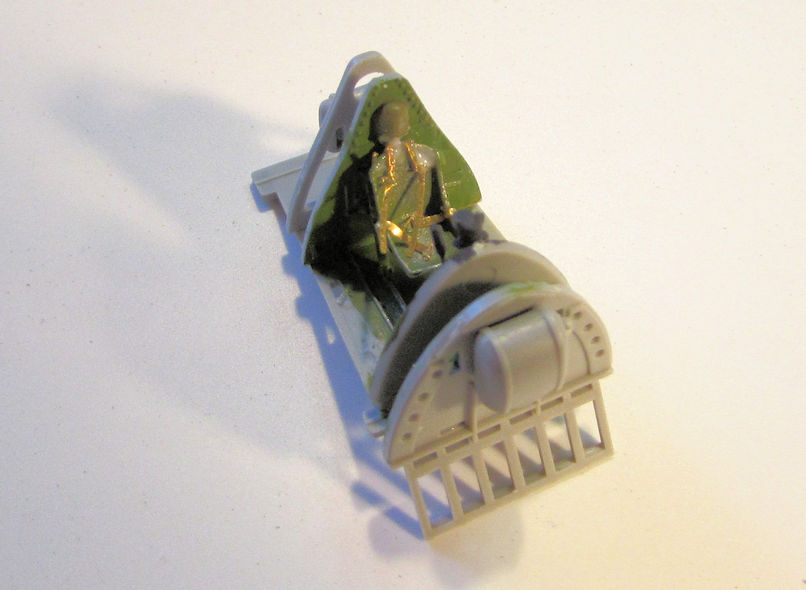
You can see the shoulder belts are all over the place. I glued the top of them to the seat with Gator Grip Glue and waited till they dried. Once everything was dry, I took a semi-rounded rod and pressed them into the seat:
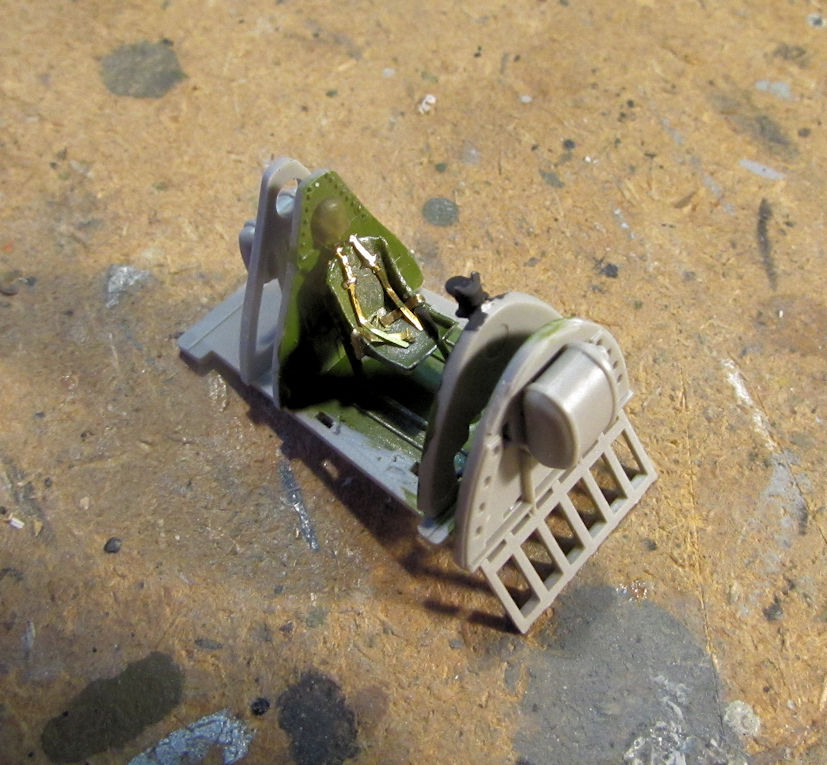
They aren't laying the best, but in this scale, it's tough to see anyway. Once these dried further, I painted them up:
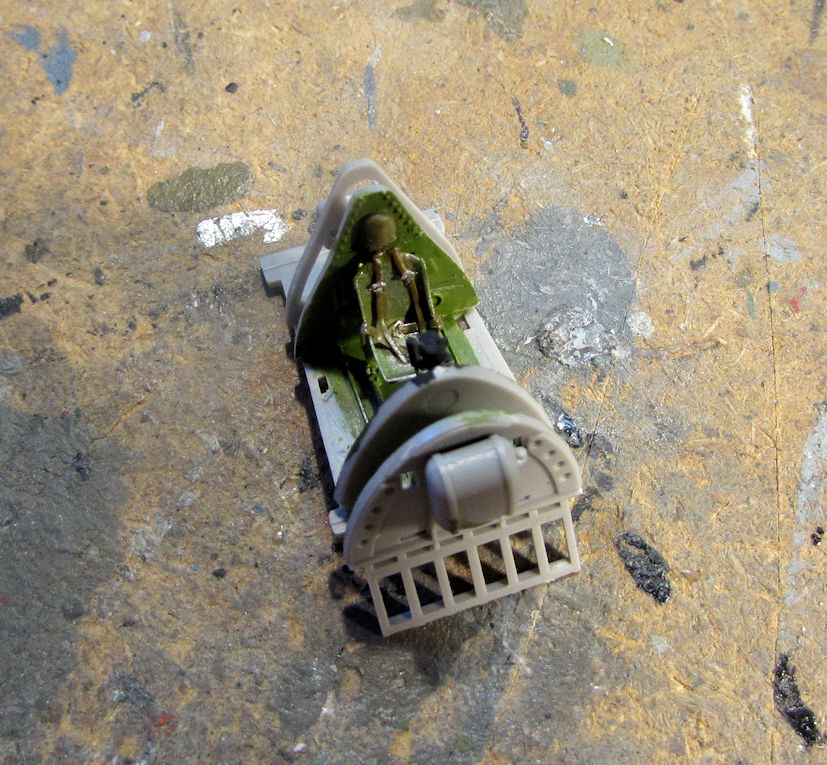
Once that was done, I finished the cockpit assembly...
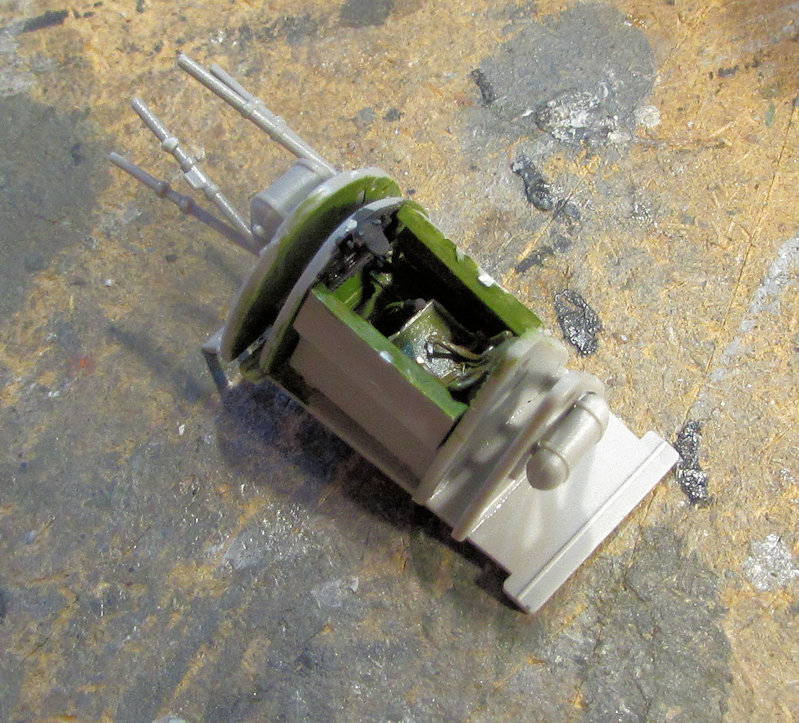
...and then installed it inside the fuselage:
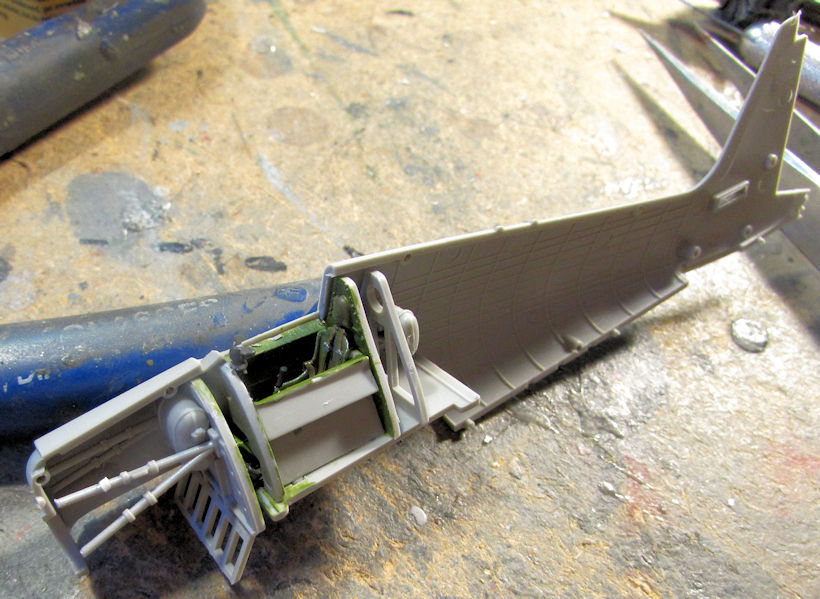
Finally, I assembled the tail wheel, added it to the fuselage half and closed everything up. Then I cemented the center wing section to the underside of this model and added the horizontal stabilizers. I also dry-fit the engine to the front to see how it fit:
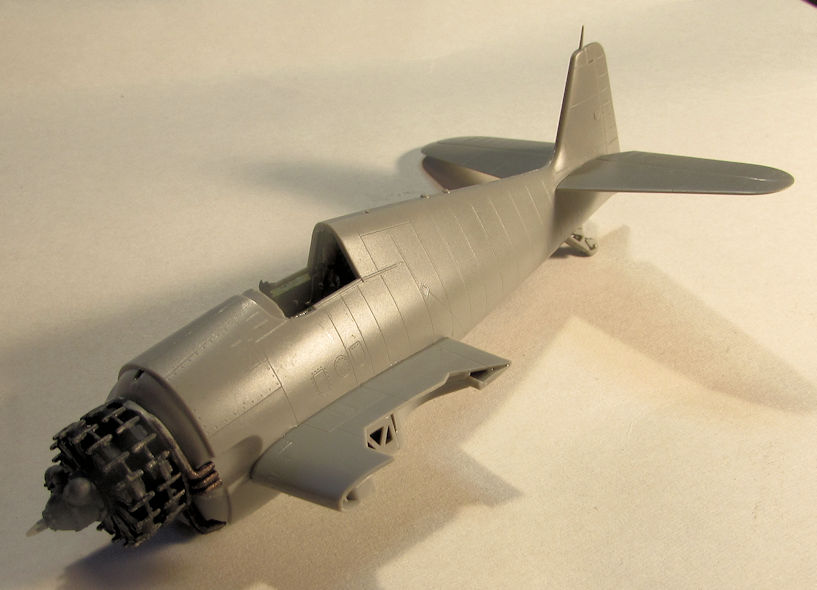
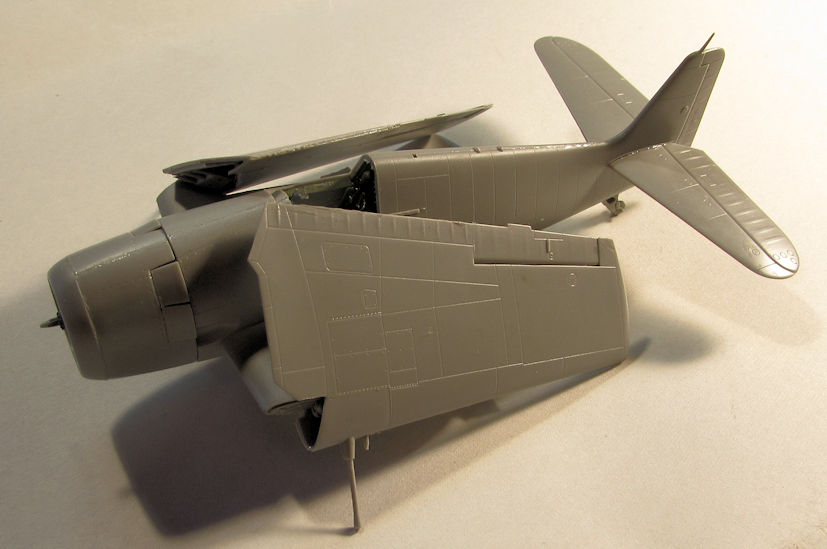
Just for fun, I dry fit the wings and the cowl to this to see how it was coming along, as well as check the fit of all these parts:
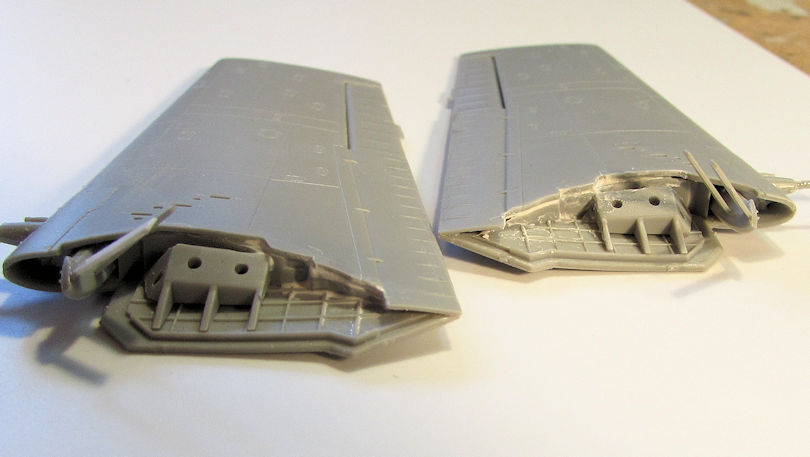
Looking over the model later; I decided to take my acrylic putty and fill in the small gaps on the ends of the wings that I couldn't glue shut, even with clamps:
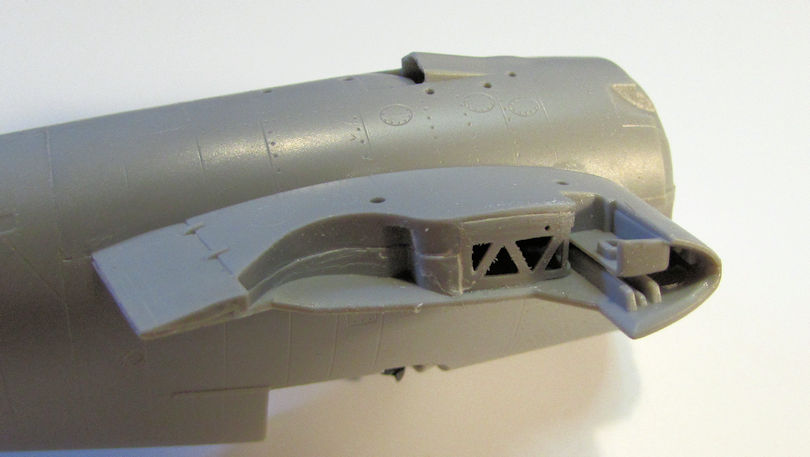
I also had a few very minor seams on the center wing section to fill:
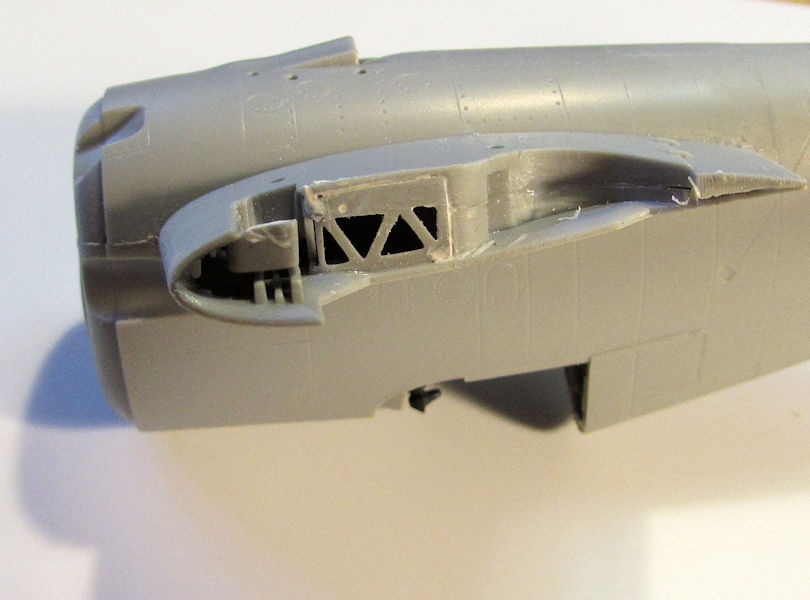
Furthermore, while looking over the sprues, I encountered these parts and for the life of me I could not figure out how they fit on the model:
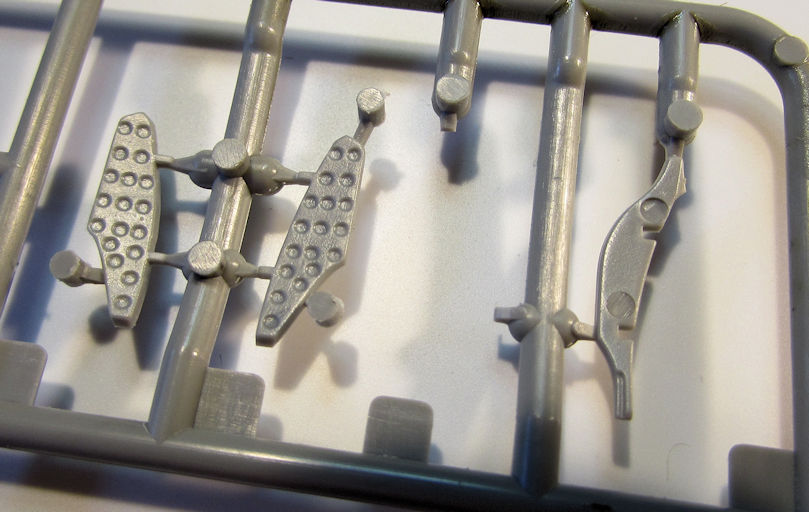
The instruction sheet was as clear as mud about the placement; if it was to be believed, the part on the right was supposed to be glued on one end with a very fragile join to the center wing section and the other end was supposed to swing in the wind as there was nothing to connect it to. I tried as much as I could to figure it out, even looking at reference pics but could not come up with a solution. Therefore, these parts were not added to the model. As they are in the underside, they wouldn't be well seen anyway. I don't know what else to do about it. Finally I moved on and assembled the center drop tank:
Now this model is ready to mask and paint. Hopefully I'll be able to get that done by next week.
Meanwhile, comments are welcome, stay tuned for more.
Starting out, I added the photo etch seat belts to the seat, starting with the lap belts first; then the shoulder belts:
You can see the shoulder belts are all over the place. I glued the top of them to the seat with Gator Grip Glue and waited till they dried. Once everything was dry, I took a semi-rounded rod and pressed them into the seat:
They aren't laying the best, but in this scale, it's tough to see anyway. Once these dried further, I painted them up:
Once that was done, I finished the cockpit assembly...
...and then installed it inside the fuselage:
Finally, I assembled the tail wheel, added it to the fuselage half and closed everything up. Then I cemented the center wing section to the underside of this model and added the horizontal stabilizers. I also dry-fit the engine to the front to see how it fit:
Just for fun, I dry fit the wings and the cowl to this to see how it was coming along, as well as check the fit of all these parts:
Looking over the model later; I decided to take my acrylic putty and fill in the small gaps on the ends of the wings that I couldn't glue shut, even with clamps:
I also had a few very minor seams on the center wing section to fill:
Furthermore, while looking over the sprues, I encountered these parts and for the life of me I could not figure out how they fit on the model:
The instruction sheet was as clear as mud about the placement; if it was to be believed, the part on the right was supposed to be glued on one end with a very fragile join to the center wing section and the other end was supposed to swing in the wind as there was nothing to connect it to. I tried as much as I could to figure it out, even looking at reference pics but could not come up with a solution. Therefore, these parts were not added to the model. As they are in the underside, they wouldn't be well seen anyway. I don't know what else to do about it. Finally I moved on and assembled the center drop tank:
Now this model is ready to mask and paint. Hopefully I'll be able to get that done by next week.
Meanwhile, comments are welcome, stay tuned for more.
The Duke
Virtuoso of Miniatures
"Do you know what the chain of command is? It's the chain I get and beat you with 'till you understand who's in ruttin' command!"
-Jayne Cobb, Firefly Episode 2 "The Train Job"
We are modelers - the same in spirit, in hunger to insanely buy newly released kits, hustlers in hiding our stash from our better halves and experts in using garbage as replacements for after-market parts.
Virtuoso of Miniatures
"Do you know what the chain of command is? It's the chain I get and beat you with 'till you understand who's in ruttin' command!"
-Jayne Cobb, Firefly Episode 2 "The Train Job"
We are modelers - the same in spirit, in hunger to insanely buy newly released kits, hustlers in hiding our stash from our better halves and experts in using garbage as replacements for after-market parts.
-
speedgraflex
- Moderator
- Posts: 11535
- Joined: Fri Feb 10, 2017 11:08 pm
- Contact:
-
Stikpusher
- Moderator
- Posts: 21386
- Joined: Sat Apr 05, 2014 8:37 pm
- Location: Ceti Alpha 5
Re: Commission Build for Bruce Cooper
Looking real good so far Mark!
"Surely I have made my meaning plain? I intend to avenge myself upon you, Admiral. I have deprived your ship of power, and when I swing 'round, I intend to deprive you of your life."
FLSM
FLSM
-
Medicman71

- Elite Member
- Posts: 11396
- Joined: Mon Apr 07, 2014 9:32 am
- Location: Houston, Tx
Re: Commission Build for Bruce Cooper
Great work!
Mike
Sponsored by Boeing, Lockheed Martin, Northrop Grumman, Saab, BAE, and Dassault
Sponsored by Boeing, Lockheed Martin, Northrop Grumman, Saab, BAE, and Dassault