1/48 Tamiya F-14A Jolly Rogers
-
Medicman71

- Elite Member
- Posts: 11242
- Joined: Mon Apr 07, 2014 9:32 am
- Location: Houston, Tx
Re: 1/48 Tamiya F-14A Jolly Rogers
Very nice! I thought about getting those for my Tamiya F-14D.
Mike
Sponsored by Boeing, Lockheed Martin, Northrop Grumman, Saab, BAE, and Dassault
Sponsored by Boeing, Lockheed Martin, Northrop Grumman, Saab, BAE, and Dassault

Re: 1/48 Tamiya F-14A Jolly Rogers
Really interesting srep by step on how to use these decals John, those and the resin seats really do up the detail.
Glad to see this build hit your workbench, I'll be making notes for when I build mine!
Glad to see this build hit your workbench, I'll be making notes for when I build mine!
Stuart Templeton 'I may not be good but I'm slow...'

Re: 1/48 Tamiya F-14A Jolly Rogers
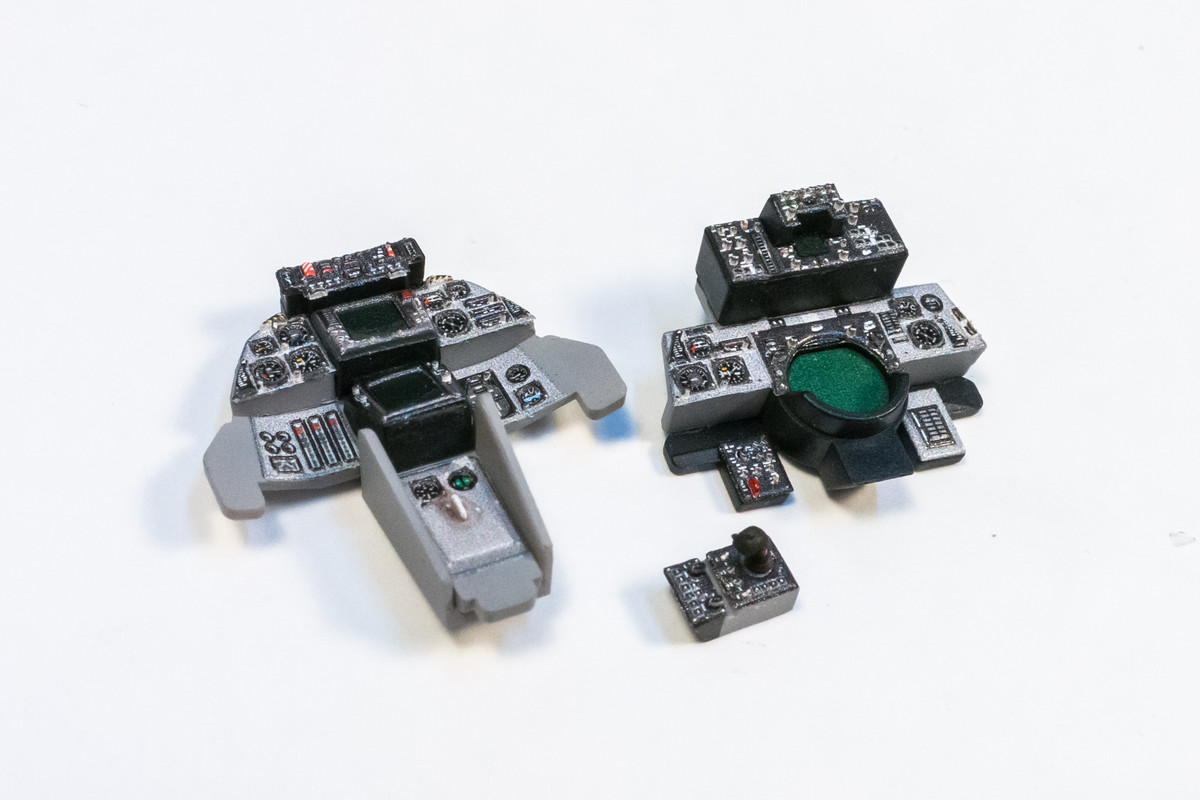
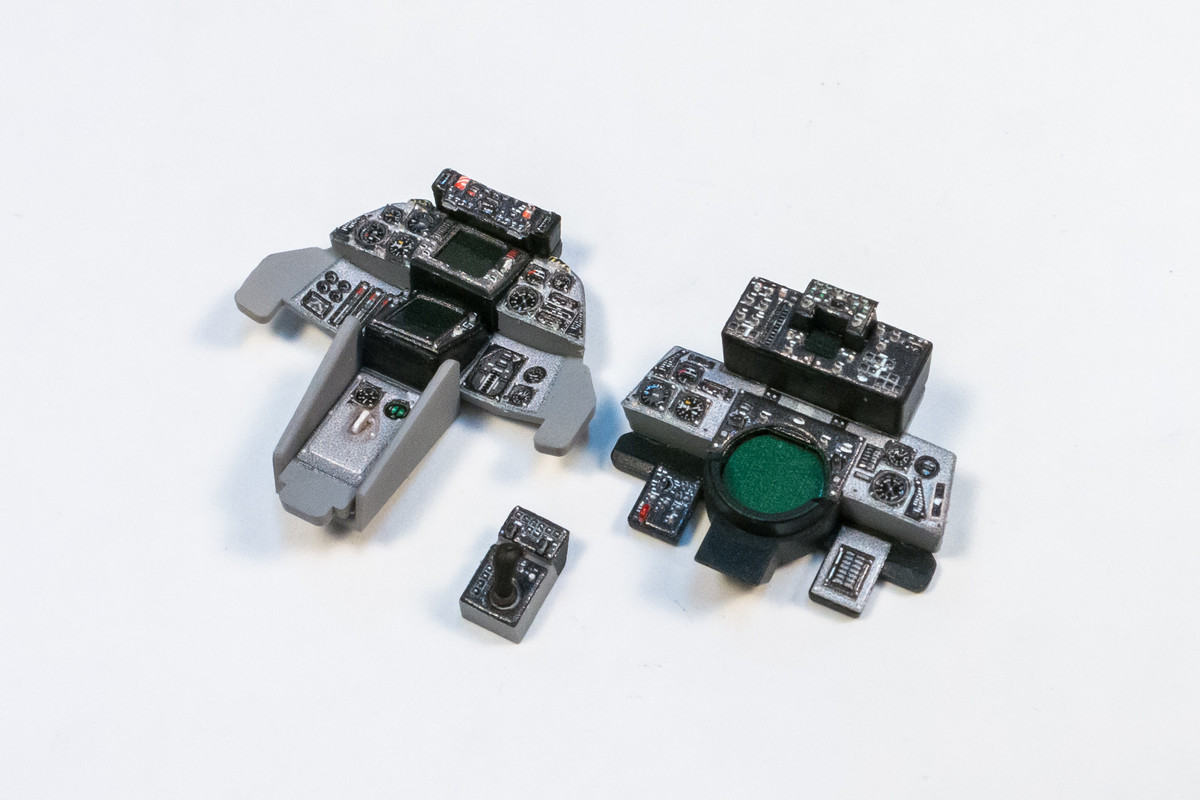
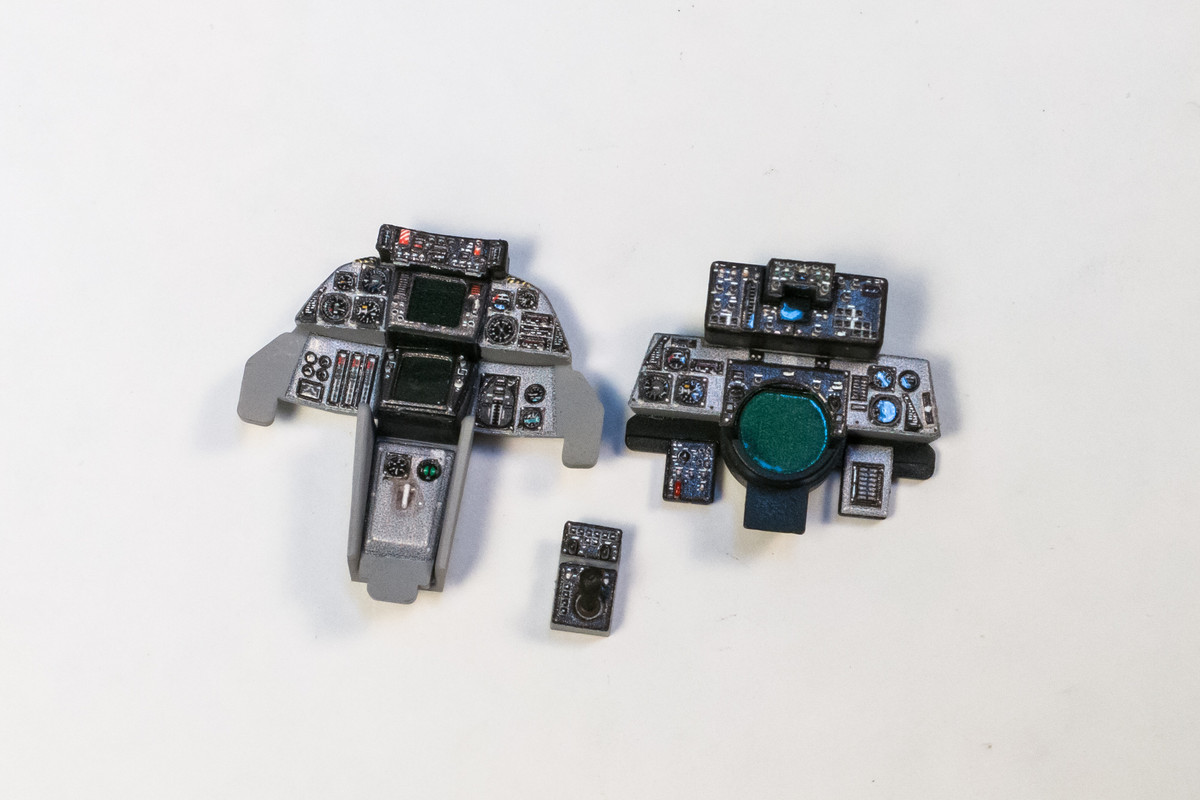
Thanks guys! As promised here are some additional shots of the Quinta Studios side consoles.
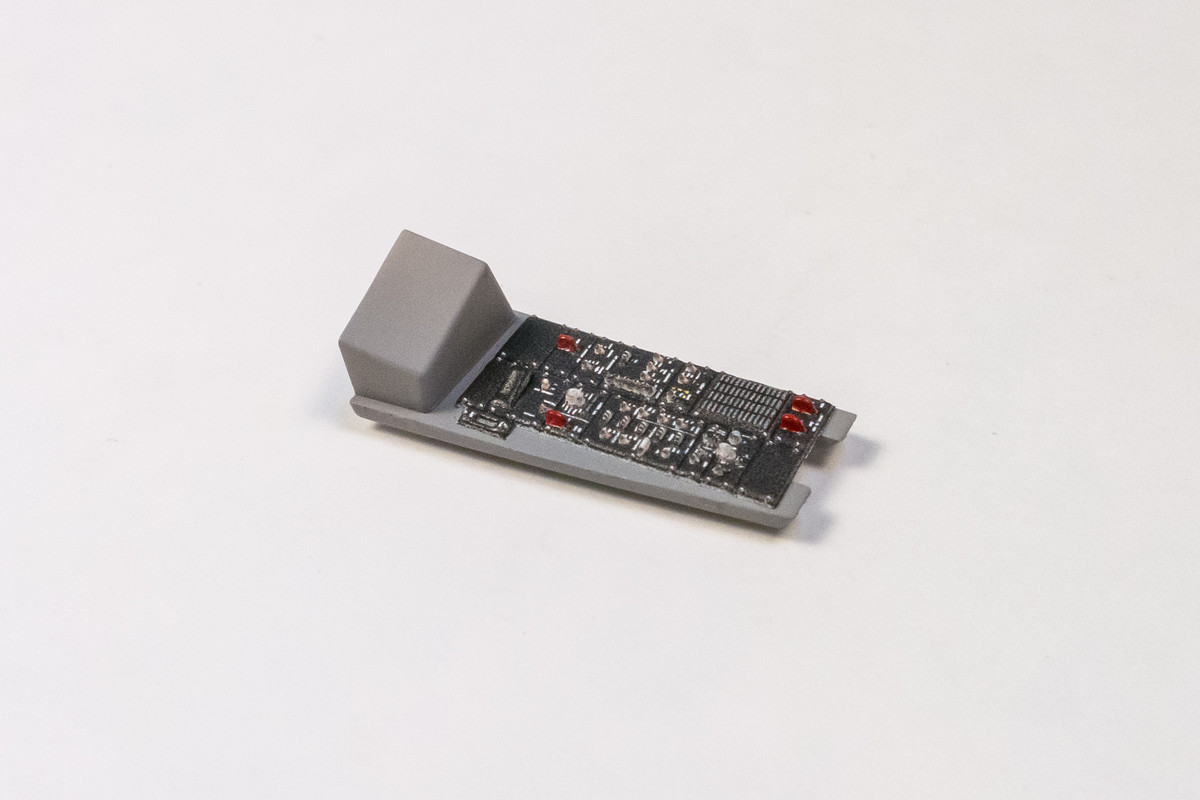
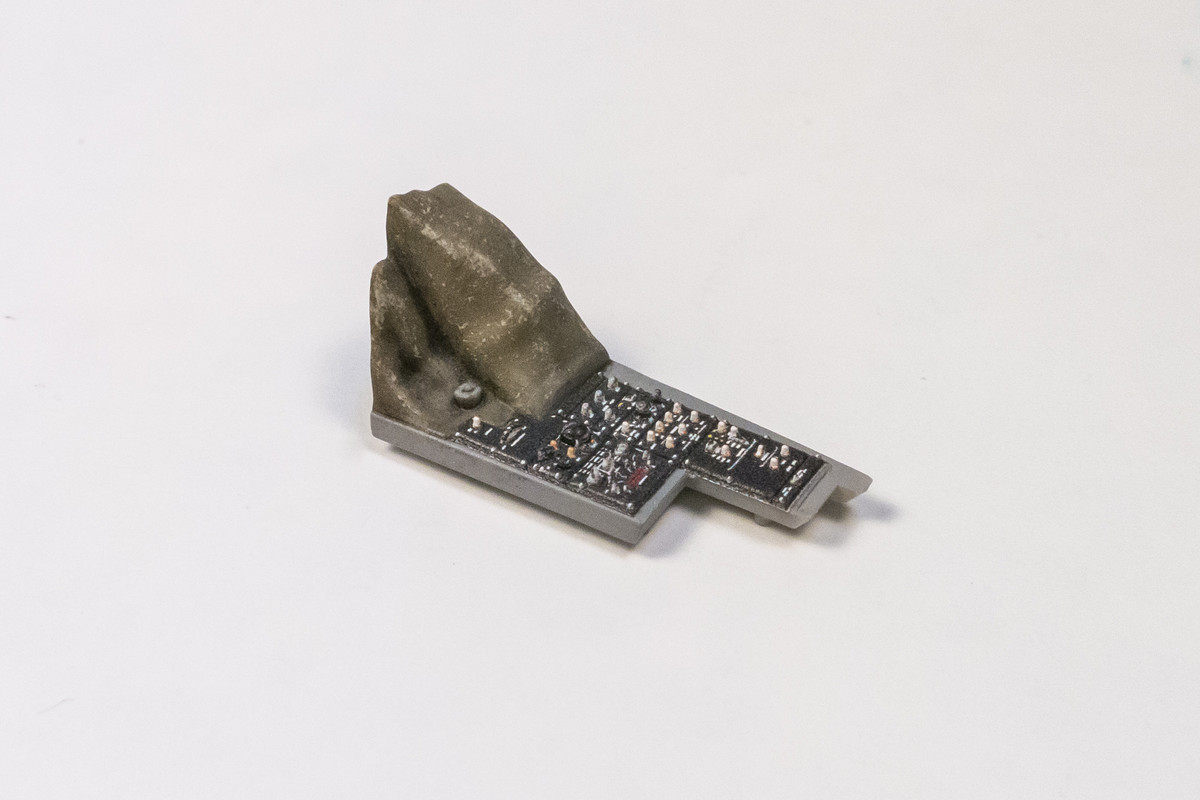
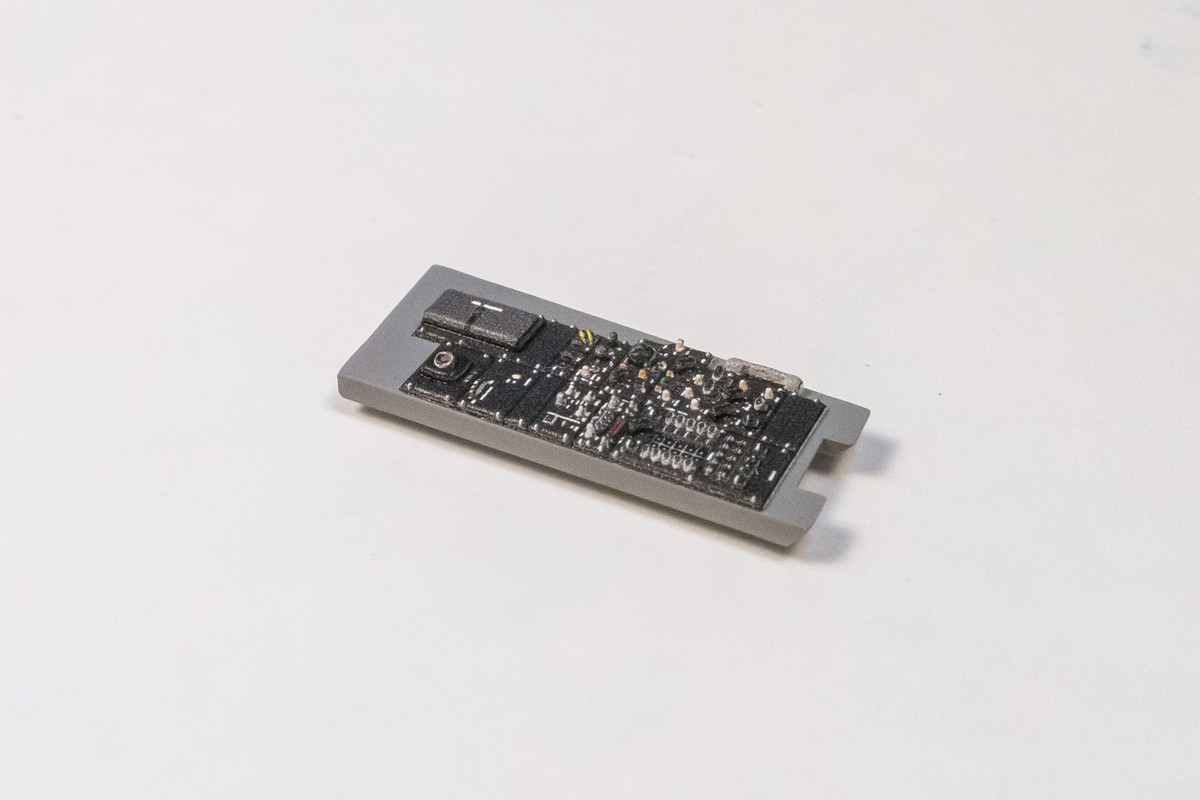
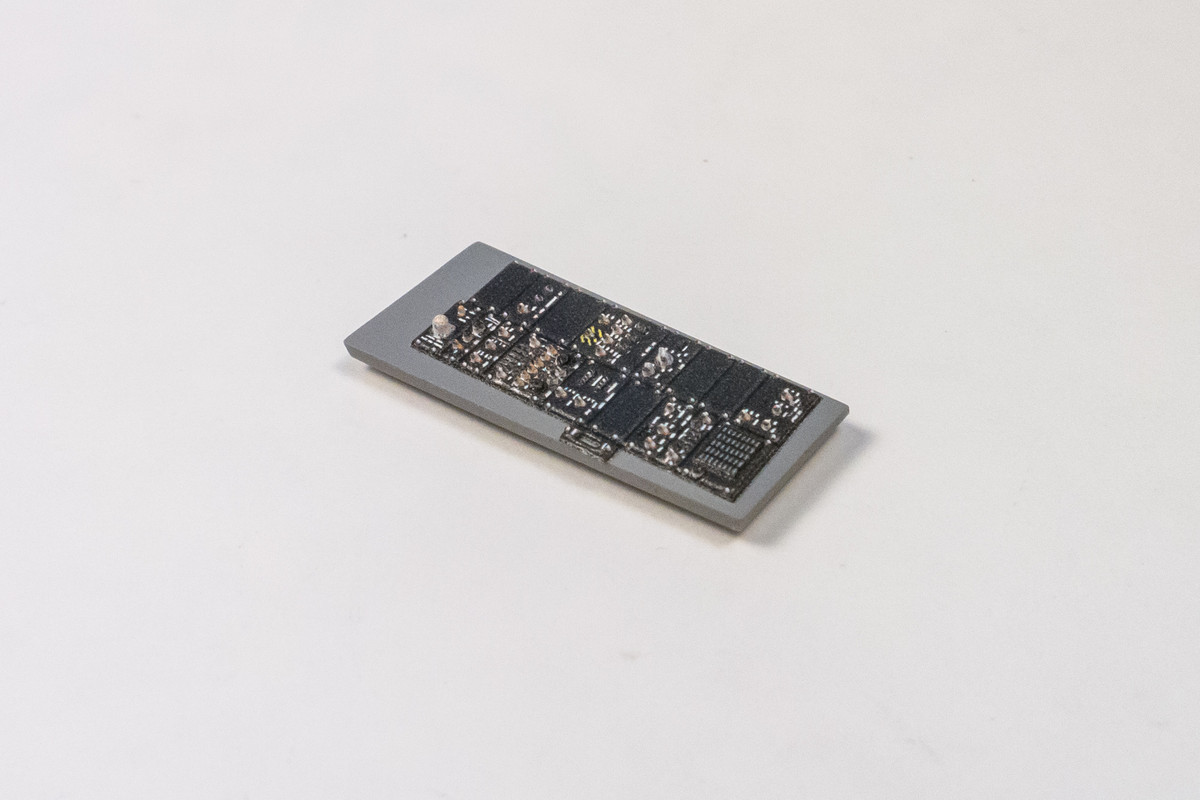
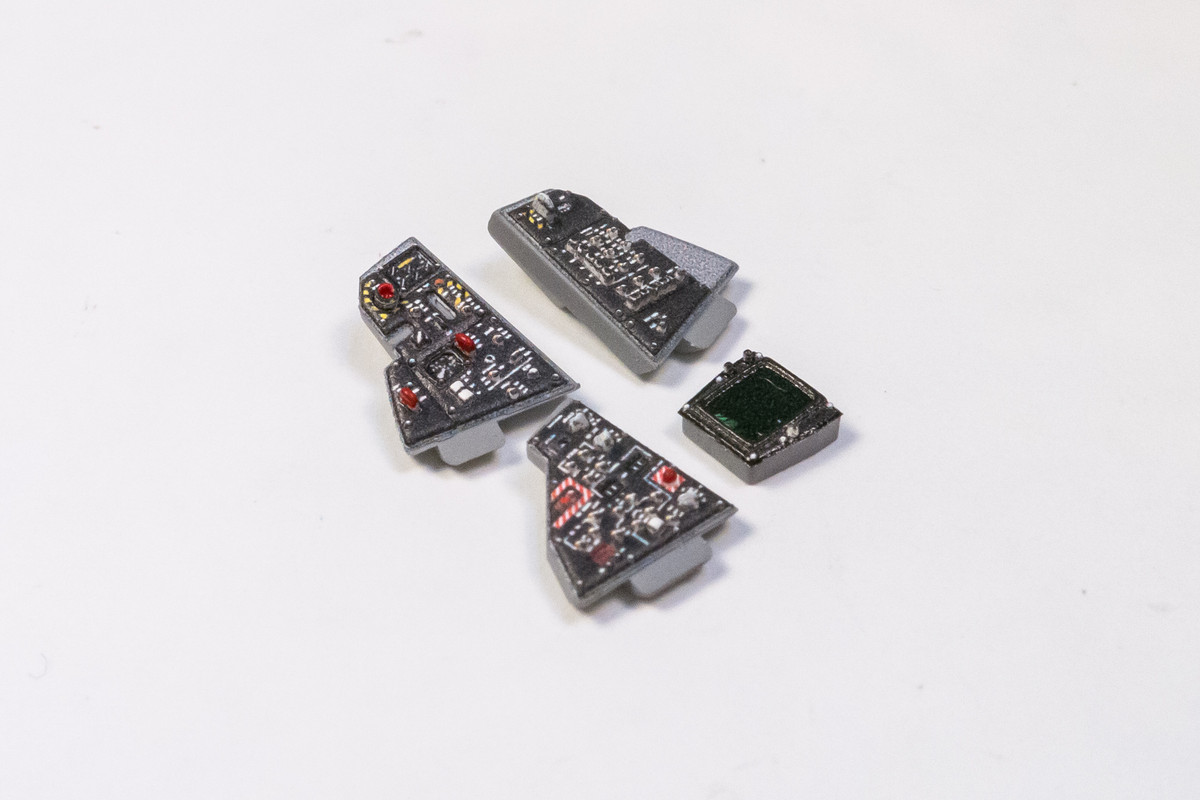
The labels and markings alongside the knobs and switches are short of being legible but the effect is very convincing nonetheless. And keep in mind how small these pieces really are.
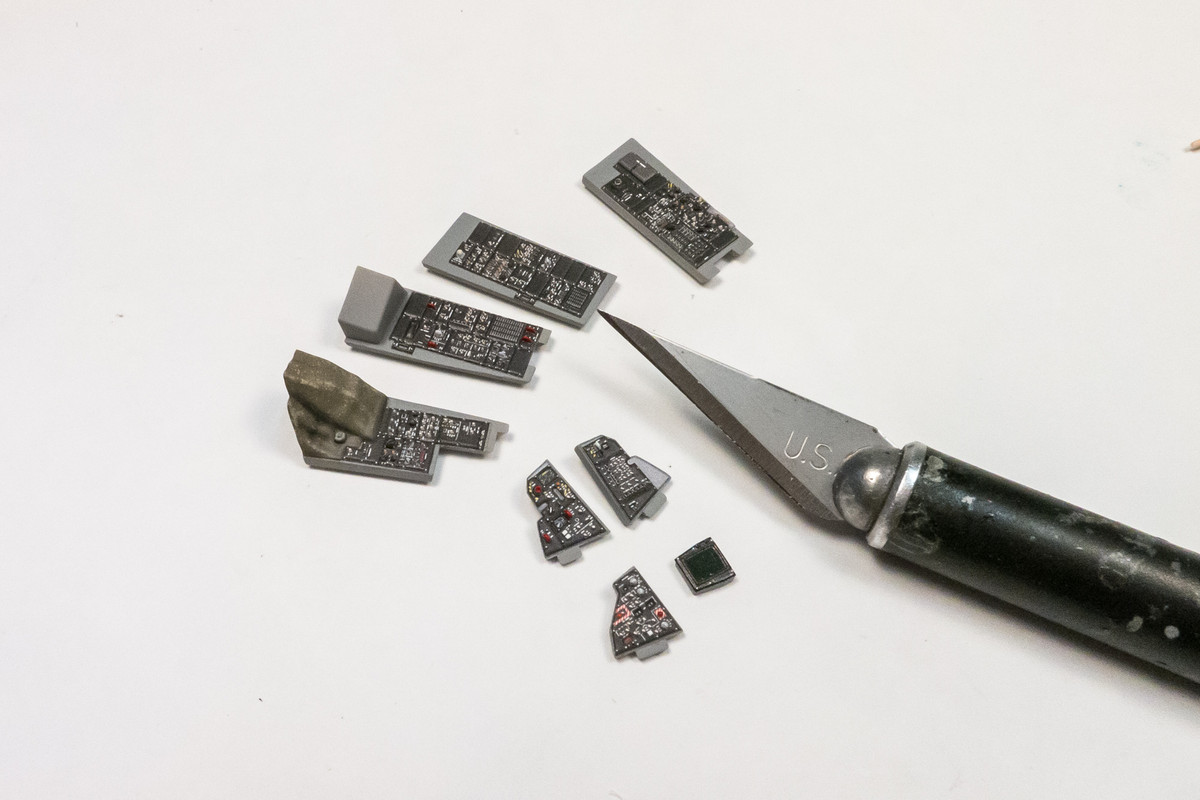
The next set of parts to be enhanced with the Quinta decals.
The instrument panel and radar panel were not given a semi-matte coat. Each individual dial has a glossy face to simulate a clear lens and I didn't want to remove that effect. The fit of the Quinta panels has been perfect on all of the parts so far. Some of the Quinta decals have a slight white edge, which can be touched up with careful painting.
The labels and markings alongside the knobs and switches are short of being legible but the effect is very convincing nonetheless. And keep in mind how small these pieces really are.
The next set of parts to be enhanced with the Quinta decals.
The instrument panel and radar panel were not given a semi-matte coat. Each individual dial has a glossy face to simulate a clear lens and I didn't want to remove that effect. The fit of the Quinta panels has been perfect on all of the parts so far. Some of the Quinta decals have a slight white edge, which can be touched up with careful painting.
John aka JKim
-----------<><

-----------<><


Re: 1/48 Tamiya F-14A Jolly Rogers
These are beautiful
March as one, Don't look back
Odin's sons... Attack!
Unleash hell! Do not repent! Warfare grants us no lament
Let your weapons slash and tear This is no place for fear
Hold the lines! Move as one! In unity our victory's won
Our shields will form a mighty wall
United we shall never fall
Odin's sons... Attack!
Unleash hell! Do not repent! Warfare grants us no lament
Let your weapons slash and tear This is no place for fear
Hold the lines! Move as one! In unity our victory's won
Our shields will form a mighty wall
United we shall never fall
-
Norman

- Senior Member
- Posts: 85
- Joined: Sun Apr 06, 2014 12:54 am
- Location: Hamburg, Germany
- Contact:
Re: 1/48 Tamiya F-14A Jolly Rogers
Quinta Studios do awesome stuff, unfortunately always sold out very quickly here in Germany and also quite expensive. Well worth the price, as I see it.
Re: 1/48 Tamiya F-14A Jolly Rogers
That looks excellent John!
Stuart Templeton 'I may not be good but I'm slow...'

Re: 1/48 Tamiya F-14A Jolly Rogers
QS knocks it out of the park. In addition to your modeling skills this F-14 will be reference class when it's finished.
Cheers,
Torben
Torben
-
mustang1989

- Moderator
- Posts: 5013
- Joined: Tue Mar 18, 2014 8:35 pm
Re: 1/48 Tamiya F-14A Jolly Rogers
Just found this thread and you definitely chose the right kit for an F-14 build. Never seen those Quinta sheets yet but have to say.....that I am indeed....impressed. 
Re: 1/48 Tamiya F-14A Jolly Rogers
Thank you gentlemen! Appreciate the input as always!
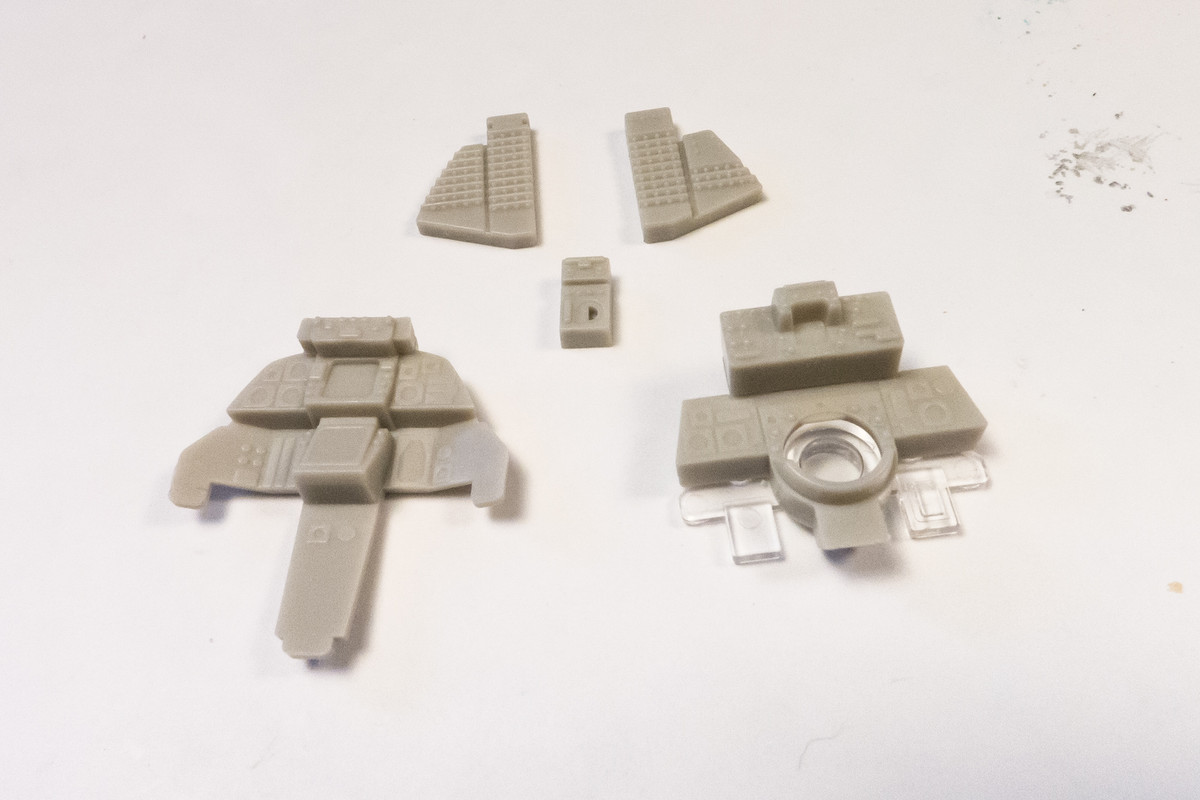
The painting of the cockpit components continues. Here are some other parts including the rear bulkhead and the cockpit sidewalls, which will be difficult to make out due to the acute angle in which they are installed. The foot pedals look like an afterthought and that's how I'm treating them but I don't they will be visible at all.
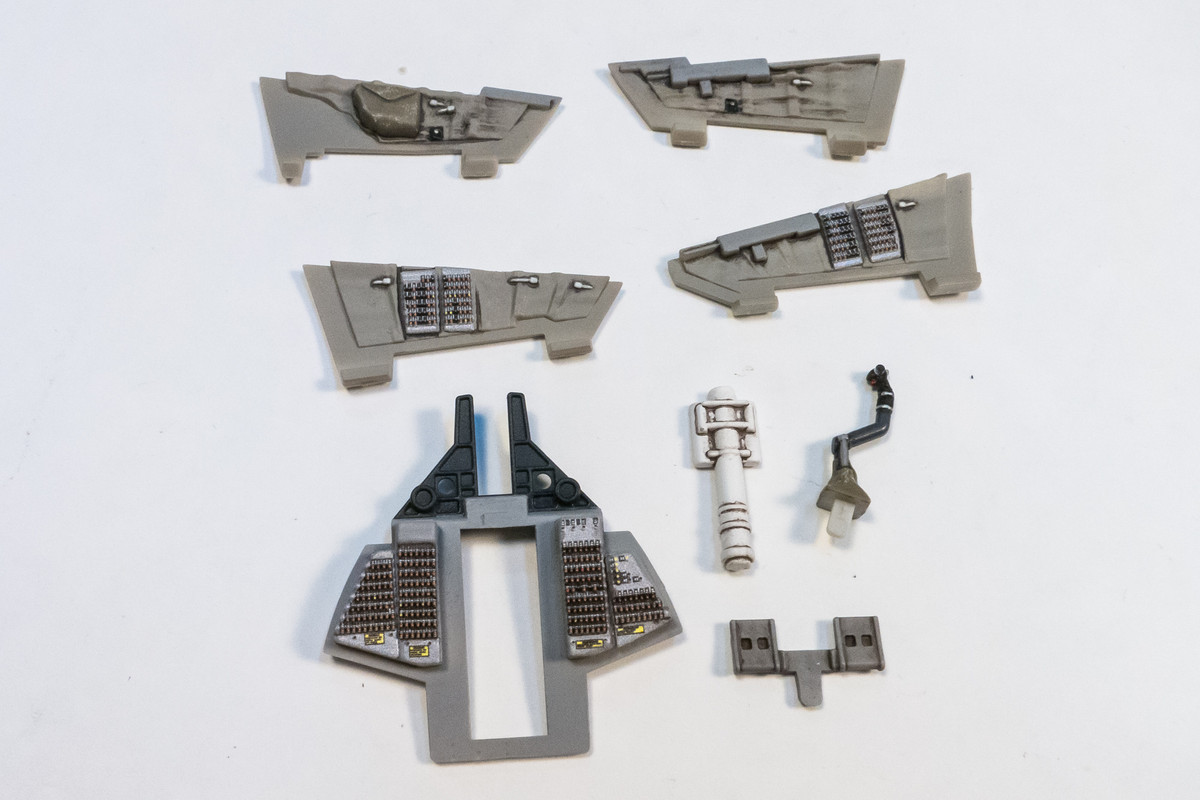
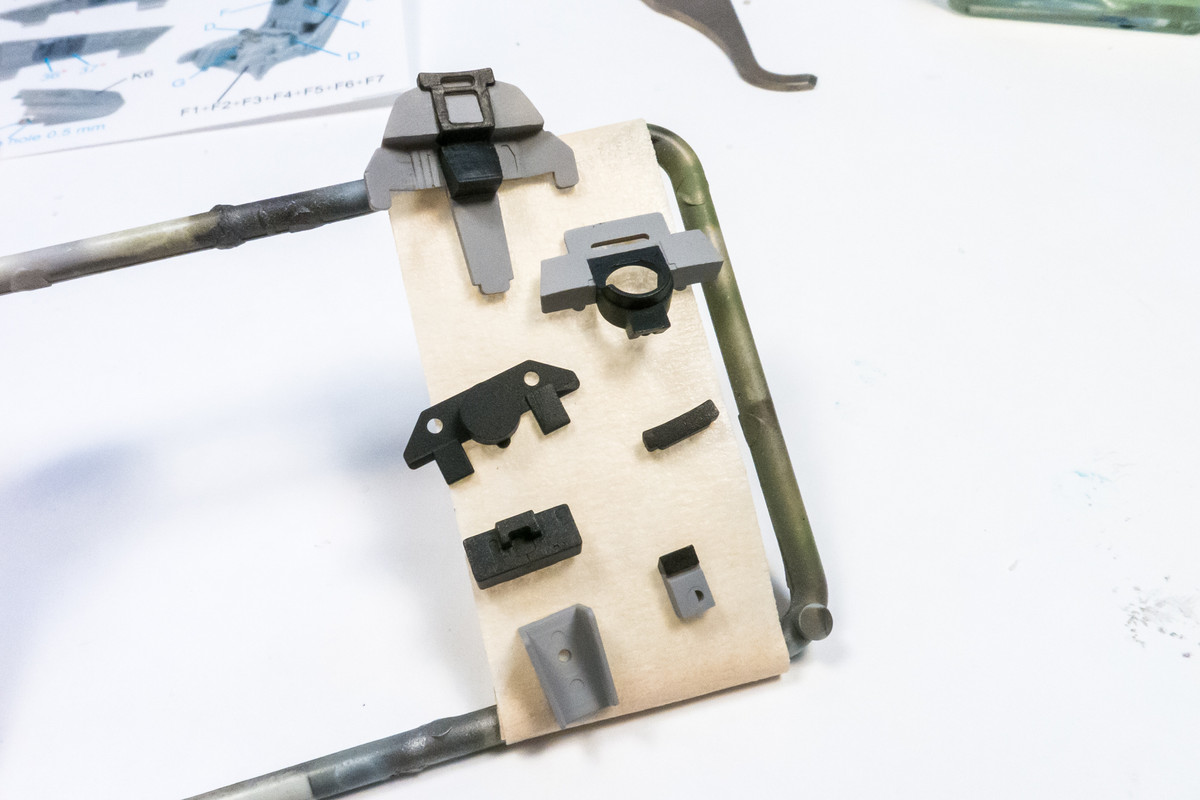
A mock-up of the cockpit with the painted components in place. After looking at the previous photos, I thinned out the side shrouds on central base of the pilot's instrument panel. I also fashioned a throttle lever using a bit of scrap plastic. It was very awkward trying to shape and paint something this small.
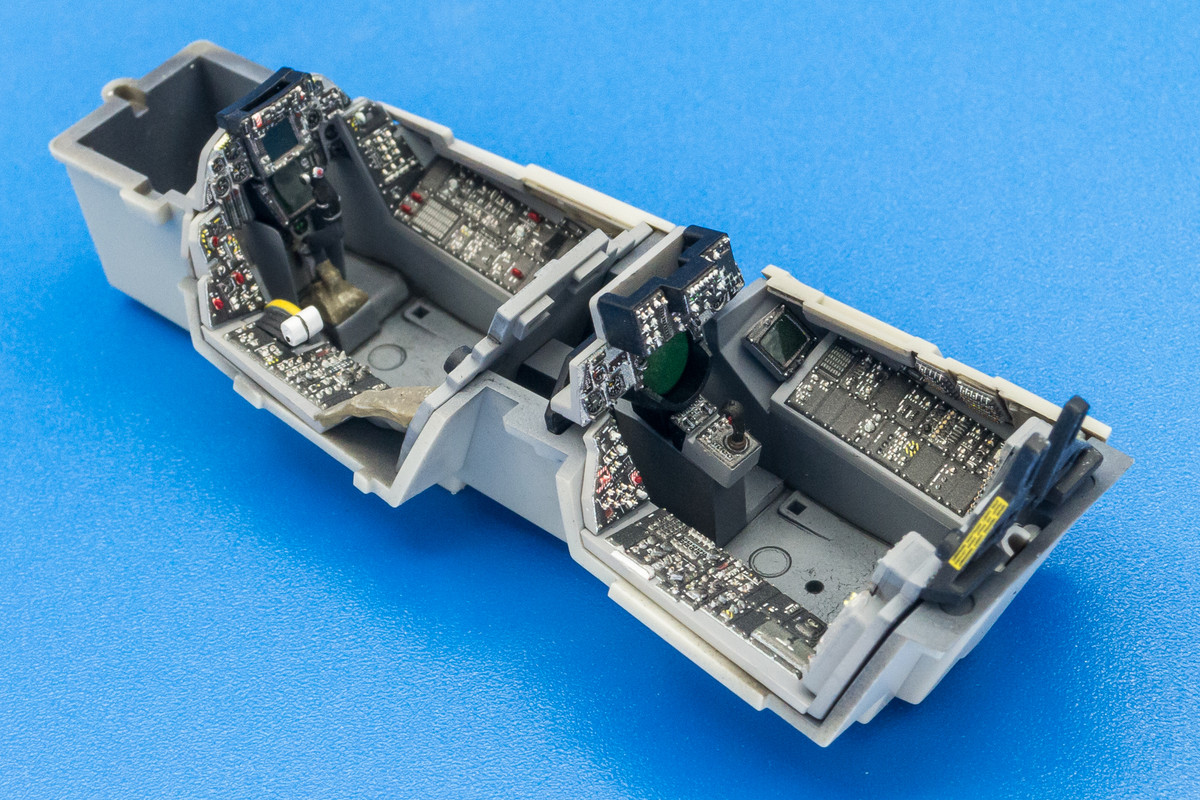
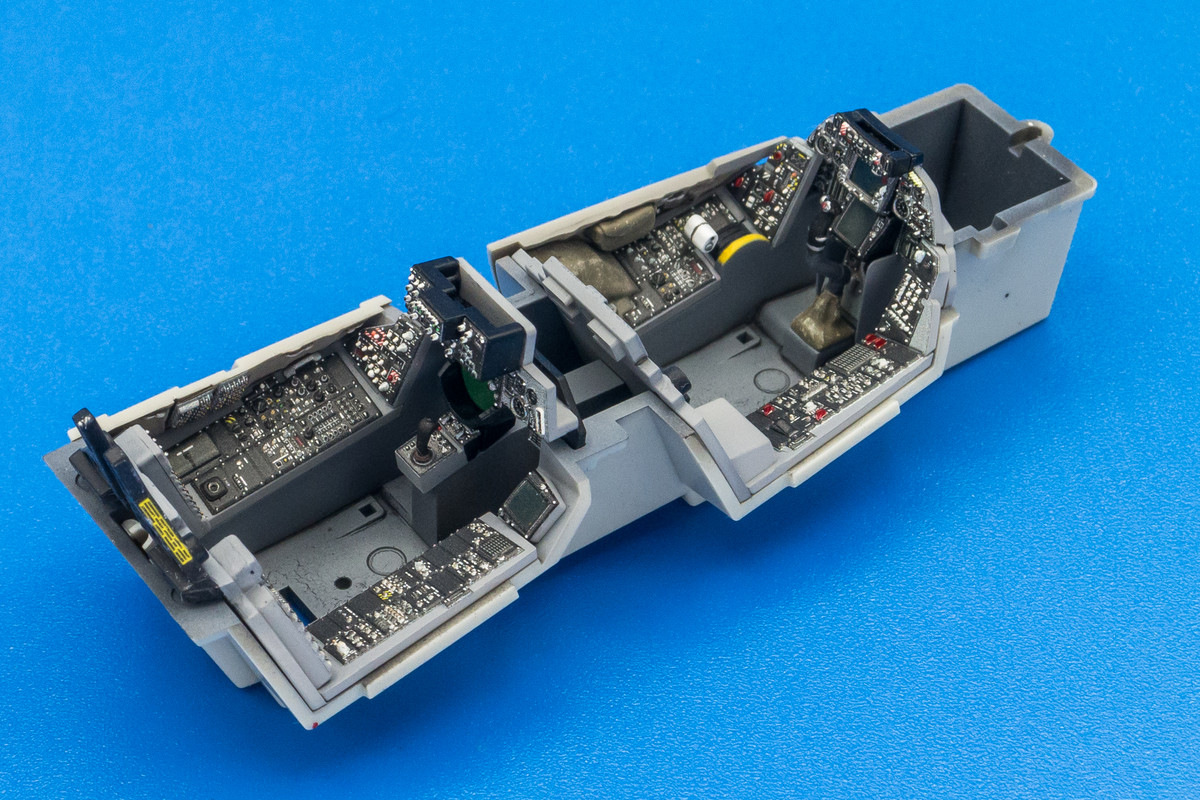
Working on the seats now.
The painting of the cockpit components continues. Here are some other parts including the rear bulkhead and the cockpit sidewalls, which will be difficult to make out due to the acute angle in which they are installed. The foot pedals look like an afterthought and that's how I'm treating them but I don't they will be visible at all.
A mock-up of the cockpit with the painted components in place. After looking at the previous photos, I thinned out the side shrouds on central base of the pilot's instrument panel. I also fashioned a throttle lever using a bit of scrap plastic. It was very awkward trying to shape and paint something this small.
Working on the seats now.
John aka JKim
-----------<><
-----------<><