Page 21 of 44
Re: 1/32 Hasegawa Fw190D-9 Red One
Posted: Mon Dec 10, 2018 11:59 pm
by speedgraflex
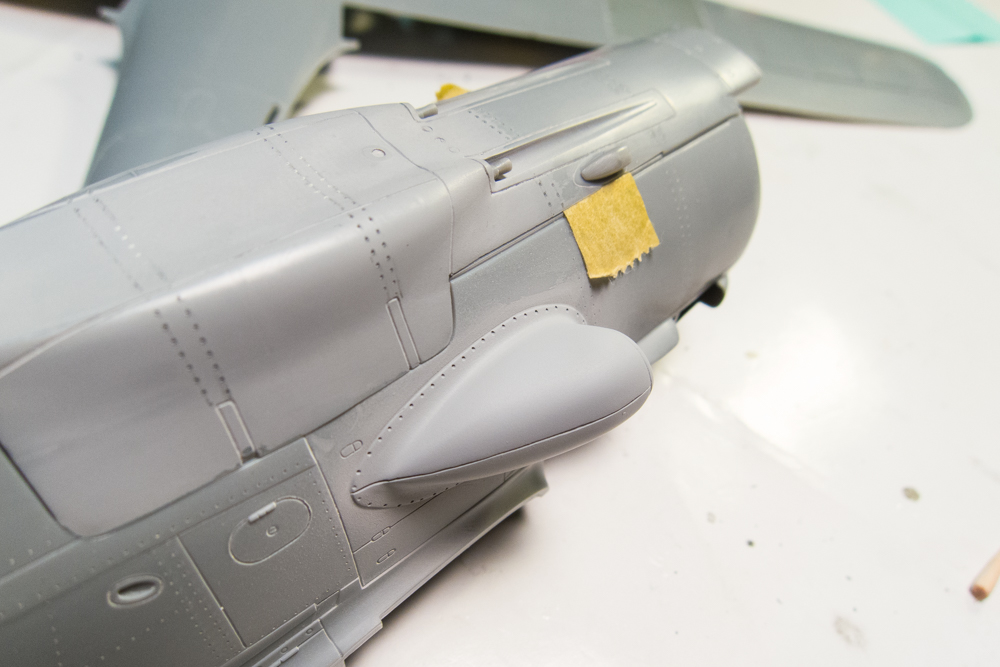
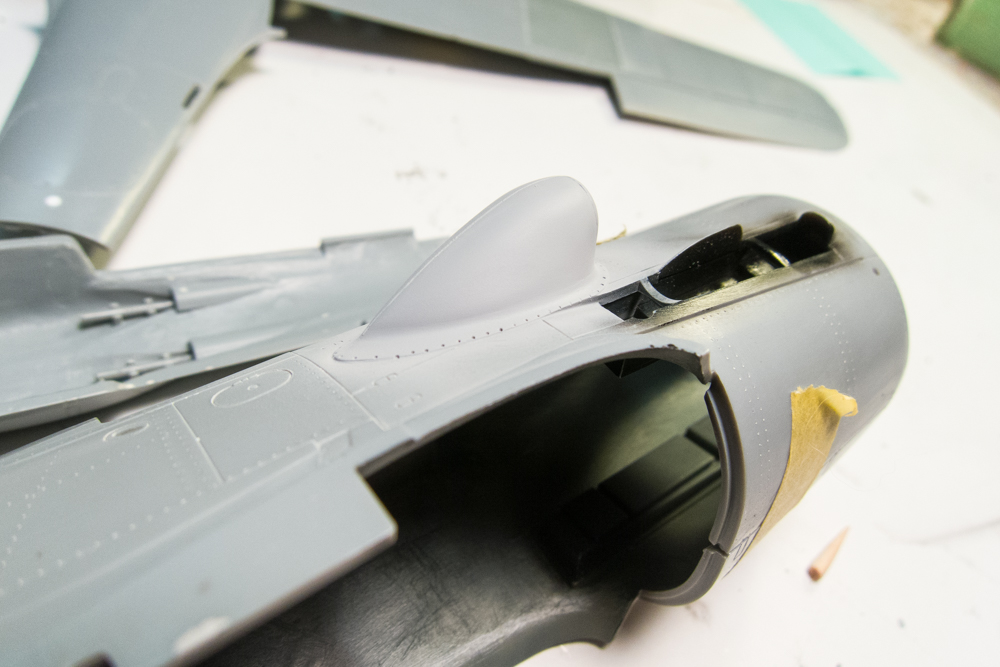
Seconded. There is some seriously beautiful scratch-building and seam-filling work happening here, John. Interesting mix of filler and filler primers to fill the supercharger scoop seam... and excellent results.
Re: 1/32 Hasegawa Fw190D-9 Red One
Posted: Tue Dec 11, 2018 1:34 am
by jkim
After sanding, the supercharger scoop was given another spritz of primer. Some very minor touch-ups and it should be done. The order of the filling materials was intentional and saved me some time. Milliput does not shrink AND has the advantage of being reduced with water so I was able to make an initial gap fill with no sanding. The Mr Dissolved Putty shrinks only slightly and is easier to apply in thin coats than Milliput so it made a good choice in creating a level surface between the all three elements (fuselage, gap filled with Milliput and the scoop). Mr Surfacer shrinks alot but is the best at feathering an edge so it was used last and in the smallest amount, which takes the shrinkage out of play.
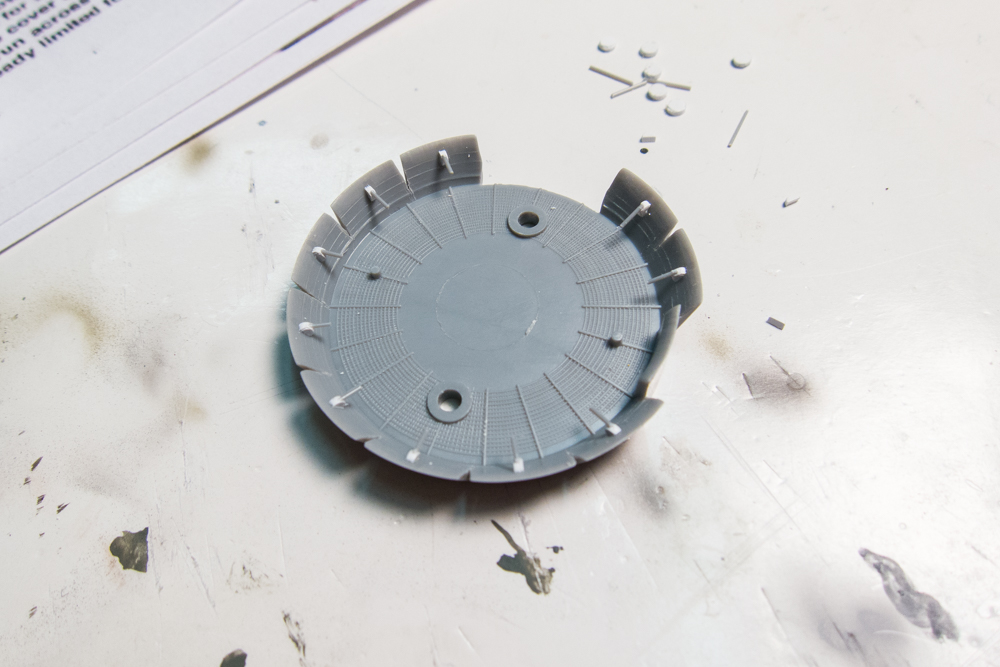
Another minor detail that I decided to address was the cowl flap actuator rods. In reality, the Dora has a complicated network of pushrods and levers that control the cowl flaps. Very difficult to render accurately and since the view into the back of the flaps is very limited, I resigned myself to simply showing a rod for each flap. Better than nothing...
Finally got the nerve to rivet the wing bottoms tonight. To make it more manageable and avoid smearing of the pencil lines, I decided to attack it in sections. First I did the center...
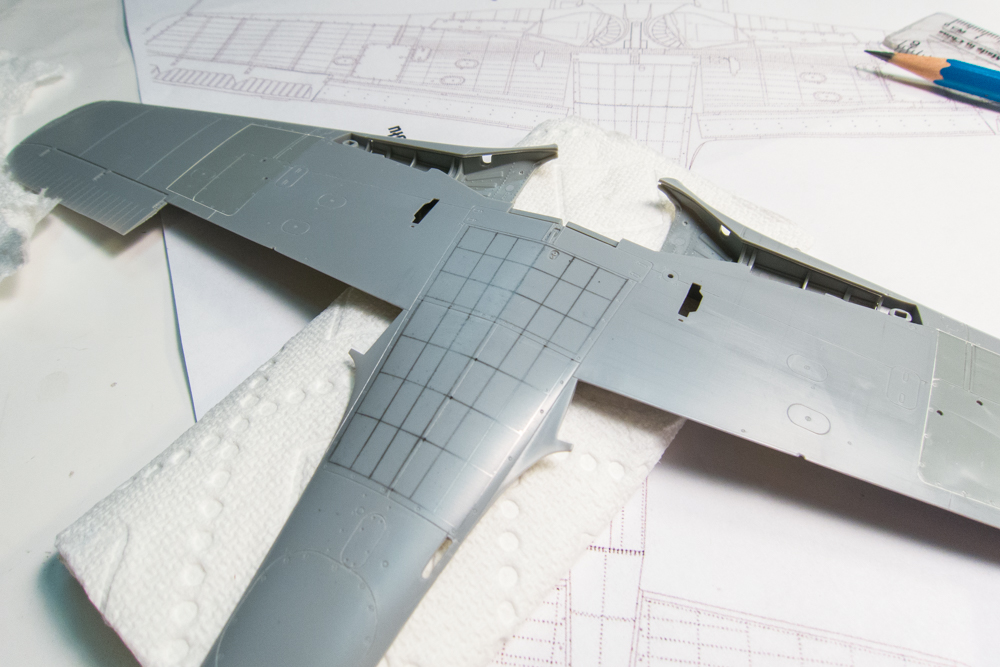

And then the outer wing sections...

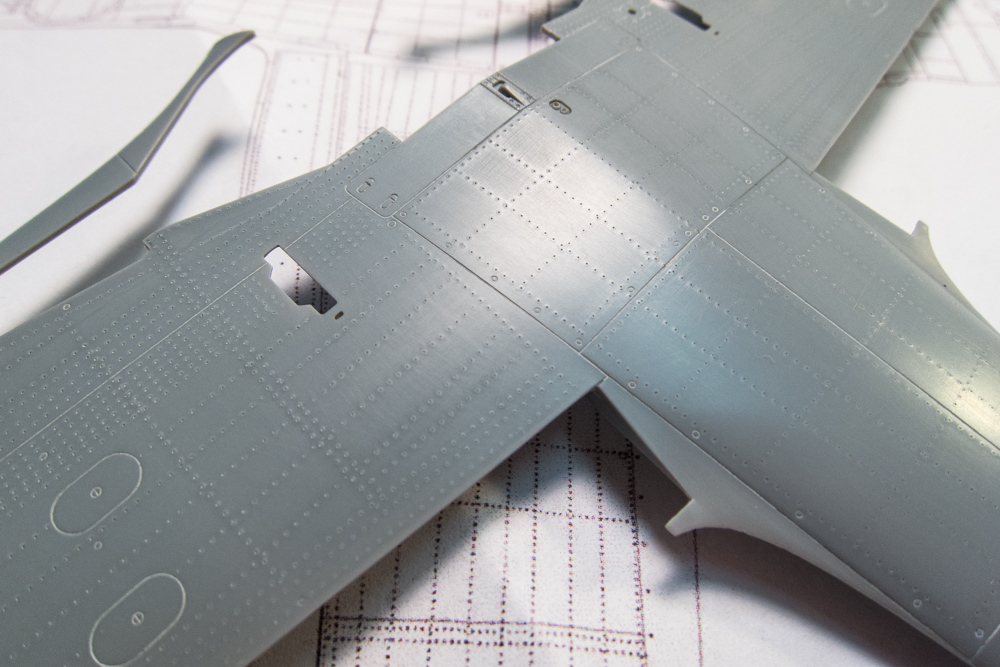
After the rivets were applied, the entire bottom was sanded with very fine sandpaper to get rid of the raised plastic above each rivet. The wing was washed with warm water afterwards. You can't even see the rivets from this distance but that is intentional.

The majority of the airframe has been riveted. I've held off on the rivet lines along the major seams. It'll be easier to do them after assembly.
Re: 1/32 Hasegawa Fw190D-9 Red One
Posted: Tue Dec 11, 2018 8:06 am
by Stikpusher
Very wise to tackle the rivet work in sections. Your end results look great! And the intake scoop looks very sharp too! I appreciate the explanation of your filling technique here.
Re: 1/32 Hasegawa Fw190D-9 Red One
Posted: Tue Dec 11, 2018 11:38 am
by mostrich
What Carlos said. Your filling work is next level and worth being printed.
Re: 1/32 Hasegawa Fw190D-9 Red One
Posted: Tue Dec 11, 2018 11:58 pm
by jkim
Thanks guys! I appreciate the kind words!
It's finally time for a major construction step! The fuselage halves can now be glued together. First, I've glued the engine plug into the starboard fuselage side.

Tube glue is then applied to the edges of the engine plug that will be contacting the port fuselage side. The port side is then pushed into place, making sure that the engine plug contact points are pushed against the fuselage side. Then, I'll fuse together the fuselage seam one section at a time using Tamiya Extra Thin cement. Masking tape is used to apply pressure on the seam as the glue dries.
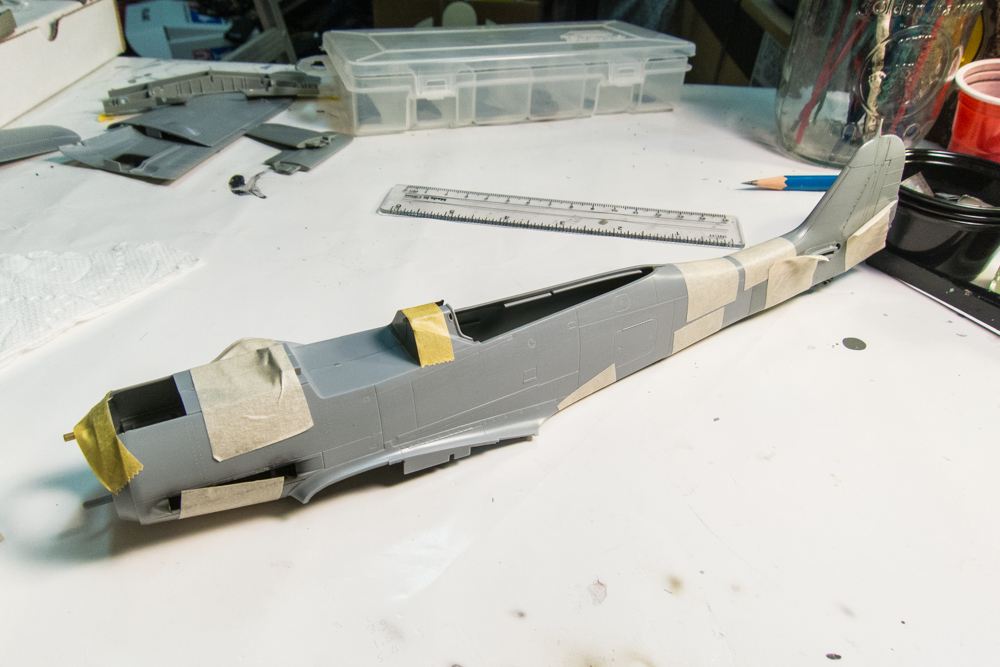
A view up from the bottom. The small wheel on the starboard cockpit sidewall has been glued into place. It had been knocked loosed during the riveting/sanding process.
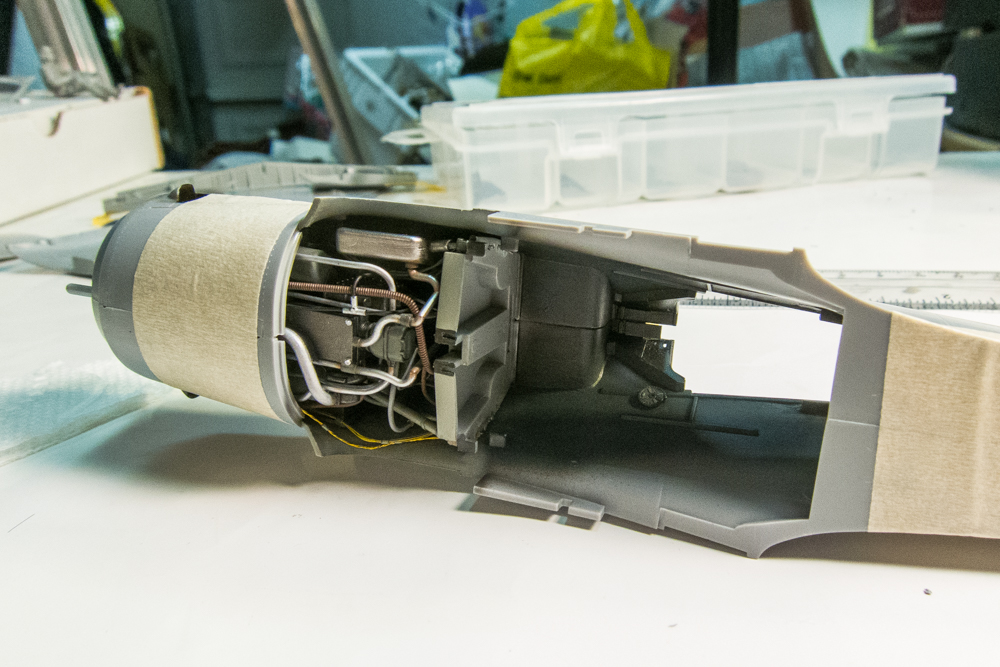
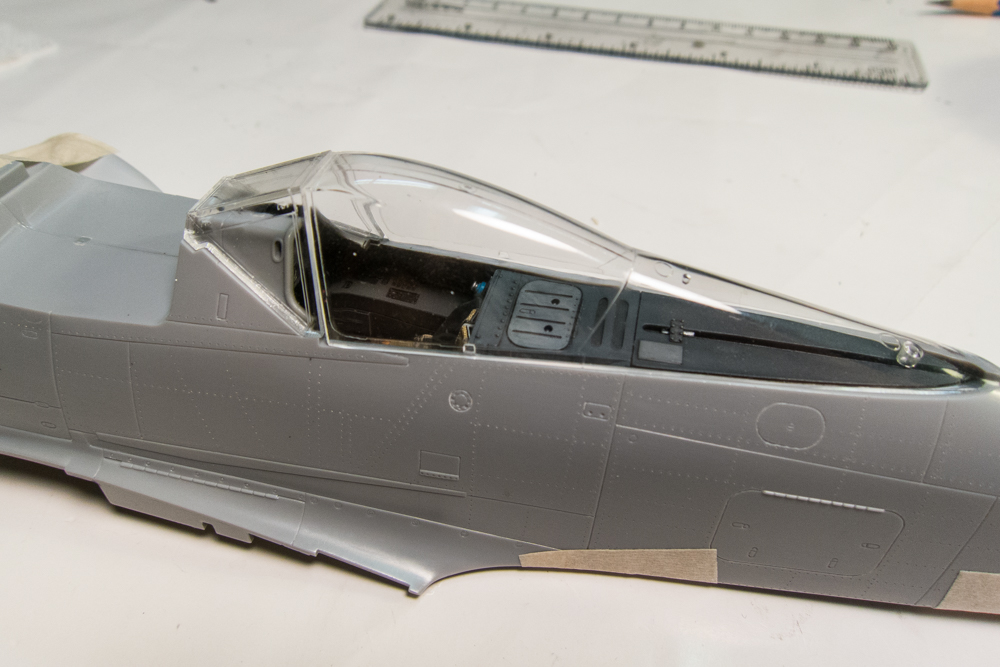
The Aires resin cockpit assembly is pushed into place and secured temporarily with tape. I want to make sure that it fits properly especially in relation to the rear cockpit sill. Note the gap on the edge of the cockpit coaming where the Revi gunsight sits. This is incorrect and the coaming padding along the edge should be continuous.

A quick check to see if the clear canopy parts fit... no problem here.
Another check to see if the gun cowling and radiator cowling fit. I love the lines of the Dora and this build is finally starting to reveal some of the lines of this menacing fighter.
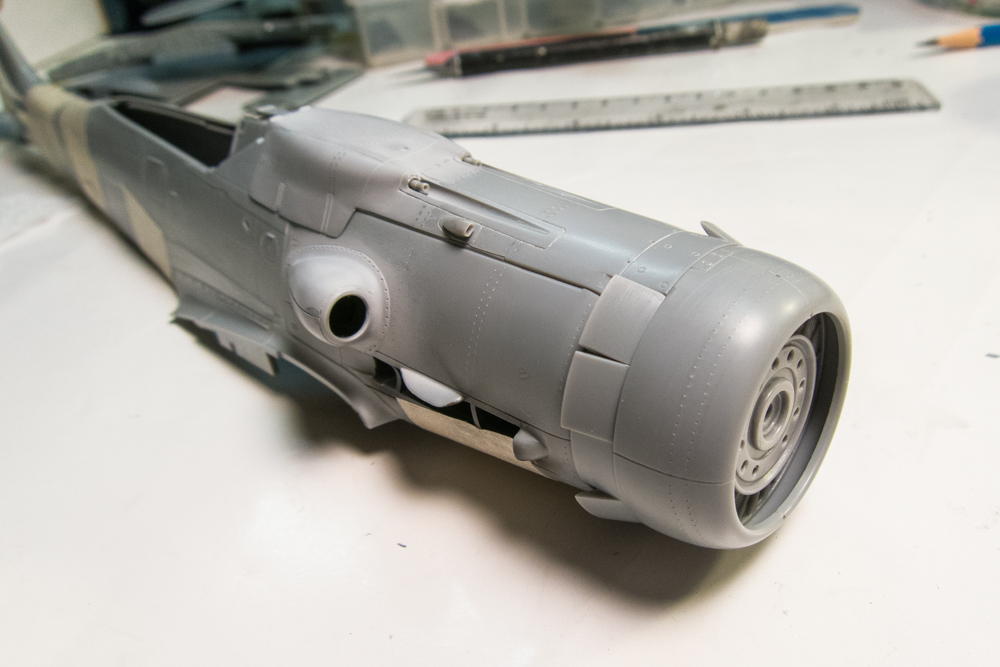

Here you can see the cowl flap actuators that I added. Still lots of painting that I have to do before I start gluing these components on but I like getting a sneak peak.
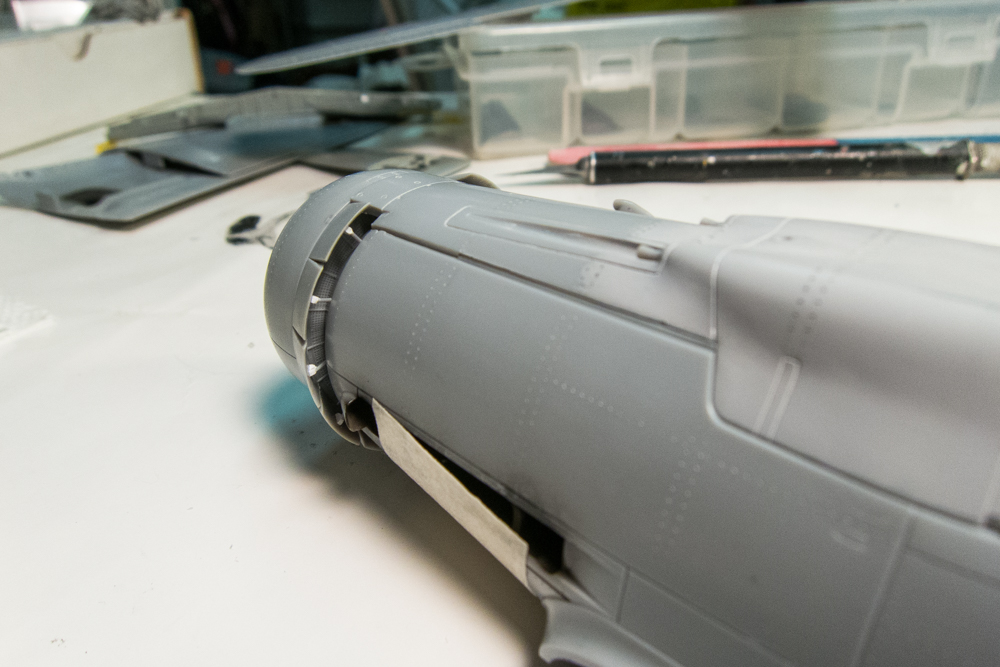
Putting the front end on the Dora made me think of the prop. This leads me to one of my favorite parts of any Luftwaffe 1/32 scale build... a Henri Daehne resin prop assembly.

Stay tuned...
Re: 1/32 Hasegawa Fw190D-9 Red One
Posted: Wed Dec 12, 2018 9:16 am
by Stikpusher
So far, so good....

Re: 1/32 Hasegawa Fw190D-9 Red One
Posted: Wed Dec 12, 2018 12:36 pm
by KennyX
I like those lines too, man oh man. And what you did concerning correcting the fuselage there where the guns are looks great. Also, dealing up the fuselage is a happy event. I’m glad to see this baby all sealed up, nice!
Re: 1/32 Hasegawa Fw190D-9 Red One
Posted: Wed Dec 12, 2018 12:54 pm
by Medicman71
This is so awesome!
Re: 1/32 Hasegawa Fw190D-9 Red One
Posted: Wed Dec 12, 2018 12:58 pm
by Mopar Madness
Nice riveting John! The plumbing in the engine looks the business!
Re: 1/32 Hasegawa Fw190D-9 Red One
Posted: Wed Dec 12, 2018 2:39 pm
by Duke Maddog
