Page 23 of 26
Re: WW2 1946 GB Official Thread
Posted: Sat Jun 11, 2016 1:44 am
by Thomas_M
Not being a fan of this pre-shading process I wonder what will be seen later after adding the camo colours?
But, hey, this is a Michel build! So I am looking forward to your painting skills!

Re: WW2 1946 GB Official Thread
Posted: Sat Jun 11, 2016 4:51 am
by MichelC
portman wrote:That's looking great MC!
Thanks, Portman!
M
Re: WW2 1946 GB Official Thread
Posted: Sat Jun 11, 2016 6:59 am
by MichelC
Thomas_M wrote:Not being a fan of this pre-shading process I wonder what will be seen later after adding the camo colours?
But, hey, this is a Michel build! So I am looking forward to your painting skills!
Thanks, Thomas!
I think shading is an integral part of painting a model and pre-shading is my preferred method for panel lines as it affords more control than post-shading, which I reserve for random shading. Trying to post shade panel lines drives me nuts because the contrast between the base color and the post shade color is so small that I can't see what I'm doing. I much prefer pre-shading, which allows me to see exactly where I'm spraying.
Pre-shading can be overdone or underdone, the latter being the most frequent sin: flooding the model with the base coat causes the pre-shading to disappear and it was all for naught (which I think is what you're hinting at in your comment, Thomas). The mistake here is to just airbrush the entire area with the base color in a uniform manner. By the time you have gotten a good coverage the pre-shading lines might well have almost disappeared. That's the wrong way to go about it as it affords no control on the effect you're aiming at.
The right way to lay down the base coat is to fill in each of the little squares between the pre-shaded panel lines (each of the panels, in fact) with the base color, carefully avoiding touching the pre-shading. Then, once you're satisfied with the coverage of the panels, start spraying over the pre-shading in light coats, gradually covering them until you achieve the exact effect you want (regularly hold the model at arm's length and check the overall effect). To finish you can use a highly thinned mix of the base color to blend it all in and to correct spots where the pre-shading is still too pronounced. This gives you complete control over the process and result.
I've seen quite a few modelers who've grown wary or skeptical of pre-shading and I'm wondering if perhaps they're doing the above mistake. Maybe this info will be of help to anyone who's had trouble with pre-shading, which IMO is a great technique, provided you know this trick.
M
Re: WW2 1946 GB Official Thread
Posted: Sat Jun 11, 2016 10:28 am
by Thomas_M
Yes, Michel, this is what I wanted to say. Thank you for explaining the process in detail.
I have got some nice effects by priming my MRAP in black. Not only the recesses, but the whole vehicle! A so-called "Full Flat Black Basing" (I have just invented this expression...

). I then added the vehicles base colour, trying not to cover the borders. I guess this is the same as your pre-shading, in the end.
Re: WW2 1946 GB Official Thread
Posted: Sat Jun 11, 2016 12:03 pm
by MichelC
Thomas_M wrote:Yes, Michel, this is what I wanted to say. Thank you for explaining the process in detail.
I have got some nice effects by priming my MRAP in black. Not only the recesses, but the whole vehicle! A so-called "Full Flat Black Basing" (I have just invented this expression...
). I then added the vehicles base colour, trying not to cover the borders. I guess this is the same as your pre-shading, in the end.
You're welcome.
Black undercoating is used a lot by miniaturists as it allows for dark recesses and accentuates shadows. You're MRAP looks very nice! So if the technique works for you...
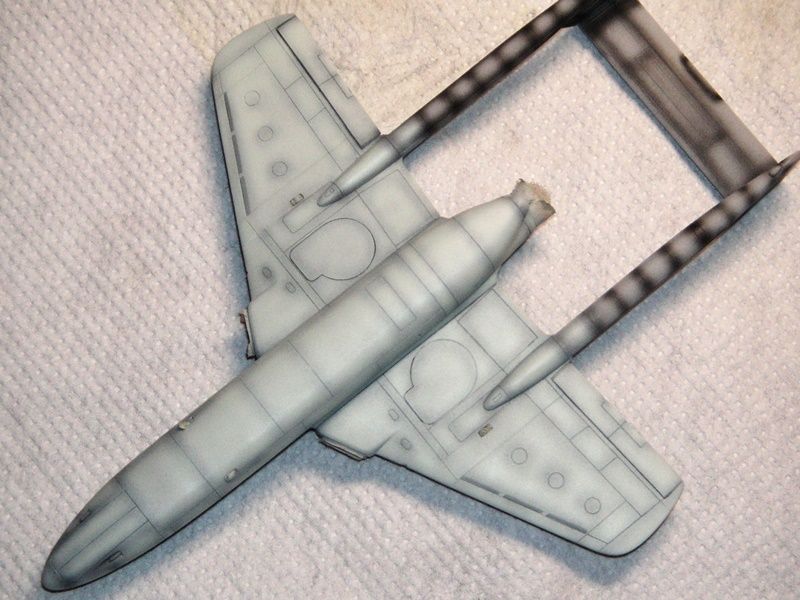
Here's a preview of the pre-shading on the Flitzer. It's still a WIP and the camera's flash tends to 'flatten' colors but I think the results can be appreciated nonetheless.
Re: WW2 1946 GB Official Thread
Posted: Sun Jun 12, 2016 2:15 am
by Thomas_M
I guess you thinned the paint more than usually?
Re: WW2 1946 GB Official Thread
Posted: Sun Jun 12, 2016 5:18 am
by MichelC
Thomas_M wrote:I guess you thinned the paint more than usually?
No, I proceeded as explained above with a 50/50 dilution. Once I finish with the entire area I'll use a 20/80 ratio to fine tune as necessary.
M
Re: WW2 1946 GB Official Thread
Posted: Sun Jun 12, 2016 1:16 pm
by MichelC
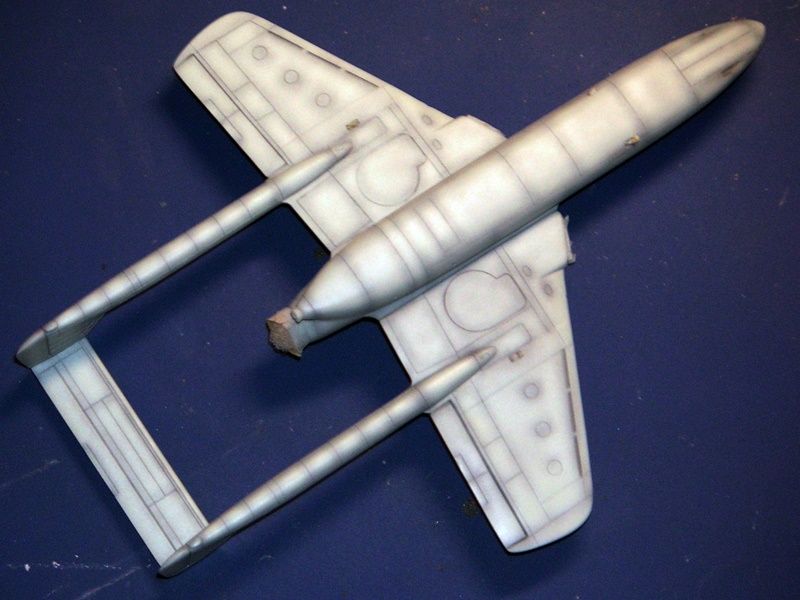
The underside is finished. I used the Gunze version of RLM 84 (gray blue).
M
Re: WW2 1946 GB Official Thread
Posted: Sun Jun 19, 2016 2:31 pm
by MichelC
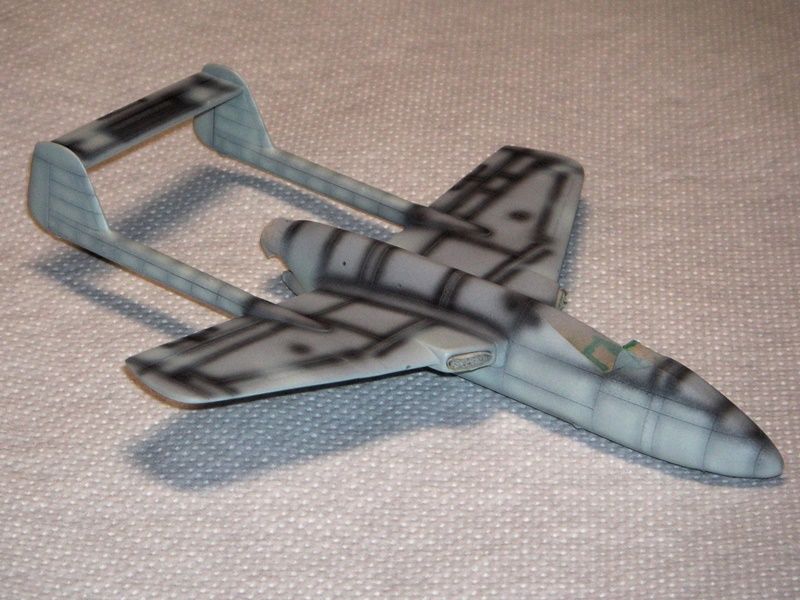
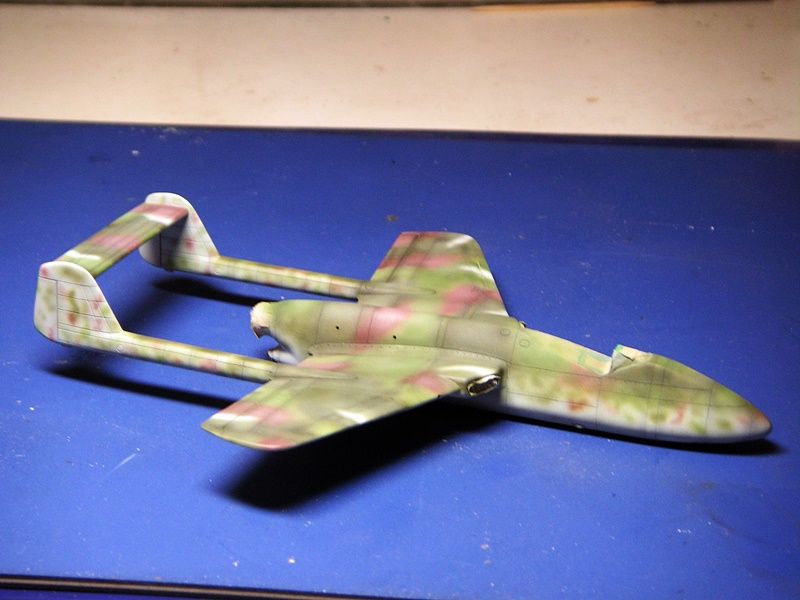
Today was a good day: I finished all three camo colors and the mottling as well!
Fist color: RLM 82 Light Green.
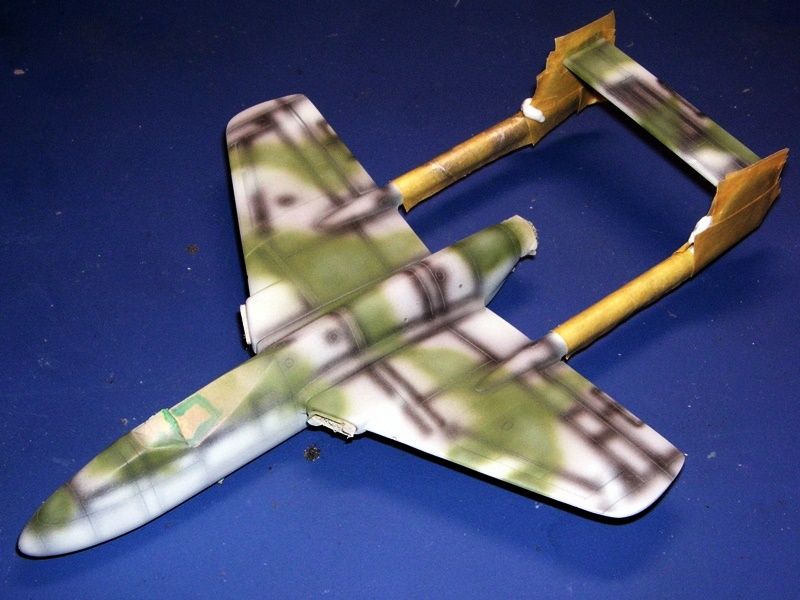
Second color: RLM 83 Dark Green.
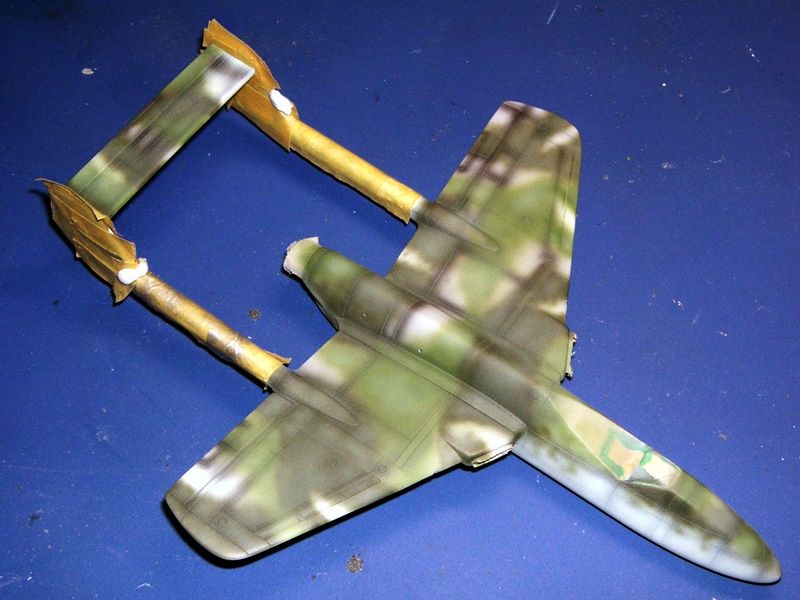
Third color: RLM 81 Brown Violet (my own tweaked version of it). B)
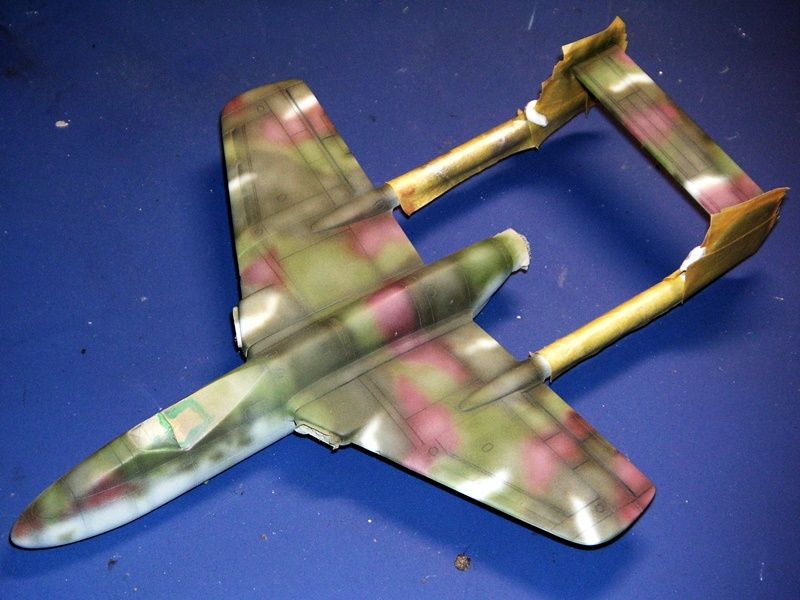
Same colors (all paints are Gunze) used for the mottling on the fuse sides, booms and fins.
More to come!
M
Re: WW2 1946 GB Official Thread
Posted: Mon Jun 20, 2016 12:20 am
by BorgR3mc0
That is some exquisite paintwork Michelc.


