Page 25 of 52
Re: 1/32 Tamiya F4U-1a Corsair - Boyington 17740
Posted: Sun Apr 14, 2019 1:19 am
by Floki
Beautiful looking parachute, the shading is fantastic.
Re: 1/32 Tamiya F4U-1a Corsair - Boyington 17740
Posted: Sun Apr 14, 2019 6:41 am
by KennyX
I like what you’ve done with that parachute. Very good!!
Re: 1/32 Tamiya F4U-1a Corsair - Boyington 17740
Posted: Sun Apr 14, 2019 8:42 am
by Stikpusher

One more fan of your work on the ‘chute!

Re: 1/32 Tamiya F4U-1a Corsair - Boyington 17740
Posted: Sun Apr 14, 2019 9:57 am
by KSaarni
More than well done with the parachute !
- Kari
Re: 1/32 Tamiya F4U-1a Corsair - Boyington 17740
Posted: Mon Apr 15, 2019 7:33 am
by LyleW
You simply have to show how you painted that parachute. Wow that is nice.
Wait, I figured it out.....you have a miniaturization machine in the basement, don't you?!
Re: 1/32 Tamiya F4U-1a Corsair - Boyington 17740
Posted: Mon Apr 15, 2019 12:52 pm
by Medicman71
That parachute is just incredible!
Re: 1/32 Tamiya F4U-1a Corsair - Boyington 17740
Posted: Mon Apr 15, 2019 6:03 pm
by jkim
Thanks guys! The parachute was relatively simple to paint. Sprayed the base khaki color with the airbrush and then brush painted the other colors. The straps were painted Buff and then re-done with Buff+White to add some depth. The parachute was given a gloss coat and then a dark pastel wash to highlight the recessed details. Flat coat to finish it off.
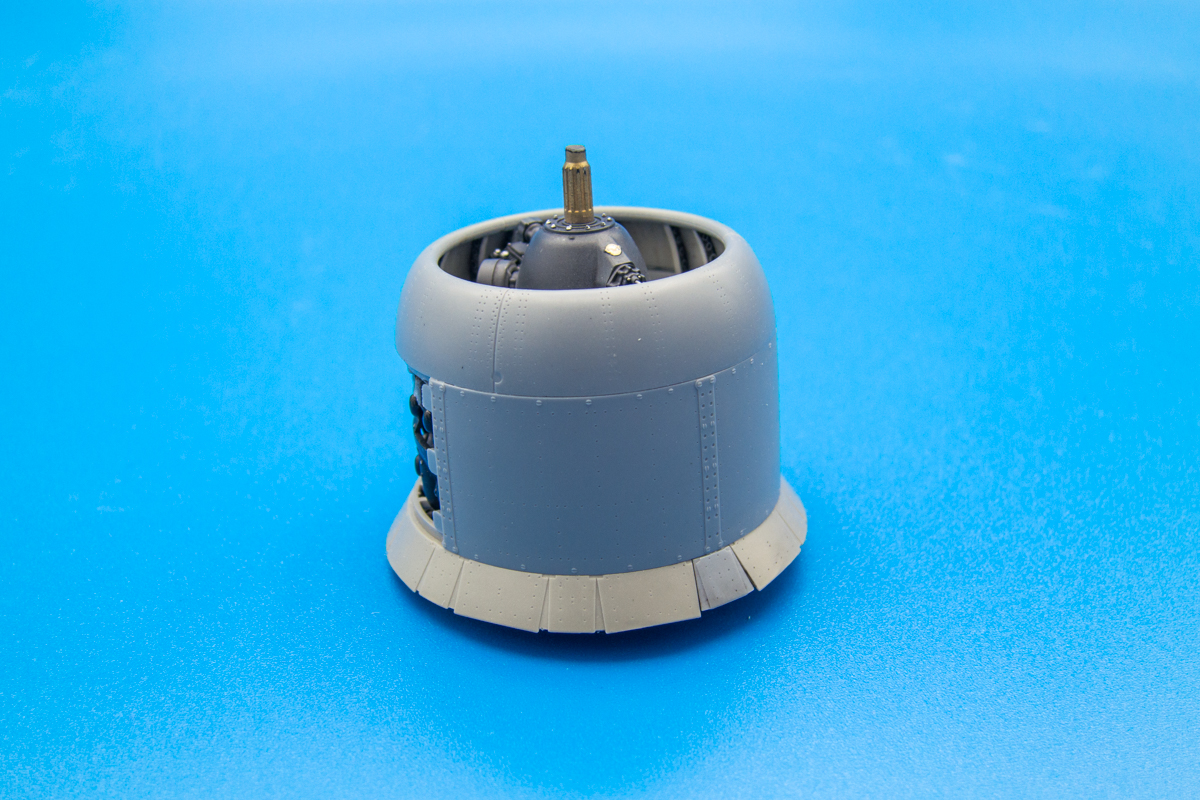
Nursing a cold so I haven't spent too much time on the bench even though I am at home. I've been playing with the engine assembly, trying to eliminate gaps between the panels and preserving the removability of the engine covers, which I don't think will be possible. The Vector resin cowl flap piece is too flexible and the attachment to the engine too imprecise for BOTH of those things to happen: I have to pick one or the other.
The most positive attachment of the cowl flaps are the four tabs at the rear of the engine so I've gone ahead and used 2-part epoxy to secure the flaps into place. I then glued the bottom engine cover into place using thin CA glue, making sure the cover is butted up precisely to the cowl flaps. Finally, I glued the nose ring into place with Tamiya Extra Thin, compressing everything with my fingers to minimize the gaps. So far so good.
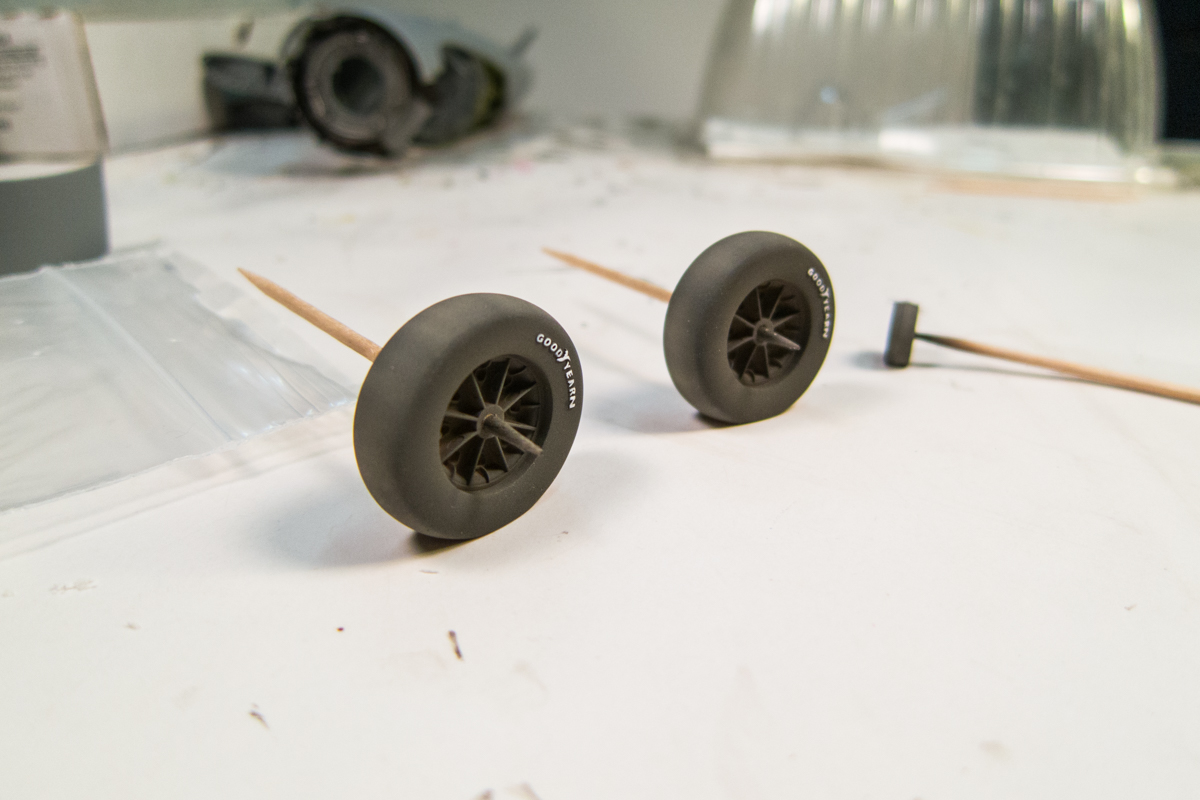
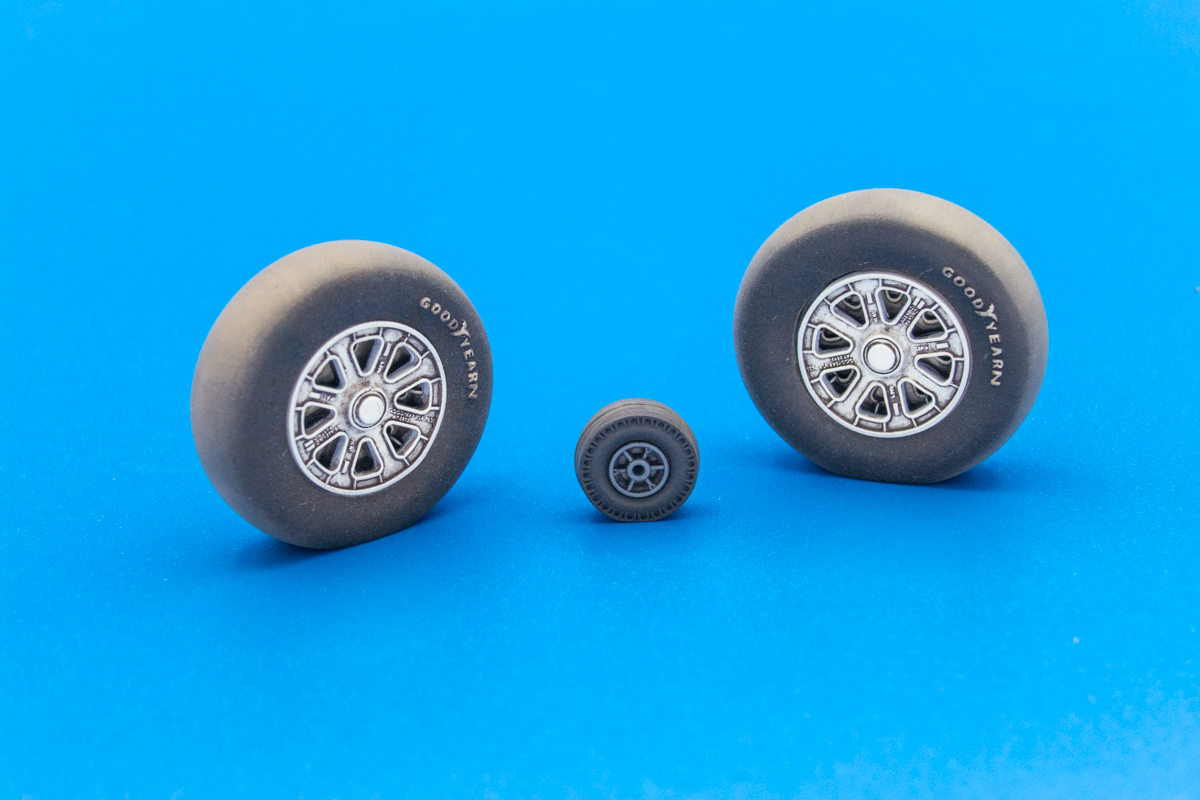
I've started to paint the wheels. The Barracuda casting is nice and sharp and the Goodyear logo has just enough of an edge to allow for some careful brush painting.
Re: 1/32 Tamiya F4U-1a Corsair - Boyington 17740
Posted: Mon Apr 15, 2019 7:05 pm
by KennyX
John,
My pal Brian ran into a similar issue with the cowling parts and fit after he’d assembled the engine. Problem there was, he got so fed up with it he abandoned the build

I’ve read a few other folks who’ve said the same concerning the gaps. You look like you have a good handle on it though.
As to the cowling flaps- I bought that same Vector Resin kit for my 1:32 Bird Cage. I’m disappointed to hear that it’s unweildy. I kind of liked the idea of being able to take stuff off and on in order to show off that amazing engine the kit comes with. Oh well, the Vector flaps have such great detail and they’ll look really nice once they’re all painted and installed.
Anyway, you’re doing great work on this and I’m really enjoying watching this project progress. Also, finding out you got after that parachute with a brush to get that amazing finish on it, man oh man... I have not been able to brush paint that kind of realism into anything I’ve tried so far.
So all that is to say, you’re kicking wholesale butt with this project. You’re doing an amazing job and frankly, I’ve seen a lot of Double Wasp engines during my reading and the one you’ve painted is the best one I’ve seen so far, in my own subjective opinion. It is, frankly, glorious.
Oh and yup, those Barracuda wheels are rad. I bought those too.
Re: 1/32 Tamiya F4U-1a Corsair - Boyington 17740
Posted: Mon Apr 15, 2019 7:38 pm
by jkim
Thanks for the good words Kenny! I appreciate the positive input! I don't think it is impossible to get the Vector resin cowl flaps to function exactly like the kit cowl flaps and have the engine panels removable. It wasn't a high priority for me and I've complicated matters by snapping the cowl flap part so that the floppy o-ring is now an even floppier letter "C".
Here's a couple of things you might want to consider when you use the Vector flaps. Make sure you clean the attachment tabs. There should be a groove cut into the front side of the tabs. Mine were filled in with excess resin and needed to be gouged out. Refer to the kit part and you'll see what I'm talking about. Also... be careful as the ring along the top of the flaps is very thin and is prone to breakage. And once it breaks, it's hard to keep together. I have repaired mine about 3-4 times already but it kept re-breaking due to the constant flexing during test fitting.
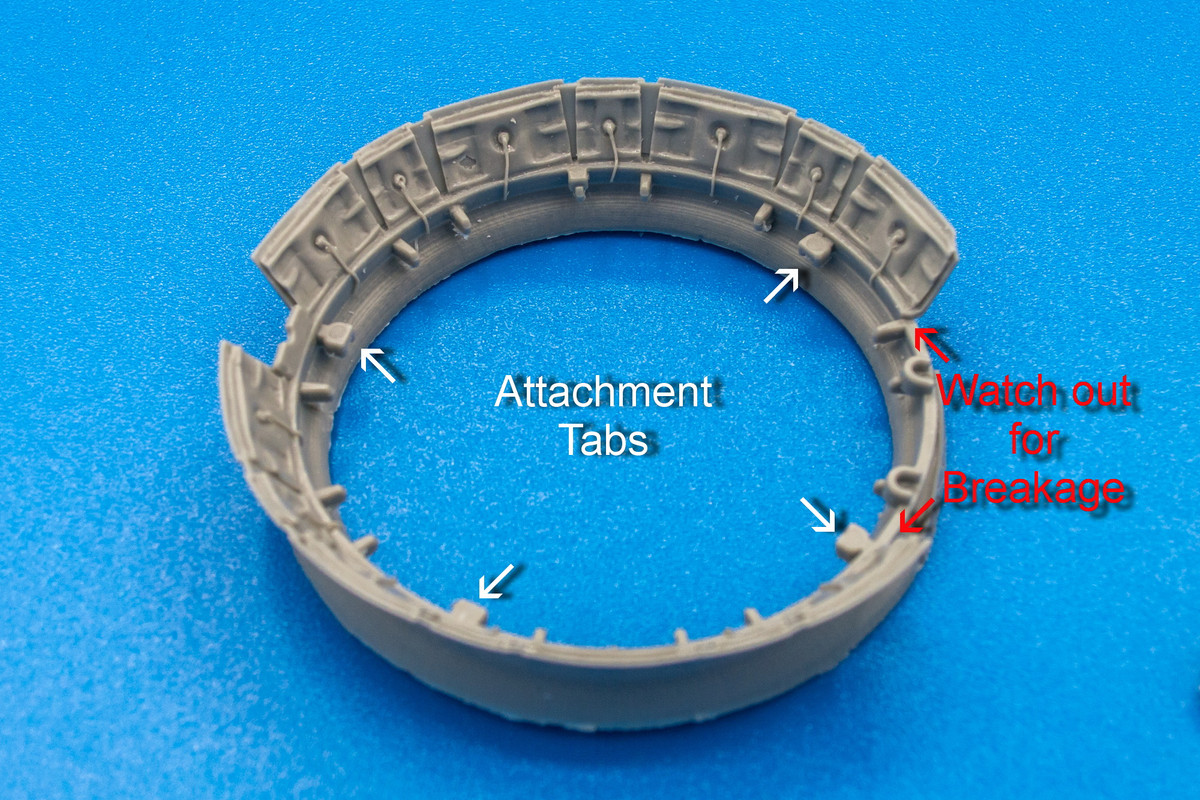
Now that the cowling flaps are permanently glued to the bottom engine cowling, it is much more secure.
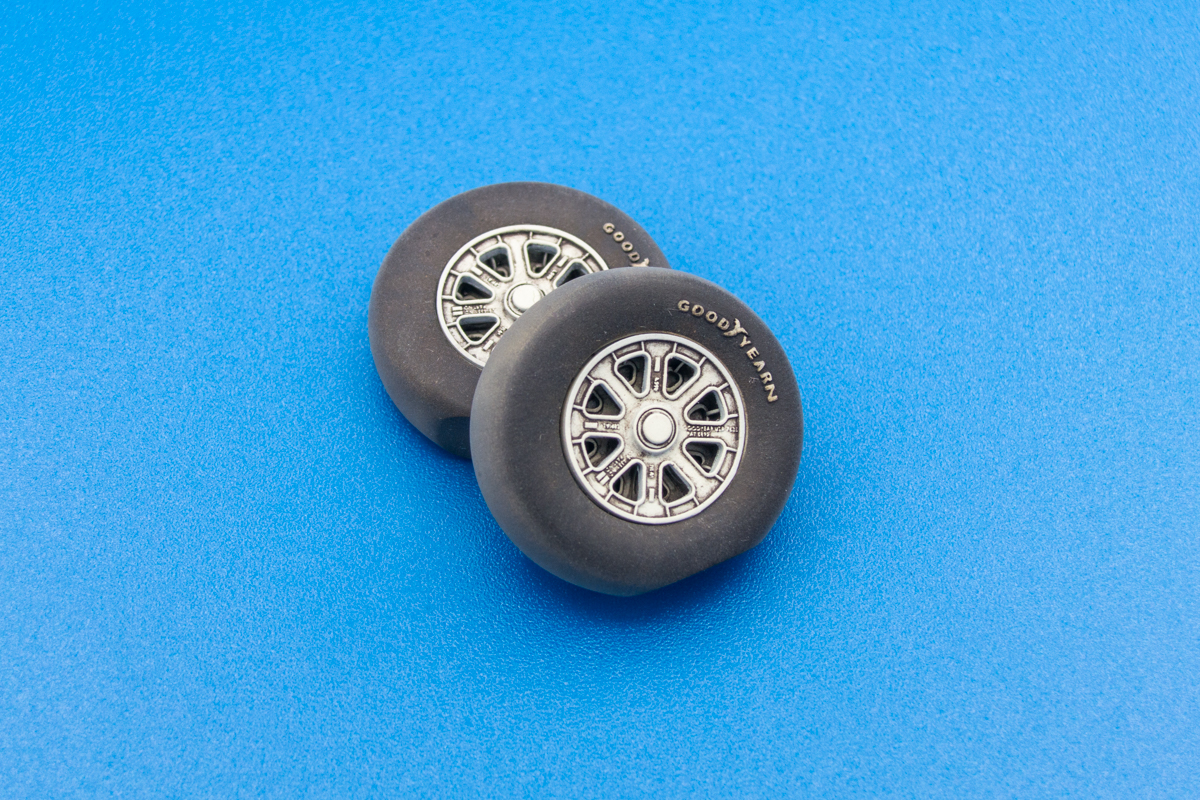
I've done some painting and initial weathering of the tires/wheels.
Re: 1/32 Tamiya F4U-1a Corsair - Boyington 17740
Posted: Mon Apr 15, 2019 7:53 pm
by KennyX
John,
Thank you for the sidebar about the cowling flaps. That’s much appreciated and I’ll make sure to heed your advice on that when the time comes. *thumbs up* it’s kind of doubly appreciated on account of- I’ve never worked with resin before. This is all new to me. So I’ll proceed with mindfulness taking your advice to heart.
Those wheels are looking superb, by the way.