1/32 Hasegawa Fw190D-9 Red One
-
BlackSheep214

- Elite Member
- Posts: 13600
- Joined: Sun Apr 06, 2014 8:47 pm
Re: 1/32 Hasegawa Fw190D-9 Red One
In that case since it was within a month before the end of WW2, now I understand why you opted for the second pic. Looks good.
“Who controls the skies, controls the fate of this Earth”
Author unknown- 352nd Fighter Group, Blue-Nosed Bastards of Bodney
“Send one plane it’s a sortie; send two planes it’s a flight; send four planes it’s a test of airpower. - Richard Kohn
Author unknown- 352nd Fighter Group, Blue-Nosed Bastards of Bodney
“Send one plane it’s a sortie; send two planes it’s a flight; send four planes it’s a test of airpower. - Richard Kohn

Re: 1/32 Hasegawa Fw190D-9 Red One
Happy Holidays SPAMmers! I hope everyone is in good spirits this holiday season. A tiny little update on the Dora for ya'll. I went back to the wheels and gave them another try with the Oilbrushers. Using a different color (Ochre) this time to contrast with the Grey I did before. Due to the small space that I am working in, the amount oil placed is simply too much. Using repetitive strokes, I slowly start to remove the oil. I clean the brush and dip it in mineral spirits to help the removal process.
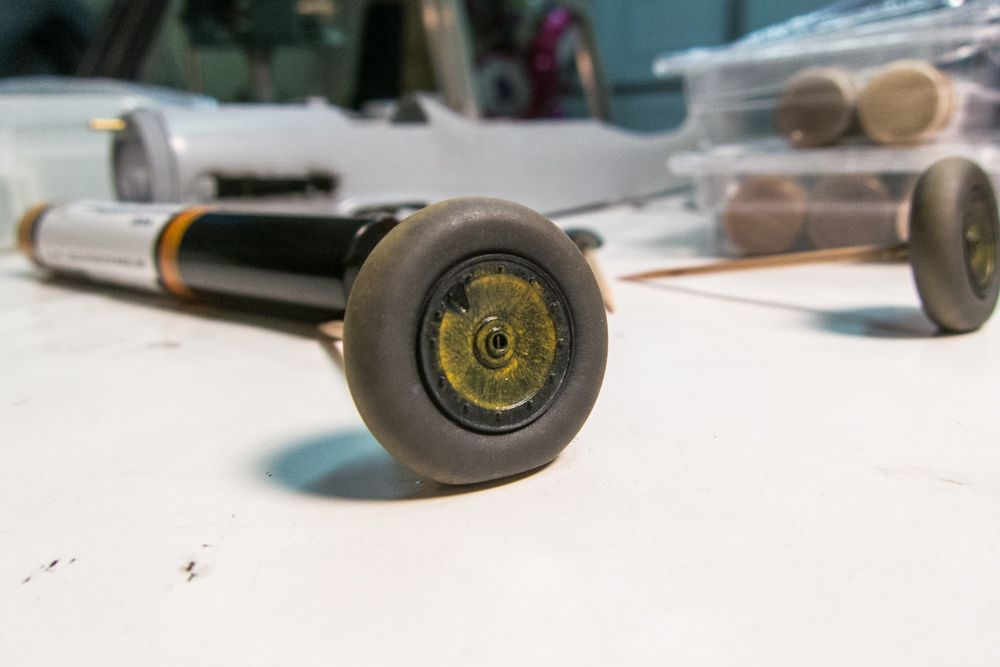
Eventually, I get to a point where the effect is subtle and not overpowering.

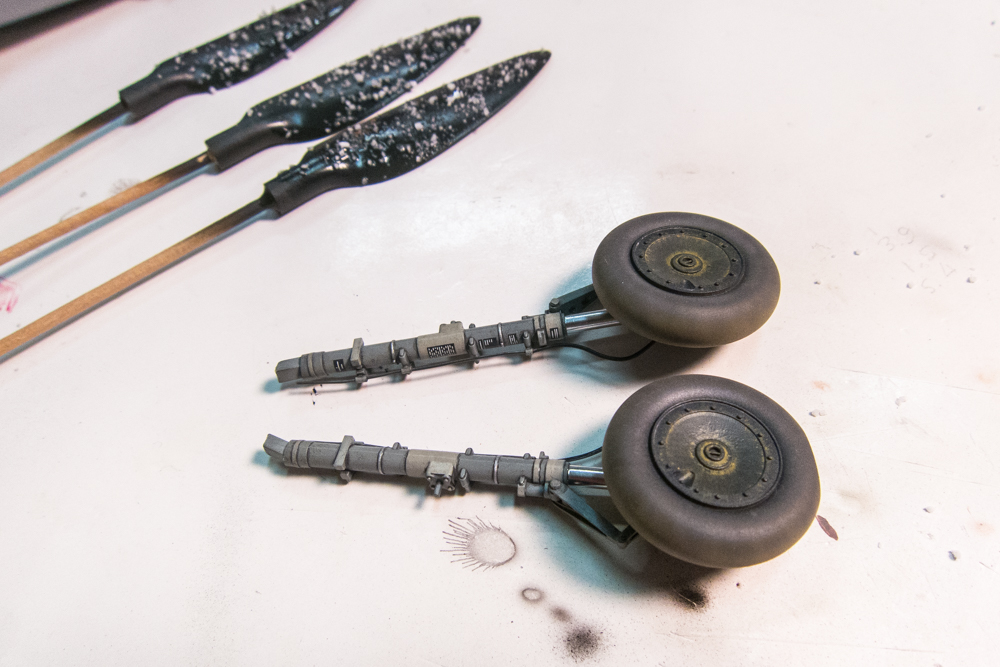
Briefly mounted on the landing gear legs. The brake lines have been painted by this stage.
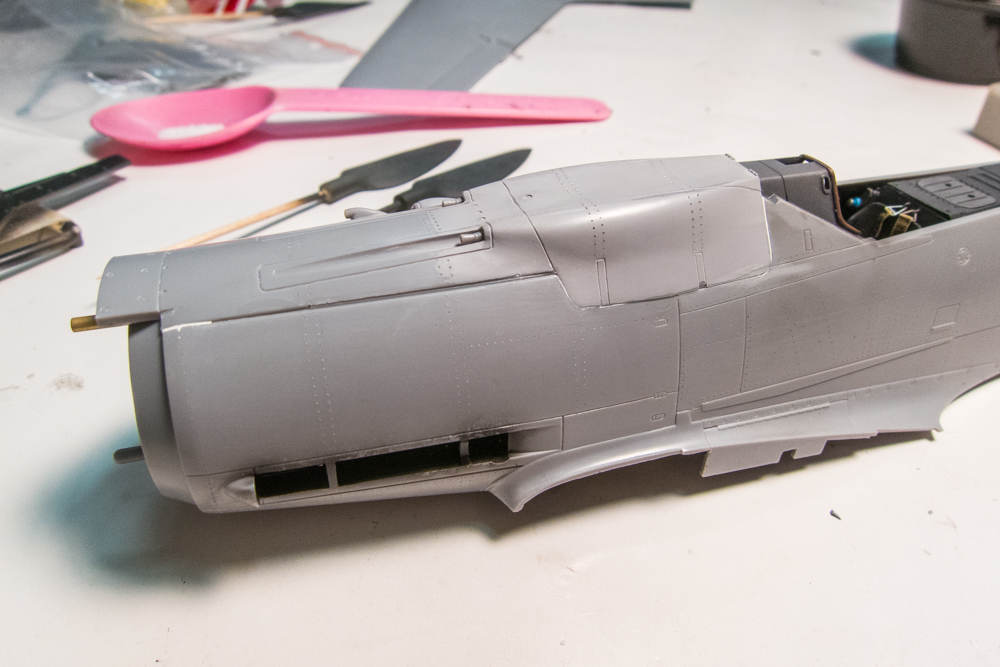
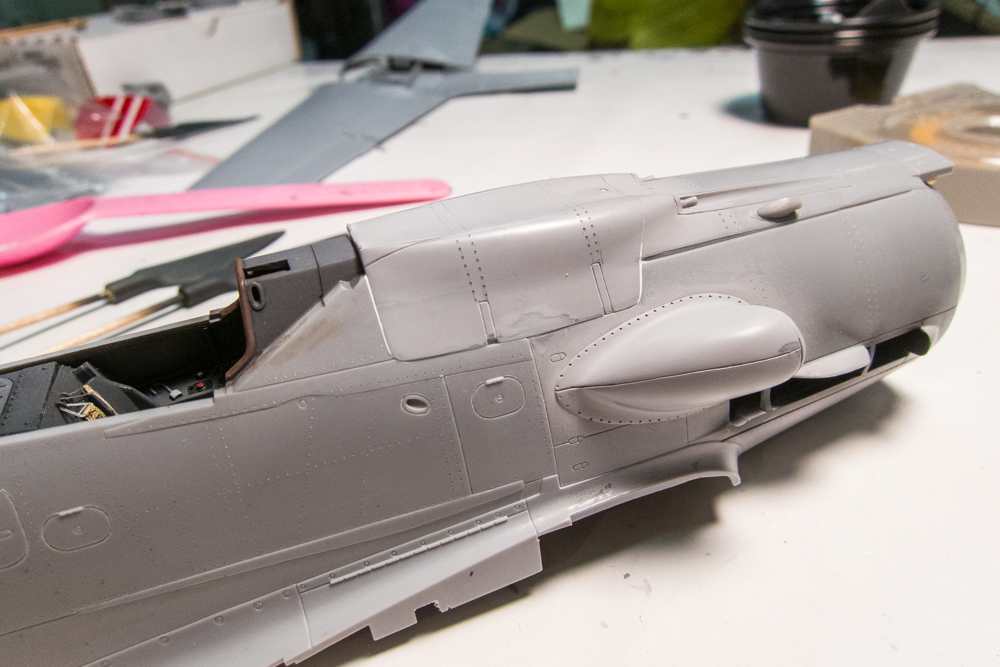
The gun cowling has been cemented into position using Tamiya Extra Thin. There were a few tiny gaps that were filled using Milliput White.
My second go at painting the landing gear covers.
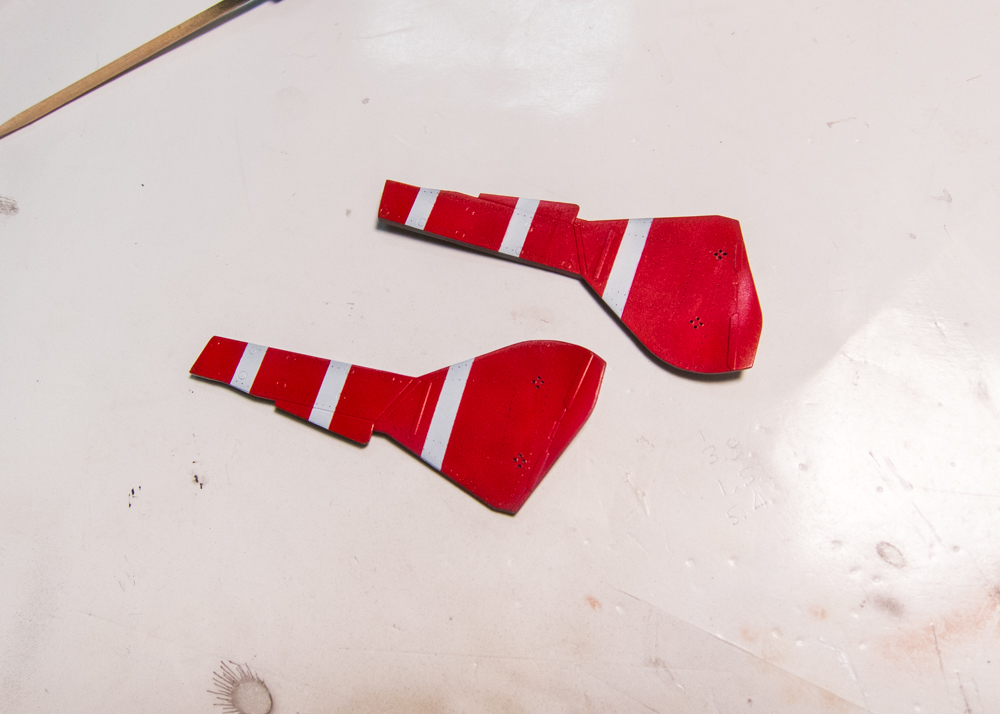
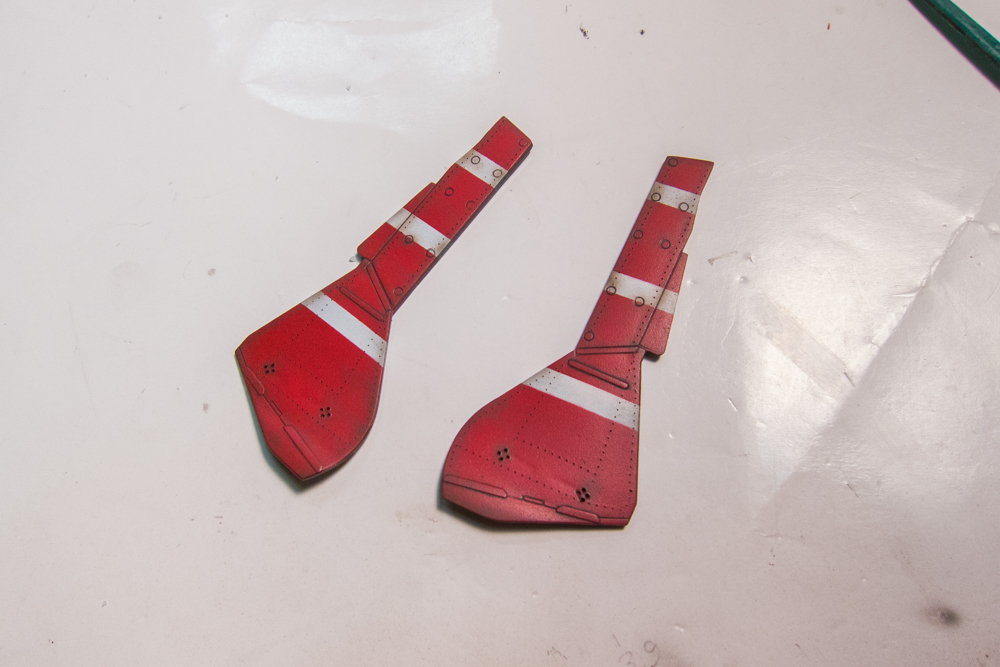
I tried using hairspray chipping but the effect of two relatively thick layers of paint over the metal proved too tough for me to chip through. I've done a round of weathering on the doors including a dark wash and airbrush highlighting with highly thinned brown/black. Some additional chipping/staining will be done but I just wanted to verify the painting process which will be used on the bottom of Red 1.
Eventually, I get to a point where the effect is subtle and not overpowering.
Briefly mounted on the landing gear legs. The brake lines have been painted by this stage.
The gun cowling has been cemented into position using Tamiya Extra Thin. There were a few tiny gaps that were filled using Milliput White.
My second go at painting the landing gear covers.
I tried using hairspray chipping but the effect of two relatively thick layers of paint over the metal proved too tough for me to chip through. I've done a round of weathering on the doors including a dark wash and airbrush highlighting with highly thinned brown/black. Some additional chipping/staining will be done but I just wanted to verify the painting process which will be used on the bottom of Red 1.
John aka JKim
-----------<><

-----------<><
-
Stikpusher

- Moderator
- Posts: 21388
- Joined: Sat Apr 05, 2014 8:37 pm
- Location: Ceti Alpha 5
Re: 1/32 Hasegawa Fw190D-9 Red One
The gear covers look great as they turned out. Considering that JV-44 was in existence for only three months, I think your results reflect that timespan.
"Surely I have made my meaning plain? I intend to avenge myself upon you, Admiral. I have deprived your ship of power, and when I swing 'round, I intend to deprive you of your life."
FLSM
FLSM
-
speedgraflex

- Moderator
- Posts: 11538
- Joined: Fri Feb 10, 2017 11:08 pm
- Contact:
Re: 1/32 Hasegawa Fw190D-9 Red One
Merry Christmas! Alternate to hairspray 1
I sent this to Ken earlier... just keepin' the conversation lively! I need to look at all the images and read your narrative again when I am rested. Now is not that time. Still this was an extremely important thread for me to see tonight and I want to stress that it is this level of integrity that your work features that is always a pleasure to peruse, ponder and use to practice better techniques! Thanks, John.
I sent this to Ken earlier... just keepin' the conversation lively! I need to look at all the images and read your narrative again when I am rested. Now is not that time. Still this was an extremely important thread for me to see tonight and I want to stress that it is this level of integrity that your work features that is always a pleasure to peruse, ponder and use to practice better techniques! Thanks, John.
Make more models!

Re: 1/32 Hasegawa Fw190D-9 Red One
Happy holidays to you and your family, John!
Iteration on the props with the salt technique? Did you start from zero or is this straight over the old layer of dunkelgrün?jkim wrote:

Re: 1/32 Hasegawa Fw190D-9 Red One
I have seldomly (if everjkim wrote:
Briefly mounted on the landing gear legs. The brake lines have been painted by this stage.
 ) seen as fantastic landing gears as these twins!
And I am afraid (in positive sense) they will sort of "disappear" among all other good stuff when attached under the wing..
- Kari
---
On the bench:
Eduard 1:48 - Fokker D.VII OAW
https://www.facebook.com/GrundAsk-Scale ... 721218708/
On the bench:
Eduard 1:48 - Fokker D.VII OAW
https://www.facebook.com/GrundAsk-Scale ... 721218708/

Re: 1/32 Hasegawa Fw190D-9 Red One
Your attention to detail, even the seemingly most minuscule details, is incredible. This will be an amazing aircraft when complete. Also, I like what you did with the oils on the wheels. They look lovely.
Kenny X
Head Mother Trucker In-Charge @ Kenny X’s Reichs Winzigkleines Flugzeugewerks *and now* Airboat Records, too!
Head Mother Trucker In-Charge @ Kenny X’s Reichs Winzigkleines Flugzeugewerks *and now* Airboat Records, too!
Re: 1/32 Hasegawa Fw190D-9 Red One
Merry Christmas Day to all! Thank you for your comments... much appreciated. Rolling right along with Red 1. I finally got to the point where I could glue the wings onto the fuselage. Fit was good but not perfect and I'll have to do some work to clean up the joints. That upper wing root is always the hardest to get to when it comes to sanding but it has to be done.
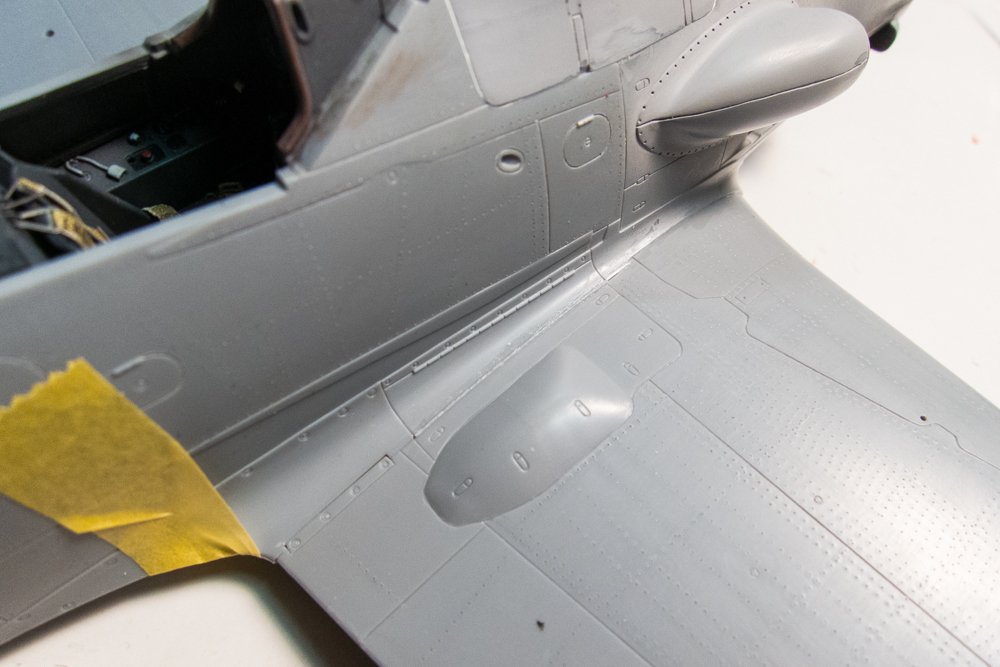
There was a slight gap on the starboard side. Not good since it means that there is not a good glue joint. I don't like using filler in these situations since it does nothing to add adhesion between the two parts. I used a piece of stretch sprue and welded the piece into place using Tamiya Extra Thin. The sprue gets soft and pliable when the glue is applied so I used that opportunity to press the sprue into the gap as much as possible to create a better bond.
The port side had no gap. The wing root ammo cover is a monolithic piece that extends to that hinge on the lower fuselage. So I'm going to have to eradicate the joint completely.
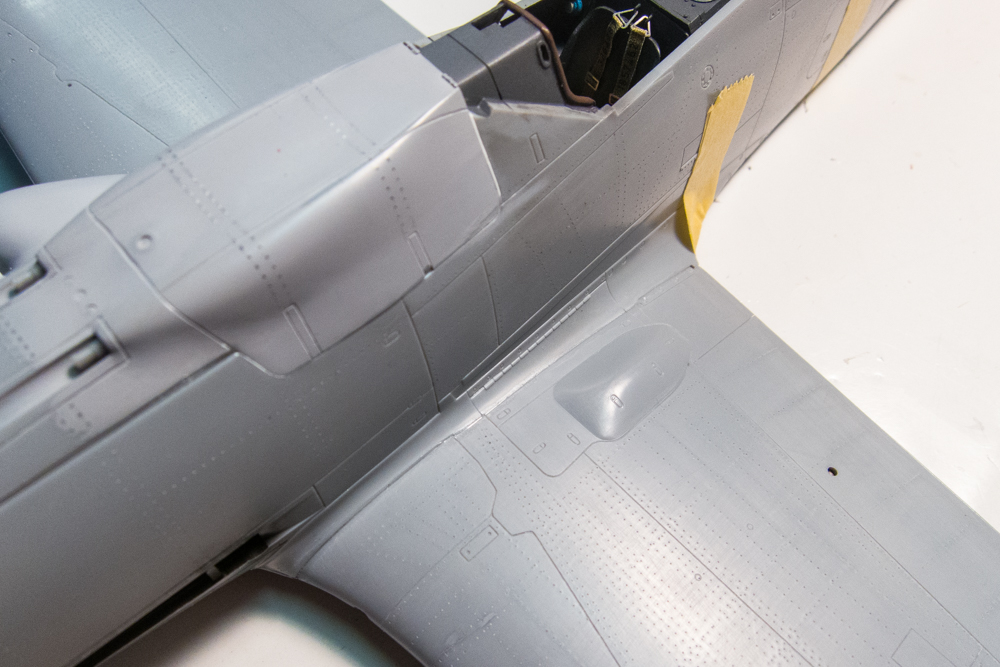
Here is what Red 1 looks like with the wings attached. The shape of the Focke Wulf is starting to appear. With this build, I've paid particular attention to all of the major glue joints. Black 1 was damaged during shipping and upon inspection, I noticed that many of the failures occurred due to insufficient strength in the joints. So I've made sure to flow the Tamiya cement generously into each seam, multiple times if necessary.

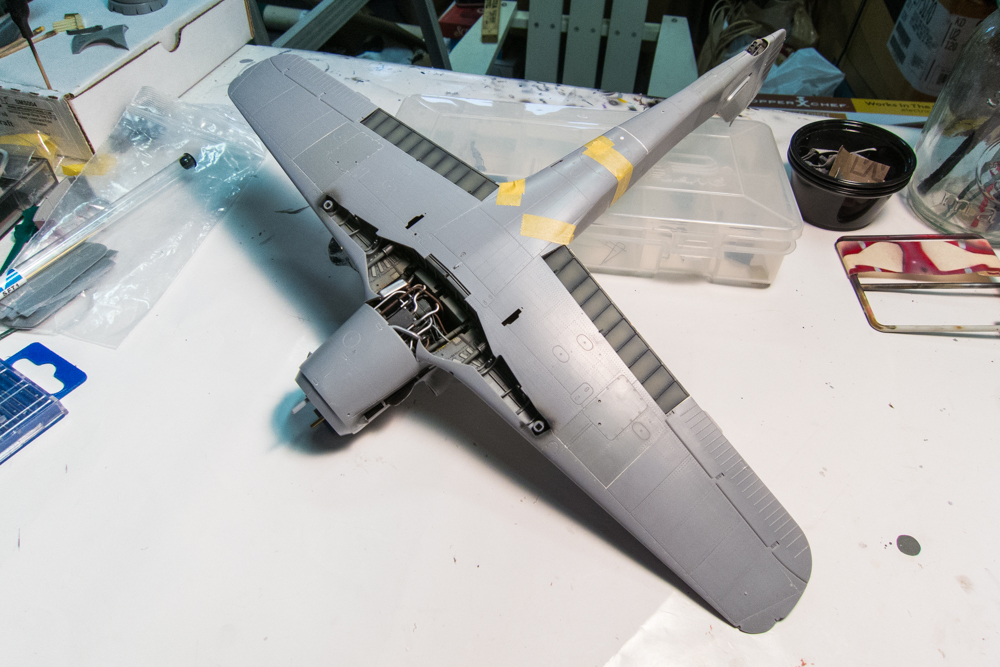
Another view into the wheel wells. Soon, the piece to cover the center of the wheel wells will be put into place and that will restrict the view into this area.

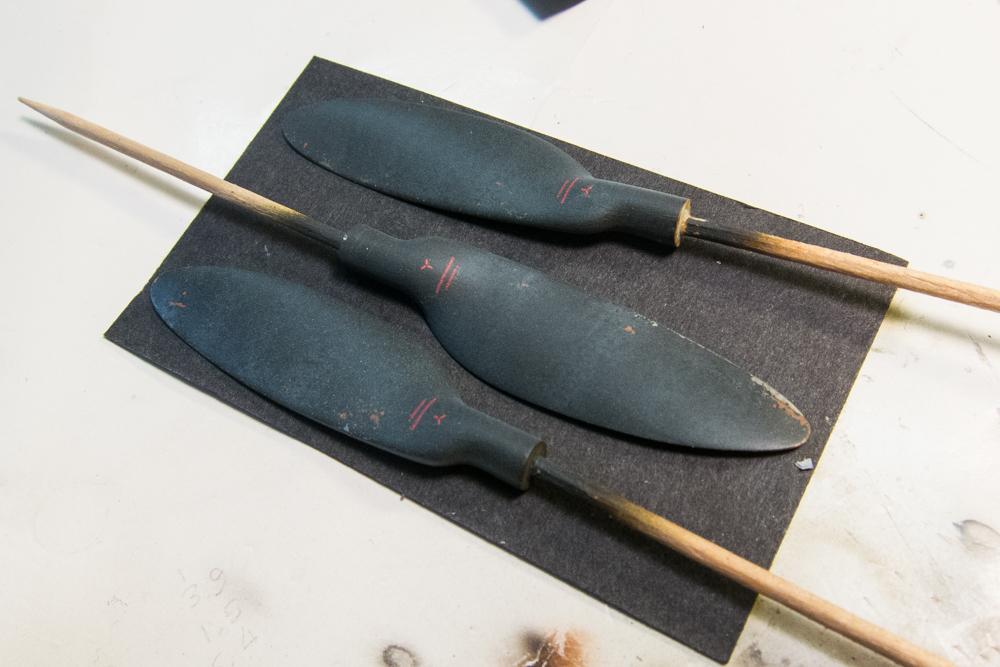
The finished props. After the chipping, I gave each prop blade two layers of salt chipping to portray wear. The first was a lightened Black Green and the second was a highly thinned grey. The effects are very subtle... almost too subtle but the photos indicate that the props did not exhibit heavy wear so I'm inclined to leave the effect as is. We'll see.
After an initial application of Mr Dissolved Putty, the wing root seams are being finished with Mr Surfacer 1000.
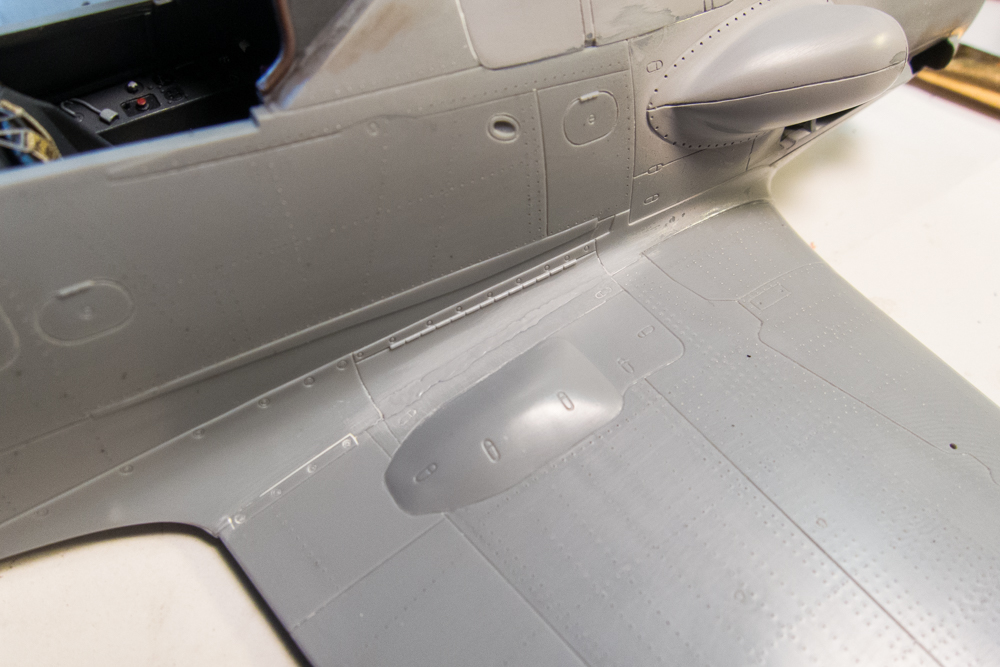
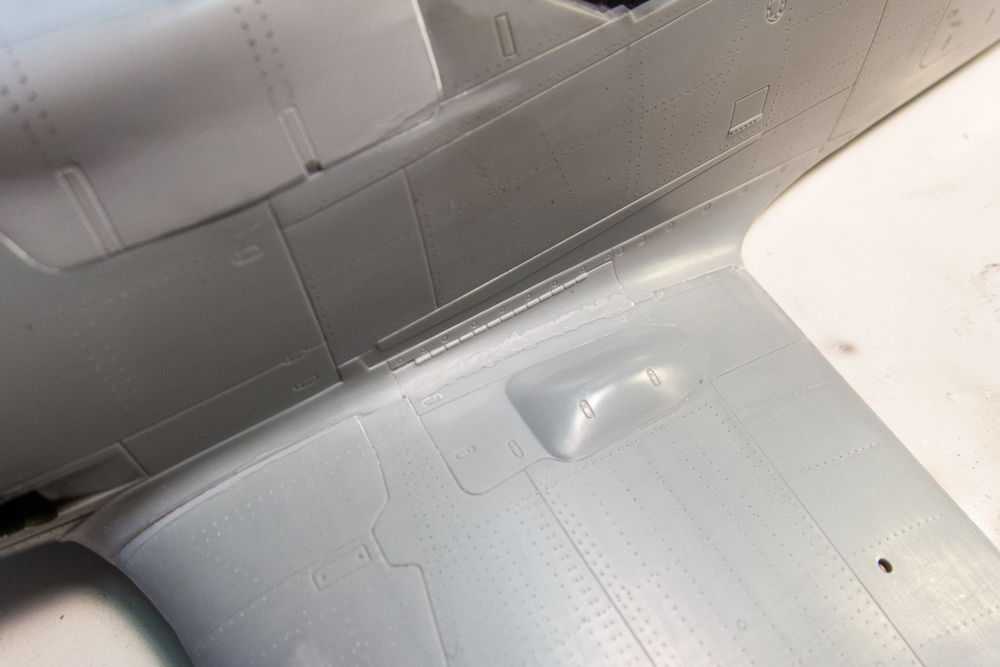
The biggest seam was found on the bottom. Despite my use of a shim, the fit here wasn't very good and included gaps AND a step. I'm using my normal Mr Surfacer over Mr Dissolved Putty to fill the gap and level the area. Panel lines and rivets will need to be added after the seam is fixed.

There was a slight gap on the starboard side. Not good since it means that there is not a good glue joint. I don't like using filler in these situations since it does nothing to add adhesion between the two parts. I used a piece of stretch sprue and welded the piece into place using Tamiya Extra Thin. The sprue gets soft and pliable when the glue is applied so I used that opportunity to press the sprue into the gap as much as possible to create a better bond.
The port side had no gap. The wing root ammo cover is a monolithic piece that extends to that hinge on the lower fuselage. So I'm going to have to eradicate the joint completely.
Here is what Red 1 looks like with the wings attached. The shape of the Focke Wulf is starting to appear. With this build, I've paid particular attention to all of the major glue joints. Black 1 was damaged during shipping and upon inspection, I noticed that many of the failures occurred due to insufficient strength in the joints. So I've made sure to flow the Tamiya cement generously into each seam, multiple times if necessary.
Another view into the wheel wells. Soon, the piece to cover the center of the wheel wells will be put into place and that will restrict the view into this area.
The finished props. After the chipping, I gave each prop blade two layers of salt chipping to portray wear. The first was a lightened Black Green and the second was a highly thinned grey. The effects are very subtle... almost too subtle but the photos indicate that the props did not exhibit heavy wear so I'm inclined to leave the effect as is. We'll see.
After an initial application of Mr Dissolved Putty, the wing root seams are being finished with Mr Surfacer 1000.
The biggest seam was found on the bottom. Despite my use of a shim, the fit here wasn't very good and included gaps AND a step. I'm using my normal Mr Surfacer over Mr Dissolved Putty to fill the gap and level the area. Panel lines and rivets will need to be added after the seam is fixed.
John aka JKim
-----------<><
-----------<><
-
Duke Maddog

- Elite Member
- Posts: 7703
- Joined: Tue Jun 03, 2014 11:22 am
- Location: Rowland Heights, CA
Re: 1/32 Hasegawa Fw190D-9 Red One
Wow!! Overwhelmingly stunning work! I could swear parts of this are full-sized pictures! Man, I can't get over how magnificently realistic this model is...
I bow to the Master....
I bow to the Master....
The Duke
Virtuoso of Miniatures
"Do you know what the chain of command is? It's the chain I get and beat you with 'till you understand who's in ruttin' command!"
-Jayne Cobb, Firefly Episode 2 "The Train Job"
We are modelers - the same in spirit, in hunger to insanely buy newly released kits, hustlers in hiding our stash from our better halves and experts in using garbage as replacements for after-market parts.
Virtuoso of Miniatures
"Do you know what the chain of command is? It's the chain I get and beat you with 'till you understand who's in ruttin' command!"
-Jayne Cobb, Firefly Episode 2 "The Train Job"
We are modelers - the same in spirit, in hunger to insanely buy newly released kits, hustlers in hiding our stash from our better halves and experts in using garbage as replacements for after-market parts.
Re: 1/32 Hasegawa Fw190D-9 Red One
That’s solid work on that wing root, and I’m thrilled to see this bird taking shape!
This here:
That’s gorgeous. I like the way you painted the wires and plumbing, the detailing you did there is tremendous.
Merry Christmas buddy!
This here:
That’s gorgeous. I like the way you painted the wires and plumbing, the detailing you did there is tremendous.
Merry Christmas buddy!
Kenny X
Head Mother Trucker In-Charge @ Kenny X’s Reichs Winzigkleines Flugzeugewerks *and now* Airboat Records, too!
Head Mother Trucker In-Charge @ Kenny X’s Reichs Winzigkleines Flugzeugewerks *and now* Airboat Records, too!