Page 26 of 85
Re: 1:48 Tamiya Corsair
Posted: Tue Jun 05, 2018 1:59 pm
by speedgraflex
SCISSORS N GLUE 1:48 WIRING HARNESS

Rule: Make it first then attach it
Cut 24 lengths of wire. Pair off and glue pairs together. Add an extra glue bead to create the attachment point.
Cut two lengths of wire. Form to each side. Use kit 2 part as a form not the painted one. Attach six spark plug leads evenly spaced to each side. Again add an extra bead to the attachment point.
Let dry. Test for integrity. Fit in place. Adjust then glue in place.
Re: 1:48 Tamiya Corsair
Posted: Tue Jun 05, 2018 2:05 pm
by KennyX
Yup. Pain in my ass indeed. I’m giving it a day to think it over.
Re: 1:48 Tamiya Corsair
Posted: Tue Jun 05, 2018 2:10 pm
by jkim
Hey Kenny... I totally hear you about adding things to a part that has already been finished. Sometimes you just have to decide to move on although Bruce has given some good options in case you want to try again. Ultimately, the decision is yours and I personally think the model will be just fine without the wiring.
If you DO want to make another attempt, I'd pick up a set of micro drill bits and a pin vise to hold them. Very cheap stuff... should be less than $10.
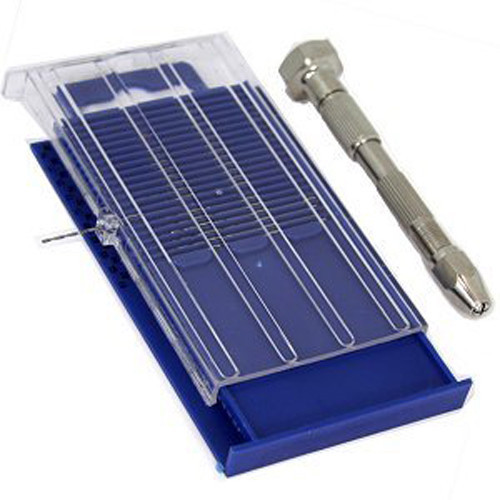
You were on the right track in terms of attaching the wiring at the harness first. Accepting holes in the wiring harness and in the cylinder heads will give you better attachment points.
Re: 1:48 Tamiya Corsair
Posted: Tue Jun 05, 2018 2:11 pm
by KennyX
speedgraflex wrote:SCISSORS N GLUE 1:48 WIRING HARNESS
Rule: Make it first then attach it
Cut 24 lengths of wire. Pair off and glue pairs together. Add an extra glue bead to create the attachment point.
Cut two lengths of wire. Form to each side. Use kit 2 part as a form not the painted one. Attach six spark plug leads evenly spaced to each side. Again add an extra bead to the attachment point.
Let dry. Test for integrity. Fit in place. Adjust then glue in place.
I didn’t see this Bruce. Nice! I’ll give it a try tomorrow! Thanks!!!
Re: 1:48 Tamiya Corsair
Posted: Tue Jun 05, 2018 2:29 pm
by speedgraflex
A couple corrections—the number of pairs you need is just enough for the front cylinders—

And I think adding the curved wire on
top of the Tamiya plastic part works even better. I am not in love with how flat Tamiya’s version is so adding the wire above it gives you a more accurate rendering in addition to way more glue area. Win-win.
Re: 1:48 Tamiya Corsair
Posted: Tue Jun 05, 2018 3:37 pm
by KennyX
Yessir, I wasn’t happy with how it looked when inaffozed them to the back of it. And I had trouble with getting them affixed to the edge. I was gonna make the little nubs for them but I couldn’t cut plastic small enough. If I try again, I’m going to give this idea a shot.
Re: 1:48 Tamiya Corsair
Posted: Tue Jun 05, 2018 3:38 pm
by KennyX
And as to John advice, yep. I have a very small hobby drill but I need one of those jobs you posted. Definitely going to get one in the very near future.
Re: 1:48 Tamiya Corsair
Posted: Tue Jun 05, 2018 3:43 pm
by Stuart
Great sketches Bruce.
Kenny - Fair dues to you for giving it a go! Either way it'll look fantastic with or without.
Re: 1:48 Tamiya Corsair
Posted: Tue Jun 05, 2018 3:43 pm
by speedgraflex
Gluing the leads together in pairs will give you enough contact area. I would go to the local Hardware superstore or Target mart to buy epoxy, but I am pretty darn sure CA will work. You just have to build this as a separate entity and then bring it together as part of the detailing. Also I would not worry about attaching the leads. I would let those drape over the cylinder heads, then let the glue cure fully before attaching. The wire looks soft and perfectly in scale. What did you use?
Re: 1:48 Tamiya Corsair
Posted: Tue Jun 05, 2018 3:56 pm
by KennyX
Thank you, Stuart! I appreciate it! This ain’t easy, for sure LOL
Bruce, that’s the silver wire you’ll find inside a coaxial cable
