Hasegawa 1/32 Fw 190D-9 Brown 4

Re: Hasegawa 1/32 Fw 190D-9 Brown 4
I absolutely love that scheme. The flat coat always works wonders on the contrasts.
Cheers,
Torben
Torben

Re: Hasegawa 1/32 Fw 190D-9 Brown 4
Drop tank and post shading is looking really good
March as one, Don't look back
Odin's sons... Attack!
Unleash hell! Do not repent! Warfare grants us no lament
Let your weapons slash and tear This is no place for fear
Hold the lines! Move as one! In unity our victory's won
Our shields will form a mighty wall
United we shall never fall
Odin's sons... Attack!
Unleash hell! Do not repent! Warfare grants us no lament
Let your weapons slash and tear This is no place for fear
Hold the lines! Move as one! In unity our victory's won
Our shields will form a mighty wall
United we shall never fall

Re: Hasegawa 1/32 Fw 190D-9 Brown 4
That drop tank came out amazingly well 
Stuart Templeton 'I may not be good but I'm slow...'

Re: Hasegawa 1/32 Fw 190D-9 Brown 4
Thanks everyone! The build is creeping along. My mind has been distracted by work and also potential new projects. I may start a new build and leave the Ki-61 build for a little later as I don't feel like riveting right now.
The cowl gun barrels were painted prior to the post shading but I forgot to post it. Because the gun barrels hang from the ceiling of the cowling and separated from the troughs, they are easy to mask off and paint.
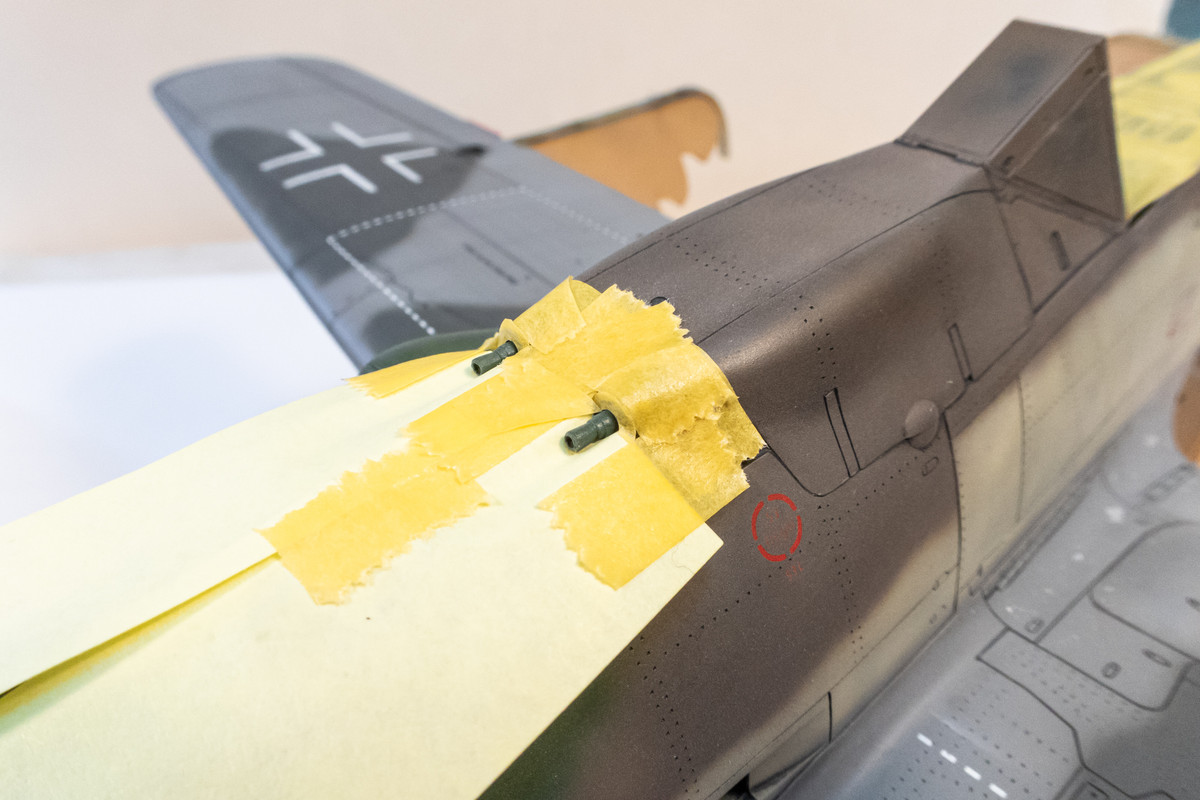
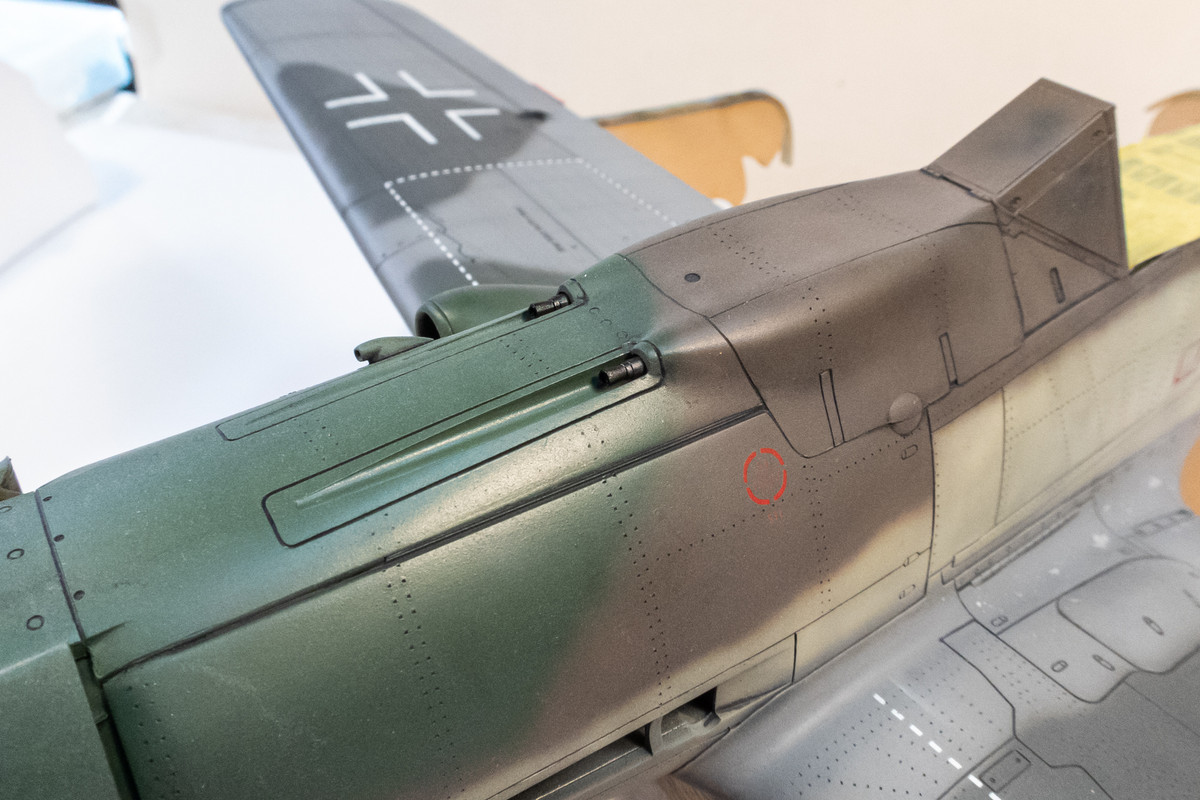
Another round of post shading was done and this is what Brown 4 looks like prior to the salt fading stage.
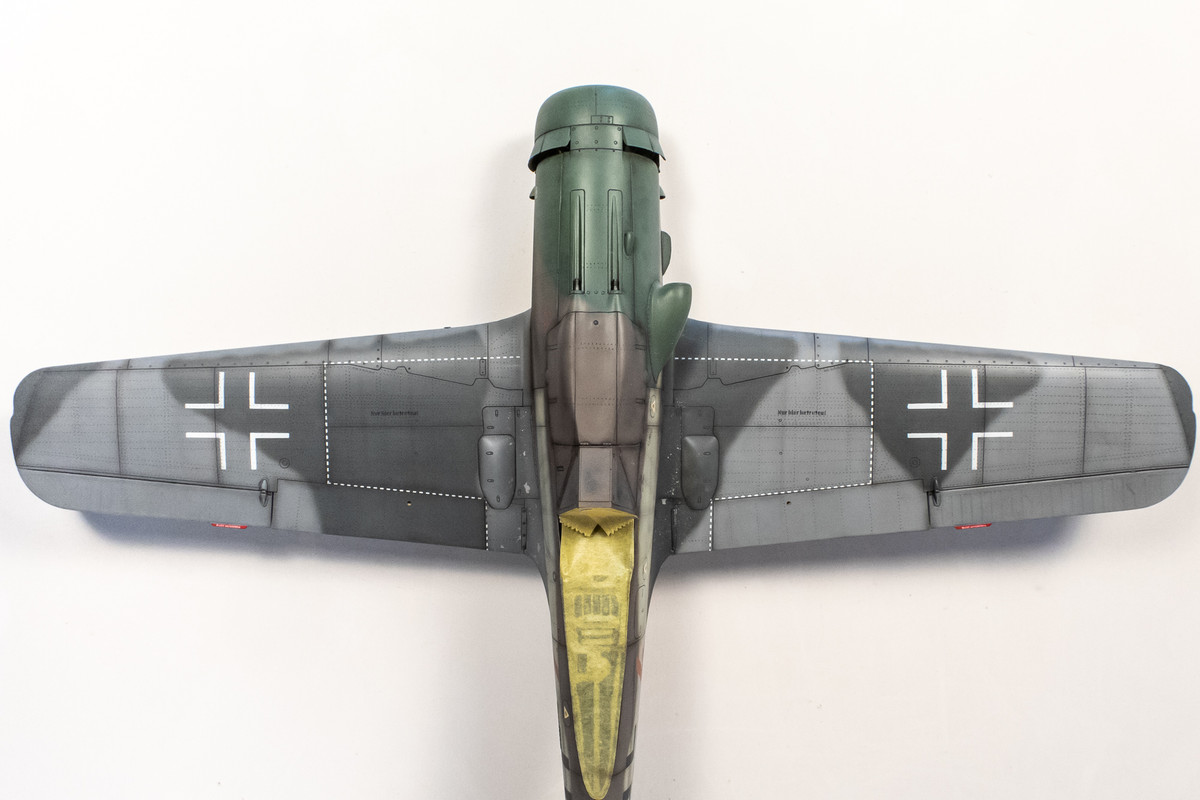
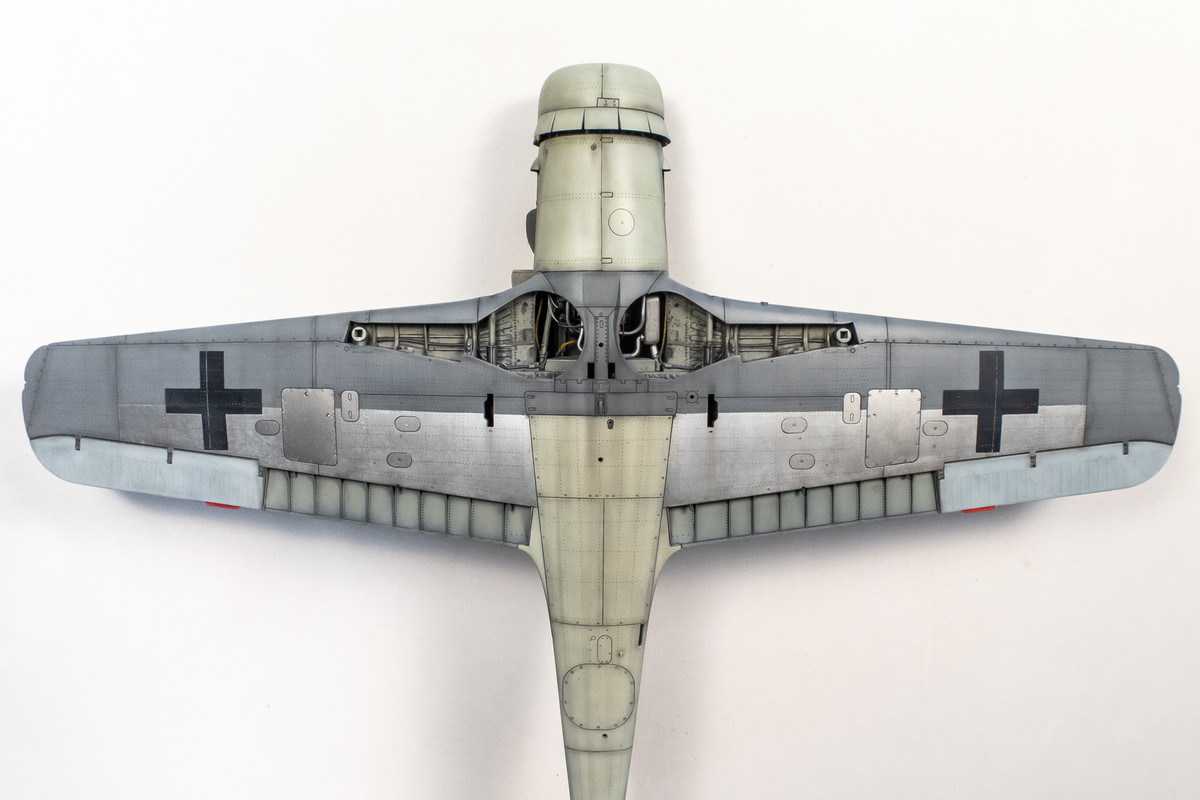
The cowl gun barrels were painted prior to the post shading but I forgot to post it. Because the gun barrels hang from the ceiling of the cowling and separated from the troughs, they are easy to mask off and paint.
Another round of post shading was done and this is what Brown 4 looks like prior to the salt fading stage.
John aka JKim
-----------<><

-----------<><
Re: Hasegawa 1/32 Fw 190D-9 Brown 4
The next weathering step is salt fading. Sometimes used created chipping effects, this technique utilizes salt crystals to form a mask of random spot patterns. The salt is affixed to the model using a thin layer of water... when the water dries, the salt is temporarily fused onto the model's surface.
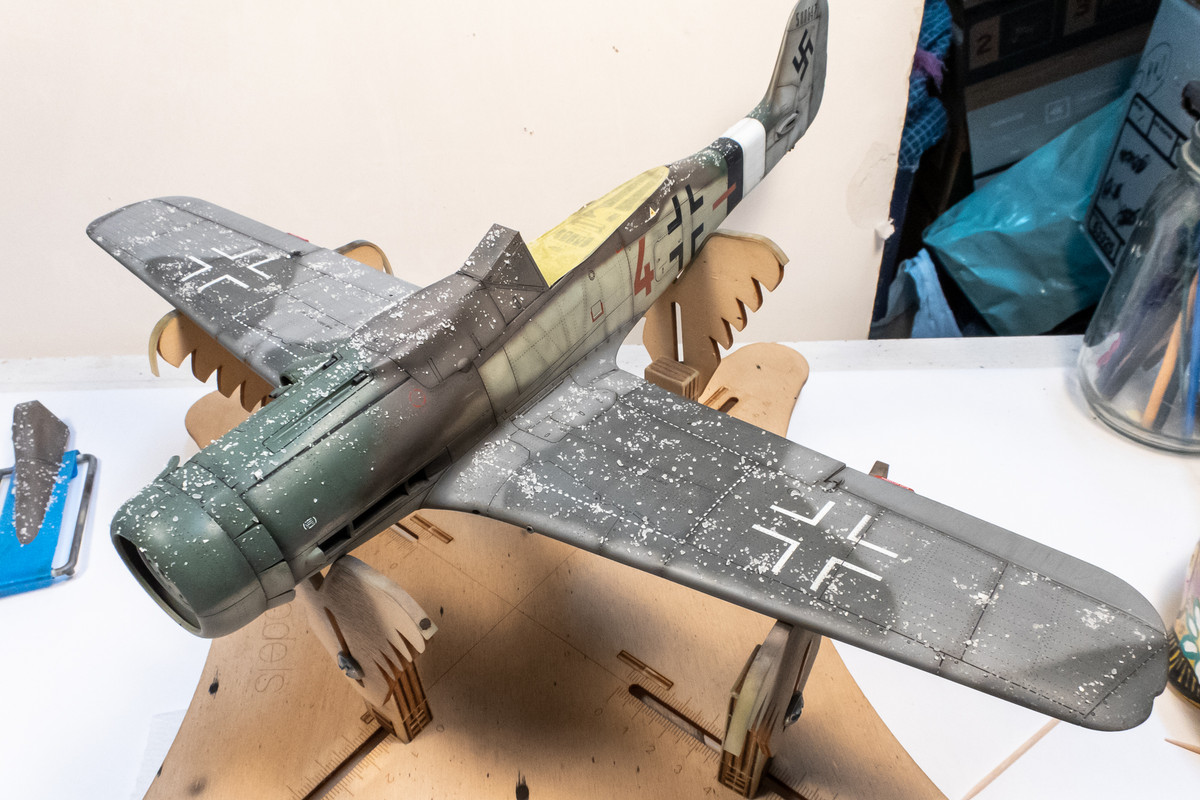
Once dry, a highly diluted lighter color such as tan or grey is randomly sprayed onto the model. This is a tricky technique as it is very difficult to discern how heavy or light the diluted color is being applied. I like a very subtle, barely noticeable effect but I have a hard time dialing it in. This time, the effect was a little too strong. This is a very thin layer so it can be scrubbed back using Micromesh.
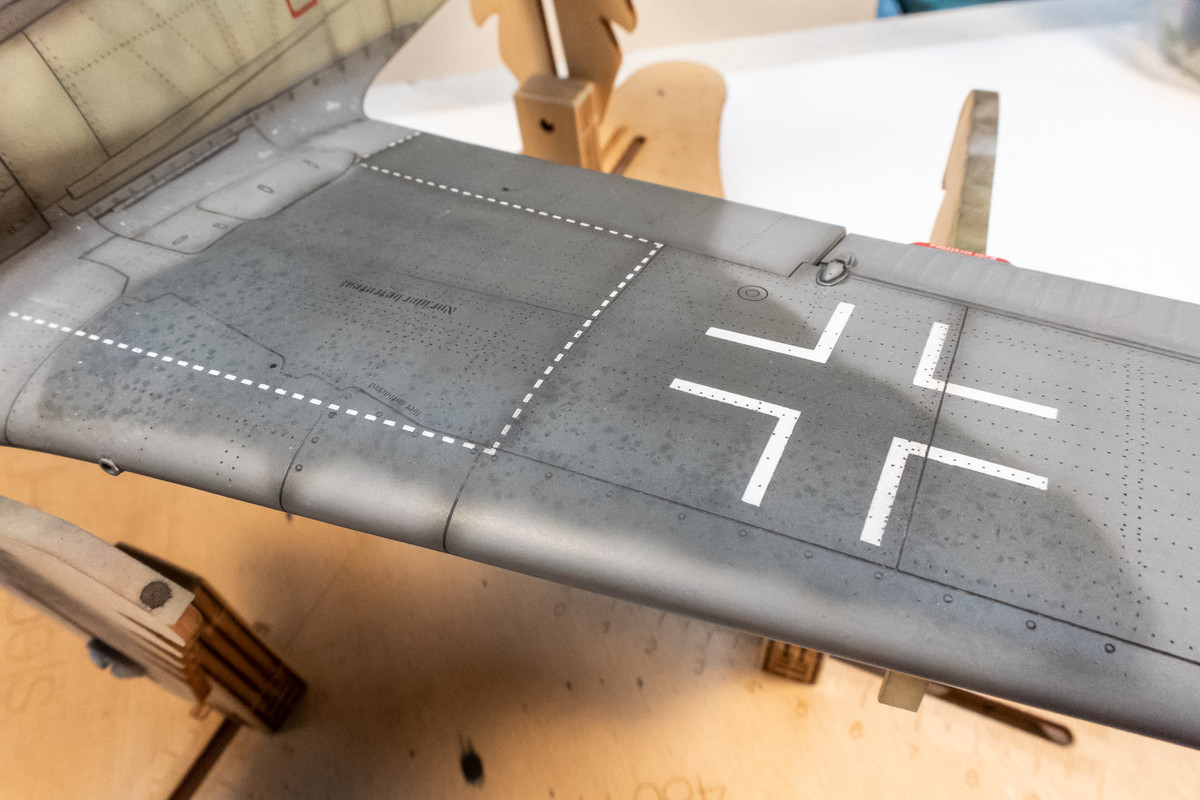
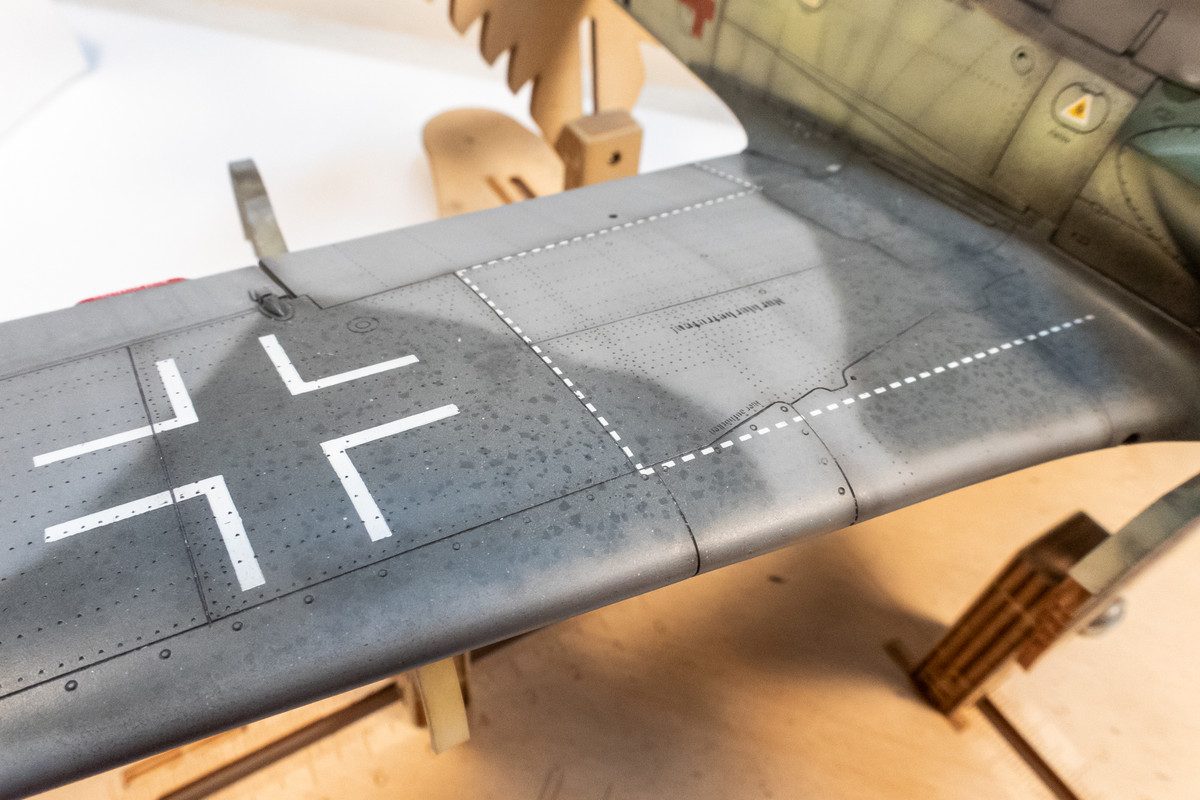
After some adjustments, the salt fading looks a little less pronounced. I still need to work on it a little bit more. The exhaust stains were applied during the post shading step.
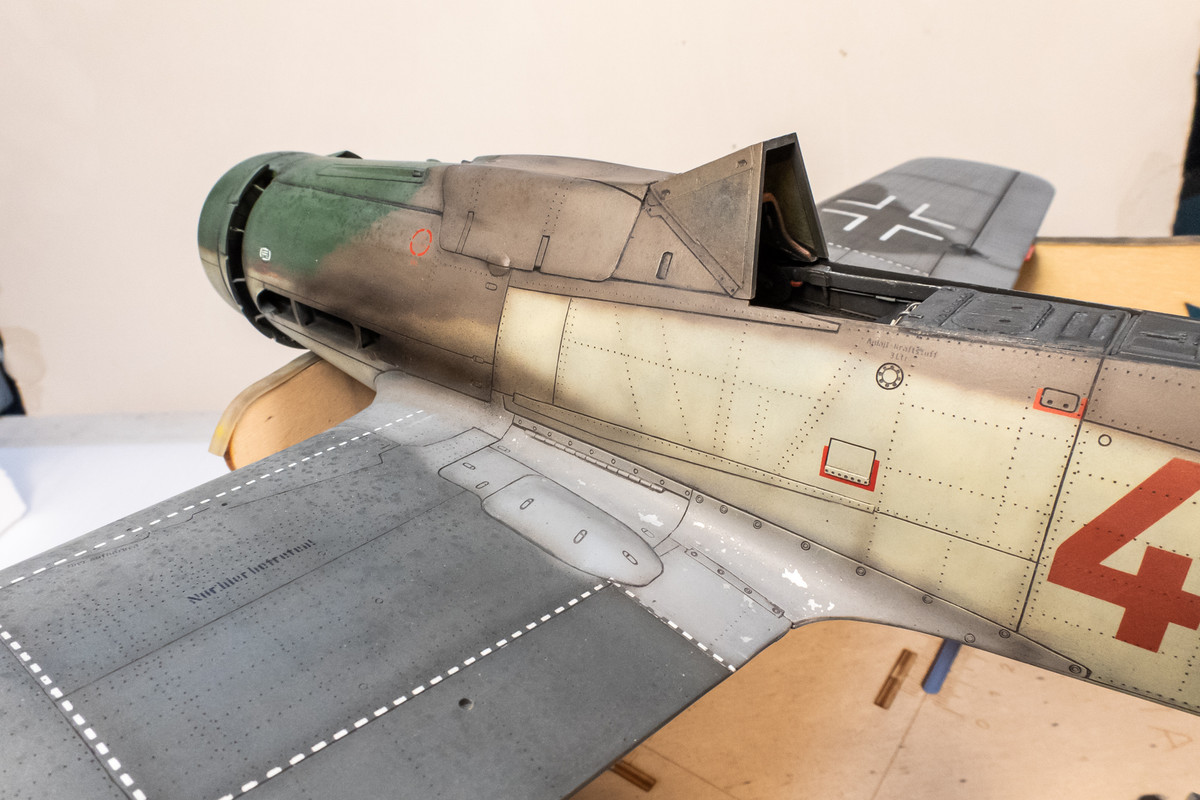
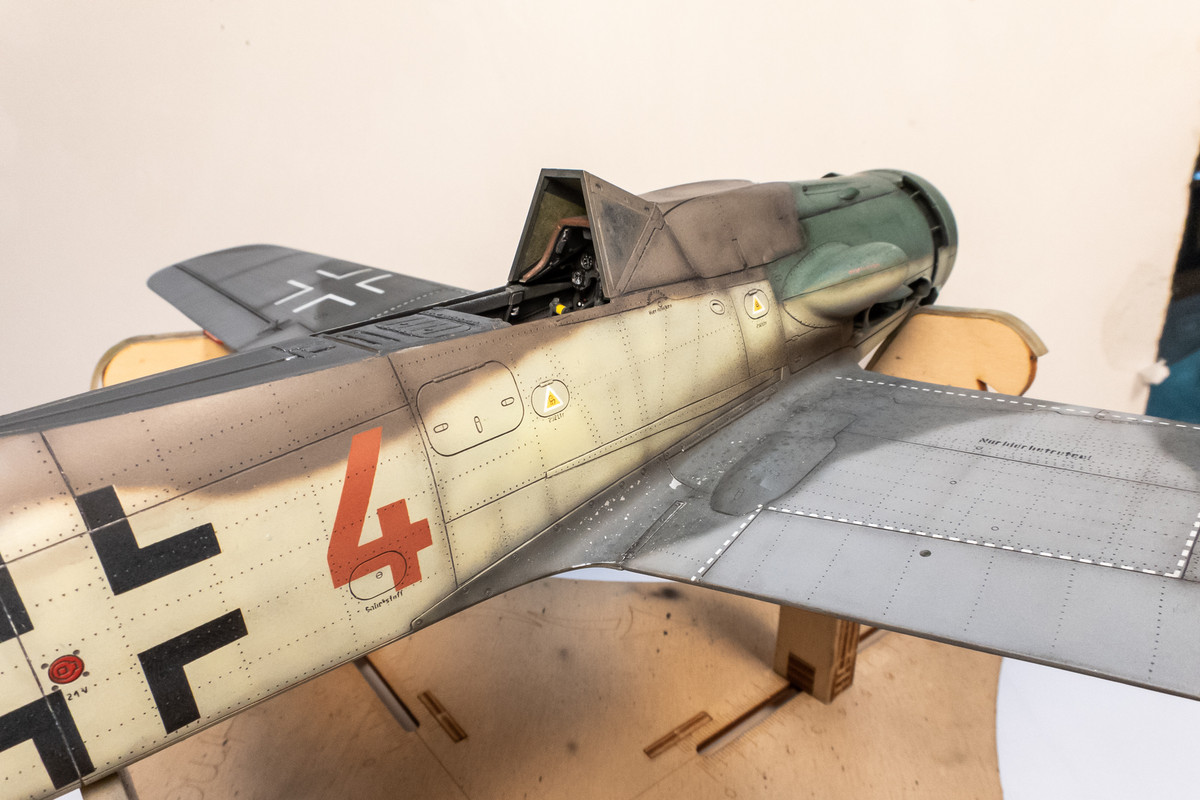
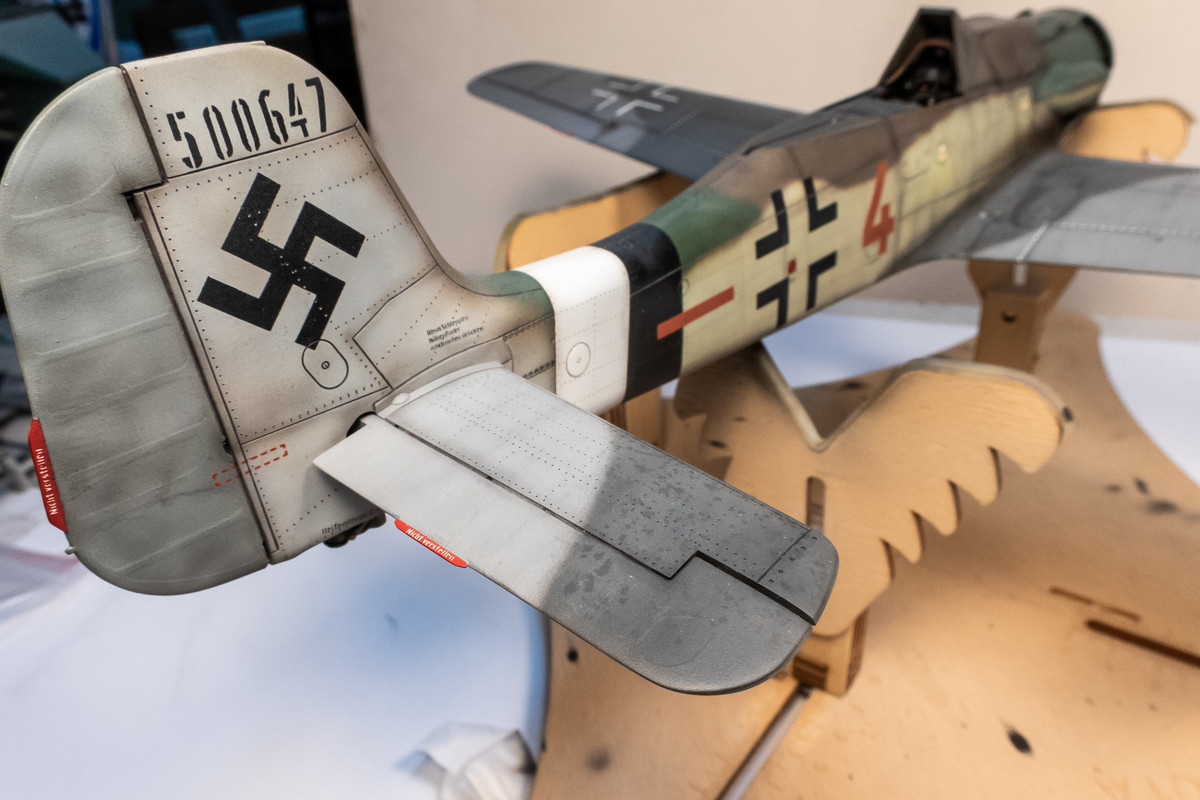
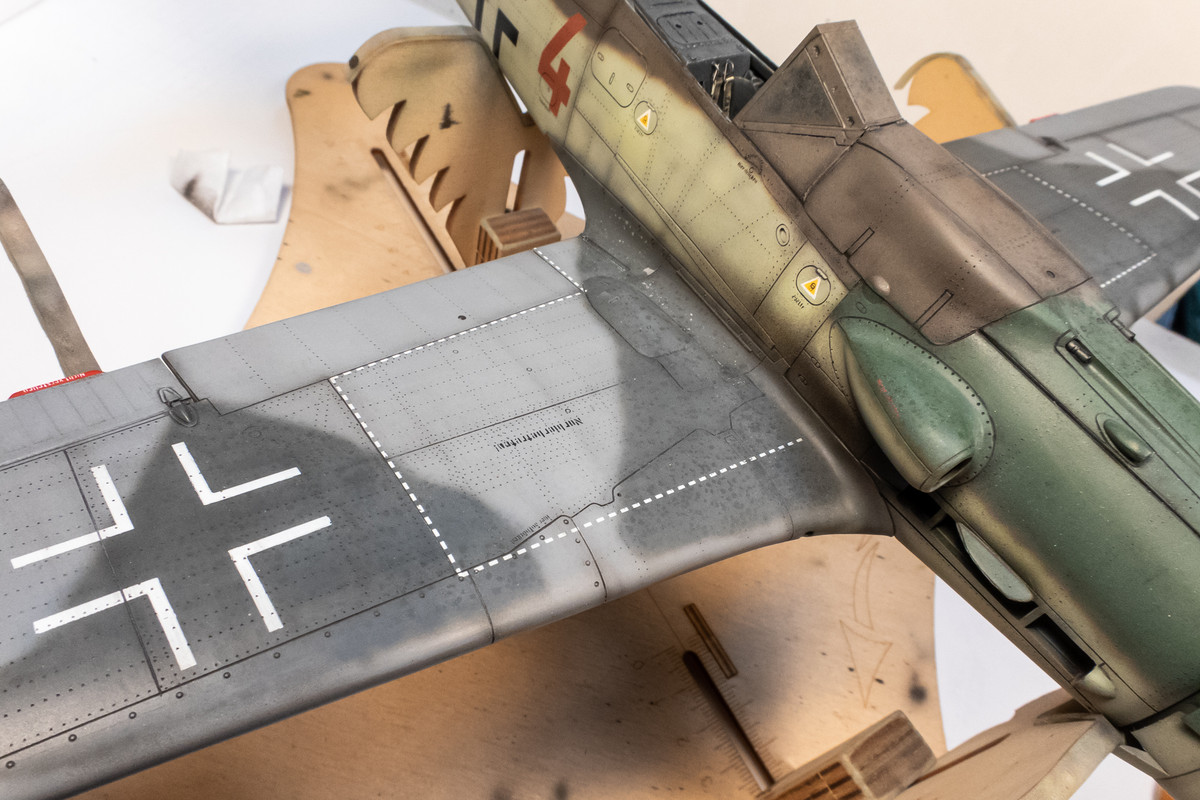
I normally apply the salt fading on the upper surfaces as it seems to mimic the stains left by water drying after rain. A closer look at some of the streaking effects applied by airbrush during the post shading stage.
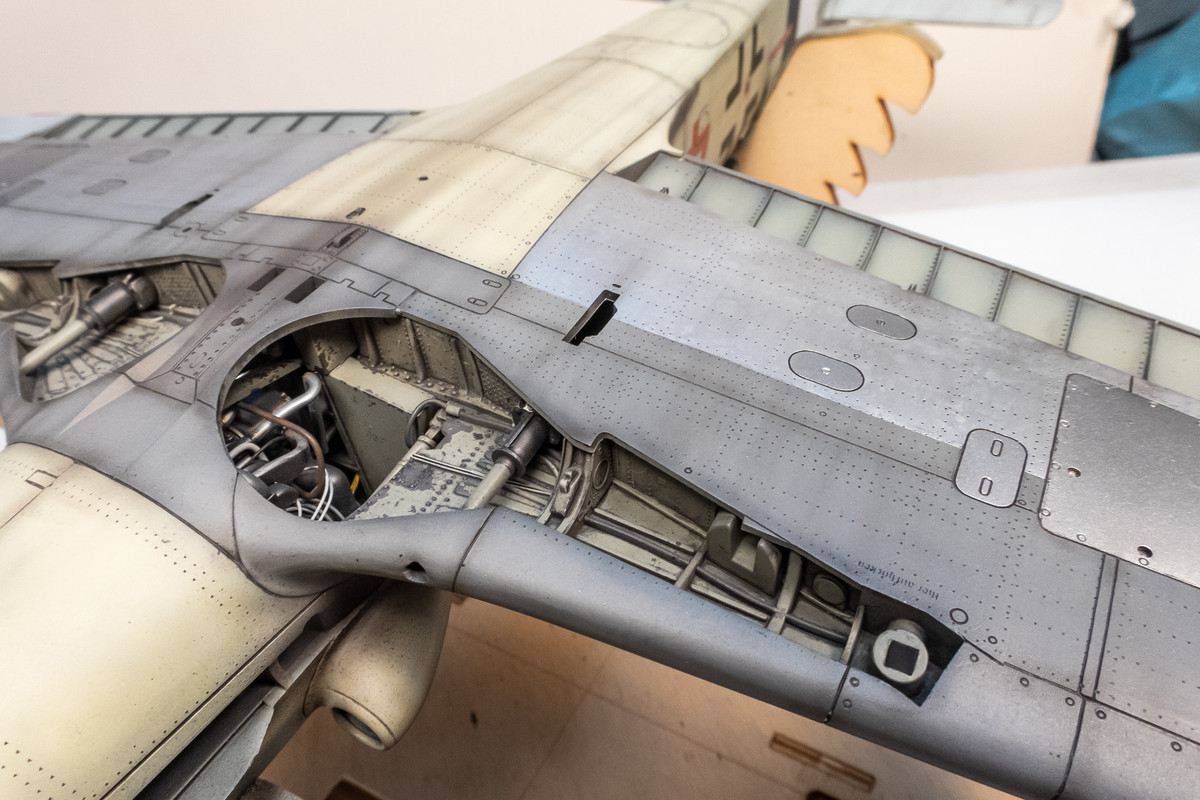
Once dry, a highly diluted lighter color such as tan or grey is randomly sprayed onto the model. This is a tricky technique as it is very difficult to discern how heavy or light the diluted color is being applied. I like a very subtle, barely noticeable effect but I have a hard time dialing it in. This time, the effect was a little too strong. This is a very thin layer so it can be scrubbed back using Micromesh.
After some adjustments, the salt fading looks a little less pronounced. I still need to work on it a little bit more. The exhaust stains were applied during the post shading step.
I normally apply the salt fading on the upper surfaces as it seems to mimic the stains left by water drying after rain. A closer look at some of the streaking effects applied by airbrush during the post shading stage.
John aka JKim
-----------<><
-----------<><
Re: Hasegawa 1/32 Fw 190D-9 Brown 4
Almost approaching the finish line on this one.
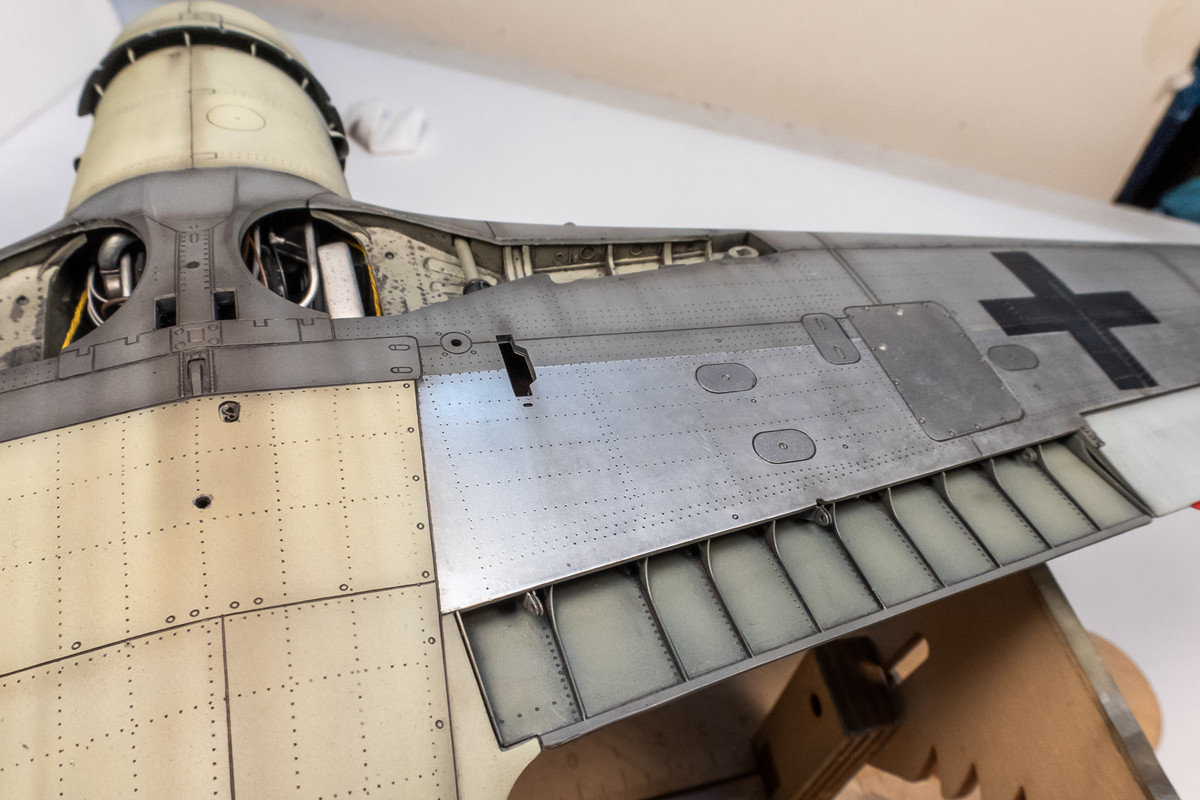
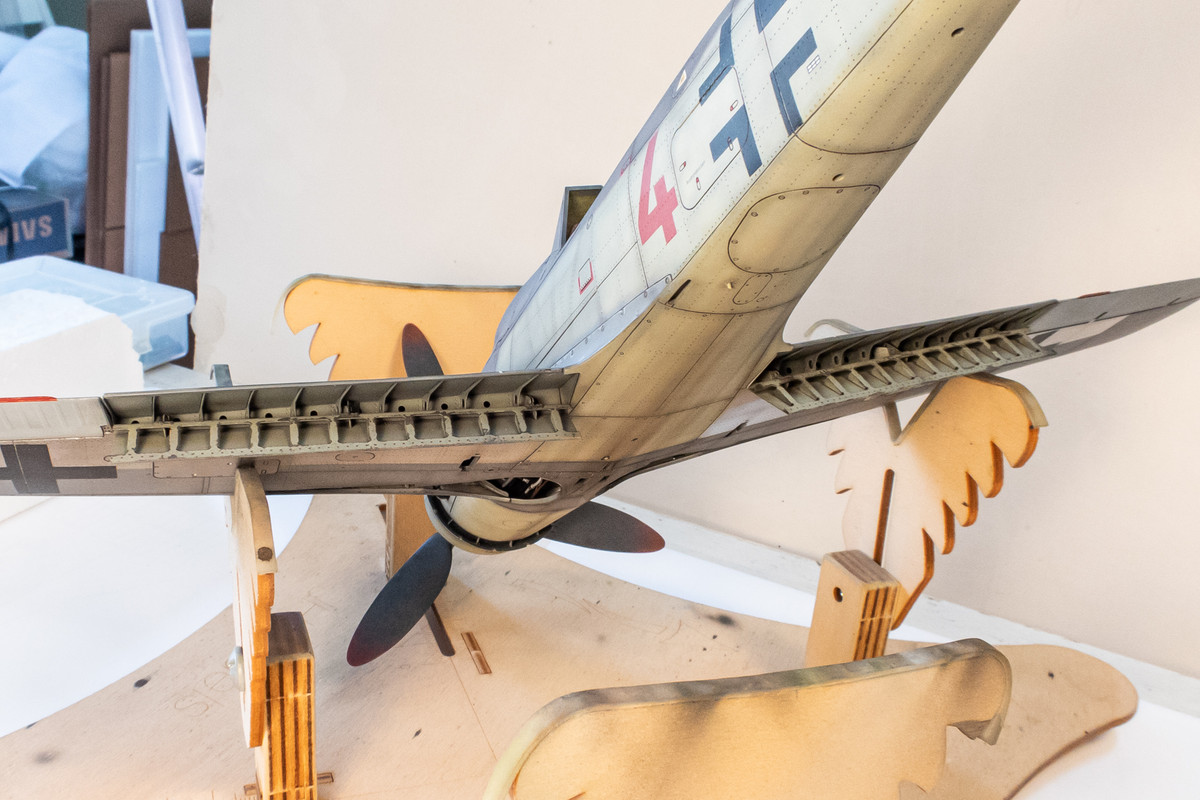
Checking to see the fit of the external bits that were finished earlier like the Eduard PE flaps. Friction is enough at the three attachment points to keep each flap in place without glue so I can slip these on and off as necessary.
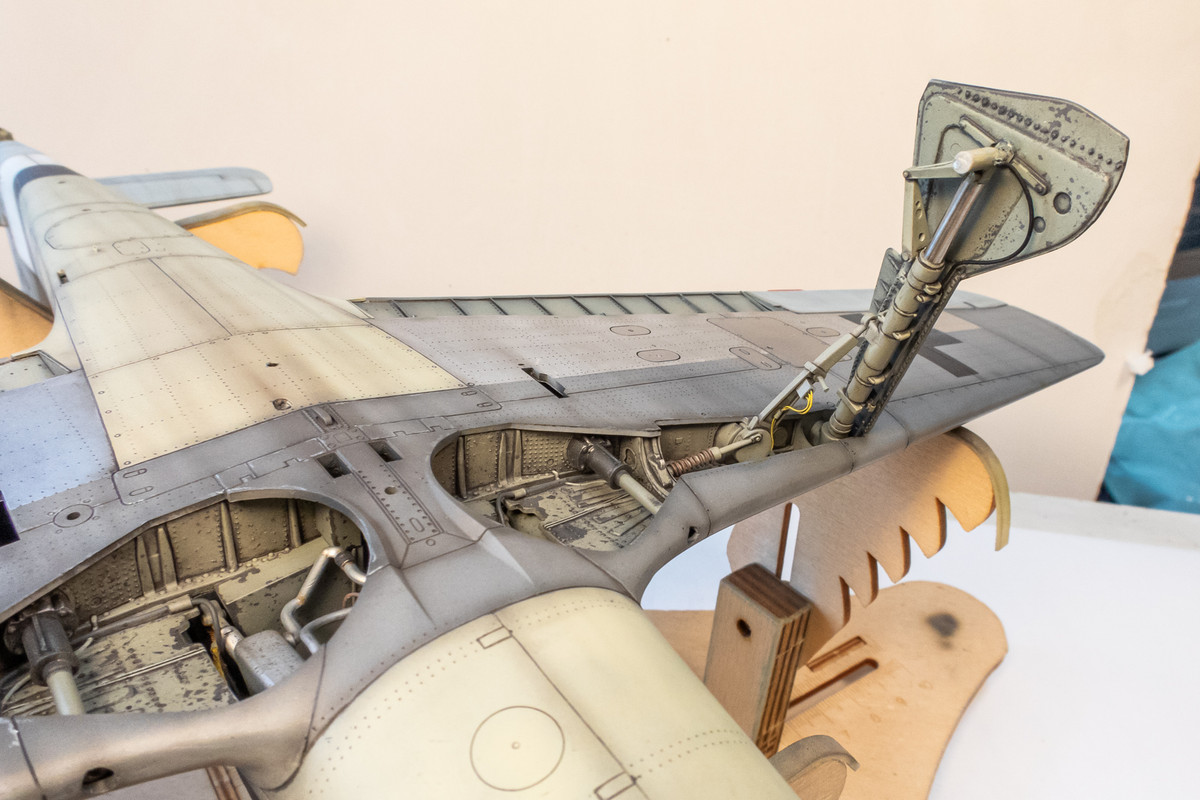
Some adjustments need to made (shaving the landing gear door extensions that I added) to make the landing gear fit. Not glued in yet... just checking things out.


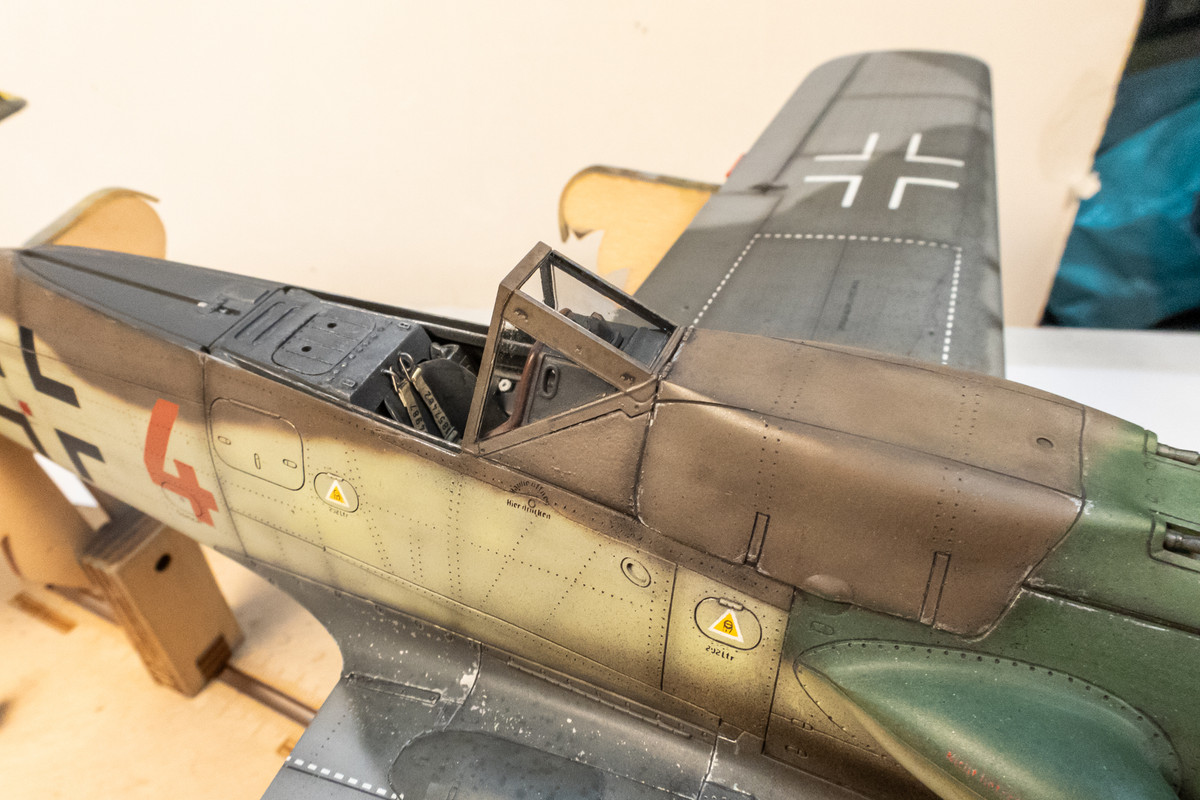
I've reached a point where I won't be spraying anything on the fuselage, at least near the cockpit anyway, so off come the paint masks on the clear parts. There was a bit of overspray that crept into the windshield on the starboard side but I was able to gently scrub it away with a wooden toothpick moistened with water.
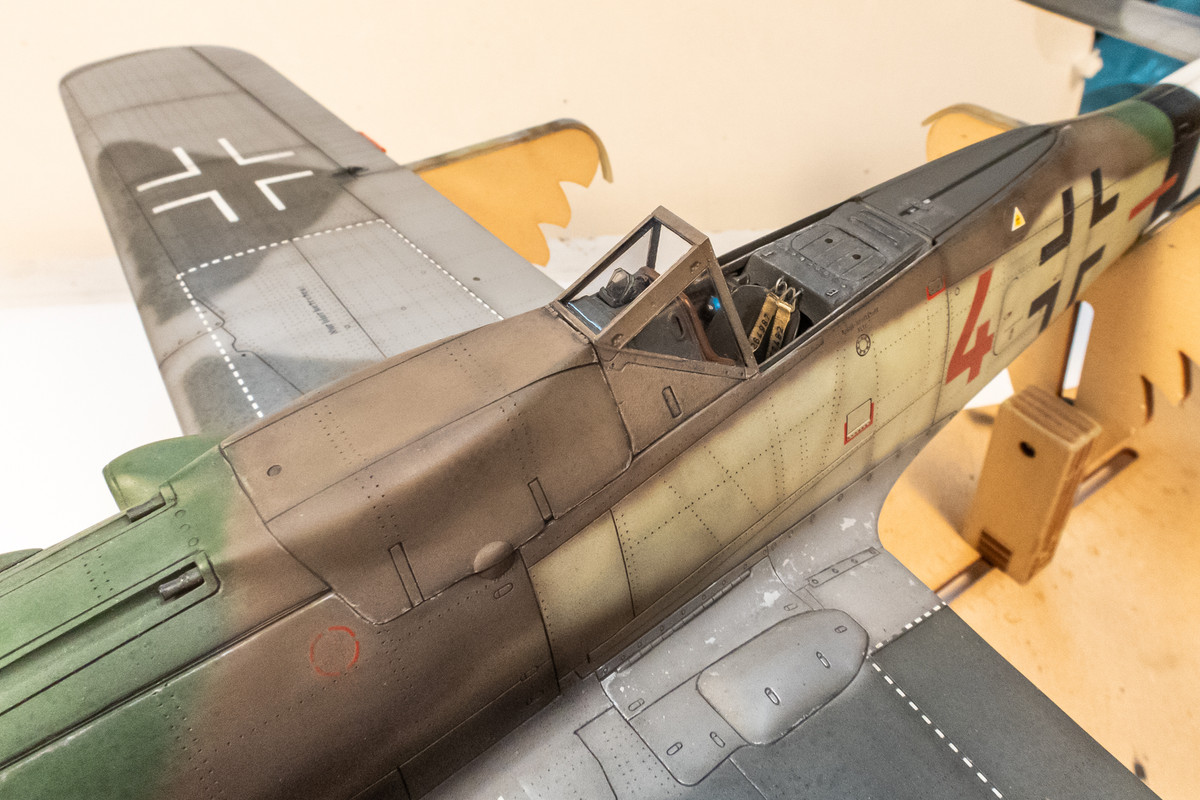

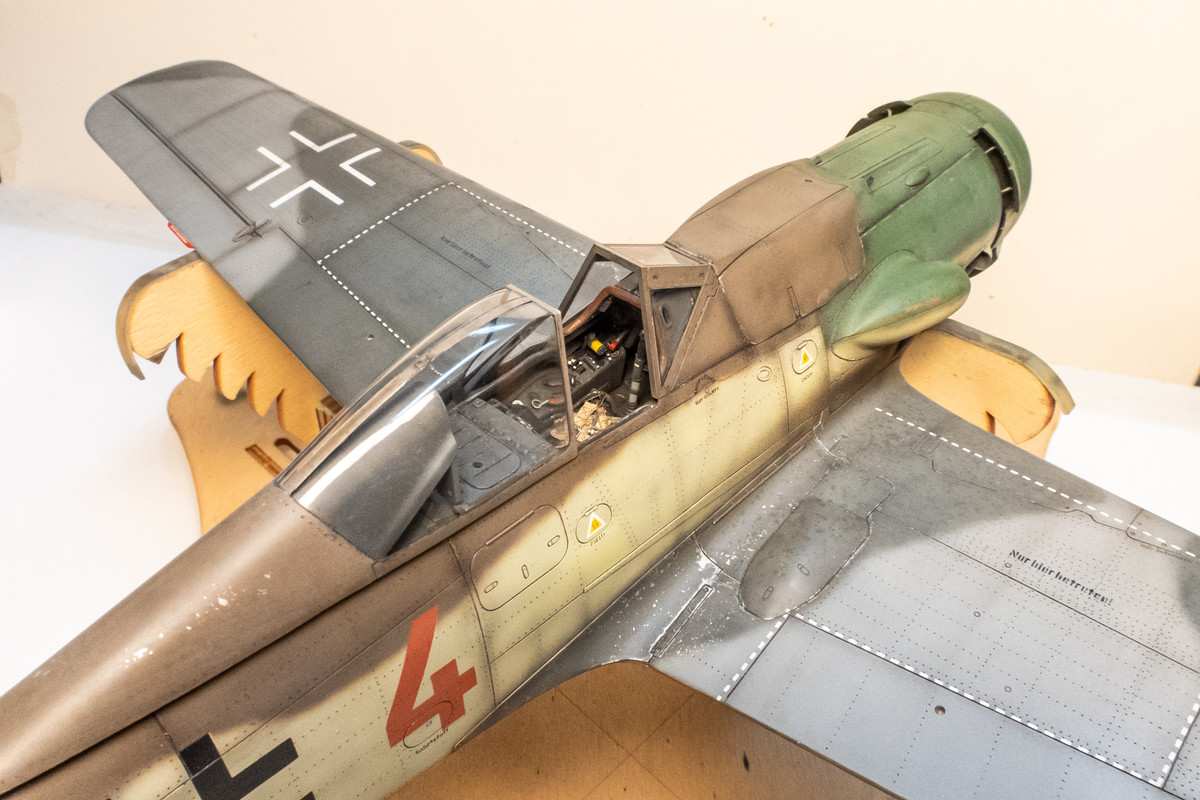
Checking to see the fit of the external bits that were finished earlier like the Eduard PE flaps. Friction is enough at the three attachment points to keep each flap in place without glue so I can slip these on and off as necessary.
Some adjustments need to made (shaving the landing gear door extensions that I added) to make the landing gear fit. Not glued in yet... just checking things out.
I've reached a point where I won't be spraying anything on the fuselage, at least near the cockpit anyway, so off come the paint masks on the clear parts. There was a bit of overspray that crept into the windshield on the starboard side but I was able to gently scrub it away with a wooden toothpick moistened with water.
John aka JKim
-----------<><
-----------<><
-
tempestjohnny

- Elite Member
- Posts: 3825
- Joined: Sat Oct 15, 2016 4:51 am
- Location: Naples. FL
-
TheMongoose
- Advanced Member
- Posts: 173
- Joined: Fri Oct 21, 2022 11:51 am
Re: Hasegawa 1/32 Fw 190D-9 Brown 4
Nice tips on the salt fading. Thanks for that! Beautiful build across the board. That paint just looks perfect in every close up!
-
BlackSheep214

- Elite Member
- Posts: 13593
- Joined: Sun Apr 06, 2014 8:47 pm
Re: Hasegawa 1/32 Fw 190D-9 Brown 4
I have no words... 
“Who controls the skies, controls the fate of this Earth”
Author unknown- 352nd Fighter Group, Blue-Nosed Bastards of Bodney
“Send one plane it’s a sortie; send two planes it’s a flight; send four planes it’s a test of airpower. - Richard Kohn
Author unknown- 352nd Fighter Group, Blue-Nosed Bastards of Bodney
“Send one plane it’s a sortie; send two planes it’s a flight; send four planes it’s a test of airpower. - Richard Kohn
Re: Hasegawa 1/32 Fw 190D-9 Brown 4
Thanks guys!
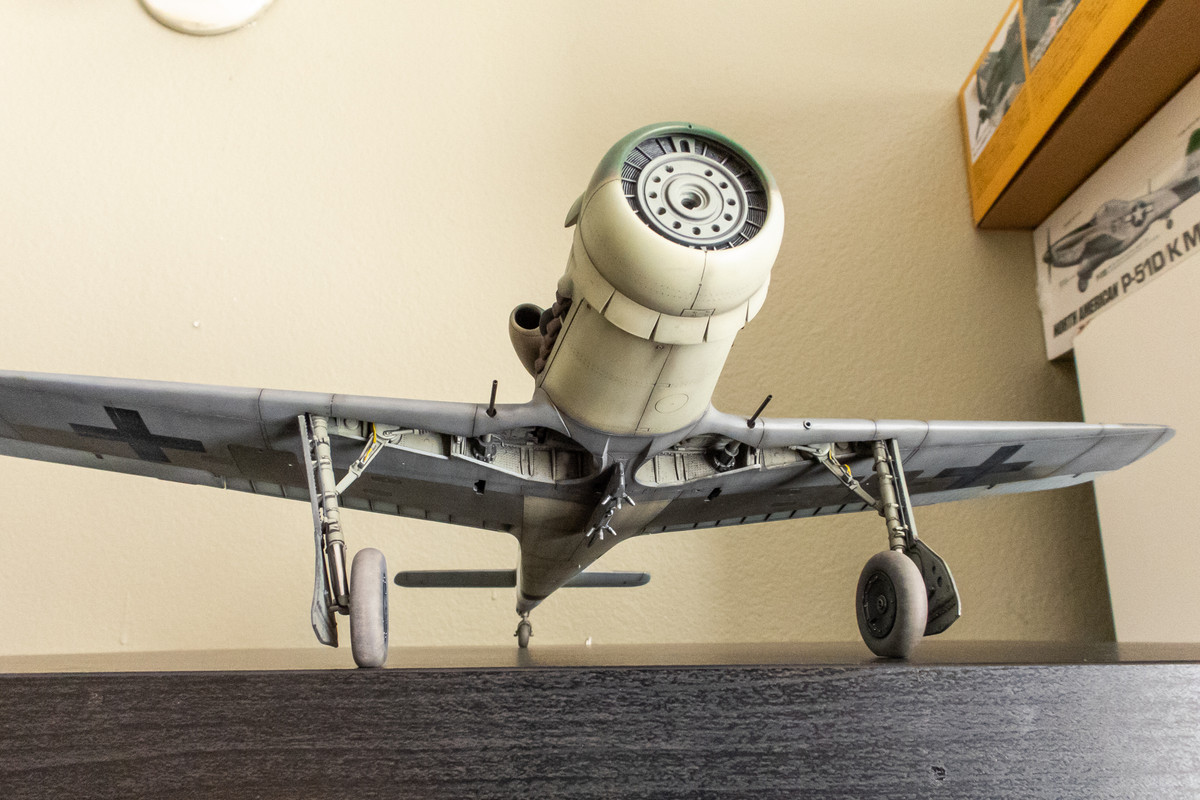
Last bits are being added onto the model. The landing gear legs have been glued into place.
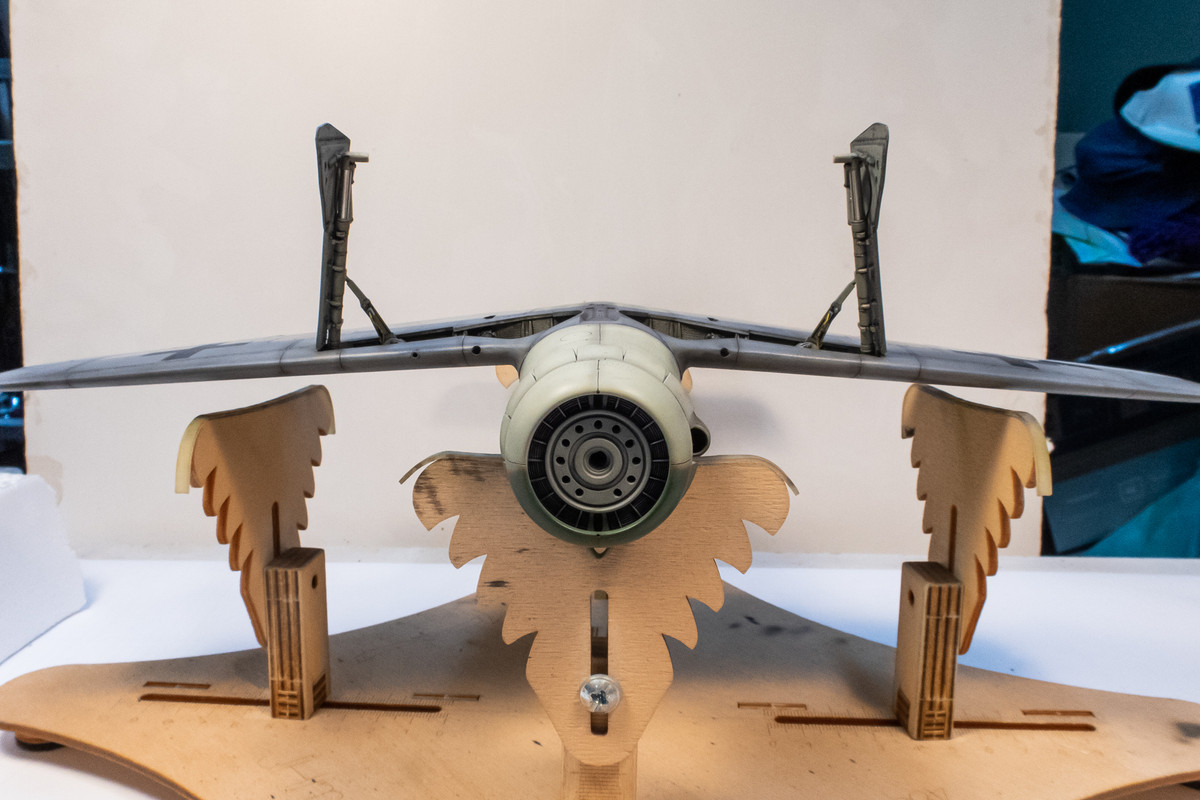
The tail wheel also.
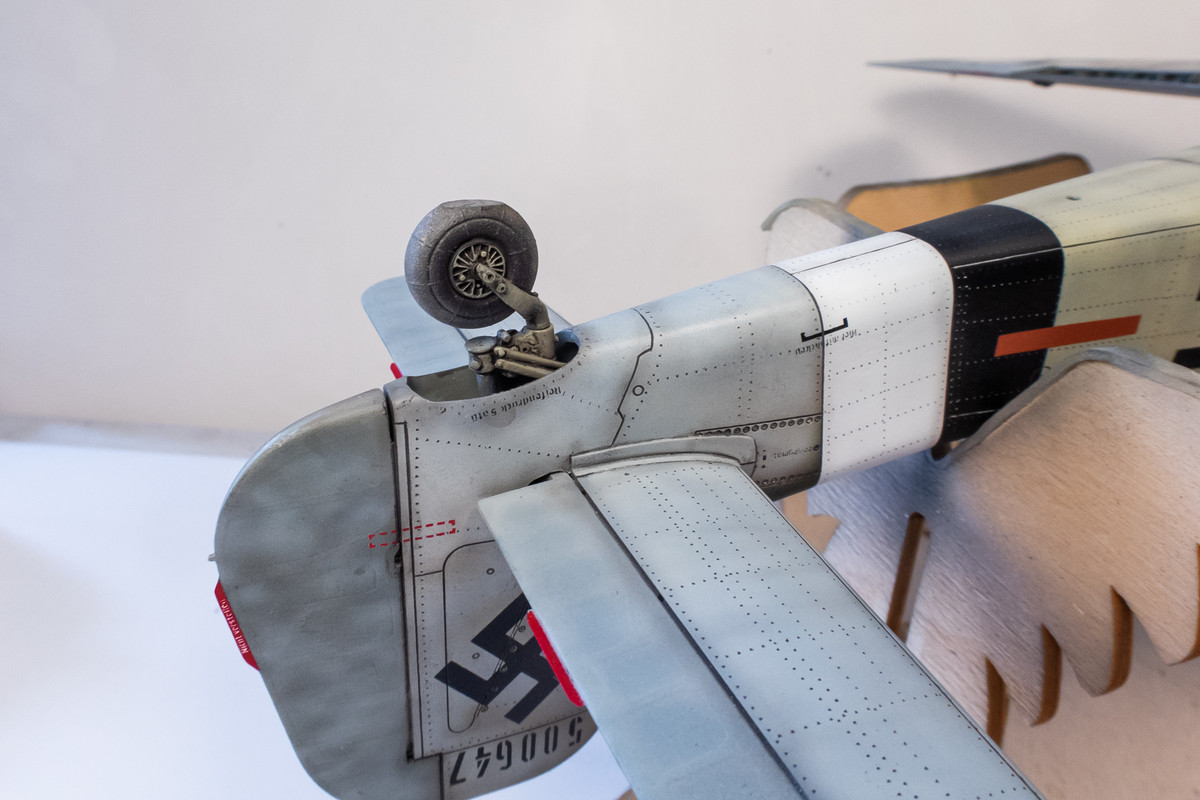
I'm using JB Kwik Weld 2-part epoxy to attach the wheels to the main landing gear legs. It's thickish like toothpaste and starts to hard in about 5 minutes, giving me time to orient the flat spots on the tires correctly.
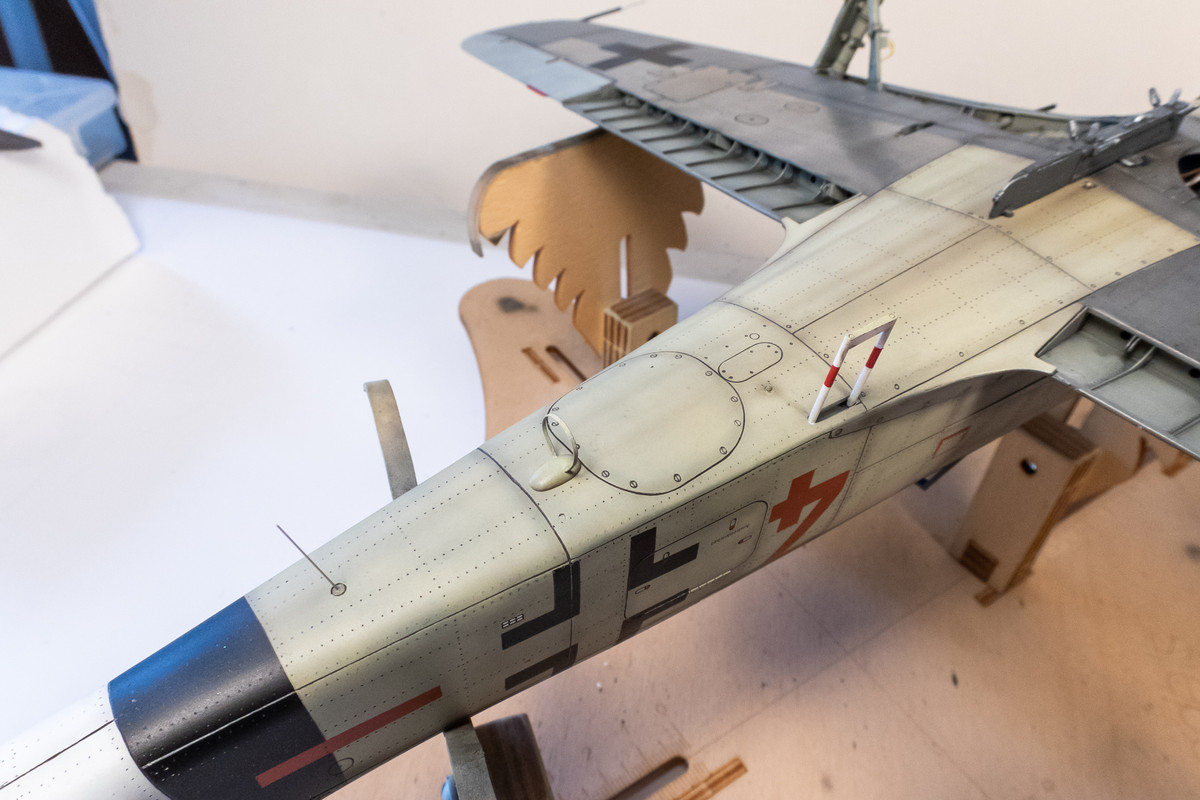
The little IFF antenna, the DF loop antenna and the boarding ladder are attached now.
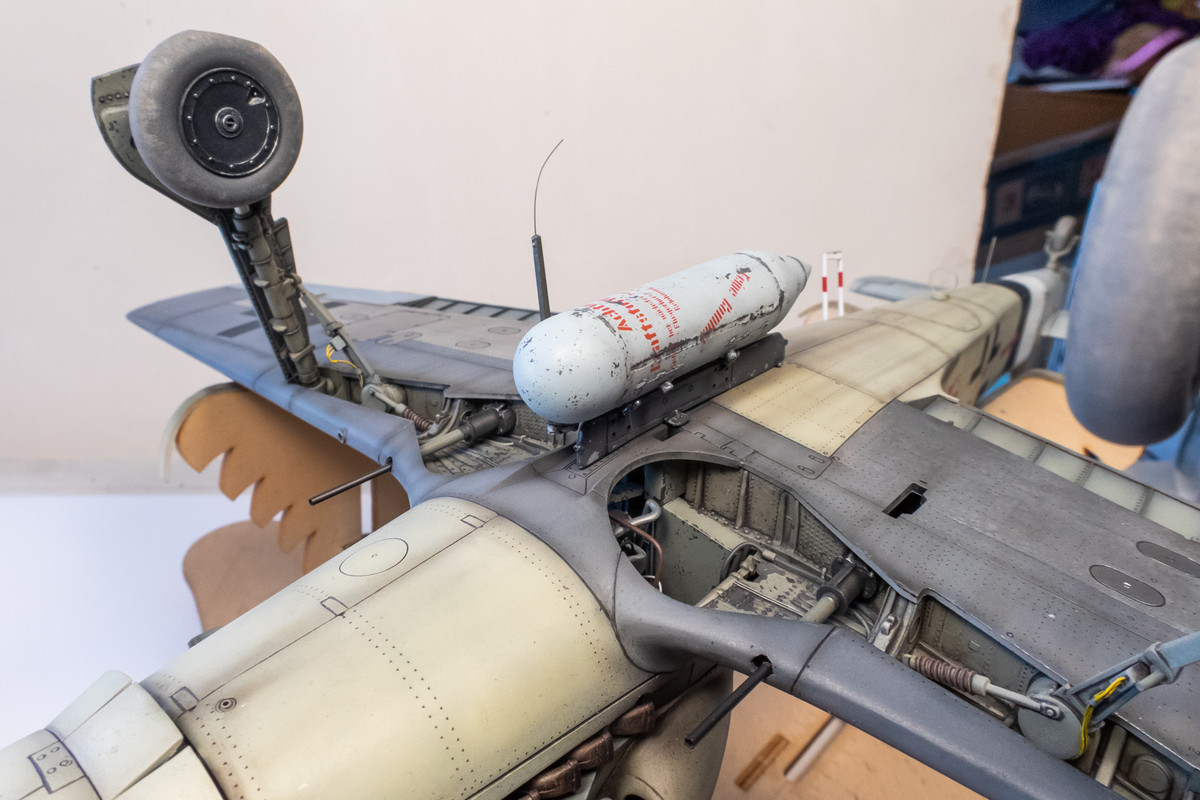
The ETC rack and drop tank are held in place with friction so I'm not going to glue them in place.
She's nearing the finish line!
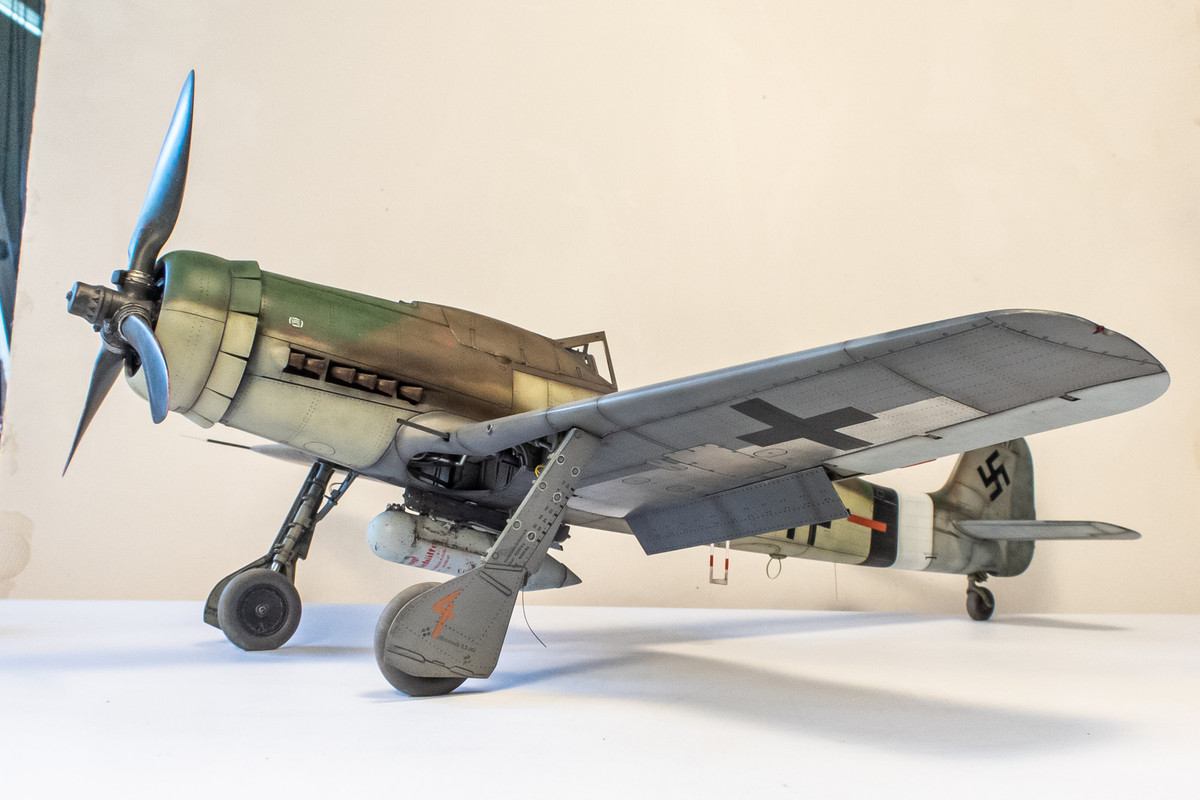
Last bits are being added onto the model. The landing gear legs have been glued into place.
The tail wheel also.
I'm using JB Kwik Weld 2-part epoxy to attach the wheels to the main landing gear legs. It's thickish like toothpaste and starts to hard in about 5 minutes, giving me time to orient the flat spots on the tires correctly.
The little IFF antenna, the DF loop antenna and the boarding ladder are attached now.
The ETC rack and drop tank are held in place with friction so I'm not going to glue them in place.
She's nearing the finish line!
John aka JKim
-----------<><
-----------<><