1/32 Hasegawa Fw190D-9 Red One

Post your work in progress of your aircraft builds in here.
User avatar
BlackSheep214
Elite Member
Posts: 13419
Joined: Sun Apr 06, 2014 8:47 pm

Re: 1/32 Hasegawa Fw190D-9 Red One

Post by BlackSheep214 »

Amazing work indeed on the spinner nose. :shoutout: :shoutout: :shoutout:
“Who controls the skies, controls the fate of this Earth”

Author unknown- 352nd Fighter Group, Blue-Nosed Bastards of Bodney

“Send one plane it’s a sortie; send two planes it’s a flight; send four planes it’s a test of airpower. - Richard Kohn
User avatar
jkim
Elite Member
Posts: 4073
Joined: Mon Apr 10, 2017 4:03 pm

Re: 1/32 Hasegawa Fw190D-9 Red One

Post by jkim »

Thanks guys! That attention to detail is what drives us eh? Sometimes to the point of distraction. I don't know if I can live with those little paint blobs on the spinner. I tried buffing them out with Micromesh but wasn't 100% successful. I can try to incorporate them into chipping marks but we'll have to see how that looks. Worst case is that I wipe the spinner and give it another go. Not too difficult especially since I have the Montex spiral masks. Just more time and effort. :hmm:

The work on the exhausts may seem excessive but I wanted to avoid the spray-and-done approach. Applying the rust-colored "chipping" and highlighting the tips in black helps break up the row of exhausts visually into individual pipes. And that adds one layer of complexity that wasn't there before. Hopefully, the different layers work together to make our eyes think they are seeing something heftier than a piece of plastic.
John aka JKim
-----------<><
Image
User avatar
speedgraflex
Moderator
Posts: 11358
Joined: Fri Feb 10, 2017 11:08 pm
Contact:

Re: 1/32 Hasegawa Fw190D-9 Red One

Post by speedgraflex »

John! Your work is phenomenal! Have you shared any of the photos with Henri? I bet he would be so excited to see the attention you have given here.

Image

What color are your hydraulic lines for the landing gear? I’m preparing ideas for the Do-17 including colors necessary for hydraulics and electrical systems.

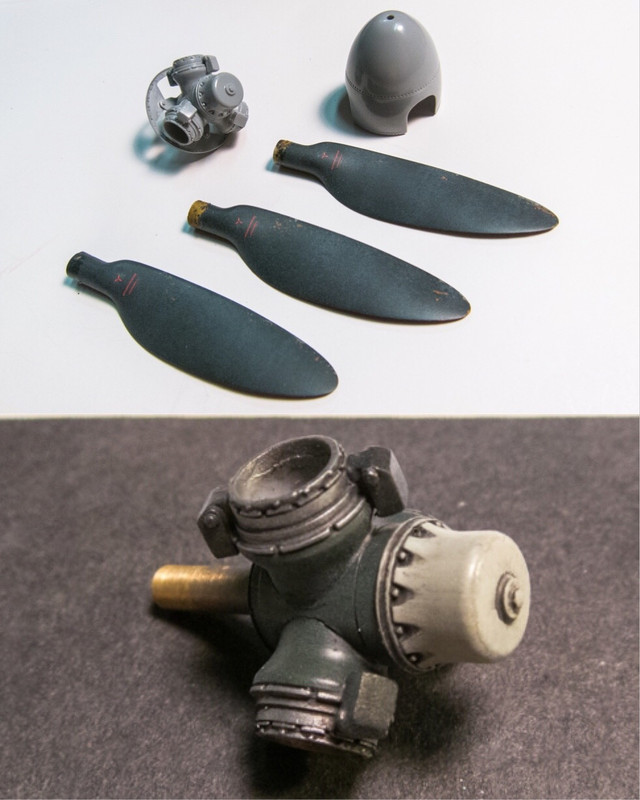
Also, would you detail the absolutely STUNNING work on the interior propeller hub assembly?
Make more models!
User avatar
jkim
Elite Member
Posts: 4073
Joined: Mon Apr 10, 2017 4:03 pm

Re: 1/32 Hasegawa Fw190D-9 Red One

Post by jkim »

Thanks Bruce! The landing gear brake lines were painted either very dark grey or black. I'm assuming that the big line that is molded into the wheel wells is the brake line so I painted them dark grey not yellow like I did the last build.

And no, I haven't shared any pics with Henri. I figured he has the best modelers in the world using his stuff... I'm assuming he's got some great pics. But I love his work so I'd do anything to support his products... I'll think about sending him some photos.

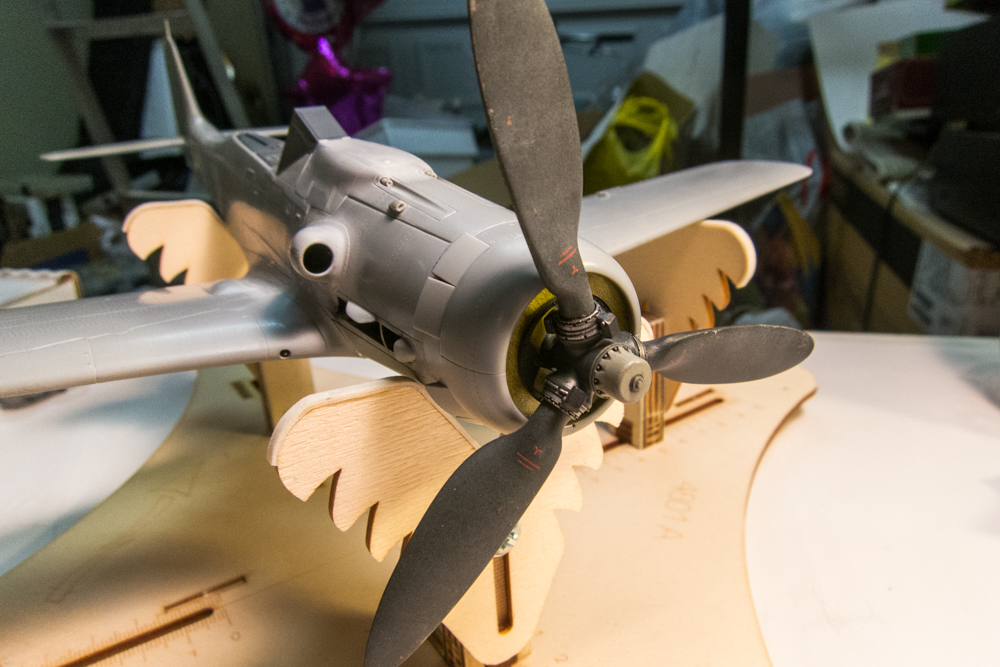
Speaking of the HD props... here is what the prop looks like mounted without the spinner.
Image

I was able to repair the spinner to my satisfaction. I still need to think about weathering it a bit but not sure how to do it considering the two contrasting colors. I did put a dark wash to make the rivets stand out more.
Image
Image

I'm very close to painting. In preparation, I've masked off the wheel wells with foam and the flap opening with tape. Not sure which I want to do first... top or bottom? Thinking about doing the bottom first as I would rather deal with green overspray on the red than the red overspray on the green. Or would I? I'll think about it. A short trip up to LA to meet my niece's fiance! We'll get back to Red 1 in a couple of days.
Image
John aka JKim
-----------<><
Image
User avatar
KSaarni
Elite Member
Posts: 5621
Joined: Sun Apr 06, 2014 7:13 am
Location: Gent, Belgium
Contact:

Re: 1/32 Hasegawa Fw190D-9 Red One

Post by KSaarni »

Wouh!
Can hardly wait for the main painting session to start!

Have a great time in LA!

- Kari
---
On the bench:

MiniArt 1:48 - Junkers F13 Float Plane


https://www.facebook.com/GrundAsk-Scale ... 721218708/
User avatar
speedgraflex
Moderator
Posts: 11358
Joined: Fri Feb 10, 2017 11:08 pm
Contact:

Re: 1/32 Hasegawa Fw190D-9 Red One

Post by speedgraflex »

John,

Thank you for your reply, plus the update. This is an important moment!

1. My perspective is always to honor the original painting sequence—factory fresh to field applied repairs—and I would treat this project the same way as much as possible. I would at least try this as a test on a wing: (a) original factory first including the RLM 65, (b) fading the paint significantly, (c) adding white, (d) adding red.

2. I know a note from you to Henri would make him happy, but I leave that to your discretion. However I officially nominate you as equal to those who make the best models in the world, and I believe I am not alone in assessing this.

3. Thank you for the information on brake lines! I have seen brown hydraulic lines as well as ones painted gray. I have found factory floor photos of Do-17s which are useful for details, but all so far are black and white. The search continues.

4. Congratulations, Herr Thunnus, for adding the wing to the Me 262 (featured elsewhere, in absolutely beautiful detail). The Dora will be ready to protect her!

5. Enjoy L.A.
Make more models!
User avatar
KSaarni
Elite Member
Posts: 5621
Joined: Sun Apr 06, 2014 7:13 am
Location: Gent, Belgium
Contact:

Re: 1/32 Hasegawa Fw190D-9 Red One

Post by KSaarni »

speedgraflex wrote:I officially nominate you as equal to those who make the best models in the world, and I believe I am not alone in assessing this.
:that: :P1: :bow:

Could not agree more!

- Kari
---
On the bench:

MiniArt 1:48 - Junkers F13 Float Plane


https://www.facebook.com/GrundAsk-Scale ... 721218708/
User avatar
Duke Maddog
Elite Member
Posts: 7669
Joined: Tue Jun 03, 2014 11:22 am
Location: Rowland Heights, CA

Re: 1/32 Hasegawa Fw190D-9 Red One

Post by Duke Maddog »

I third that motion above...
The Duke
Virtuoso of Miniatures

"Do you know what the chain of command is? It's the chain I get and beat you with 'till you understand who's in ruttin' command!"
-Jayne Cobb, Firefly Episode 2 "The Train Job"

We are modelers - the same in spirit, in hunger to insanely buy newly released kits, hustlers in hiding our stash from our better halves and experts in using garbage as replacements for after-market parts.
User avatar
jkim
Elite Member
Posts: 4073
Joined: Mon Apr 10, 2017 4:03 pm

Re: 1/32 Hasegawa Fw190D-9 Red One

Post by jkim »

Thanks guys! Very flattered but I'm just another dude who is obsessed with plastic. Back at home after spending a few days in LA. Your points about painting sequence are very interesting, Bruce. Yes, I tend to follow the original painting sequence but only because I assume they followed the same basic rule: lighter colors first and darker colors on top. But even that rule gets violated frequently in order to achieve the result I need with the tools that I have. For example, dark hard-edged mottles on a lighter background will get painted in the reverse order. The dark gets painted first and the mottle pattern is created with blobs of Blu-Tack and lighter color is sprayed on top of that. I find this easier to do than cutting out the mottle on a tape mask.

More than the original painting order, I consider the transitions first. If the transitions are hard then order, to me, is largely irrelevant and is largely arbitrary, maybe established by ease of masking. In the case of Red 1, there is a hard demarcation between the bottom and top so I don't feel restricted to a particular order. If that makes any sense.

Yes, the 262 build has been re-started and posted to LSP. There will be lots of work cleaning up the wing/fuselage joints so I won't be doing any major updates soon.
John aka JKim
-----------<><
Image
User avatar
jkim
Elite Member
Posts: 4073
Joined: Mon Apr 10, 2017 4:03 pm

Re: 1/32 Hasegawa Fw190D-9 Red One

Post by jkim »

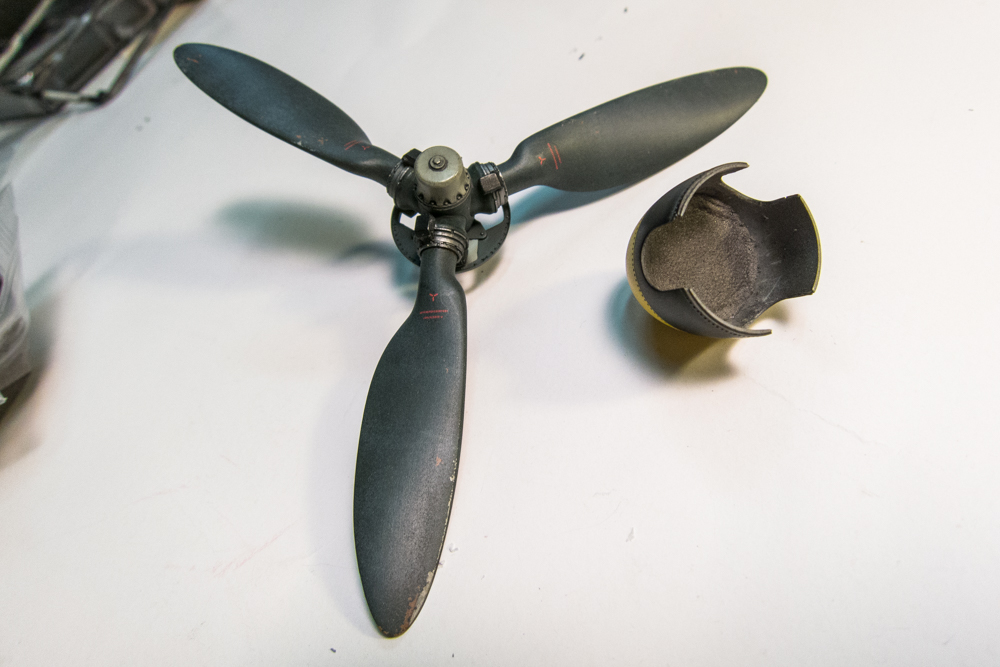
I had a brilliant idea of using children's clay to make the spinner removal. This clay dries into a stiff foam-like substance. My thought was to put a small amount of this clay into the spinner and then press the prop hub into it. Let it dry and the hardened clay would form a "receptacle" for the hub, giving enough friction to hold the spinner in place. It worked... for a few minutes. After only a couple of removals, the tight fit of the dry foam got too loose to hold the spinner in place. Back to the drawing board.
Image

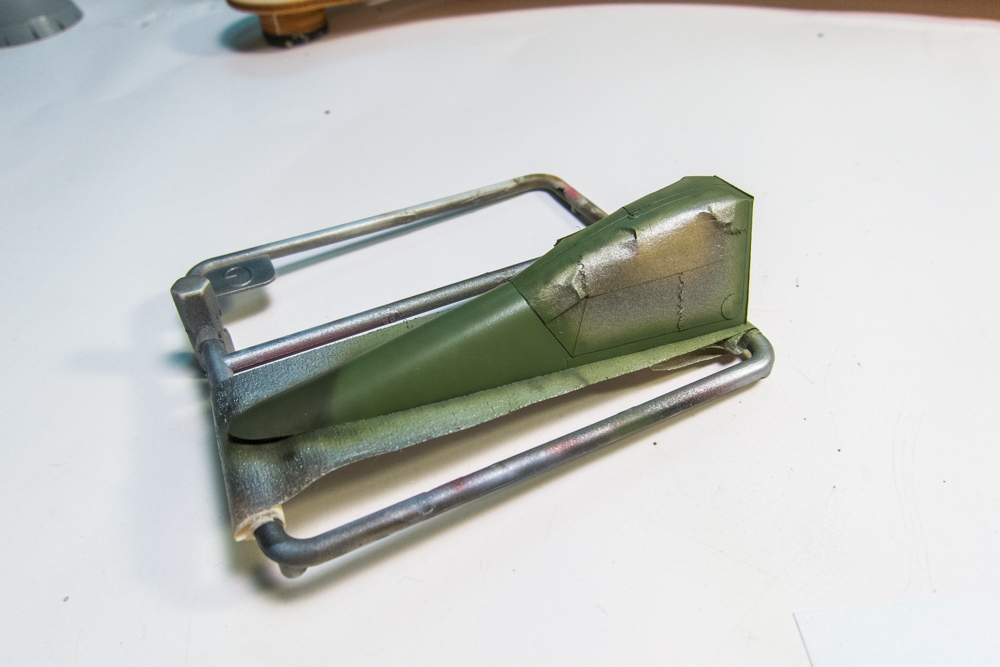
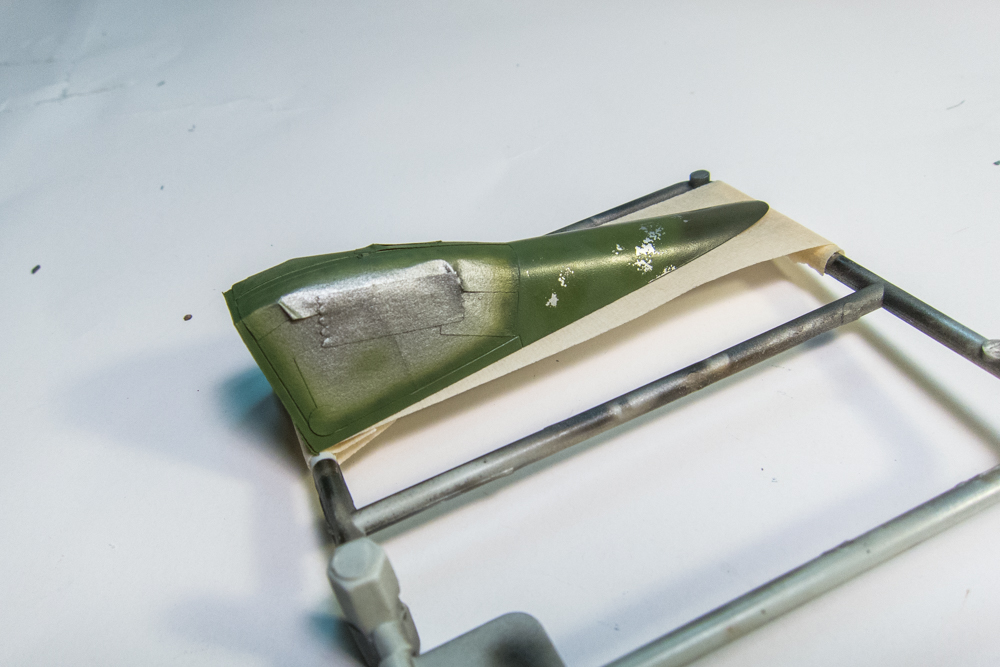
I am using Gunze acrylics for the RLM 82/83 top side colors. So I wanted to test these out on the canopy. Red 1 had some noticeable chipping on the canopy so a coat of Tamiya AS-12 (silver in a spray can decanted into the airbrush) was put over a black base.
Image

After hairsrpay was applied and left to dry, the preshading was done.
Image

The canopy is mostly RLM 82 with just the rear portion in the darker RLM 83.
Image

The chipping worked out well using the hairspray. Much better than the MIG stuff.
Image

All of the seams on the Dora have been addressed so she is ready for painting.
Image

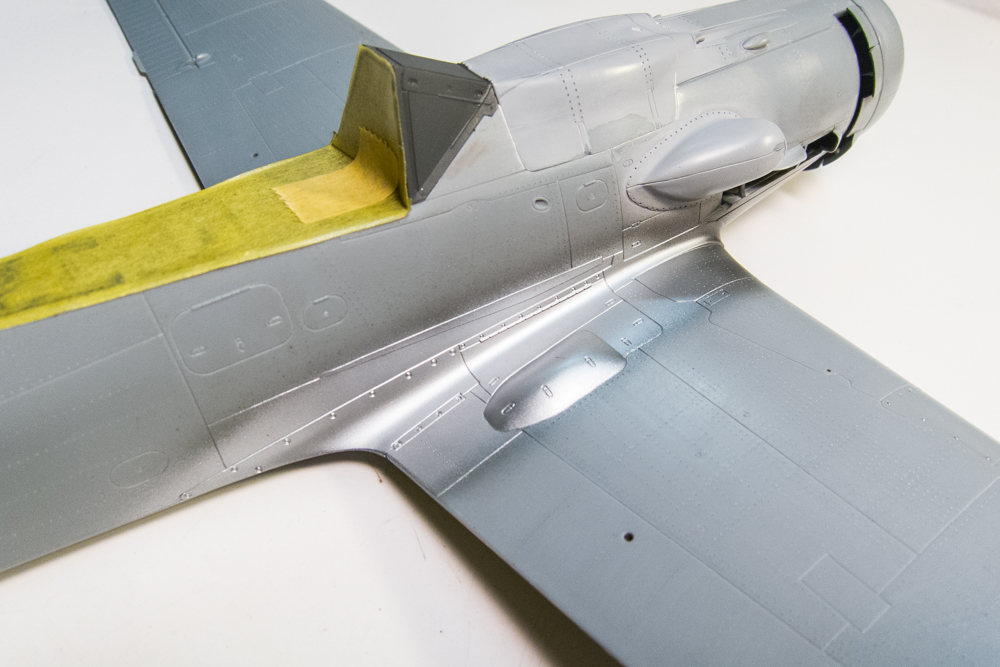
I still have not decided whether to do the top or bottom first but I am going to do hairspray chipping at the wing root so again I used Tamiya AS-12 over black as the base metal color. Metallic finishes are unforgiving when it comes to underlying flaws so this is a good test to see how successful the wing root repair was.
Image
Image

The canopy frame has been given a layer of salt fading.
Image
John aka JKim
-----------<><
Image
Post Reply

Return to “Aircraft Work in Progress”