1/32 Revell Me262B-1/U1 Nachtjager

Re: 1/32 Revell Me262B-1/U1 Nachtjager
Looking fantastic John! I want to paint my Tamiya Uhu in this type of scheme but haven't been brave enough to try it. Have any tips for consistency?
March as one, Don't look back
Odin's sons... Attack!
Unleash hell! Do not repent! Warfare grants us no lament
Let your weapons slash and tear This is no place for fear
Hold the lines! Move as one! In unity our victory's won
Our shields will form a mighty wall
United we shall never fall
Odin's sons... Attack!
Unleash hell! Do not repent! Warfare grants us no lament
Let your weapons slash and tear This is no place for fear
Hold the lines! Move as one! In unity our victory's won
Our shields will form a mighty wall
United we shall never fall
-
BlackSheep214

- Elite Member
- Posts: 13595
- Joined: Sun Apr 06, 2014 8:47 pm
Re: 1/32 Revell Me262B-1/U1 Nachtjager
Yeah. Incredible work. If I was attempting that, no doubt the 10 will be gone.tempestjohnny wrote:Wow. Amazing control going around the decals

“Who controls the skies, controls the fate of this Earth”
Author unknown- 352nd Fighter Group, Blue-Nosed Bastards of Bodney
“Send one plane it’s a sortie; send two planes it’s a flight; send four planes it’s a test of airpower. - Richard Kohn
Author unknown- 352nd Fighter Group, Blue-Nosed Bastards of Bodney
“Send one plane it’s a sortie; send two planes it’s a flight; send four planes it’s a test of airpower. - Richard Kohn

Re: 1/32 Revell Me262B-1/U1 Nachtjager
I am struck dumb...well, okay mute, what ever.. wow!
To make each build less crappy than the last one. Or, put another way, "Better than the last one, not as good as the next one!"..

Re: 1/32 Revell Me262B-1/U1 Nachtjager
Thanks guys! The key to this type of painting is THIN mixes and keeping the airbrush moving. My mixes are very watery and the paint will pool if you keep the airbrush in one position for more than a second. But the great advantage of thin mixes besides the nice smooth finish is the forgiveness of the spray since it is quite translucent. You don't have to be as precise with your aiming and you can visually adjust your pattern to exact positions WHILE you spray, if that makes sense.
A new set of masks were prepared to fix the port side red "10". It is exposing only the red portion of the numeral and masking the white border.
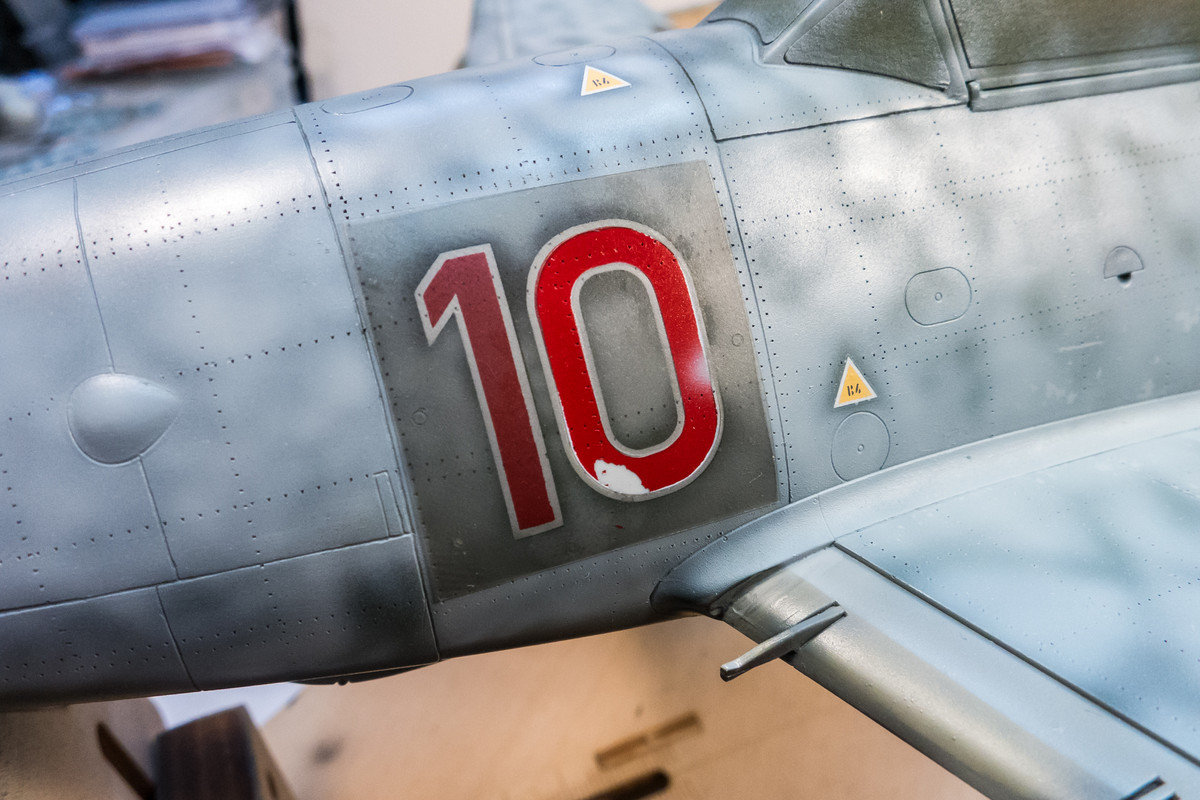
As you can tell by the paint splatter, the red was mixed a bit thicker than normal to try to help fill in the void left by the lifted paint. Ideally, I would have used some micromesh to shave down the edges.
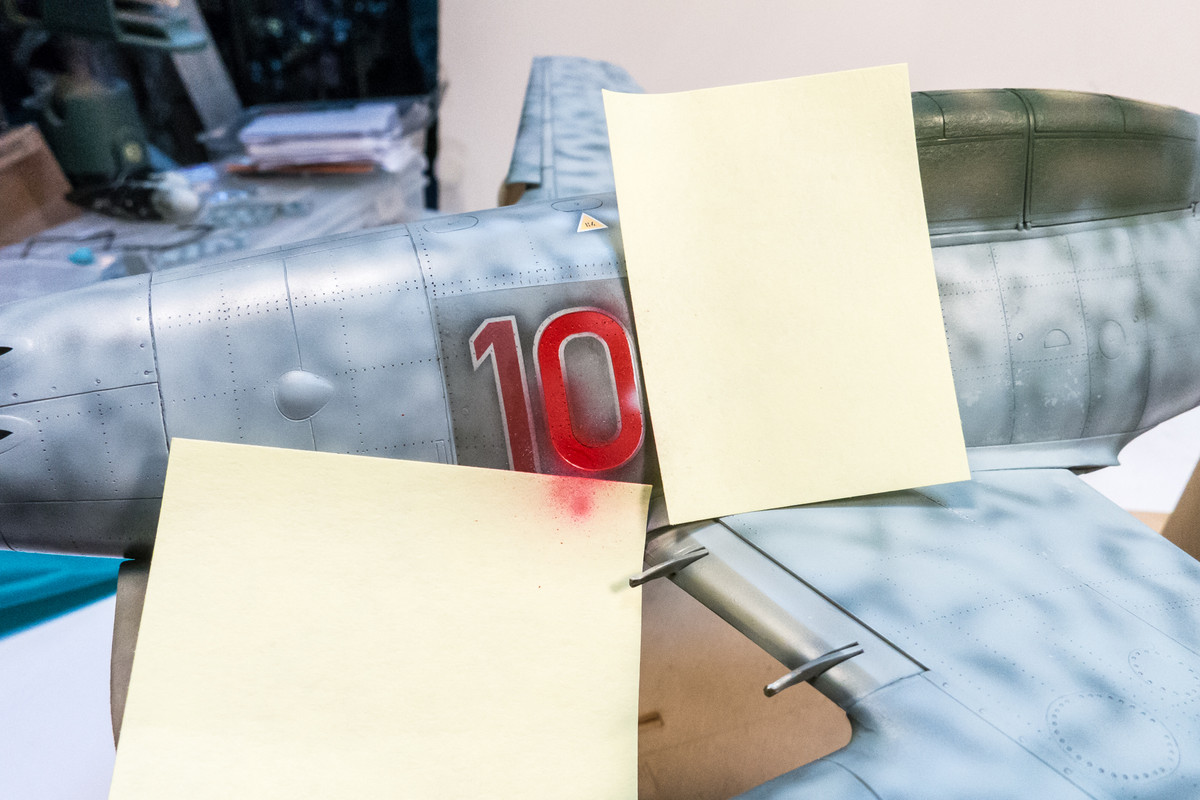
The "10" after repair. There is still a faint edge around the repair spot but I think subsequent clear coats will take care of it.
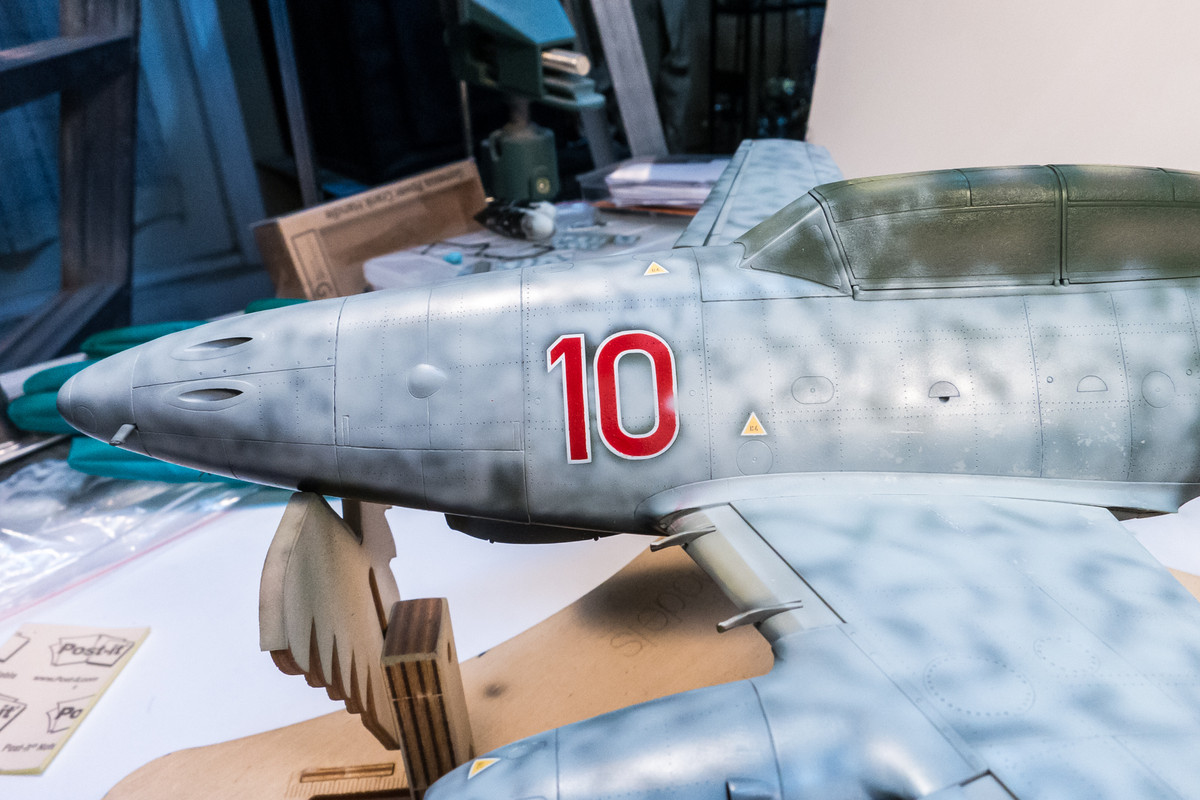
After the repair, the remainder of the mottling is completed.
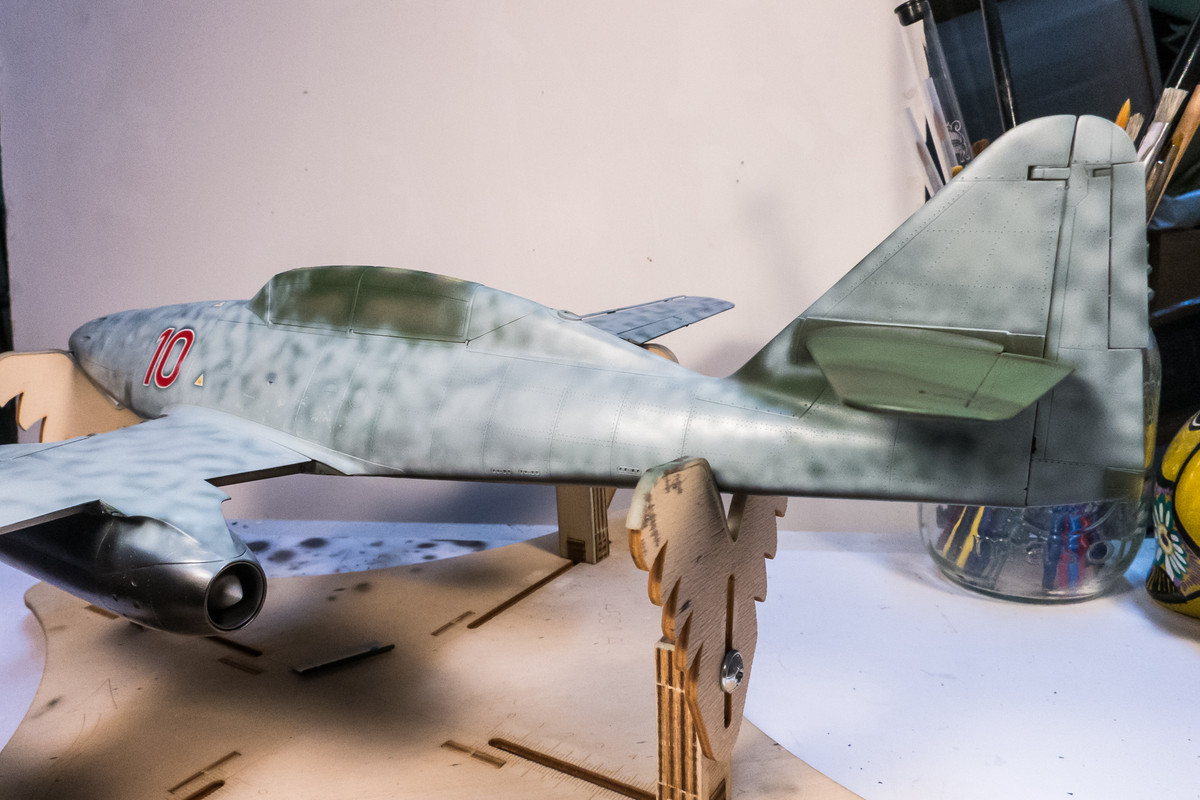
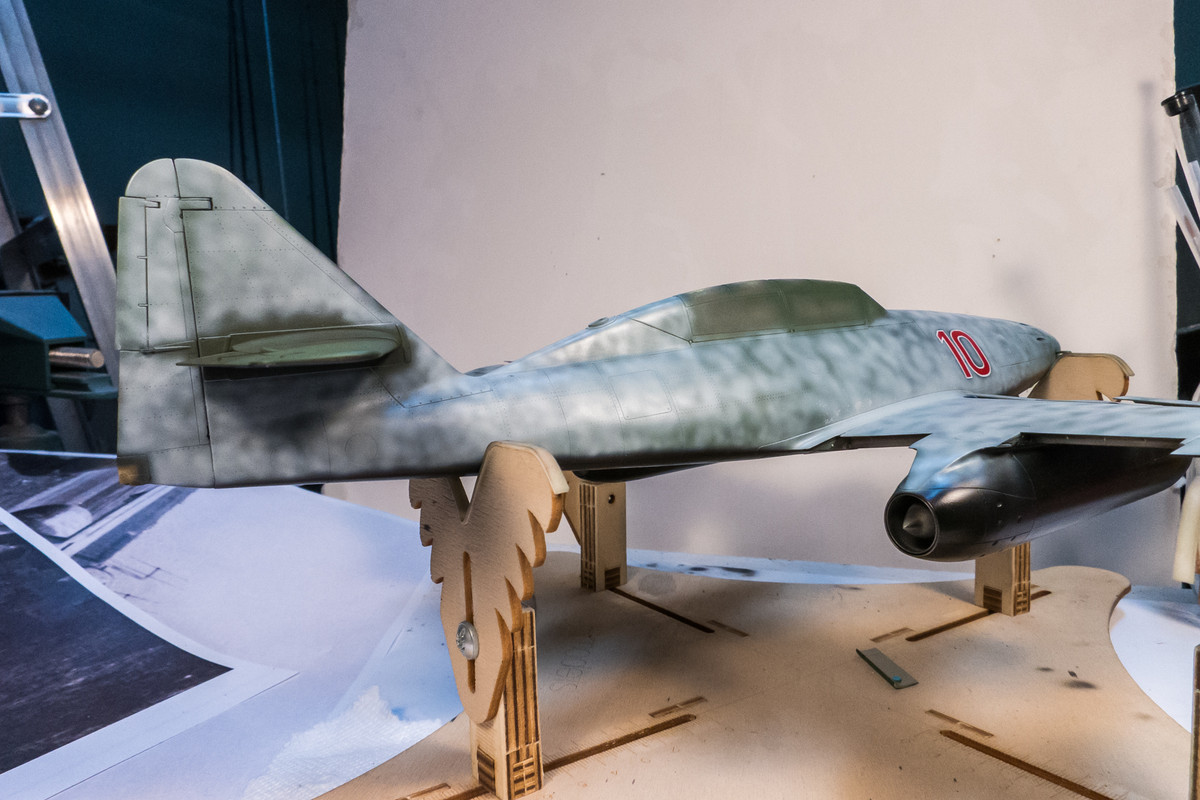
A quick session in the light box to document this painting stage. High quality photography is a great way to improve your modeling technique since it reveals things that you might normally miss. And by "high quality", I don't mean expensive DSLR. As long as you are working in a well-lit environment, you can get excellent photographic results with cheap point-n-shoots (I use a Canon S110 that I picked up for $80) or smartphone.
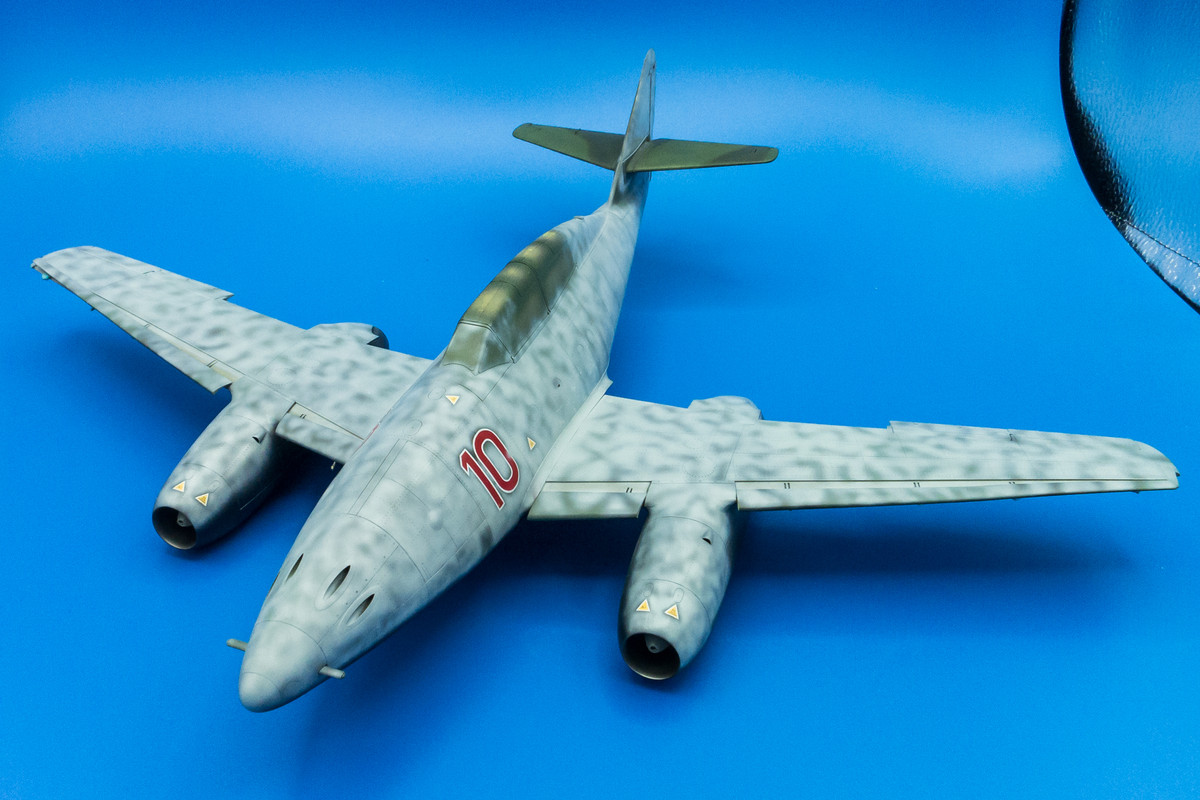
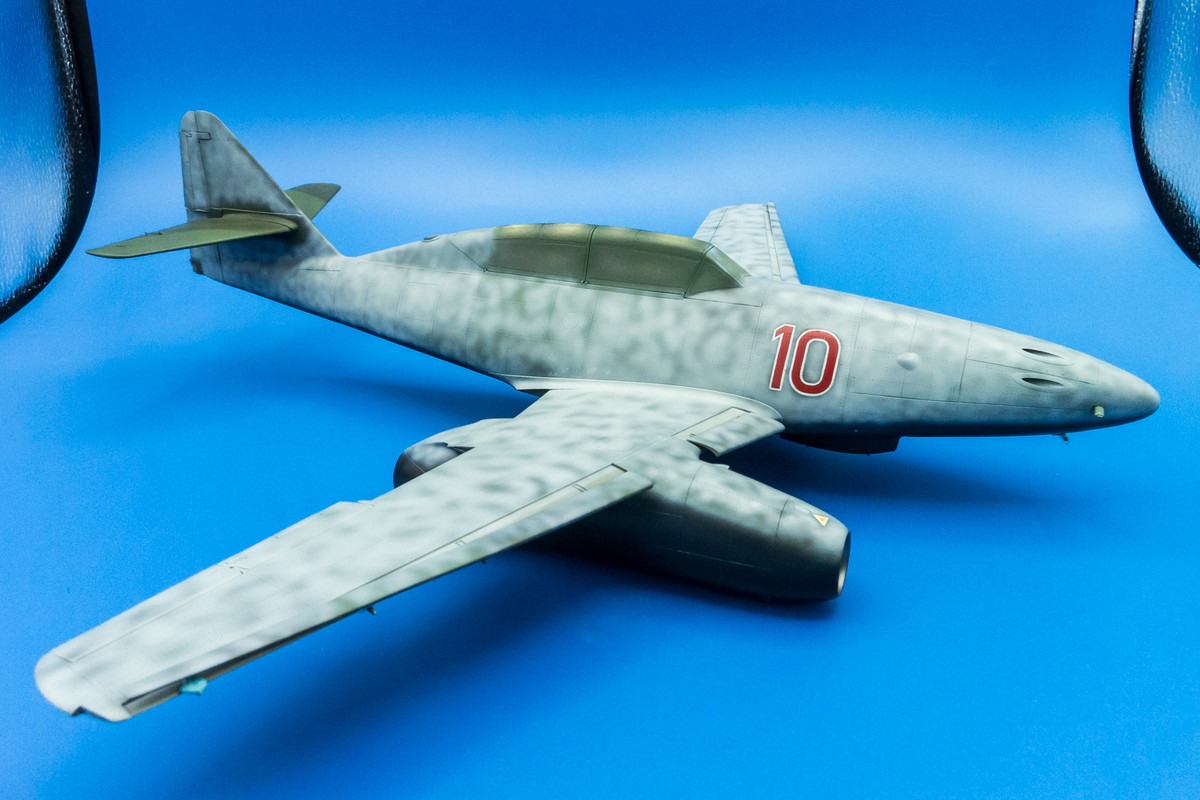
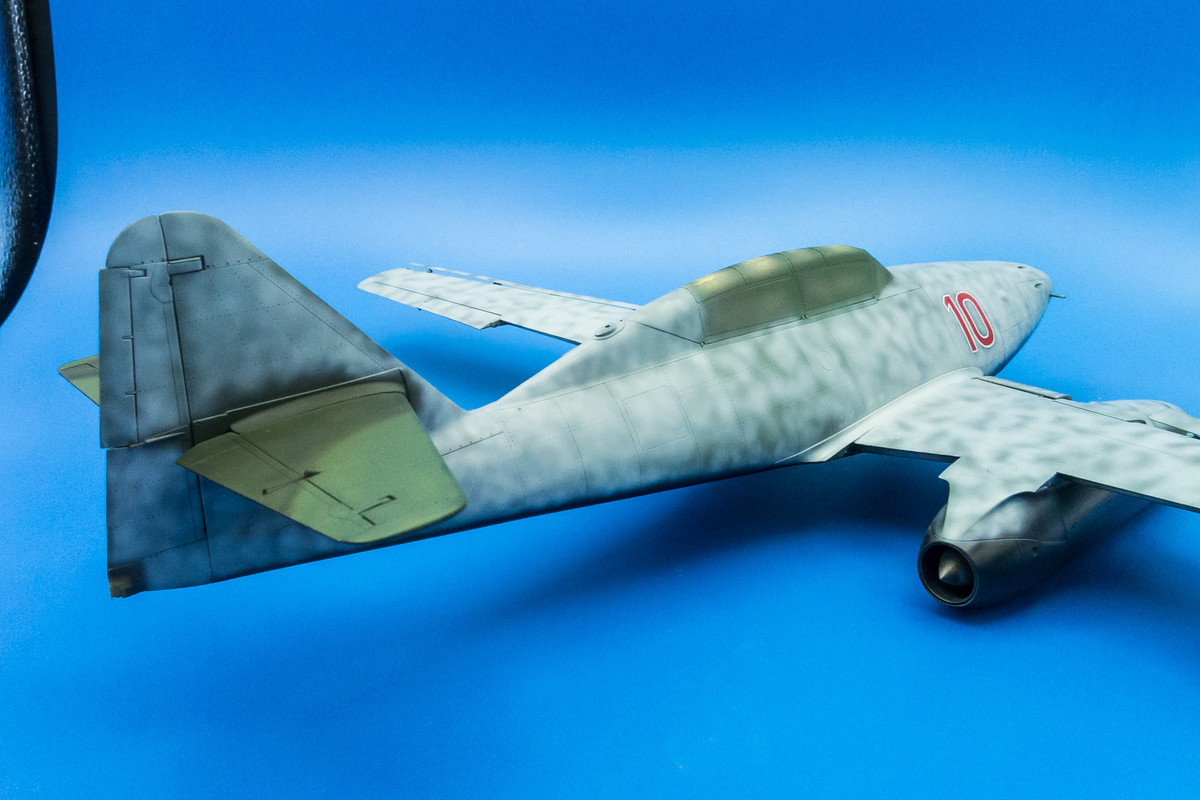
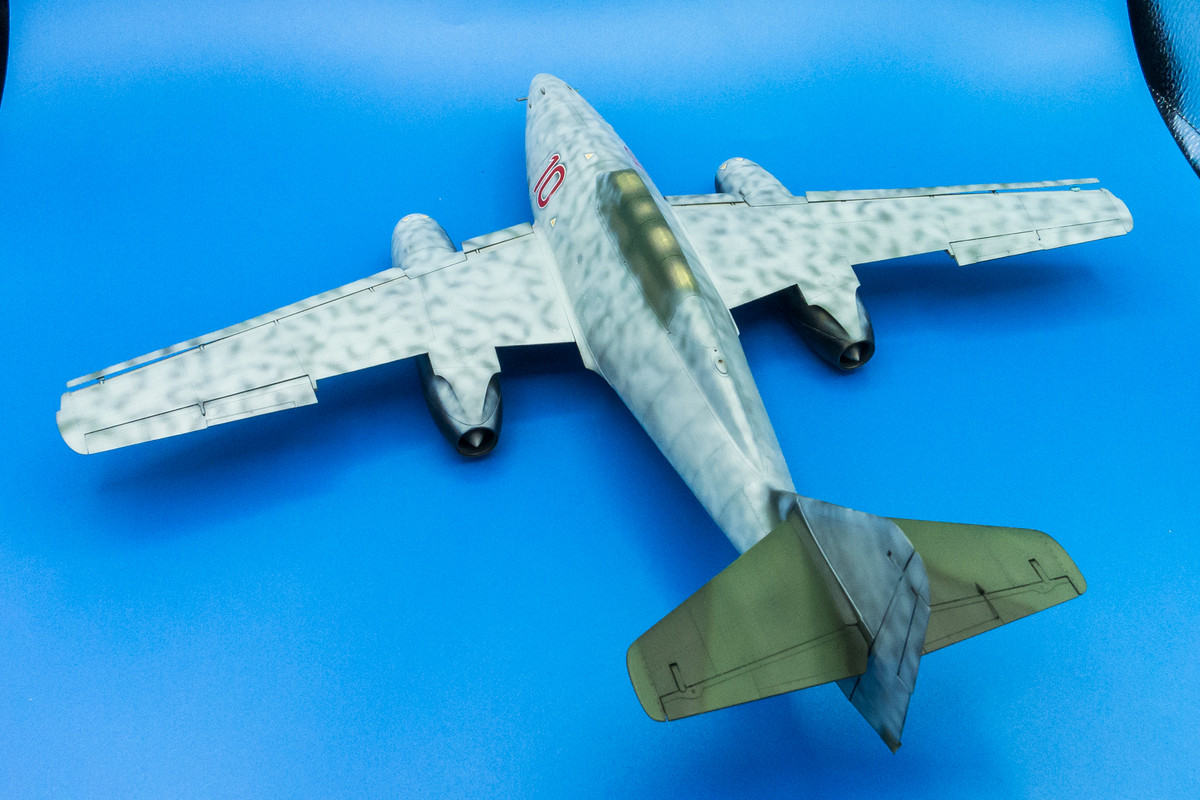
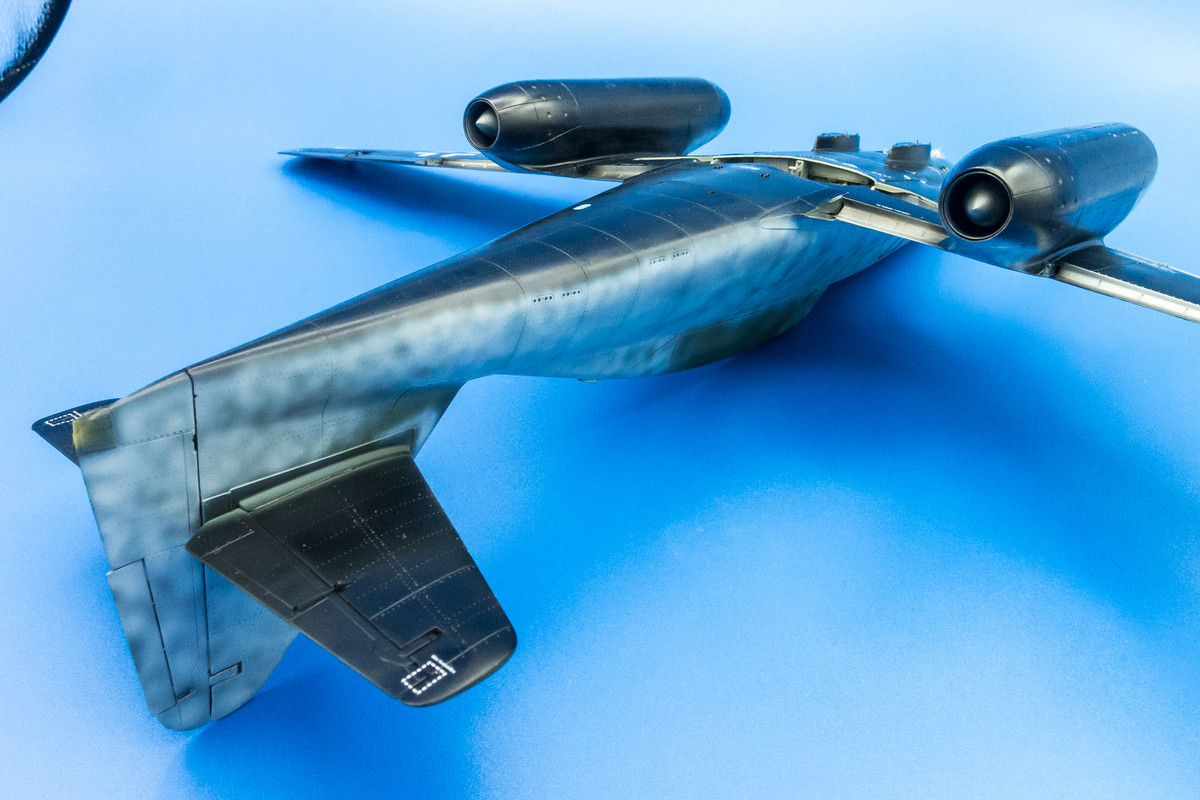
I will be making minor adjustments to the camo by cleaning up the overspray and referring to the archive photos of Red 10 to see if there are any obvious visual characteristics that I want to represent.
A new set of masks were prepared to fix the port side red "10". It is exposing only the red portion of the numeral and masking the white border.
As you can tell by the paint splatter, the red was mixed a bit thicker than normal to try to help fill in the void left by the lifted paint. Ideally, I would have used some micromesh to shave down the edges.
The "10" after repair. There is still a faint edge around the repair spot but I think subsequent clear coats will take care of it.
After the repair, the remainder of the mottling is completed.
A quick session in the light box to document this painting stage. High quality photography is a great way to improve your modeling technique since it reveals things that you might normally miss. And by "high quality", I don't mean expensive DSLR. As long as you are working in a well-lit environment, you can get excellent photographic results with cheap point-n-shoots (I use a Canon S110 that I picked up for $80) or smartphone.
I will be making minor adjustments to the camo by cleaning up the overspray and referring to the archive photos of Red 10 to see if there are any obvious visual characteristics that I want to represent.
John aka JKim
-----------<><

-----------<><
Re: 1/32 Revell Me262B-1/U1 Nachtjager
The wing roots have been set up for hairspray paint chipping but it didn't work out as well as expected. I should have learned from my Bf109G-14 build that mottle camo patterns and hairspray aren't a good match. You really need a uniform paint layer on top or else the chipping will just propagate around the areas where the paint is thinnest. I stopped after I started to notice this pattern.
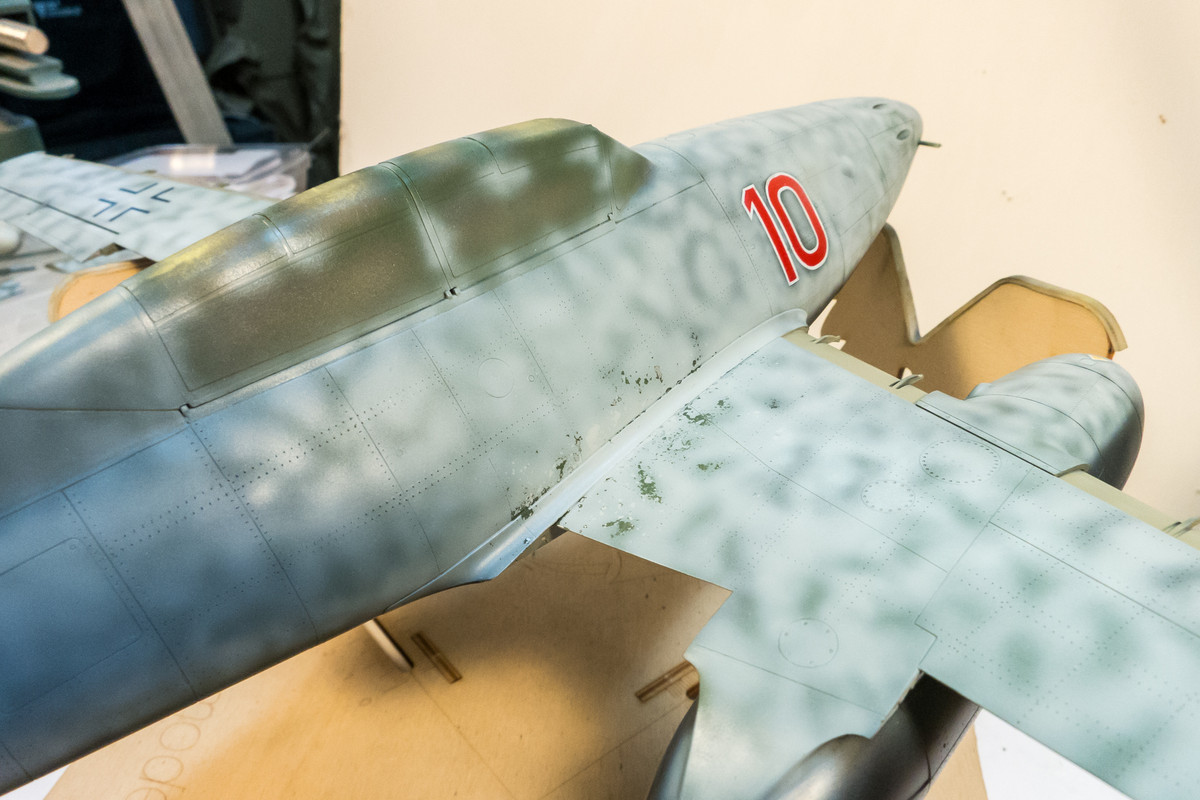
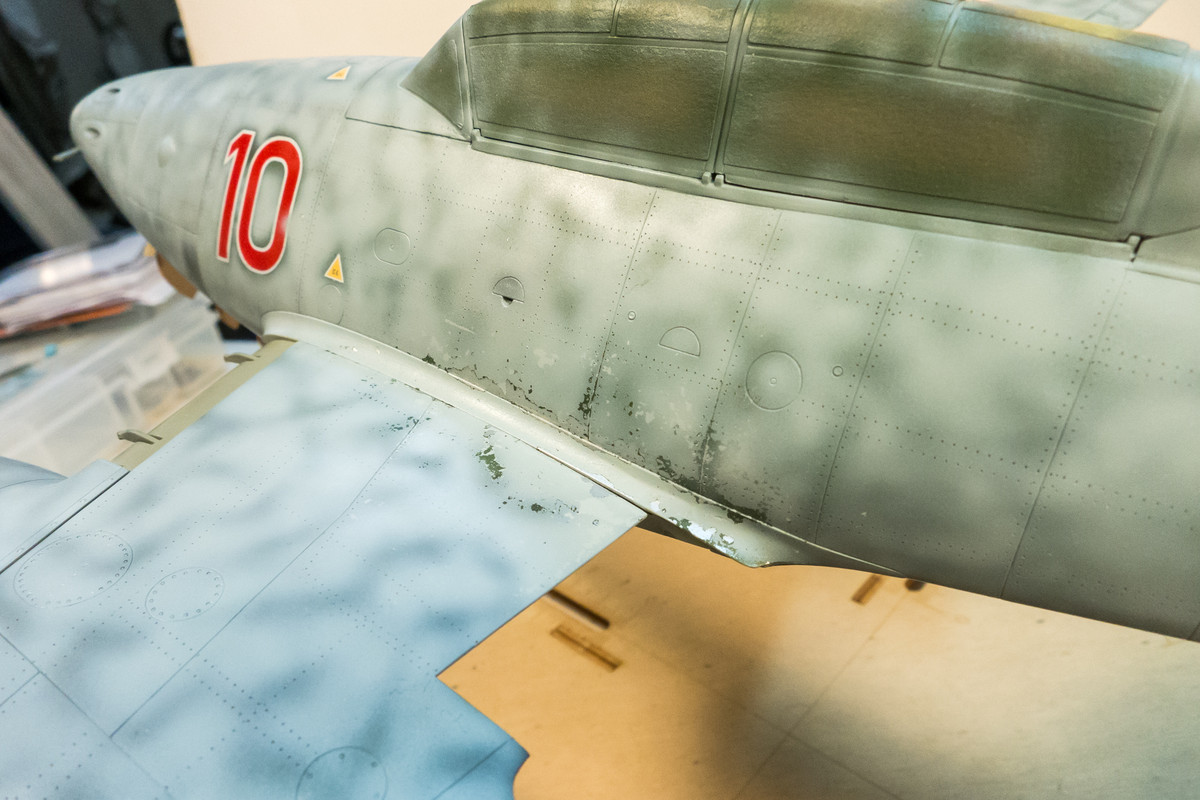
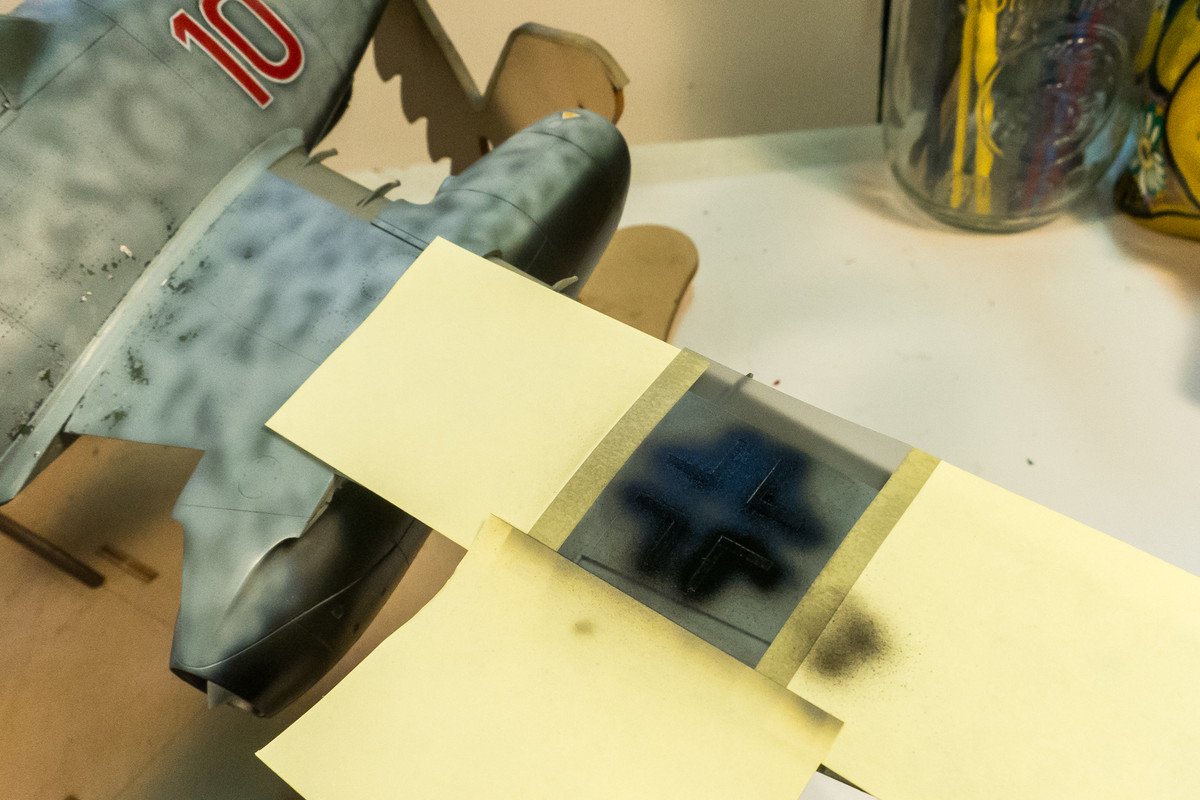
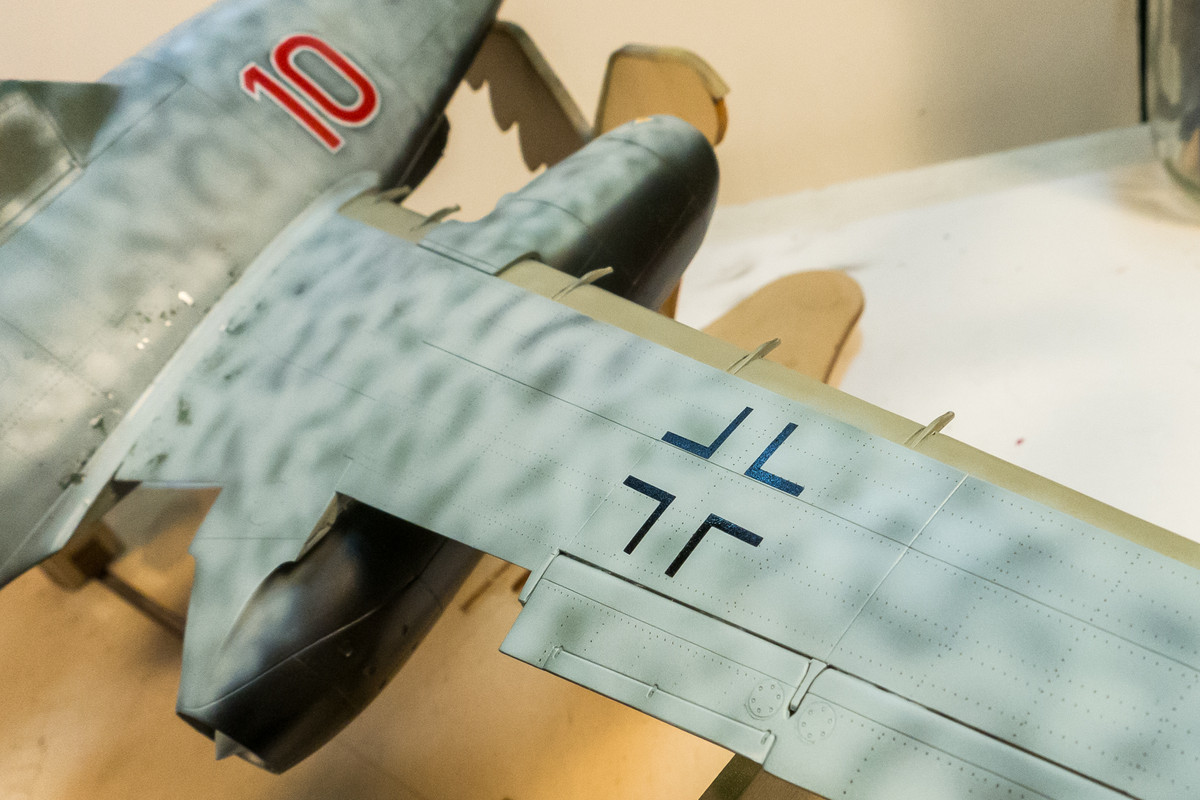
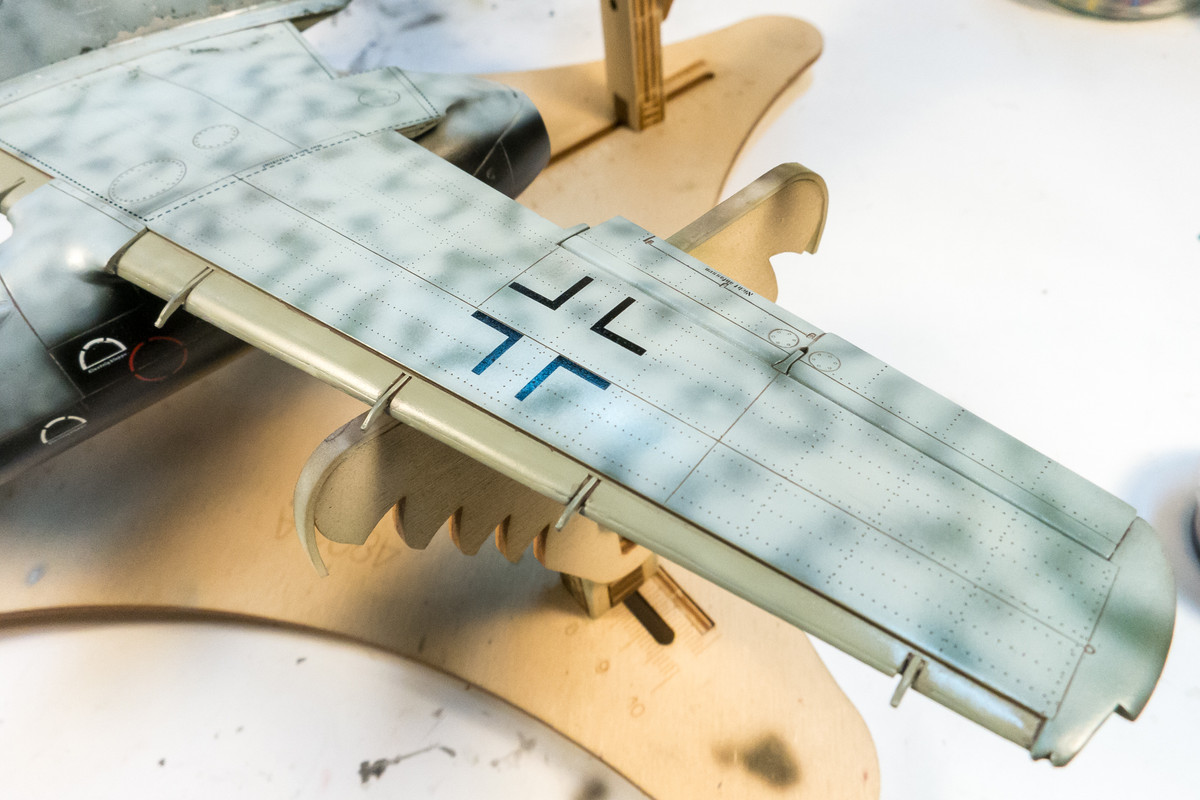
Wing crosses have been masked and painted.
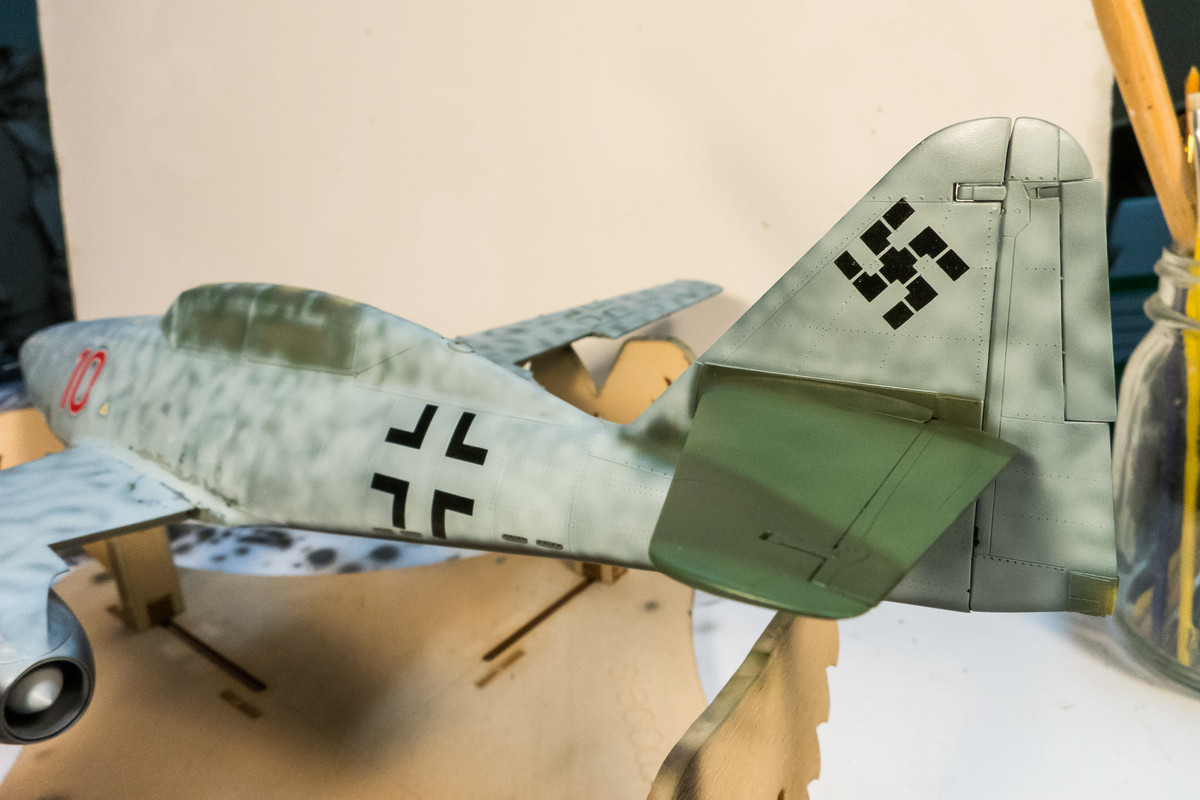
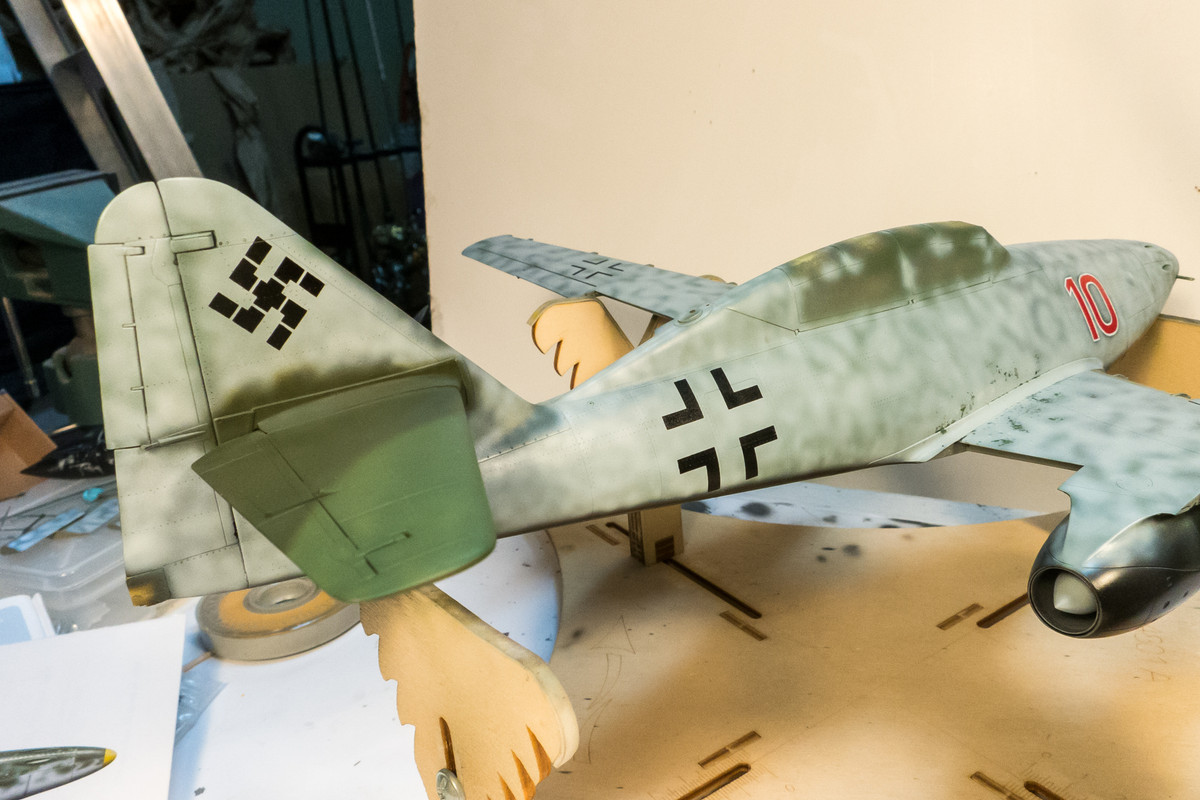
The fuselage crosses and tail swastikas were painted next.
I'll let this dry before I paint the aircraft WN code on the tail, which will be the last painted marking. The rest of the stencil decals go on next.
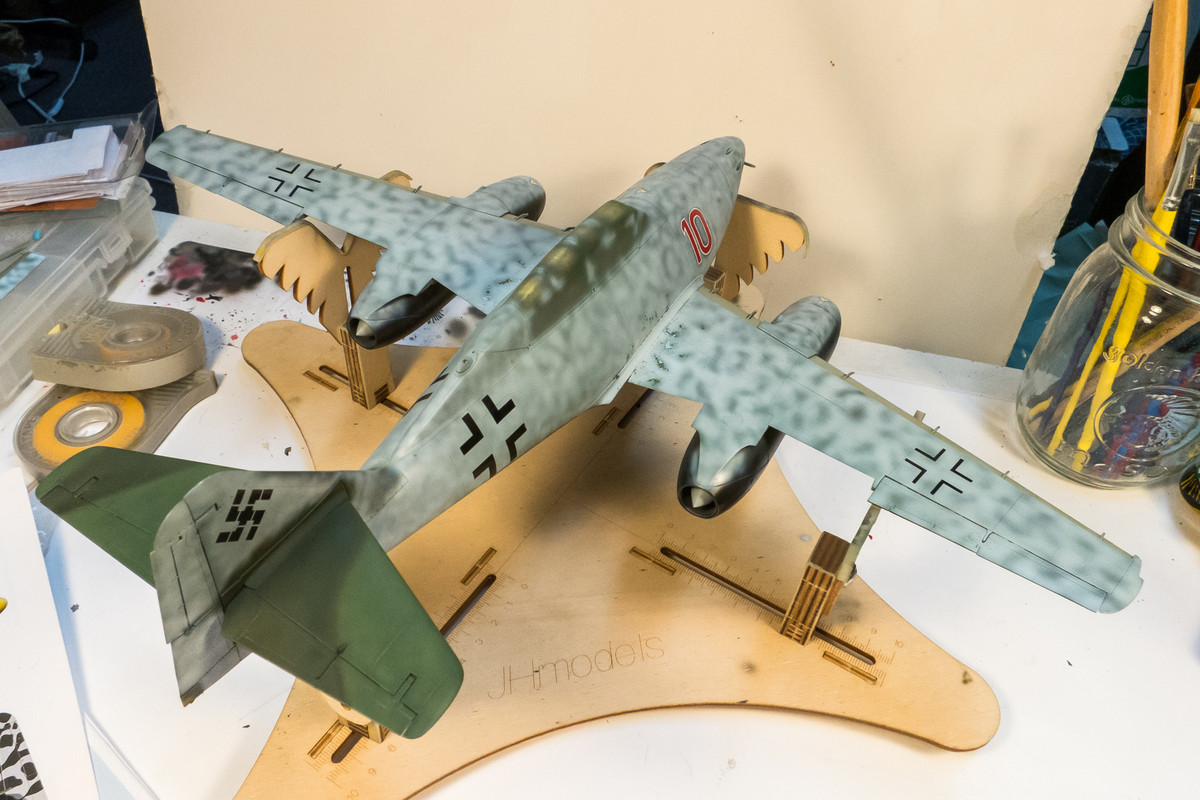
Wing crosses have been masked and painted.
The fuselage crosses and tail swastikas were painted next.
I'll let this dry before I paint the aircraft WN code on the tail, which will be the last painted marking. The rest of the stencil decals go on next.
John aka JKim
-----------<><
-----------<><
-
BlackSheep214
- Elite Member
- Posts: 13595
- Joined: Sun Apr 06, 2014 8:47 pm
Re: 1/32 Revell Me262B-1/U1 Nachtjager
Wow....
“Who controls the skies, controls the fate of this Earth”
Author unknown- 352nd Fighter Group, Blue-Nosed Bastards of Bodney
“Send one plane it’s a sortie; send two planes it’s a flight; send four planes it’s a test of airpower. - Richard Kohn
Author unknown- 352nd Fighter Group, Blue-Nosed Bastards of Bodney
“Send one plane it’s a sortie; send two planes it’s a flight; send four planes it’s a test of airpower. - Richard Kohn
-
jeaton01

- Elite Member
- Posts: 2374
- Joined: Thu Apr 23, 2020 9:20 am
- Location: Northern California
- Contact:
Re: 1/32 Revell Me262B-1/U1 Nachtjager
Yes indeed!
Re: 1/32 Revell Me262B-1/U1 Nachtjager
Looking amazing John and thank you for explaining your approach at painting. The painted on markings are also a great improvement over decals as always. You are right about good photos helping find defects you don't see with the eye. I've noticed my seam work has gotten better and faster since upgrading my bench lighting.
March as one, Don't look back
Odin's sons... Attack!
Unleash hell! Do not repent! Warfare grants us no lament
Let your weapons slash and tear This is no place for fear
Hold the lines! Move as one! In unity our victory's won
Our shields will form a mighty wall
United we shall never fall
Odin's sons... Attack!
Unleash hell! Do not repent! Warfare grants us no lament
Let your weapons slash and tear This is no place for fear
Hold the lines! Move as one! In unity our victory's won
Our shields will form a mighty wall
United we shall never fall
Re: 1/32 Revell Me262B-1/U1 Nachtjager
If you anyone was curious, the top sides of the horizontal stabilizers are being left in their green state without mottling. There are no clear photos of this area but what can be made out from the leading edges, these surfaces being un-mottled is a distinct possibility.
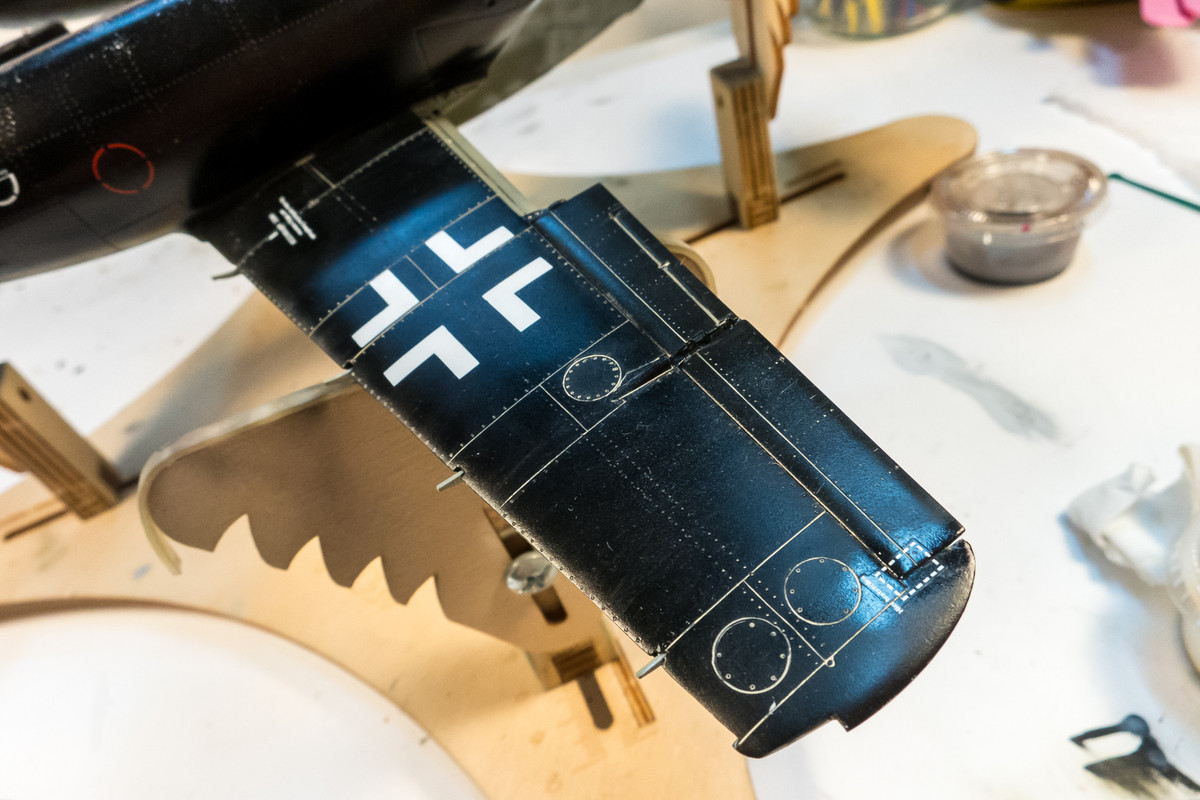
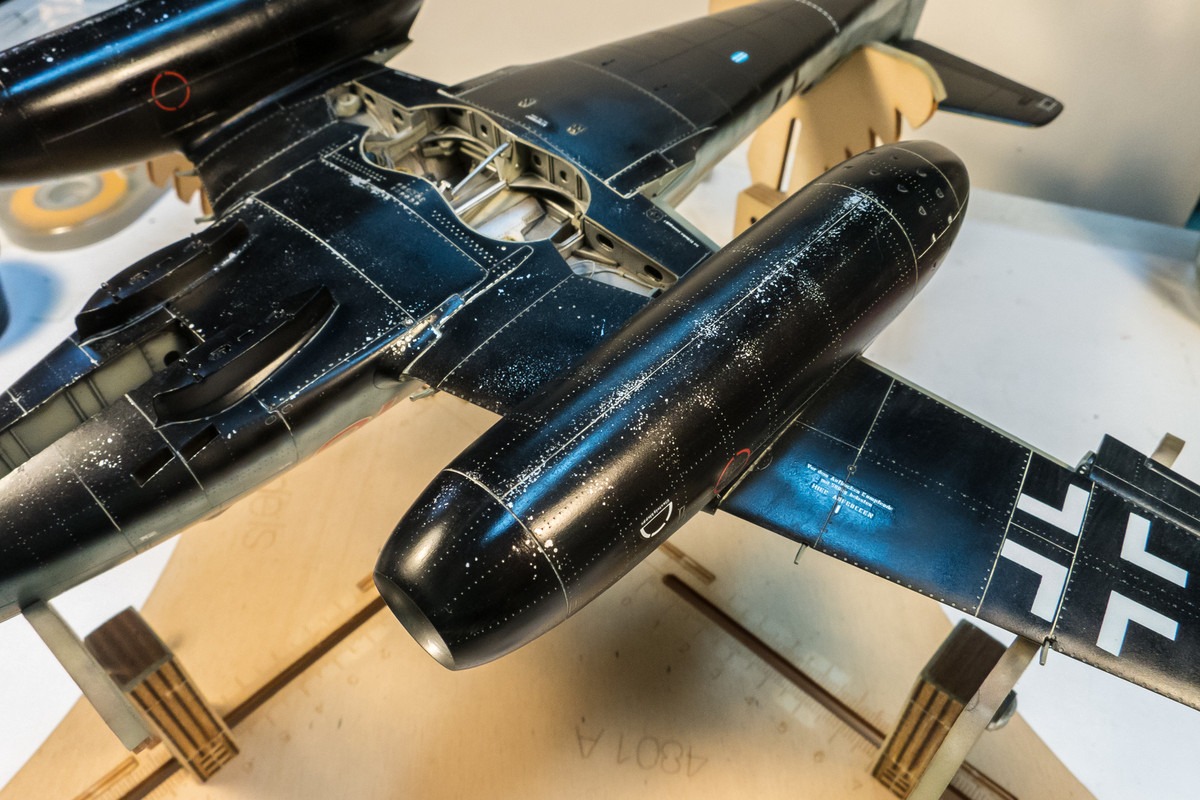
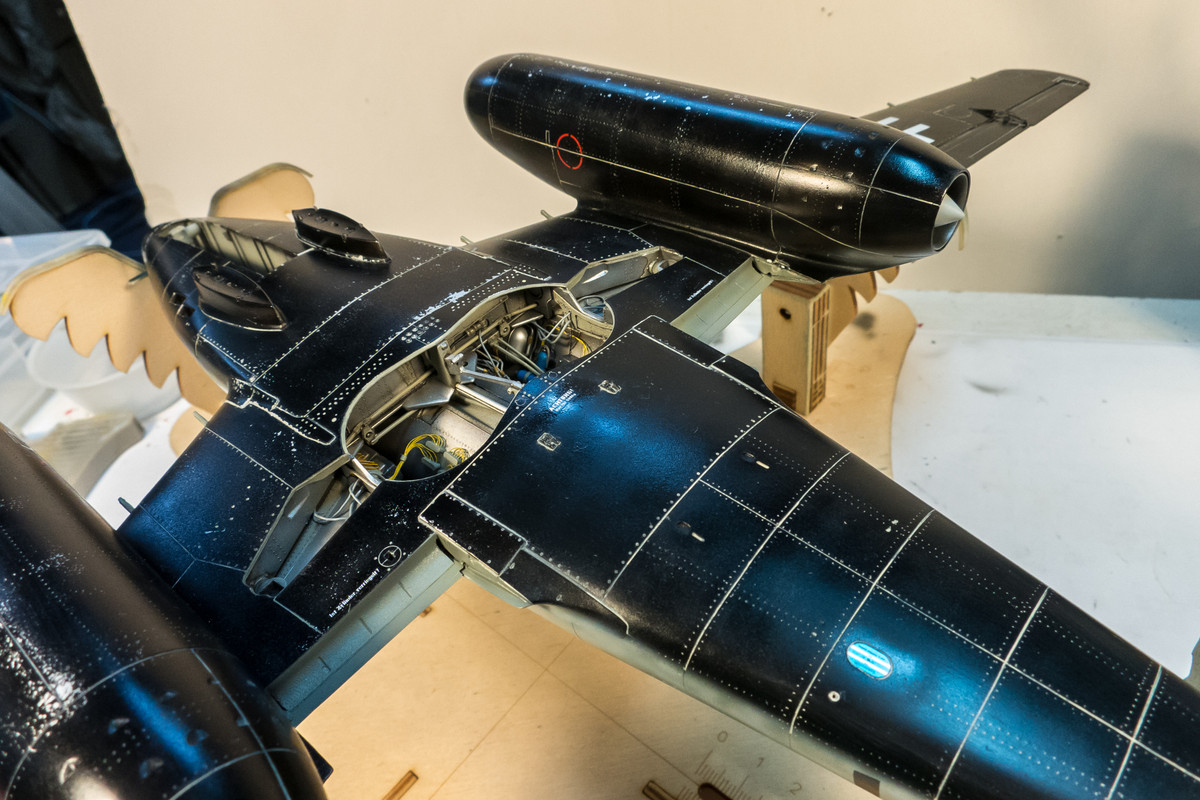
The rest of the stencil decals have been applied and now it is time to give the model a dirty wash. As usual, I am going to make my washes using pastel chalks and water.
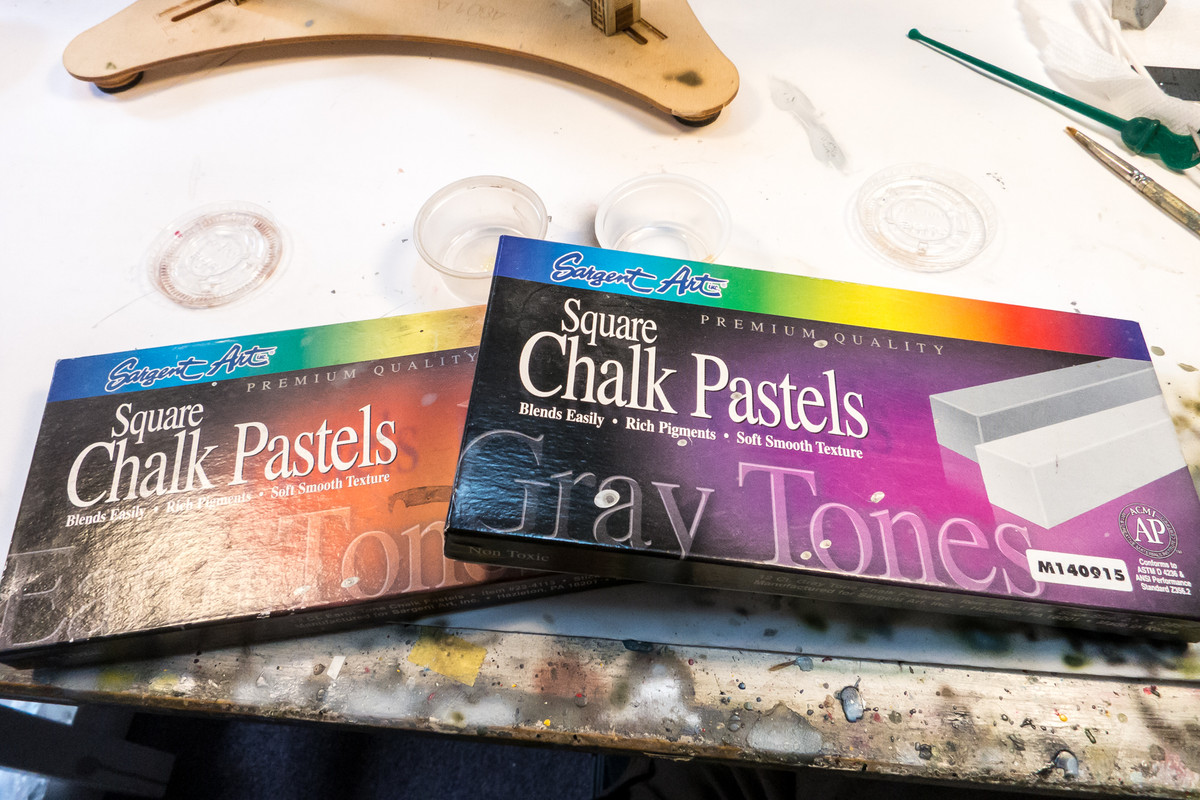
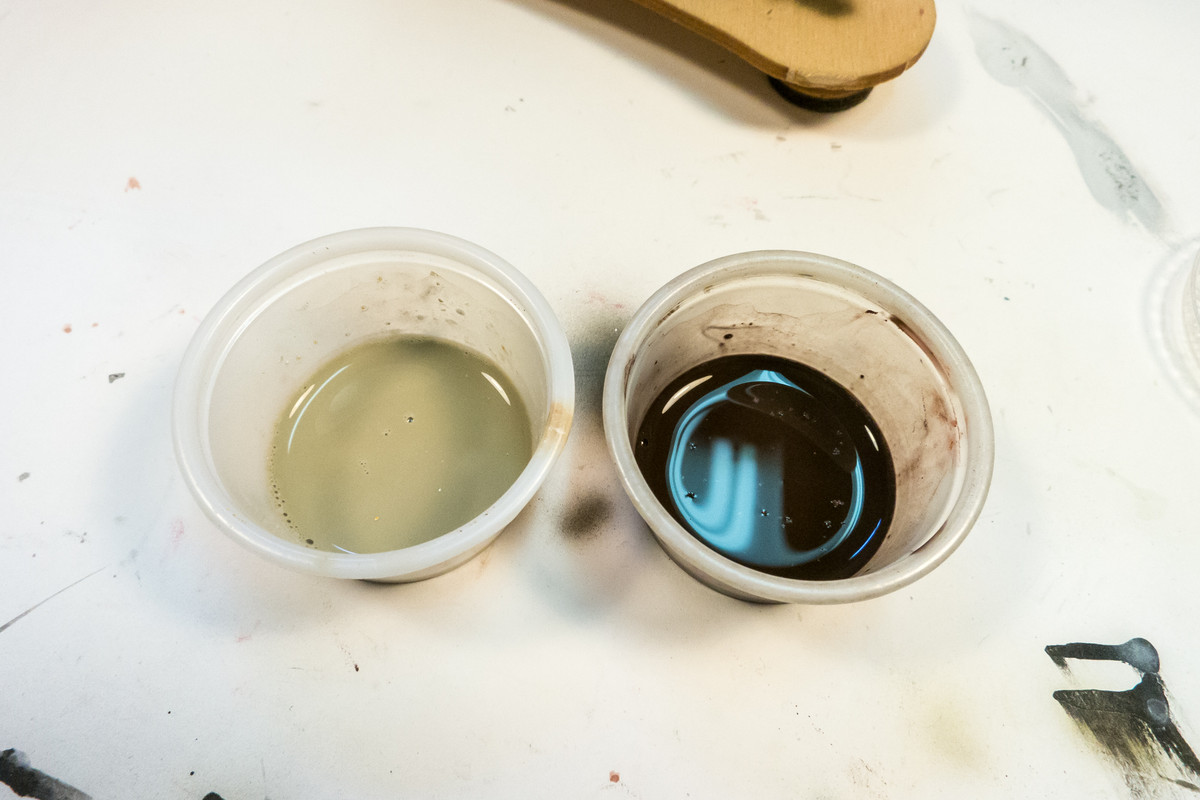
I am making two washes... one light beige for the undersides and a dark brown for the uppers. A drop of liquid soap is added to the mix to help the pastel particles to suspend and not sink.

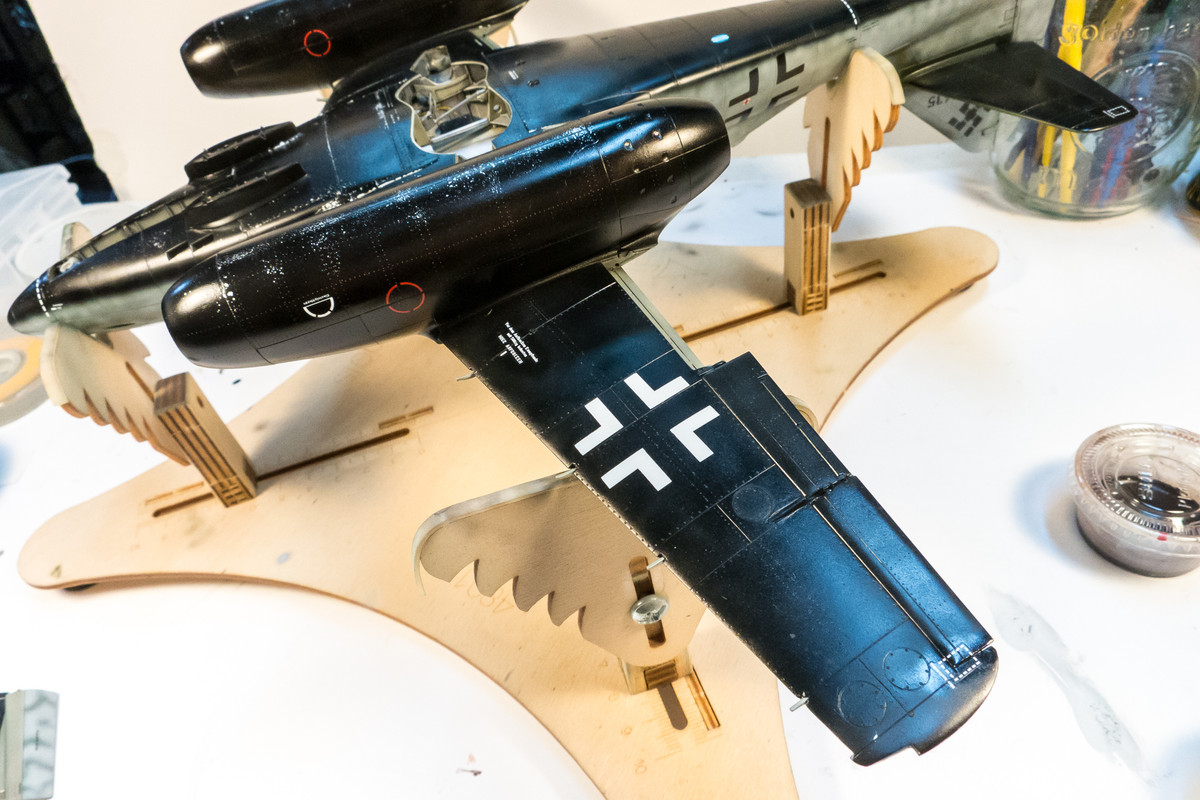
The undersides are done first with the beige color. The wash is brushed over all of the raised and recessed details and allowed to dry.
The top sides are given a dark brown wash.

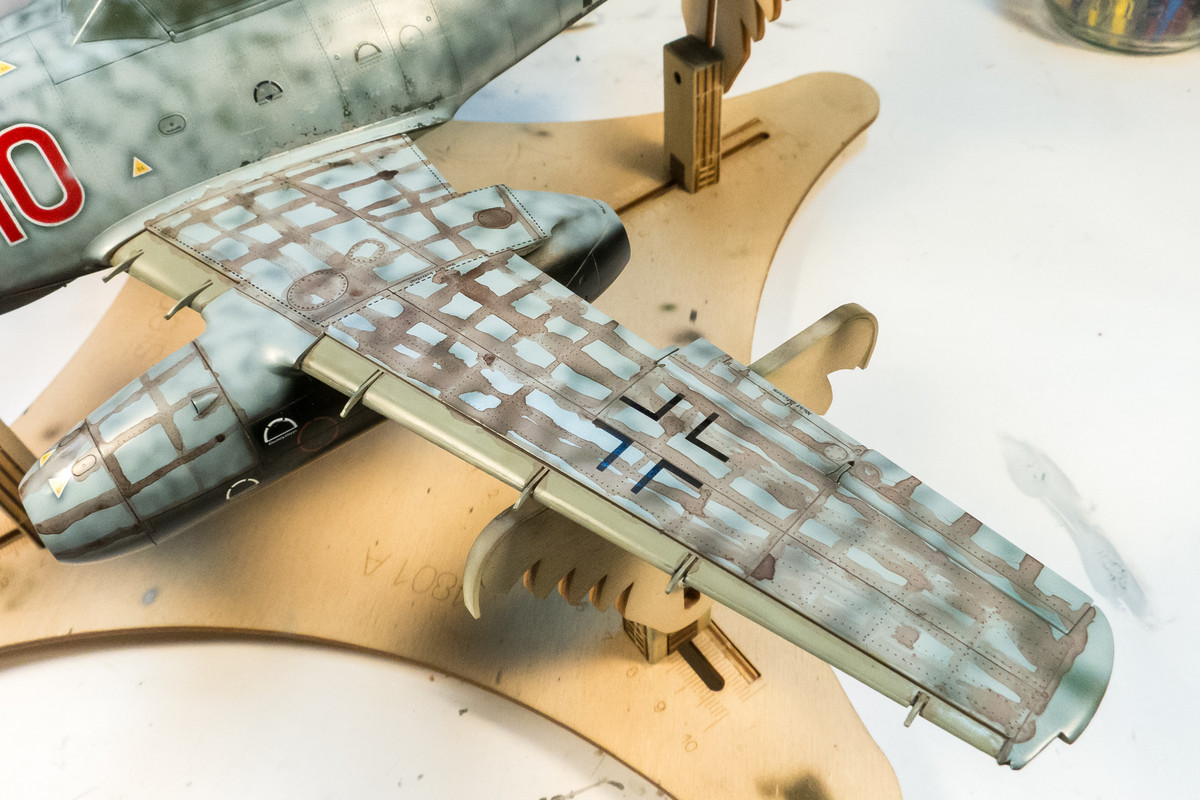
I usually work in sub-sections to make sure that the wash process is complete and uniform.
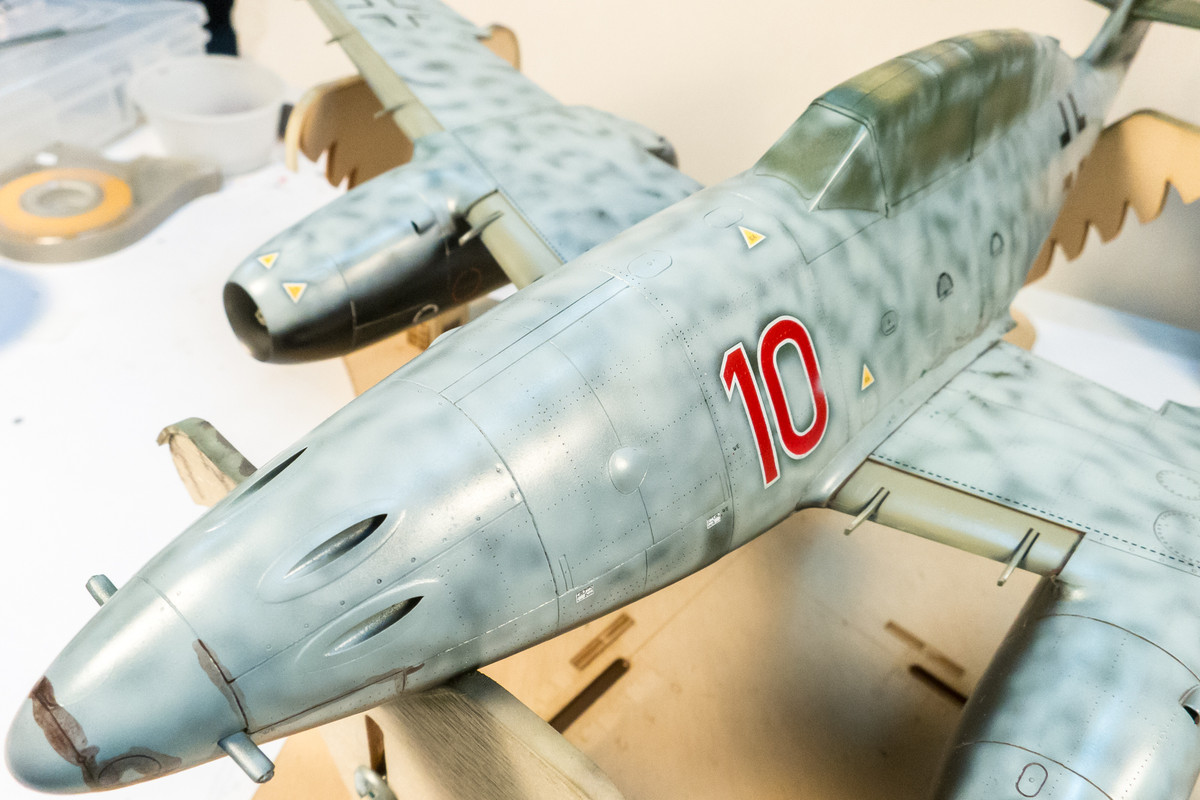
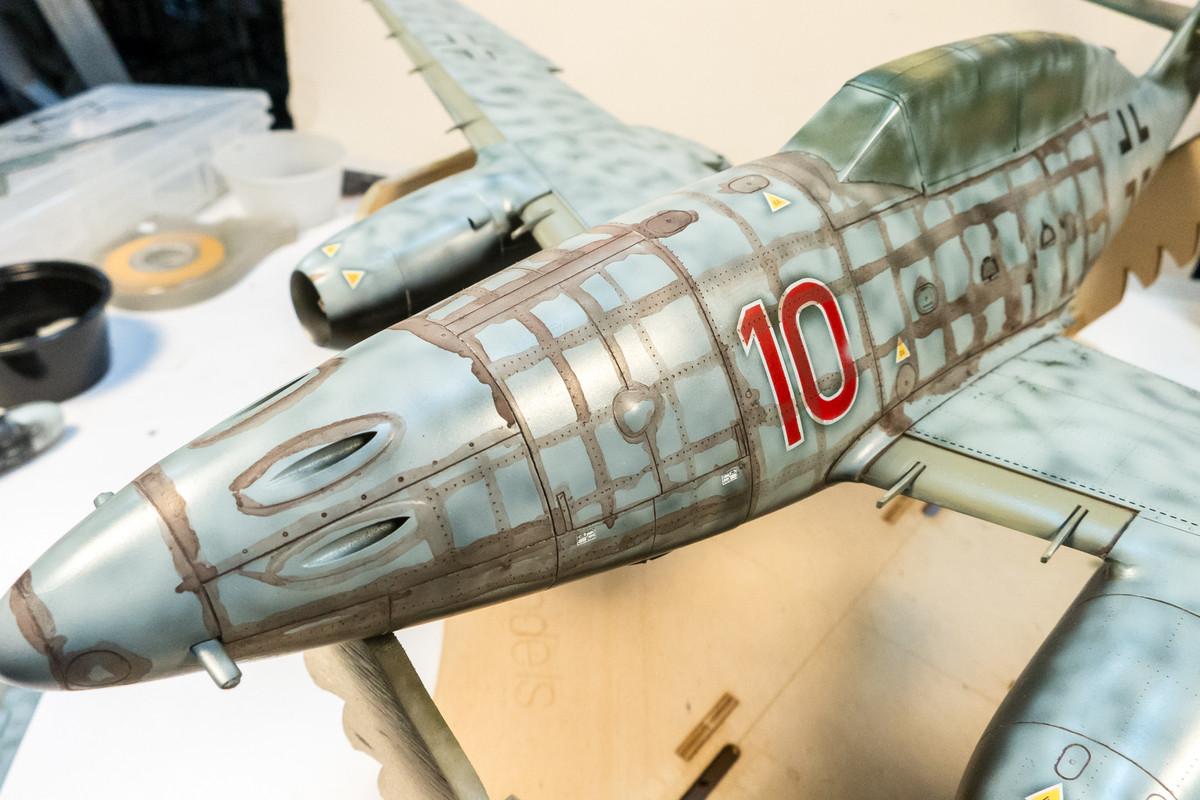
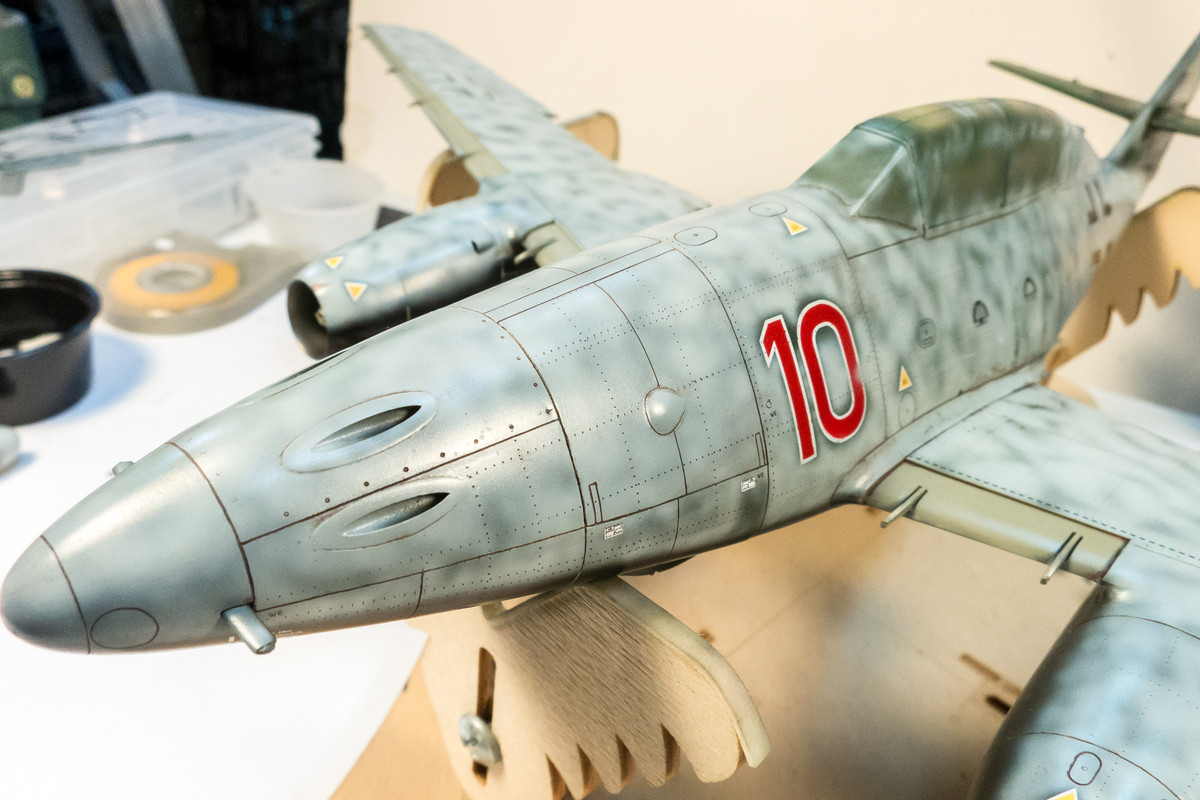
The brown shade was chosen to provide contrast with the light blue upper camo color and add a dirty tinge to the exterior. I thought a black wash would be too stark.
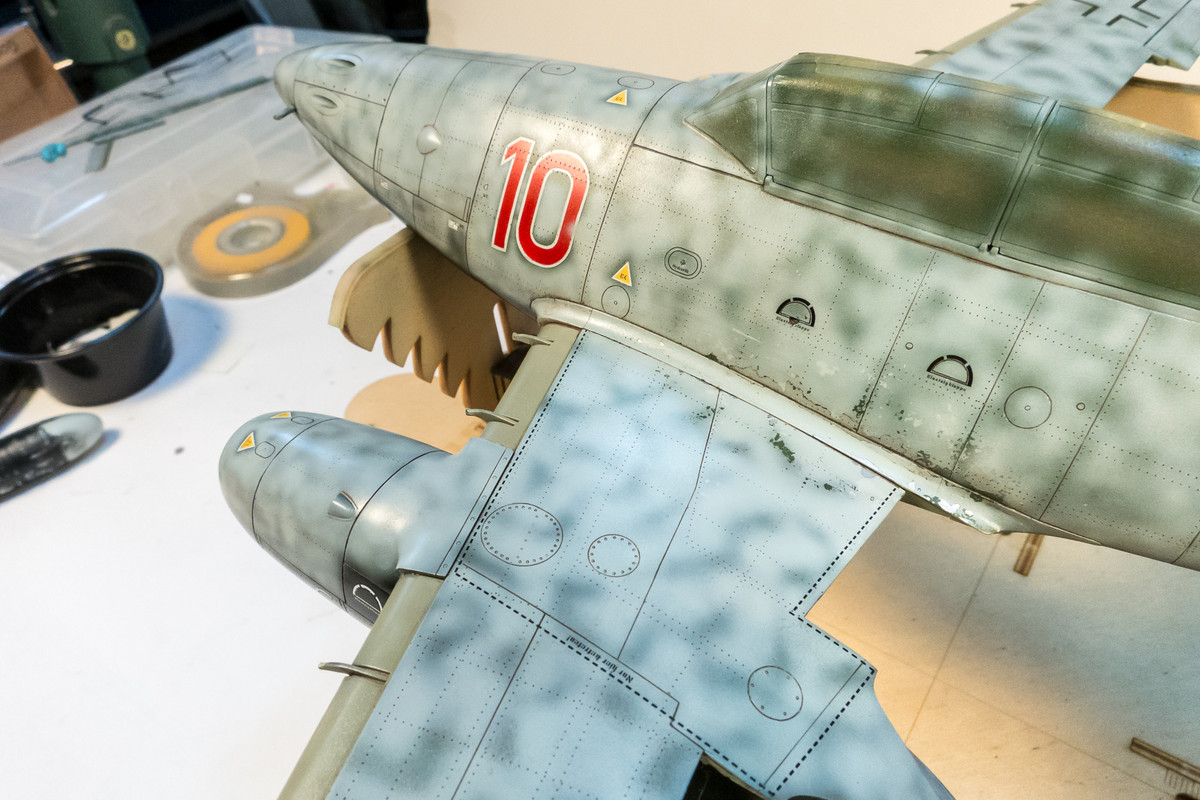
The rest of the stencil decals have been applied and now it is time to give the model a dirty wash. As usual, I am going to make my washes using pastel chalks and water.
I am making two washes... one light beige for the undersides and a dark brown for the uppers. A drop of liquid soap is added to the mix to help the pastel particles to suspend and not sink.
The undersides are done first with the beige color. The wash is brushed over all of the raised and recessed details and allowed to dry.
The top sides are given a dark brown wash.
I usually work in sub-sections to make sure that the wash process is complete and uniform.
The brown shade was chosen to provide contrast with the light blue upper camo color and add a dirty tinge to the exterior. I thought a black wash would be too stark.
John aka JKim
-----------<><
-----------<><
-
Medicman71

- Elite Member
- Posts: 11396
- Joined: Mon Apr 07, 2014 9:32 am
- Location: Houston, Tx
Re: 1/32 Revell Me262B-1/U1 Nachtjager
Man I love the way you do your washes. They look so good on the model. 
Mike
Sponsored by Boeing, Lockheed Martin, Northrop Grumman, Saab, BAE, and Dassault
Sponsored by Boeing, Lockheed Martin, Northrop Grumman, Saab, BAE, and Dassault