Page 30 of 44

Re: 1/32 Hasegawa Fw190D-9 Red One

Posted: Tue Jan 01, 2019 8:35 am
by Stikpusher
Floki wrote:Beautiful build the black mottle persuade is something I would like to master one day.
I don’t know about mastering it, but the more I see of Johns technique here, the more tempted that I am to try it one day. :hmm: I do find his method of treating every sub assembly as a project of its own to completion: engine, prop, landing gear, before moving on to the next portion, to be masterful. The results speak for themselves.

Re: 1/32 Hasegawa Fw190D-9 Red One

Posted: Tue Jan 01, 2019 8:43 am
by KennyX
:P1: big plus 1 on that, Carlos. For sure. I’m trying to assimilate this philosophy into what I’m doing because the results of John’s labors are, frankly, stunning.

Re: 1/32 Hasegawa Fw190D-9 Red One

Posted: Tue Jan 01, 2019 9:14 am
by KSaarni
:P1:

- Kari

Re: 1/32 Hasegawa Fw190D-9 Red One

Posted: Tue Jan 01, 2019 2:09 pm
by jkim
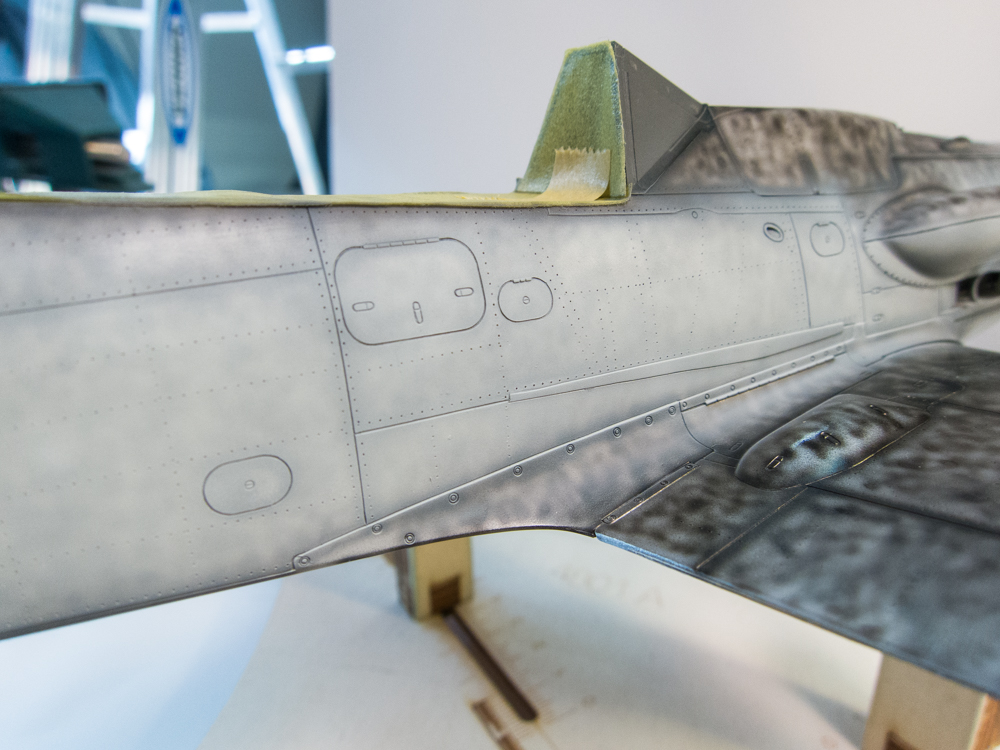
The mottle preshade is very easy to do. There is nothing complicated about it so I'm sure any of you could give it a try and get similar results. The main thing thing about this technique (and black basing) is the thin paint mixtures. I'm using 3:1 or 4:1 thinner/paint ratios. It's quite watery and you have to adjust your painting techniques to compensate. Coverage will take multiple passes to build up enough opacity. The reward is an infinite increase in control and satin, grain-free finishes.

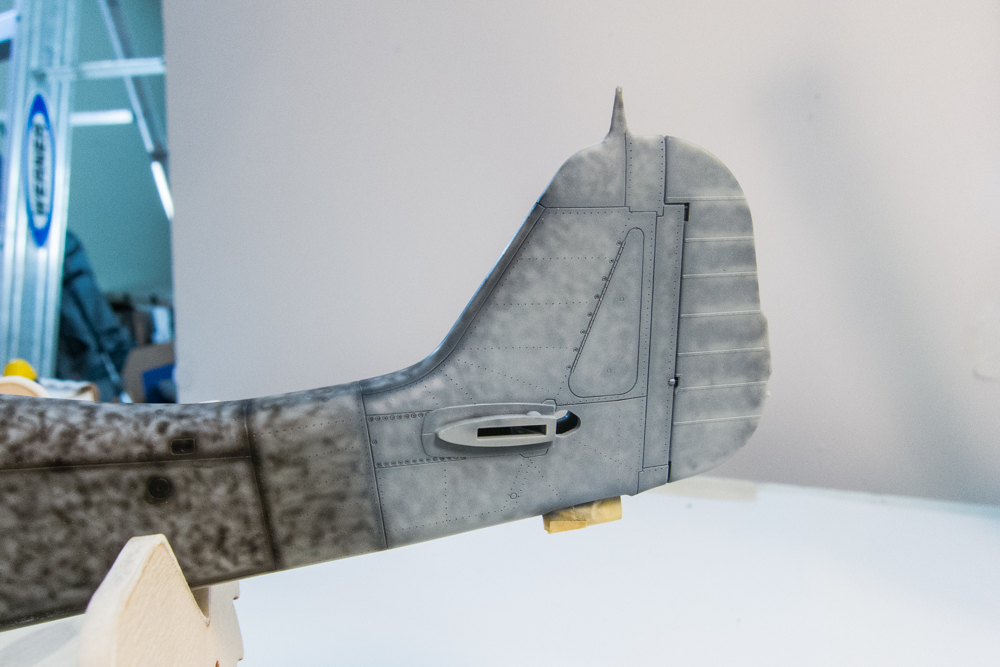
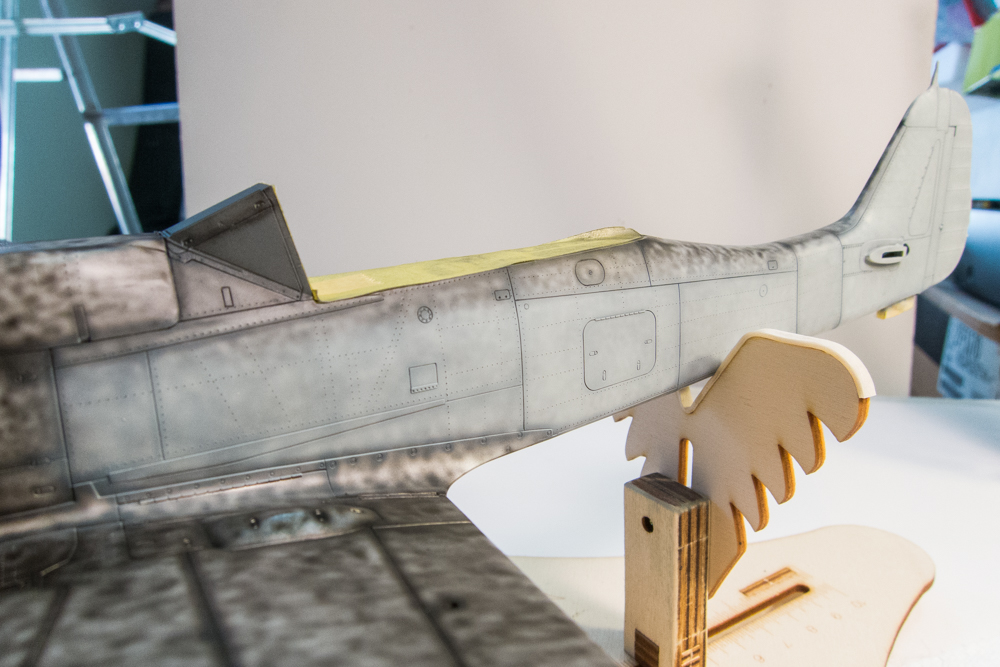
The Dora is ready for its first camo color, which will be the RLM 76 Light Blue. Starting at the tail, the blue is built up slowly, gradually and working from panel to panel. It's important to have good lighting and constantly shift your perspective to make sure you monitor your results from all angles as you go.
Image

As I move forward, I'm looking at the areas I've already painted and adding opacity to the blue until I get to the desired point.
Image

The thin paints allow you to dial in the effect, depending on what you want. I prefer a very subtle, almost unnoticeable effect, which the tail exhibits. This will be the first of many layers of weathering so I don't need the pre-shade to do it all.
Image

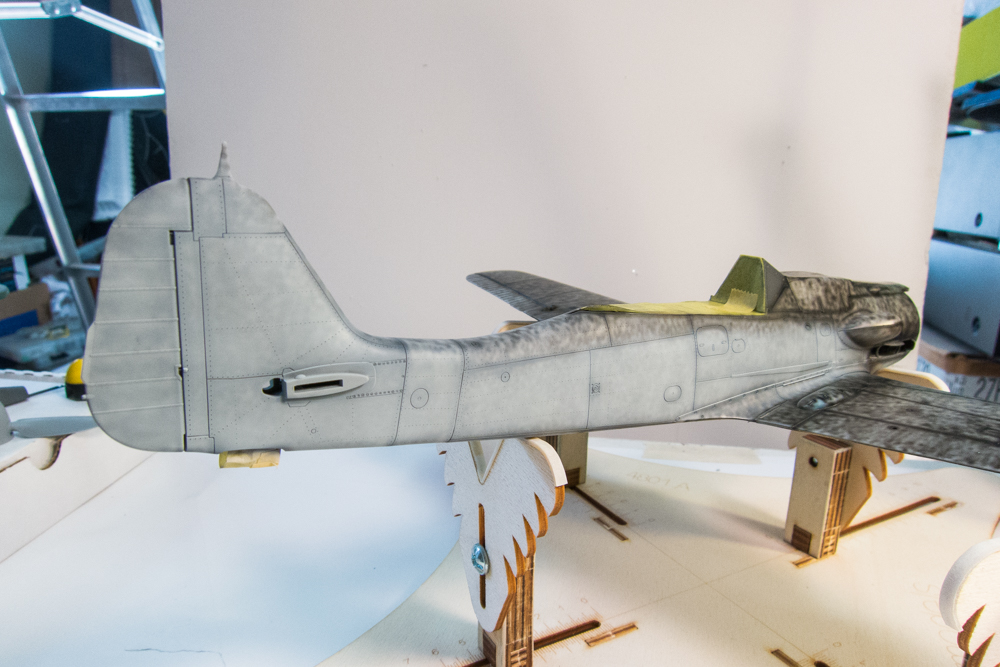
Similarly, I apply the RLM 76 to the other side. I am leaving more of the preshade visible as you go forward. This is due to the engine location, which in itself is a source of wear (i.e. the exhaust pipes and various heat effects). Also the camo gets denser and more complicated towards the front.
Image

A close-up of some of the painted areas to show the riveting work and also the smooth, grain-free paint finish that the thinned paint allows. One of the things that I do in the beginning of all builds is to re-scribe ALL of the panel lines including hatches and ports. Not necessarily to make them deeper but make them more uniform.
Image
Image

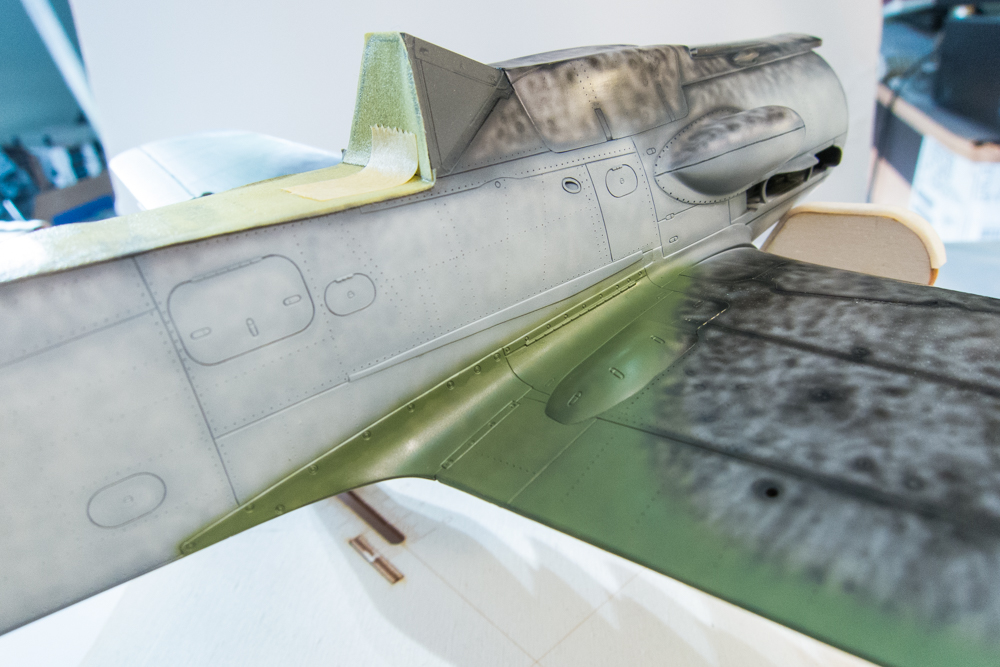
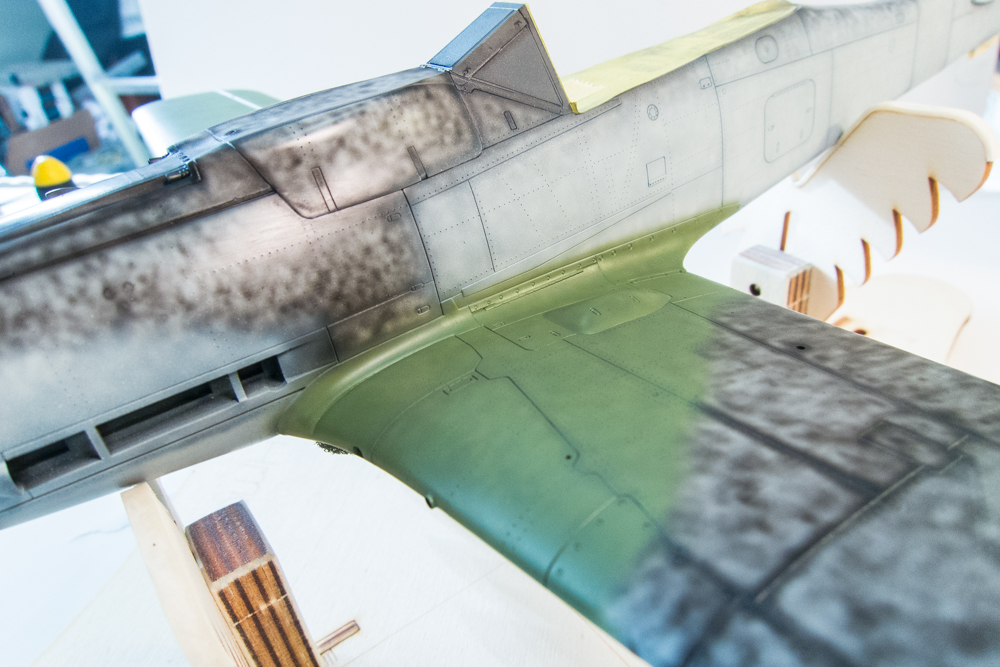
After the RLM76 is done, I apply the RLM82 Bright Green to the wings. Because the wing camo is simpler and also to facilitate the chipping at the wing roots, I am going to paint the wings first and do the fuselage later.
Image

The thin paint also much greater spray control, which minimizes the need for masking. There is a slight overspray at the RLM 76/ RLM 82 junction but perfectly acceptable given the further painting that will occur here. I will probably chip the RLM 82 before applying the darker RLM 83 green.
Image
Image

Image

Re: 1/32 Hasegawa Fw190D-9 Red One

Posted: Tue Jan 01, 2019 2:13 pm
by BorgR3mc0
That paint looks fabulous.

Re: 1/32 Hasegawa Fw190D-9 Red One

Posted: Tue Jan 01, 2019 4:55 pm
by speedgraflex
John, wow! That does look amazing—your thin coats transform the details! I also really dig the smoothness of the finish work. That is amazingly beautiful from the perspective of a model builder and representative of the actual metal and fabric sheeting on the tail! The tail is really off the charts, my friend! I also wanted to add an important note that page 25 (the propeller surface prep) is outstanding. I have no words to describe the effect of wood under varnish which you created... except one: outstanding.

Re: 1/32 Hasegawa Fw190D-9 Red One

Posted: Tue Jan 01, 2019 5:44 pm
by Duke Maddog
Wow, I have no words to express my sheer astonishment at the incredible imagery I see here. I envy you your ability to spray such sharp and straight lines during preshading. Stunning! I doubt I could replicate anything like this in my scale, although I might consider trying it on one of my larger aircraft. I'd have to be in the right mood for that though....

I'm going to continue to follow this but I don't know how often I'll be able to reply since I've run out of words to describe my impression of the massively phenomenal work going on here. :whiteflag:

Re: 1/32 Hasegawa Fw190D-9 Red One

Posted: Tue Jan 01, 2019 8:41 pm
by jkim
Thanks guys! Actually, Duke the preshading lines don't have to be straight. They are going to be blitzed by the top colors anyway so crooked pre-shading lines work just as well as straight ones. I like tracing over each panel line during this step... it feels like I'm getting more familiar with the kit, one line at a time.

I'm glad you liked the prop blades, Bruce. A mostly unnecessary exercise as you later saw with the chipping results. It was something in my head that I wanted to try and so I did it, knowing it would probably be for naught.

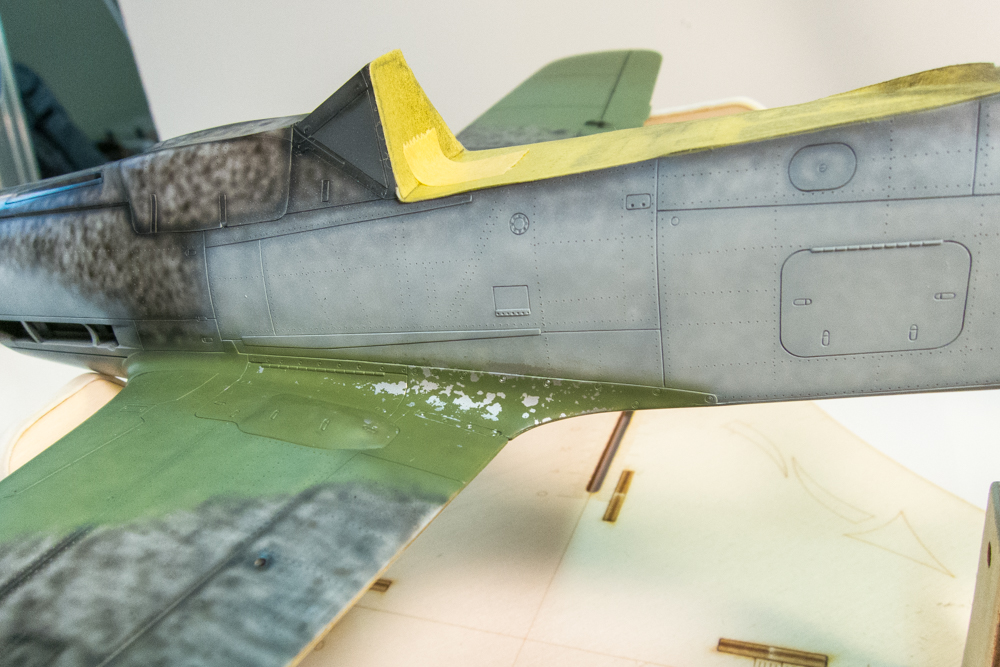
After the RLM 82 has dried a few hours, I get a stiff brush damped with water and start "scrubbing" all over the wing root. After a few moments, you'll start to see a few dots of silver popping through and with continued brushing, the dots turn into bigger and bigger chips. Water will compromise the top from beneath so after some chips are established, I like to wipe any standing water off and start again with a newly dampened brush. Remember to wipe off any water when you are done. The areas of chipping are unnaturally isolated... the two wing roots and on top of the canopy... but that's ok. We can these areas in with more chipping using other techniques later on.
Image
Image

I can now continue with my camo painting. The RLM 83 Dark Green goes next. Try it out on the horizontal stabilizers first.
Image

Follow suit with the wings. All of the airbrush work to this point has been freehand with no masks required. I always refer to the reference photos when determining how hard or how soft the demarcation line is and use the appropriate technique.
Image
Image

A tape mask is used to mark the hard edge between the engine cowling and the fuselage.
Image
Image

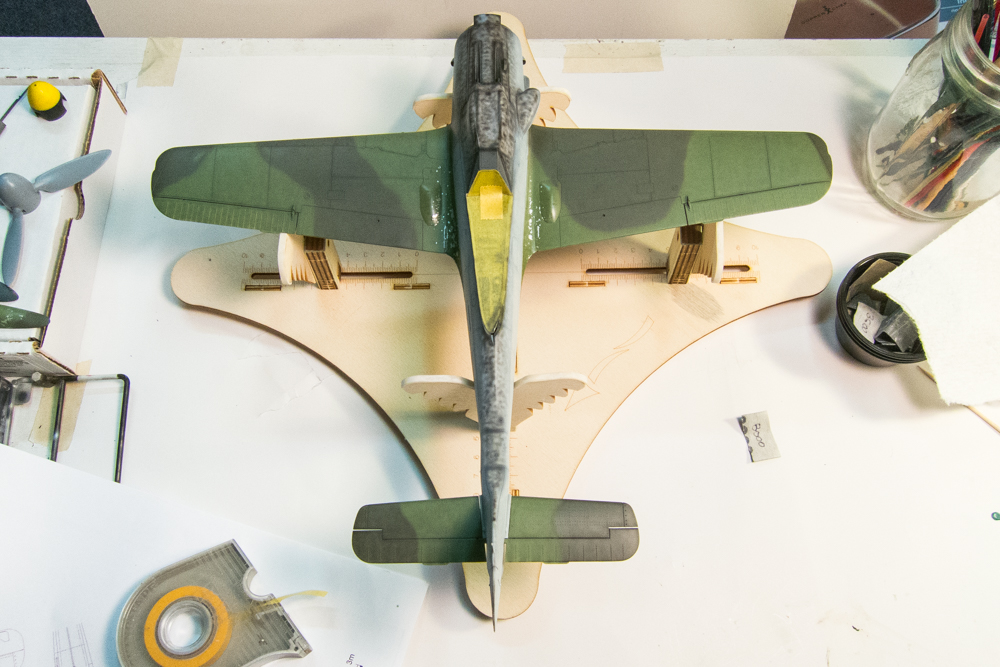
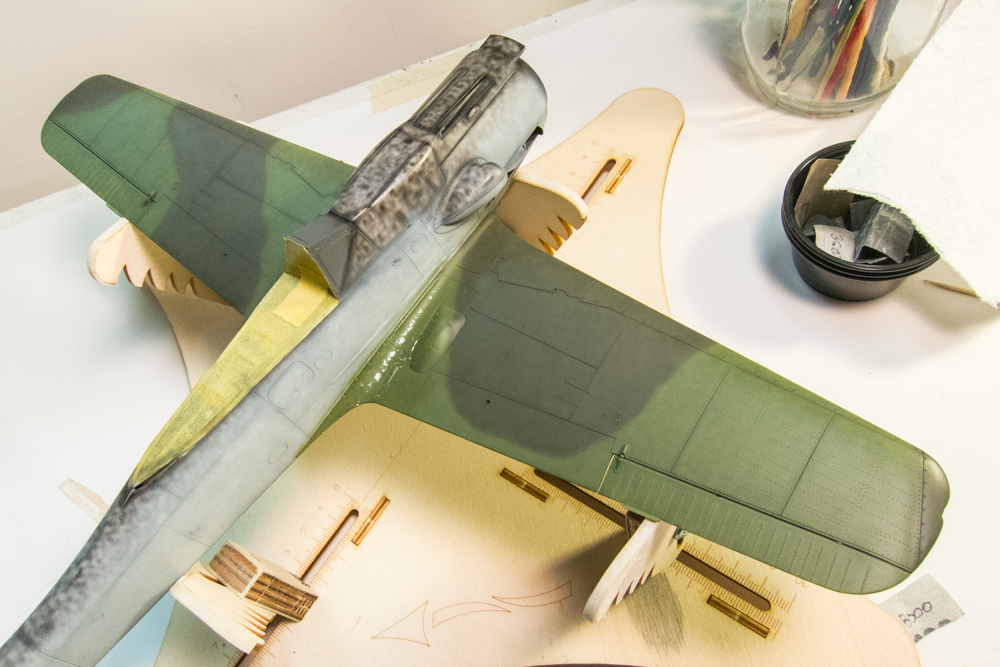
Ok... here's where we are at... most of the major camo painting has been complete. The gun cover will be masked off after the paint dries and then I'll have to tackle the mottling (the most nerve-racking, for me) and the various field markings/stains that appear on the reference photos.
Image
Image
Image
Image

I always think the plane looks really weird at this stage. This is especially true of late war Luftwaffe aircraft, with their hodge-podge of separately manufactured sub-components and replaced equipment. At this point of the build, it's important NOT to listen to your gut and stick to what you see in the reference photos. It will all make visual sense later on in the build.

Re: 1/32 Hasegawa Fw190D-9 Red One

Posted: Wed Jan 02, 2019 12:31 am
by jkim
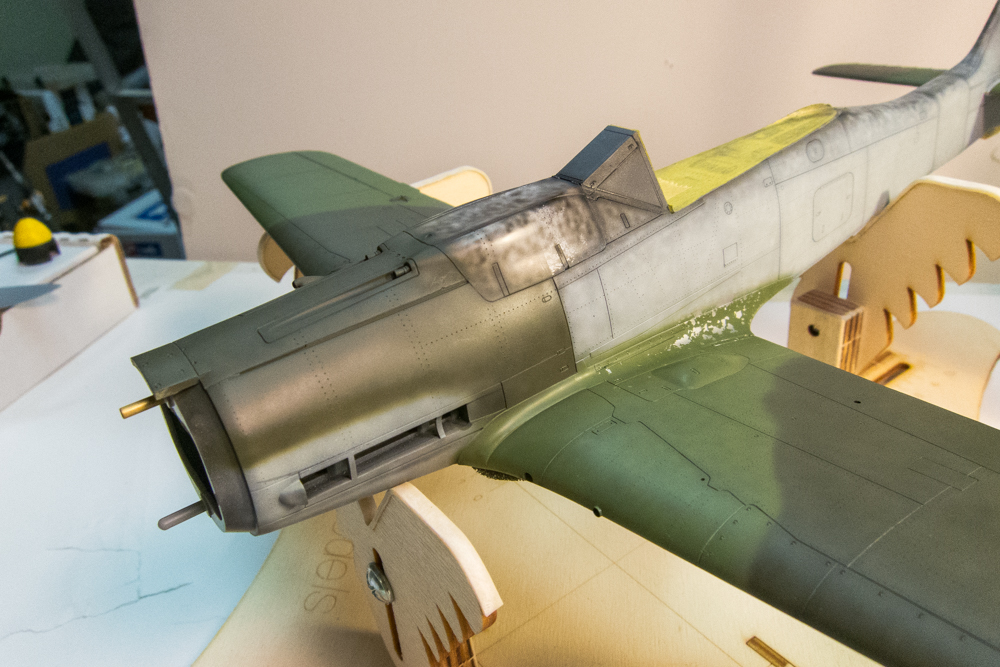
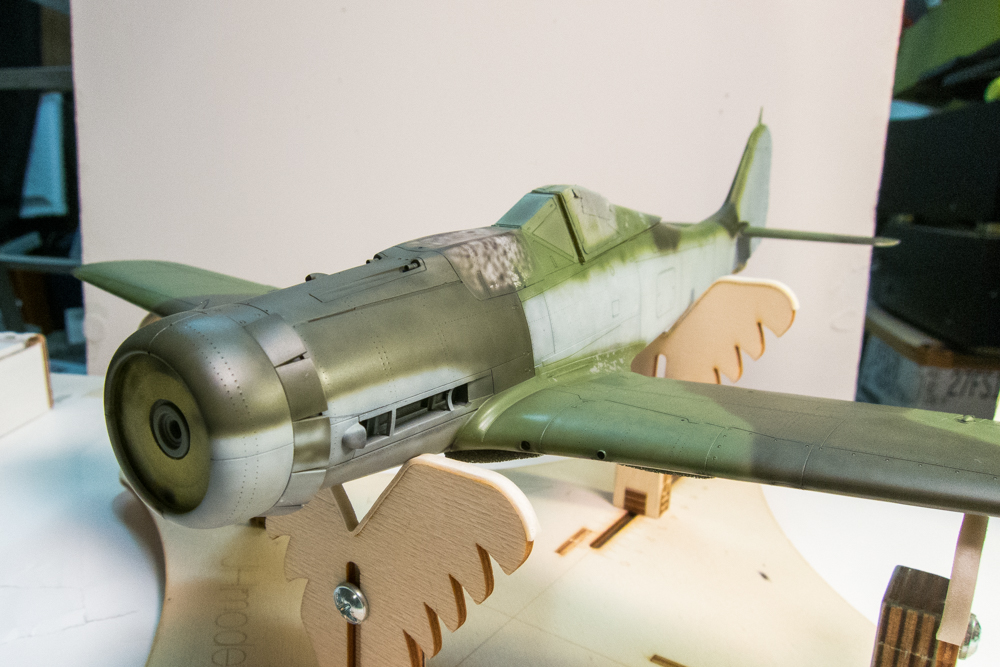
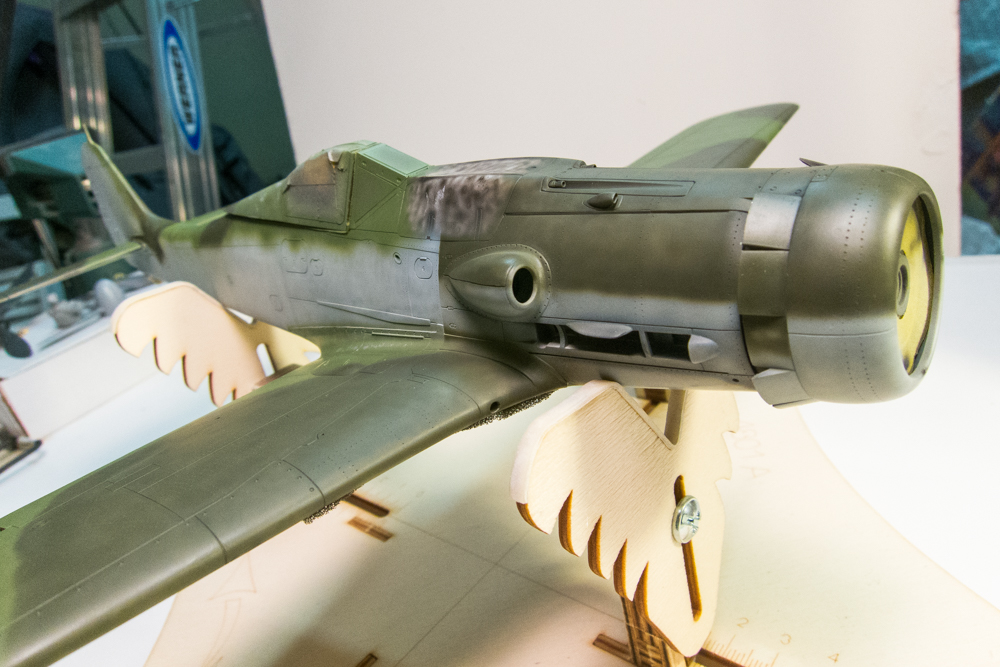
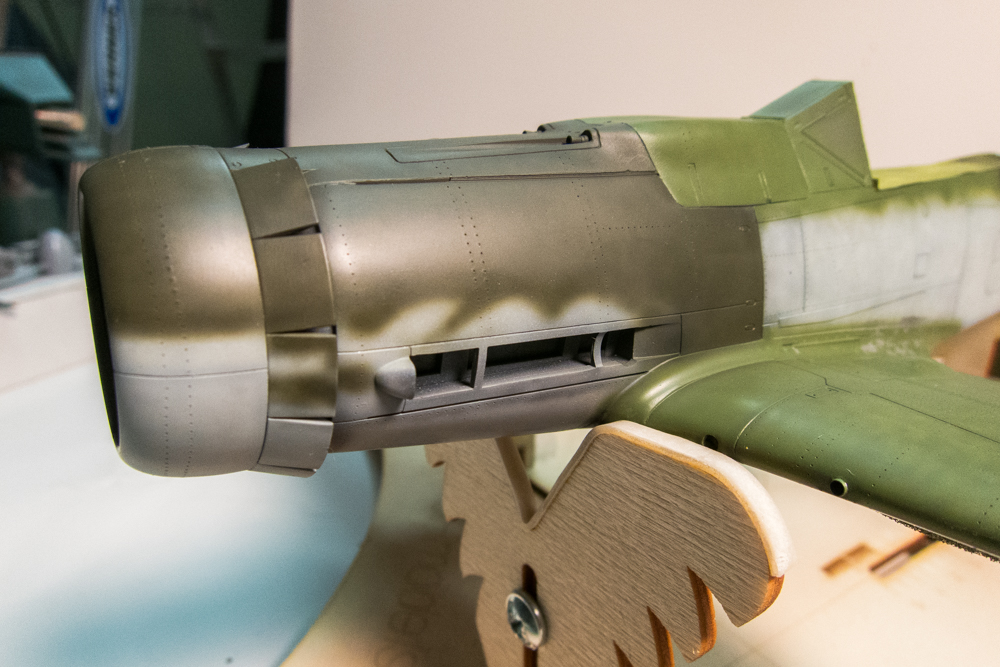
A little bit more to report before calling it a day. I've masked off the gun cowling and painted it RLM 82.
Image

I've added some mottling to the nose of Red 1 based on the photos. There are lots of reference photos of Red 1 that I can draw from but limited in terms of point of view and also they are all, with the exception of one, black and white. So there will be a lot of color speculation but I'll do my best to replicate Red 1's particular look.
Image
Image

Re: 1/32 Hasegawa Fw190D-9 Red One

Posted: Wed Jan 02, 2019 7:51 am
by KennyX
This is fantastic, John. Not only the results you’ve achieved so far, but the look into the process. I really, really dig how you’ve worked this. I like the precision of your technique, and the subtlety of the modulation and tonal variation you’ve achieved. I think it’s fantastic and I definitely want to give this a shot sometime.