Page 30 of 49
Re: Yeah baw 1:32 Saburo Shindo Zeke!
Posted: Fri Oct 04, 2019 9:38 am
by Stuart
KennyX wrote:
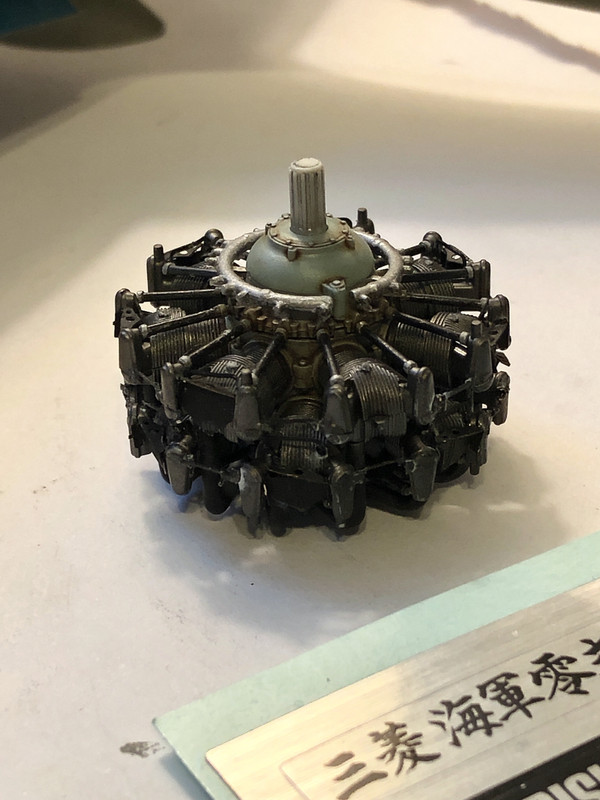
Okay best comment I can come up with - I've worked on several large radial engines over the years and that looks spot on what I've seen in the past. Not pristine concourse nor hammered, but used.
Of course if we modellers really wanted to depict reality, we'd all be buying scale drip trays to sit under our models.
Re: Yeah baw 1:32 Saburo Shindo Zeke!
Posted: Fri Oct 04, 2019 12:18 pm
by KennyX
Stewart,
Thank you for your comment. It made me feel good about the extra time and effort I put into it. Not only was it not easy even after I did get into a rhythm with it, I’m a horrible perfectionist and I knew going into it that that mentality was not something wise to take with me. I went with a “It doesn’t have to be perfect, but don’t half-ass it either,” mentality. And thank you for confirming that I got the look I was shooting for.
Now, there’ll be some light dry brushing on that stuff. Nothing crazy. Just a shade above imperceptible. I’ll be doing that before I wire it up again. Shoot speaking of- I have to paint those wires! I’ll do that today, as I’ll be spraying Aotake on the engine frames too so my airbrush will be fired-up anyway. I’m going to go with a nice light gray for the wires. Just something to let them stand out a little bit. I see light gray wires a lot in old photos of Nakajima engines but of course- who actually knows how they looked when they were in-service.
Anyhow, thank you again. It doesn’t have to be perfect as long as the gestalt ends up correct and I’m pleased that in this case it did indeed. That extra work this week that I put into it was absolutely worth it. 100%.
Re: Yeah baw 1:32 Saburo Shindo Zeke!
Posted: Fri Oct 04, 2019 7:27 pm
by Floki
That engine is very impressive Kenny
Re: Yeah baw 1:32 Saburo Shindo Zeke!
Posted: Sat Oct 05, 2019 8:59 am
by KennyX
Thank you! I’m getting started on the re-wiring this afternoon!
Re: Yeah baw 1:32 Saburo Shindo Zeke!
Posted: Sat Oct 05, 2019 7:24 pm
by KennyX
Today’s work, a little better than maybe a third of the way done:
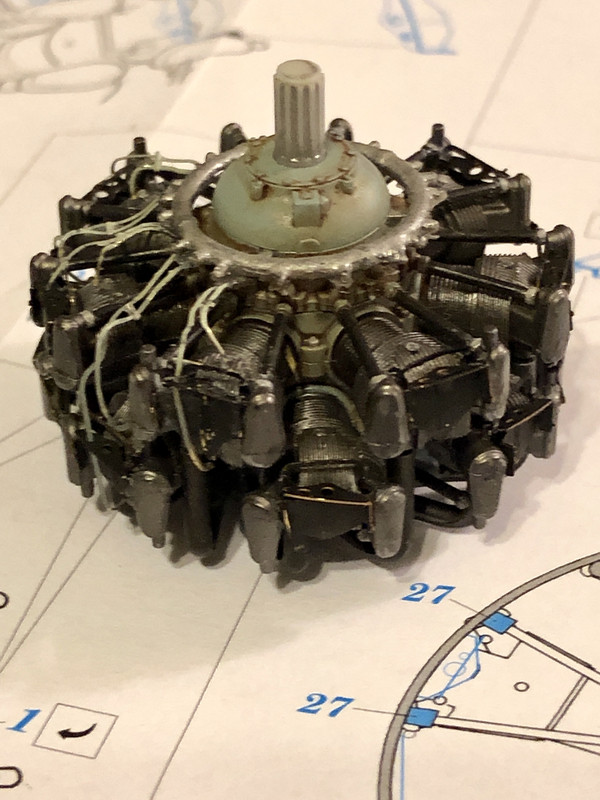
I have my likes and dislikes with the wires in this detail set. Let me state first, the biggest thing I like is that they look way better than my home-rolled solution, hands down. They please me much more aesthetically than the wiring I did previously out of gutted coaxial cable. What I dislike is that they’re pre-formed into a certain shape and it doesn’t lend its self to installation and laying how I would like them to, very well. I have to cut the wires that plug into the front of the forward cylinders and fiddle with them, a lot. But again- they look way better than what I’d made previously so I ain’t complaining.
Anyhow, more to go! Slogging my way through it. It’s worth it.
Re: Yeah baw 1:32 Saburo Shindo Zeke!
Posted: Sun Oct 06, 2019 11:59 am
by Stuart
Re: Yeah baw 1:32 Saburo Shindo Zeke!
Posted: Sun Oct 06, 2019 12:46 pm
by Medicman71
Very nice!
Re: Yeah baw 1:32 Saburo Shindo Zeke!
Posted: Sun Oct 06, 2019 2:36 pm
by pzl66
That is a beauty!
Re: Yeah baw 1:32 Saburo Shindo Zeke!
Posted: Sun Oct 06, 2019 5:28 pm
by BlackSheep214
Looking good, Kenny!
Re: Yeah baw 1:32 Saburo Shindo Zeke!
Posted: Mon Oct 07, 2019 9:58 am
by KennyX
Thanks folks!
And with that, the wiring harness is done:
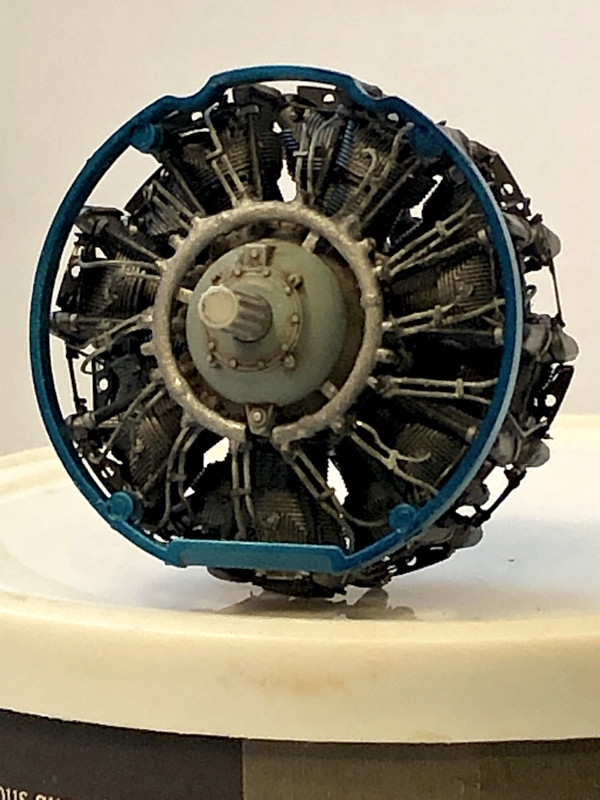
This one is much better. I’m glad I did that. Still, I need improvement in this area. It would look better if the wires actually did plug into the ring. I’ve seen people drilling holes in there, as well as opting to remove the stubs and fashion their own out of small brass tubing. I’m going to explore those options during subsequent practice sessions. Furthermore, while I like the way the brass looks in this case for the most part, I would be happier if they weren’t so bendy. Just personal preference. I’m going to experiment with different wires and with forming them to shape for the cylinders pre-install for a kind of pop-in-place solution as opposed to a “glue to the ring and then bend in” type of solution. I’d like to minimize bending during install as much as possible.
Anyway, I’m happy with how it turned out. It looks better.

