PZL-Messerschmitt Flugzeugwerke GmbH
-
Handiabled
- Master Member
- Posts: 591
- Joined: Sat Mar 15, 2014 7:13 am
Re: 1/48 Eduard Bf 109E-4 W.Nr. 5587
I just opened the box on mine....... you almost have an entire staffel of them built............ Looking great so far Kevin!
Re: 1/48 Eduard Bf 109E-4 W.Nr. 5587
Thanks Handi! Herman will be pleased to see what arrived today! (Have to wait til I get home though...)
Messerschmitt 109 Addict
Re: 1/48 Eduard Bf 109E-4 W.Nr. 5587

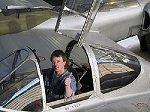
Well as the other Emil is almost done and more work is shifting to this one (pictured on the bottom) I keeping getting torn on the actual scheme... I have been eye balling the “Afrika” scheme and my build can be shifted to an E-7 still...

I would build it as the main box art pictured and since the main E-7 parts have yet to be installed I could go this route.
Also going to consolidate my builds into this one thread for ease of me posting and your viewing.
Messerschmitt 109 Addict
Re: Multiple Eduard 1/48 Bf 109
So for those who are wanting to do the “closed-up” look, this is where you deviate from the instructions and this is also about as far as you want to go before putting the upper cowl on for good. Next picture is what modification you will need to do before you button up the hatches.

Messerschmitt 109 Addict

Re: 1/48 Eduard Bf 109E-4 W.Nr. 5587
Very nice indeed!pzl66 wrote:
Stuart Templeton 'I may not be good but I'm slow...'

Re: Multiple Eduard 1/48 Bf 109
Ok, this thread is now officially the "PZL-Messerschmitt Flugzeugwerke GmbH".
Very cool!
Very cool!
Cheers,
Torben
Torben
Re: Multiple Eduard 1/48 Bf 109
Thanks Portman!

Lol thanks Mostrich! Renaming thread to your new title!mostrich wrote:Ok, this thread is now officially the "PZL-Messerschmitt Flugzeugwerke GmbH".
Very cool!
Messerschmitt 109 Addict
Re: PZL-Messerschmitt Flugzeugwerke GmbH
Some progress, tonight I sprayed a coat of Mr. Surfacer to check for proper finish on the mating areas. Added rivets to the areas that lost then during minor sanding and when I was making the wing radiators have a more flush look.
I took some pick of the process of my way of doing the closed cowl and here are the steps:
You will be at this point in your build, fuselage assembled and wings assembled and attached to each other. During the fuselage assembly you will have installed the lower radiator assembly glued to one fuselage half. The best thing about this method is you will achieve the best fit of this part to the fuselage (note: the actual lower cowl is a part of the fuselage halves, try to get them as close to even as possible but it being perfect is not the most important part, its making sure everything else is flush. You will be sanding the seam on the lower cowl smooth) and you will get the strongest bond of the parts I have found by adding more cement to all the interior joints on other parts.

Step one - cut the cylinder head portion of the engine off of each engine halve (mark orientation on the inside of it, I carved an arrow for this)

Step two - attach exhaust pipes onto each head as instructed in the directions.

Step three - install the first assembly into it’s designated spot, apply thin cement to the interior portion where it wont be visible when the model is fully assembled.

Step four - you will need to trim the other cylinder head like this to clear the other one already installed. Apply thin cement like in previous step.

Step five - just for a little more structure support, run thin cement where the two engine halves are touching.

And there you have it, ready to install the upper cowl with no issues. Just remember to install the gun part BEFORE you install the cowl so you don't have to do what I did with glueing two separate parts after..... That part is not fun, doable, not fun.

I took some pick of the process of my way of doing the closed cowl and here are the steps:
You will be at this point in your build, fuselage assembled and wings assembled and attached to each other. During the fuselage assembly you will have installed the lower radiator assembly glued to one fuselage half. The best thing about this method is you will achieve the best fit of this part to the fuselage (note: the actual lower cowl is a part of the fuselage halves, try to get them as close to even as possible but it being perfect is not the most important part, its making sure everything else is flush. You will be sanding the seam on the lower cowl smooth) and you will get the strongest bond of the parts I have found by adding more cement to all the interior joints on other parts.
Step one - cut the cylinder head portion of the engine off of each engine halve (mark orientation on the inside of it, I carved an arrow for this)
Step two - attach exhaust pipes onto each head as instructed in the directions.
Step three - install the first assembly into it’s designated spot, apply thin cement to the interior portion where it wont be visible when the model is fully assembled.
Step four - you will need to trim the other cylinder head like this to clear the other one already installed. Apply thin cement like in previous step.
Step five - just for a little more structure support, run thin cement where the two engine halves are touching.
And there you have it, ready to install the upper cowl with no issues. Just remember to install the gun part BEFORE you install the cowl so you don't have to do what I did with glueing two separate parts after..... That part is not fun, doable, not fun.
Messerschmitt 109 Addict
-
speedgraflex

- Moderator
- Posts: 11358
- Joined: Fri Feb 10, 2017 11:08 pm
- Contact:
Re: PZL-Messerschmitt Flugzeugwerke GmbH
Great tutorial! Extremely helpful. Just to recap: after cutting the engine block off, you glue the header-exhaust assemblies one at a time inside the compartment?

Make more models!
Re: PZL-Messerschmitt Flugzeugwerke GmbH
Nice sketch!
You glue the individual headers to the block while it is outside of the fuselage, depending on what cement you use (I waited 10 minutes) then you slide the assembly in and the guide the exhaust stubs into the opening (rear one first) and align the block so the stubs are almost flush with the opening on the cowl (see pictures). The second block halve you install will end up sitting on top of the other block, not flush/even (the red/green portion of your sketch where they meet) (due to this process).
You glue the individual headers to the block while it is outside of the fuselage, depending on what cement you use (I waited 10 minutes) then you slide the assembly in and the guide the exhaust stubs into the opening (rear one first) and align the block so the stubs are almost flush with the opening on the cowl (see pictures). The second block halve you install will end up sitting on top of the other block, not flush/even (the red/green portion of your sketch where they meet) (due to this process).
Messerschmitt 109 Addict