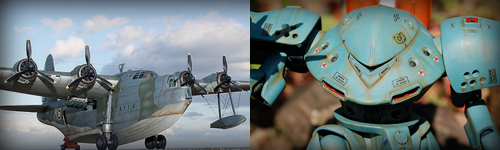
1/72 Hasegawa Shinmeiwa PS-1

Post your work in progress of your aircraft builds in here.
User avatar
BsYamato
Addicted Member
Posts: 1130
Joined: Mon Apr 07, 2014 3:20 pm

Re: 1/72 Hasegawa Shinmeiwa PS-1

Post by BsYamato »

Will look for tour marineer Duke :)

I see lots on putty needed there Monty but I'm sure you will erase any trace of it when the big amphibious finished :)
Notice the closed air intake and exhaust of the five engine of this plane that works to flow air in the flaps to help take off, landing operations.
Image
User avatar
Duke Maddog
Elite Member
Posts: 7668
Joined: Tue Jun 03, 2014 11:22 am
Location: Rowland Heights, CA

Re: 1/72 Hasegawa Shinmeiwa PS-1

Post by Duke Maddog »

Thanks BsY. Gonna possibly start it end of January, early February. Meanwhile, I'm going to continue taking notes of Monty's excellent work.
The Duke
Virtuoso of Miniatures

"Do you know what the chain of command is? It's the chain I get and beat you with 'till you understand who's in ruttin' command!"
-Jayne Cobb, Firefly Episode 2 "The Train Job"

We are modelers - the same in spirit, in hunger to insanely buy newly released kits, hustlers in hiding our stash from our better halves and experts in using garbage as replacements for after-market parts.
User avatar
dmminiatures
Master Member
Posts: 534
Joined: Mon Apr 07, 2014 10:16 am

Re: 1/72 Hasegawa Shinmeiwa PS-1

Post by dmminiatures »

BsYamato wrote:Will look for tour marineer Duke :)

I see lots on putty needed there Monty but I'm sure you will erase any trace of it when the big amphibious finished :)
Notice the closed air intake and exhaust of the five engine of this plane that works to flow air in the flaps to help take off, landing operations.
Lots of putty work here, Silvio. I've expected that and I am sure I will also expect that the kit will give a bitter fight to the end.

Here are photos from the engine nacelles. I have done the main putty work with Tamiya expoxy putty, marked the imperfections with a ballpoint. Phase-2 putty work with Tamiya white putty, followed by a thin layer of super glue.

The super glue will harden and fill any pores from the previous putty work

Image
Monty / dmminiatures
User avatar
dmminiatures
Master Member
Posts: 534
Joined: Mon Apr 07, 2014 10:16 am

Re: 1/72 Hasegawa Shinmeiwa PS-1

Post by dmminiatures »

Continuing the progress...

Working on the wheel bulges. There is no interior, so a makeshift one needs to be made. Here, its just a pair of 0,5mm styrene sheets.

Image

One of the most tricky part in completing this project is the wheel bulges on the side of the fuselages. I need to mark them down with a pen or sort because they are no gluing pins. the two holes (in this picture) for the landing gear is totally inaccurate. so obviously, you need to close them first (including the joint lines below it) and make a pair of new holes before you glue the bulges.

Image

Nose section had to get some putty treatment (epoxy and white standard putty) and a lot of sanding afterwards

Image
Monty / dmminiatures
User avatar
LyleW
Admin
Posts: 15035
Joined: Fri Dec 13, 2013 7:25 am
Location: Mt. Washington KY

Re: 1/72 Hasegawa Shinmeiwa PS-1

Post by LyleW »

Glad to see this one back on...I think! Lot's of things to do, it appears.
To make each build less crappy than the last one. Or, put another way, "Better than the last one, not as good as the next one!"..
User avatar
Manny1943
Addicted Member
Posts: 1293
Joined: Fri Jul 11, 2014 1:38 pm

Re: 1/72 Hasegawa Shinmeiwa PS-1

Post by Manny1943 »

I like the work going into this MOFO so far---very unusual and LARGE plane... :lashed:
User avatar
BsYamato
Addicted Member
Posts: 1130
Joined: Mon Apr 07, 2014 3:20 pm

Re: 1/72 Hasegawa Shinmeiwa PS-1

Post by BsYamato »

Nice return with the great amphibious :bow:
Image
User avatar
Duke Maddog
Elite Member
Posts: 7668
Joined: Tue Jun 03, 2014 11:22 am
Location: Rowland Heights, CA

Re: 1/72 Hasegawa Shinmeiwa PS-1

Post by Duke Maddog »

Looking good Monty. I just looked in my Shinmeiwa box and found something. Someone had included a resin correction set for those wheel bulges. Now I see why they were in there.

Watching with interest Monty....
The Duke
Virtuoso of Miniatures

"Do you know what the chain of command is? It's the chain I get and beat you with 'till you understand who's in ruttin' command!"
-Jayne Cobb, Firefly Episode 2 "The Train Job"

We are modelers - the same in spirit, in hunger to insanely buy newly released kits, hustlers in hiding our stash from our better halves and experts in using garbage as replacements for after-market parts.
User avatar
CallSignOWL
Addicted Member
Posts: 1754
Joined: Mon Apr 07, 2014 12:45 pm

Re: 1/72 Hasegawa Shinmeiwa PS-1

Post by CallSignOWL »

wow, thats some great work on that monster.
Every take-off has a landing...some are just better than others
User avatar
dmminiatures
Master Member
Posts: 534
Joined: Mon Apr 07, 2014 10:16 am

Re: 1/72 Hasegawa Shinmeiwa PS-1

Post by dmminiatures »

yeah, would be great if I had those resin correction, which I dont. well, in life we kinda have to move on on what we have, I guess.. LoL

I have added the wheel buldges, which was a real undertaking since there is no clue whatsoever on the correct location is. had to rely on reference photos. Bu now, I am here at the junction. "To Scribe or Not to Scribe."

The premise is that if I keep all the oversized rivits and fine raised panel lines, I think I am going to face a lot of trouble in the decals. I am already loosing A LOT of rivets and panel lines due to poor fitting. So as my mind was thinking the next steps... my hands started to lay out the tools for scribing.... just in case the other half of me decided to go on that path.

Image
Monty / dmminiatures
Post Reply

Return to “Aircraft Work in Progress”