
1/32 Hasegawa Fw190D-9 Red One
-
Cherrylock

- Addicted Member
- Posts: 1225
- Joined: Mon Apr 07, 2014 12:24 pm
- Location: Königreich Bayern; Germany
Re: 1/32 Hasegawa Fw190D-9 Red One
very good color and details
-
speedgraflex

- Moderator
- Posts: 11535
- Joined: Fri Feb 10, 2017 11:08 pm
- Contact:
Re: 1/32 Hasegawa Fw190D-9 Red One
Beautiful! The Post-It “system” is a truly inspired method of spot masking, John. On top of that, the contrast between the red and the white is really gorgeous. I also greatly admire the way you tailored the central stripes of the fuselage to form a V near the tail. That is an incredibly well done job of masking by anyone’s standards. Your hard work paid off incredibly well.
Make more models!

Re: 1/32 Hasegawa Fw190D-9 Red One
Thanks guys! The completion of the red and white bottom is definitely a major milestone on this build. Maybe THE milestone, all things considered. I'm glad that my efforts to keep the painting surfaces clean of finger oils showed a positive result. One of the differences between Red 1 and Black 1 that you can't see is increased strength. Better glue joints all around. Sprue-strengthened gaps. And the paint job seems more robust too. The model just feels more solid when I pick it up.
The pics of the bottom hurt my eyes! We have many more steps ahead including weathering the bottom at some point. I'm not sure how I'm going to weather the red and white but we have some time to think about it. It's hard to see in the photos but a bit of the panel pre-shading DID come all the way through the red.
The pics of the bottom hurt my eyes! We have many more steps ahead including weathering the bottom at some point. I'm not sure how I'm going to weather the red and white but we have some time to think about it. It's hard to see in the photos but a bit of the panel pre-shading DID come all the way through the red.
John aka JKim
-----------<><

-----------<><
-
Duke Maddog

- Elite Member
- Posts: 7703
- Joined: Tue Jun 03, 2014 11:22 am
- Location: Rowland Heights, CA
Re: 1/32 Hasegawa Fw190D-9 Red One
I am overwhelmed at the quality of this model! The work you did on the bottom making that red and white striped pattern is what has kept me from ever doing one of these birds for my collection in 1/72 scale. You've done a truly masterful job and like Carlos said, this is now off the charts!
The Duke
Virtuoso of Miniatures
"Do you know what the chain of command is? It's the chain I get and beat you with 'till you understand who's in ruttin' command!"
-Jayne Cobb, Firefly Episode 2 "The Train Job"
We are modelers - the same in spirit, in hunger to insanely buy newly released kits, hustlers in hiding our stash from our better halves and experts in using garbage as replacements for after-market parts.
Virtuoso of Miniatures
"Do you know what the chain of command is? It's the chain I get and beat you with 'till you understand who's in ruttin' command!"
-Jayne Cobb, Firefly Episode 2 "The Train Job"
We are modelers - the same in spirit, in hunger to insanely buy newly released kits, hustlers in hiding our stash from our better halves and experts in using garbage as replacements for after-market parts.

Re: 1/32 Hasegawa Fw190D-9 Red One
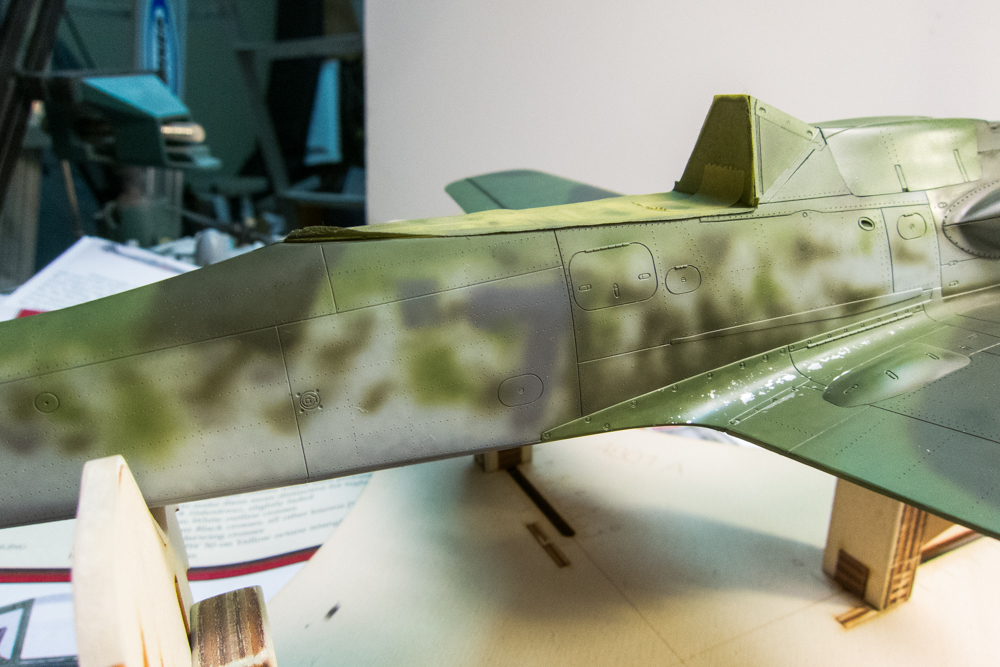
That mottling is just absolutely lovely, John.
Kenny X
Head Mother Trucker In-Charge @ Kenny X’s Reichs Winzigkleines Flugzeugewerks *and now* Airboat Records, too!
Head Mother Trucker In-Charge @ Kenny X’s Reichs Winzigkleines Flugzeugewerks *and now* Airboat Records, too!
-
Stikpusher

- Moderator
- Posts: 21386
- Joined: Sat Apr 05, 2014 8:37 pm
- Location: Ceti Alpha 5
Re: 1/32 Hasegawa Fw190D-9 Red One
I love that overpainted “7” too! Shows that this aircraft has a bit of a past life.KennyX wrote:
That mottling is just absolutely lovely, John.
"Surely I have made my meaning plain? I intend to avenge myself upon you, Admiral. I have deprived your ship of power, and when I swing 'round, I intend to deprive you of your life."
FLSM
FLSM
Re: 1/32 Hasegawa Fw190D-9 Red One
Yessir. I dig that, too. And John nailed it! A paint-over shouldn’t be hard to represent (it’s a paint-over after all) but I’ve seen a few here and there which didn’t look so good to me on that aesthetic level. What I like about this here is that it looks accurate *and* it also looks nice aesthetically. That’s what does it for me. It looks like it belongs there compositionally-speaking, but the effect is still there- “at one point in the past, this was #7”. That’s not easy to pull off. At least not for me.
Kenny X
Head Mother Trucker In-Charge @ Kenny X’s Reichs Winzigkleines Flugzeugewerks *and now* Airboat Records, too!
Head Mother Trucker In-Charge @ Kenny X’s Reichs Winzigkleines Flugzeugewerks *and now* Airboat Records, too!
Re: 1/32 Hasegawa Fw190D-9 Red One
LOL... hey guys, you know that the grey "7' was changed right? It looks like this now...
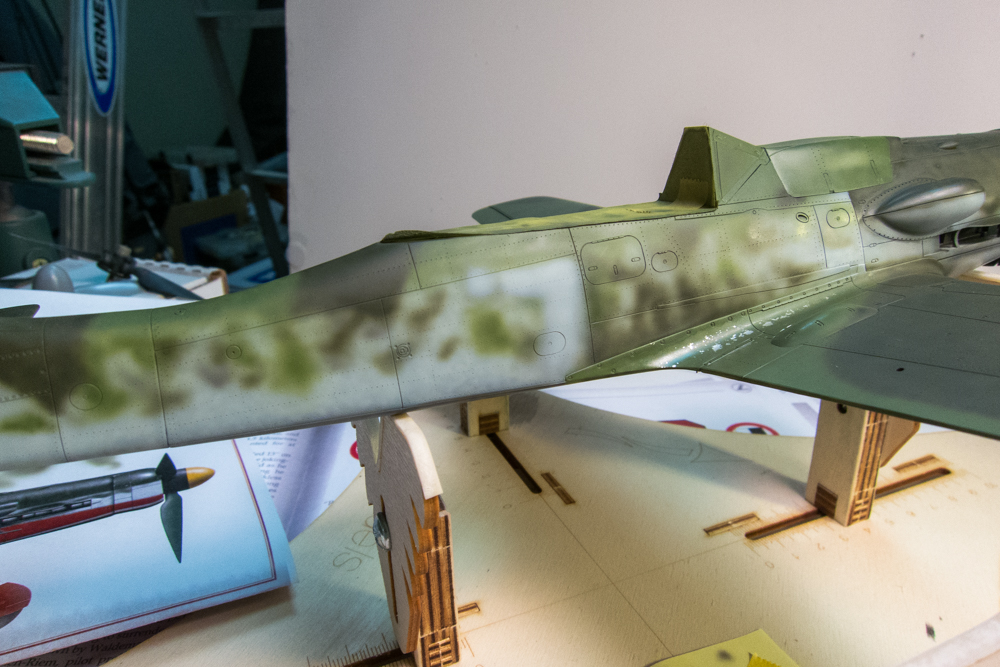
Based on my two references (Crandall's Dora Volume 2 and Japo's 190D Camo and Markings Volume 2), I don't know if that is an actual "7" or just a paint repair shaped like a 7.
Thanks for following this build. Just a few more touch-ups before I start doing the markings.
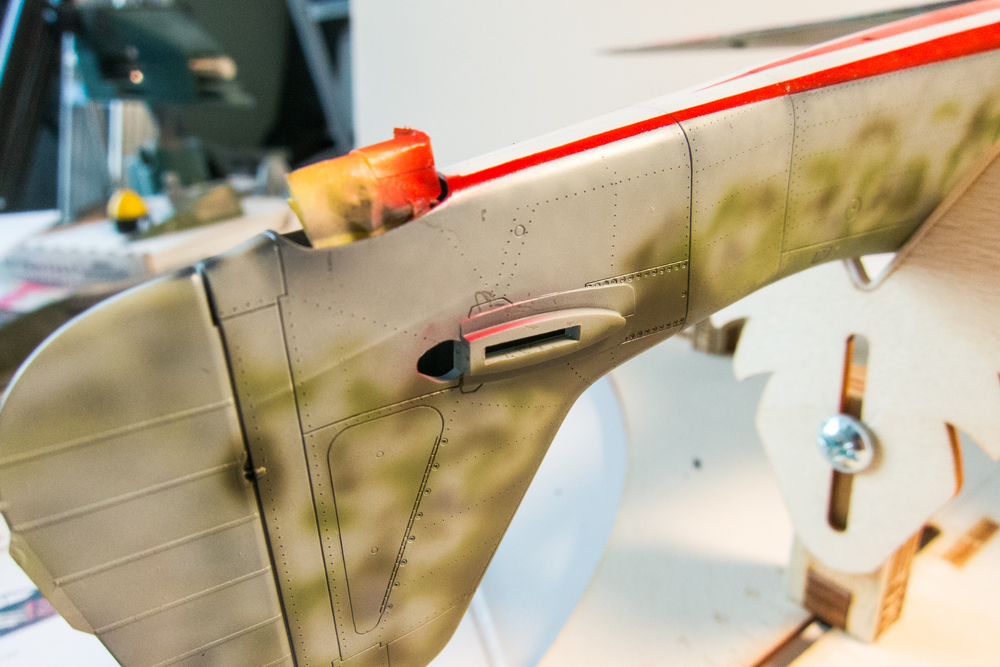

I'm using a set of Montex vinyl masks for the large markings. The only masked markings on the bottom are the black crosses on the wings. It's interesting that Red 1 did not have the higher visibility white-bordered crosses as the other JV44 Doras did.
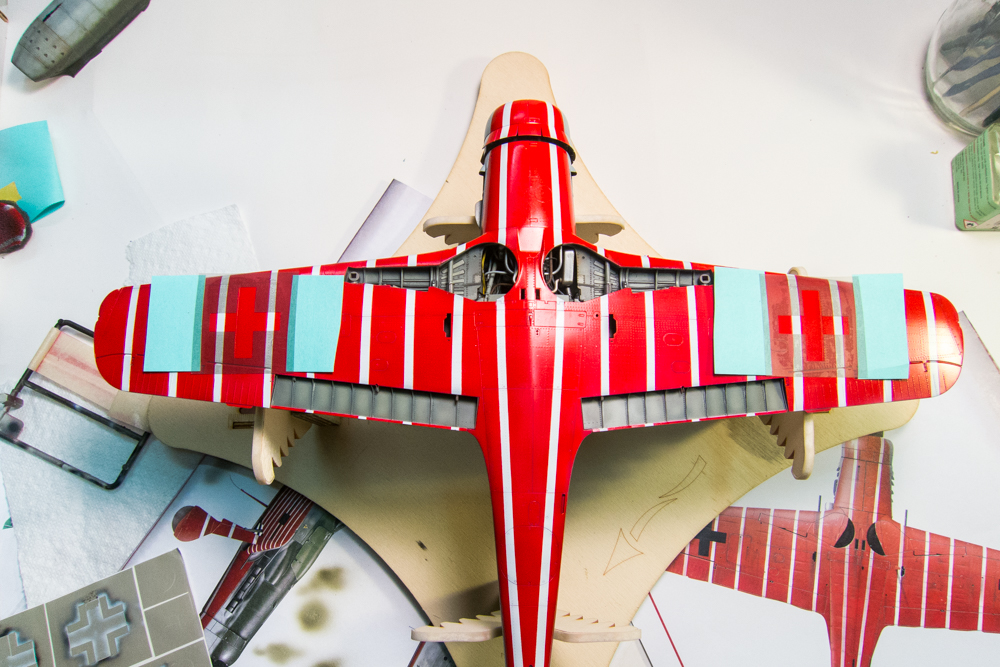

The tail swastikas and the Werknummer (port side only) were also painted using masks. I really like how the Werknummer came out.
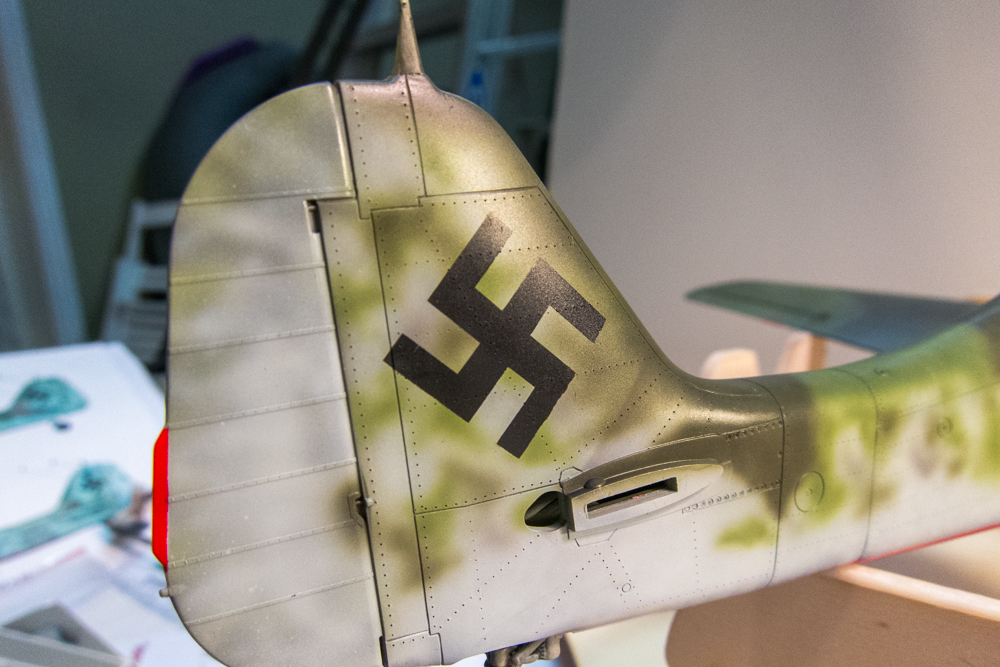
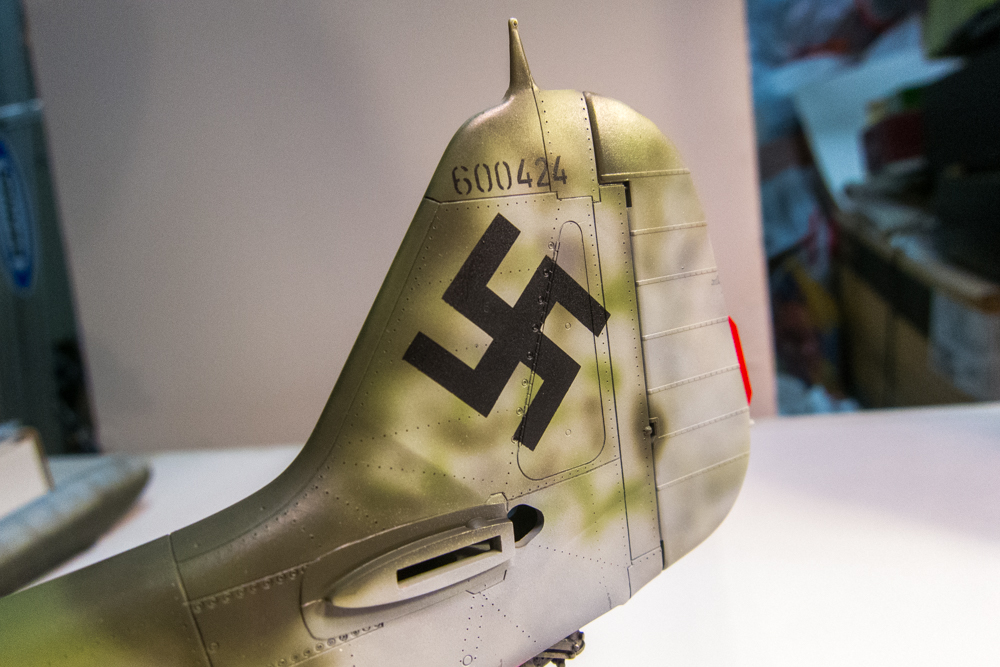
The two-color masks are a little trickier and these never come out as nice as the single color masks.

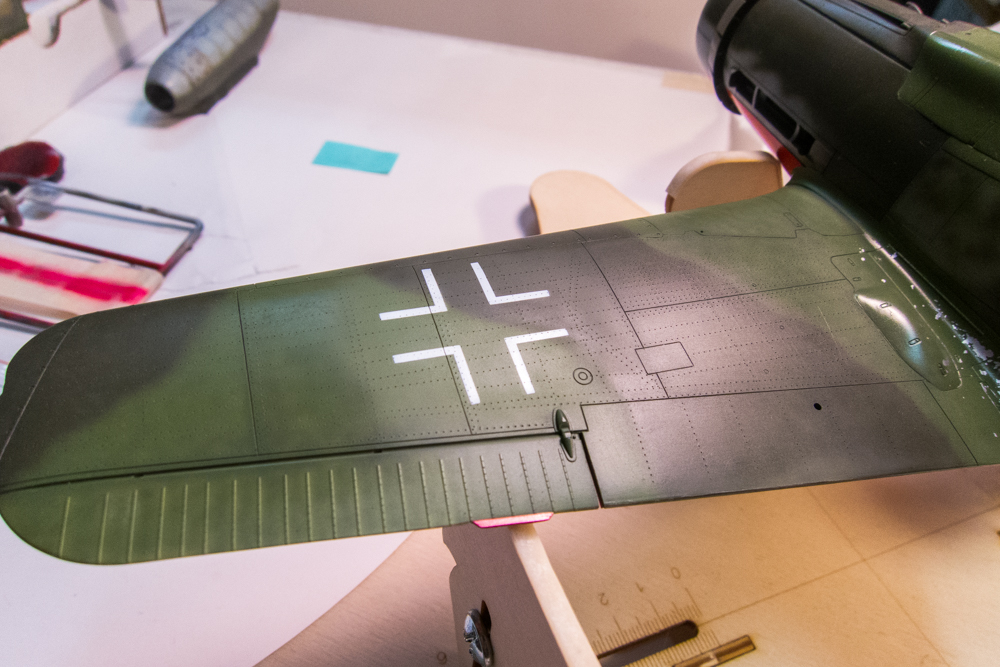
The top wing masks were previously used on Black 1. So the masks weren't as transparent and I had a hard time lining them up. Port wing is slightly off. The question is... (1) live with a slightly crooked upper wing cross or (2) fix it and lose some of the pre-shading?

I opened Door #2 and laid down a base of Neutral Grey over the cross.

The new white cross. The transition between the original green and repaired green is exaggerated in the photo due to flat/gloss differences and no so much color. But the lack of pre-shading on the repaired green is noticeable. In hindsight, I should've added some mottling to the neutral grey before I put the green back on... oh well. I can address this with a post-shading technique... maybe those new masks I bought???
The squadron emblem is also sprayed using the Montex masks.


Red 1 is documented to have a different style "1" on each side of the fuselage. This is not an uncommon occurrence on Luftwaffe aircraft but something that most decal manufacturers (and mask makers) ignore. Jerry Crandall did not ignore this issue on his Eagle Editions decal set and provides both styles of "1". The Montex masks seems to have only one style.
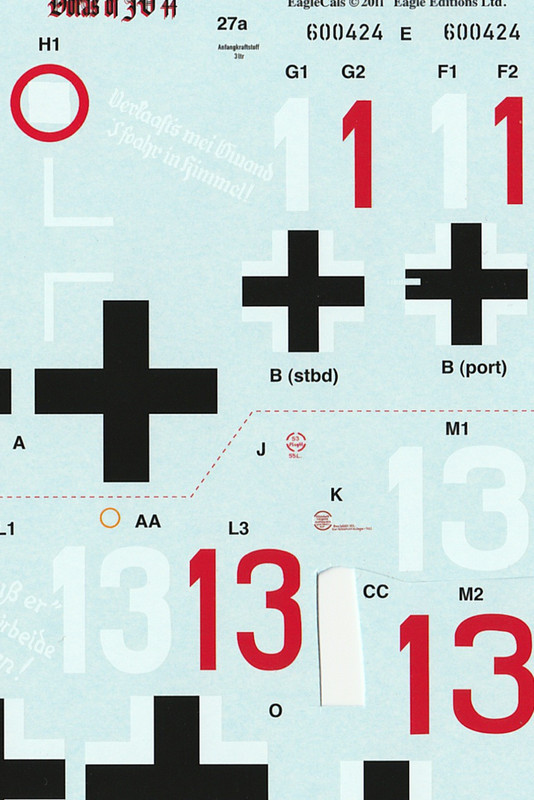
Again, I am confronted with a couple of choices. I can use the decals. In most cases, this would be a no-brainer but the fact that Eagle uses TWO decals for a single digit and knowing that white decals are usually the thickest and most difficult to conform to panel lines and rivets makes me hesitate.
I have a Silhouette Portrait cutter and can make custom masks for any pattern that I can come up with in CAD. I almost forgot that I had it (it would've saved me some headache on that upper wing cross issue). The process to convert a CAD drawing into a file format the Portrait can use is foggy. I've done it before and I can do it again but it will take me a bit of time to figure it out.
So I'll try and make a custom mask for the two different "1" using the Eagle Cal decals as a template. Stay tuned...
Based on my two references (Crandall's Dora Volume 2 and Japo's 190D Camo and Markings Volume 2), I don't know if that is an actual "7" or just a paint repair shaped like a 7.
Thanks for following this build. Just a few more touch-ups before I start doing the markings.
I'm using a set of Montex vinyl masks for the large markings. The only masked markings on the bottom are the black crosses on the wings. It's interesting that Red 1 did not have the higher visibility white-bordered crosses as the other JV44 Doras did.
The tail swastikas and the Werknummer (port side only) were also painted using masks. I really like how the Werknummer came out.
The two-color masks are a little trickier and these never come out as nice as the single color masks.
The top wing masks were previously used on Black 1. So the masks weren't as transparent and I had a hard time lining them up. Port wing is slightly off. The question is... (1) live with a slightly crooked upper wing cross or (2) fix it and lose some of the pre-shading?
I opened Door #2 and laid down a base of Neutral Grey over the cross.
The new white cross. The transition between the original green and repaired green is exaggerated in the photo due to flat/gloss differences and no so much color. But the lack of pre-shading on the repaired green is noticeable. In hindsight, I should've added some mottling to the neutral grey before I put the green back on... oh well. I can address this with a post-shading technique... maybe those new masks I bought???
The squadron emblem is also sprayed using the Montex masks.
Red 1 is documented to have a different style "1" on each side of the fuselage. This is not an uncommon occurrence on Luftwaffe aircraft but something that most decal manufacturers (and mask makers) ignore. Jerry Crandall did not ignore this issue on his Eagle Editions decal set and provides both styles of "1". The Montex masks seems to have only one style.
Again, I am confronted with a couple of choices. I can use the decals. In most cases, this would be a no-brainer but the fact that Eagle uses TWO decals for a single digit and knowing that white decals are usually the thickest and most difficult to conform to panel lines and rivets makes me hesitate.
I have a Silhouette Portrait cutter and can make custom masks for any pattern that I can come up with in CAD. I almost forgot that I had it (it would've saved me some headache on that upper wing cross issue). The process to convert a CAD drawing into a file format the Portrait can use is foggy. I've done it before and I can do it again but it will take me a bit of time to figure it out.
So I'll try and make a custom mask for the two different "1" using the Eagle Cal decals as a template. Stay tuned...
John aka JKim
-----------<><
-----------<><
Re: 1/32 Hasegawa Fw190D-9 Red One
The Spinner Saga...
The detail that Henri Daehne supplies with his prop assemblies is beautiful but most of it ends up getting hidden by the spinner. Due to the sparse attachment area between the backplate and the bottom edge of the spinner, I've had to glue the spinner on and locking all of that detail away. As more people commented on it, the more I thought about trying to make the spinner removable. The foam clay mold idea was a failure but Bruce came up with a tantalizing solution... magnets.
The ones Bruce posted were tiny... didn't know they came that small. I actually bought one size bigger.. 3mm x 1mm discs.
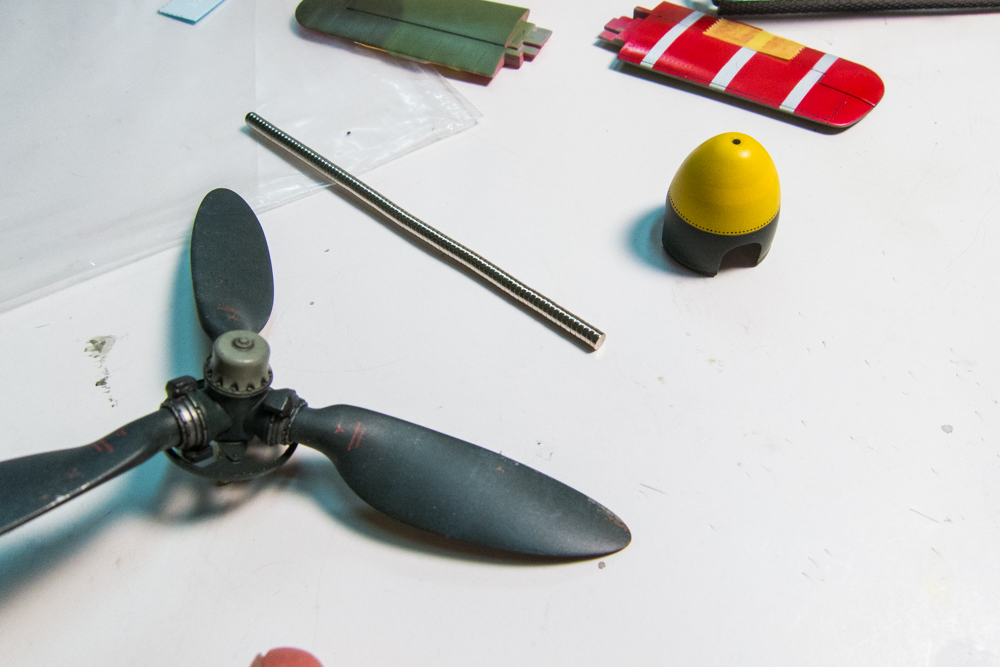
The plan was to remove the prop hub, drill a 3mm hole from the bottom and stick a magnet in the hole. I could then glue another magnet at the tip from the inside and hopefully that would keep the spinner attached. But as I've said, I've taken great pride in increasing the strength of all of the glue joins INCLUDING the prop hub. Long story short... I could not get it off. I went as far as giving it a whack with a hammer while the hub was held by a vise. I thought I'd better stop before I ruin the hub or bend the shaft.
Then another idea... why not just drill the 3mm hole from the TOP of the hub? I could re-make the hub details with punched plastic easily enough.
So I sliced off the detail from the top of the hub.
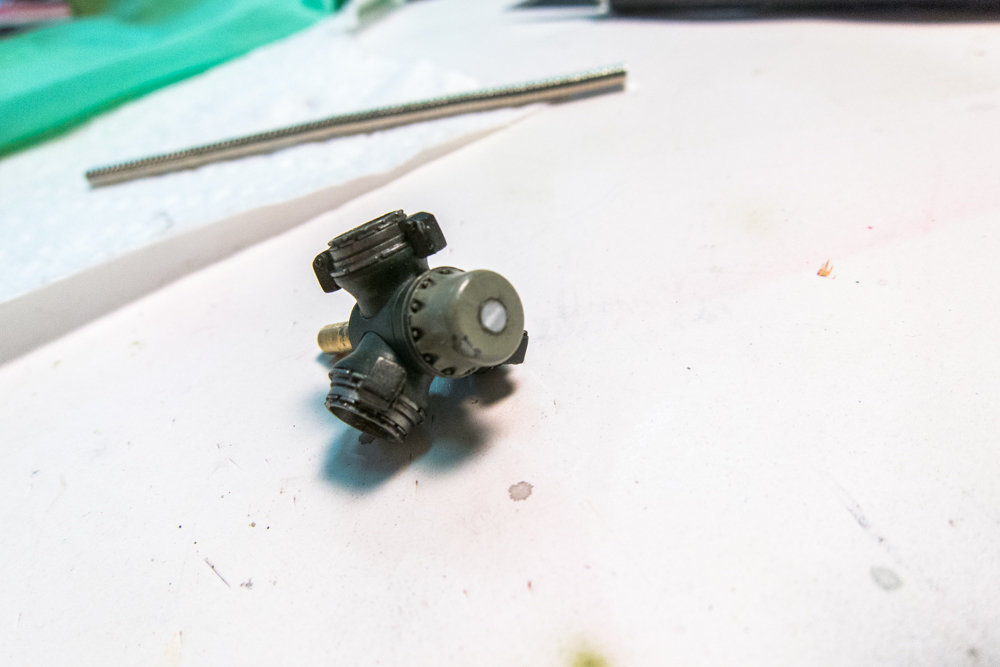
Drilled a shallow hole into the hub using a 3mm drill bit.
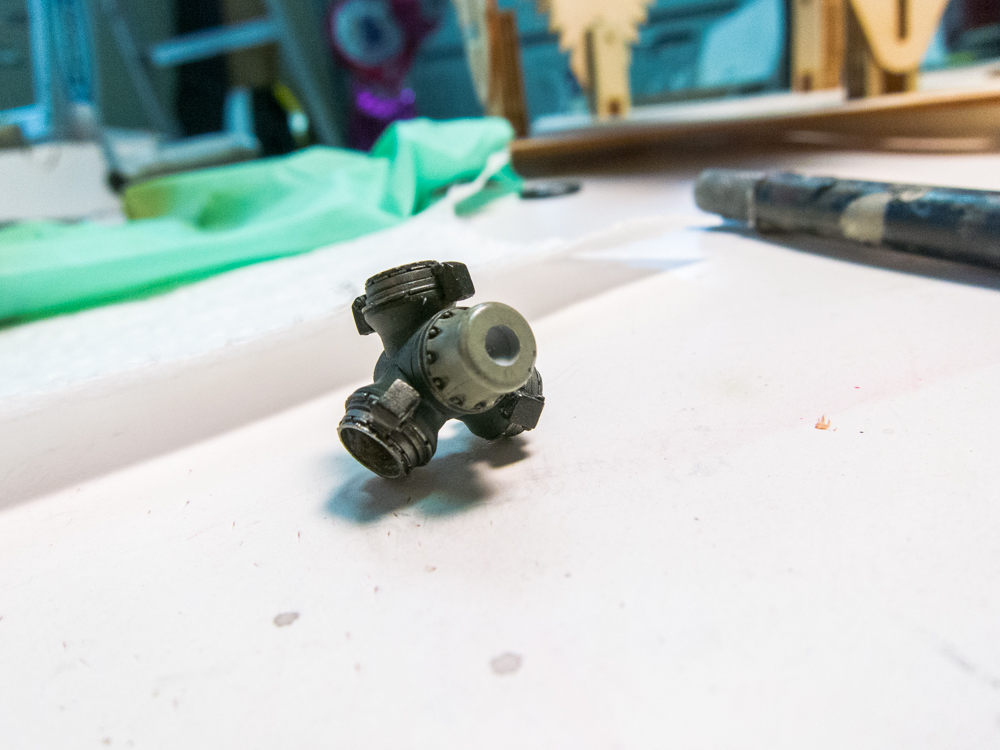
The little magnet fits almost perfectly!
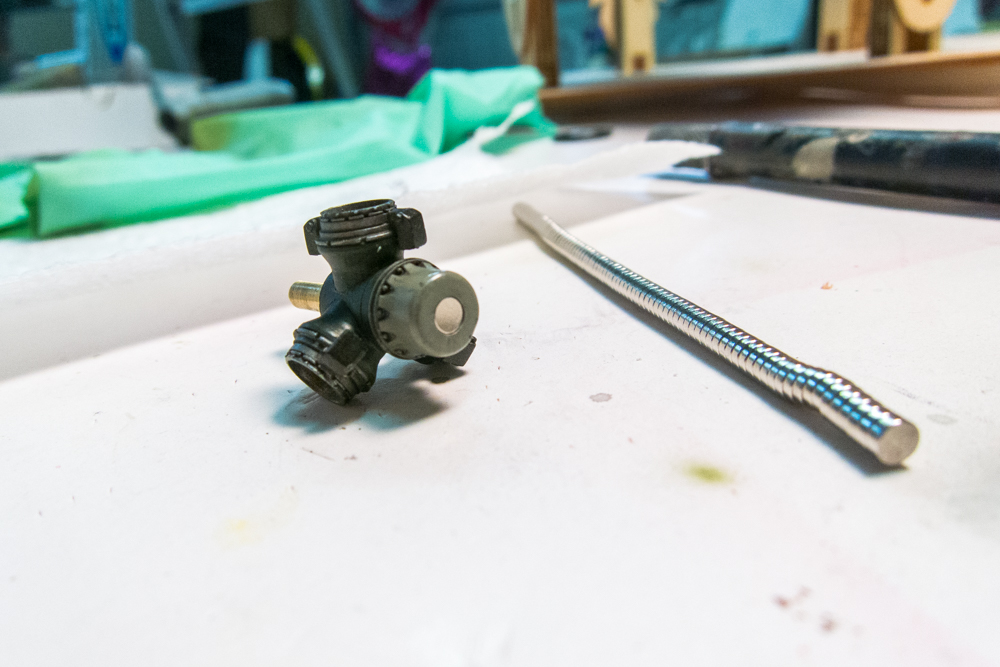
Hub detail replaced using punched plastic discs.
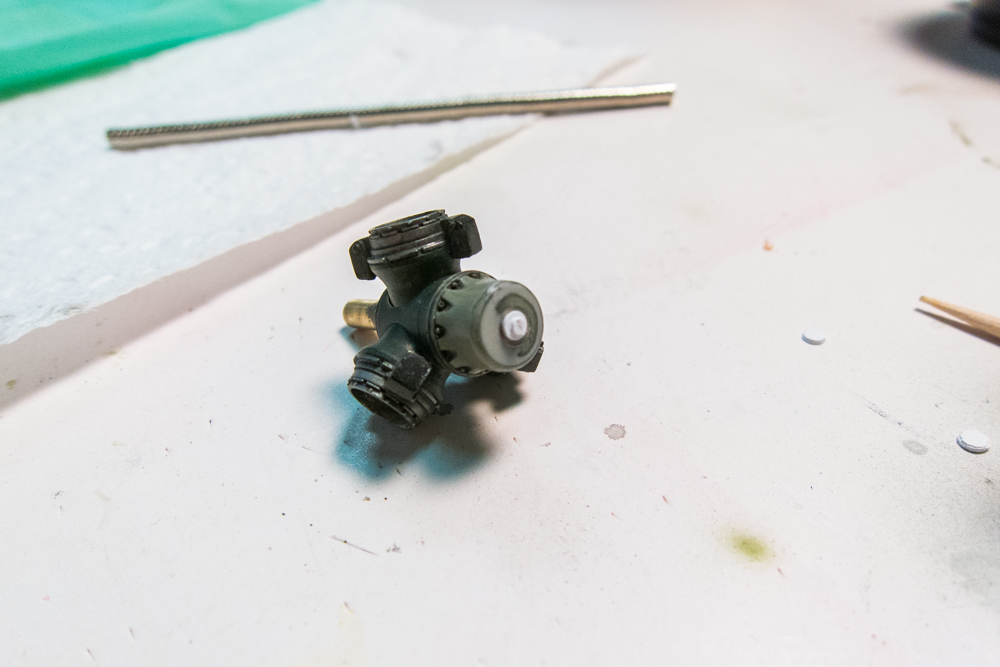
Hub looks good as new after some paint!
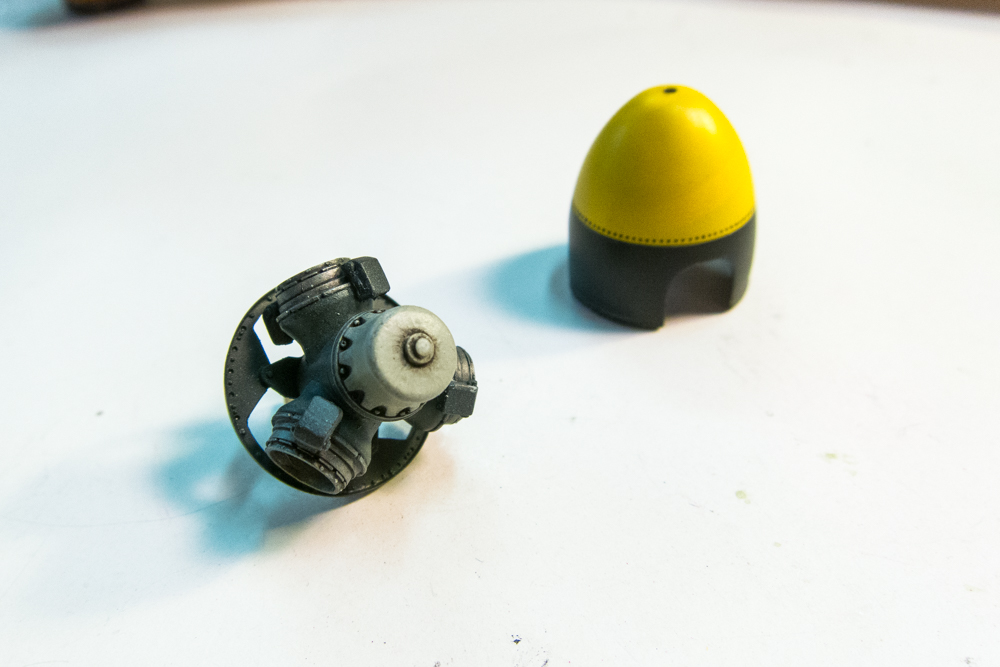
Another magnet was superglued into the tip of the spinner. There was a slight gap between the magnet and the top of the hub but I added a magnet to reduce the gap. So... does it work? Yup! Like a charm! The magnets pulls the spinner into place with a satisfying click even against gravity.
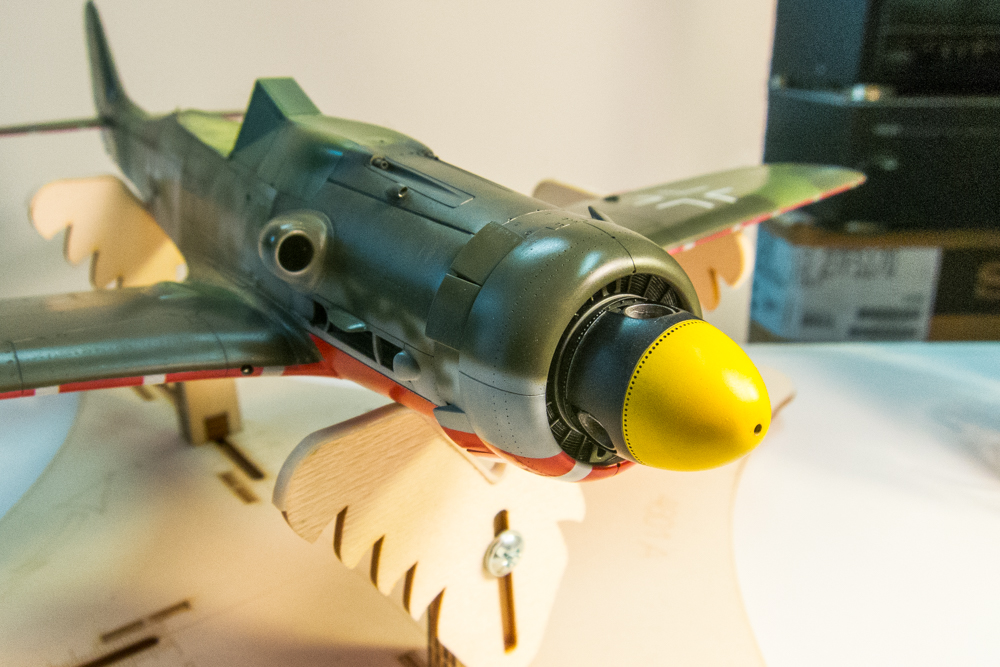
The spinner comes off at any time to reveal the hub details... success!
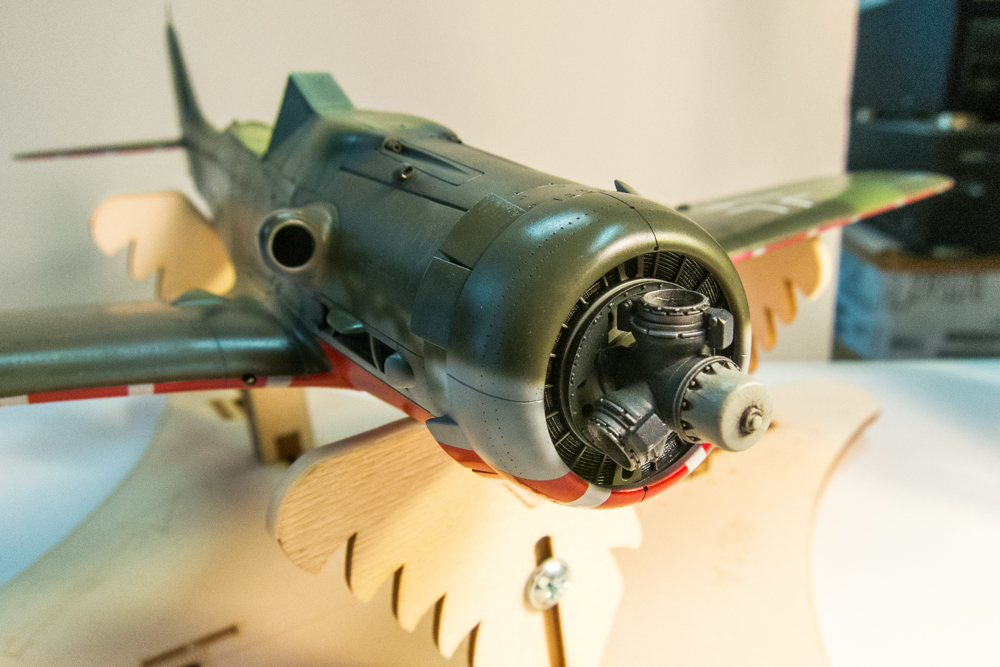
Thanks to SPAM and Bruce especially. I would NEVER have done this without the additional brain power that you guys provide! Awesome!
The detail that Henri Daehne supplies with his prop assemblies is beautiful but most of it ends up getting hidden by the spinner. Due to the sparse attachment area between the backplate and the bottom edge of the spinner, I've had to glue the spinner on and locking all of that detail away. As more people commented on it, the more I thought about trying to make the spinner removable. The foam clay mold idea was a failure but Bruce came up with a tantalizing solution... magnets.
The ones Bruce posted were tiny... didn't know they came that small. I actually bought one size bigger.. 3mm x 1mm discs.
The plan was to remove the prop hub, drill a 3mm hole from the bottom and stick a magnet in the hole. I could then glue another magnet at the tip from the inside and hopefully that would keep the spinner attached. But as I've said, I've taken great pride in increasing the strength of all of the glue joins INCLUDING the prop hub. Long story short... I could not get it off. I went as far as giving it a whack with a hammer while the hub was held by a vise. I thought I'd better stop before I ruin the hub or bend the shaft.
Then another idea... why not just drill the 3mm hole from the TOP of the hub? I could re-make the hub details with punched plastic easily enough.
So I sliced off the detail from the top of the hub.
Drilled a shallow hole into the hub using a 3mm drill bit.
The little magnet fits almost perfectly!
Hub detail replaced using punched plastic discs.
Hub looks good as new after some paint!
Another magnet was superglued into the tip of the spinner. There was a slight gap between the magnet and the top of the hub but I added a magnet to reduce the gap. So... does it work? Yup! Like a charm! The magnets pulls the spinner into place with a satisfying click even against gravity.
The spinner comes off at any time to reveal the hub details... success!
Thanks to SPAM and Bruce especially. I would NEVER have done this without the additional brain power that you guys provide! Awesome!
John aka JKim
-----------<><
-----------<><

Re: 1/32 Hasegawa Fw190D-9 Red One
Magnets for the win! It's an already planned method for the payload of my next plane build.
I admire your patience and your persnicketiness. I'd left the white cross on the wing just like it were. A bit weathering on top of it and all's fine. But you took the rocky road (again).
I admire your patience and your persnicketiness. I'd left the white cross on the wing just like it were. A bit weathering on top of it and all's fine. But you took the rocky road (again).
Cheers,
Torben
Torben