We’ve got a slight hiccup.
Have a look at the cowling:
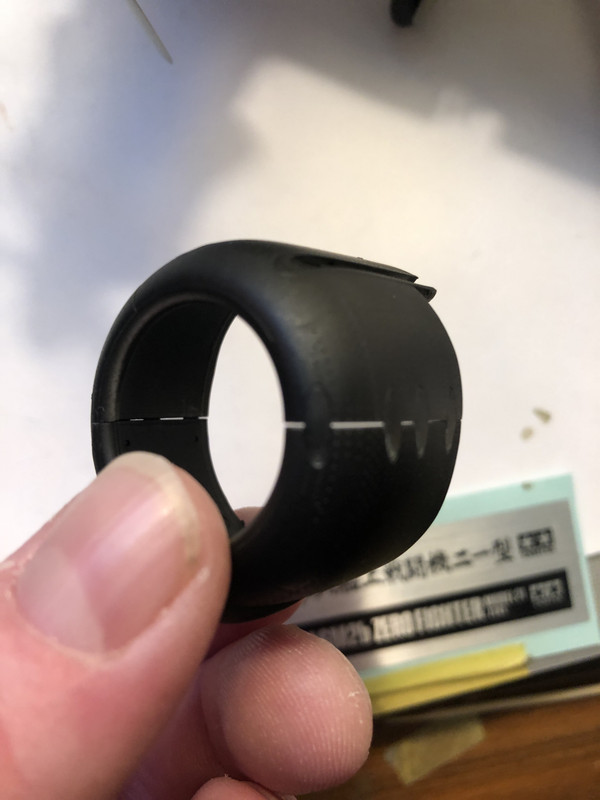
It doesn’t fit flush. I wouldn’t normally sweat this because with some Tamiya Extra Thin I could have that squared-away no problem. But I wanted to have the cowling removable, and when I fit it over the frames, those minuscule gaps grow by about half a millimeter.
Furthermore, the cowling doesn’t fit 100% without some gentle coaxing, and it seems to me that it’s sitting about a half millimeter too far forward:
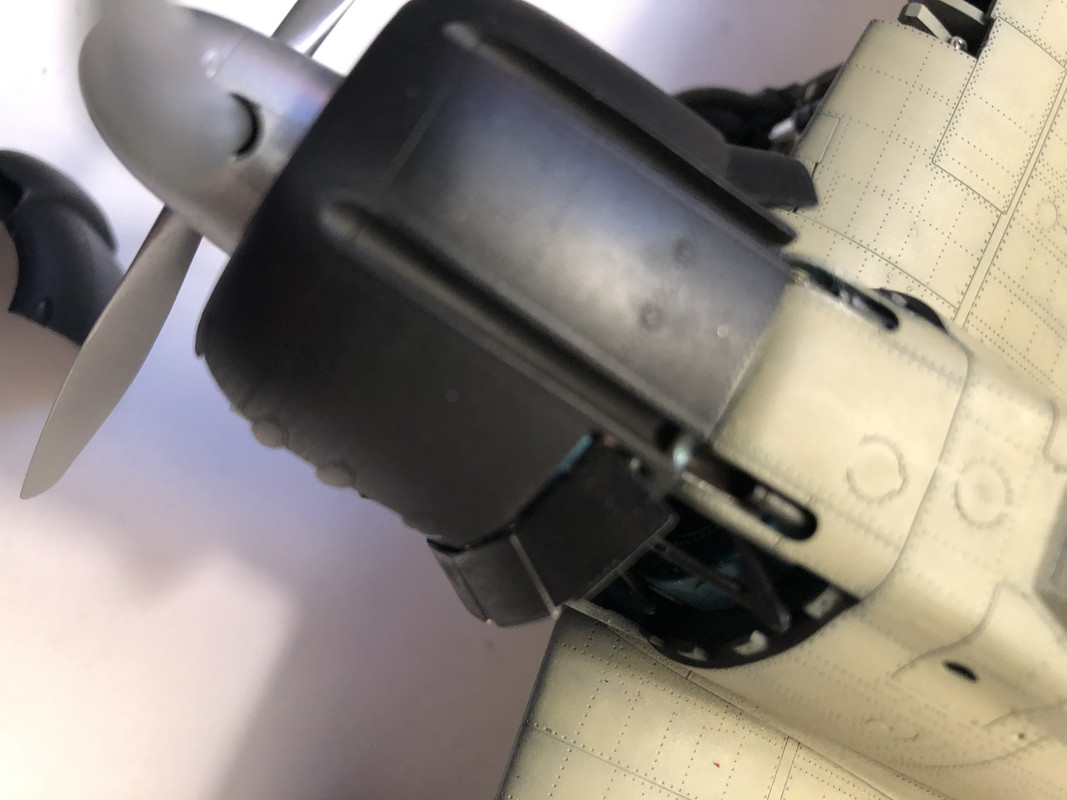
That’s easily corrected by gently nudging it back and talking sweet to it, but it exacerbated the gap problem even worse when the bottom of the cowling is added.
Now, I’m pretty sure I could jam that SOB together around the engine, and glue it up with no gaps or crookedness, but I didn’t put all that work in to super-detailing that engine to entomb it under a cowling.
I’m pretty sure this is my fault, although I’ll be damned if I can figure out how. For one thing, the arms that mount the engine and firewall to the airframe are indeed installed correctly, they mated-up beautifully aside from a small issue with the join from the firewall to the airframe (which I was actually able to correct fairly well), and from what I can tell, none of that brass I put in there is interfering.
Oh well, I’m disinclined to worry about because frankly, this photo here, which was a one-off which I ended up really liking:
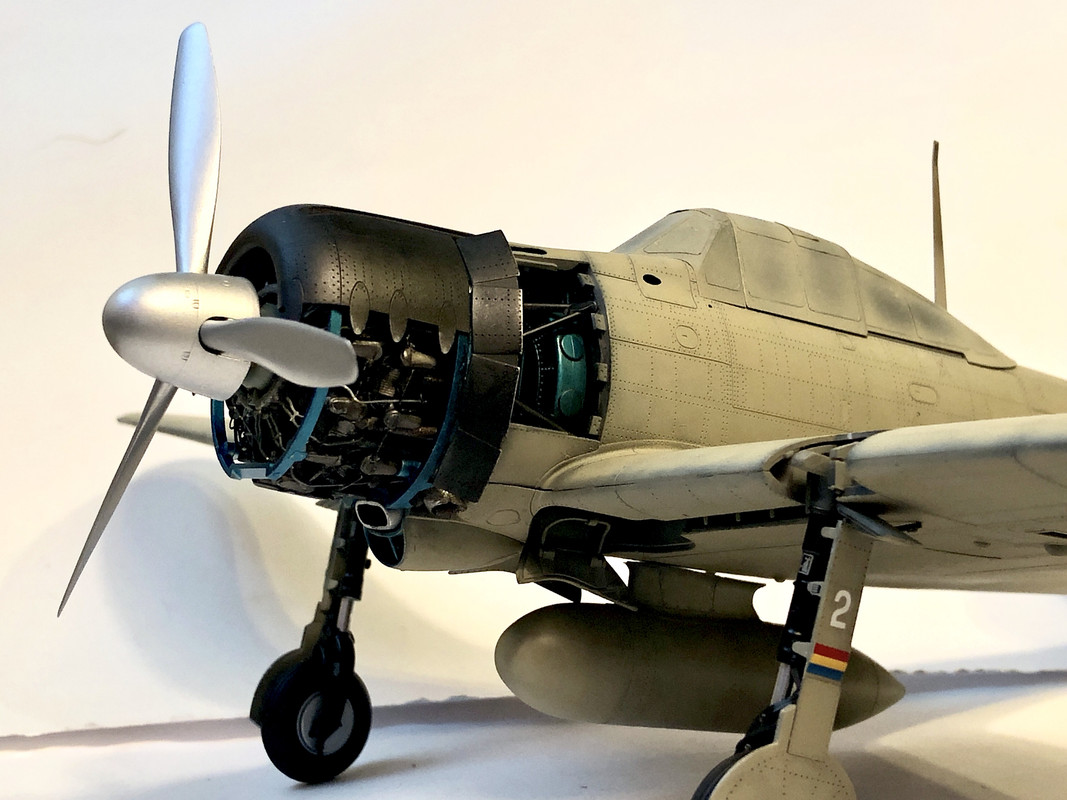
made my vision come to life in physical form. Seeing this photo after I took it sealed it for me- “This is rad! This is what I wanted to accomplish. I feel good about this work.” I sad to myself.
So I’m disinclined to worry about the cowling problem, and I’m leaning toward displaying the model this way once she’s all finished because it’s quite compelling to me.
Of course, my vision also included the means of showing this model cowling intact, so that the lines of the aircraft could be fully appreciated, but I resolve to not be disappointed about that, after all- I can always build an A6M2 with the cowling intact later on.
Looking at it objectively, I picked a challenging kit for my first real Go! at a 1:32 aircraft. All the fiddly bits for the movable control surfaces (some of which were a success and others of which were not -but hey at least they ended up neutral which was the plan) and the retractable gear and the brass engine details... if this was the only problem that arose, and if it still looks really cool after all is said and done being displayed this way, then I am 100% pleased with the outcome of this project and I will absolutely consider it a tremendous personal achievement.
So all that said- BANZAI you boys, I’m moving ahead with my next steps toward completing this project. I’ll be painting stripes and insignias on her this week, along with painting the rest of the wing and airframe parts (two gun covers and two panels, only one of which will be glued on), and then on from there. Looking at probably having her completed in the next four weeks or so, give or take.


