Page 39 of 49
Re: Yeah baw 1:32 Saburo Shindo Zeke!
Posted: Mon Nov 04, 2019 2:53 pm
by KennyX
speedgraflex wrote:The adjustments you made to the surface finish are impeccable. I am going to add that I am quite in agreement and alignment with your reasoning behind the approach itself, as real painting is achieved with far smaller color blocking then most modelers attempt. Your approach leads away from an overall wash of color to create the much smaller variegation effects which are present in reality. I do think there is quite an enormous improvement between initial color and adjusted one—particularly in the yellow or cream tone, easily overdone, is in better proportion to the actual painted skin of the aircraft. “Wax on... wax off” becomes “Paint on... paint off.” Beautiful adjustments.
Splendid work.
Bruce,
Thank you very much! You just articulated what was going on in my head at the time, and what I’ve been bandying about in my head after the fact leading up to the subsequent blend coats way better than I could.
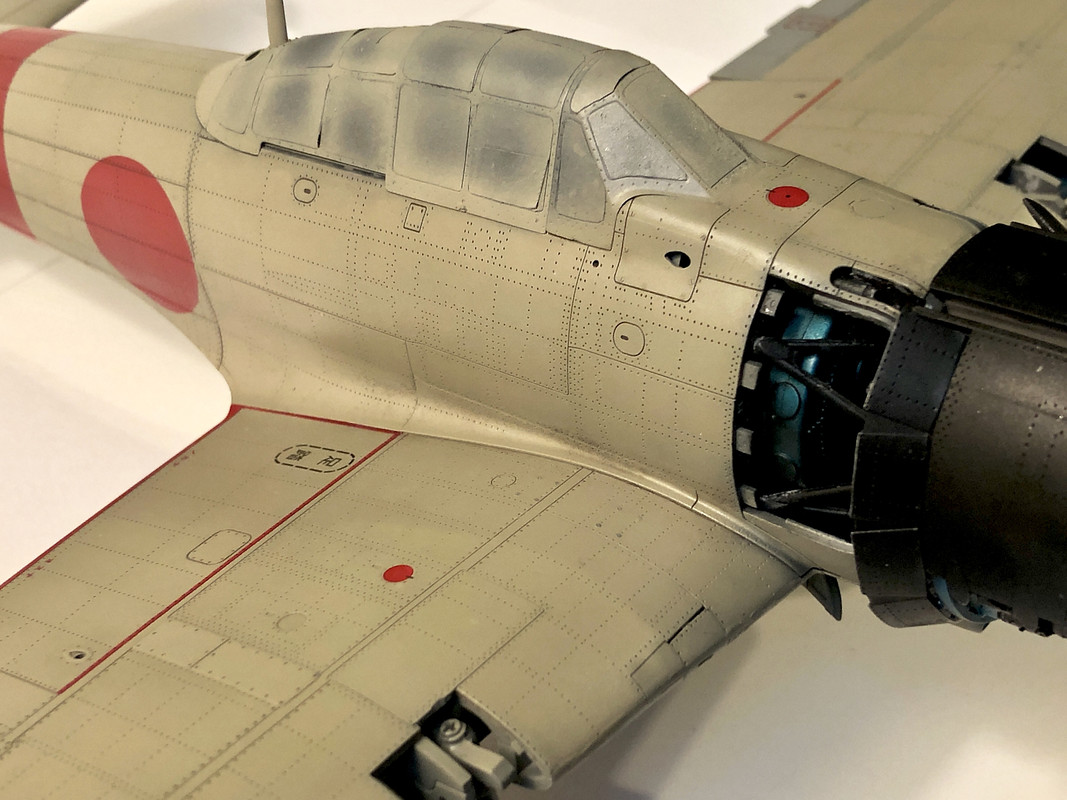
Have a look here, this is a blow-up of the aircraft’s surface very early in the painting process:
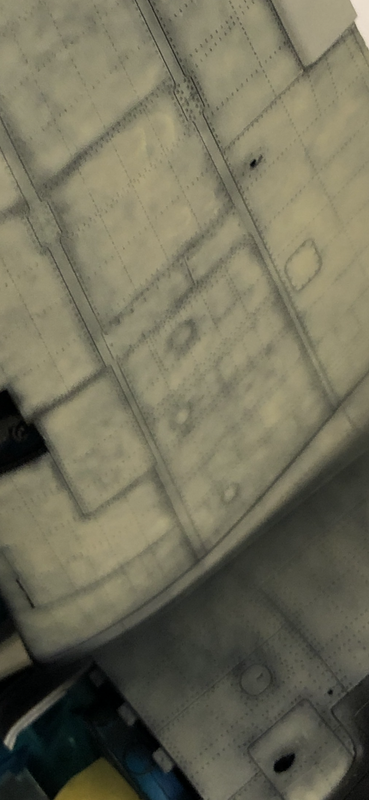
You were right on the money with what you said about the color blocking and variegation. I was absolutely attempting to re-create that on this aircraft. And what you see in that photo is me, using the intersecting rivet lines as a grid, building up the paint meticulously tiny section by tiny section. I first mottled-in a very heavily-thinned, unadulterated base color, tiny rectangle by tiny rectangle. Next, I lightened that color very mildly and mottled that in, tiny rectangle by tiny rectangle, and then lightened it a little brighter, and mottled that in. I used the smallest spray pattern I could. Super-Clean airbrush, needle just a millimeter or so above the surface. Tiny, translucent dot. Paint so thin it would almost bleed. And I built it up that way, keeping in mind to make the resulting tonal variation on as close to a “micro level” as I could get it. And you can see, I was avoiding river lines and panel lines in a relaxed way. I didn’t want a pre-shade effect per-se, it’s more like I wanted a very, very subtle call-out, once the blend coats were done, and we’re talking “practically imperceptible” here. But yeah, if you just thought “Holy crap he painted that with three or four thin layers of paint mottled into quarter inch rectangle by quarter inch rectangle” you’d be correct. And it took many hours.
After that the blend coats came. I used the heavily thinned, unadulterated base color for that. I wanted to avoid the “Tartan Quilt” effect you hear modelers talking derisively about, I wanted subtlety, and I wanted smoothness along with some nice depth. I wanted to lose about 70% of the variation, knowing that, just as you said, the cream hues won’t be present in their proper proportion if there isn’t enough paint on there. The first result looked great, but it looked too used to my eye, and the cream tones weren’t pulling through enough. NO PROBLEM. Just a few more thin blend coats got the job done.
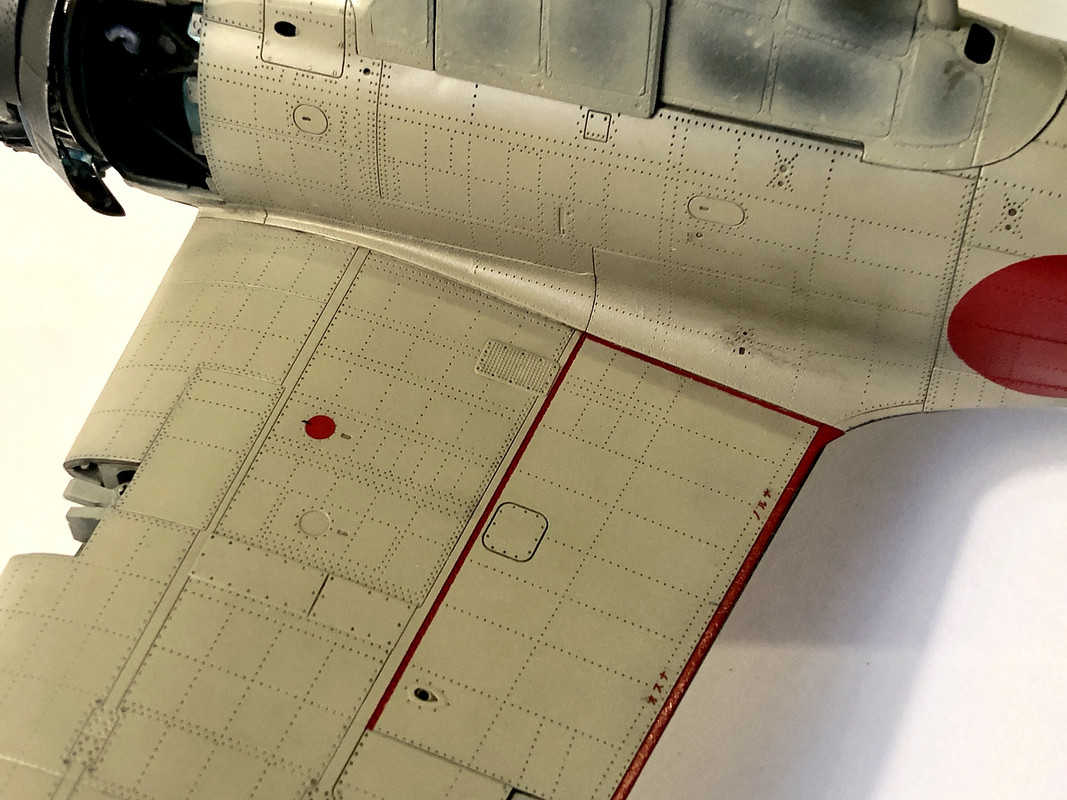
Here’s a close-up of the port wing after the clear coat has set up:
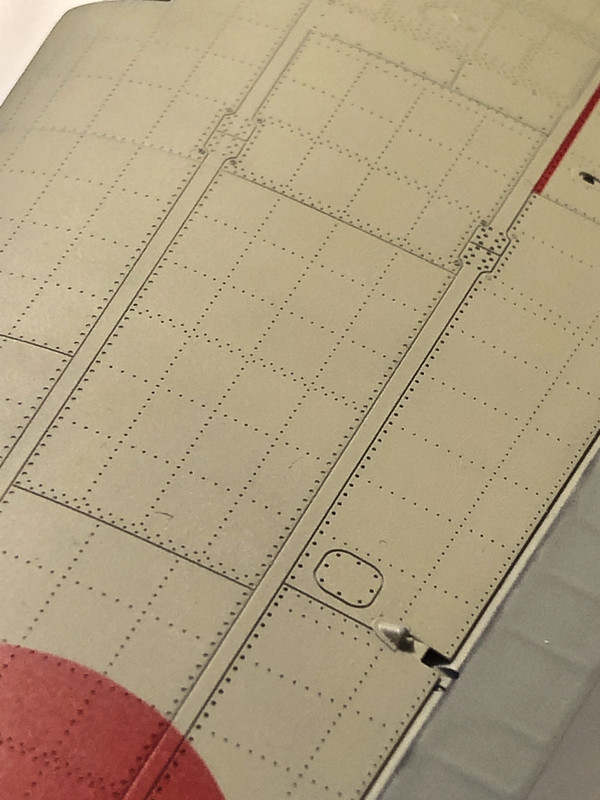
As you can see, the tonal variation was knocked back quite a bit, but again- practically brand new aircraft which was literally babied by the Japanese Navy. And there is still some depth and tonal variation in the paint, along with barely-perceptible called-out surface detail- rivet lines and panel lines —and those’ll look LOVELY when washed with the Mig Neutral Brown.
This was a tricky balance to achieve and I’m relieved that that part is done

Anyway, thank you for your comment. It was gold. You nailed exactly what I was trying to do.
Re: Yeah baw 1:32 Saburo Shindo Zeke!
Posted: Mon Nov 04, 2019 3:14 pm
by speedgraflex
I read what you wrote twice because it was a pleasure to read. You articulated a perfect pattern of adjustments available in 1/32. Since I do my paint tests on a 1/32 model I easily relate and sincerely appreciate your approach. My current goal is shrink down or minimize the steps in a similar fashion to 1/72.
I personally would advise a waiting period following final additions, and no weathering effects. I feel you have created the aircraft as closely and authentically as possible to how it was, and the photographer in me wants to see that aircraft photographed from all angles in sunlight, because in my opinion you have hit your target, and you are ready for the next project. Again this is strictly my opinion but I do feel you have achieved your goal and the aircraft is a testament to your process. I have always felt the final test, similar to listening to a mix on a car stereo is to set up the aircraft like she would be on the deck of an aircraft carrier then photograph the hell out of her from all angles, just to catch the light on surface effects.
Light on surface, in my opinion, is what modeling ultimately is about. When it is boiled and pared down to its very essence, light on surface is our medium—our window into the past is sunlight filtered.
Re: Yeah baw 1:32 Saburo Shindo Zeke!
Posted: Mon Nov 04, 2019 3:23 pm
by KennyX
Bruce,
Interesting that you mentioned 1:72, because I am working along similar lines. I’d like to take this procedure and carry it over to my 1:72 Spitfire, whenever I decide to start it. And frankly, this project here was kind of a test bed for my 1:48 Ta. I’ve been thinking a lot about how to take that monochrome red/orange and make it interesting. And this is exactly the procedure I’ll use. And for the Spit- I just think a camp job done this way on such a small scale would look hella awesome.
As to weathering, you are correct. It’s pretty-much there. Aside from what small stencils remain, and a very subtle wash, this is pretty much it. And once the underside insignias are done and the stencils are done, she’ll definitely rest for awhile, so during that time I’ll absolutely take photos. Lots and lots of photos.
Re: Yeah baw 1:32 Saburo Shindo Zeke!
Posted: Tue Nov 05, 2019 9:07 am
by Stuart
Re: Yeah baw 1:32 Saburo Shindo Zeke!
Posted: Tue Nov 05, 2019 4:40 pm
by KennyX
Re: Yeah baw 1:32 Saburo Shindo Zeke!
Posted: Tue Nov 05, 2019 5:31 pm
by KennyX
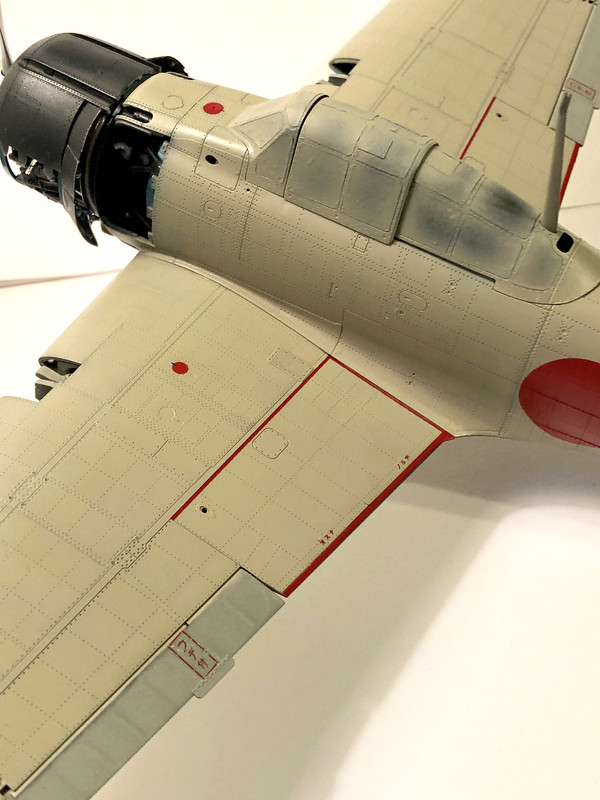
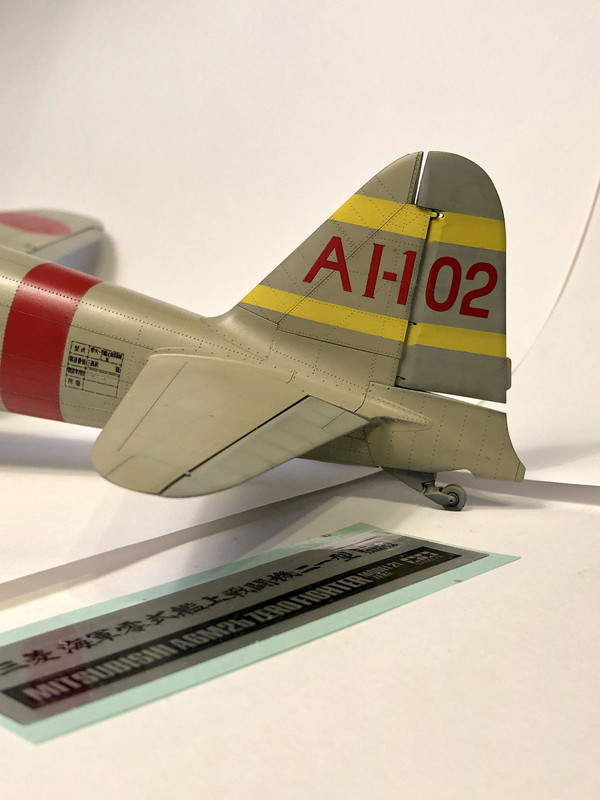
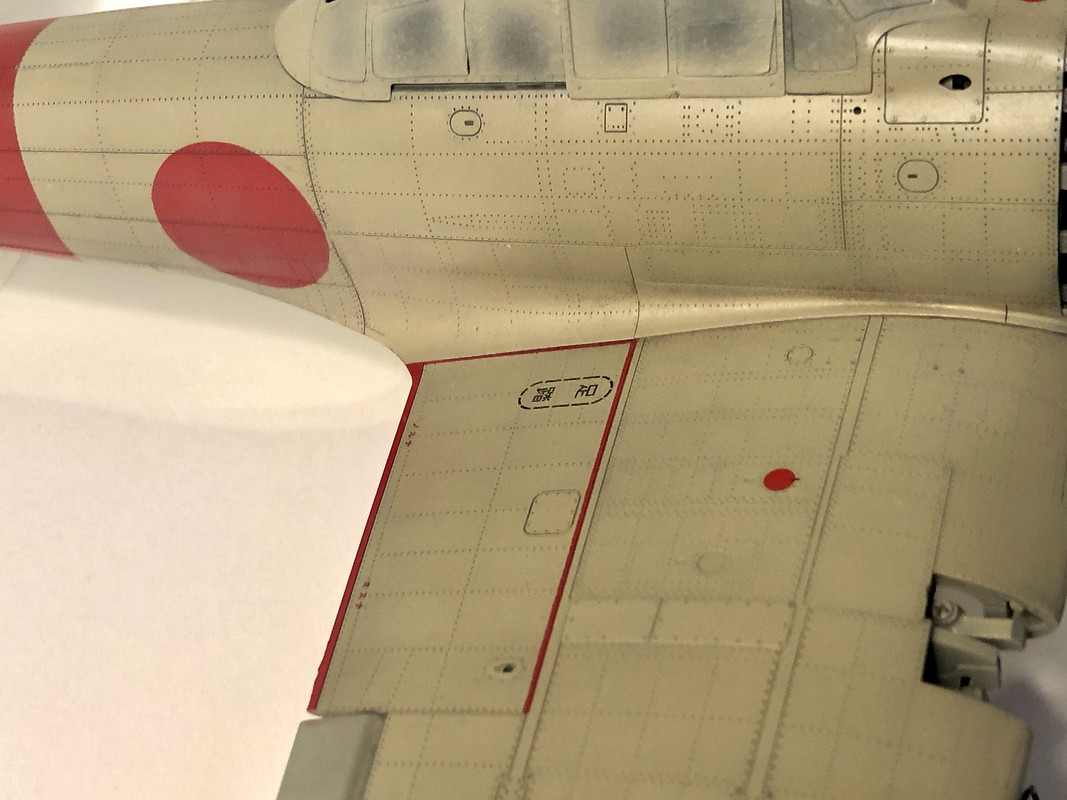
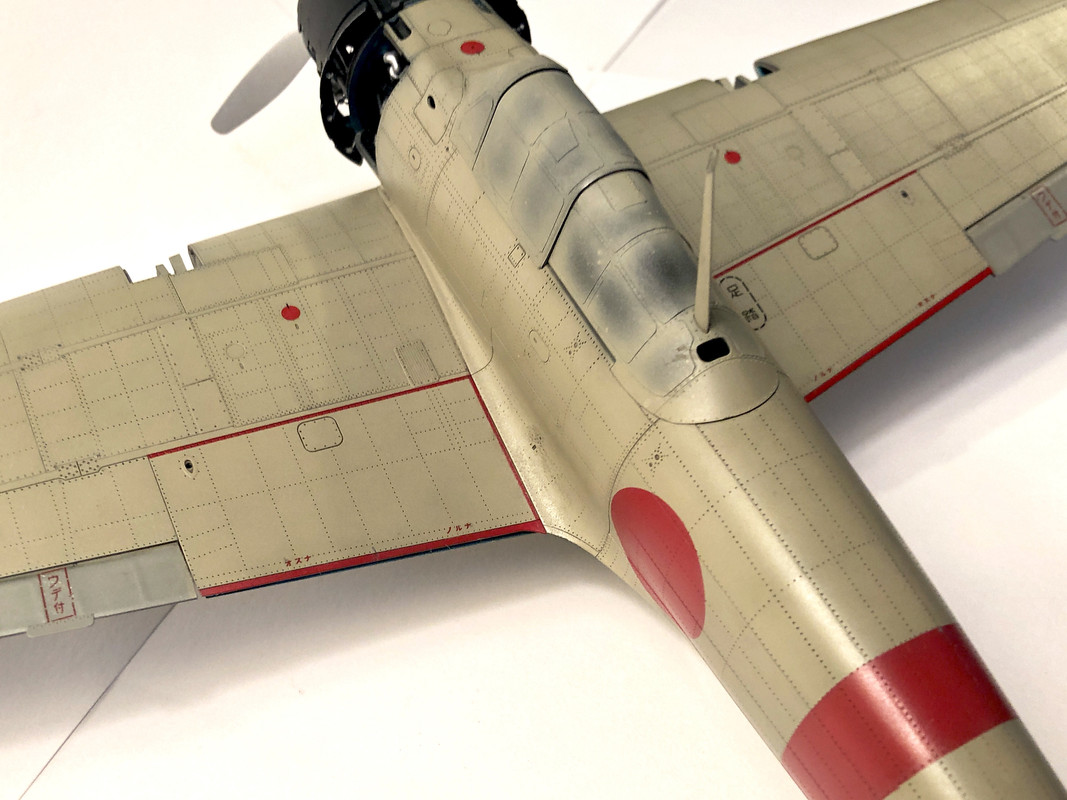
Okay, not a big update today, just some markings. There really weren’t many, due to the fact I painted most of the markings on. I’m going to do that more often. For me it’s just easier and less hassles to paint as much of it as I can up-front. The Mr. Mark Setter and Mr. Mark Softer got the job done fairly well.
I’ll probably paint the Hinomaru on the underside tomorrow. I built me a 1:32 size jig from a kid I had stashed away so I can flip this thing and work on the bottom safely. I didn’t want to perch it on pipe tobacco tins
Re: Yeah baw 1:32 Saburo Shindo Zeke!
Posted: Wed Nov 06, 2019 12:23 pm
by KennyX
Re: Yeah baw 1:32 Saburo Shindo Zeke!
Posted: Wed Nov 06, 2019 3:58 pm
by Duke Maddog
Wow, what a sweet sexy bird! Brilliant work Kenny, work I could never hope to replicate in my wildest dreams. I would be interested in seeing your efforts to replicate this effect in 1/72 scale. It might help me improve my own work.
Re: Yeah baw 1:32 Saburo Shindo Zeke!
Posted: Wed Nov 06, 2019 4:36 pm
by KennyX
Big Duke,
Thank you sir! And as it happens, I’m cogitating on that very thing right now- replicating this on a smaller scale. I’m still at an impasse as to what I wish to do about the insignias on my 1:72 Zeke. I dislike the color (looks like tomatoes to me), and I also dislike how they didn’t settle enough around the lights on the wings for me to simply paint the light colors over. I may yank the pit out of it and pop it into my other 1:72 Zeke and try again, and if THAT happens then absolutely I will give a scaled-down version of this method a-GO!
If I decide not to, and just keep that airplane as-is (I probably won’t because I’m insane but if I do), I am already looking at a means to replicate this, in camouflage, on the 1:72 Spitfire Mk.IXe kit which just arrived at my house yesterday. I’ll be getting started on that one very soon.
Now, one word more on this. I dislike the idea of black basing a 1:72 aircraft. I say that because of the brilliant results silver basing gave me with my 1:72 Zeke. That said, some subtle tonal variation would be nice at 1:72. It would help make the aircraft appear larger. So while I intend to silver base, I am also planning on laying down a darker shade of the main color, very thinly, first, to give me a best-of-both-worlds kind of situation. Or maybe just Panzer Gray. or, OR— darker metallics! AS-12 on the majority of the airframe, with certain areas done in Duraluminum and others done in Magnesium! Then a thin, mottled coat of the base color, panel by panel, then a thin mottled layer of the base lightened 3:1, then another thin mottled coat of the base color lightened 2:1, then the blend coats with the unadulterated base color! That’s an interesting idea!
Hmmmmm... and for using that on the Spit’s camp job, I could base it AS-12, and do the same thing, use different metalizers, one under the blue camp and a different shade under the brown....
This is going to be fun.
Re: Yeah baw 1:32 Saburo Shindo Zeke!
Posted: Thu Nov 07, 2019 8:07 am
by KennyX
Big Duke,
Got another stream of consciousness here for you concerning this style of painting!
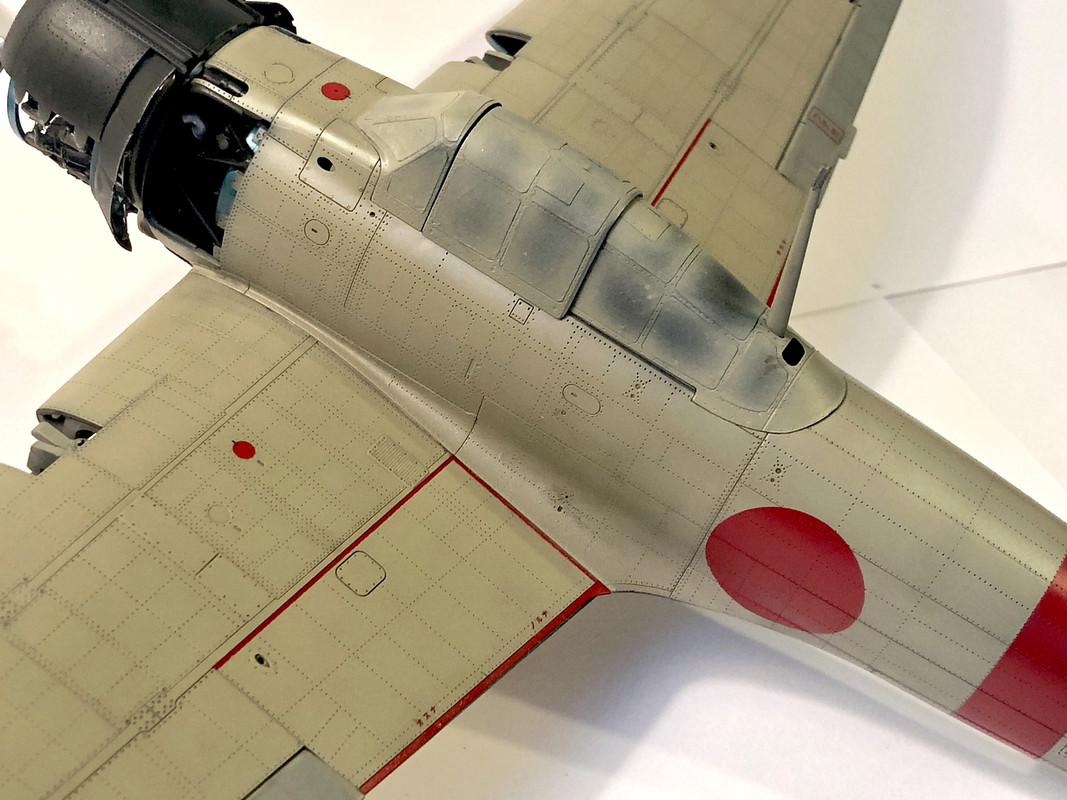
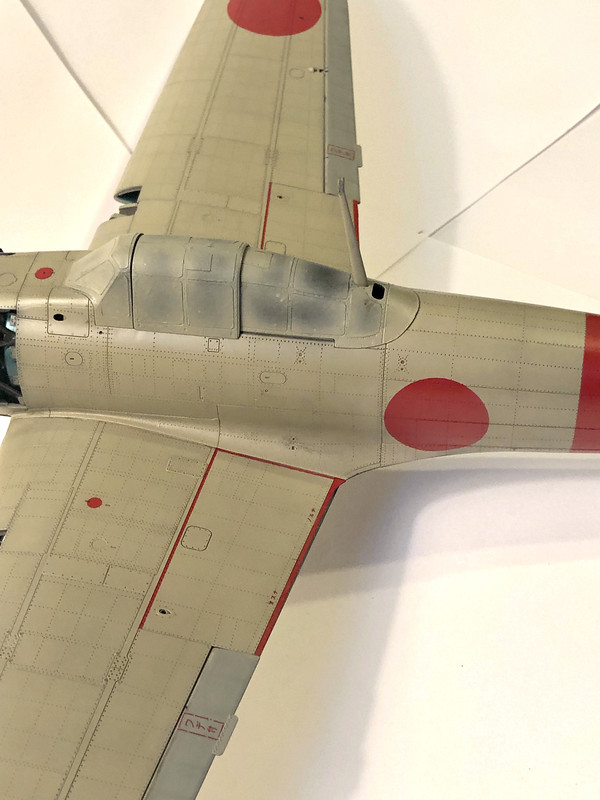
I was reviewing yesterday’s photographs, and I noticed something interesting. Have a look at this blown-up shot of the starboard side of the aircraft, particularly the area inside and around the no-walkie lines:
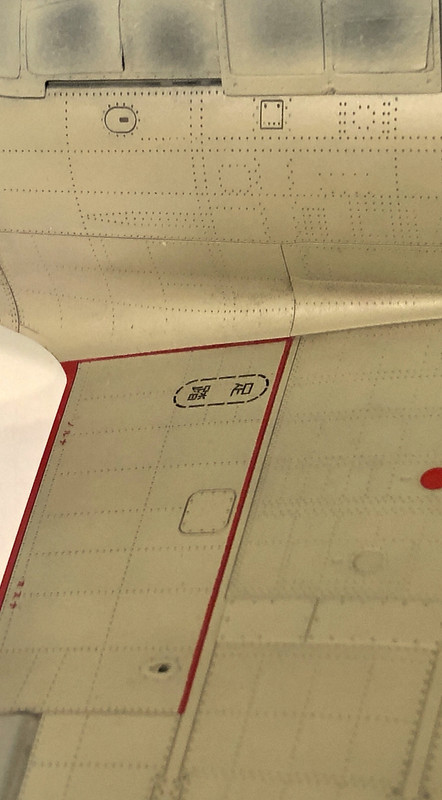
That is post pin wash. Now have a look at a shot I took *before* I applied the wash:
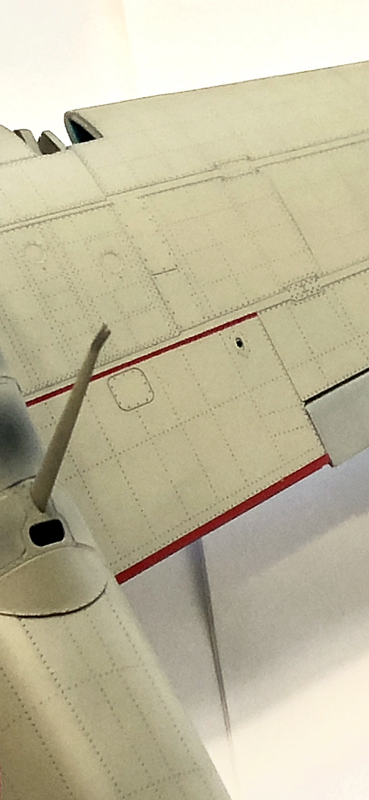
Now, it’s different lighting and a different angle but this comparison doesn’t have to be staged perfectly in order to illustrate what I’ve observed.
Look at the pre-wash photo. Much of the tonal variation has been knocked-back, and that of course was what I wanted to do. Now, when I look at the post-wash picture, and I could be going crazy here- it looks to me like after applying that wash, some of the tonal variation has returned. I can spot the hue shifts in each individual rectangular section a lot better than I could before I applied the wash. And it makes sense- the wash in the rivets created those faint lines of demarcation between each section which, I theorize, make it easier for the eyes to see each individual section and for the brain to process the, uh, “data” from each one individually when creating the “picture” we see of it. Bruce knows a whole lot more about this stuff than me and he is absolutely free and welcomed to weigh-in if he wants to, I’d appreciate it.
Also of note is how the areas into which I sprayed more of the lightened shade are being picked up. That makes sense too. The light catches the surface just right and the panels I lightened a little bit more pop out a little bit. I like that, that’s one of the things I was looking to accomplish.
All that said, I believe it is absolutely possible to get results like this in 1:72. Not on such grand a scale of course, but still compelling. I’m going to repaint the 1:72 Zeke in this fashion and see what happens. I’ll log the whole thing here for you.