Re: Revell 1/72nd Type VIIc U-Boat U-552
Posted: Sun Mar 28, 2021 4:30 am
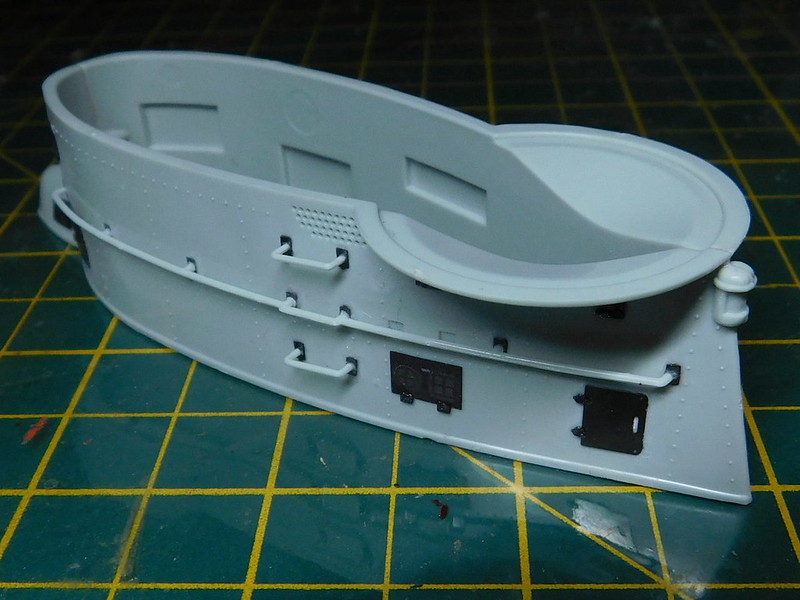
I got back to this in Feb and have been working on it slowly. I started off focusing on the conning tower. On the top piece i have sanded away the molded on wood sides, added the loops where the crew can hook on their saftey harness by drilling out a small indentation and useing some fine wire. Also used some styrene for the 5 braces around the front of the tower.

The same for the other side. The 4 small white buts of styrene are the hinges for folding seats. From what i have read these were in different locations depening on the boat, on the 552 they were on the port side. There are no clear images of these seats or a clear description of them. I am guessing they are wood rather than metal or fabric, so i have cut them out from some spare pieces on the nautilus deck kit.

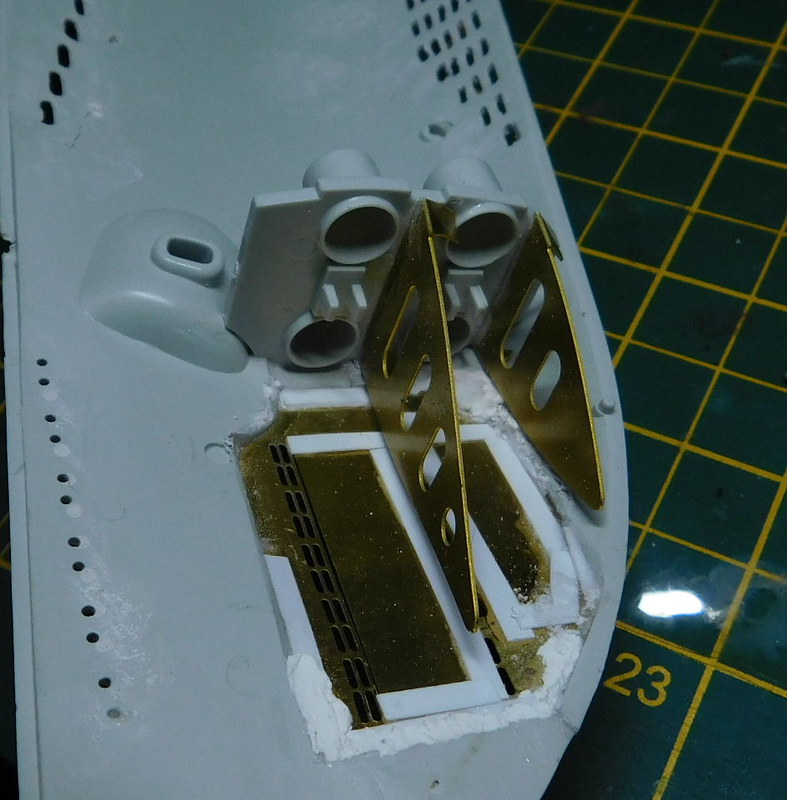
I have also decided to replace the kit periscope bases with some 3D printed ones. Unfortunatly they are not sold seperatly, they only comes with some snorkel parts, which i won't need, and a UZO which i already have. But i can use my other UZO for my Type IX.
The bottom of the tower has been finished, no scratching needed here, just PE and kit parts.

I will have to scratch some tubes which carry the radio wires and are at the back of this piece but not included in the kit.
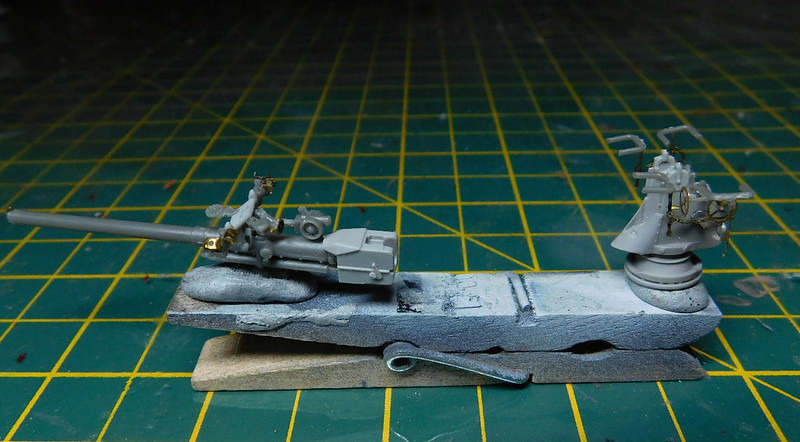
The Eduard deck gun is complete, all resin and PE. Rather intricate but a nice looking piece.
And then the railing around the back of the tower. These are to thick and its recomended to make a new one out of wire or live with the thick parts. I took a 3rd option and simply sanded down the whole thing to make the railings thinner. I am happy with that.

I have since primed all this and painted the inside of the tower. I have moved on the hull to get that finished off and hopefully get both parts together soon.
And after a couple of more weeks i had the starboard side cheek piece in place. Theres a lot of work to get these fitted. Also added the torpedo doors.

The doors are actually a fraction smaller than the opening, so they need somthing to hold them in place. I use some styrene strip. Also aded the front of the torpeo tubes. These won't be seen byt they do with with strengtheing the hull.
I also added styrene inside the hull to replicate the saddle tanks. I removd ethe one i did on the port side and re-did it as it was to wide.
I then sprayed black primer on the inside where it migt be seen through the many openings.

And primed over the PE areas so i can see what more work needs to be done to blend them in.


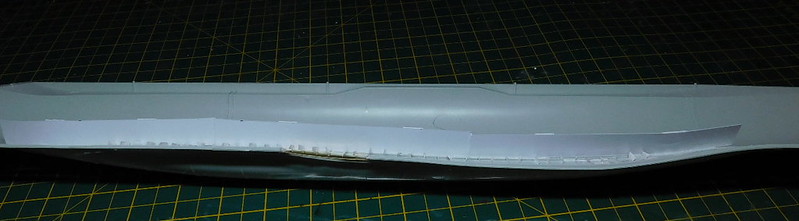
There is still some work to do there, but i will do that after finally getting the hull together. This should make it easier to handle without damaging the rib's i added. And putting the hull together is what i did next. 3 months work, but finally got to this stage.

So thats how it looked 2 weeks ago. Been working oin the oil canning as well as tidying up around the PE parts and all the areas that needed filling. Hoipe to have another update tonight.
The same for the other side. The 4 small white buts of styrene are the hinges for folding seats. From what i have read these were in different locations depening on the boat, on the 552 they were on the port side. There are no clear images of these seats or a clear description of them. I am guessing they are wood rather than metal or fabric, so i have cut them out from some spare pieces on the nautilus deck kit.
I have also decided to replace the kit periscope bases with some 3D printed ones. Unfortunatly they are not sold seperatly, they only comes with some snorkel parts, which i won't need, and a UZO which i already have. But i can use my other UZO for my Type IX.
The bottom of the tower has been finished, no scratching needed here, just PE and kit parts.
I will have to scratch some tubes which carry the radio wires and are at the back of this piece but not included in the kit.
The Eduard deck gun is complete, all resin and PE. Rather intricate but a nice looking piece.
And then the railing around the back of the tower. These are to thick and its recomended to make a new one out of wire or live with the thick parts. I took a 3rd option and simply sanded down the whole thing to make the railings thinner. I am happy with that.
I have since primed all this and painted the inside of the tower. I have moved on the hull to get that finished off and hopefully get both parts together soon.
And after a couple of more weeks i had the starboard side cheek piece in place. Theres a lot of work to get these fitted. Also added the torpedo doors.
The doors are actually a fraction smaller than the opening, so they need somthing to hold them in place. I use some styrene strip. Also aded the front of the torpeo tubes. These won't be seen byt they do with with strengtheing the hull.
I also added styrene inside the hull to replicate the saddle tanks. I removd ethe one i did on the port side and re-did it as it was to wide.
I then sprayed black primer on the inside where it migt be seen through the many openings.
And primed over the PE areas so i can see what more work needs to be done to blend them in.
There is still some work to do there, but i will do that after finally getting the hull together. This should make it easier to handle without damaging the rib's i added. And putting the hull together is what i did next. 3 months work, but finally got to this stage.
So thats how it looked 2 weeks ago. Been working oin the oil canning as well as tidying up around the PE parts and all the areas that needed filling. Hoipe to have another update tonight.